Have you ever thought about channeling your love for dogs into a painting? Trust me, it’s not as intimidating as it sounds. You can capture the joyful spirit of a Golden Retriever or get playful with a Corgi on a skateboard. Whether you’re a beginner or an artist-in-hiding, these ten creative dog painting ideas might just spark some inspiration. Ready to release your inner artist? Let’s explore these designs together.
Vibrant Color Palette Ideas
When you’re diving into the world of dog painting, choosing a vibrant color palette can feel like picking the right flavor for your favorite ice cream—so many options, and they all seem amazing.
You might opt for fiery oranges and yellow hues that practically leap off the canvas, or soothing blues and greens that create a calm atmosphere. Why not mix it up with playful pinks and purples?
When brainstorming dog painting ideas, consider your pup’s personality; a spunky dog might look fabulous in bright colors, while a chill canine might shine in earthy tones. Additionally, incorporating elements from premium dog training equipment can inspire unique thematic designs that showcase your furry friend’s essence.
Our Collection
Ready to explore what we’ve got in our collection? You’ll find everything from a charming Golden Retriever portrait to a stylish Corgi on a skateboard—because who doesn’t love a dog with wheels?
Each piece captures the unique spirit of our furry friends, so let’s take a closer look at these creative designs that’ll surely brighten up your space. Additionally, consider complementing your artistic decor with high-quality dog food from premium dog food makers, ensuring your pets stay happy and healthy.
1. Portrait of a Golden Retriever
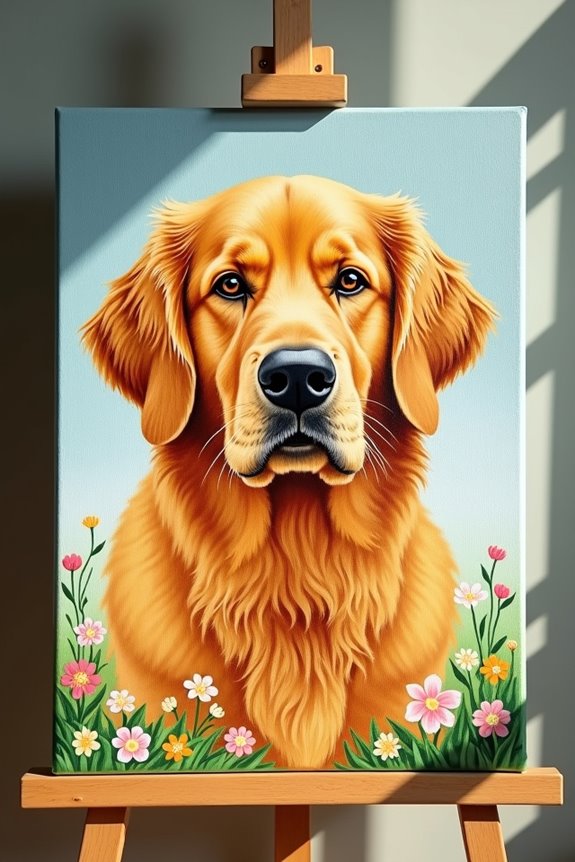
Have you ever wanted to capture the essence of your beloved Golden Retriever in a vibrant portrait? This DIY project is a fun and rewarding way to create a personal piece of art that celebrates your furry friend and adds a touch of charm to your home. Plus, it can save you a pretty penny compared to buying a professional painting. Imagine hanging a beautiful, custom piece that tells the story of your Golden without breaking the bank. Additionally, consider enhancing your pup’s well-being with a premium dog food subscription for a diet tailored to their needs, which can include high-quality ingredients that provide essential nutrition. Investing in luxury dog grooming products can also further show your love for your canine companion.
Materials Needed:
- Canvas or thick art paper (any size you prefer)
- Acrylic paints (yellow, brown, white, black, and any other color for the background)
- Paintbrushes (various sizes)
- Palette for mixing colors
- Cup of water (for rinsing brushes)
- Paper towels (for drying brushes and cleaning messes)
- Pencil (for sketching)
- Reference photo of your Golden Retriever
- Easel (optional, but helpful)
Step-by-Step Instructions:
1. Gather Your Materials: Collect all the supplies listed above, make sure your workspace is clear, and set everything within easy reach. You don’t want interruptions in the middle of your creativity.
2. Choose a Reference Photo: Pick a cute picture of your Golden Retriever. Make sure it’s clear and shows off their best features — the floppy ears, big brown eyes. You know, those features that get you all mushy inside.
3. Sketch the Outline: Lightly Sketch the Outline of your Golden on the canvas using the pencil. Don’t worry about making it perfect, just get the basic shapes. They won’t judge your artistic skills — they love you unconditionally.
4. Start with a Base Color****: Grab your yellow acrylic paint and use a medium brush to fill in the body of your Golden. Think of it as dunking your pup in a paint bath — but a much safer option, of course.
5. Layering Colors: Once the base dries, add shadows using brown, and highlight those fur details with white. This part can be a bit tricky, but just layer colors gradually, blending as you go.
Remember, practice makes progress, not perfection.
6. Add Features: Use smaller brushes to paint the eyes, nose, and mouth. This is where your painting really starts to come alive. Pay special attention to the twinkle in their eyes – that’s the magic!
7. Final Touches: After you’ve worked some magic, let the painting dry completely. If you want, you can paint the background to complement your Golden’s fur. Soft blues or greens are lovely, but have fun with it.
Optional Add-ons/Variations:
- Instead of a solid background, why not add a fun pattern like paw prints or flowers around your Golden? It’s like a cute bow tie for the portrait.
- If you want to go a little extra, consider using metallic paint for the collar or any accessories they might have. Who doesn’t like a bit of sparkle?
Pro Tip:
When choosing your paints, opt for high-quality acrylics. They blend better and provide richer colors, plus they’ll last longer on your canvas.
Remember to cover your work surface with newspaper or an old drop cloth — because let’s face it, we all have that one “oops” moment.
Now, roll up those sleeves, channel your inner artist, and create something that not only showcases your love for your Golden Retriever but also becomes a cherished keepsake for years to come. Happy painting!
2. Beagle With Floral Background
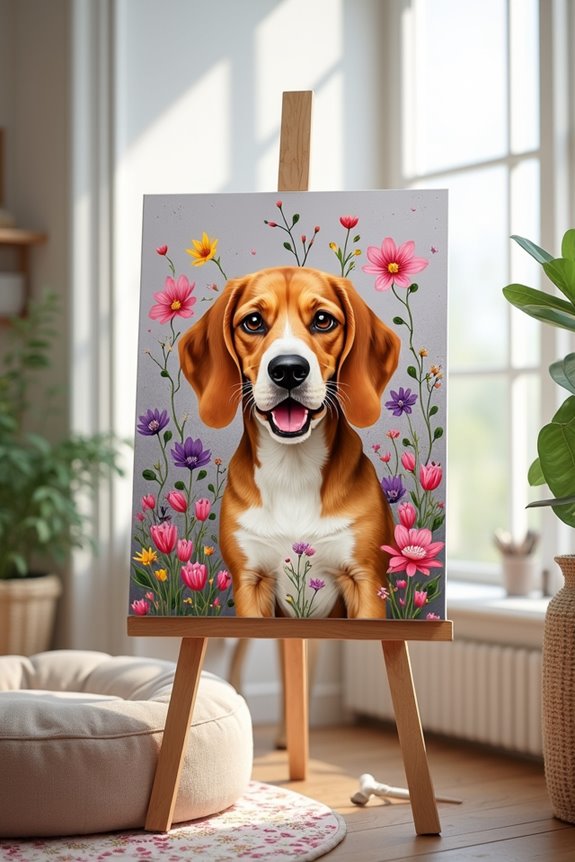
If you’re a proud Beagle parent, why not celebrate your furry friend in a beautiful and creative way? Creating a Beagle painting against a floral backdrop can add a fresh burst of life to your home while showcasing the playful personality of your pup. Plus, it’s a fun project that saves you money by turning a standard print into a personalized work of art.
Materials Needed:
- Canvas or heavyweight paper (your choice of size)
- Acrylic paints (variety of colors including shades of brown, black, white, and vibrant hues for the flowers)
- Paintbrushes (different sizes for various details)
- Palette for mixing
- Cup of water (for rinsing brushes)
- Paper towels (to clean up and dry brushes)
- Pencil (for sketching your Beagle)
- Reference photo of your Beagle
- Easel (optional, but useful for comfort)
Step-by-Step Instructions:
- Prepare Your Workstation: Create an organized, clutter-free space where you can paint. Lay out all your materials so you can reach them easily – trust me, you don’t want to have to search for a brush when inspiration hits.
- Pick a Photo: Choose a fascinating reference photo of your Beagle. Look for a snapshot that captures their unique personality — think playful expressions or that irresistible “I just did something naughty!” look that we all know too well.
- Sketch the Outline: Lightly sketch the outline of your Beagle on the canvas or paper using a pencil. Don’t stress over every tiny detail; just focus on the overall shape. Your Beagle won’t be critiquing your art skills, so keep it light and fun.
- Base Color Splash: Using a medium brush, apply a base coat of your chosen brown for your Beagle’s body. Like giving them a big ol’ bath in paint (without any of the wet dog smell).
- Add Depth and Detail: Once the base coat dries, start layering with darker browns for shadows and lighter shades for the highlights. Blend as you go to create that lovely fur texture. Just remember, this isn’t a race—take your time and enjoy the process.
- Paint the Face: Switch to a smaller brush for detailing the face. Give your Beagle those adorable big eyes, a shiny nose, and that subtle smile. This is where your painting starts to radiate personality.
- Floral Fantasy: Now it’s time to add the background. Use bright colors to create a floral design. You could go for a wildflower look or a more uniform garden pattern—whatever suits your Beagle’s spirit. Let your imagination run wild; flowers can be as varied as your pup’s antics.
- Final Touches: Once everything dries, take a step back and admire your work. You might want to add a few finishing touches, like a few highlights or adjusting colors, to really make your Beagle pop.
Optional Add-ons/Variations:
- Experiment with different floral patterns or even paint a favorite location as the background, like your local park where your Beagle loves to romp.
- If you want to get a little extra fancy, try using metallic paints for the floral accents—they can make your painting sparkle and shine.
Pro Tip:
Paint in natural light if you can; it helps you see true colors and details better than artificial light. And don’t forget to give yourself a chance to step back often. Sometimes, you need a few paces away to see the overall image and catch any clashing colors.
Enjoy the journey of creating a piece that not only brightens your space but also warms hearts with the love you have for your Beagle. Happy painting!
3. Dalmatian With Colorful Spots
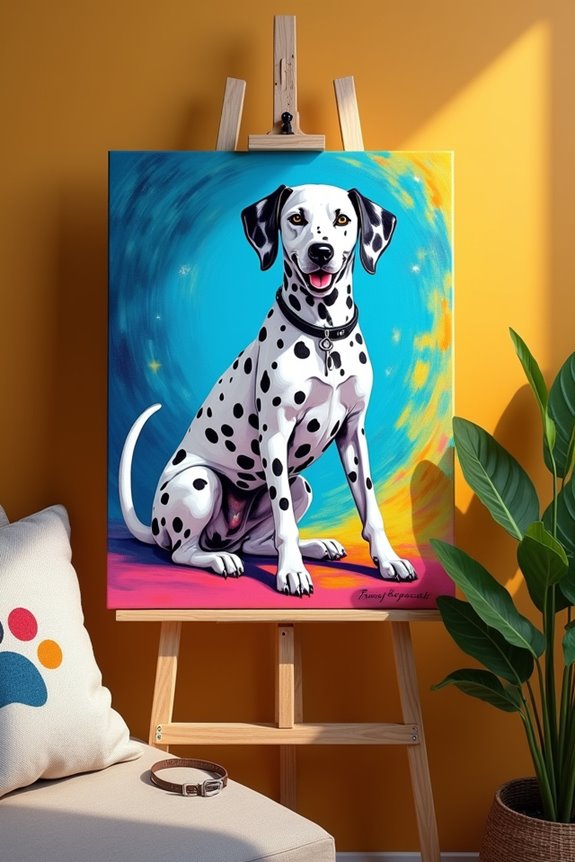
If you’re lucky enough to have a Dalmatian in your life, why not capture their distinct charm in a colorful and playful painting? This DIY project not only provides a personal touch to your home décor but also saves you money compared to buying a mass-produced print. Plus, it’s a fun way to bond with your artistic side while celebrating your furry friend. Investing in high end dog care products can further enhance your pet’s lifestyle and comfort, and these items can also be complemented with stylish luxury dog collars personalized to truly elevate your pup’s look.
Materials Needed:
- Canvas or heavyweight paper (your choice of size)
- Acrylic paints (black, white, and a variety of bright colors for those fun spots)
- Paintbrushes (varying sizes for different details)
- Palette for mixing colors
- Cup of water (for rinsing brushes)
- Paper towels (to clean up and dry brushes)
- Pencil (for sketching)
- Reference photo of your Dalmatian (extra pint-sized personality is always a plus)
- Easel (optional, but it can make the process a bit more comfortable)
Step-by-Step Instructions:
- Set Up Your Space: Create a cozy painting haven by clearing a spot in your home where you feel inspired. Arrange all your supplies so they’re easy to grab. We’re not trying to play hide and seek with a brush or color.
- Select Your Reference Photo: Search through your camera roll or favorite snapshots to find the perfect picture of your Dalmatian. Look for something that showcases their unique spots or that goofy grin, because who wouldn’t want to recreate that?
- Sketch the Outline: Grab your pencil and lightly sketch the outline of your Dalmatian. Don’t fret about perfection—focus on the fun of capturing their essence. A bit of wobbliness adds character—it’s all part of the charm.
- Base Coat of Black and White: Using a medium-sized brush, paint your Dalmatian’s body with a base coat of white. You’ll want to let this dry a bit before moving to the next step. (And hey, turn on your favorite tunes—it makes the drying time less painful).
- Layer the Spots: Once the base layer is dry, switch to black and start adding those iconic spots. Remember, no two Dalmatians are alike, so have fun placing the spots wherever feels right. If you need inspiration, check your own pup – they just might’ve some fun placement of their own.
- Colorful Accents: Now for the fun part—adding bright colors around your Dalmatian! Create a background with vibrant colors or even a playful pattern that makes your pup pop. This is your opportunity to let your creative flag fly.
- Final Touches: Take a step back and admire your work. Add any final details to your Dalmatian, maybe a shiny nose or sparkling eyes, and step back to see how it all comes together.
Optional Add-ons/Variations:
- Experiment with different backgrounds like a sunny park or starry night. You can also use glitter paint to make your painting shimmer.
- Try using a palette knife for creating texture, especially around the colorful spots and background. Who doesn’t love a bit of pizzazz?
Pro Tip:
Keep paper towels nearby to clean brushes between color changes. Trust me, mixing brown and bright pink can lead to some interesting shades that don’t quite scream “Dalmatians.” A clean brush brings clarity to your masterpiece, just like a freshly bathed dog brings joy after a muddy adventure.
4. Bulldog With Abstract Shapes
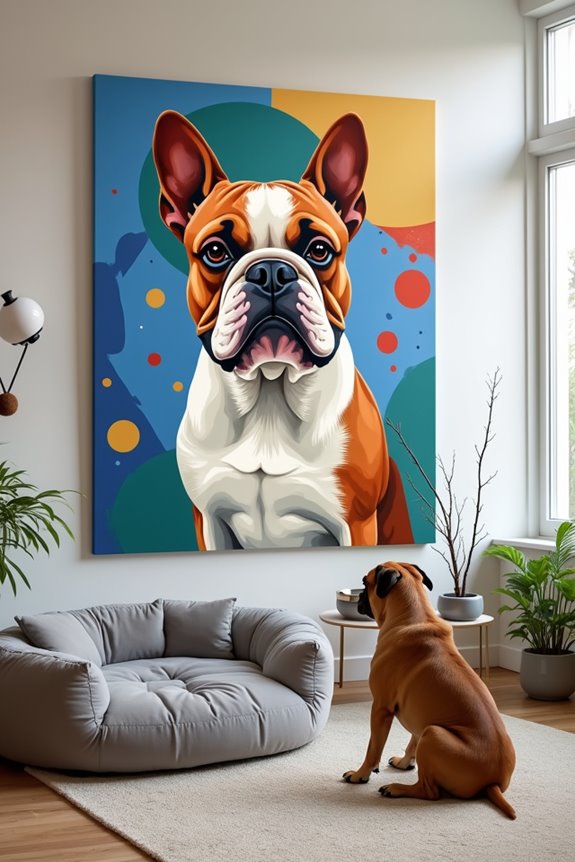
If you’re a proud bulldog owner, how about turning your furry friend’s likeness into a stunning piece of abstract artwork? This DIY project not only lets you flex your creative muscles but also gives your space a unique touch—the perfect blend of personality and style that might earn you a few compliments at your next dog-friendly gathering. Did you know that luxury dog furniture can complement your artistic decor by adding elegance to your living space? Not only that, but luxury pet furniture can also enhance your home’s aesthetic while accommodating your beloved pets. Plus, it’s a budget-friendly way to add some pizzazz to your home without splurging on something fancy. You can also decorate your artwork with premium dog supplies to create a truly personalized piece that pays homage to your beloved bulldog.
Materials Needed:
- Canvas or thick paper (choose your favorite size)
- Acrylic paints (bold colors like blue, red, yellow, plus black and white)
- Paintbrushes (different sizes for details and broader strokes)
- Paper palette (or a plate for mixing colors)
- Cup of water (to rinse those brushes)
- Paper towels (for quick clean-ups)
- Pencil or charcoal (to outline your design)
- Reference photo of your bulldog (to capture all that cuteness)
- Easel (if you’re feeling fancy)
Step-by-Step Instructions:
- Get Cozy: Find a spot in your home where you feel inspired and can spread out your supplies. A comfy chair or a bright window can make all the difference. Move anything that you might accidentally splatter with paint—a dog’s wagging tail can lead to a colorful mess without warning.
- Choose Your Reference Photo: Scan through your pictures to locate a photo that shows off your bulldog’s personality. Whether they’re staring thoughtfully or caught mid-sneeze, pick a shot that brings a smile to your face.
- Sketch the Outline: Lightly sketch your bulldog’s shape onto the canvas. Don’t stress if the lines aren’t perfect—abstract art is all about embracing imperfections. Consider focusing on parts of their face, like squishy cheeks and prominent jowls; those are the things that capture their character best.
- Base Layer Magic: With a medium brush, paint a base layer using a color of your choice. Perhaps a vibrant blue that you love, or go classic with bright white against a funky background. Let this layer dry while you daydream about dog treats—because who doesn’t love those?
- Add Funky Shapes: Grab your smaller brush and start painting abstract shapes around your bulldog. Circles, squares, triangles—let your imagination run wild. Remember, this isn’t about replicating realism; it’s all about capturing the spirit of your bulldog in a fun way. Mix up some colors for depth and layer them for an artistic vibe that would impress Picasso.
- Bring It All Together: Once you’ve dotted and shaped to your heart’s desire, let everything dry. Take a step back and see if there are any areas that need a little extra love. Maybe add some splashes of color or even some painted paw prints for that authentic pooch touch.
- Final Flourish: After everything is dry, consider outlining parts of your bulldog or shapes with a thin black brush for a pop of definition. This step adds a bit of pizazz and makes the colors really shine. Step back one last time, and there you go—a masterpiece that captures your bulldog’s spirit.
Optional Add-ons/Variations:
- Color Play: Instead of traditional bulldog colors, choose a whimsical palette. Imagine neon pink or electric green, just for kicks. Your bulldog doesn’t mind looking fabulous.
- Pattern Mixing: Use some patterned paper as a background if you’re feeling a bit more crafty. Think stripes or polka dots that can create a dynamic backdrop for your pup.
Pro Tip:
While you’re painting, keep your pup entertained with a new toy or their favorite treat on standby. A happy dog nearby can make the creative process that much more enjoyable. And don’t forget, if you inhale too many paint fumes while trying to balance art and a distracted bulldog, open a window—fresh air never hurt anyone!
5. Corgi on a Skateboard
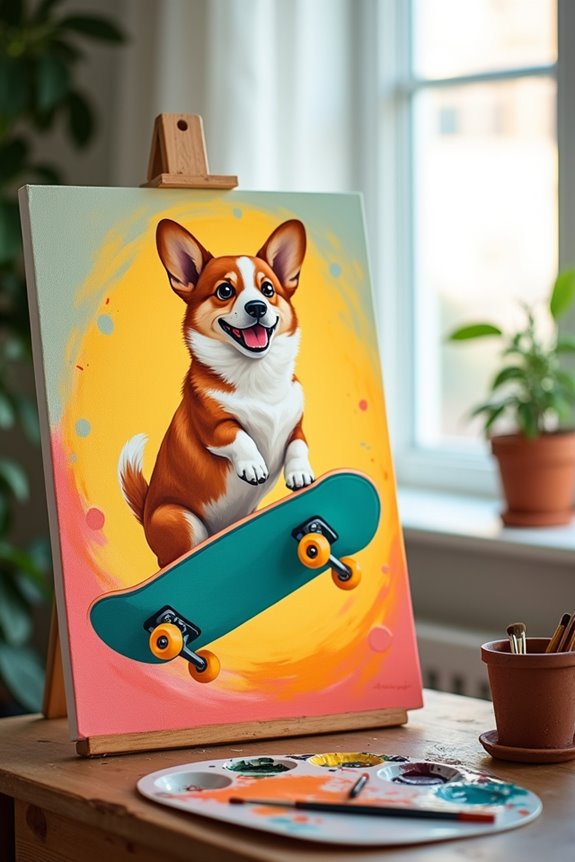
If you’re searching for a charming way to celebrate your corgi’s playful spirit, why not create a vibrant DIY art piece capturing them on a skateboard? This project not only immortalizes those quirky, adorable moments of your corgi’s antics but also adds a delightful touch to your home décor.
Plus, it can be a cost-effective alternative to pricey art pieces, allowing you to cherish your dog’s personality without breaking the bank.
Materials Needed:
- Canvas or thick paper (your preferred size works)
- Acrylic paints (a mix of fun colors like orange, pastel blue, and deep purple)
- Paintbrushes (various sizes for different details)
- Mixing palette (a paper plate works great)
- Cup of water (to clean those brushes)
- Paper towels (for those inevitable oopsies)
- Pencil or soft chalk (to outline your design)
- A reference photo of your corgi on a skateboard (or in a similar pose)
- Optional: a skateboard model (for real-life inspiration)
Step-by-Step Instructions:
- Set the Scene: Find a cozy art space—maybe at your kitchen table or in a well-lit corner of your living room. Don’t forget to shield any surfaces because when creativity flows, so can paint.
- Pick Your Photo: Dig through your camera roll or photo albums to find that perfect shot of your corgi on a skateboard. Whether they’re zooming around excitedly or just posing like a little superstar, choose one that brings you joy.
- Outline Time: Using your pencil or chalk, lightly sketch the outline of your corgi and the skateboard on your canvas. No need to be Michelangelo here; just capture the essence of their cuteness. Emphasize those big, expressive eyes and the wiggly body.
- Base Layer Fun: Pick a lively base color for your background—maybe a sunny yellow or a light green to lend a playful vibe. Using a medium brush, cover the canvas and let it dry, giving yourself a moment to envision the final look.
- Let’s Add Color: With your smaller brush, start painting your corgi. Use vibrant hues for the skateboard, and don’t shy away from mixing shades to create depth (like a little black for shadowing). Whoops, a bit of paint on your hand? That’s part of the process—a badge of honor.
- Bring the Details: It’s time to add fun elements—think wheels on the skateboard or some colorful action lines to show how fast they’re going. You can also doodle some goofy expressions to capture the character of your corgi.
- Final Touches: Step back and admire your work. Are there blank spots? Maybe add a few little stars or splashes of color to fill them. Don’t forget the signature at the bottom; after all, you’re the artist here.
Optional Add-ons/Variations:
- Explore different color themes; maybe a funky retro vibe with bright neon colors could work. Experiment with glow-in-the-dark paints for a unique twist.
- Instead of just a skateboard, add a fun background scene like a park or beach to really bring the piece to life. Bonus points if you add other playful elements, like flying frisbees.
Pro Tip:
When mixing colors, remember to start with a small amount of paint and gradually add more until you achieve your desired shade; this helps reduce waste and guarantees you get that perfect hue without diving into a paint panic later.
6. Poodle Surrounded by Balloons

For all the proud poodle parents out there, this DIY project captures your pooch in a burst of joyfulness with colorful balloons! Imagine creating a lively piece that showcases your fur baby’s spirited personality while adding a dash of charm to your home. It’s a delightful way to express your love for your poodle that also saves you money on art—you’re about to become the Picasso of pooches! A great way to capture their essence is with a professional dog portrait kit, which can enhance your artistic endeavors, especially when you indulge your chihuahua with premium dog food options to keep them healthy and happy. Selecting premium dog food tailored for poodles ensures they have the nutrients needed for a vibrant life.
Materials Needed:
- Canvas or sturdy paper (any size you prefer)
- Acrylic paints (think bright colors like pink, sky blue, and sunny yellow)
- Paintbrushes (a mix of sizes will do)
- Mixing palette (a simple paper plate works perfectly)
- Water cup (for rinsing brushes)
- Paper towels (oops, happens to the best of us)
- Pencil or light chalk (to sketch your design)
- Reference photo of your poodle (preferably posing glamorously with some balloons)
- Optional: real or toy balloons for additional inspiration
Step-by-Step Instructions:
1. Prepare Your Space: Set up in a comfortable spot where you can let your creativity flow—maybe the dining table or a sunny nook.
Remember to put down some old newspaper or a plastic sheet to protect your surfaces because we all know paint has a mind of its own.
2. Select Your Image: Browse through your photo library for that perfect shot of your poodle—whether they’re posing with balloons or just being their adorable selves, choose one that makes your heart smile.
3. Sketch Away: Grab your pencil or chalk and lightly outline your poodle and the balloons on the canvas.
Don’t stress—just capture the essence. Channel your inner artist, but remember, no one is grading you here.
4. Time for the Background: Choose a vibrant color for the background that complements your poodle—maybe a whimsical light blue to mimic the sky.
Go ahead and paint that color onto the canvas with your medium brush and let it dry.
5. Bring Your Poodle to Life: Using a smaller brush, start adding color to your poodle, layering in those fluffy curls with different shades.
For the balloons, mix in a few pastel colors for fun variety—after all, we want them to pop (pun intended).
6. Details Matter: Add the finishing touches! Cute little details like sparkle on the balloons or a happy grin on your poodle can elevate your artwork.
You might even want to add a gentle halo of soft colors to show that joyful atmosphere.
7. Finalize & Display: Once everything is dry, find a lovely spot in your home to hang your new masterpiece.
Whether it’s your living room, hallway, or even your poodle’s personal space, let that artwork shine.
Optional Add-ons/Variations:
– Consider using glitter or metallic paint for the balloons to give them extra sparkle.
Who doesn’t love a little shimmer, especially if it reflects your poodle’s personality?
– Try a different background, like a dreamy sunset palette or a polka-dot pattern, to add a unique flair.
The more personal, the better!
Pro Tip:
If you want to save some money, check your local thrift stores for second-hand canvases.
They often have perfectly good ones just waiting for a new lease on life, and it could be a fun treasure hunt!
Plus, always let your poodle be nearby as you paint; their goofy antics just might inspire your next creative flare.
Happy painting!
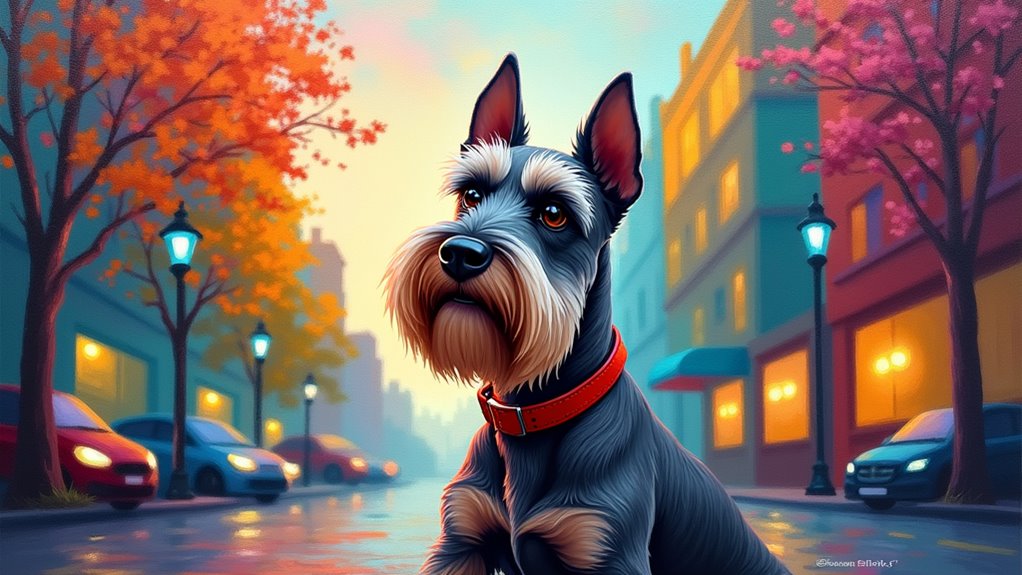
7. Schnauzer in a Cityscape
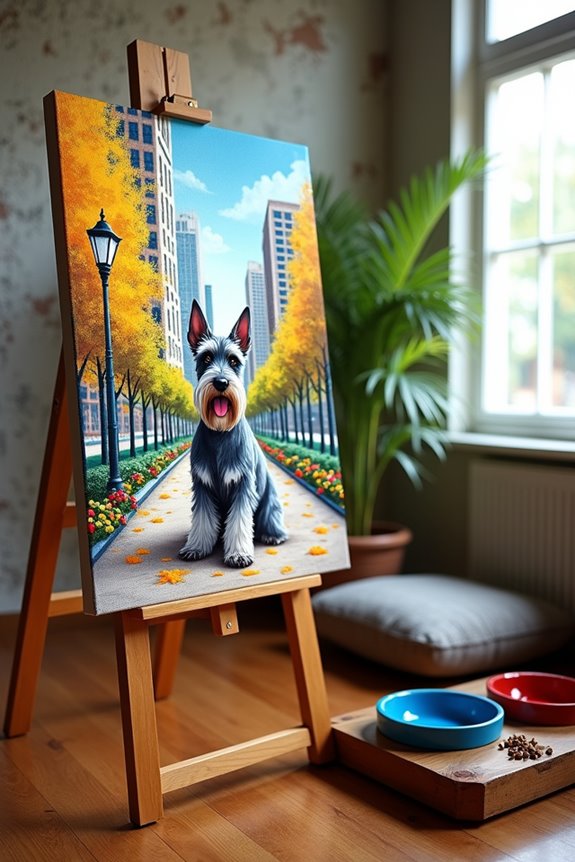
Looking for a fun way to celebrate your sweet schnauzer? How about transforming a blank canvas into a lively cityscape featuring your furry friend? This DIY project not only saves you from splurging on high-priced art but also lets you showcase your beloved pup against an urban backdrop that reflects their adventurous spirit. Plus, it’s a fabulous conversation starter when guests come over. A perfect addition to your home decor is a premium puppy feeding station that complements your artistic masterpiece. Additionally, consider enhancing your pup’s comfort with luxury dog stairs beds to help them reach their favorite spots. Furthermore, investing in luxury dog accessories ensures your schnauzer feels as pampered as your artwork looks.
Materials Needed:
- Canvas or heavy-duty paper (size of your choice)
- Acrylic paints (think vibrant urban colors like brick red, sky gray, and bright yellow)
- A variety of paintbrushes (small for details, medium for larger areas)
- Mixing palette (a paper plate works wonders)
- Water cup (for cleaning brushes)
- Paper towels (painting can get messy)
- Pencil or light chalk (for your initial sketch)
- Reference photo of your schnauzer posing (bonus points for photos in front of city landmarks)
- Optional: images of city elements (like buildings or parks) for extra inspiration
Step-by-Step Instructions:
- Create a Cozy Workspace: Pick a spot with good light, maybe your kitchen table or a spacious countertop. Lay down some old newspapers (because who wants to explain paint splotches to the landlord?) to keep things tidy.
- Choose Your Reference Photo: Dig through your phone or photo albums to find that adorable shot of your schnauzer. Maybe it’s a pic of them looking regal or playful—anything that captures their essence and invites a smile.
- Sketch Your Design: With a pencil or light chalk, lightly outline your schnauzer and the cityscape around them on your canvas. Just capture the basic shapes—don’t worry about perfection; remember, this is YOUR art.
- Paint the Background: Start with the background—use a light or mid-tone to represent the sky or an abstract city scene. Get your larger brush and spread those colors across the canvas. Let it dry completely before moving on.
- Bring Your Schnauzer to Life: Using a smaller brush for detail, paint your schnauzer with their unique colors. Layer the fur in strokes that mimic fluffiness. As you paint, you might find yourself chuckling at their little quirks—maybe that silly ear that always stands up or their big, warm eyes.
- Add City Elements: Begin adding buildings, trees, or whatever cityscapes inspire you! Use contrasting colors to make sure your schnauzer pops out in the foreground. Don’t hold back on the creativity here; this is where you can really let your artistic juices flow.
- Final Touches: Step back, take a look, and see what might be missing. Is your schnauzer smiling? Maybe add some twinkling stars in the background or a colorful city sunset. This is your chance to infuse personality into the piece. Once everything is dry, you can sign your artwork—after all, you’re the artist now!
Optional Add-ons/Variations:
Want to be super creative? You could paint your schnauzer wearing a little superhero cape in the cityscape or even add fun decorations like streetlights or benches.
Change up the color palette to match your living room too—think bohemian vibes with earthy tones or a funky pop-art style with neon splashes.
Pro Tip:
While you paint, keep a damp cloth nearby to quickly clean brushes and any accidental smudges.
Want your art to last longer? Consider sealing it with a clear varnish once it’s completely dry. It’ll protect your masterpiece from dust and keep it looking fresh for years to come, like your schnauzer at the dog park—always full of energy!
Extra Tips & Ideas
As you immerse yourself in the fun world of dog painting designs, don’t underestimate the power of embellishments and little details that can take your artwork to the next level.
Think about adding a bright background or playful textures to make your pup pop. Ever tried splattering paint? It might sound messy, but it can add a whimsical touch. Remember, incorporating luxury dog accessories into your painting can also reflect your pup’s unique style.
If you’ve got a fluffy dog, don’t hesitate to exaggerate those fur details—trust me, it adds character. Consider incorporating elements from their environment or favorite luxury designer dog beds for added realism and depth.
And how about a splash of glitter? Just a sprinkle can make certain areas shine and draw the eye.
Keep in mind, progress is key; don’t sweat the small stuff. Everyone has an off day, even Picasso.
Moreover, consider incorporating some premium dog toys as props in your painting for added charm and character.
Enjoy your creative journey!
Frequently Asked Questions
What Materials Do I Need for Dog Painting Projects?
You’ll need acrylic paints, canvas or paper, brushes of various sizes, water for cleaning, and a palette for mixing colors. Don’t forget an apron to protect your clothes and a sample photo of your dog!
Can I Use My Pet’s Fur in the Artwork?
Yes, you can use your pet’s fur in your artwork! It creates a unique, personal touch. Just make certain it’s clean, dry, and well-prepared. Your furry friend contributes to a special piece of creative expression.
How Can I Include My Dog’s Paw Prints in Designs?
You can include your dog’s paw prints by using non-toxic, washable paint. Simply dip their paw gently, press it onto your canvas, and clean their paws afterward. It creates a personal touch in your artwork!
Is It Safe to Use Any Paint on My Dog?
About 60% of pet owners worry about toxic substances. You shouldn’t use regular paint on your dog; it can be harmful. Opt for pet-safe, non-toxic paints specifically designed for animals to guarantee your dog’s safety.
Where Can I Showcase My Completed Dog Paintings?
You can showcase your completed dog paintings at local art fairs, community galleries, online platforms like Etsy or Instagram, or even host a personal exhibition in your home or a pet-friendly café.
Conclusion
So, as you grab your brushes and set up your canvas, just think about how those colors can come alive. Isn’t it exciting to imagine a joyful Golden Retriever making your space pop or a Corgi zooming by on a skateboard? With these dog painting ideas, you can turn your creative spark into fur-tastic masterpieces. Immerse yourself, let your imagination run wild, and who knows? You might just become the Picasso of pooches, or at least a very happy painter.