
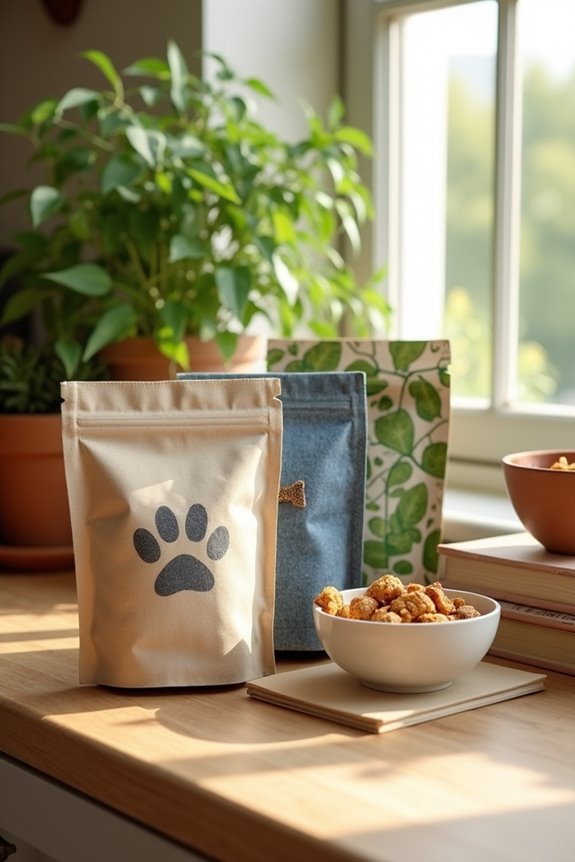
When you think about dog food packaging, what comes to mind? A plain brown bag? Well, let me tell you, things have changed. Today’s designs are as vibrant and creative as they are practical. There are resealable pouches, biodegradable materials, and even bags with transparent windows so you can see those tasty morsels inside. It’s not just about looks, though; these innovations make your life easier too. Curious about what else is out there?
Innovative Materials Showcase
When you think about dog food packaging, do you ever wonder what goes into making it not just functional, but also eco-friendly and eye-catching?
It’s amazing how innovative materials can elevate those bags. You might find biodegradable films or recycled plastics that help keep your pup’s food fresh while being kind to the planet. Many brands, such as premium dog food German shepherd, are now focusing on sustainable packaging solutions to reduce their environmental impact. Additionally, companies are increasingly considering premium dog food allergies to cater to pups with specific dietary needs.
Then there’s the whole “shelf appeal” factor—colors, textures, and patterns that catch your eye even from a distance. Imagine picking a bag that looks lively and playful, reflecting your dog’s personality.
And don’t forget about ease of use; resealable pouches make life easier. A focus on premium dog food brands ensures that the packaging aligns with high-quality ingredients and sustainable practices.
There’s so much more than meets the eye in dog food packaging, and it’s a pleasure to dig into these details, isn’t it?
Our Collection
Our Collection
Let’s chat about our collection, which is packed with some really cool packaging ideas.
You’ll find eco-friendly biodegradable pouches, perfect for the planet, and transparent windowed bags that let you peek at the goodness inside. Additionally, our range includes premium dog food for your Goldendoodle, ensuring that every bite is both delicious and nutritious. And hey, who doesn’t love resealable zip lock bags that keep things fresh, customizable label designs that let your brand shine, and tamper-proof sealed packaging that screams safety? Additionally, we offer a variety of dog food storage containers in different sizes to suit any home and ensure your pet’s food stays fresh and safe. Our selection includes high quality dog food storage solutions that not only enhance freshness but also maintain nutritional value for your furry friend.
1. Eco-Friendly Biodegradable Pouches
Are you tired of those bulky dog food bags piling up in your pantry? Well, say goodbye to clutter with this fun DIY project! You can easily make your own eco-friendly biodegradable dog food pouches, perfect for keeping your pup’s meals fresh and your home neat. Plus, it’s a budget-friendly way to reduce waste while showing off your creativity. Who knew being environmentally conscious could feel so good? In addition, if you want to treat your furry friend, consider adding freezedried chicken breast treats to their diet for an extra boost of flavor and nutrition. To ensure your puppy receives the best nutrition possible, look for premium puppy food labels that meet high-quality standards. Installing a strong and secure dog run fencing system ensures your pup’s safety while they enjoy outdoor playtime.
Materials Needed:
- Biodegradable fabric or old cloth bags (like canvas or cotton)
- Scissors
- Sewing machine or needle and thread
- Measuring tape
- Fabric marker or chalk
- Velcro or buttons (for closure)
- Iron (optional)
Step-by-Step Instructions:
- Measure and Cut: Take your biodegradable fabric and measure out a rectangle about 12 inches wide and 15 inches tall. This size works well for most dog food portions. Cut out two identical pieces.
- Prepare the Edges: If you’re using fabric that frays easily, fold over the edges about half an inch and iron them flat to prevent any mess. Ironing is optional, but it makes sewing so much easier, trust me.
- Sew the Sides: Place the two fabric pieces together, with the good sides facing each other. Sew along the sides and bottom, leaving the top open. A simple straight stitch is perfect for this! If you’re feeling adventurous, you can make decorative stitches too.
- Create the Closure: To keep the food secure, sew Velcro strips or attach buttons on the top edge. If you choose buttons, be sure to sew a fabric flap over it to keep the pouch looking sleek and professional. Who doesn’t love a little pizzazz?
- Turn it Inside Out: Once it’s all sewn together, turn your pouch inside out, so the seams are tucked away. Give it a gentle shake to help it take shape.
- Fill Her Up: Finally, fill the pouch with your dog’s favorite kibble or treats, and fold down the top to close it securely. Make sure your pup is nearby to let you know if you did good. Their wagging tail is the ultimate validation.
- Store and Enjoy: Find a cute spot to store your new pouches. Your pantry will thank you for the extra space. Now you can neatly dispense your dog’s meals while feeling like a responsible pet parent.
Optional Add-ons/Variations:
- Get Creative: Use fabric paint or markers to personalize your pouch with your dog’s name or fun designs. Maybe a paw print here or a heart there—it’s all about showing your dog some extra love.
- Mix It Up: Instead of fabric, consider using old pillowcases, T-shirts, or even denim scraps. Upcycling makes this project even more eco-friendly and adds a unique touch to your pouches.
Pro Tip:
Be sure to wash and dry your pouches before the first use, especially if you used second-hand fabric. A good wash guarantees they’re fresh, and it gets rid of any potential odors. Plus, it’s a great way to guarantee they last longer, making your DIY venture worthwhile.
Now you have it—a simple, cute, and eco-conscious way to store your pup’s food while decluttering your life. Happy crafting!
2. Transparent Windowed Bags
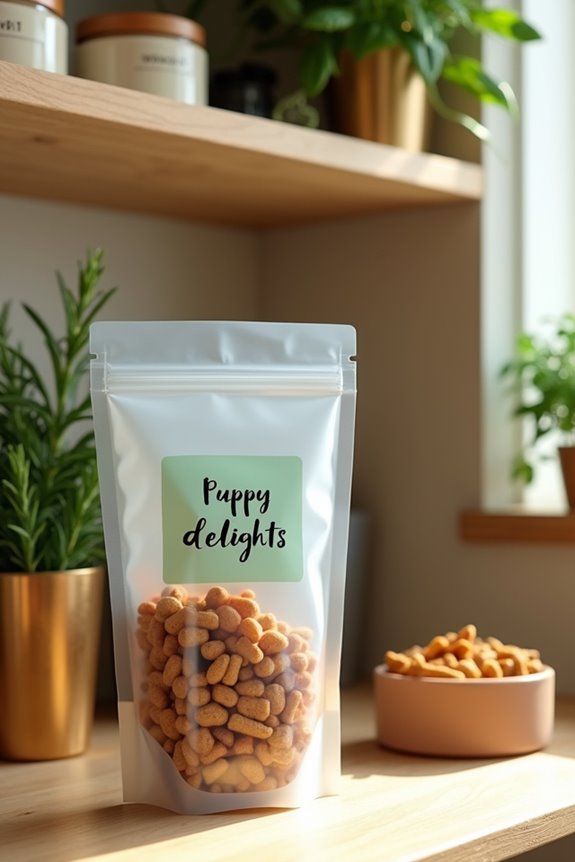
Have you ever struggled to see what’s inside your dog’s food bag? Or maybe you’ve accidentally opened an old bag of treats, only to discover they’ve gone stale? Enter the transparent windowed bag—a stylish, practical solution for dog owners who want to keep their canine companions’ food fresh while also looking good in their pantry. These bags not only make it easy to see what’s inside but also come in a variety of designs that can elevate your home organization game. Plus, you can indulge your pup with a luxury dog treat dispenser that complements the stylish look of your new storage solution! Additionally, investing in premium cockapoo dog supplies ensures that your dog’s diet and storage are both top-notch. Not to mention, the growing popularity of luxury dog accessories highlights the trend of pet owners seeking high-quality items that reflect their pets’ unique personalities. Let’s explore a DIY project that brings a touch of transparency to your dog food storage.
Materials Needed:
- Clear vinyl fabric
- Scissors
- Sewing machine or needle and thread
- Measuring tape
- Fabric marker or chalk
- Velcro strips (for closure)
- Iron (optional)
- Ruler
Step-by-Step Instructions:
- Measure and Cut: First up, grab your clear vinyl fabric and measure out a rectangle about 12 inches wide and 18 inches tall. This size is perfect for most dog food portions. Cut out two identical pieces. Don’t worry if they’re not perfect; dogs really don’t care about straight lines, right?
- Prepare the Edges: If your vinyl tends to get sticky, consider lightly applying a bit of baby powder on the edges to prevent that tacky feeling. You can also fold the edges about half an inch to clean them up a bit before you sew. If you want to iron, avoid direct heat on the vinyl—use a pressing cloth instead.
- Sew the Sides: Place the two pieces of vinyl together, keeping the good sides facing each other (yes, it does have a good side!). Sew along the sides and the bottom while leaving the top open. Using a zig-zag stitch can help keep those edges secure, but a straight stitch works great if you’re gentle.
- Attach the Closure: Now it’s time to secure your bag. Sew Velcro strips along the top edge, making sure they align perfectly so you can easily open and close the bag. This is essential for keeping those treats fresh and free from sniffing noses.
- Turn it Inside Out: Flip the bag inside out! Those seams should now be hidden. Give it a little shake to help it settle into shape. Voilà, your bag is starting to look ready for action.
- Fill and Seal: Fill your bag with your dog’s food or treats. Fold down the top and press the Velcro strips to secure it shut. If your dog isn’t already sitting nearby, they might just appear in hopes of a taste test.
- Display and Enjoy: Find a nice spot in your pantry or on a shelf for your new see-through bag. Enjoy that sense of organization—no more hunting through the chaos for kibble. Plus, you can show off how stylish your dog’s food storage can be.
Optional Add-ons/Variations:
– Jazz It Up: Use colorful vinyl or patterned fabric for a fun take on the transparent look. You could even put a cute label on the front to easily identify different bags for treats or meals—less room for human mistakes, right?
Pro Tip:
When sewing with vinyl, it can be a bit tricky since it sticks to some sewing machines. To prevent mishaps, place a piece of freezer paper under your vinyl while sewing. This way, it slides easier, and you can focus on creating the perfect pouch. Plus, don’t forget to keep a backup treat nearby for that inevitable *just in case* moment your dog decides to steal the spotlight.
That’s it! With these transparent windowed bags, you’ll not only keep your dog’s meals fresh but also rock your pantry organization like a pro. Now, go forth and create a home that’s as fabulous as your furry friend!
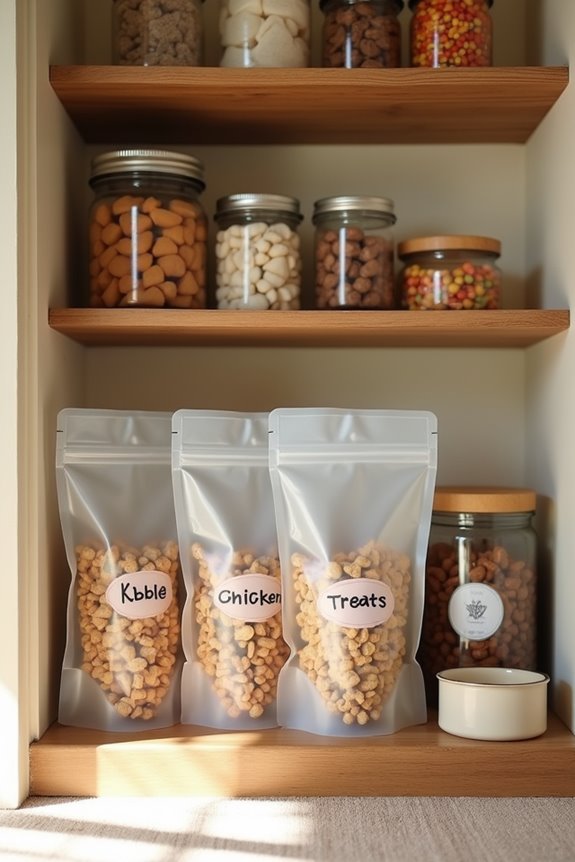
3. Resealable Zip Lock Bags
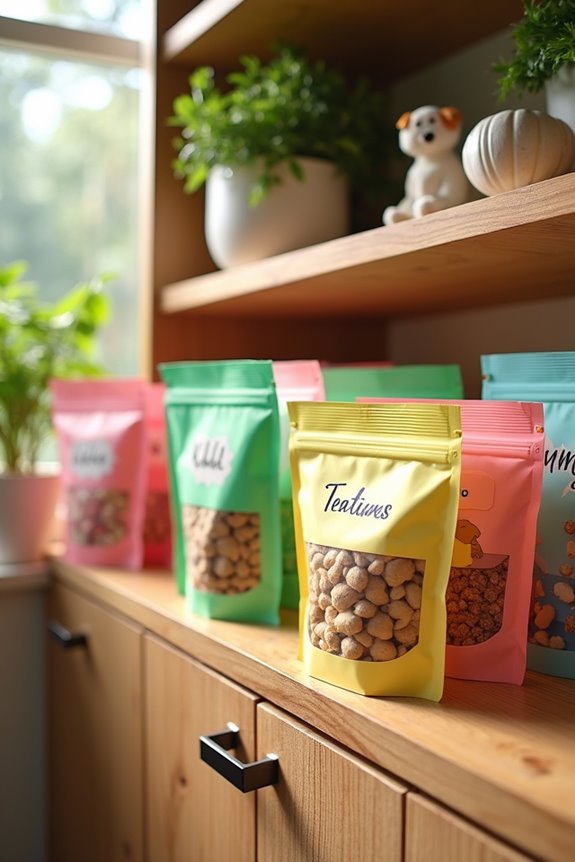
Uh-oh, have you ever opened a bag of dog food or treats only to find that they’ve become stale? Or do you wish you could store your dog’s food in a way that’s not only functional but also super cute? Let’s fix that with our DIY resealable zip lock bags project!
These bags are a game-changer for dog owners, giving you a simple, cost-effective way to keep your pooch’s snacks fresh while enhancing your home’s aesthetic. Plus, they’re a fantastic way to showcase your style through colors, patterns, and customization! Additionally, consider investing in a dog food storage cabinet to keep your pup’s supplies organized and protected, making your space feel even more luxurious goldendoodle dog supplies. Moreover, using luxury dog toys and games as storage options can also elevate the space.
Materials Needed:
- Resealable zip lock bags (various sizes)
- Decorative washi tape or stickers
- Scissors
- Permanent markers (for labeling)
- A ruler (optional)
- Access to a printer (for custom labels, optional)
Step-by-Step Instructions:
1. Choose Your Bags: Start by picking out the sizes of zip lock bags you want to use. For kibble, choose larger bags; for treats, smaller ones work just fine.
I sometimes find myself buying a cute size that I’ve no business using. You know, just because they look great.
2. Decorate: Take your decorative washi tape or stickers and start embellishing the outside of the bags. You can create stripes, patterns, or even your dog’s name.
Get creative—it’s your chance to let your personality shine! Just be careful not to cover the opening mechanism, that would be a rookie mistake.
3. Labeling Time: Grab your permanent markers and label each bag with what’s inside. You can write “Kibble,” “Chicken Treats,” or even something fun like “Paw-some Snacks.”
You could also create custom labels on your computer and print them out to stick on!
4. Fill Up the Bags: Carefully open your zip lock bags and start filling them with your dog’s food or favorite treats.
Don’t go overboard; it’s easy to underestimate how much can fit, and trust me, the last thing you want is a treat explosion.
5. Seal and Store: Once filled, firmly seal each bag by pressing the zip lock closed. Try giving it a little test tug to verify everything is secure.
Your dog will thank you for not letting their goodies go stale.
6. Show Them Off: Find a nice, organized spot in your pantry or on a shelf where the bags can be easily accessed.
Feel free to arrange them in a cute pattern or stack them. You’ll enjoy the satisfaction of having an organized space, and who knows? Maybe you’ll throw yourself a little celebration—complete with doggy treats, of course.
Optional Add-ons/Variations:
– Color Code: Want to take it a step further? Use different colored bags to indicate different types of food or treats.
For example, use green for dog food and red for treats. You’ll never grab the wrong bag again.
– Print Fun Graphics****: If you have access to a printer, consider printing out pictures of your dog or fun sayings to stick on each bag.
Something like “Fetch Time!” can really jazz it up.
Pro Tip:
Always write the date on the bag when you open a new package of food. This way, you can keep track of how long it’s been open.
Stale food doesn’t just taste bad; it affects your pup’s health, too. Health is wealth, my friends, even for our furry besties.
Dive into this project, get organized, and enjoy the peace of mind that comes with having fresh dog food at your fingertips. Your dog (and pantry) will thank you for it!
4. Customizable Label Designs
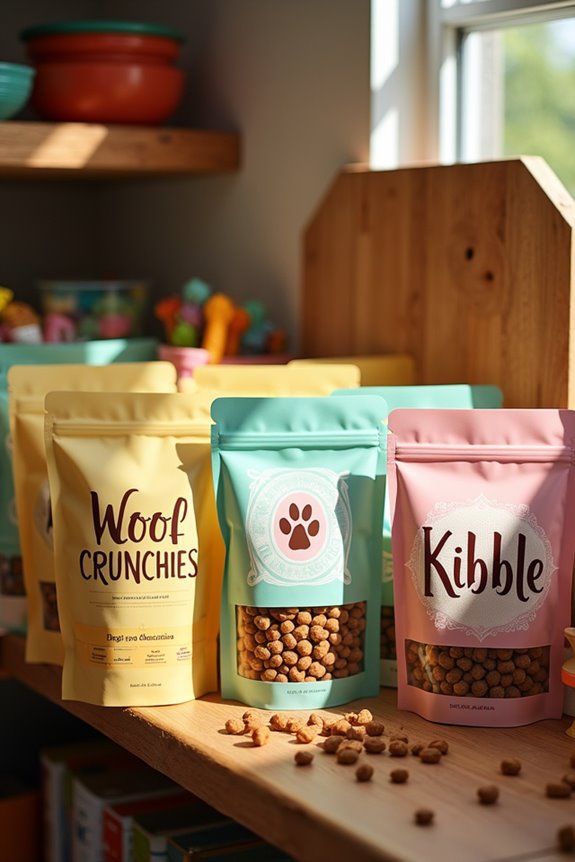
Let’s face it, having a cute, organized way to label your dog’s food can make all the difference. Not only does it streamline snack time, but it also adds a splash of personality and flair to your kitchen or pantry.
Plus, who doesn’t love a little DIY project that saves money and enhances comfort? Say goodbye to guessing what’s inside each bag; let’s jump into creating customizable labels that show off your dog’s unique style! Plus, using a dog sewing machine kit can help you create themed bags for even more fun storage options!
Materials Needed:
- Blank adhesive labels or label sheets
- Computer and printer (or handwriting skills, your choice)
- Colorful markers or pens
- Decorative washi tape (optional)
- Ruler (for precision)
- Scissors (if you’re cutting labels)
Step-by-Step Instructions:
1. Decide on Your Label Design****: First, think about what you want your labels to say. Will it be just simple “Kibble” and “Treats,” or something fun like “Woof Crunchies”? The sky’s the limit—the more personal, the better.
2. Choose Size and Shape**: Measure** your zip lock bags to determine the best label size. A little square or rectangular label can fit perfectly on the bags, so grab your ruler and make some calculated choices.
3. Create Your Designs: If you’re crafty on the computer, use a design program or a template online. Make sure to incorporate fun fonts and colors that match your style. If you prefer the old-school way, grab those markers and let loose with your handwriting.
4. Print or Write: Print your designs on adhesive labels or write them out by hand. If you’re printing, make sure to check if the printer settings match the label size for that perfect fit.
5. Cut and Stick: If you printed your labels on a sheet, cut them out. Carefully peel the back off and stick them onto the bags. For a personal touch, finish it off with a piece of decorative washi tape around the edges. It really elevates the look, and who doesn’t love a little pizzazz?
6. Fill and Label: Head back to those resealable bags filled with kibble or treats, and adhere your new labels proudly! Now you’ll know exactly what’s inside.
Plus, your pantry will start looking like a stylish doggie’s dream!
7. Show Off Your Work: Arrange your newly labeled bags in a way that’s pleasing to the eye—maybe color-code them or line them up by size. You’ll relish that neat and tidy feeling each time you reach for a snack.
Optional Add-ons/Variations:
- For a simple twist, use colored card stock instead of standard labels. Cut them and attach a string to hang for a cute rustic look.
- Try different themes for special occasions, like including festive designs for your pup’s birthday or holiday-inspired colors.
Pro Tip:
When labeling, think about durability. Use waterproof labels to keep your designs looking fresh even if there’s a bit of spilled kibble or a splash of water. Trust me, it’s way easier than explaining the “oops” moment to your pup later.
With just a little time and creativity, you’ll transform your basics into beautiful, personalized items that cater to both function and style.
Enjoy showcasing your dog’s snack collection, and let the tails wag with excitement!
5. Tamper-Proof Sealed Packaging
Let’s explore a super useful DIY project that won’t only keep your dog’s food fresh but also guarantee it’s safe from prying paws and curious noses. Tamper-proof sealed bags are a game-changer for dog owners, offering a simple way to store kibble and treats. You’ll save money by keeping food fresher for longer and bring a touch of organization to your pantry—who wouldn’t love that? Not only do these bags help maintain food quality, but they also pair perfectly with premium dog food appliances, enhancing your pet’s dining experience. Additionally, opting for premium dog food packages ensures that your pup receives balanced nutrition in every meal.
Materials Needed:
- Resealable plastic bags (zip lock style)
- Heat sealing machine or an iron (a flat surface needed)
- Parchment paper (to protect the bags during sealing)
- Scissors
- Permanent markers (for labeling)
- Airtight containers (optional, for extra protection)
Step-by-Step Instructions:
- Gather Your Supplies: Set up your workspace with all your materials handy. If you’re searching for a heat sealing machine or a trusty iron, make sure it’s clean—nobody wants crumbs stuck to their iron, right?
- Prepare the Bags: Take your resealable plastic bags and fill them with your dog’s food. Leave a little room at the top so they can seal properly. Too much food in there makes it an epic struggle later.
- Seal the Bags: If you’re using a heat sealing machine, simply feed the top of the filled bag through the machine and press to seal. If you’re using an iron, place a piece of parchment paper over the top of the bag, set the iron on low, and run it over the parchment for a few seconds until the plastic sticks together. Voilà! It’s like magic but involves less rabbit and more kibble.
- Check the Seal: Gently tug on the top of the bag. If it holds tight, you’re golden! If not, just re-iron or reheat seal that area. You’re on a quest for perfection here, and we all know how passionate our pups can be about their snacks.
- Label Your Bags: Once your bags are sealed, grab a permanent marker and write the contents on the front—“Kibble,” “Chicken Treats,” or whatever delightful names you’d like. This step is essential for quick identification, especially when you have the brain of a goldfish at snack time.
- Store Safely: If you want to take it up a notch, transfer your sealed bags into airtight containers. This isn’t only extra secure but also elevates your organization game. Your life may not turn into a Pinterest board, but we’re getting close.
- Show Off Your Work: Find a dedicated spot for your tamper-proof bags, whether it’s on a pantry shelf or a cute basket. Every time you reach for the kibble, you’ll feel that satisfying swirl of your efforts paying off. Who says dogs get all the good stuff?
Optional Add-ons/Variations:
- Feel free to jazz things up with decorative labels or stickers based on your dog’s personality. Maybe they get a sassy “Royal Ruffs” label or a chic “Gourmet Munchies” tag. The sky’s the limit when it comes to creativity.
- For extra flair, consider using colored tape for the seals instead of just parchment paper. It adds a nice touch, and your dog might think they’re really living large.
Pro Tip:
Make sure your heat sealing machine or iron is completely clean before sealing, or you might end up with surprise flavors mingling in your dog’s food. Nobody wants a hint of burnt chicken with their kibble.
Plus, keeping your sealed bags upright helps maintain freshness. After all, even your pup deserves that perfect crunch every time!
Give this simple project a try, and you’ll be well on your way to a more organized, budget-friendly, and modern dog food storage system. Your furry best friend will thank you (with lots of tail wags, of course).
6. Aromatherapy-Infused Food Bags
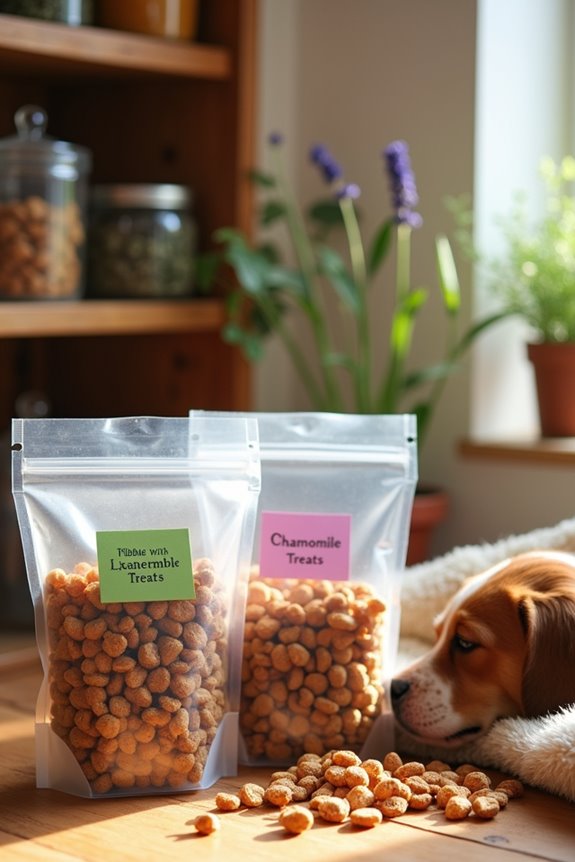
When it comes to keeping your dog’s food fresh, why not add an extra touch of aroma? Aromatherapy-infused food bags not only preserve your pup’s kibble but also create a delightful atmosphere with soothing scents. This DIY project is a fantastic way to elevate your dog’s dining experience and can even help calm anxious furry friends. Plus, it’s an easy way to incorporate a bit of style into your pantry. Additionally, using dog health supplements alongside a calming environment can further enhance your furry friend’s well-being, contributing to overall pet wellness. Consider complementing your aromatherapy initiative with premium dog health products, which can maximize your dog’s overall health.
Ready to take your dog food storage to a whole new level?
Materials Needed:
- Resealable plastic bags (zip lock style)
- Essential oils suitable for dogs (like lavender or chamomile)
- Small cotton balls or pads
- Permanent markers (for labeling)
- Airtight containers (optional, for extra protection)
- Scissors (for cutting cotton pads, if needed)
Step-by-Step Instructions:
- Choose Your Essential Oils: Start by picking essential oils that are safe for dogs. Lavender is known for its calming properties, while chamomile can help ease anxiety. A little research here can go a long way—no hasty decisions, please!
- Prepare Your Cotton Balls: Take a couple of cotton balls (or pads) and add one drop of your chosen essential oil to each. This is where the magic happens. But remember, less is more. You’re aiming for a subtle scent that’ll enhance the experience, not overpower it.
- Pack the Bags: Fill your resealable plastic bags with your dog food, leaving some space at the top for sealing. Next, tuck in the infused cotton balls. Think of them as your secret agents, subtly working to freshen the bag and uplift the mood.
- Seal It Up: Close the bags securely, ensuring there’s no air in them to keep the food fresh. If you want that extra layer of security, follow the tamper-proof sealing process we discussed earlier.
- Label Your Creation: Grab your permanent marker and label the bags—“Kibble with Lavender” or “Chamomile Treats.” This won’t only help you stay organized but also make it super clear what delicious aromas await your pup.
- Storage Time: Place your aromatic food bags into airtight containers if you want that extra bump in organization. It’s like giving your dog’s food a VIP suite in the pantry. Who wouldn’t want that for their best friend?
- Observe and Adjust: After a few days, take a moment to check in. If your pup seems relaxed or more joyful at mealtimes, you’ve hit the jackpot. If the scent is too strong, consider using a smaller drop next time. Fine-tuning is part of the fun!
Optional Add-ons/Variations:
Want to get creative? Try using fabric drawstring bags instead of plastic ones for a more rustic look. You can also use colored markers to decorate your food bags, adding your pup’s name or fun patterns that reflect their personality. If you’re feeling adventurous, consider blending scents. What about a calming lavender-chamomile combo? Your dog might just thank you with extra tail wags.
Pro Tip:
Always double-check that the essential oils you choose are safe for canine consumption. A quick chat with your vet can provide peace of mind. Remember—while a little sniff may be pleasant, some oils can be hazardous. Better safe than sorry, right?
Get ready to enjoy a fresh-smelling pantry and transform your dog’s mealtime into a relaxing ritual. What’s not to love?
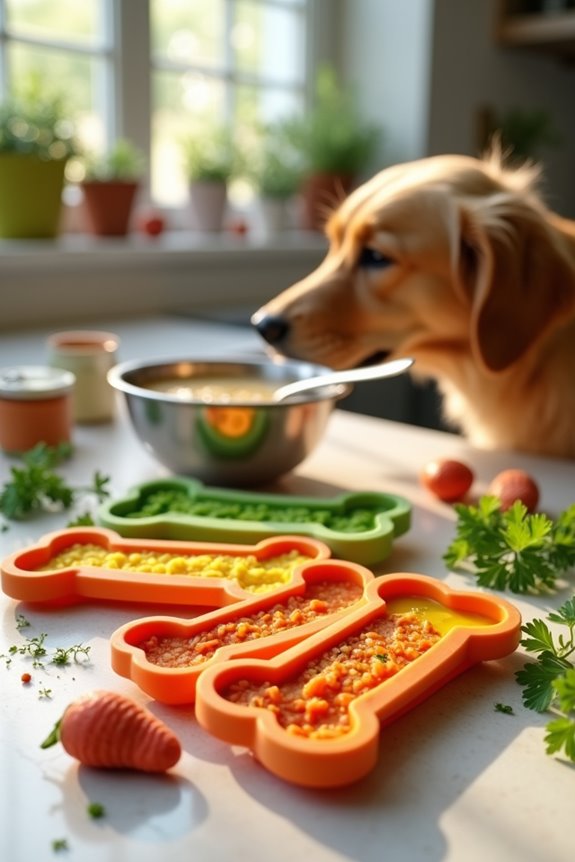
7. Nutrient-Infused Flavor Packs
Who wouldn’t want to give their furry friend a tasty boost with homemade nutrient-infused flavor packs? This DIY project not only enhances your dog’s meals but also guarantees they receive the essential vitamins and minerals they need. Plus, it’s a cost-effective way to spoil your pup while saving money on expensive store-bought options.
Materials Needed:
- Silicone molds (bone-shaped is fun, but any shape will do)
- Chicken or beef broth (low sodium, of course)
- Pureed vegetables (think sweet potatoes, peas, or carrots)
- Nut butter (make sure it’s xylitol-free)
- Optional: Freeze-dried meat bits or nutritional powders
- Measuring cups and spoons
- Mixing bowl
- Freezer bags for storage
Step-by-Step Instructions:
- Gather Your Ingredients: Start by measuring out about one cup of low-sodium broth, which will serve as the base of your flavor packs. Did you know that pups love the taste of broth? It’s like their version of a gourmet meal—only way less fancy!
- Add Pureed Veggies: Next up, stir in about half a cup of pureed veggies. This is where you can get creative! Sweet potatoes are popular, but don’t shy away from peas or carrots either—your dog may surprise you with their newfound veggie-loving ways.
- Mix in Nut Butter: Add a tablespoon of nut butter to the mixture. It not only adds flavor but also healthy fats. Just make sure it’s dog-friendly—nothing worse than that moment when your beloved pup gets a tummy ache from not-so-great ingredients.
- Incorporate Extras: If you’re feeling adventurous, toss in some freeze-dried meat bits or a scoop of nutritional powder. This is like adding a secret ingredient to your special family recipe. Don’t tell your dog; they might expect gourmet dining every night.
- Fill the Molds: Carefully pour the mixture into your silicone molds. Make sure to leave a tiny bit of space at the top since it may expand when frozen. Unless you want puppy popsicles the size of your dog’s head—now that could make for a hilarious Instagram moment.
- Freeze and Store: Pop those molds into the freezer for a few hours or until solid. Once they’re frozen solid, gently remove the pack shapes and store them in freezer bags. They’ll last for several months, which is perfect because let’s be honest, you’re probably making a million and one things for your dog right now.
- Serve Up the Love: Whenever it’s mealtime, just grab one or two of your nutrient-infused flavor packs and toss them into your pup’s bowl. Watch as their eyes light up like it’s Christmas morning. Honestly, what’s cuter than a tail wagging in pure joy?
Optional Add-ons/Variations:
- Herb It Up: Consider adding some dog-safe herbs like parsley or basil for a flavor twist. They also have breath-freshening properties, which could be a win-win situation.
- Colorful Layers: Get creative with your mixtures! Try layering different colors of broth and veggies in the molds for a visually appealing treat. It’s the dog-version of a rainbow cake—and let’s face it, who doesn’t love a bit of color in their life?
Pro Tip:
Always ascertain that whatever ingredients you use are safe and healthy for dogs. Consulting with your vet can be super helpful, especially if your pup has any food allergies. Who wants to play the guessing game with their furball’s health? Plus, using high-quality ingredients enhances their nutrition and flavor, ensuring your dog enjoys luxury dog grooming products experience every mealtime.
Now go ahead, put on your apron, and let your inner chef shine. Your dog won’t know what hit them, and their tail will be wagging in gratitude. Happy cooking!
Extra Tips & Ideas
While you might think dog food packaging is all about looks, there’s so much more that can make your design stand out on the shelf.
Think about bold colors and fun graphics that catch the eye. You want pet owners to feel a connection when they see it—like a warm hug from their furry friend. Consider incorporating warm fleece dog sweaters into your branding as a way to evoke feelings of comfort and coziness.
Don’t forget texture. A little bump or a matte finish could turn a casual glance into a “Wow, what’s that?” moment.
You might also consider eco-friendliness; pet parents love brands that care for the planet. Additionally, large dog equipment can play a role in highlighting your commitment to quality and care for larger breeds.
And, hey, how about a QR code for fun recipes? It makes your brand feel approachable and engaging.
Additionally, consider incorporating luxury dog supplies into your branding to attract discerning pet owners who appreciate high-quality products.
Keep experimenting, because your next best idea could be just a scoot away!
Frequently Asked Questions
How Do I Choose the Right Size of Dog Food Packaging?
To choose the right size of dog food packaging, consider your dog’s breed, age, and appetite. Think about how often you’ll buy food, ensuring the packaging fits your storage capabilities and maintains freshness effectively.
Can I Customize My Dog Food Packaging Design?
Absolutely, you can customize your dog food packaging design! With endless creative possibilities, you’ll make a unique statement that catches pet owners’ eyes. Just collaborate with designers who understand your vision and brand identity.
What Printing Options Are Available for Dog Food Bags?
You’ve got several printing options for dog food bags, including flexographic, digital, and gravure printing. Each method offers unique benefits, so consider factors like budget, design complexity, and production volume when making your choice.
How Do I Ensure Freshness in Dog Food Packaging?
To keep dog food fresh, seal bags tightly, store ’em in cool, dry places, and use moisture-resistant materials. Regularly check for expiration dates, and consider resealable designs to maintain quality between feedings.
Are There Eco-Friendly Packaging Options for Dog Food?
Yes, you’ve got eco-friendly options for dog food packaging! Consider biodegradable bags, recycled materials, or compostable containers. These choices help reduce waste while keeping your furry friend’s food fresh and environmentally friendly.
Conclusion
In the world of dog food packaging, think of your dog as royalty, deserving only the finest. Just like a treasure chest that holds their favorite snacks, these innovative designs keep kibble fresh and exciting. So, next time you’re at the store, consider which pouch not only satisfies your pup’s cravings but also brings a smile to your face. With these designs, it’s not just about the food; it’s about the entire experience—like a delightful dinner date with your furry friend, every time.