Did you know that drawing dogs can actually improve your focus and hand-eye coordination? It’s true. So, if you’ve been itching to pick up a pencil but don’t know where to start, you’re in the right place. From playful pups to serene sunbathers, there’s a whole world of dog-inspired art waiting for you. Stick around, and let’s explore some delightful ideas that’ll make your drawings come to life, one wagging tail at a time.
Dog Poses and Expressions
When you think about drawing dogs, have you ever considered how their poses and expressions can tell an entire story? Each wag of a tail, every perk of an ear can spark incredible dog drawing ideas.
Picture a pup mid-leap, chasing that elusive squirrel—its joy is palpable, right? Or, envision a loyal companion, head tilted as if pondering your every word. Capturing these moments isn’t just fun; it’s a way to connect with your art.
Struggling with poses? Start with simple sitting positions or a playful roll in the grass. Experiment with expressions like surprise or determination. Who knew those floppy ears could convey so much?
Each sketch brings you closer to understanding these furry friends and their unique personalities.
Our Collection
Alright, let’s talk about some fun dog drawing ideas you can try.
Imagine a playful pup sprinting after a ball, or a sleepy dog soaking up the sun—adorable, right?
Whether it’s a puppy digging in the sand or a dog with a stick in its mouth, our collection captures all those heartwarming moments that make you smile.
1. Playful Pup in Action
Creating paw print art can capture your furry friend’s personality while also serving as a cherished keepsake. It’s not just an artistic project; it’s a way to celebrate those muddy little paws, and let’s be real, what dog owner doesn’t want to immortalize their pup’s cuteness? Plus, pampering your pup with premium dog grooming essentials can make your fur baby’s art-making experience even more special.
Plus, by doing this yourself, you save money while adding a personal touch to your home decor—a win-win.
Materials Needed:
- Non-toxic baby-safe paint (any color you like)
- A canvas or sturdy paper (in any size)
- Paintbrush (for detailing)
- Container for paint
- Baby wipes or damp cloth (for quick clean-up)
- Dog treats (to keep your pup motivated)
- Optional: a frame for the finished artwork
Step-by-Step Instructions:
- Prepare the Workspace: Lay down some newspaper or an old cloth where you’ll be working. We’re aiming for paw prints, not paw disasters all over your floor.
- Get Your Dog Ready: Gather your pup, the treats, and the paint. It might be helpful to have a buddy around to help keep your dog entertained. A little extra pair of hands makes a difference when it comes to wrangling a wiggly dog.
- Paint Those Paws: Dip your dog’s paw into the non-toxic paint, making sure to coat it evenly. To avoid a paint-in-paw fiasco, you might start with just their front paw.
- Press and Print: Gently press your dog’s paw onto the canvas or paper. Press down firmly but don’t squish—this is art we’re talking about. Lift gently to reveal the print.
- Clean up: Right after the print is made, use baby wipes or a damp cloth to clean your dog’s paw. No one wants a multi-colored pup running around the house.
- Add Details: Once the paw print is dry, get creative. You can use the paintbrush to add tails, hearts, or even your dog’s name underneath. Let your artistic flair shine.
- Let It Dry and Display: Confirm your masterpiece is completely dry before displaying. If you’d like, you can frame it to add a polished touch. Now it’s ready to showcase in your home—you’re basically a top-tier artist now.
Optional Add-ons/Variations:
Feeling extra creative? Try using different colors for each paw to make a vibrant rainbow effect.
Or go for a seasonal theme—paint some paw prints and surround them with autumn leaves or snowflakes, depending on the time of year. Your dog’s paw prints could represent every season!
Pro Tip:
Use a smidge of dish soap mixed with water to clean your brushes after painting.
And here’s a thought: if your dog’s having a hard time sitting still, snap a few photos mid-splash for a fun memory, and don’t forget that dog treats are your best friend in this process.
Painting with your dog doesn’t just create art; it creates moments—those little paw prints will forever remind you of their playful spirit.
Plus, if you mess up, just remember: it’s art. Embrace the chaos. Enjoy the process.
2. Sleeping Dog in Sunlight
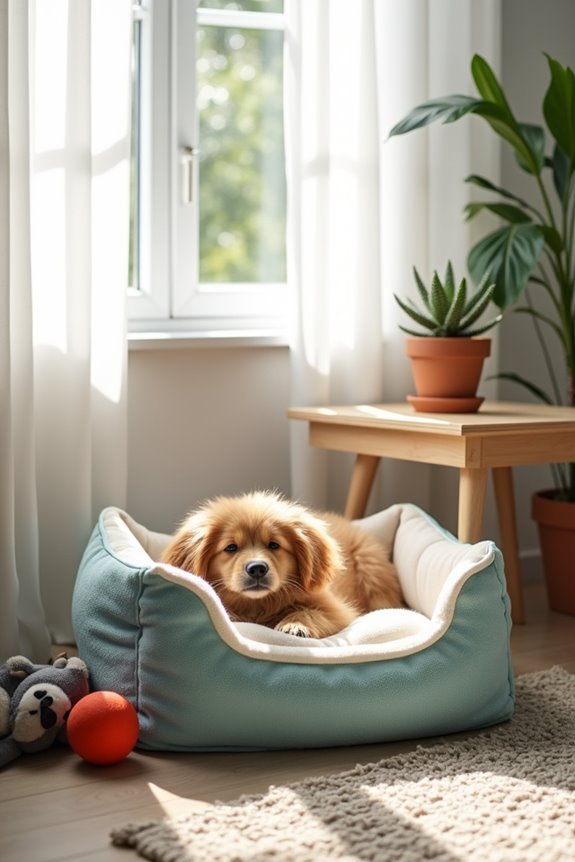
Creating a cozy dog bed is a fantastic DIY project that every dog owner can enjoy. Not only does it provide your furry friend with a comfortable space to relax, but it also allows you to personalize the design to fit your home’s decor.
Plus, making a dog bed yourself can save you a significant amount of money compared to store-bought options, allowing you to splurge on extra treats for your pup. Additionally, you can use high-quality materials similar to those found in premium dog food brands to ensure long-lasting comfort.
Materials Needed:
- Old blankets, towels, or fleece fabric (enough to create a cushion)
- Large canvas or cotton fabric (for the outer cover)
- Sewing machine or needle and thread
- Scissors
- Pins or clips (to hold fabric in place while sewing)
- Soft stuffing or an old pillow (for filling)
- Optional: fabric paint or patches for decoration
Step-by-Step Instructions:
- Choose Your Fabric: Start by selecting a comfortable and durable fabric—think about how much your dog loves to chew. Old blankets or towels work wonders and are often soft and snuggly.
- Measure & Cut: Decide on the size of the bed based on your dog’s sleeping habits. Cut the outer fabric into a large rectangle, roughly double the width you want the finished bed to be, allowing for some fold-over.
- Fold & Pin: Fold the fabric in half, right sides together, pin the edges together, and leave one side open for turning it inside out and stuffing.
- Sew the Edges: Sew around the edges, but remember to leave that one side open. A simple straight stitch will do, but you can also get fancy with zigzag stitching for added durability.
- Turn It Inside Out: After sewing, turn the fabric inside out through the open side. The pretty side should now be facing out.
- Fill It Up: Stuff the bed with soft stuffing or an old pillow—you want it fluffy and inviting. You can use your favorite pillow that may have lost its fluff. No judgment here; we all have those hanging around!
- Seal It Up: Once it’s stuffed to your liking, sew the open side closed. A simple needle and thread will do, just make sure it’s secure. Your pup’s jumping and wiggling might test your handiwork.
- Decorate (Optional): If you’re feeling creative, use fabric paint or patches to add your dog’s name or fun designs. This way, the bed becomes uniquely theirs.
Optional Add-ons/Variations:
Feeling adventurous? You can use different colors of fabric for a patchwork design, or even incorporate waterproof layers for those water-loving dogs.
Maybe consider adding a cozy blanket for even more comfort, the kind your dog will steal from you anyway.
Pro Tip:
Be sure to use pet-safe fabrics and stuffing. You wouldn’t want your pup to have a taste of something that could irritate their tummy.
And if you’re using an old pillow, check it’s still fluffy enough for the best comfort. Your dog deserves the best, after all.
3. Dog With a Stick
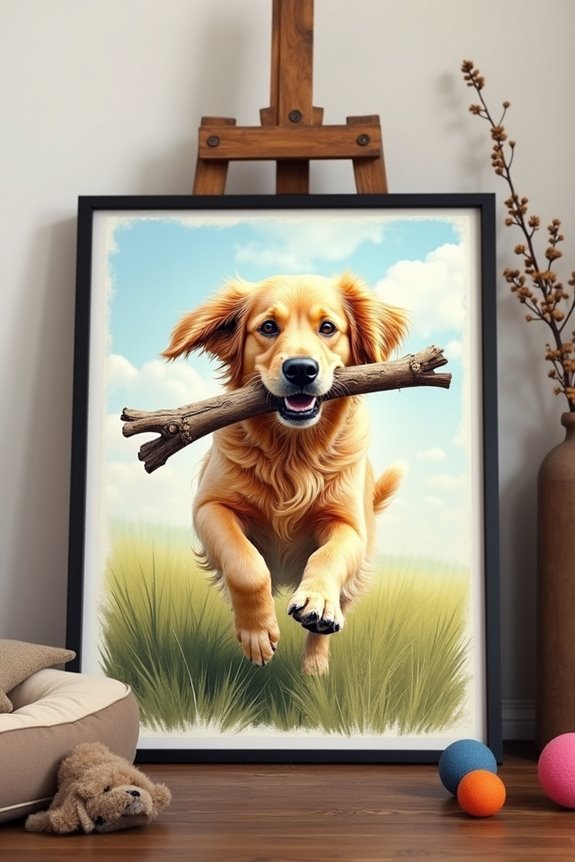
Creating a delightful drawing of a dog with a stick isn’t only a fun art project but also a charming way to capture your pup’s playful spirit. This DIY project can add a personal touch to your home décor or even make for a thoughtful gift for a fellow dog lover. Plus, it’s a great excuse to spend some quality time with your furry friend—who knows, they might just want to show you their favorite stick! To elevate your pup’s art experience, consider incorporating luxury dog accessories that complement your drawing and showcase your furry companion’s unique style.
Materials Needed:
- Drawing paper or canvas
- Pencils (for sketching)
- Erasers
- Colored pencils, markers, or paint (your choice)
- Fine-tipped black marker (for outlining)
- Reference photos of dogs with sticks (optional)
- A glass of water (for painting) and a paper towel (to blot)
Step-by-Step Instructions:
- Gather Inspiration: Start by looking for pictures of dogs with sticks online or snapping a photo of your own canine companion during playtime. Choose a pose that you find inspiring—maybe a mid-fetch action shot or a relaxed dog chewing on their favorite stick.
- Sketch the Basic Outline: Lightly use your pencil to sketch the basic shape of the dog on your drawing paper. Pay attention to the proportions—everyone wants their pup to look more adorable than goofy. If your dog has floppy ears or a wagging tail, those little details can really bring your sketch to life.
- Add the Stick: Next, sketch in the stick. Pay attention to how it connects with the dog’s mouth or paws. Maybe it’s a long branch they’ve totally conquered, or a small twig they think is the best treasure in the world. Keep it playful.
- Refine Your Sketch: Once you’re happy with the basic shapes, go back and refine your lines. Erase any mistakes or unnecessary sketches. It’s okay; those clean-up moments are part of the process—you’re not alone here, I’ve made plenty of oopsies too.
- Outline with a Marker: After refining your sketch, carefully trace over your pencil drawing with a fine-tipped black marker. This adds definition and brings your dog and the stick to the forefront. Let it dry for a minute; this way, you won’t accidentally smudge any lines—trust me.
- Add Color: Here comes the fun part! Use colored pencils, markers, or paint to bring your drawing to life. Choose colors that match your dog’s fur and create a realistic yet vibrant piece. Don’t forget to add shading for depth—shadows can make a simple sketch really pop.
- Final Touches: Once the colors are down, take a step back and see if there are any final touches needed. Maybe you want to add some grass under the dog or some blue sky above. A little detail can make a big difference.
Optional Add-ons/Variations:
Feeling adventurous? Why not try drawing a variety of dog breeds with their favorite sticks? Each breed has its own unique shape and personality, which can be a fun challenge and give you a diverse collection.
You could also experiment with different art styles—try a watercolor effect or even a cartoonish design for a more whimsical feel.
Pro Tip:
When working with colored pencils or markers, layer the colors gradually to avoid overwhelming the paper. This technique gives you more control and allows you to create those soft, gradual changes that mimic your dog’s fur.
And if you’re painting, be sure to let each layer dry before applying the next to prevent muddy colors. Your masterpiece deserves the best!
Now all that’s left is to hang your drawing proudly on the wall or share it with friends. What a wonderful way to celebrate your dog’s playful spirit—and who knows, it might just inspire someone else to create their very own dog art.
4. Dog Chasing a Ball
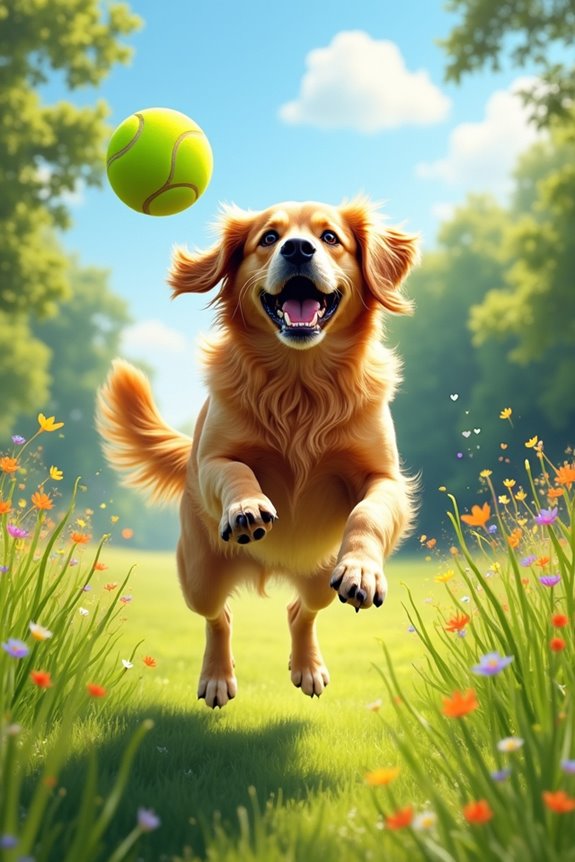
Creating a drawing of a dog chasing a ball is a fantastic way to immortalize that joyful moment we all love—watching our furry friends in full action. This DIY project not only nurtures your artistic side but also brings a splash of life and cheer to your walls. Plus, it’s a wonderful way to bond with your pup by reminiscing about those exciting days spent at the park.
Materials Needed:
- Drawing paper or canvas
- Pencils (for sketching)
- Erasers
- Colored pencils, markers, or paint (your choice)
- Fine-tipped black marker (for outlining)
- Reference photos of dogs chasing balls (optional)
- A glass of water (for painting) and a paper towel (to blot)
Step-by-Step Instructions:
1. Find Your Inspiration**: Start by gathering some reference pictures** of dogs in action—preferably ones chasing balls. If your own dog has a vibrant fetch routine, snap a quick photo to use as motivation. The excitement in those moments can really translate into your art.
2. Sketch the Outline**: Lightly use your pencil to draft the basic shape of the dog. Focus on action poses**; it could be a mid-sprint or a playful leap into the air. Capture the joy in those floppy ears flapping and the fur swirling in motion.
3. Position the Ball: Now, draw the ball in front of or flying just above the dog’s paws. Maybe it’s a brightly colored tennis ball or a textured rubber fetch toy—whatever inspires you to imagine the chase. Make it look like the dog is in full pursuit.
4. Refine Your Sketch: Ok, this is where we get detailed. Go over your initial drawing, refining the look of your dog and the ball. Make sure those luscious doggie features—like wagging tails and happy expressions—shine through.
Mistakes? They happen. Just erase and fix as needed; we’ve all been there.
5. Outline with a Marker: Grab your fine-tipped black marker and carefully trace over your pencil lines. This step adds clarity and pops the image from the page. Allow it to dry for a moment—there’s nothing worse than smudging your artwork right after finishing.
6. Bring it to Life with Color**: Now for the artistic flair! Use colored pencils, markers, or paint to add vibrancy. Match your dog’s coloring and give life to the ball—why not throw in some bold, bright colors? Don’t forget to use shading to create depth**; shadows can really make the whole scene come alive.
7. Final Touches: Step back and take a look at your work. What’s missing? A few highlights, maybe some fur texture? The small details can make a world of difference.
Take your time and enjoy customizing your artwork until it feels complete. You’re doing great.
Optional Add-ons/Variations:
- Funky Backgrounds: Consider adding a colorful background that features a grassy field or a bright blue sky. You could even doodle some flowers or other playful elements around to enhance the fun vibe.
- Different Dog Breeds: Experiment with various dog breeds to see how their unique features change the design. Imagine a fluffy Golden Retriever versus a sleek Greyhound—both will bring different energy to your artwork.
Pro Tip:
When drawing, don’t forget to take breaks. Stepping away from your work can give you fresh eyes, letting you spot those little details to enhance. Also, make sure you have plenty of natural light to see colors and details better—squinting doesn’t help anyone!
With these steps, you’ll create a joyful celebration of your dog’s spirit in action. So grab your supplies, and let the fun begin—who knows, you might just inspire an adorable masterpiece. Remember, practicing with a therapy dog training kit can even help enhance your bond and responsiveness with your pet while you create art together.
5. Puppy Digging in the Sand

If you’ve ever watched a puppy plunge into a pile of sand, you know it’s practically a comedy show. This DIY project captures that playful spirit and lets you create a delightful piece of art that reflects your pup’s personality. Not only does this drawing make a charming addition to your home décor, but it also serves as a reminder of those carefree moments spent at the beach or the park. Plus, it’s a money-saver, turning your love for art into something truly unique! And while you’re enjoying your artistic journey, consider enhancing your training sessions with premium dog training equipment to further bond with your furry friend!
Materials Needed:
- Drawing paper or a canvas
- Pencils (for sketching)
- Erasers
- Colored pencils, markers, or paint (this is your canvas—get creative!)
- Fine-tipped black marker (for outlining)
- Reference photos of puppies digging (always helpful)
- A glass of water (if you’re using paint) and a paper towel (to blot)
Step-by-Step Instructions:
1. Gather Inspiration: Start by looking for photos of cute puppies digging. Whether they’re pawing through the sand at the beach or happily rooting in a garden, find an image that makes you smile. If you have a little digger at home, snap a pic during playtime for a personal touch.
2. Sketch the Puppy: Lightly outline your puppy’s basic shape with a pencil. Focus on capturing the joy and enthusiasm in their body language. Are they sprawled out, digging furiously, or caught mid-jump with sand flying everywhere? Aim for that action-packed moment!
3. Add the Sand: Now it’s time to create the sand scene. Sketch a mound around your pup, maybe scattering it in little lines and dots for texture. Don’t forget to include some mess—puppies do love to make a ruckus when digging, so embrace that playfulness.
4. Refine the Drawing: Take a step back and look at your sketch. Time to make it pop! Go over your lines, adding beloved details like floppy ears, wagging tails, and the adorable little expressions that make puppies irresistibly cute. If you made a mistake, hey, just erase it and try again—this is all about having fun.
5. Outline with Marker: Grab that fine-tipped black marker and carefully trace your favorite lines, making your puppy and sand stand out bold and bright. Just remember to give it a moment to dry—smudges are like ugly footprints on a beautiful beach drawing, and nobody wants that!
6. Color it In: Now for the fun part! Bring your drawing to life with your colorful materials. Match your pup’s fur as closely as possible, and don’t be shy about using different shades to give depth. When it comes to the sand, play around with yellows and browns.
And throw in some playful details—maybe a tiny beach ball nearby, or a seagull overhead!
7. Final Touches: Once you’re done coloring, take a good look at your masterpiece. Is there anything that needs a little extra love? Maybe you want to add some texture to the sand or a sparkle in your pup’s eyes. This is your chance to make it uniquely yours.
Optional Add-ons/Variations:
- Consider adding a splash of color to the sand by mixing in some whimsical patterns or shapes. Maybe polka dots or even little footprints leading up to the puppy could add another layer of storytelling.
- Use different colored papers or even fabric instead of traditional drawing paper for a mixed-media approach. It could bring an exciting texture to your artwork that’s fun and eye-catching.
Pro Tip:
When creating this drawing, remember to have fun! Art should be enjoyable, so don’t stress about perfection.
If you’re working with kids, they might love using non-traditional colors or techniques like finger painting to capture that sand and puppy joy. And hey, just like puppies, don’t forget to get a little messy; that’s where the fun truly lies!
6. Dog Wearing a Bandana
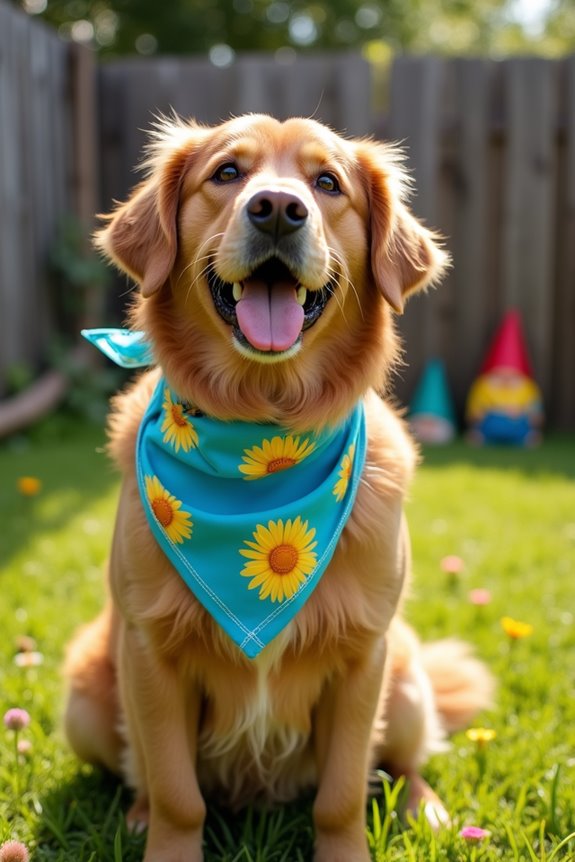
Dogs are more than just pets; they’re our family members. So, why not let them express their personality with a stylish bandana? This DIY project isn’t only fun but also super practical for dog owners. You can save money by making your own accessories for your furry friend, and there’s something incredibly satisfying about crafting something unique that fits their personality. Plus, a cute bandana can make your dog look glorious while keeping fur at bay during those messy playdates.
Materials Needed:
- Fabric of your choice (cotton works great)
- Measuring tape or ruler
- Scissors
- Fabric glue or sewing needle and thread
- Iron (optional, for smoothing)
- Optional embellishments (like patches or embroidery)
Step-by-Step Instructions:
- Measure Your Pup: Start by measuring around your dog’s neck where the bandana will sit. Add a couple of extra inches to allow for tying. You’ll want comfort over constriction, after all.
- Cut the Fabric: Cut your fabric into a large triangle. A good size for most dogs is about 24 inches on each side. Make it a bit larger if you have a larger breed or a particularly fluffy pup—you don’t want to skimp on style.
- Make It Pretty: If you’d like, you can iron the fabric to remove wrinkles. This is totally optional, yet it gives your bandana a polished look. Just be careful—don’t burn your future fashion accessory.
- Secure the Edges: To prevent fraying, use fabric glue along the raw edges, or sew them with your needle and thread if you’re up for it. Make sure to let it dry completely if you’re using glue.
- Add Embellishments: Get creative! Add patches, embroider your dog’s name, or use fabric markers to doodle some fun designs. Personalization is key here; your dog deserves to stand out in a crowd.
- Try it On: Slip the bandana around your dog’s neck and tie it securely. Make sure it’s snug but not too tight—your pup should be able to breathe comfortably.
- Snap a Pic: Now that your dog is looking fabulous, grab your camera! Capture that moment for Instagram or just to look back on later. After all, who can resist a dog in a bandana?
Optional Add-ons/Variations:
You could switch up fabric colors based on the season—bright florals for spring, plaid for fall, or even holiday-themed patterns when the festivities roll around.
Paint on some funky designs with fabric paint for an artsy twist. The sky’s the limit; let your creativity run wild.
Pro Tip:
Always check the fabric for any potential hazards, such as loose threads or overly long ties that can get caught during playtime. A well-made bandana should enhance your dog’s look and not become a safety concern.
And remember, if you’re not a master seamstress, a little fabric glue can go a long way—just think of it as a quick fix to your crafting woes.
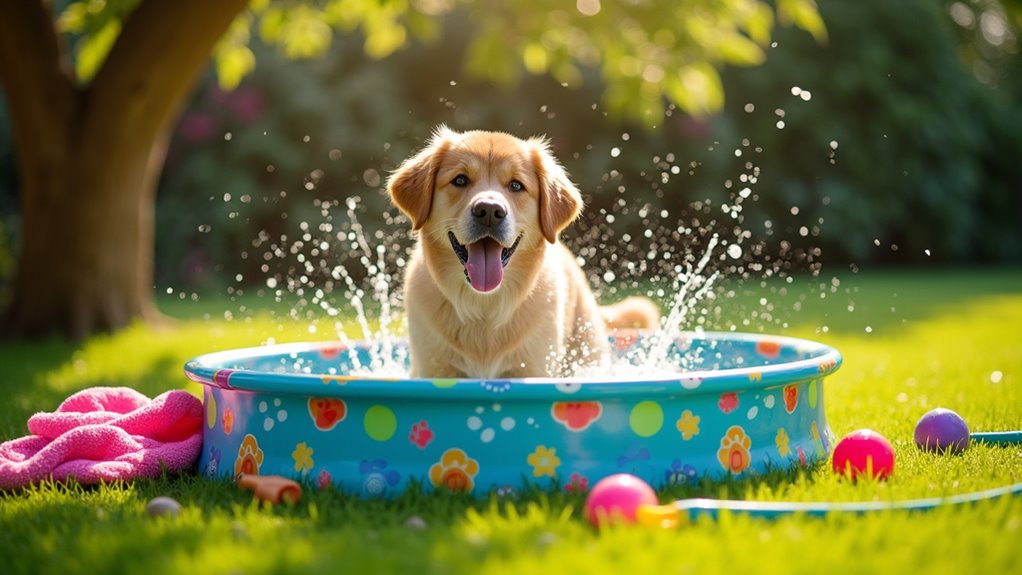
7. Dog Enjoying a Splash
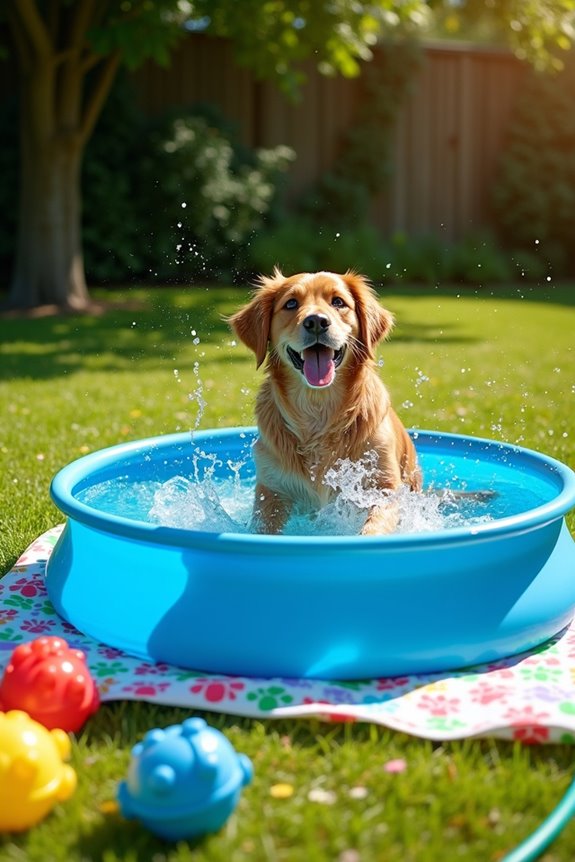
If your dog loves water as much as they love you, making a DIY splash pad is the perfect way to keep them cool and entertained during those hot summer days.
It’s not only a fun activity for your pup but an excellent investment for dog owners who want to promote active play while saving on treats and toys. Plus, watching your furry friend splash around can be the highlight of your day.
Materials Needed:
- A kiddie pool (the larger, the better)
- Water hose or portable water source
- Non-toxic spray paint (optional for decoration)
- Colorful pool toys (like floating balls or rings)
- Dog-safe splash pad mat (optional for added texture)
- Towels for drying off (because, let’s face it, you’ll need them)
Step-by-Step Instructions:
1. Choose Your Spot: Find a safe, flat area in your yard or patio where the kiddie pool can sit. Ideally, it should be somewhere that’s easily accessible for you and your pup but also has some shade to keep them cool.
2. Set Up the Kiddie Pool: Inflate if it’s an inflatable pool, and set it in place. Make sure it’s stable and won’t tip over if your enthusiastic dog decides to launch in like a cannonball.
3. Fill It Up: Grab your water hose and start filling the pool. Use cold water to help keep your pup comfortable in the heat. Depending on your dog’s size, filling it halfway should suffice for a fun day of splashing.
4. Decorate (Optional): If you’re feeling crafty, use non-toxic spray paint to add some designs to the pool.
Think paw prints or colorful swirls—something that reflects your pup’s personality. Just be sure to let the paint dry completely and check it for safety before the fun begins.
5. Add Toys: Toss some dog-safe pool toys into the water. Floating toys are perfect as they’ll entice your furry friend to jump in and have a blast.
Watching them chase and splash is one of life’s little joys, isn’t it?
6. Let Them Jump In: Encourage your dog to explore and get in the pool. You might need to lead them gently at first; sometimes a little coaxing with treats works wonders.
Once they realize how much fun it is, there will be no holding them back.
7. Supervise and Snap: As your pup starts splashing around, keep a close eye on them. Safety first! Don’t forget to grab your camera and capture those adorable moments—dogs and water are a winning combination.
Optional Add-ons/Variations:
You can switch things up by adding a splash pad mat underneath the pool for extra cushioning and texture, making it a cozy spot for your pup to play.
Or, try placing different toys in for varying levels of difficulty—water-fetch game level expert mode. You might just find that surprise squeaky toy buried in the backyard will become your dog’s new best friend.
Pro Tip:
Always check the water temperature before letting your dog jump in, especially if it’s been sitting out in the sun.
Dogs can overheat more quickly than we realize, so a quick splash is a great way to cool down, but verify that chilly water is ready to help them beat the heat.
And hey, don’t forget—you’ll probably end up soaked too, so wear your oldest clothes and embrace the fun. You’ll both be laughing in no time.
Extra Tips & Ideas
When you pick up that sketchbook, the world of dog drawing stretches out before you like a sprawling park just waiting to be explored.
Don’t shy away from experimenting with different styles—maybe try a whimsical cartoon look or a more realistic portrait. Remember to observe your own pup’s quirks; those floppy ears or goofy grins can give your drawings personality.
Ever tried drawing action shots? Capture a pup mid-leap, or during a vigorous tail chase. And hey, you can always grab a reference photo for tricky poses.
Finally, don’t forget to have fun with color—watercolors can create that dreamy effect. If your doodle flops? It’s just a stepping stone. Keep going; every stroke gets you closer to your masterpiece.
Frequently Asked Questions
What Materials Are Best for Dog Drawing?
You’ll want quality sketch paper, a variety of pencils for shading, and colored pencils or watercolors for vibrant details. Charcoal also adds depth, while pastels can create soft, textured effects. Enjoy experimenting with different materials!
How Can I Improve My Drawing Skills?
Did you know 75% of artists see improvement through consistent practice? To boost your drawing skills, draw daily, study anatomy, seek feedback, and experiment with various styles. Embrace challenges; they’ll elevate your creativity and technique.
Where Can I Find Reference Photos of Dogs?
You can find reference photos of dogs on websites like Unsplash, Pixabay, or Pexels. Social media platforms, especially Instagram and Pinterest, also offer a wealth of inspiration. Just search specific breeds or styles you like!
Can I Use Digital Tools for Dog Drawing?
Absolutely, you can use digital tools for dog drawing! Programs like Procreate or Adobe Illustrator offer fantastic features. You’ll find layers, brushes, and colors that make capturing your dog’s likeness both fun and innovative.
Are There Online Courses for Dog Drawing Techniques?
Yes, there are plenty of online courses for dog drawing techniques! Ever thought about how learning from experts can elevate your skills? Immerse yourself in various platforms, and you’ll find courses tailored just for you!
Conclusion
So, you’ve got your sketchbook, and you’re ready to tackle these dog drawing ideas. Just remember, even if your pup’s portrait looks more like a potato than a pet, it’s all part of the creative process. Embrace the quirkiness; after all, Picasso didn’t exactly stick to traditional forms. Whether your dog’s wagging tail is a masterpiece or just a happy accident, it’s the joy of creating that truly counts. Now go release that inner artist—furry friends await!