Imagine your furry friend lounging high and mighty on a stylish elevated dog bed, basking in comfort and coolness. You might think, “How can I create that?” Well, you’re in luck. There are so many ways to craft a unique sleeping spot that blends both style and comfort. From using repurposed materials to adding a personal touch, let’s explore how to build the perfect elevated haven for your dog that’ll make you both proud.
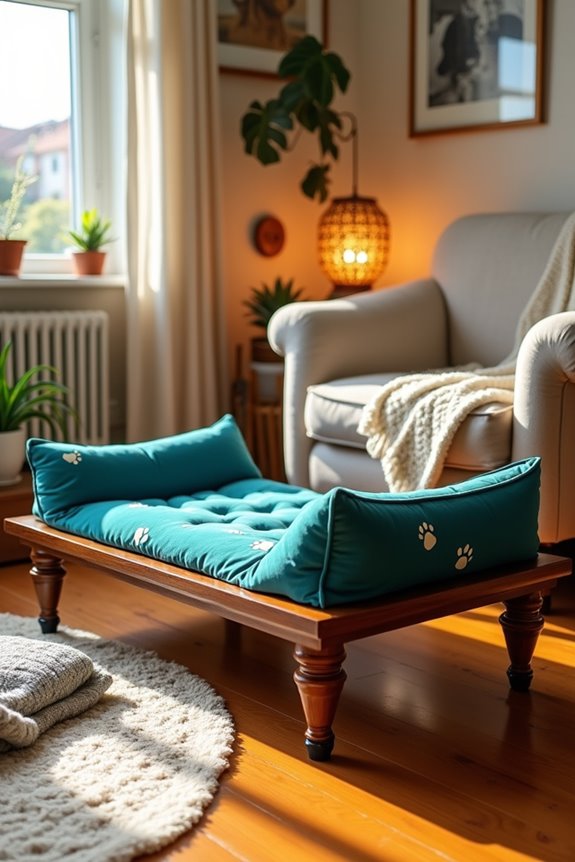
Elevated Wooden Frame Designs
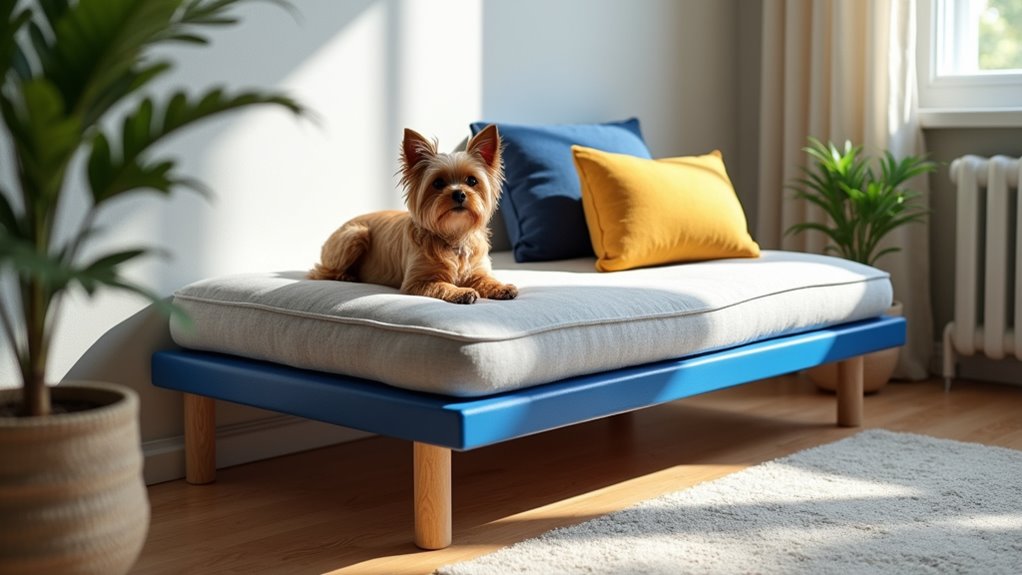
When you think about keeping your furry friend comfortable, have you ever considered an elevated wooden bed? Think of it as a cozy throne for your pup.
Building a DIY elevated dog bed isn’t just fun; it’s a simple project! Grab some sturdy wood, like pine, and start by measuring your dog’s size. You want the bed to be about six inches off the ground—just enough to keep your pet cool and dry.
Cut the wood for the frame and use screws, not nails—trust me, you don’t want a wobbly bed. Add a soft, washable mattress, and voilà! You’ve made a stylish haven that’ll have your dog happily snoozing.
Plus, you’ll feel proud showing it off to your friends.
Our Collection
Now that you’ve seen those beautiful wooden frame designs, let’s talk about what makes our collection truly special.
You’ll find stylish canvas bed covers that’ll give your pup’s space a pop of personality, plus memory foam inserts for that extra comfort your furry friend deserves.
And don’t forget about those cute cotton rope side handles and personalized name plates—who wouldn’t want to add a touch of flair to their dog’s bed?
1. Stylish Canvas Bed Covers
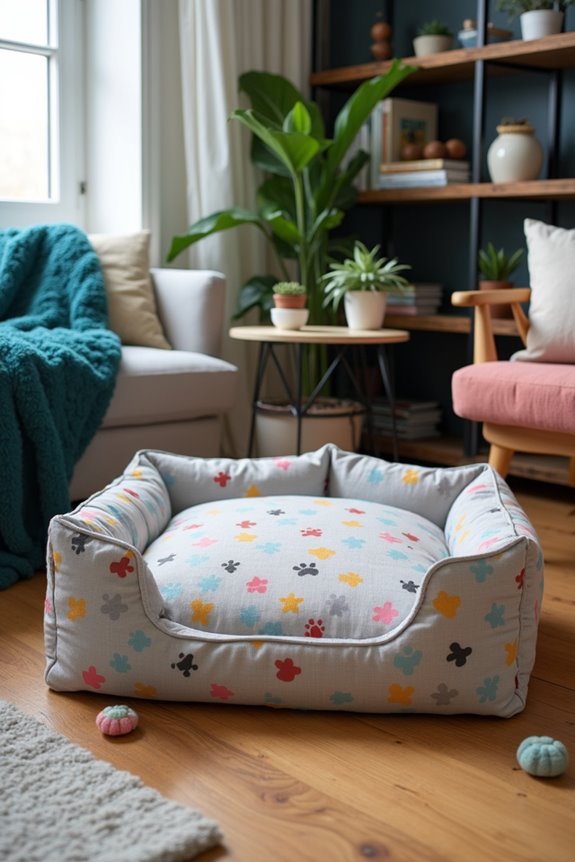
Are you tired of your furry friend’s bed clashing with your home décor? This DIY Stylish Canvas Bed Cover is just what you need. Not only does it elevate your dog’s comfort, but it also brings a touch of personality to your space, saving money on fancy pet products. Plus, making it yourself will give you the satisfaction of knowing that you created something special for your four-legged buddy. Additionally, using luxury dog furniture as inspiration can help you create a truly stylish look that complements your home.
Materials Needed:
- Canvas fabric (enough to cover your dog bed; consider 2 yards for a medium-sized bed)
- Sewing machine (or needle and thread if you prefer the “old-school” method)
- Scissors
- Measuring tape
- Pins or fabric clips
- Sewing pins (for holding fabric)
- Fabric chalk or a fabric marker
- Optional: Velcro strips (for easy removal and washing)
Step-by-Step Instructions:
- Measure Your Dog Bed: Lay your bed flat and measure its length, width, and height. Jot down these dimensions. Remember, your fur baby needs space to sprawl comfortably.
- Cut the Fabric: Using your measurements, cut out the pieces of canvas fabric. You’ll want one piece that can wrap around the sides and top, plus a little extra for folding under. (Actually, I cut mine too short at first… Let’s just say my dog ended up with a very stylish “crop top” bed cover.)
- Pin the Edges: Fold the edges over by half an inch to prevent fraying and pin the folds in place. Smart, right? Use pins or fabric clips to keep everything in line.
- Sew the Edges: Using a sewing machine, sew along the pinned edges to secure your fold. If you’re hand sewing, just make nice, even stitches. The more even, the prettier—just like my morning coffee pour… mostly.
- Attach Velcro (Optional): If you want to be able to easily remove the cover for washing, sew Velcro strips along the underside of the cover and the bed itself. This little trick saves you from any wrestling matches during laundry day.
- Fit It on the Bed: Slip your lovely new cover over the dog bed and adjust it to make sure it’s snug but comfy. Watch your pup’s excitement as they verify their new throne.
- Celebrate!: Take a step back, admire your hard work, and snap a picture. Your dog deserves to look fabulous, after all.
Optional Add-ons/Variations:
- For a cozy touch, consider adding fun patterns or bright colors that reflect your style. Who wouldn’t want a neon striped bed cover in their living room?
- Experiment with durable outdoor fabrics for extra water resistance and endurance. Imagine a canvas cover with whimsical prints like little bones or paw prints. Your dog’s bed has never looked so chic.
Pro Tip:
Always pre-wash your fabric before sewing. This simple step prevents any surprise shrinkage that could turn your trendy cover into a cute but tiny dog bed hat. Trust me—your pup deserves better than a poorly tailored outfit.
This DIY project not only allows you to express your creativity but also makes your home more dog-friendly and stylish. Happy sewing!
2. Memory Foam Bed Inserts
If you want to give your dog the utmost comfort, creating a DIY memory foam bed insert is a fantastic project! Not only does it enhance your pup’s sleeping experience, but it also saves you some bucks on pricey pet bed replacements. Plus, you’ll be proud to say you made something special just for your four-legged companion. An orthopedic dog bed luxury option can provide superior support for your pet’s joints and overall well-being.
Materials Needed:
- Memory foam (enough to cover your dog bed; typically, 1-3 inches thick depending on your preference)
- Measuring tape
- Sharp knife or electric knife (to cut the foam)
- Fabric for the cover (like soft fleece or cotton, enough to wrap around the foam with extra for seams)
- Sewing machine (or needle and thread if you’re feeling adventurous)
- Scissors
- Pins or fabric clips
- Fabric chalk or a fabric marker
Step-by-Step Instructions:
- Measure the Bed: Start by measuring your dog bed’s inner dimensions. How big is the opening? You want your memory foam to fit perfectly, like a cozy puzzle piece.
- Cut the Memory Foam: Using your measurements, cut the memory foam to size with your knife. If you’re like me and take a little off the top, just remember: dogs don’t care about a perfectly even cut, so breathe easy.
- Create the Cover: Measure the fabric based on your foam dimensions, adding an inch for seams all around. Cut your fabric to size. If crafting were an Olympic sport, I’d definitely be aiming for a medal in “the art of fabric cutting,” but alas, precision isn’t my forte.
- Pin and Sew the Cover: Fold the edges of your fabric inward and pin them to keep it neat. Then, sew along the edges to create the cover for your memory foam. Make sure that everything’s snug. Ah, but don’t worry. If you end up sewing your fabric to your pants like I did last week, just laugh it off and keep going.
- Fit the Foam Inside: Slip your freshly sewn cover over the memory foam. It should hug the foam tightly, so there’s no slipping when your pup jumps in for a nap.
- Show It Off: Place the new insert back into the dog bed and watch your pup’s face light up as they experience their new throne. It’s like giving them a cloud to rest on, and trust me, their gratitude will be evident.
Optional Add-ons/Variations:
- Consider adding a little extra flair with fun or themed fabrics that match your décor or your pup’s personality. Maybe polka dots or paw prints? Who wouldn’t want a bed cover that practically wags its tail?
- Instead of one piece, create a removable cover by using zippers or snaps. That way, you can easily wash it without worrying about the mess that comes with doggy playtime.
Pro Tip:
For ideal comfort, opt for high-density foam—it’ll provide extra support for your dog’s joints, which is especially important if they’re a more seasoned pup. Additionally, consider using an anti-bacterial or water-resistant fabric to keep the bed clean and fresh for longer. Your dog’s tail may wag with joy at their new comfy bed, and you’ll be celebrating less laundry!
3. Cotton Rope Side Handles
Creating cotton rope side handles for your dog bed isn’t just a fantastic DIY project; it’s also a game-changer for any dog owner. Not only do these sturdy handles make transporting the bed a breeze, but they also add a touch of charm to the overall aesthetic. Plus, you’ll save money by making your own instead of buying fancy designer beds with handles. It’s both practical and stylish, so let’s get our craft on! Investing in a high-end outdoor dog kennel can provide a safe environment for outdoor dogs while enhancing their comfort and style.
Materials Needed:
- Cotton rope (about 10-15 feet, depending on your bed size)
- Scissors
- Measuring tape
- Hot glue gun and glue sticks (or a sewing needle and strong thread for a more durable option)
- Fabric tape (optional, for extra grip)
- Optional: decorative paint or fabric for embellishment
Step-by-Step Instructions:
- Measure and Cut the Rope: Start by measuring the length of cotton rope you want for your handles. A good length is about 10-15 inches, depending on how big you want the handles. Cut four equal pieces of rope, because symmetry is key (unless you’re aiming for an avant-garde look).
- Create the Loops: Fold each piece of rope in half to form a loop. This will be the part that you attach to the bed. Make sure the loops are even; if they’re not, just pretend you were going for a quirky look.
- Attach the Handles: Position each rope loop along the sides of the bed, making sure they’re both anchored securely. Use the hot glue gun to affix the ends of the rope to the sides of the bed, keeping them firmly in place. If you’re sewing instead, just stitch them in with a few strong passes. Remember – this is for your puppy, so strong is essential.
- Secure with Fabric Tape (Optional): For extra grip, wrap a few strips of fabric tape around where the rope meets the bed. It not only adds durability but can also lend a pop of color. It’s like giving your dog bed a stylish accessory.
- Final Touches: If you’re feeling artistic, you can paint the rope with non-toxic paint or wrap it with fun fabric to jazz things up. Your pup mightn’t notice, but every little touch adds to your home’s aesthetic.
- Test it Out: Once everything is set, give the handles a gentle tug to make sure they’re secure. Place the bed in your favorite spot, grab the handles, and give it a test lift. Or let your dog take it for a spin – after all, it’s their bed, not just a piece of furniture!
Optional Add-ons/Variations:
- Consider dyeing the cotton rope in vibrant colors to match your interior décor or your dog’s personality. Just imagine a bright blue or sunny yellow – it could be the new centerpiece of the room.
- If you want to go the extra mile, add fabric pockets to the sides of the bed, making it a multi-functional masterpiece for toys and treats.
Pro Tip:
Always confirm that the glue has set completely before you let your pup lounge on their new bed. A little patience goes a long way, and it saves you from having to redo any hasty DIY decisions. Plus, if you have a very enthusiastic dog, they might think the bed is just another chew toy before you know it.
4. Durable Outdoor Fabric Options
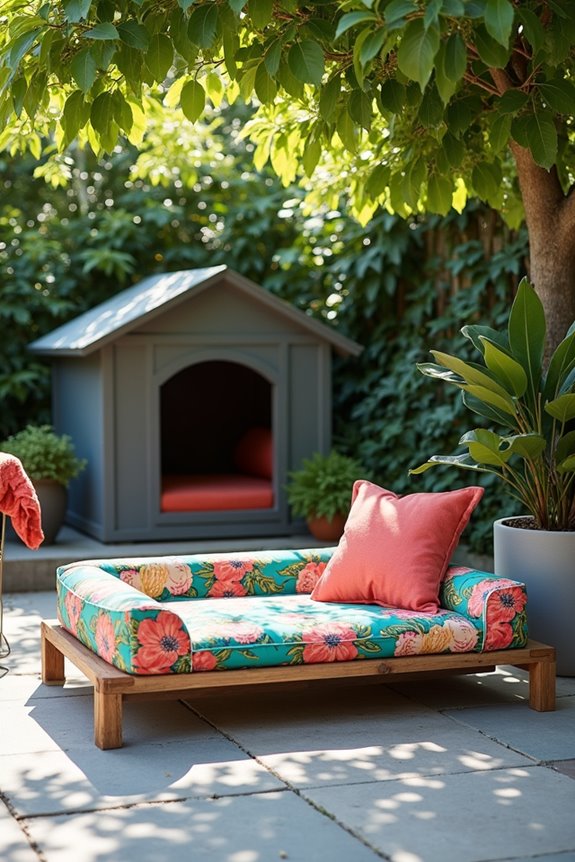
If your dog loves to lounge outside or if you’re simply looking to spruce up your patio with a cute dog bed, this DIY project is a must-try. Choosing the right outdoor fabric for your dog bed not only enhances comfort but also guarantees durability against the elements. A little investment in the right materials can save you from replacements and accidents down the road. Additionally, consider pairing your new dog bed with a luxury outdoor dog house for a complete outdoor sanctuary for your furry friend.
Plus, your furry friend will thank you for providing a cozy spot to curl up under the sun.
Materials Needed:
- Outdoor fabric (around 2-3 yards depending on bed size)
- Heavy-duty sewing machine or needle and thread
- Scissors
- Measuring tape
- Pins or clips
- Fabric chalk or marker
- Optional: waterproof lining or batting for added comfort and protection
Step-by-Step Instructions:
1. Measure Your Dog Bed: Start by measuring the dimensions of your existing dog bed. You want to ascertain your new cover fits snugly. Take note of the length, width, and height (if it has sides).
2. Cut the Fabric: Using your measurements, cut out pieces of outdoor fabric. Depending on your design, you may need one large piece to cover the top or separate pieces for the sides. Always add an extra inch for seams.
It feels good to have a bit of wiggle room; trust me, no one likes snug seams.
3. Pin it Together: Before sewing, align your fabric pieces together and secure them with pins or clips. This helps prevent any sliding while you’re sewing and makes everything easier.
Think of it as a giant puzzle where the pieces need a little coaxing into place.
4. Sew the Edges: With your heavy-duty sewing machine, begin stitching around the edges. A straight stitch will do the trick, but if you want to be fancy, a zig-zag stitch can add a touch of flair while guaranteeing no fraying happens.
If you’re hand-sewing, do it carefully—your dog’s comfort depends on this.
5. Turn Right Side Out: Once you’ve sewn everything together, turn the fabric right side out. This is when it starts looking like an actual dog bed, which can be quite satisfying.
Give it a little shake to fluff it up; your dog deserves it to look comfy.
6. Add Lining (Optional): If you want to add an extra layer of comfort, consider placing a waterproof lining or batting inside the cover before closing it up. It can help keep things dry and cozy, especially after an unexpected rain shower—or a mud puddle connoisseur’s adventure.
7. Final Touches: Slip the cover onto your dog bed, and if you have velcro or button closures, secure them tightly.
Voila! You’ve transformed your dog’s lounging experience while making it outdoor-friendly.
Optional Add-ons/Variations:
- Paint your fabric with non-toxic outdoor fabric paint for a personalized touch. Bright colors can make it pop against your patio setting!
- Use patterned outdoor fabric for a more vibrant feel; think bold florals or geometric designs—why not match your dog’s personality?
Pro Tip:
Always pre-wash your outdoor fabric before starting. This removes any sizing added by the manufacturer and can prevent any surprises later, like shrinking or fading.
Trust me, no one wants a bed that’s suddenly two sizes too small after the first wash, especially when your pup has become emotionally attached to it!
5. Stamped Personalized Name Plates
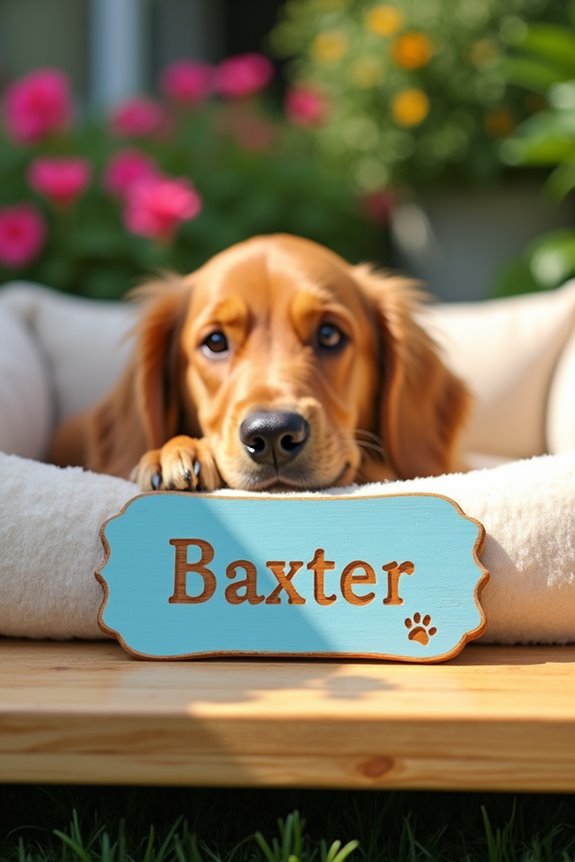
Creating adorable stamped personalized name plates can be a fun and meaningful project for dog owners. Not only do these name plates help identify your furry friend, they also add a touch of charm to their dog bed or collar. And let’s be honest, how many times have you wished your pup came with a “hello, I’m [insert dog’s name]!” sign? Well, now you can make one.
Plus, a little DIY magic saves you money on store-bought tags, all while showcasing your dog’s unique personality.
Materials Needed:
- Blank metal or wooden tags (available at craft stores)
- Letter and number stamps
- Hammer
- Sandpaper (for smoothing edges if using wood)
- Jump rings or keychain rings (for attaching to collars)
- Optional: paint or sealant for additional customization
Step-by-Step Instructions:
- Choose Your Tags: Decide on whether you want metal or wooden tags. Wood can give a rustic vibe, while metal usually comes in cute shapes. Pick however you like, but make sure it’s sturdy enough to withstand a playful pup!
- Prep Your Surface: If you’re using wooden tags, a quick sanding to slightly smooth the edges will help avoid splinters, and who wants that? For metal, just find a flat, sturdy surface to work on.
- Position Your Stamps: Take your letter and number stamps and plan where you want to place your dog’s name. You can even get creative with initials or fun symbols. Just make sure to leave enough space for each letter; nobody wants a scrambled dog’s name.
- Start Stamping: Carefully hold each stamp in place and give it a good whack with your hammer. But go easy on it—this isn’t a game of whack-a-mole. A firm yet gentle tap will do the trick. For the best results, you might want to practice on a scrap piece of metal or wood first.
- Clean Up: For wooden tags, you might want to wipe down with a damp cloth to remove any dust. If you want to paint or seal your tag, do it now.
- Attach Your Tags: Use a jump ring or keychain ring to attach the tag to your dog’s collar. Watch how proud your pup looks strutting around with their new bling.
- Showcase Their Personality: Whether it’s a cute saying, pun, or just their name, let your dog’s unique side shine through. You can always create tags for special occasions—like birthdays or holiday themes.
Optional Add-ons/Variations:
- Play with colors by painting the wooden tags before stamping for a pop of personality. The brighter, the better, I say.
- Consider adding charms or beads alongside the tag on the collar for extra flair.
Pro Tip:
Make sure to stamp your dog’s name deeply enough to be readable, especially if using metal; a light stamp won’t hold up as well.
And hey, if you make a mistake, embrace it. Add a fun twist and create a hilarious nickname tag. Who wouldn’t want a name plate that says “Sniffer McFluff” instead of “Buddy”? The best memories sometimes come from the unexpected.
6. Cooling Gel Mattress Topper
Introducing the ultimate comfort upgrade for your dog’s sleeping situation: a cooling gel mattress topper! Not only does it help keep your furry friend cool during those scorching summer months, but it also adds an extra layer of plushness to their bed. Investing in a luxury dog grooming kit can further enhance your pet’s overall well-being.
This DIY project can save you money on fancy dog bed replacements, while guaranteeing your pet enjoys a cozy and comfortable sleep. Who wouldn’t want their pooch to snooze like a baby, right?
Materials Needed:
- Cooling gel mattress pad (available at most home goods stores)
- Scissors
- Measuring tape
- Non-slip fabric (to prevent slipping)
- Sewing machine or fabric glue
- Optional: fabric cover in a fun design for added flair
Step-by-Step Instructions:
1. Measure Your Dog’s Bed: Start by measuring the dimensions of your dog’s current bed. This will help you determine how much cooling gel mattress pad you need. A little tip—don’t forget to include an extra inch or two for a snug fit.
2. Cut the Cooling Gel Pad****: Using your scissors, cut the cooling gel mattress pad to match the dimensions you measured in the first step. If you’re unsure about cutting straight lines, you can fold the pad and make a clean cut along the fold.
Remember, it doesn’t have to be perfect—it’s going under the cover, after all.
3. Prepare the Non-Slip Fabric: Cut the non-slip fabric to the same dimensions as your cooling pad. This will help keep your dog from sliding around, especially if they’re a little rambunctious.
4. Combine Layers: Place the cooling gel pad on top of the non-slip fabric. You can now carefully sew or glue the edges together. The goal here is to create a single unit that’s easy to manage.
If using a sewing machine, opt for a straight stitch to keep it simple.
5. Add a Fun Fabric Cover (Optional): If you want to give your dog’s sleeping situation even more personality, consider sewing or using fabric glue to attach a cover made from a fun or stylish fabric.
Make sure to leave one side open for easy access to the pad—because you might want to wash it now and then.
6. Final Touches: Place your newly created cooling gel mattress topper on the dog bed. Help your pooch hop onto it and watch how they immediately sink into their refreshed sleeping spot.
Might want to sit back and observe with a cup of coffee—in case they transform into an adorable sleeping angel.
Optional Add-ons/Variations:
– Feeling adventurous? You could use different fabric patterns or textures for the cover to match your home decor or your dog’s personality.
Imagine a polka dot theme or a cozy plaid—so stylish.
– For colder months, add a removable fleece layer on top of the cooling gel pad for extra warmth, so your pup remains comfy all year round.
Pro Tip:
Choose a cooling gel pad that’s machine washable or has a removable cover for easy cleaning. After all, who knows what kind of shenanigans your pup will get into—they might just think their new bed is a chew toy.
Keeping it clean will guarantee a hygienic snooze spot, making both you and your pup happy!
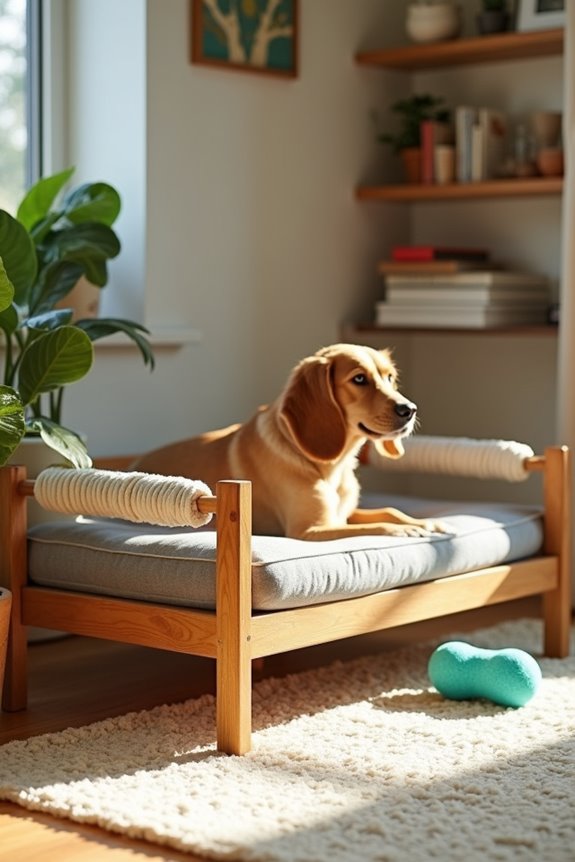
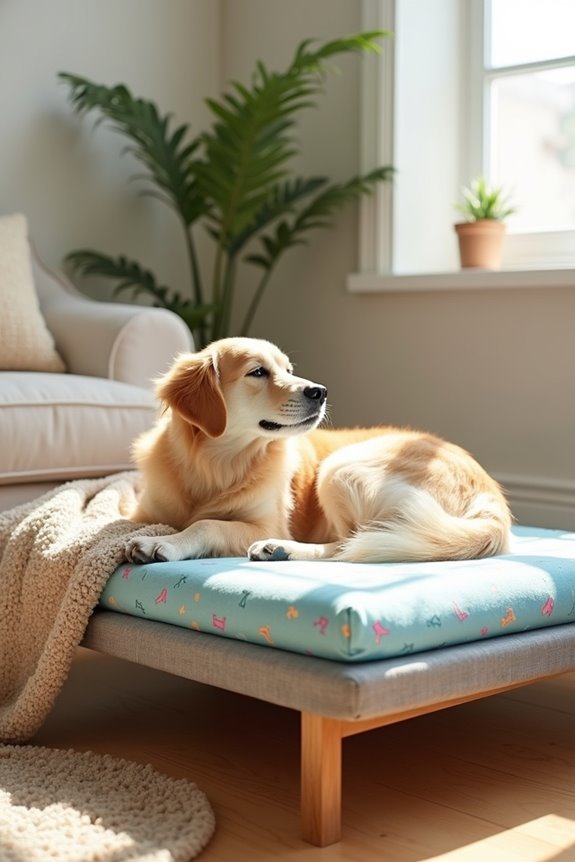
7. Adjustable Height Support Legs
Is your pup’s elevated dog bed a little too low to the ground? Or maybe you’re just looking for a way to give them an extra boost—and a little flair—to their nap zone? This DIY adjustable height support legs project is your ticket to ultimate doggie comfort. Not only does it save money compared to purchasing a fancy new bed, but it also elevates them (literally and figuratively) to a new level of cozy. Let’s get crafting!
Materials Needed:
- Four wooden dowels (or PVC pipes) – choose a sturdy diameter
- Rubber caps (to fit the ends of your dowels)
- Saw (if you need to cut the dowels to size)
- Sandpaper (for smoothing edges)
- Measuring tape
- Drill
- Screws (for attaching legs)
- Optional: Paint or wood stain (for a personalized touch)
Step-by-Step Instructions:
- Measure the Height: Decide how high you want your dog bed to be. Remember that taller isn’t always better—especially if your pup is small or older. Keep in mind that a height of 4 to 12 inches is generally comfy for most breeds.
- Cut the Dowels: If your dowels aren’t the right height, it’s time to get cutting. Use a saw to trim them down. Just make sure all four are the same length, or else your dog might feel like they’re on a roller coaster instead of snoozing in style.
- Sand the Edges: This is the part that makes all the difference (trust me). Use sandpaper to smooth out any rough edges on the cut dowels. Nobody wants splinters—least of all your precious pup.
- Attach Rubber Caps: Slip a rubber cap onto the bottom of each dowel to prevent slipping. Think of them as the dog bed’s new shoes. After all, they need a firm grip on the floor, right?
- Drill Holes for the Legs: Take your dog bed and find the corners where you’ll attach the legs. Drill holes into the corners (if they’re not pre-drilled) to fit the dowels snugly. Always double-check the placement so you don’t end up with a lopsided bed.
- Fasten the Legs: Insert the dowels into the holes and secure them with screws. Tighten them well to avoid any accidental wobbles during your dog’s much-needed siestas.
- Finishing Touch: If you want to add a little pizzazz, go ahead and paint or stain the legs to match your home décor. Just wait for it to dry first—don’t want to have to explain to your dog why they’ve to sleep next to the smelly paint can.
Optional Add-ons/Variations:
- Color Your World: Go wild with bright paints or whimsical patterns for a funky touch. Maybe even stencil a paw print or your dog’s name on the legs.
- Swap Out Materials: If wood isn’t your thing, consider using PVC pipes for a lighter option. They can be painted, too, in case you still want that colorful pop.
Pro Tip:
For ultimate durability, choose legs that can support at least double your dog’s weight. And consider using extra screws to secure the legs firmly. Think of it this way—an extra few minutes of work could mean an extra few years of pleasant naps for your furry friend.
Now, as you plan your elevating adventure, imagine your pup lounging like royalty on their newly elevated throne. Is there anything better? Let’s be real—your pooch deserves the best, and you just leveled up their napping game. Happy crafting!
Extra Tips & Ideas
When you want to elevate your dog’s comfort and style, thinking outside the box can lead to some pretty awesome ideas.
Have you thought about adding a cozy blanket? It’s an easy way to make that elevated bed feel like a plush cloud. You could also attach little pockets on the side for toys—who wouldn’t love a hidden treasure?
If you’re feeling crafty, consider painting the bed to match your decor. Trust me, it’ll make you smile every time you see it.
And don’t forget ventilation! Adding mesh panels can keep your pup cool during those hot summer days.
Frequently Asked Questions
What Materials Are Best for an Elevated Dog Bed?
For an elevated dog bed, you’ll want durable materials like hardwood for the frame, breathable fabric such as mesh, and sturdy supports. Choose weather-resistant options if it’ll be used outdoors, ensuring your pup’s comfort and safety.
How Can I Personalize My Dog’s Elevated Bed?
You can personalize your dog’s elevated bed by adding their name on a removable pillow, selecting fabric in their favorite color, or incorporating a unique design element that reflects their personality. It’ll truly make it special!
Is It Suitable for All Dog Breeds?
Not all elevated dog beds suit every breed. Large breeds need sturdier designs, while small breeds require something lower to the ground. It’s best to take into account your dog’s size, weight, and sleeping habits when choosing one.
How Do I Clean an Elevated Dog Bed Properly?
To clean an elevated dog bed, remove the fabric cover and machine wash it. Wipe the frame with a damp cloth and mild detergent. Allow everything to dry completely before reassembling for your pup’s comfort.
Can I Use Waterproof Fabric for the Bed?
Yes, you can use waterproof fabric for the bed. It’ll help keep it clean and dry, making maintenance easier. Just make sure it’s breathable to keep your dog comfortable while resting on it.
Conclusion
Building your elevated dog bed isn’t just putting together wood and fabric; it’s crafting a throne for your four-legged friend. Each design choice becomes a brushstroke on the canvas of your pup’s comfort, reflecting their personality. So, whether you go with that fancy cooling gel or the sturdy memory foam, remember that every paw print will leave a mark on your heart. After all, a happy dog means a happy home, right? Now, get building—your pup’s royal decree awaits.