Your golden retriever has officially claimed every soft surface in the house.
The couch cushion? His. That throw pillow you found on Pinterest? Also his — complete with a drool stain you can’t unsee.
And honestly, buying another dog bed feels pointless when he just drags it across the room and destroys it in a week. You’ve tried the fancy store ones. They last maybe a month before they’re flat and sad and shoved in a corner.
Here’s the thing though — making your own diy dog bed pillow is so much easier than it sounds, and WAY more rewarding. I made one for my sister’s lab last winter and she texted me three times saying how obsessed she was with it.
These 18 ideas give your pup a cozy spot he’ll actually use — and give your home that put-together look you love.
#1: Patchwork Quilted Dog Bed Pillow (The Pinterest-Worthy One Your Golden Will Actually Use)
You know that moment when your golden flops down on your freshly vacuumed rug again — wet paws, fur everywhere — because her actual bed is just… sad? Yeah. Been there with my cousin’s retriever, Maple. That dog had three beds and still chose the throw pillow situation on the couch.
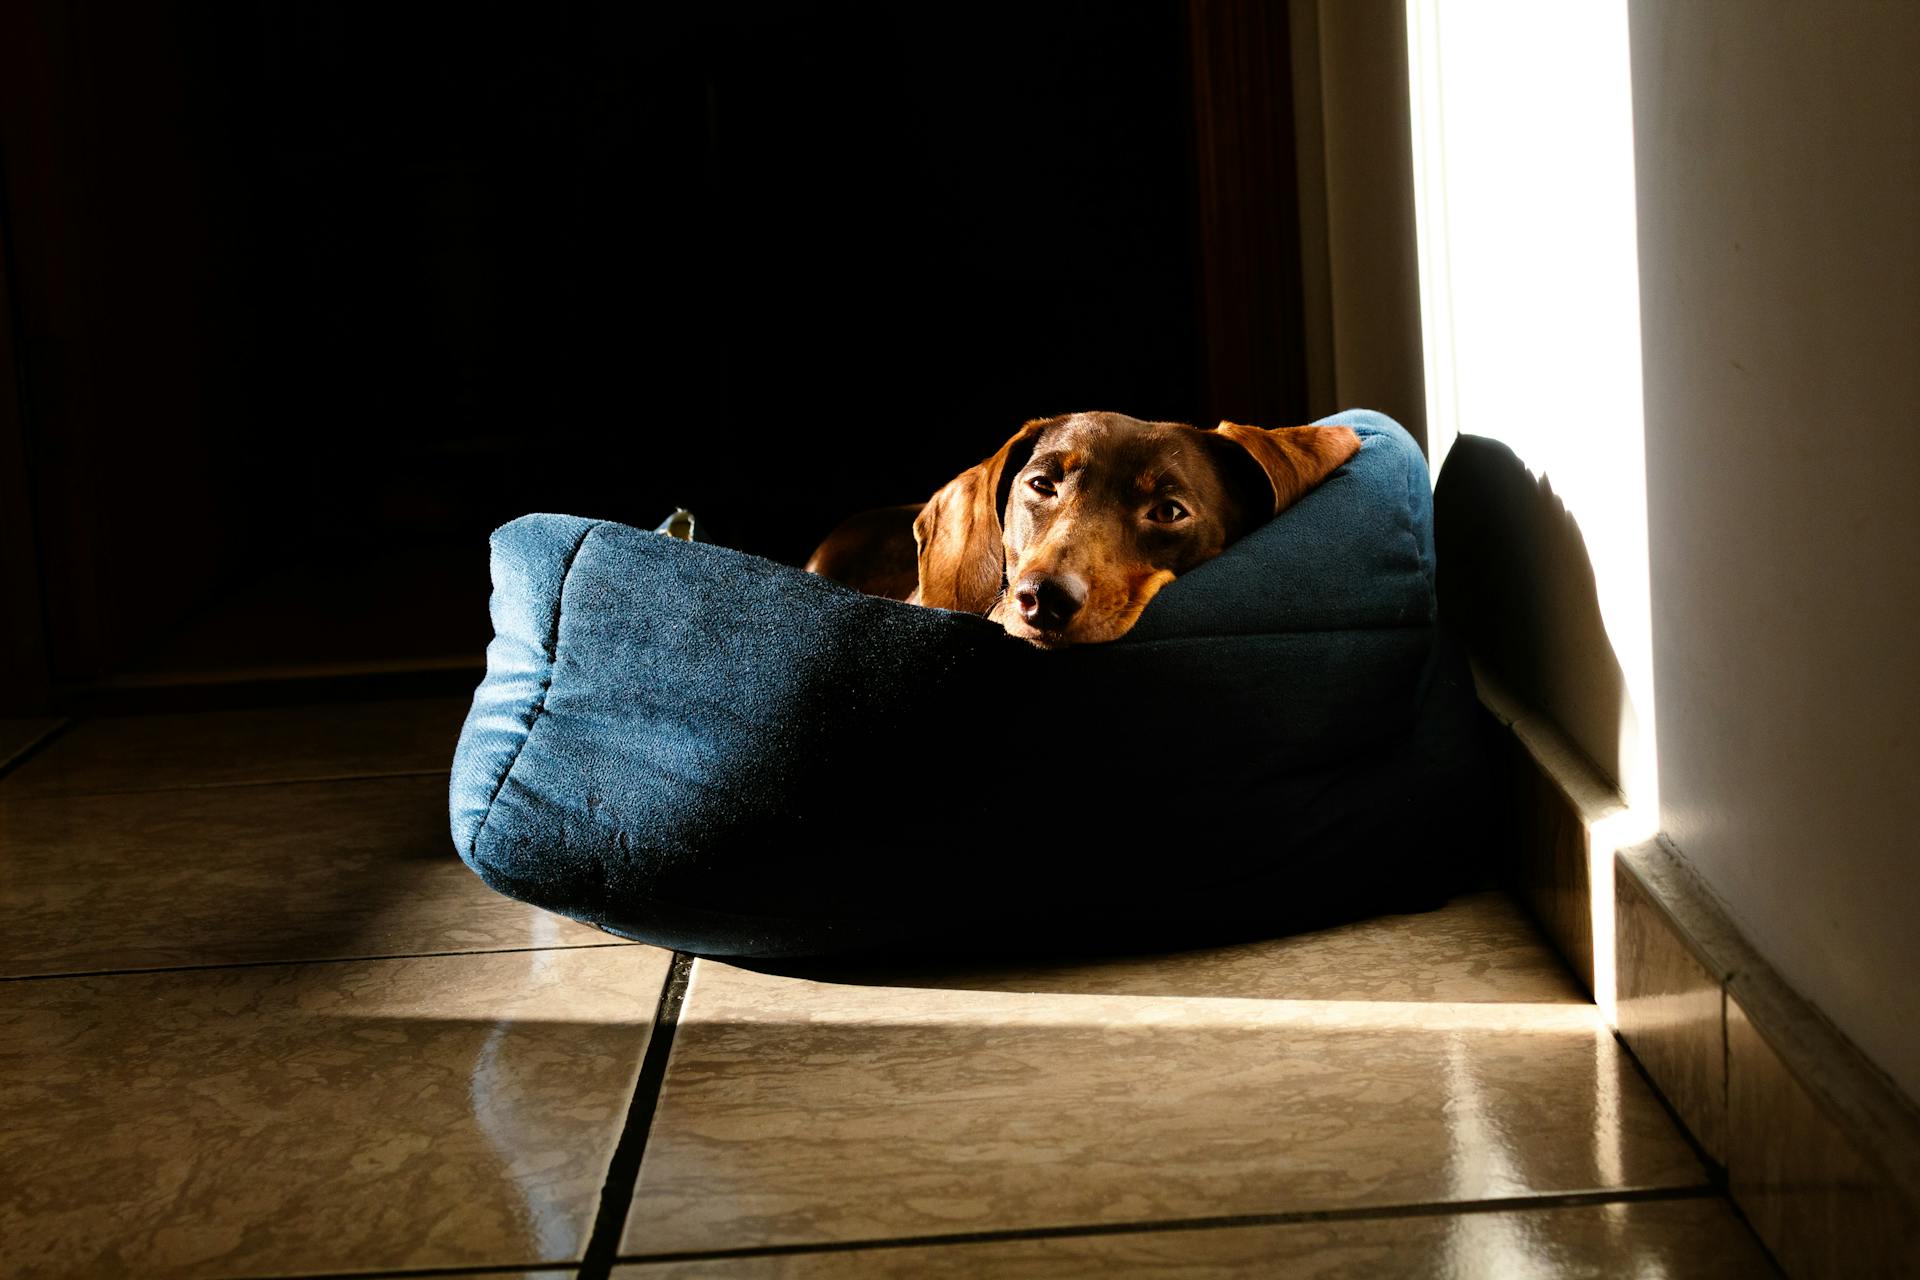
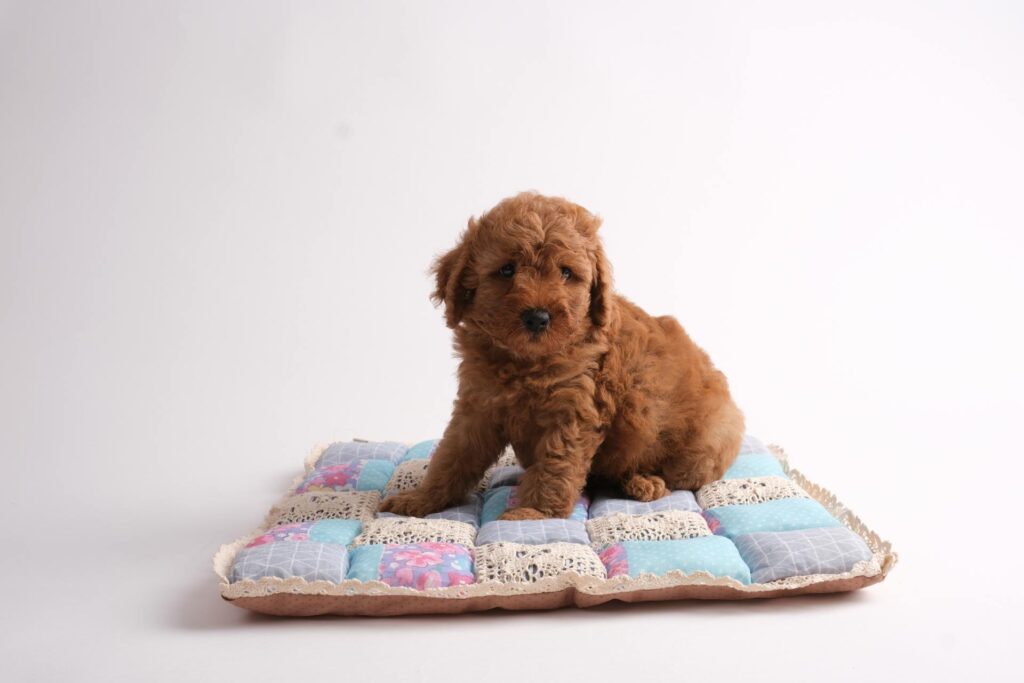
This patchwork quilted dog bed pillow is genuinely the cutest thing I’ve made in a while. Think soft blue floral, dusty lavender, and blush pink cotton fabric squares, separated by cream crochet lace trim, all sitting on a warm caramel-brown base fabric. It looks like something straight off your Pinterest board, honestly.
Materials & Tools:
– ½ yard each of 3 cotton fabrics (floral, solid blue, solid lavender)
– ¼ yard cream crochet lace ribbon trim
– ¾ yard brown canvas base fabric
– High-loft polyester fiberfill stuffing (about 2 lbs)
– Sewing machine + thread
– Fabric scissors
– Straight pins
– Iron
Instructions
Cut your cotton fabrics into 4×4 inch squares — you’ll need about 16 total for a 12×16 inch finished pillow. Arrange them in a 4×4 grid, mixing colors so nothing clusters together. Pin each square to its neighbor along the ½ inch seam allowance before sewing them into rows. Press every seam open with your iron as you go — this is what gives the pillow that flat, professional grid look instead of a lumpy mess.
Once your top panel is done, cut your lace trim and hand-stitch or machine-sew it along each seam line where the squares meet. Real talk: this step takes patience, but the texture contrast between the cotton squares and the lace is exactly what makes this bed look handmade in the best way.
Cut your brown canvas base to match your patchwork top — 12×16 inches. Pin both panels right-sides together and sew around the perimeter, leaving a 4-inch gap on one short side for stuffing. Turn it right-side out, push out the corners with a pencil, and stuff generously with your fiberfill. You want it full enough that the puffed-square effect really shows. Slip-stitch the opening closed.
The high-loft fiberfill inside structured fabric squares cradles your dog’s joints while holding its shape wash after wash — so the bed stays beautiful long after Maple has claimed it seventeen times.
Prep Time: 20 min | Active Project Time: 2–3 hours | Difficulty Level: Beginner-Intermediate
Prewash all your fabrics before cutting — cotton shrinks, and you don’t want a warped bed after the first wash. If your lace trim has a directional pattern, lay it all out in the same direction before sewing so it reads consistently across the whole top panel.
If you love making cozy spaces for your dog, dog bed ideas are a great rabbit hole to fall into next.
📸 Photo credit: pexels
#2: The Cozy Leaf-Print Pillow Dog Bed Your Pup Will Actually Use

Your golden retriever just did that thing again — hopped on the couch, circled three times, and planted herself right on top of your favorite throw pillow. The one with the pretty leaf pattern you found on Pinterest.
Honestly? Same energy. And that’s exactly what inspired this DIY.
I made one of these for my cousin’s Boston Terrier last fall, and watching that little dog curl into it like a rotisserie chicken was the most satisfying thing I’ve witnessed all year.
Materials & Tools:
– 1.5 yards of cream cotton canvas fabric
– Red and taupe leaf-print fabric (pre-printed or stamp your own with acrylic craft paint)
– 24″ x 24″ pillow insert or polyester fiberfill stuffing
– Matching thread (cream or off-white)
– Fabric scissors
– Sewing machine or needle
– Pins
Prep Time: 20 min | Active Project Time: 1.5 hours | Difficulty Level: Beginner
Instructions
Cut two 24″ x 24″ squares from your canvas fabric. If you’re stamping the leaf print yourself, do it now and let it dry for 30 minutes before touching it again — trust me, I skipped that step once and smeared red paint across the whole thing.
Pin both squares together with the printed sides facing inward. Sew around three sides using a ½-inch seam allowance. Flip it right-side out, stuff it firm with your fiberfill — firm stuffing supports your dog’s joints, which means less stiffness after those long nap sessions — then hand-stitch the fourth side closed.
The polyester fiberfill core keeps its shape through washing, so the bed stays structured, and your dog gets consistent support every single night.
Tuck it right into the corner of a dark leather couch like the photo. Perfection.
Want an easy win? Toss the finished cover in the wash on cold before your dog uses it — removes any paint residue and pre-softens the fabric.
If you love building dedicated spaces for your pup, 7 Unique DIY Dog Crate Ideas for Your Pup pairs beautifully with this project.
📸 Photo credit: pexels
#3: The Flat Quilted Floor Pillow Your Dog Will Actually Stay On
You know that moment when your golden has claimed your throw pillow again — the one you picked out specifically for your living room — and now it’s covered in fur and drool?
Yeah. This one’s for you.
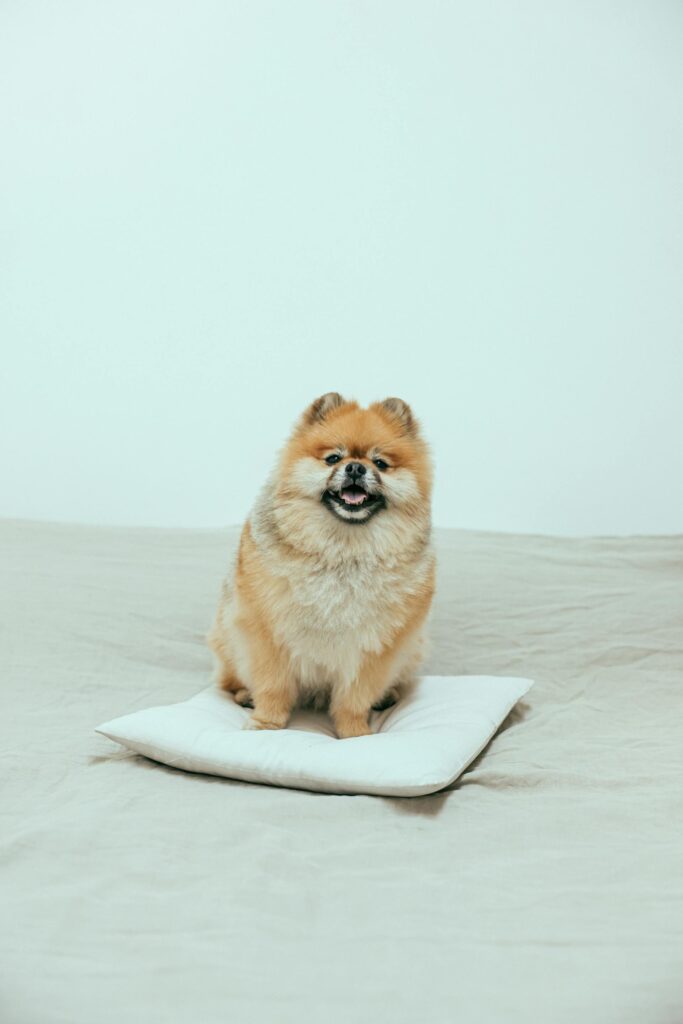
This DIY uses natural linen fabric in a soft off-white/cream tone — the kind that actually looks good in your space. The finished pillow lays perfectly flat, almost like a mini meditation mat for your dog.
Materials & Tools:
– ½ yard of linen or cotton canvas fabric (cream or natural tone)
– Polyester fiberfill or flat quilt batting (about 2 inches thick when compressed)
– Sewing machine + matching thread
– Fabric scissors
– Pins
– Iron
Instructions
Cut two 16×20 inch rectangles from your fabric. Place them face-to-face and pin around the edges. Sew three sides with a ½ inch seam allowance, leaving one short end open. Flip it right-side out — run a pencil along the inside corners to get them crisp.
Now stuff it. The flat look in the photo comes from not overfilling — stop when it’s about 1.5 inches thick. Tuck the open edges in, pin, and topstitch the whole border closed with a ⅛ inch edge stitch. That topstitch does the real work here — it holds the fill flat, keeps the pillow from bunching, and gives your dog a stable surface that doesn’t slide under their weight.
And because the linen is washable, mud day doesn’t mean trash day.
Swap the fiberfill for an old folded fleece blanket inside — it compresses even flatter and adds weight your dog will love.
Prep Time: 10 min | Active Project Time: 30 min | Difficulty Level: Beginner
📸 Photo credit: pexels
#4: The Polka Dot Pillow Dog Bed Your Pup Will Hog Forever
Your golden has that one spot on the bed — right in the middle, buried under your favorite throw pillow, looking way too comfortable to move. Mine does the same thing, and honestly? I stopped fighting it.
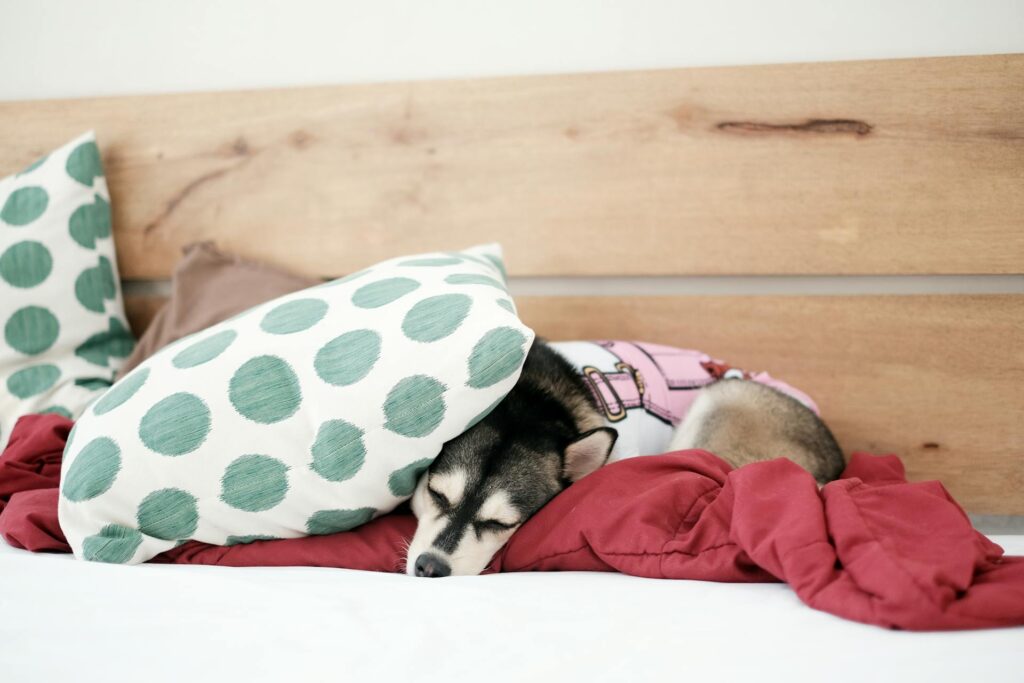
This DIY is inspired by exactly that energy. A white cotton pillowcase printed with large teal polka dots layered over a deep crimson red duvet — it’s cozy, it’s cute, and it looks straight off a Pinterest board.
Materials & Tools:
– 1 yard white cotton canvas fabric
– Teal fabric paint (foam brush or stencil)
– Large circular stencil (4–5 inch diameter)
– Polyfill stuffing or foam insert
– Sewing machine or fabric glue
– Pink adjustable dog harness (optional styling touch)
– Red fleece blanket for base layering
Instructions
Cut your fabric into two 24×24 inch squares. Stencil the teal circles across one panel in a scattered grid — let it dry completely before touching it. Pin both panels together, sew three sides, stuff firmly with polyfill, then sew the final edge closed.
Layer it over a folded red fleece blanket against a wooden headboard for that elevated look.
The polyfill core supports your dog’s joints — better pressure distribution means less stiffness after long naps, so your pup actually wakes up feeling rested.
Keep this in mind: wash the pillowcase on cold to keep those teal dots from fading fast.
Prep Time: 15 min | Active Project Time: 45 min | Difficulty Level: Beginner
📸 Photo credit: pexels
#5: The Chunky Round Dog Bed Pillow That Looks Like It Belongs in a Pottery Barn Catalog
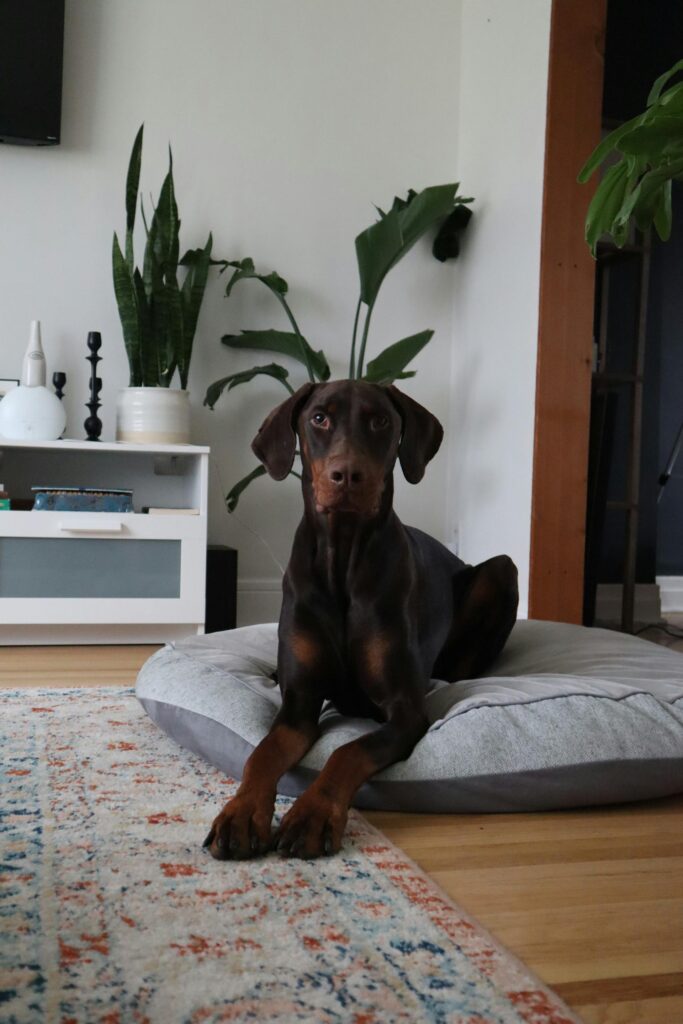
Your golden retriever has claimed the couch again. You sit down and there’s that warm, slightly damp spot where she was napping — and you love her, but girl, she needs her own spot.
This round floor pillow bed is it. The one in the image is giving serious living room goals — a gray and light heather tweed round pillow with a dark charcoal velvet border, sitting right on a Persian-style rug like it was styled by an interior designer. And honestly? Your golden would look stunning on this.
Materials & Tools:
– 1.5 yards of heather tweed fabric (main top/bottom)
– 0.5 yards of dark charcoal velvet or microsuede (border strip)
– Polyester fiberfill or a 24-inch round foam insert
– Fabric scissors, pins, sewing machine
– Zipper (22-inch, invisible preferred) or heavy-duty snaps
– Chalk or fabric marker
Instructions
Cut two 24-inch circles from your tweed fabric — trace a pizza box or use a string compass with chalk for a clean circle. Cut your velvet into a strip measuring 6 inches wide x 78 inches long — this wraps the entire perimeter and gives that structured, bolster-style edge you see in the photo.
Pin the velvet strip along the outer edge of one circle, right sides together, and sew it with a ½-inch seam allowance. This border — sewn tight and flush — keeps its shape wash after wash, which means your dog gets consistent support and you keep your sanity.
Attach the zipper along the back seam of the border strip before closing everything up. Trust me, sewing the zipper in before assembling the full pillow is so much easier than fighting it afterward. I learned that the hard way on my first attempt — ripped the whole thing apart at 11pm.
Once your zipper is in, attach the second circle to the other edge of the border strip, leaving the zipper section open. Clip the curves every 2 inches so the fabric lays flat. Turn right side out, stuff with your fiberfill or drop in your foam insert, and zip it closed.
For extra durability, do a double topstitch around the outer seam — it adds that tailored look you see in the photo and keeps the border from collapsing under a 60-pound dog.
Prep Time: 20 minutes | Active Project Time: 2–3 hours | Difficulty Level: Intermediate
The two-fabric combo — soft tweed on top, structured velvet on the sides — gives your dog a cozy landing spot while the firm border keeps the pillow from pancaking flat over time. And if your pup is anything like my neighbor’s Doberman, they will immediately claim it and stare at you like royalty.
Wash your fabric before cutting to pre-shrink everything. Nothing worse than a beautifully sewn bed that warps after the first laundry cycle. If you want more inspo for your dog’s dedicated space, 7 Creative Ways to Build an Elevated Dog Bed has some really good pairings for this style.
📸 Photo credit: pexels
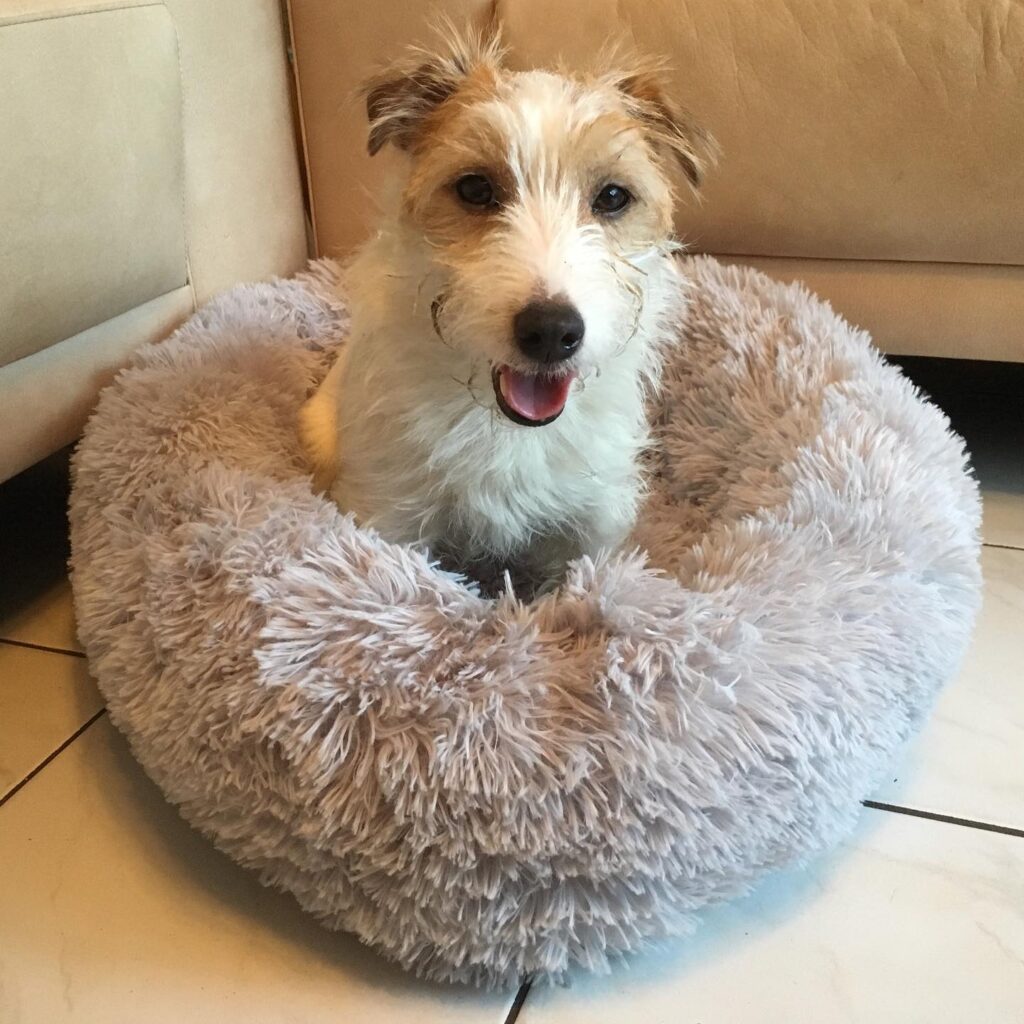
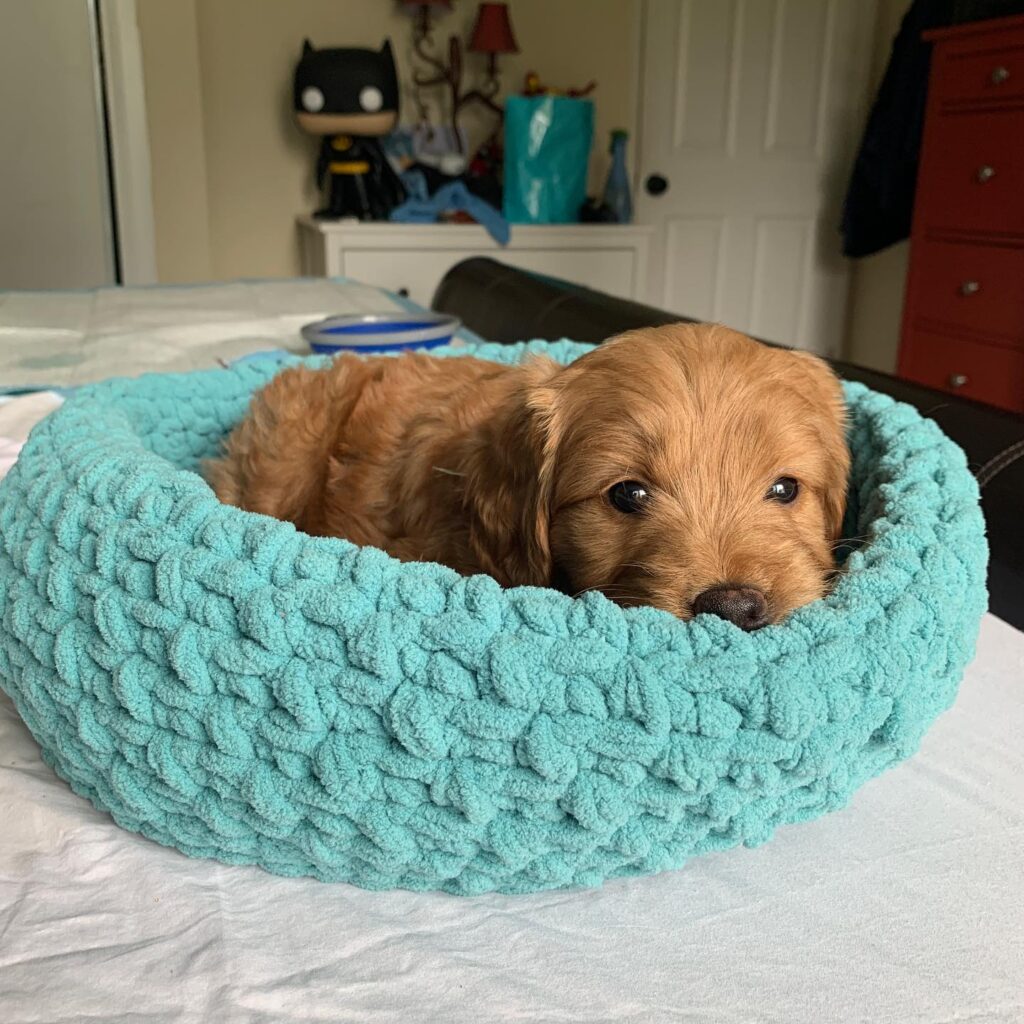
#6: Round Turquoise Donut Pillow Bed — The Cuddly DIY Your Pup Will Flop Into Instantly

You know that moment when your golden just completely gives up on being a dignified dog? Legs in the air, belly up, flopped across whatever soft thing she claimed five minutes ago? Yeah. That’s the energy we’re matching with this one.
My cousin’s cavapoo does this exact thing every single afternoon — just surrenders to comfort like it’s her job. And honestly? I wanted to make her something worthy of that dramatic little routine.
Materials & Tools:
– 1.5 yards of turquoise short-pile plush fabric
– 12 inches of coordinating cotton fabric (for the side band — mustard, coral, or red works great)
– High-loft polyester fiberfill stuffing, about 2 lbs
– Fabric scissors and pins
– Sewing machine with a size 14 needle
– Chalk or fabric marker
– 18-inch round cardboard template
Prep Time: 20 min | Active Project Time: 1.5 hours | Difficulty Level: Beginner-Intermediate
Instructions
Cut two 18-inch circles from your turquoise plush — one for the top, one for the bottom. Then cut a 5-inch wide strip from your contrasting cotton fabric, long enough to wrap the full circumference (roughly 57 inches). This strip becomes the pillow’s side band, and it’s where you sneak in that Pinterest-worthy color pop.
Pin the cotton strip along the edge of your bottom circle, right sides facing in. Sew all the way around with a half-inch seam allowance. Then attach the top circle the same way, but leave a 6-inch gap for stuffing. Flip the whole thing right-side out — this is where it starts looking like the real deal.
Stuff it with your polyester fiberfill. Don’t be shy here. Pack it firm, because a flat pillow collapses under a dog’s weight within a week. The dense fill keeps the donut shape intact, which supports your pup’s spine and hips — that’s the feature-benefit payoff right there: structured fill means actual joint support, not just a cute photo prop.
Slip-stitch the gap closed by hand using a ladder stitch. Pull it tight so no raw edges peek through.
One thing to remember: plush fabric shifts during sewing, so use more pins than you think you need — especially around the curves. It saves so much frustration.
If your dog is more of a “nest digger,” try making the side band slightly taller — 6 to 7 inches — so she has a little wall to burrow against. My girl Rosie does this every single time I give her something new. Immediately starts rearranging it like she’s decorating her own space.
For more fun ways to create a cozy corner for your pup, 7 Creative DIY Dog Crate Furniture Ideas has some seriously good inspo that pairs well with this bed.
📸 Photo credit: pexels
#7: DIY Damask Pillow Dog Bed (The One That Looks Like It Belongs on a Pinterest Board)
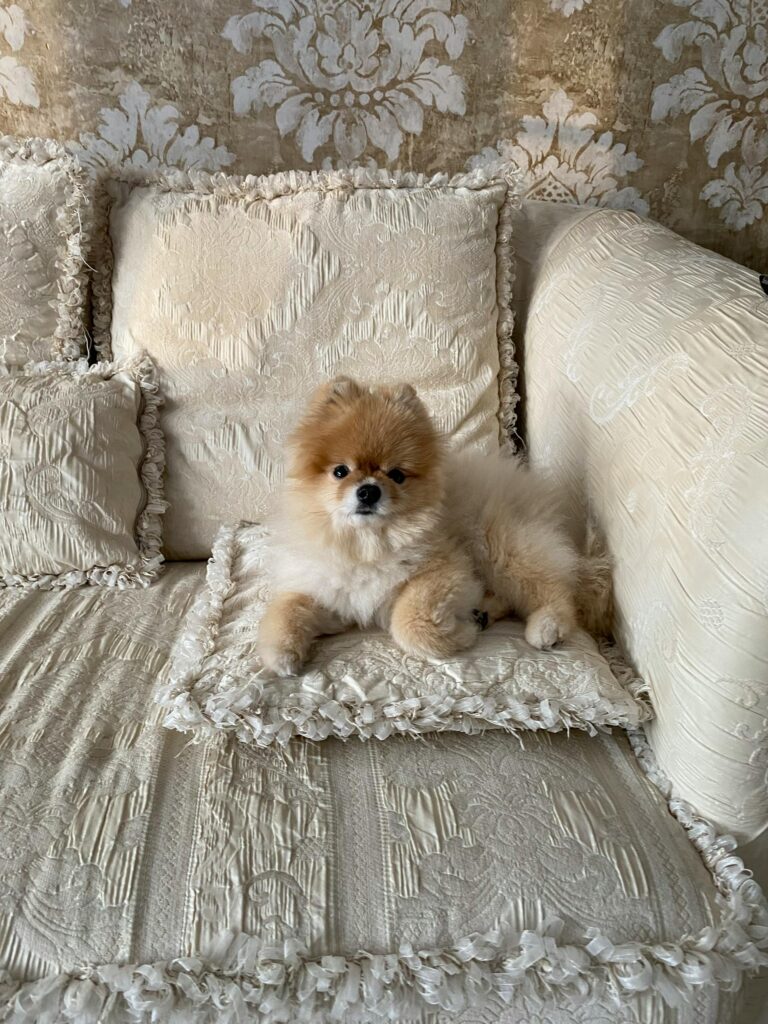
You know that moment when your golden retriever hops on your fancy sofa and just… claims it? Like, full paws out, chin down, “this is mine now” energy. That’s exactly what this pillow bed is for — giving her a spot that feels just as luxe as your couch, but actually belongs to her.
Prep Time: 20 minutes | Active Project Time: 1.5 hours | Difficulty Level: Beginner
Materials & Tools:
– 1.5 yards of ivory damask brocade fabric
– 2 yards of ruffle trim or ribbon fringe
– High-loft polyester fill (or repurposed pillow inserts)
– Thread in cream or ivory
– Sewing machine or fabric glue gun
– Fabric scissors
– Straight pins
Instructions
Cut two 18×18 inch squares from your damask fabric. Pin your ruffle trim along the outer edge of one square, facing inward, so when you flip it right-side out the ruffle frames the border. Sew three sides closed.
Stuff it generously with your polyester fill — the fuller, the better for joint support, which means your dog sinks in comfortably instead of bottoming out on the floor. Stitch the final side closed, then hand-tack extra ruffle at each corner for that tailored finish you see here.
And honestly? Layer two or three of these together like in the photo. That stacked look gives your dog cushion and you the aesthetic moment you’ve been chasing.
Store a spare pillow insert nearby — swapping covers for washing takes under five minutes and keeps everything fresh between washes.
📸 Photo credit: pexels
#8: DIY Round Dog Bed Pillow with a Cozy Gray Fleece Cushion
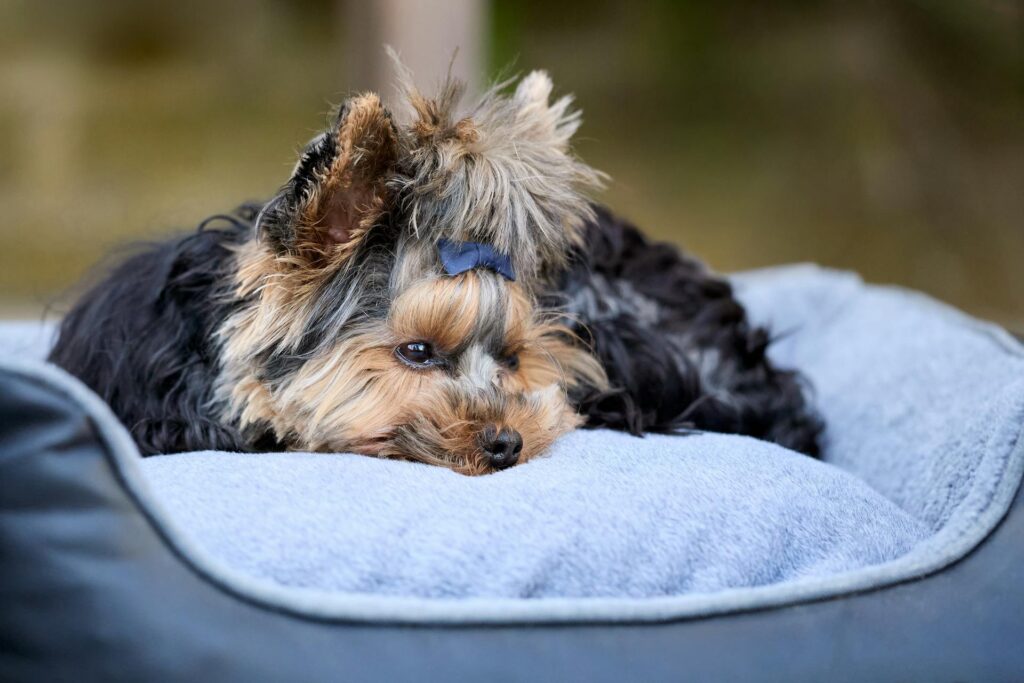
Your golden retriever does that thing where she circles her bed three times, flops down dramatically, and somehow still ends up half on the floor. Yeah. Mine does that too. That’s actually what pushed me to make a bigger, plusher version — one that actually holds her whole body.
This one was inspired by that image of a tiny Yorkshire Terrier totally melted into a round gray microfiber dog bed with a removable cushion liner. The setup is so clean — gray-on-gray, that little navy bow as a pop of detail. Honestly it looks like something off a Pinterest board.
Materials & Tools:
– 1.5 yards of charcoal gray fleece fabric (outer shell)
– 1 yard of light gray microfiber terry cloth (cushion top)
– Polyester fiberfill stuffing (approximately 3 lbs for a 24-inch diameter bed)
– Navy blue ribbon (0.5 inch wide, optional accent)
– Fabric scissors, pins, sewing machine, thread, zipper (18-inch)
Prep Time: 20 minutes | Active Project Time: 2.5 hours | Difficulty Level: Beginner-Intermediate
Instructions
Cut two 24-inch circles from your charcoal fleece — these become your top and bottom shell. Then cut one 22-inch circle from the microfiber terry cloth for your inner cushion liner. That slight size difference matters; it keeps the liner sitting flush inside without bunching.
Sew the fleece circles right-sides together, leaving a 6-inch gap along one edge. This is where your stuffing goes in later. Flip it right-side out, push the edges crisp with your fingers, then stuff with fiberfill until the base feels firm but still has some give. Your dog’s joints will thank you — that density supports pressure points without feeling like a rock. Hand-stitch the gap closed.
For the removable cushion, fold your microfiber circle in half and sew an 18-inch zipper along the straight edge. Sew the remaining perimeter closed, leaving the zipper side open. Stuff lightly — this layer should feel like a cloud. The microfiber surface wicks moisture away from your dog’s coat, which means less funk on the fabric between washes.
Drop the cushion inside the fleece shell. Tuck that little navy ribbon into a small bow and hand-stitch it near the front edge as a finishing detail. That tiny bow is what makes the whole thing look intentional.
Toss the removable cushion in the wash every two weeks. The charcoal fleece shell hides fur between washes like a champ.
If your pup likes to lounge outside too, a diy outdoor dog area with a weather-protected spot gives this bed a great home on a covered porch.
Sizing up? Double the fiberfill and cut your circles to 32 inches for bigger breeds.
📸 Photo credit: pexels
#9: Couch Cushion Dog Bed (The Lazy Girl DIY That Actually Looks Good)
Your golden is already sleeping on your throw pillows anyway, right? Mine does the same thing — drags them off the couch, makes a little nest, and looks at me like I owe her an apology.
So let’s just… lean into it.
Prep Time: 10 min | Active Project Time: 45 min | Difficulty Level: Easy
Materials & Tools:
– 2 white striped throw pillow covers (18×18 inches or 20×20 inches)
– High-density polyester stuffing (about 3 lbs per pillow)
– Basic needle and upholstery thread
– Fabric-safe iron-on hem tape (no-sew option)
– Scissors
Instructions
Grab both pillow covers and stuff them generously — don’t be shy with the filling because a flat pillow means your dog’s joints hit the floor anyway. Once stuffed, fold the open edge 1.5 inches inward and use the hem tape to seal it, or hand-stitch it closed with a whip stitch.
Stack both pillows slightly offset on your tan leather couch section — just like in the photo. Place the fuller pillow flat, then lean the second one against the sofa back at a 45-degree angle.
That angled pillow is the secret. It gives your dog a headrest and a bolster in one — supportive stuffing keeps pressure off their neck, which means longer, deeper rest between your walks.
I did this on a Sunday afternoon, and by Monday morning my dog claimed that corner like she’d always owned it.
Use striped linen-blend covers so they blend with your existing decor — guests won’t even clock it as a dog bed.
📸 Photo credit: pexels
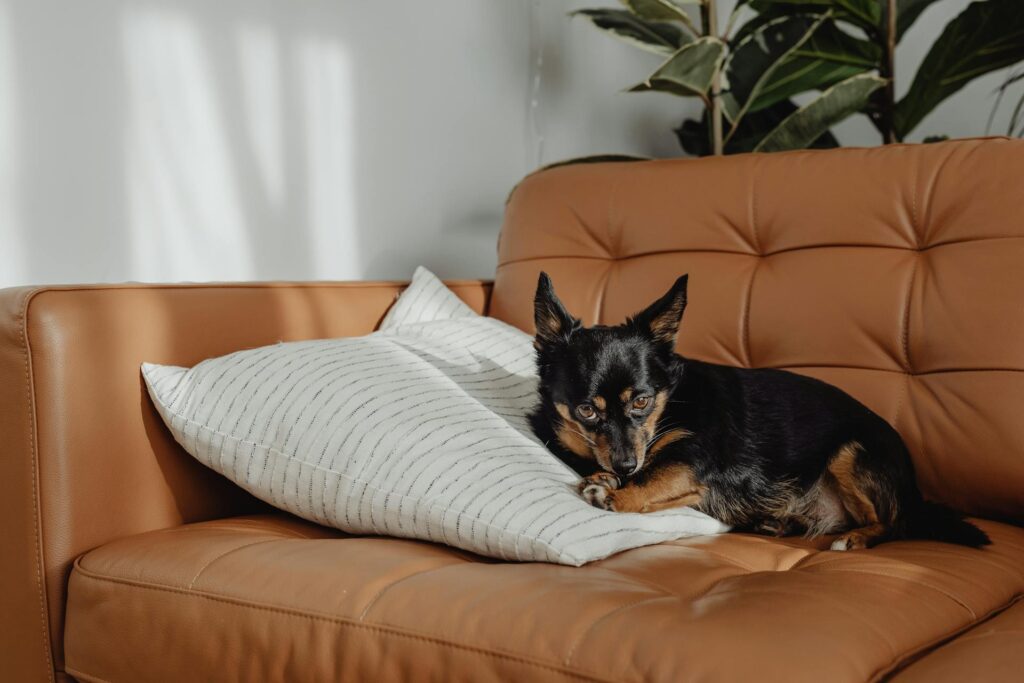
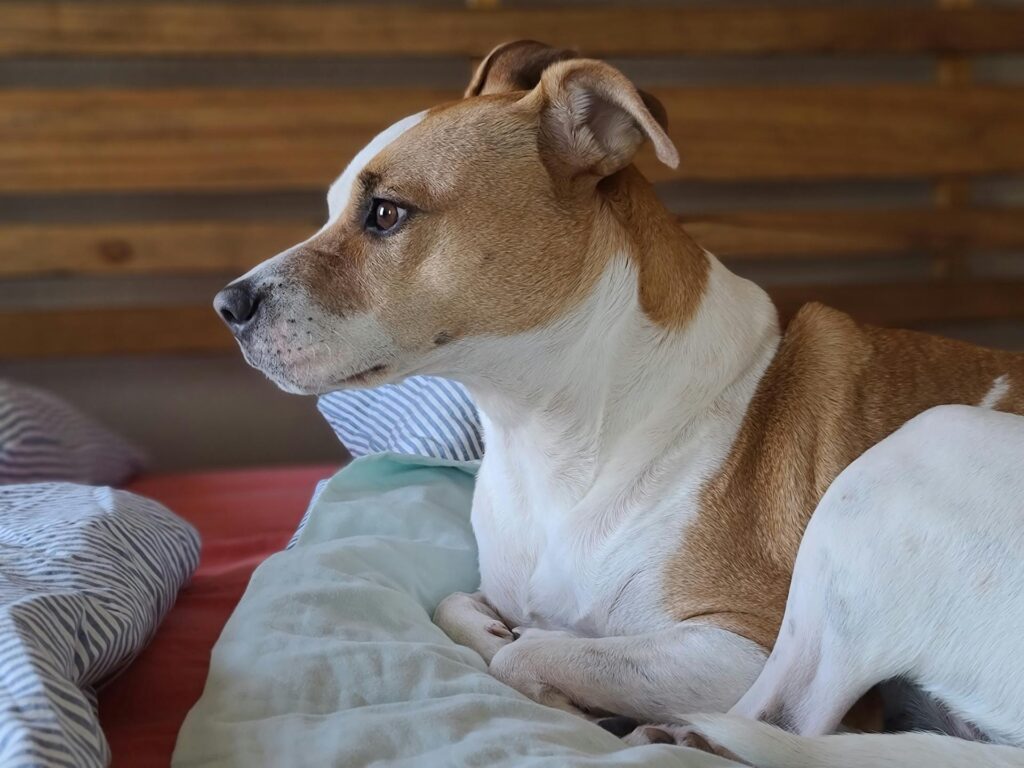
#10: DIY Couch Corner Dog Bed Pillow (The One Your Dog Will Claim Immediately)

You know that moment when you look over at your couch and your golden has just… taken over the entire corner? Tucked between two throw pillows, paws curled in, completely unbothered? That is the energy we’re building toward — except on purpose, with something that actually looks good.
This project is inspired by exactly that vibe. A white and black-eared Jack Russell living his best life on a tan leather sofa, sandwiched between a striped linen pillow and a geometric cream cushion. We’re recreating that cozy corner setup intentionally — so your golden has her own designated spot that doesn’t destroy your aesthetic.
Materials & Tools:
– 1.5 yards of natural linen fabric (cream or striped pattern)
– 24″ x 24″ pillow insert (high-loft, washable)
– Coordinating cotton thread
– Fabric scissors
– Sewing machine or needle
– Pins
– Iron
Instructions
Start by cutting your linen into two 26″ x 26″ squares — that extra 2 inches gives you a clean seam allowance all around.
Iron both pieces flat. Pin them together with the right sides facing inward. Sew three sides with a ½-inch seam, backstitching at the corners for durability.
Turn the cover right-side out and press the edges crisp. Slide your 24″ insert inside — a snug fill means the pillow holds its shape even when your dog kneads it like dough (and she will).
Fold the open edge ½ inch inward twice, pin, and hand-stitch or machine-sew it shut. A tight ladder stitch here keeps everything invisible.
Tuck the finished pillow into your couch corner against an existing throw pillow. That layered setup — pillow behind, soft cushion beside — creates a nest effect that makes dogs naturally gravitate toward it. The linen fabric is breathable enough for long naps but structured enough to keep its shape, so your couch stays looking Pinterest-ready while she sleeps for four hours straight.
Wash the cover every 1-2 weeks on a gentle cold cycle to keep it fresh without shrinking.
Prep Time: 10 min | Active Project Time: 45 min | Difficulty Level: Beginner
If your linen frays easily, run a quick zigzag stitch along the raw edges before you sew the panels together — it saves you from unraveling seams after the first wash.
📸 Photo credit: pexels
#11: How to Make a Cozy Quilted Dog Bed Pillow Your Pup Will Actually Use

You know that moment when your golden retriever gives you that look — chin resting on the floor, eyes half-sad, like their whole life is a tragedy because their bed isn’t soft enough? Yeah. Mine does the same thing, and honestly, I caved completely.
This DIY pillow bed is exactly what I made after seeing my dog ditch her fancy store-bought cushion for my throw pillows. Again.
Materials & Tools:
– 1.5 yards of navy or slate blue canvas fabric (heavy-duty, washable)
– Polyester fiberfill stuffing (roughly 3-4 pounds for a medium dog)
– One heavy-duty zipper, 18-22 inches
– Sewing machine + matching thread
– Fabric scissors + pins
– Iron for seams
Instructions
Cut two rectangular fabric panels — I did 24″ x 30″ for a medium-sized dog. Pin them right sides together and sew three sides using a ½-inch seam allowance, leaving the short end open for your zipper. Attach the zipper along that open edge — this zipper placement is everything because it means washable cover without replacing the whole bed. Flip the cover right-side out, press those seams flat with your iron so you get that quilted-looking finish. Then stuff generously with fiberfill. Dogs like real loft under their chins, so don’t skimp here. Zip it closed.
That washable zipper closure means muddy paw days go from stressful to a five-minute fix — finally a dog pillow that works with your life, not against it.
Prep Time: 15 min | Active Project Time: 45-60 min | Difficulty: Beginner
Choose a fabric color that complements your floors — the slate blue canvas in this photo looks gorgeous against warm wood tones and doesn’t show dark fur the way white fabric does.
📸 Photo credit: pexels
#12: The Curl-Up Cushion — A Striped Pillow Bed Your Dog Will Claim Before You Even Finish Making It
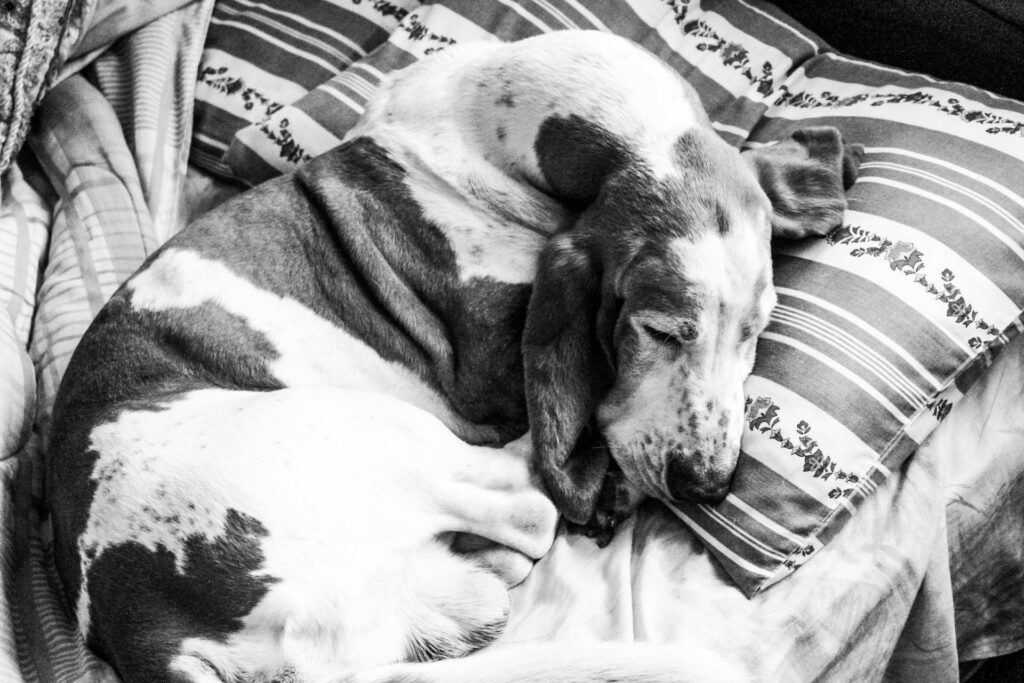
Your golden has that one spot on the couch. You know the one. The cushion that’s now permanently dented, slightly damp, and covered in fur you’ll find in your coffee somehow.
This DIY is basically that cushion — but made for her, so yours can survive.
Looking at this photo, I’m obsessed with how this basset hound curled himself into a perfect little donut on a striped cotton pillow bed. That’s the exact vibe we’re going for.
Materials & Tools:
– 1.5 yards of striped cotton canvas fabric (medium weight)
– 1 yard of coordinating floral cotton fabric for the border panels
– Polyester fiberfill stuffing — at least 3 lbs for that plush sink-in feel
– Sewing machine + matching thread
– Fabric scissors
– Pins
– 20-inch zipper (optional, for washability)
Instructions
Cut two 24×24-inch squares from your striped canvas — this becomes the top and bottom of the pillow. Cut 4-inch wide strips from your floral fabric for the border. Pin the floral strips along all four edges of your top panel, right sides together, and sew with a ½-inch seam allowance.
Attach your bottom panel next, leaving one side open for stuffing. Push your fiberfill in generously — don’t be shy here. A flat pillow means your dog shifts around all night, which means she’s waking you up at 3am. Full stuffing keeps her settled and supported, which means you both actually sleep.
Hand-stitch or zipper-close the opening. Toss it in her favorite corner.
The washable zipper closure keeps the cover fresh — which, trust me, after mud season with a retriever, you’ll use every single week.
Prep Time: 15 min | Active Project Time: 1.5 hours | Difficulty Level: Beginner-Friendly
Preshrink your fabric before cutting. Cotton canvas can shrink up to 3% in the wash, and a too-small pillow after the first laundry is a heartbreak nobody needs.
📸 Photo credit: pexels
#13: Chocolate Dream Pillow Bed — The DIY Your Dog Will Claim Before You Finish Making It
You know that moment when you walk into your bedroom and your golden is already draped across your good white pillow, legs hanging off the edge like she owns the place?
Yeah. That’s what this is fixing.
This rust-brown corduroy and quilted pillow bed is inspired by exactly that image — a big, happy dog melting into a nest of pillows like she’s at a five-star hotel. And honestly? She deserves it. The warm chocolate-toned fabric against white textured quilting looks so Pinterest that you’ll want to style it next to your floral duvet anyway.
Materials & Tools:
– 1.5 yards of rust/chocolate corduroy or short-pile velvet fabric
– 1 yard of white quilted cotton fabric (for the base layer/pillow insert cover)
– Polyfill stuffing (approximately 3-4 lbs for a large dog)
– Matching brown thread
– Sewing machine or fabric glue
– Scissors, pins, measuring tape
– Optional: white piping trim for pillow edge definition
Instructions
Cut two 24″ x 24″ squares from your corduroy — this becomes your main pillow cover. Cut one 30″ x 20″ rectangle from the quilted fabric for the flat base pad your dog actually rests her paws on.
Sew your corduroy squares together on three sides with a ½-inch seam allowance, leaving one side open. Turn it right-side out — the texture should feel dense and grip-y, which keeps it from sliding on your bed frame or couch.
Stuff it generously. Don’t pack it tight like a decorative pillow. You want it to have a soft, sinkable center because that’s what makes a dog actually choose her bed over yours. The polyfill gives cushion, the corduroy holds shape, and your floors stay dog-hair-free — that’s the payoff.
Stitch the quilted base pad into a simple envelope-style cover, so you can pull it off and wash it. Lay the stuffed corduroy pillow on top at a slight angle, just like in the photo.
Tuck a second smaller 18″ x 18″ pillow behind it — same corduroy fabric — so your dog has something to press her head against.
For an even cozier setup, place the whole thing inside a corner where two walls or cushions meet. Dogs feel safer when their back is supported.
Prep Time: 20 min | Active Project Time: 1.5–2 hours | Difficulty Level: Beginner–Intermediate
If your dog keeps nudging the pillow around, add non-slip fabric backing to the base pad — it’s a $3 fix that saves the whole setup. And if you love this kind of cozy build, 7 Cozy DIY Dog Couch Ideas for Happy Pets has more inspo that works with this same aesthetic.
📸 Photo credit: pexels
#14: Foldover Blanket Dog Bed Pillow (The One That Looks Too Good for a Dog)
Okay so you know that moment when your golden has claimed your whole bed and somehow looks more comfortable than you ever have? That’s this dog. Just fully sprawled on a pile of soft linens like she owns the place — and honestly? She does.
This DIY uses a large fleece or cotton blanket (think 60″ x 80″) in a neutral tan, cream, or sage green — something that actually matches your bedroom aesthetic instead of clashing with it. The whole thing gets folded and layered into a cushioned lounge pad, then placed on top of a low-profile platform bed frame or directly on the mattress.
Materials & Tools:
– 1 large blanket (60″ x 80″) — fleece, velvet, or washed cotton
– 1 standard pillow (20″ x 26″) or a body pillow for extra loft
– Striped accent pillowcase (light blue and white cotton)
– Needle and thread or iron-on hem tape
– Scissors
Instructions
Lay your blanket flat and fold it in thirds lengthwise to create a dense, layered base — this gives your dog real cushion without buying a separate insert. Slide your pillow inside the top fold so it sits at the “headrest” position, and stitch or hem-tape the open edge shut so the pillow stays put when she inevitably digs at it. Place the striped pillowcase accent at the front edge for that Pinterest-layered look. The soft stacking here — blanket base, pillow bolster — supports her joints while keeping shedding contained to one washable layer.
Toss the whole thing in the wash weekly. No stuffing escaping, no zipper fights.
Prep Time: 10 min | Active Project Time: 25 min | Difficulty: Easy
📸 Photo credit: pexels
#15: DIY Donut Dog Bed — The Fluffy Cloud Your Pup Deserves
Okay, you know that moment when your golden flops onto the couch again and you’re just staring at the dog hair situation like… why did I buy white cushions? Yeah. This is the fix.
This round, cloud-like donut bed is made from a light taupe faux fur fabric — the kind that looks like it belongs on a Pinterest board and somehow survives actual dog ownership. It’s a circular bolster-style bed, roughly 24–28 inches in diameter, with a raised rim all around and a plush center that cradles your pup like a hug.
Materials & Tools:
– 1.5 yards of long-pile faux fur fabric (taupe, cream, or blush)
– Polyester fiberfill stuffing (about 3–4 lbs)
– 1 yard of canvas or denim fabric (bottom lining)
– Fabric scissors, sewing pins, sewing machine or needle and thread
– Fabric chalk or marker
– Large dinner plate or compass for tracing circles
Instructions
Cut two large circles — one from your faux fur and one from your canvas lining — both 28 inches in diameter. Then cut a long donut strip from the faux fur, roughly 8 inches wide and 88 inches long. This becomes your bolster rim.
Fold the strip in half lengthwise, right sides together, and sew along the long edge to create a tube. Turn it inside out so the fur faces outward — and this is the part where you’ll want a pencil to help push the corners through, trust me on that.
Now form the tube into a ring and stitch the two short ends together. Pin the ring to your faux fur circle base, fur sides facing in, and sew all the way around. Leave a 6-inch gap to stuff it.
Stuff the rim generously — that raised bolster shape only holds if you don’t skimp here. The firm rim gives your dog something to rest their chin on, which supports their neck and makes them feel enclosed and secure. That enclosed feeling actually reduces anxiety in smaller breeds. And golden retrievers? They’ll claim this as their entire personality.
Once stuffed, hand-stitch the gap closed. Attach the canvas circle to the bottom with a simple whip stitch — it keeps the bed from sliding on tile floors.
The faux fur top washes well on a cold, gentle machine cycle. Toss the fiberfill insert in separately if you make it removable with a hidden zipper — totally worth the extra step.
If your pup needs more than just a bed, 10 Cozy Dog Bedroom Ideas for Happy Pups has some seriously dreamy inspo for building out their whole space.
Prep Time: 20 min | Active Project Time: 2–3 hours | Difficulty Level: Intermediate
📸 Photo credit: Instagram @sammyandjop
#16: Chunky Knit Teal Dog Bed (No-Sew, No-Needle Magic)
Your golden just did the thing — circled three times on your white linen couch, plopped down, and left a warm fur halo you’ll be picking off your throw pillows for days.
This is the project that fixes that.
Prep Time: 15 min | Active Project Time: 45–60 min | Difficulty Level: Beginner
Materials & Tools:
– 3–4 skeins of Bernat Blanket Extra yarn (teal/aqua colorway shown)
– Size 50 circular knitting needles or your bare hands for finger-knitting
– Non-slip rug pad cut to 18″ diameter (base liner)
– Poly-fil stuffing (roughly 16 oz for the walls)
– Fabric glue or hot glue gun (optional, for securing the base)
– Scissors
Instructions
Start by cutting your non-slip pad into a circle — use a dinner plate as your template if you don’t have a compass. This becomes the hidden floor of the bed, so your golden doesn’t slide around while she’s doing her dramatic collapse routine.
Next, finger-knit or needle-knit long chunky ropes using the Bernat Extra yarn. Each rope wants to be roughly 36–40 inches before you start coiling. The chunky texture traps warmth against your dog’s belly — that heat retention means deeper rest, and deeper rest means you get a quieter morning.
Coil the first rope flat on your non-slip base, securing each round with a dab of fabric glue. Once you hit 6–7 inches of flat base, start angling your coils upward to build the donut wall. Stuff poly-fil loosely between coil layers as you rise — this gives the walls that plush, supportive hug shape you see in the photo.
Keep building until your walls reach about 5–6 inches tall. Tuck and glue your final yarn tail underneath.
The teal colorway photographs beautifully against golden fur — your Pinterest board will thank you.
If your dog is a serious sprawler, 16 bed extension ideas for your dog can help you think through sizing before you start your first coil. And if you caught the finger-knitting bug, 18 crochet dog bed patterns to try now will keep you busy all weekend.
Wash the finished bed on cold, gentle cycle inside a pillowcase — the chunky yarn holds its shape better that way, and the teal stays bright wash after wash.
📸 Photo credit: Instagram @whiskerscrafts
The Fill Material Secret That Makes or Breaks Your DIY Dog Bed Pillow
Here’s something most tutorials won’t tell you — the fabric you choose matters way less than what goes inside.
I learned this the hard way after making my first dog bed pillow with regular polyester fiberfill. Looked gorgeous on day one. By week three? It had pancaked into basically nothing, and my dog was sleeping on what felt like a throw rug.
Skip the basic fiberfill. Go straight for shredded memory foam offcuts — you can grab bags of them from fabric stores or mattress shops for almost nothing. They hold their shape, they’re washable, and your girl won’t be secretly sleeping on the floor.
The other thing nobody talks about? Double-layer your outer fabric. One layer of canvas or duck cloth on the bottom, softer fabric on top. Your golden is going to scratch, circle, and flop down like she’s doing a dramatic scene. That bottom layer takes the abuse so the pretty top lasts.
And if you want to skip the DIY route someday, these dog bed furniture pieces are genuinely worth browsing for inspo.
Your Golden Deserves a Bed That Actually Holds Up
You’ve been patient. You’ve tried the cheap options, watched them fall apart, and cleaned up more stuffing than you ever signed up for. This time, go with what works.
Pick the bed that fits your space, your dog’s sleep style, and honestly — your living room aesthetic too. Because you shouldn’t have to choose between a cozy pup and a Pinterest-worthy home.
And hey, if you’re still figuring out where to even put the thing, dog bed under stairs ideas that actually fit your layout might spark something good.
So tell me — what’s the one thing your golden does to destroy every bed you buy? 🐾