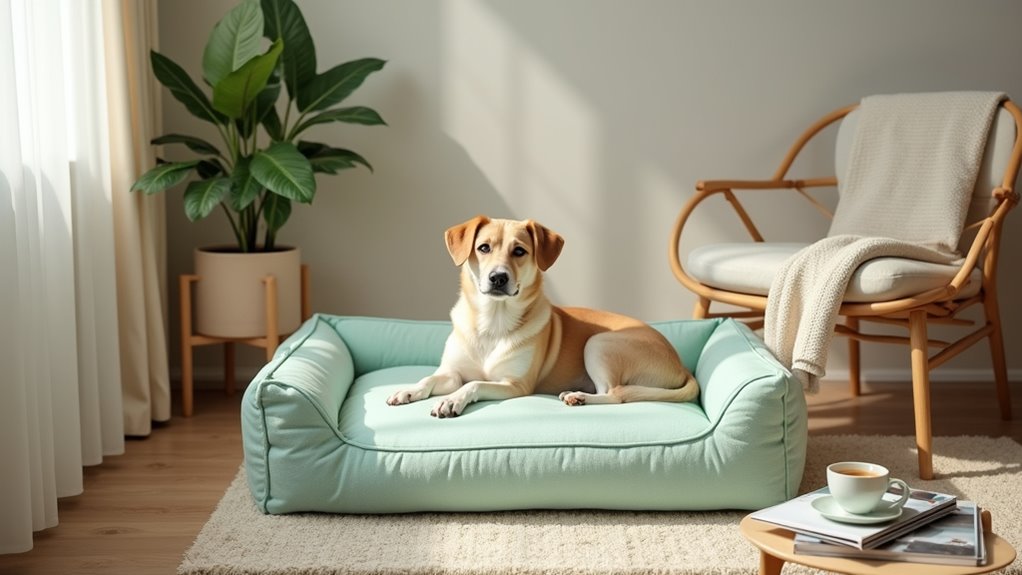
Did you know that a cozy dog bed can actually help reduce your pet’s anxiety? It’s true. You might be surprised how something as simple as a comfy spot can make a big difference. So, if you’re tired of those overpriced dog beds that don’t quite match your style, here’s your chance to get crafty. Want to know how to create a stylish retreat for your pup? Let’s get into these seven inspiring DIY steps that’ll transform nap time.
Cozy Fabric Suggestions
When you’re crafting a cozy dog bed, picking the right fabric is key, and there are so many options that it can feel a bit overwhelming—trust me, I’ve been there.
You could go for soft fleece, which feels like a cloud, or perhaps a durable cotton that’s easy to wash. Don’t forget about waterproof materials for those occasional accidents. You want your pup to sink into comfort!
For a personal touch, consider repurposing an old blanket; it gives cozy vibes and a sense of familiarity to your furry friend.
And hey, if you’re planning some dog steps for bed DIY, choose a fabric that matches your bed to keep things stylish. Your dog will appreciate it, even if they don’t say so.
Our Collection
Now that you’ve picked out some cozy fabrics, let’s talk about our collection of dog bed essentials.
You’ll love how the memory foam cushion can cradle your pup just right, and the waterproof liners? They’re a game changer for those messy accidents (we’ve all had those).
Plus, you can choose from plush fleece or gel-infused cooling pads, so there’s something perfect for every furball out there.
1. Memory Foam Cushion Options

Creating a cozy, customized dog bed is a rewarding project that savvy pet owners can tackle right at home. Not only does it save you money compared to store-bought options, but it also allows you to design a bed that fits your pup’s style and comfort needs perfectly. Adding premium dog collar accessories can enhance their overall comfort during nap times.
Plus, when your furry friend is snug as a bug, everyone’s happier, right? So let’s get started.
Materials Needed:
- Memory foam mattress (can be cut to size)
- Soft fabric for the cover (fleece, cotton, or upholstery fabric)
- Sewing machine (or fabric glue for a no-sew option)
- Thread (matching your fabric)
- Scissors
- Measuring tape
- Pins or clips
- Optional: zipper (for removable cover)
Step-by-Step Instructions:
- Measure Your Doggy: Start by measuring your dog. The length and width of the bed should allow your pup to stretch out comfortably. Don’t forget to account for any extra fluff they might have.
- Cut the Memory Foam: Using your measurements, cut the memory foam mattress to size. Enjoy this part—rack up some imaginary points showcasing your “professional foam cutter” skills. Just be careful with those scissors.
- Prepare Your Fabric: Now it’s time to cut your fabric. Lay the memory foam on top of your chosen fabric and cut it to size, leaving about an inch of extra fabric all around.
- Sew It Up: [If sewing] Pin the fabric pieces together, right sides facing each other. Sew along the edges, leaving one side open for inserting the foam. [If no-sew] Use fabric glue along the edges, following the same principles. Trust me, no one will know if you don’t tell them.
- Stuff It: Turn the fabric right side out, and carefully slide in the memory foam. For the loving touch, give it a little fluff as you go, making your dog’s new bed as comfortable as possible.
- Seal the Deal: If you included a zipper, simply zip it up to secure the foam in place. If you’re pretending to be a sewing wizard and didn’t use a zipper, just stitch or glue up the open side.
- Personalize It: For an extra flair, consider using fabric paint or iron-on patches to decorate the bed with your dog’s name or favorite designs. Your dog mightn’t appreciate the personal touch, but your guests will surely be impressed.
Optional Add-ons/Variations:
Feel free to mix and match textiles—how about a funky patterned fabric on one side and a solid color on the other?
You could also opt for waterproof fabric for those drooly, rainy day adventures. Just imagine the possibilities.
Pro Tip:
If you know your dog’s favorite lounging spot, give the cushion a little height adjustment to level it up. A slightly elevated memory foam bed can help support their joints and keep the chill away.
Also, sprinkle in some dog-friendly blankets for extra coziness. Remember, happy dog, happy life.
Now that you’ve created a cozy haven for your furry friend, all that’s left is to watch them enjoy their new throne.
And hey, if they look up at you with those big, puppy dog eyes, just know you deserve all the belly rubs for your DIY efforts.
2. Waterproof Liner Options

When crafting the perfect dog bed, don’t forget about the waterproof liner. It’s a game changer for dog owners looking to keep everything neat and tidy. Investing in the best premium dog food makers will help ensure your furry friend stays healthy while they enjoy their new cozy space.
Think about it—spills, drool, and the occasional muddy paws can wreak havoc on your pup’s cozy spot. A waterproof liner not only protects the memory foam but also extends the life of your creation.
Ready to get started? Let’s plunge into this simple DIY project.
Materials Needed:
- Waterproof fabric or vinyl
- Measuring tape
- Scissors
- Sewing machine (or heavy-duty fabric glue for a no-sew option)
- Thread (strong enough for your chosen material)
- Pins or clips
- Optional: Velcro strips (for easy access)
Step-by-Step Instructions:
- Measure Your Bed: Grab that trusty measuring tape and measure the dimensions of your dog bed, including the height if you want the liner to wrap around the sides. It’s not a race, so take your time to get it right.
- Cut the Waterproof Fabric: Using your measurements, cut the waterproof material. Leave about an inch of extra fabric around each side for seam allowance. Don’t worry about making it perfect; it’s a liner, remember?
- Pin It Down: Fold the edges of the liner inward by about half an inch to create a clean edge, then pin or clip them in place. This step will keep things tidy as you sew or glue.
- Sew It (or Glue It): If you’re sewing, simply stitch around the edges to keep everything in place. For a no-sew option, apply fabric glue along the folded edges. Either way, it’s all about keeping water out and comfort in.
- Test It Out: Lay the liner inside your dog bed shell. Give it a quick check to make sure it fits snugly and securely. This is a real “ah-ha” moment because suddenly, you can see how everything comes together.
- Secure It (Optional): If you want, add some Velcro strips to the corners to keep the liner in place. This way, you can easily remove and wash it when needed, making clean-ups a breeze.
- Celebrate Your Creation: Take a moment to admire your handiwork. You’ve just leveled up your dog’s sleeping space, and your furry friend will appreciate the cozy, hygienic environment.
Optional Add-ons/Variations:
Feeling adventurous? Consider using different colors of waterproof fabric for a playful twist.
For a more stylish look, try combining waterproof materials with fun patterned fabrics on the outside. Your dog deserves the best, after all!
Pro Tip: If you’re using a fabric that may fray, adding a quick zigzag stitch along the edges can keep it from unraveling over time. It’s a little detail that can save you a headache in the future, trust me.
Now that you’ve got your waterproof liner ready, your DIY dog bed is about to become one cozy, durable space for your furry family member. Let the tail-wagging begin!
3. Fabric Pattern Ideas

If you’ve just finished crafting a waterproof liner for your dog’s bed and you’re itching to give it some personality, this project is a perfect follow-up. Choosing the right fabric pattern can transform a simple dog bed into a stylish accessory that complements your home décor while providing comfort for your furry friend.
Plus, let’s be honest, a cute dog bed can really elevate your living room vibe. So, let’s plunge into some fun fabric pattern ideas that are sure to inspire you.
Materials Needed:
- Various fabric samples (cotton, canvas, or any dog-friendly material)
- Measuring tape
- Scissors
- Sewing machine or fabric glue
- Thread that matches or complements your fabric
- Pins or fabric clips
- Optional: Fabric swatches for color coordination
Step-by-Step Instructions:
1. Sketch Your Vision: Start by jotting down some ideas. What colors does your home feature? Do you lean more toward vibrant or muted tones? A quick sketch can help you visualize how different patterns will blend in.
2. Choose Your Fabrics: Hit up your favorite fabric store or shop online for patterns that catch your eye. Floral designs, geometric shapes, or even fun cartoon prints can really make your dog bed pop.
Remember, choose something you won’t mind showing off.
3. Measure and Cut: Measure your dog bed dimensions again (yes, it’s a repeat, but trust me, it’s so worth it). Cut your fabric according to the measurements, leaving about an inch for seam allowance.
If math isn’t your thing, don’t worry, it’s all about getting it close enough.
4. Pin or Clip It: Fold the edges of the fabric inward by about half an inch to keep a clean look. Use pins or fabric clips to hold them in place.
Feel free to channel your inner fashion designer while you do this—it’s like you’re giving your pup a little closet upgrade!
5. Sew or Glue: Now it’s time to bring it all together. If you’re sewing, simply stitch around the edges. If you’re going the no-sew route, apply fabric glue along the folded edges and press it down.
Both options work well, so go with what feels comfortable for you.
6. Fit Check: Once finished, pop the fabric cover over the liner and give it a good look. Make sure it fits snugly, like a well-fitted sweater.
This is the moment where your hard work pays off.
7. Finalize It: If you’re feeling fancy, you can use Velcro or buttons to secure the fabric layer over the waterproof liner—this makes it easy to remove and wash.
Your dog deserves the best, and keeping it clean is crucial! Additionally, considering premium dog food brands can ensure your Goldendoodle stays happy and healthy.
Optional Add-ons/Variations:
Feeling creative? How about mixing and matching two different prints?
Imagine a polka-dotted cover paired with a striped liner. It’ll be like a fashion show for dogs. Or maybe you want to try out some playful animal prints—perfect for all the dog lovers out there.
Pro Tip:
Before you plunge into cutting your fabric, always wash and dry it first.
This ensures that any shrinkage happens before your glorious creation is finished. Plus, pre-washing can bring out those beautiful colors in your fabric, giving your dog bed that extra ‘wow’ factor.
4. Plush Fleece Material Choices

Are you tired of staring at your dog’s tired, old bed? This DIY project will have you jazzing up their sleeping space with plush fleece, making it cozy for your pup and stylish for your home. Plus, imagine enhancing your mixology skills with a premium bartending kit, perfect for entertaining friends while your dog enjoys its new bed.
Not only will this save you from shelling out bucks on a new bed, but your dog will enjoy the comfort of a soft, warm space that looks great in any corner of your home.
Materials Needed:
- Plush fleece fabric (in your chosen color or pattern)
- Old dog bed (or new foam or stuffing if you’re starting from scratch)
- Measuring tape
- Scissors
- Sewing machine (or fabric glue if you want to skip the sewing)
- Pins or fabric clips
- Matching thread (if sewing)
Step-by-Step Instructions:
- Measure Your Bed: Grab that measuring tape and get the dimensions of your dog bed. Don’t skip this step; this is where the magic begins.
- Cut Your Fleece: Based on your measurements, cut a piece of fleece that’s roughly twice the height of the bed edges plus your bed’s dimensions. This allows for those oh-so-important seams.
- Pin the Edges: If you want a clean look, fold the edges of your fleece inward by about half an inch. Pin it down, and while you’re at it, imagine your dog diving into their new plush kingdom.
- Sew or Glue It: If you
5. Gel-infused Cooling Pads

Ready to turn your home into a doggy oasis? This DIY project for gel-infused cooling pads is a fantastic way to keep your furry friend cool during those hot summer months. Not only will your pup appreciate the invigorating comfort, but you’ll also save some cash by making your own instead of splurging on pricey pet store options. Consider pairing your DIY efforts with dog hair clippers to maintain your pup’s coat while ensuring they stay comfortable and cool. Let’s keep those tails wagging!
Materials Needed:
- Gel-infused foam (available at craft or home improvement stores)
- Fabric (cooling or breathable fabric works great; cotton is a solid choice)
- Measuring tape
- Scissors
- Sewing machine or fabric glue
- Pins or fabric clips
- Matching thread (if sewing)
Step-by-Step Instructions:
- Measure Your Dog: Grab that trusty measuring tape and measure the length and width of your pup when they’re sprawled out comfortably. This will guarantee the cooling pad is the perfect size.
- Cut Your Foam: Using your measured dimensions, cut the gel-infused foam to size. Remember, it’s better to start a bit bigger; you can always trim it down.
- Cut Your Fabric: Now, lay your foam piece on the fabric and cut two pieces that are about twice as big in length and width as the foam. This is for the envelope to keep it snug and secure.
- Pin and Sew Up: Place the foam between the two fabric pieces, right sides together. Fold in the edges about half an inch, pin it down, and sew around the edges, leaving one side open. If you’re feeling adventurous, go for a zig-zag stitch—it adds flair and strengthens the seam.
- Flip It: Turn your fabric inside out so the right side is now showing. This is where you’ll marvel at how you actually managed a “sewing project!”
- Stuff the Foam: Insert the chilled gel-infused foam into your fabric pocket, pushing it down to the corners. You might want to stop and give yourself a high-five for not glueing your fingers together yet.
- Seal the Deal: Fold in the raw edges of the remaining opening and sew or glue it shut. Voilà, your sweet pup’s cooling pad is complete!
Optional Add-ons/Variations:
- Consider dyeing your fabric with pet-safe fabric dye to match your home’s aesthetic or your pup’s personality. Go bold with bright colors or stick to calming pastels; either way, it’s all about customization.
- Add a non-slip bottom using rubber shelf liner between the foam and fabric to keep the pad from sliding around on tile or hardwood floors.
Pro Tip:
To give your dog extra cooling comfort, try placing the cooling pad in the fridge for a short while before letting your pup lounge on it. Just be sure to check for any icy spots because we don’t want any surprised barks from a too-chilly doggo.
This DIY cooling pad project not only boosts your dog’s comfort but also adds style to your living space. It’s all about keeping your furry friend cool and happy, while giving a personal touch to their cozy corner. You got this!
6. Recycled Denim Fabric Options

Looking for a creative and eco-friendly way to add some style to your dog’s bed? Let’s explore the world of recycled denim fabric. Not only does this project appeal to your inner DIY enthusiast, but it also helps reduce waste and gives your pup a chic place to lounge. Plus, you’ll save money by using old jeans rather than purchasing expensive new fabrics—an absolute win-win!
Materials Needed:
- Old denim jeans or denim fabric (the more worn, the better)
- Sewing machine or needle and thread
- Measuring tape
- Scissors
- Pins or fabric clips
- Iron (optional, but handy for smooth edges)
- Batting or foam (for added comfort)
Step-by-Step Instructions:
- Gather Your Denim: Raid your closet for old pairs of jeans that may not fit or have seen better days. You’d be amazed at how many you can find. Who knew your wardrobe had so much potential?
- Measure and Cut: Consider how big you want the dog bed to be. Cut your denim into several large squares or rectangles—aim for a layered approach that gives it warmth and comfort. Feel free to mix and match different shades of blue for added flair.
- Prep the Layers: If you want extra coziness, add a layer of batting or foam between the denim pieces. This will make your pup’s bed feel plush. Who doesn’t love a soft spot to curl up on?
- Pin It Together: Layer your denim pieces with batting (if using) and pin them down tightly so they don’t shift as you sew. Go ahead and channel your inner Picasso with the pin arrangement—no one’s judging here.
- Sew It Up: Start sewing around the edges, leaving a small gap so you can flip it inside out. A straight stitch works fine, but feel free to get experimental with decorative stitching if you’re feeling fancy.
- Flip and Stuff: Once you’ve sewn it up (and hopefully haven’t sewn your fingers together in the process), turn it right-side out and stuff it with soft material or extra batting. You’ll feel like a styling wizard when you see your final product.
- Finish It Off: Fold the raw edges of your gap inward and either sew it shut or use fabric glue for a quick closure. Stand back, admire your handiwork, and prepare for the ultimate doggie delight!
Optional Add-ons/Variations:
- Try using patterned or embellished denim from thrift store finds for a stylish touch. Think floral patches or funky designs that reflect your personality or your dog’s quirky nature.
- Add a side pocket to store your pup’s favorite toys. Your furry friend will appreciate having their toys close at paw, and it adds a cute, functional detail.
Pro Tip:
Consider washing your denim pieces with a fabric softener or using a fabric spray before sewing. This not only guarantees everything is clean but also helps make those adorable scraps softer and more inviting for your pup.
Plus, it gives you one less excuse to avoid laundry day—after all, DIY projects need their materials to smell great too, right?
7. Bamboo Fiber Cover Options

Are you on the hunt for a comfortable, eco-friendly option to spruce up your dog’s bed? Search no further than a bamboo fiber dog bed cover. Not only does it provide a soft place for your furry friend to snuggle, but it’s also breathable, moisture-wicking, and naturally odor-resistant—talk about luxury!
Plus, making your own cover can save you some cash while adding a personalized touch to your home.
Materials Needed:
- Bamboo fabric (enough to cover your dog bed)
- Sewing machine or needle and thread
- Measuring tape
- Scissors
- Pins or fabric clips
- Iron (optional, but helpful for neat edges)
- Elastic (if you’re creating a fitted cover)
Step-by-Step Instructions:
1. Measure Your Dog Bed: Grab that measuring tape and find the dimensions of your dog bed. Width, length, and height are key here. This is a project where getting it right makes all the difference.
2. Cut the Fabric: Once you have your measurements, it’s time to cut your bamboo fabric accordingly. For a simple flat cover, allow for a couple of inches extra on each side for seams. If you’re feeling adventurous, consider a fitted cover for a snug fit—just remember to add extra fabric for allowances.
3. Pin It Down: With your pieces cut out, it’s time to pin them together. Place the right sides of the fabric facing each other and pin along the edges. Don’t skip this step; it helps guarantee everything stays in place while you sew.
Let’s keep those pins in check—no accidental needle pokes, please.
4. Sew It Up: Now, go ahead and sew along the edges, leaving a gap. This is essential if you’re making a flat cover, but if you’re opting for a fitted one, be sure to leave a small opening to insert the elastic around the edges.
5. Turn and Finish: After sewing, flip the cover right-side out. Tug at the corners to make sure they pop out nicely.
Then, fold the raw edges of your gap inward and sew it shut or use fabric glue for a quick fix. Voila—you’ve got a lovely bamboo dog bed cover!
6. Put It On Your Dog’s Bed: Now comes the best part—put the cover on your dog’s bed! Watch your pup’s eyes light up as they discover their fresh new space to lounge.
It’s like Christmas morning, every day.
Optional Add-ons/Variations:
- Feel free to play with colors or prints to match your home’s aesthetic. A calming mint or a fun polka dot pattern can work wonders.
- If you want a little extra flair, consider adding pockets or a hem for a bit of decorative touch—because why not let your dog bed look just as stylish as you?
Pro Tip:
For added durability, pre-wash your bamboo fabric before cutting and sewing. This helps shrink it a bit, so you won’t be dealing with unexpected sizes after the first wash.
Plus, bamboo fabric gets softer with every wash, so more cuddles for your dog.
Now, grab that new fabric and show your pup some love with a snazzy bamboo dog bed cover. You’ve got this!
Extra Tips & Ideas
While you might think creating a cozy dog bed is a straightforward task, adding a few personal touches can elevate it from just functional to absolutely fabulous.
Have you thought about color schemes? Matching your dog’s bed to your home decor can be surprisingly satisfying. You could even throw in a stitched name patch, just like grandma used to do.
Consider scent, too—if your pup loves a particular blanket, integrate that into the design.
And don’t overlook the base; a non-slip mat can keep your masterpiece from sliding around like it’s auditioning for a doggy dance competition.
Remember, it’s not just about style; it’s about comfort. After all, a happy pup equals a happy YOU.
Frequently Asked Questions
What Tools Do I Need for Making a Dog Bed?
You’ll need a few essential tools for making a dog bed: a sewing machine, fabric scissors, a measuring tape, straight pins, and a sewing needle. Plus, don’t forget fabric and cushioning materials for comfort!
Can I Use Old Blankets for a Dog Bed?
Absolutely, you can use old blankets for a dog bed! While new materials offer style, those cozy, well-loved blankets hold comfort and warmth, providing your pup with a perfect snuggle space they’ll adore.
How Do I Ensure the Bed Is Safe for My Dog?
To guarantee the bed’s safe for your dog, check that no loose threads or harmful materials exist. Make sure it’s sturdy enough to support your dog’s weight and wash it regularly to maintain cleanliness.
What Are the Benefits of a Homemade Dog Bed?
A homemade dog bed gives you customization options, ensuring comfort and style while being budget-friendly. You can use materials that suit your dog’s needs and create a unique design that fits your home perfectly.
How Often Should I Clean the Dog Bed?
You might think cleaning it’s a hassle, but you should wash your dog’s bed weekly. Regular cleaning keeps it fresh and free of allergens, ensuring your pet stays comfortable and healthy all the time.
Conclusion
In the end, crafting a cozy dog bed is like building a tiny castle for your furry companion. Just remember, it’s not just about the soft fabric or fancy foam—it’s about creating a snug haven where your dog can dream of chasing squirrels in fluffy clouds. As you sew each seam, think of the joy you’ll bring. So roll up your sleeves, embrace the fun of DIY, and watch your pup sink into their new cozy retreat with pure happiness.