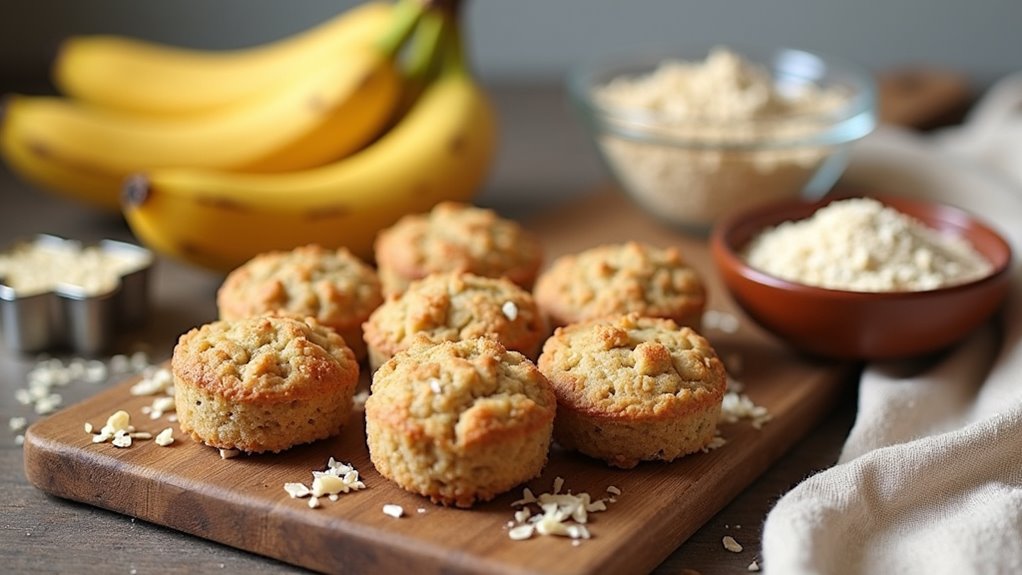
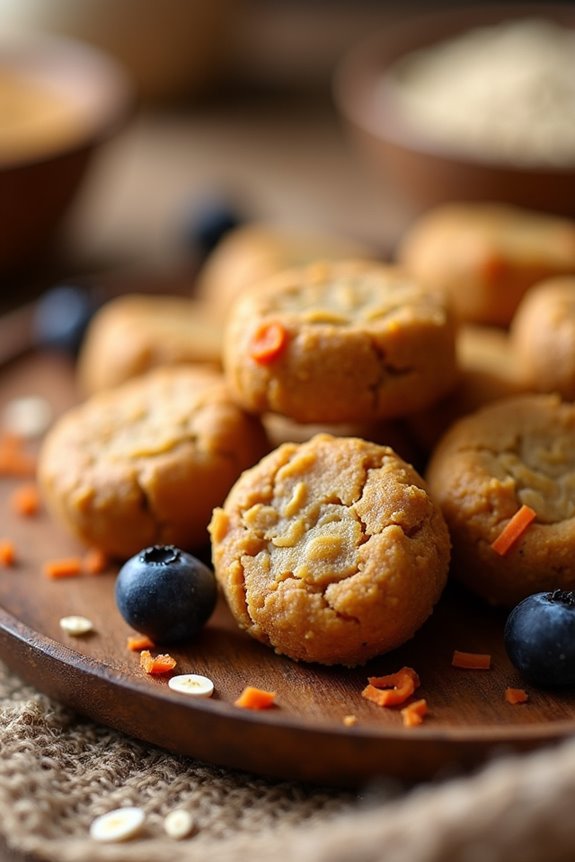
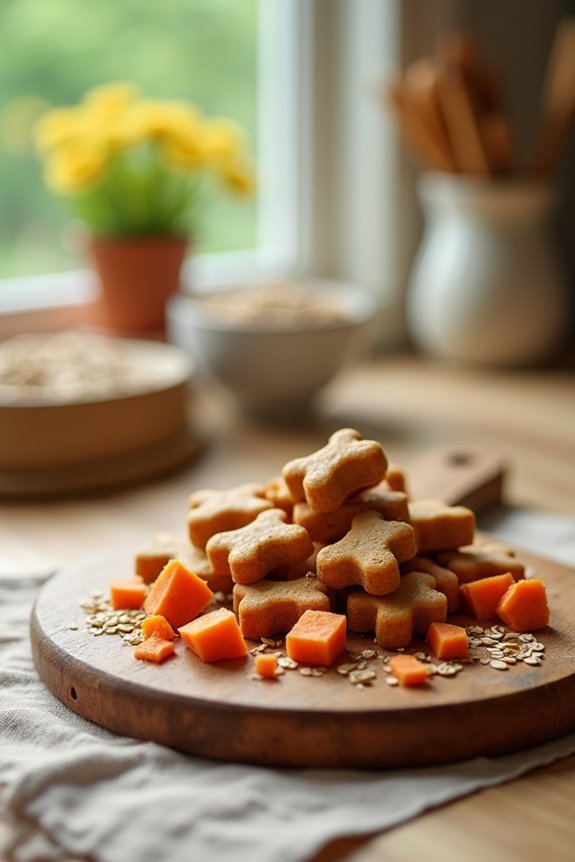
If you’ve got a senior dog, you know how important it is to keep their tails wagging and their spirits high. Homemade treats can be a game changer, don’t you think? Imagine whipping up something tasty and soft, specially designed for those precious aging teeth. You’ll be creating delightful treats like Pumpkin Oatmeal Chews or Sweet Potato and Chicken Bites—easy enough, right? Let’s plunge into some simple recipes that’ll make both you and your furry friend pretty happy.
Why Homemade?
When you think about feeding your senior dog, why wouldn’t you want to whip up something special at home? Making soft dog treats homemade isn’t just healthier, it’s an adventure you both can enjoy.
Feeding your senior dog homemade treats is a heartfelt adventure you both can savor together.
Remember the last time you bought those store-bought treats, only for your pup to wrinkle their nose at them? I feel you! When you make treats yourself, you control the ingredients—goodbye mystery meat, hello wholesome goodies. Plus, providing homemade treats often ensures better nutrition for your dog. Homemade treats can balance your dog’s diet and provide a variety of flavors that appeal to your dog’s palate, making treat time more exciting with a diverse selection.
Additionally, it’s a bonding experience. Picture yourself in the kitchen, your dog sitting by your side, tail wagging, waiting for a taste test.
With simple ingredients like pumpkin and oats, you can create delicious, soft treats that are easier on their aging teeth. While you mix, you might even find yourself snacking on the leftovers (don’t worry, I’ve done it too).
It’s cooking with a purpose, and it’s one of the best ways to show your furry friend you care. Additionally, using homemade dog treats can help address specific dietary needs, thus promoting allergy relief for your senior dog.
Dog Treat Recipes Overview
Ready to whip up some tasty treats for your senior pup?
Let’s take a quick look at a few fun recipes, like Peanut Butter Delight and the super easy Pumpkin Oatmeal Chews. Each one’s packed with flavor and love, perfect for keeping those tails wagging and your furry friend happy. Not only are these recipes simple to make, but they also use wholesome ingredients that are beneficial for your dog’s health. Homemade treats can also provide essential nutrients that contribute to your dog’s overall well-being. Additionally, using natural ingredients offers a great way to avoid preservatives and artificial additives that are found in many store-bought options. By choosing to make your own treats, you can ensure they’re tailored to meet your pet’s specific dietary needs, which is especially important for senior dogs.
1. Peanut Butter Delight Recipe
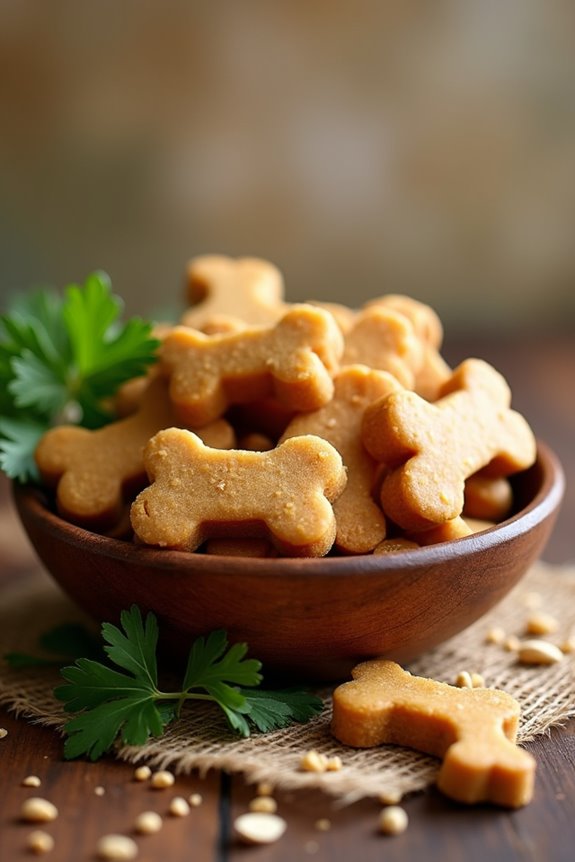
Ready to whip up some tail-wagging magic? With just a few simple ingredients, you’ll be on your way to creating peanut butter delights that your senior dog will love. Did you know that peanut butter is safe for dogs when made without harmful additives? Additionally, making homemade treats allows you to control the quality of ingredients, ensuring that your furry friend enjoys nutritional benefits without any unnecessary fillers. Let’s walk through the steps together and maybe even throw in a few tasty add-ons to keep things interesting.
Ingredients
Making homemade treats for your senior dog is a wonderful way to show them love while also keeping their health in mind. The Peanut Butter Delight recipe is super simple and, trust me, your pup will absolutely wag their tail at the smell of these baking in the oven. So, let’s gather our ingredients, and we’ll be on our way to making something delicious.
- 1 cup of whole wheat flour (make sure it’s safe for your dog)
- ½ cup of natural, unsweetened peanut butter (check that it’s xylitol-free)
- 1/4 cup of low-sodium chicken broth (homemade is best if you have time)
- 1 tablespoon of honey (a little sweetness goes a long way)
- 1 small ripe banana, mashed (great source of potassium and flavor)
See, not too many ingredients, right? And let me tell you, if you’ve got a dog at home, chances are you might already have some of these on hand. Just a few wholesome items can come together to create a treat that’ll keep your furry friend happy and healthy. How lovely is that? Plus, I can’t say enough how much easier these are to make than that sourdough loaf I tried to bake last summer. Just imagine the wagging tails when these beauties come out of the oven. Enjoy!
Step by Step Instructions
- Preheat your oven to 350°F (175°C) to get it nice and warm for baking. This is the first step to creating those delicious treats your furry friend will love.
- Gather your ingredients: unsalted peanut butter, whole wheat flour, rolled oats, and an egg. Make sure those ingredients are nearby—comfort for your canine, convenience for you.
- In a large mixing bowl, combine 1 cup of peanut butter and 1 egg. Use a whisk to blend them together until smooth and creamy, like your dog’s loveable face after a romp in the mud.
- Gradually stir in 1 cup of whole wheat flour and 1/2 cup of rolled oats. Don’t forget to fold until just combined—no need for a full workout here, just enough to bring the ingredients together (if it looks a little crumbly, you’re doing it right).
- Knead the mixture with your hands for a couple of minutes until it forms a cohesive dough. It might feel a bit sticky, but that’s okay—just think of it as bonding time with your kitchen.
- On a floured surface, roll out the dough to about 1/4 inch thick. Use a rolling pin if you have one, or a wine bottle if you’re in a pinch (no judgment here).
- Grab your favorite cookie cutter and cut out shapes from the dough. You can use bone shapes, hearts, or whatever makes you smile.
- Place them on a baking sheet lined with parchment paper—arrange them with some space in between, just like your dog does when they take a snooze.
- Bake in the preheated oven for 20–25 minutes, until they turn golden brown. The smell wafting through your kitchen will have you wondering if you can join your dog in snack time.
- Remove the treats from the oven and let them cool on a wire rack. This is important; no one wants a burnt paw.
- Cool completely before serving to your dog. Patience is key here; trust me, they’ll appreciate it.
Optional Add-ons
There’s nothing quite like treating your furry friend to something special, right?
When you whip up the Peanut Butter Delight, consider adding pumpkin puree or a dash of cinnamon. Both can make those treats even tastier.
Just remember, a sprinkle of creativity goes a long way. You want your pup drooling not just for the treat, but for the love behind it too.
2. Pumpkin Oatmeal Chews
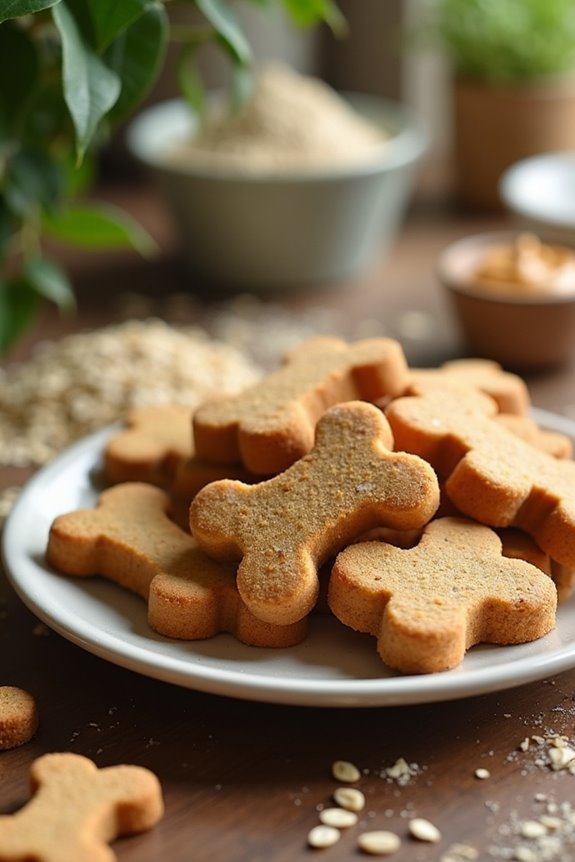
If you’re looking to whip up some tasty treats for your senior pup, pumpkin oatmeal chews are a great choice. They’re simple to make, and you probably have most of the ingredients in your pantry already. Let’s walk through the step-by-step instructions and even explore some fun optional add-ons to take these chews to the next level—because who doesn’t want to spoil their furry friend a little more?
Ingredients
When it comes to crafting tasty treats for our beloved senior pups, you want to guarantee every ingredient isn’t just delicious, but also good for them.
The great news? These Pumpkin Oatmeal Chews are super simple to whip up, and your furry friend is going to love them.
Plus, pumpkin is packed with fiber, which is perfect for those golden years. Here’s what you’ll need:
- 1 cup canned pumpkin (make sure it’s plain pumpkin, not the spiced pie filling)
- 2 cups rolled oats
- 1/2 cup peanut butter (natural, with no added sugar or xylitol)
- 1/2 teaspoon cinnamon (optional, a gentle flavor boost)
- 1/4 cup water (or more, if needed for dough consistency)
And that’s it! Just a few wholesome items you can find easily at your local grocery store.
Simple, right? And your pup will be wagging their tail yes when they get a taste of these homemade goodies. Time to get cooking!
Step by Step Instructions
1. Preheat your oven to 350°F (175°C). This is where the magic begins—let’s make those treats irresistible.
2. In a large mixing bowl, combine 1 cup of canned pumpkin and 2 cups of rolled oats. Get ready to mix it all together until it’s well blended.
Don’t rush this part; the flavors need to mingle.
3. Add 1/4 cup of unsweetened applesauce and 1 teaspoon of cinnamon to the bowl. Stir everything until it forms a thick mixture (it should be sticky but not overly wet).
If it looks like a lumpy dough, you’re on the right track.
4. Dust your countertop or a cutting board with a little flour to prevent sticking.
Don’t worry, a little mess is part of the fun!
5. Transfer your dough to the floured surface. Use your hands to knead it gently for a minute or so, just to bring it together.
You want it smooth but still thick.
6. Roll out the dough to about 1/4 inch thick. If it gets too sticky, sprinkle some flour on top.
Just imagine you’re working with playdough, but tastier.
7. Use cookie cutters to cut out shapes from the dough. You can make classic bones or whatever shapes your dog would love.
Just don’t get too attached to the leftovers—you’ll probably want a taste test, but that’s not a great idea.
8. Place the cutouts on a baking sheet lined with parchment paper. Confirm they’re spaced out—they need their own room to grow, just like us.
9. Bake the treats for 25–30 minutes, or until they’re golden brown.
Your kitchen is about to smell like heaven—but resist the urge to taste them.
10. Remove from the oven and allow them to cool completely on a wire rack.
Patience, my friend. It’s hard, but trust me—you want the best for your dog.
Cool completely before serving to your dog. They’ll be drooling with anticipation.
Optional Add-ons
After whipping up a batch of those tasty pumpkin oat treats, you might find yourself wondering how to tweak the recipe for even more variety.
Why not add some peanut butter for extra flavor, or a sprinkle of cinnamon for that warm hug in a treat?
A handful of blueberries can also give them a fruity twist.
Your pup won’t know what hit ’em!
3. Sweet Potato and Chicken Bites
Are you ready to whip up some tasty Sweet Potato and Chicken Bites for your furry friend? These treats aren’t only simple to make, but they also pack a nutritious punch. Let’s tackle the ingredients, go through the step-by-step instructions, and even sprinkle in some optional add-ons to really wow your pup.
Ingredients
When it comes to whipping up some delightful dog treats for our senior pups, keeping things simple and safe is the name of the game. Sweet potato and chicken bites aren’t only yummy but also packed with nutrients that your furry friend will appreciate, especially as they get a little older.
Here’s what you’ll need to gather for this tasty treat:
- 1 cup cooked, mashed sweet potato (about 1 medium sweet potato)
- 1/2 cup cooked, shredded chicken (make sure it’s plain, no seasonings)
- 1/4 cup rolled oats
- 1/4 cup whole wheat flour (or any dog-friendly flour)
- 1 egg
- A pinch of cinnamon (optional, but many dogs seem to like it)
That’s it! Just a handful of wholesome ingredients that you probably already have on hand.
Trust me; your dog will love these as much as they love that squeaky toy that just can’t seem to be destroyed. Plus, making treats at home means you control what’s in them—no sneaky additives, just pure, tasty goodness.
Now, let’s get baking!
Step by Step Instructions
1. Preheat your oven to 350°F (175°C) so it’s nice and toasty by the time you’re ready to bake.
2. Peel and chop 1 large sweet potato into small chunks, then place them in a pot. Cover with water and bring to a boil over medium heat. Cook until they’re tender, about 15–20 minutes.
You want them soft enough to mash, not like the rock-hard sweet potatoes I’ve accidentally served before.
3. While the sweet potatoes are boiling, take about 1 cup of cooked chicken (shredded or chopped works) and set it aside. Make sure it’s plain chicken—no seasonings or spices to worry about.
4. Once the sweet potatoes are ready, drain them and mash them in a bowl until smooth. Think about how you’re mastering your mashing skills here, think of it as a workout for your arms.
5. Add the chicken to the sweet potato mash. Then, crack 1 egg into the mixture to help bind everything together. Whisk it all together until it’s combined.
6. Gradually add 1 ½ cups of whole wheat flour to the mixture, stirring well to avoid the dreaded “flour cloud.” Mix until smooth, but don’t overmix— just until it forms a dough.
7. Lightly dust your work surface with flour and roll the dough out to about ½ inch thick.
8. Use cookie cutters or a knife to cut the dough into fun shapes. Maybe a bone for added cuteness?
9. Place the shaped treats on a baking sheet lined with parchment paper, leaving a little space between each one. They need their personal space too, right?
10. Bake for 25–30 minutes, or until they’re golden brown and smell super tempting (even to you—resist that treat!).
11. Allow the treats to cool completely on a wire rack before serving them to your furry friend. The last thing you need is a dog leaping for a hot treat.
Optional Add-ons
If you’re looking to spice up those sweet potato and chicken bites, you’re in for a treat—literally.
Try mixing in some peas or carrots for added flavor, or toss in a sprinkle of turmeric for health benefits. You can even add a dollop of peanut butter because who can resist peanut butter?
Get creative, and your pup will love you even more.
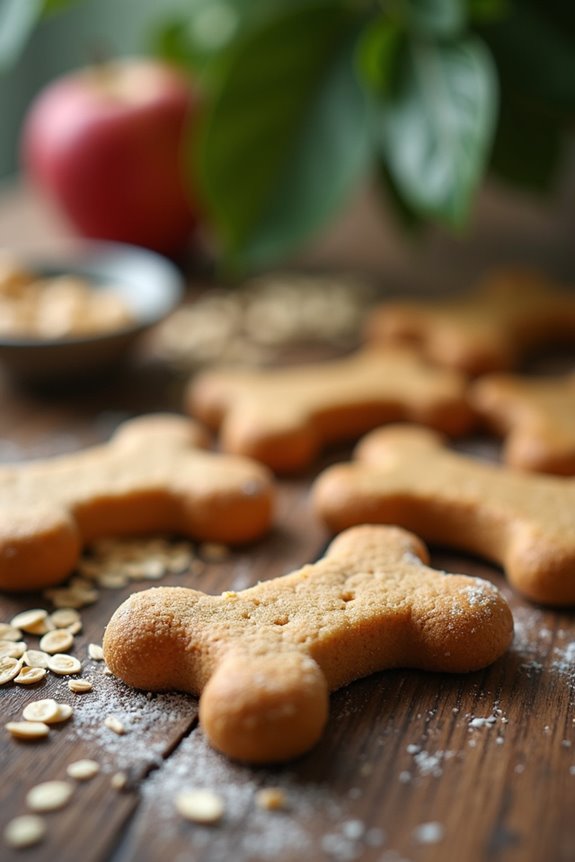
4. Apple Carrot Pupcakes Recipe

Let’s get ready to whip up some Apple Carrot Pupcakes that your furry friend will absolutely love. You’ll need just a few simple ingredients, and I promise the step-by-step instructions are easy enough that even I can follow them without burning something (this is a huge win for me). Plus, if you’re feeling adventurous, I’ve got some optional add-ons that’ll make these treats even tastier for your pup.
Ingredients
When you’re making treats for your senior dog, it’s all about keeping things healthy and tasty, right? You want to whip up something that not only smells divine but also brings a wag to their tail. So, let’s gather our ingredients for these delicious Apple Carrot Pupcakes!
- 1 cup of whole wheat flour
- 1/2 cup of unsweetened applesauce
- 1/2 cup of grated carrots
- 1/4 cup of peanut butter (make sure it’s xylitol-free!)
- 1 egg
- 1/4 cup of low-sodium chicken broth
- Optional: 1 tablespoon of honey (if your pup doesn’t have a sweet tooth, you can skip this)
See? Nothing too fancy, just good ol’ ingredients that’ll have your furry friend drooling in no time. And honestly, if I can bake these without burning the house down, you can definitely nail it too. Just remember to check your pantry first—last time I went shopping, I accidentally bought an entire truckload of flour. Oops! Happy baking!
Step by Step Instructions
1. Preheat your oven to 350°F (175°C) so it’s nice and warm when your treats are ready to bake.
2. Grab a large mixing bowl and combine 1 cup of grated carrots and 1 cup of unsweetened applesauce. Give them a good stir until they’re evenly mixed.
3. In a separate bowl, whisk together 1 cup of whole wheat flour, 1 teaspoon of baking powder, and a pinch of cinnamon. This is where the magic begins—who doesn’t love a little spice in their life?
4. Slowly add the flour mixture to the carrot and applesauce mix, folding gently until just combined.
(Don’t overmix the batter—it should be slightly lumpy, like my last attempt at pancake flipping.)
5. Spoon the batter into a muffin tin lined with paper liners or lightly greased. Fill each cup about three-quarters full to give those pupcakes some room to rise and shine.
6. Bake for 25–30 minutes, or until a toothpick inserted into the center comes out clean and your kitchen smells like a bakery (and isn’t that the best part?).
7. Once baked, remove the pupcakes from the oven and let them cool in the pan for about 10 minutes.
Then transfer them to a wire rack to cool completely.
8. Cool completely before serving to your dog.
(Trust me, no dog wants their treat served hot. It’s like giving them a hot potato—no fun at all!)
Optional Add-ons
Adding some fun optional ingredients to your Apple Carrot Pupcakes can really take these treats to the next level and make snack time even more exciting for your furry friend.
Consider mixing in some peanut butter for a creamy texture, or adding pumpkin for extra flavor. You could even sprinkle in a bit of cinnamon.
Your dog won’t know what hit ‘em, and you might just enjoy it too.
5. Peanut Butter Banana Chews

Let’s whip up some Peanut Butter Banana Chews for your furry friend. You’ll love how easy they’re to make with just a few ingredients, and your dog will definitely thank you for the tasty treats. Plus, there are a few fun add-ons you might want to contemplate, just to keep things interesting for your pup!
Ingredients
Alright, let’s get to the fun part – making some tasty treats for your furry friend. Peanut Butter Banana Chews aren’t only easy to whip up, but they also pack in those yummy flavors that dogs adore.
Just imagine your pup’s wagging tail as you bake these goodies. So, grab those measuring cups, and let’s gather the essentials.
- 1 cup peanut butter (make sure it’s xylitol-free, because that stuff is a no-go for dogs)
- 1 ripe banana, mashed (the riper the better, they’re sweeter)
- 1 ½ cups rolled oats (they’re great for digestion and energy)
- 1 egg (for that binding magic)
- 2 tablespoons honey (just a little sweetness goes a long way, but you can skip this if your dog is watching their sugar intake)
There you go! These ingredients are super straightforward and probably things you already have in your kitchen.
It’s like a mini pantry raid that results in wagging tails instead of empty shelves. Let’s get cooking and show those senior pups some love with these homemade treats. They deserve the best, don’t you think?
Step by Step Instructions
- Preheat your oven to 350°F (175°C). Think of it like setting the mood for your dog’s special treat.
- In a medium bowl, mash 2 ripe bananas until smooth but leave a few little chunks in there for texture (your dog will thank you for it).
- Add 1 cup of peanut butter to the mashed bananas; blend until well combined. Don’t worry, it doesn’t need to be perfect—rustic is a vibe too.
- Gradually stir in 2 cups of rolled oats, mixing well until everything is incorporated (you might channel your inner baker here, so don’t be shy).
- If desired, fold in ½ cup of shredded carrots or blueberries for an extra burst of flavor and nutrition (why not add a little color?).
- Scoop out tablespoon-sized portions of the dough and roll them into balls. Place them on a baking sheet lined with parchment paper, about 2 inches apart.
- Gently flatten each ball with a fork or your fingers (this is where you can pretend you’re a professional treat artist).
- Bake in the preheated oven for 25–30 minutes, watching until the edges become slightly golden brown. Your kitchen will smell like a peanut butter paradise.
- Remove them from the oven and let them cool on the baking sheet for a few minutes before transferring them to a wire rack.
- Cool completely before serving to your dog. They’ll appreciate the wait, trust me.
Optional Add-ons
While you might think the basic Peanut Butter Banana Chews are perfect on their own, just wait until you see how a few optional add-ons can take these treats to the next level.
Try mixing in some oats for added texture or even some crushed pumpkin for a tasty twist.
Your dog will be tail-wagging happy. Trust me, they’ll appreciate the upgrade!
6. Carrot and Sweet Potato Bites
Ready to whip up some tasty Carrot and Sweet Potato Bites for your furry friend? You’ll need a few simple ingredients and step-by-step instructions that even a novice chef can handle. Plus, I’ll throw in some optional add-ons to really make those tail wags happen!
Ingredients
When it comes to making homemade dog treats for your senior pup, simplicity is key. We want these goodies to be delicious, nutritious, and easy on their tummies.
These Carrot and Sweet Potato Bites are perfect for that. Now, let’s get to the shopping list. You’ll find all these ingredients in your pantry or the produce section, making them pretty easy to track down. Ready? Here we go:
- 1 cup grated carrots
- 1 cup mashed sweet potato (cooked and cooled)
- 1 ½ cups whole wheat flour (or gluten-free if needed)
- 1 large egg
- 2 tablespoons peanut butter (make sure it’s xylitol-free)
- 1 tablespoon honey (optional but adds a touch of sweetness)
That’s it!
These ingredients not only sound yummy but are also safe for your furry friend. No need to worry about any hidden nasties here—just wholesome flavors that’ll have your dog wagging their tail, begging for more.
And let’s be honest, who wouldn’t want to spoil their pup with treats they can feel good about? Get those paws prepped; we’re about to bake some tail-wagging goodness!
Step by Step Instructions
1. Preheat your oven to 350°F (175°C) to get things nice and cozy for those treats. Trust me, your dog will thank you for it.
2. Peel and chop 1 cup of carrots and 1 cup of sweet potatoes into small pieces. Remember, we want them soft enough for our dogs to chew.
3. Boil a pot of water and cook the chopped vegetables until they’re tender, about 10-15 minutes. You want them fork-tender—think of it as a mini spa day for their veggies.
4. Drain the vegetables and let them cool slightly before mashing them together in a bowl. (You can pretend you’re making baby food if that helps with the process.)
5. In a separate bowl, mix 1 cup of whole wheat flour and 1/2 cup of rolled oats. Whisk them together like you’re preparing for a big doughy showdown.
6. Add the mashed carrot and sweet potato mixture into the flour and oats. Fold gently until everything is combined.
(Avoid overmixing; nobody wants their treats tough.)
7. If the dough feels too sticky, sprinkle in a little extra flour until you can shape it easily. You want it manageable, not a wrestling match.
8. On a floured surface, roll out the dough to about 1/2-inch thick. Cut out shapes using cookie cutters or simply slice into squares—no pressure on artistry here.
9. Place the shaped pieces on a baking sheet lined with parchment paper. Space them out a bit because they’ll puff up slightly while baking.
10. Bake for 25-30 minutes, or until the treats turn a lovely golden brown. The kitchen should smell divine—you’ll want to be sure to sneak a taste (but probably best not to).
11. Remove them from the oven and let them cool completely before serving to your dog.
After all, you don’t want to be on the wrong end of a potential doggy disappointment.
Optional Add-ons
If you want to take those carrot and sweet potato bites to the next level, consider adding in some optional ingredients that can make your dog’s treats even more delicious.
How about a sprinkle of parsley for fresh breath or a dollop of peanut butter for extra flavor?
You know your pup best, so get creative—blend in their favorite flavors, and watch them gobble it up!
7. Chewy Banana Coconut Snack
Now, let’s get into the tasty world of chewy banana coconut snacks. You’re going to love how easy these treats are to whip up, and your furry friend will certainly thank you for it. We’ll cover the ingredients, step-by-step instructions, and even some fun optional add-ins, making this a treat that’s sure to impress both you and your senior pup.
Ingredients
Making treats for our senior pups is always a fun endeavor, and the Chewy Banana Coconut Snack is no exception. This recipe isn’t just delicious; it’s also simple to whip up with ingredients you probably already have in your pantry.
So, let’s gather what you need to create these paw-sitively delightful bites.
- 2 ripe bananas, mashed (they’re like a comfort food for dogs, and senior pups love them)
- 1 cup unsweetened shredded coconut (trust me, your dog will go bananas for this)
- 1 cup oat flour (you can make this by blending rolled oats in a blender until fine, super easy)
- 1/4 cup coconut oil, melted (great for their coat and helps make these treats chewy)
- 1/4 cup honey (a little sweetness never hurt, right?)
- 1 egg (a protein boost that’s great for our furry friends)
That’s it! Just gather these simple, dog-friendly ingredients, and you’re on your way to creating something both tasty and healthy for your beloved senior dog.
Looking forward to sharing the next steps with you soon.
Step by Step Instructions
1. Preheat the oven to 350°F (175°C) so it’s nice and hot when the treats are ready to go in.
2. Gather your ingredients: 2 ripe bananas, 1 cup oat flour, ½ cup shredded unsweetened coconut, and 1 egg.
(You might wanna make sure those bananas are sufficiently squishy—no one likes a chewy treat, right?)
3. In a mixing bowl, mash the bananas using a fork until they’re smooth.
It’s okay to leave a few small chunks for texture; your dog won’t complain.
4. Add the egg to the mashed bananas and mix until well combined.
It should look a bit like banana pudding—yum.
5. Gradually stir in the oat flour, then fold in the shredded coconut.
Don’t worry if the dough seems a bit sticky; that’s how we understand it’s going to be chewy!
6. Line a baking sheet with parchment paper to keep things easy when it’s time to clean up.
7. Using a spoon, drop tablespoon-sized portions of the mixture onto the prepared baking sheet.
Flatten them slightly with the back of the spoon for even baking—think of it as giving your treats a little spa day.
8. Bake for 20 to 25 minutes, or until the edges turn golden brown.
Keep an eye on them, as every oven can be a little quirky.
9. Remove the treats from the oven and let them cool on a wire rack.
10. Cool completely before serving to your dog.
(Trust me, you don’t want to burn any little tongues!)
Optional Add-ons
After your delicious dog treats have cooled down, there’s still a chance to amp up their appeal by adding a little something special to the mix.
How about a sprinkle of cinnamon or a dollop of peanut butter? You can even fold in some shredded carrots or applesauce.
Your pup won’t know what hit them, and you’ll feel like a treat-making genius.
Use Fresh, Organic Ingredients
Although you might think any old ingredient will do when whipping up treats for your senior pup, using fresh, organic ingredients makes a world of difference.
Imagine the joy on your dog’s face when they savor a treat made from sweet potatoes or pumpkin, fresh off the vine. Not only do organic ingredients taste better, but they’re also free from nasty chemicals and preservatives.
When picking what to include, think about the goodness of real chicken, not some pre-packaged junk. Your pup deserves the best, right?
Plus, those vibrant carrots or apples packed full of vitamins can help support their aging bodies.
And let’s be real—you wouldn’t want to eat something questionable yourself, would you?
Frequently Asked Questions
Can I Substitute Ingredients for My Dog’s Allergies?
Absolutely, you can substitute ingredients for your dog’s allergies. Just make sure the replacements still provide essential nutrients and maintain the treat’s chewy texture. Always consult your veterinarian before making any significant changes to your dog’s diet.
How Should I Store Homemade Dog Treats?
You should store homemade dog treats in an airtight container within the fridge for up to a week or freeze them for longer shelf life. Make sure to label and date them for easy access!
How Long Do These Treats Last?
These treats typically last about one week at room temperature. If you refrigerate them, they can last up to two weeks. For longer storage, consider freezing them, which can extend their life to several months.
Can I Freeze These Dog Treats?
Yes, you can freeze these dog treats! Just seal them in an airtight container or freezer bag, and they’ll last for up to three months. When you’re ready, thaw them before giving them to your pup.
What Are the Signs My Dog Dislikes a Treat?
Your dog might turn away, refuse to eat, or sniff the treat without tasting it. You could also notice signs of discomfort, like whining, pawing at their mouth, or excessive drooling when they dislike a treat.