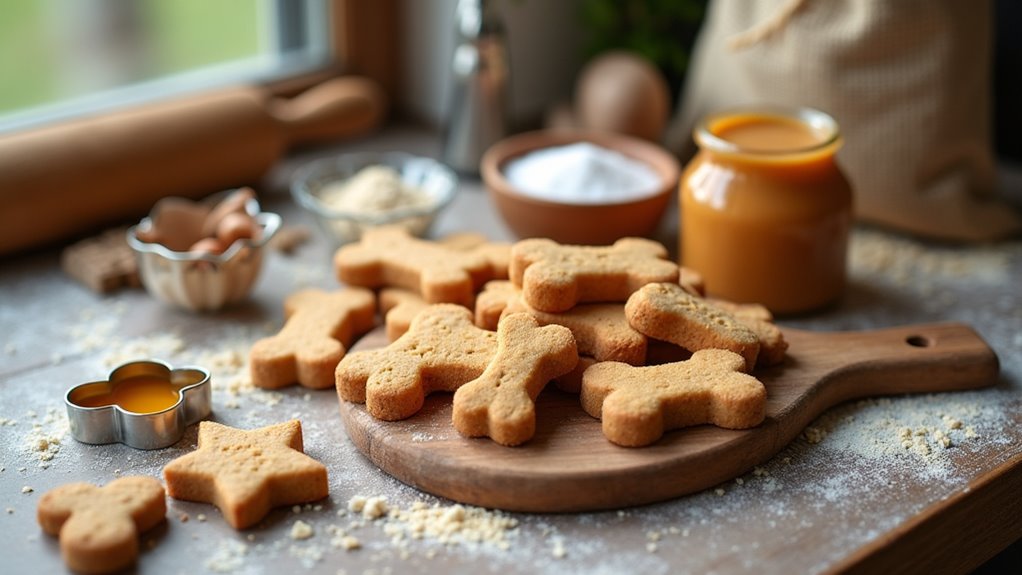
Looking to pamper your pup with some tasty treats? Baking homemade peanut butter dog treats is a fun way to show your furry friend some love. You get to control what’s in them, plus they smell amazing while they bake. Trust me, your kitchen will be filled with tantalizing aromas that might just make you wish you could sneak a bite (but let’s not go there). So, what’s on the menu today? Let’s check out some drool-worthy recipes that are sure to make your dog’s tail wag.
Why Homemade?
When it comes to making treats for your furry friend, why not go homemade? You know your pup deserves the best, and peanut butter dog treats homemade are a perfect way to spoil them.
They’re simple to whip up, and you can control the ingredients, ensuring there’s no sneaky stuff like preservatives or artificial flavors. Plus, your kitchen will smell amazing while you bake—seriously, who doesn’t love the smell of peanut butter? Additionally, homemade dog treats can be tailored to suit your dog’s dietary needs or preferences, making it easier to keep them healthy. Dogs thrive on nutritious snacks that contribute to their overall well-being, and gluten-free options are a great choice for pups with intolerances.
Picture this: a wagging tail and puppy eyes as you present your masterpiece. It’s a win-win. Not only do you get to bond with your furry buddy during the process, but your pup gets a tasty reward. Delicious peanut butter apple sauce treats are another fantastic option to consider!
You can try different shapes for the treats too, which mightn’t impress Martha Stewart, but it’ll definitely get tail wags! So grab that jar of peanut butter and let’s get baking—your best friend’s taste buds will thank you.
Flavorful Treat Recipes
Are you ready to whip up some delightful treats your pup will adore? From a creamy peanut butter and pumpkin blend to tasty peanut butter banana bites, these recipes pack a flavor punch. Homemade treats are not only a great way to bond with your pet, but they also allow you to control the ingredients for your dog’s health. In addition to peanut butter, you can incorporate sweet potato dog treats to add even more nutrition to your pup’s snack time. Baking your own snacks can be a fun way to create delicious homemade treats that your furry friend will love. Plus, preparing from scratch ensures you use only healthy ingredients that contribute to your dog’s overall well-being.
Let’s get cooking, because your furry friend deserves some delicious snacks, right?
1. Peanut Butter and Pumpkin Blend

Let’s whip up something special for your pup with a peanut butter and pumpkin blend that’s sure to get tails wagging. You’re going to need just a few simple ingredients to start, and I promise the step-by-step instructions will make it a breeze. Plus, homemade dog treats are a great way to ensure your dog enjoys healthy and tasty snacks! If you want to make it even more exciting, I’ll share some optional add-ons that your dog will love, just like my buddy Max does—he basically begs for these treats! To make these treats even more beneficial, consider adding nutrient-rich pumpkin, as it provides numerous health benefits for dogs.
Ingredients
When you’re whipping up some homemade dog treats, you want to make sure you’re using ingredients that are just as yummy as they’re safe for your furry friend.
It’s all about creating a tasty blend that they’ll wag their tails for. Here’s what you need for these delightful Peanut Butter and Pumpkin treats.
- 1 cup of peanut butter (look for the unsweetened version, no xylitol!)
- ½ cup canned pumpkin (pure pumpkin, not the spiced pie filling)
- 2 cups oat flour (it’s easy to make by blending oats in a food processor)
- 1 egg (for binding everything together)
- ½ teaspoon cinnamon (just a dash of flavor, but skip this if your dog is sensitive)
- 2 tablespoons honey (optional, but who doesn’t love a hint of sweetness)
That’s all there’s to it! Simple, right?
These ingredients come together easily to make a delightful dough, but it’s also safe enough that even I wouldn’t mind sneaking a taste (though you probably shouldn’t).
Just remember to keep an eye on the quantities, and feel free to adjust based on what your pup loves most.
Happy baking!
Step by Step Instructions
1. Preheat your oven to 350°F (175°C). Get that heat going; your treats will need a warm home.
2. In a large mixing bowl, combine 1 cup of peanut butter and 1 cup of pumpkin puree. Whisk them together until well blended.
(It should look like a deliciously thick paste—try not to let your dog sneak a lick just yet!)
3. Add 2 ½ cups of whole wheat flour and 1 egg to the mixture. Mix until everything is combined, but don’t overthink it!
(Your dough should come together—think of a soft play-dough consistency.)
4. If the dough feels too sticky, sprinkle in a bit more flour. But don’t go crazy—just a little should do the trick!
5. On a floured surface, roll out the dough to about ¼ inch thick.
(A rolling pin works wonders here, but don’t fret if you don’t have one; your hands can do the job, too.)
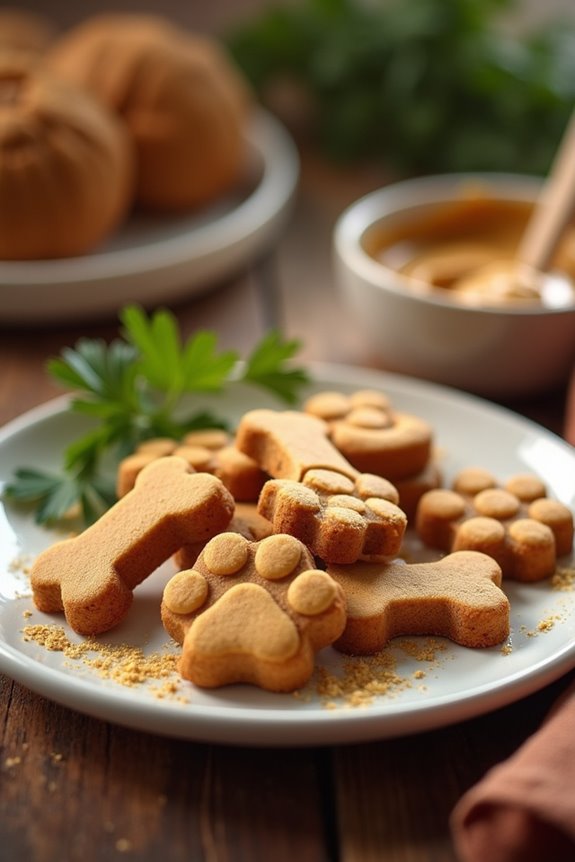
6. Use cookie cutters to shape your treats into fun designs—bones, paws, or whatever gets you and your pup excited.
(Get creative; it’s a treat-filled party!)
7. Place the cut-outs on a baking sheet lined with parchment paper. Make sure they’re spaced out a bit because they might puff up just like your favorite snack does in the oven.
8. Bake in your preheated oven for 25–30 minutes, or until they turn a delightful golden brown.
(Keep an eye on them; you want them to be chewier, not crunchy!)
9. Remove the treats from the oven and let them cool on a wire rack. This step is essential—burned tongues are no fun, even for dogs.
10. Cool completely before serving to your dog. They’ll love these homemade goodies—just like that first bite you take of your own favorite dessert. Enjoy watching your furry friend go wild!
Optional Add-ons
While you’re whipping up those tasty peanut butter and pumpkin dog treats, why not take it a step further and explore some optional add-ons?
Think about mixing in a bit of honey for sweetness or some oats for texture.
Maybe even a sprinkle of cinnamon? Your furry friend will appreciate the extra flavors, and you’ll feel like a gourmet dog chef in no time.
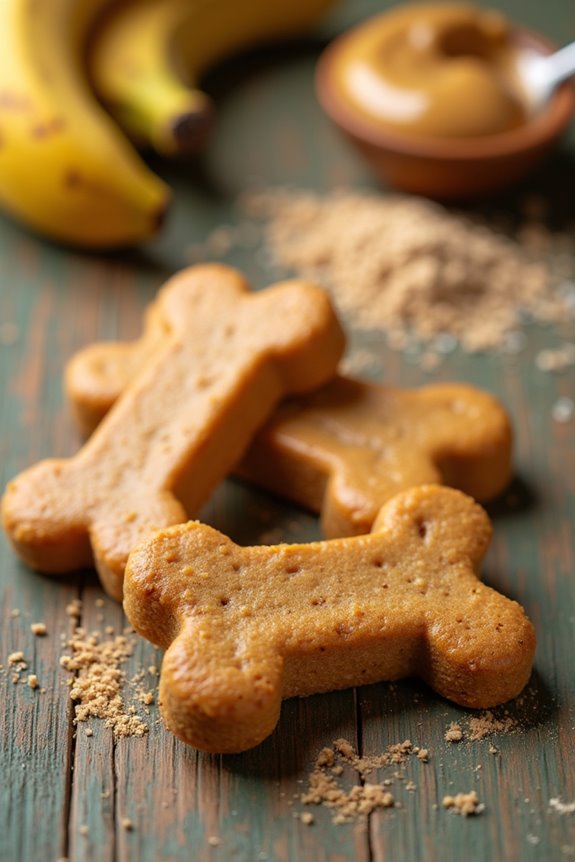
2. Peanut Butter and Banana Bites
Are you ready for some tasty Peanut Butter and Banana Bites that your pup will love? You’ll need just a few simple ingredients and some easy-to-follow steps, which makes this recipe a breeze. Plus, if you want to get a little creative, I’ll throw in some optional add-ons that’ll make these treats even more special for your furry friend.
Ingredients
Making treats for your furry best friend is a wonderful way to show you care. Plus, who doesn’t love a little tail wag of approval?
These Peanut Butter and Banana Bites aren’t just tasty; they’re simple to whip up with everyday ingredients you probably already have in your pantry. So, grab your mixing bowl, and let’s make snack time a little more special for your pup.
- 1 ripe banana, mashed
- 1 cup unsweetened peanut butter (make sure it doesn’t contain xylitol; that stuff is a no-go for dogs)
- 1 cup whole wheat flour (or use oat flour for a gluten-free option)
- 1/4 cup rolled oats
- 1/4 cup water (or adjust as needed for the desired consistency)
That’s it—simple, right? No need to overthink it. Just mix, roll, and bake. Your dog will be giving you those puppy-dog eyes in no time.
And honestly, if they could help out in the kitchen, they would, probably with a flour-covered nose just to make it a little messier. But isn’t that part of the fun?
Step by Step Instructions
- Preheat your oven to 350°F (175°C) to get things started on the right foot. A warm oven makes everything better, right?
- In a large mixing bowl, combine 1 cup of peanut butter, 1 ripe banana (mashed), and 1 cup of whole wheat flour. The smell of peanut butter should already have you grinning—just wait till your pup gets a sniff.
- Mix the ingredients together until they form a dough (it doesn’t have to be perfect; just get it all combined). If it feels too sticky, you can sprinkle in a bit more flour until it’s manageable.
- Lightly flour your countertop and roll out the dough to about 1/4 inch thick. You want it thick enough to hold its shape but not so thick it takes a workout to chew.
- Use cookie cutters to make fun shapes (bone shapes are always a hit!). If cookie cutters aren’t your style, you can also just use a knife and cut squares or triangles. No creativity left? No worries—dogs appreciate the effort regardless.
- Place the cut-out treats on a baking sheet lined with parchment paper. Give those cuties a little space; they might puff up just a tad while baking.
- Bake in the preheated oven for 25–30 minutes, or until they’re golden brown (just like a perfect cookie). Keep an eye on them to avoid any burnt pup treats—trust me, nobody wants that.
- Remove from the oven and let the treats cool on a wire rack. They may look too delicious to resist, but patience is key here.
- Cool completely before serving to your dog. That’s right, let them cool—because we’re all about those happy pups without the burnt tongues.
Optional Add-ons
If you’re on a quest to create even more scrumptious treats for your furry friend, those Peanut Butter and Banana Bites are where it’s at.
Imagine the look on your pup’s face when they taste that creamy peanut butter combined with sweet banana. You could even sprinkle in a dash of cinnamon for a unique twist.
Who knew dog treats could be so delightful for both of you?
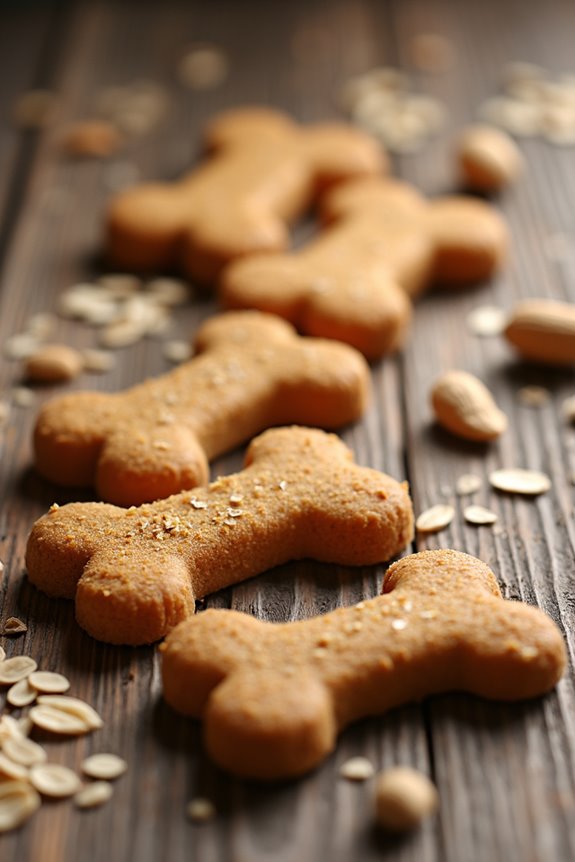
3. Peanut Butter Oatmeal Cookies
Ready to whip up some tasty Peanut Butter Oatmeal Cookies for your pup? You’ll need just a few simple ingredients, and I promise it’s easier than it sounds. Let’s tackle this step by step, and don’t forget, you can always mix in some fun add-ons to make them extra special!
Ingredients
When it comes to whipping up some tasty treats for your furry friend, you really can’t go wrong with peanut butter and oatmeal. They’re not just good for you—your dog will be drooling in no time.
Plus, these ingredients are simple and easy to find. You might already have a lot of them in your pantry, just waiting to make your pup’s day.
So, let’s plunge into what you’ll need to whip up these delicious homemade peanut butter dog treats.
- 1 cup whole wheat flour
- 1 cup rolled oats
- ½ cup unsweetened peanut butter (make sure it’s xylitol-free)
- 1/2 cup water (or enough to make a dough)
- 1 egg
That’s it! Just five easy ingredients, and before you know it, your dog will be sniffing around, excitedly waiting for these wholesome snacks.
You can almost hear the tail wagging, can’t you?
Step by Step Instructions
1. Preheat your oven to 350°F (175°C). This will get it nice and hot while you whip up those tasty treats.
2. In a large mixing bowl, combine 1 cup of peanut butter, 1 cup of rolled oats, and 1/2 cup of whole wheat flour.
Don’t get too worried about measuring—hey, a little extra peanut butter never hurt anyone.
3. Mix the ingredients together until well combined.
If it feels like a sticky mess, that’s a good sign! Just don’t let your dog sneak a taste yet.
4. Add 1/2 cup of water gradually, mixing until the dough comes together.
Aim for a somewhat stiff consistency; it shouldn’t be soup, just a nice, firm dough.
5. On a clean, floured surface, roll out the dough to about 1/4 inch thick.
Not thinner! Or they might turn into crunchy little Frisbees.
6. Use cookie cutters to create fun shapes.
Bones, stars, or whatever floats your boat—your pooch won’t care as long as it’s peanut butter flavored.
7. Line a baking sheet with parchment paper, and place the cut-out treats on it.
Give them a little space, like they’re at a dog park.
8. Bake the treats for 25–30 minutes or until they’re golden brown and smell incredible.
You might want to set a timer, or you’ll get distracted by Netflix.
9. Remove the baking sheet from the oven and allow the treats to cool on a wire rack.
This will take about 15 minutes, and trust me, your dog will be right there, giving you those pleading puppy eyes.
10. Cool completely before serving to your dog.
It will be worth the wait when you see that wagging tail!
Optional Add-ons
If you’ve ever wondered how to take those peanut butter dog treats to the next level, you’re in for a delightful surprise.
Adding a sprinkle of oatmeal creates a chewy, satisfying texture that’ll make your pup go wild.
You can even toss in some mashed bananas or applesauce for a fruity twist.
Trust me, your furry friend will thank you, tail wagging with joy!
4. Sweet Potato Peanut Butter Snacks
Let’s whip up some delicious Sweet Potato Peanut Butter Snacks that your dog will absolutely love. With just a few simple ingredients and easy step-by-step instructions, you’ll have tasty treats ready in no time—what’s not to love? Plus, you can even jazz them up with some fun optional add-ons for a little extra flair, because who doesn’t like a surprise?
Ingredients
Making these homemade sweet potato peanut butter dog treats is a fun and rewarding way to pamper your pup.
Dogs love the tasty combination of sweet potatoes and peanut butter, and trust me, your furry friend will be begging for more. The best part? You probably already have most of these ingredients in your kitchen.
- 1 cup pureed sweet potato (cooked and mashed, or canned)
- 1/2 cup natural peanut butter (make sure it’s xylitol-free)
- 2 cups whole wheat flour (or a gluten-free alternative if needed)
- 1/4 cup rolled oats
- 1/4 cup chicken broth (low sodium is best)
These simple ingredients combine to create a treat that’s not just delicious but nutritious for your dog.
Just imagine watching your pup nibble away, totally in their happy place. How could you resist that?
Step by Step Instructions
To whip up these sweet potato peanut butter dog treats, gather your ingredients and let’s get started. Your furry friend will be drooling with delight as they sniff the sweet aroma wafting through your kitchen.
- Preheat your oven to 350°F (175°C) to get it nice and warm for baking.
- Peel and chop 1 medium sweet potato into chunks.
- Boil the sweet potato in water for about 15 minutes or until tender, then drain and let it cool for a bit.
- In a large mixing bowl, mash the cooked sweet potato until smooth. (Think creamy, like a dreamy whipped potato—but don’t get too carried away, it’s for your pup.)
- Add ½ cup peanut butter to the sweet potato and mix until well blended. (Use natural peanut butter, with no added sugar or xylitol, since we want to keep our furry friends healthy!)
- Crack in 1 egg and stir the mixture until everything is thoroughly combined.
- Gradually add 2 cups of whole wheat flour to the mix, stirring until a dough forms. (If it feels too sticky, sprinkle in a little more flour.)
- Lightly flour your countertop and turn the dough out onto it. Knead the dough gently for a minute or two, just until it’s smooth.
- Roll out the dough to about ¼ inch thick. (Feel free to channel your inner rolling pin master—just don’t get too ambitious with thickness!)
- Use cookie cutters to cut shapes from the dough and place them on a lined baking sheet.
- Bake the treats in the preheated oven for 25–30 minutes, or until they start to turn golden brown. (Your kitchen will smell amazing; you might even forget these aren’t for you.)
- Once baked, remove from the oven and let cool on a wire rack.
Cool completely before serving to your dog. Enjoy watching their tail wag with joy!
Optional Add-ons
While your sweet potato peanut butter treats are sure to be a hit, why not kick things up a notch with some optional add-ons that pack extra flavor and fun?
Toss in a bit of coconut flour for a chewy texture, or some shredded carrots for crunch. Your pup’s taste buds will thank you, and you’ll be the superstar baker of doggy delights.
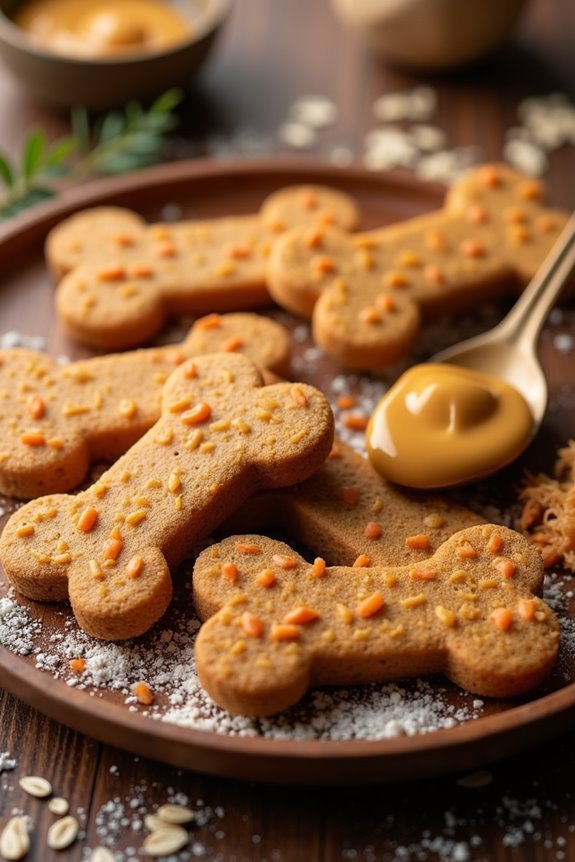
5. Peanut Butter Carrot Crunchies

Ready to whip up some Peanut Butter Carrot Crunchies? You’ll love how easy it’s to gather the ingredients and follow my step-by-step instructions that’ll make your dog drool in anticipation. And hey, if you want to amp up the flavor, stick around for some optional add-ons that can really take these treats to the next level.
Ingredients
Making your furry friend some homemade peanut butter dog treats isn’t only fun, but it also lets you know exactly what’s going into their snack.
These Peanut Butter Carrot Crunchies are simple, wholesome, and your pup will absolutely love them. Plus, the ingredients are easy to find – no weird stuff.
So, what do you need? Let’s get right into it.
- 1 cup natural peanut butter (make sure it’s xylitol-free)
- 1 cup whole wheat flour (or oat flour if your dog is wheat-sensitive)
- 1 cup grated carrots (fresh is best for that added crunch)
- 1/4 cup water (adjust as needed)
- 1 egg (which helps bind everything together)
And there you have it! Just a handful of dog-friendly ingredients that are safe, tasty, and nutritious.
Who knew being a dog chef could be this easy? I mean, if only they could appreciate my plating skills as much as I do!
But hey, they’re just after the treats, right?
Step by Step Instructions
- Preheat your oven to 350°F (175°C) so it’s nice and toasty by the time you’re finished mixing.
- In a large mixing bowl, combine 1 cup of whole wheat flour, 1/2 cup of rolled oats, and 1/2 cup of finely grated carrots. Don’t be shy about making a little mess here—dogs can’t wait to jump in, so let’s create some pizzazz.
- In another bowl, mix together 1/2 cup of natural peanut butter and 1/4 cup of water until smooth. (Remember, no added sugar or salt—your furry friend deserves the good stuff.)
- Slowly fold the peanut butter mixture into the dry ingredients. Use a spatula, and mix until everything is well combined but don’t overdo it—your treat should have some personality, not be a doorstop!
- Sprinkle a little flour on your clean countertop, and transfer the dough. Roll it out to about 1/4 inch thick. If the dough gets sticky, don’t panic, just add a tad more flour.
- Use a cookie cutter of choice—maybe a bone or a paw print—to cut out treat shapes. Place them on a parchment-lined baking sheet, leaving a little space between each treat. They need their space, after all!
- Bake in the preheated oven for 25–30 minutes, or until the treats are golden brown and your kitchen smells like a cozy bakery.
- Let the treats cool completely on a wire rack. No one likes a hot snack, not even your pup.
- Once cooled, serve them up to your dog and watch that tail wag.
Store any extras in an airtight container for up to a week (if they last that long!).
Optional Add-ons
While your dog’s tail is still wagging from those homemade peanut butter treats, why not shake things up a bit by adding some peanut butter carrot crunchies into the mix?
They’re super easy to whip up—just mix peanut butter, grated carrots, and oats. Roll them into fun shapes, bake until crunchy, and watch your pup go wild.
Trust me, they’ll love it.
6. Peanut Butter Apple Chews
Let’s whip up some delicious Peanut Butter Apple Chews your dog will go nuts for. You’ll need just a handful of simple ingredients, and I promise, there’s nothing tricky about the process—trust me, if I can do it without burning down the kitchen, so can you. And hey, if you’re feeling adventurous, I’ll share some optional add-ons to make these treats even more scrumptious.
Ingredients
Alright, let’s get into the deliciously tail-wagging world of homemade peanut butter dog treats. Your pup is definitely going to love these, and you’ll feel so good knowing they’re made with wholesome ingredients. To whip up these Peanut Butter Apple Chews, you only need a handful of simple items. Let’s check them out:
- 1 cup whole wheat flour (or oat flour if your furry friend is gluten-sensitive)
- 1/2 cup unsweetened applesauce (make sure it’s just apples and nothing else)
- 1/2 cup peanut butter (look for natural versions without added sugar or xylitol)
- 1/4 cup water (add a bit extra if the dough is too dry)
- 1/4 cup grated apple (a little texture is always a hit)
- 1 tablespoon honey (optional, if you want an extra touch of sweetness)
See how easy that was? Just pop these ingredients into your shopping cart, and you’re one step closer to making your furry friend’s day just a little brighter. Now, let’s get baking! Or, you know, I guess we can call it… “chewing.”
Step by Step Instructions
- Preheat your oven to 350°F (175°C). Get that warmth going, so your dog treats can bake to perfection.
- In a bowl, mix together 1 cup of natural peanut butter and ½ cup of unsweetened applesauce. Make sure you grab the natural peanut butter—no added sugars or salts.
- Add 2 ½ cups of whole wheat flour and 1 teaspoon of cinnamon to the mixture. Stir it all together until it forms a dough (it might feel a little sticky, but that’s okay).
- If the dough is too dry, you can add a splash of water—just a few tablespoons will do. Mix until you get a nice, cohesive dough (like a smooth ball).
- On a floured surface, roll out the dough to about ½ inch thick. This is where the fun begins; you can shape it however you want or use a cookie cutter to make neat shapes.
- Place the cut-out shapes on a lined baking sheet. Give them a little space; they don’t need to be hugging each other during baking.
- Bake for 25-30 minutes, or until they look golden brown and your kitchen smells like a bakery (seriously, your dog will be dreaming of these).
- Once they’re done, take them out of the oven and let them cool on the baking sheet for a few minutes. Then, transfer them to a wire rack; you want them to cool completely.
- Store the treats in an airtight container, and remember: they can last up to a week (but I doubt they’ll with your furry friend around).
Cool completely before serving to your dog. They’ll be wagging their tails in gratitude.
Optional Add-ons
When you want to spice up your dog’s snack time, why not try making some Peanut Butter Apple Chews?
These treats are super easy. Just mix peanut butter, grated apples, and a bit of flour.
Roll into balls and bake until golden. Your pup’s tail will wag with joy.
Seriously, what’s better than seeing your furry friend enjoy something you made? They’ll love you even more.
7. Peanut Butter and Honey Treats
Now, let’s whip up some peanut butter and honey dog treats that’ll have your pup’s tail wagging in no time. You’ll need just a few simple ingredients, and I’ll guide you through the steps—trust me, it’s easier than it sounds! Plus, we can chat about some tasty optional add-ons that’ll make these treats even more special.
Ingredients
Making homemade peanut butter dog treats is super easy and fun! Not to mention, your furry friend will absolutely love these tasty bites filled with wholesome ingredients. Let’s get right to it so we can treat our pups to something yummy. Here’s what you’ll need:
- 1 cup of natural peanut butter (make sure it doesn’t contain xylitol)
- 1/2 cup of honey
- 2 cups of whole wheat flour
- 1/4 cup of rolled oats
- 1/4 cup of water (more or less as needed)
- 1 egg
That’s it! Just simple, everyday items you can find at any grocery store. If your pup loves peanut butter like mine does, then they’re in for a real treat. And hey, if your kitchen ends up looking like a flour tornado hit it, just remember – it’s the love you put into it that counts (and a quick vacuum later).
Step by Step Instructions
- Preheat your oven to 350°F (175°C) to get it nice and warm for baking.
- In a mixing bowl, combine 1 cup of natural peanut butter and ½ cup of honey. Stir until it’s well blended and smooth—it should look like a delicious sticky paste (I promise it won’t be tempting to taste… well, maybe just a little).
- In a separate bowl, whisk together 2 cups of whole wheat flour and a pinch of salt. This will give our treats some texture and flavor.
- Gradually add the flour mixture to the peanut butter and honey blend. Mix until it forms a dough; don’t worry if it’s a bit crumbly (you can totally fix it).
- If the dough is too crumbly, add a splash of water one tablespoon at a time until it holds together nicely. Be careful not to make it too wet—nobody wants mushy dog treats.
- Roll out the dough on a lightly floured surface to about ¼ inch thick. This is where you can release your inner baker—just have fun with it!
- Use cookie cutters to create fun shapes. Bones, hearts, stars—you name it; your pup will love whatever you make.
- Place the treats on a baking sheet lined with parchment paper. Make sure they’re spaced out so they’re not cozying up in the oven (we want ‘em to bake, not hug).
- Bake in the preheated oven for 25–30 minutes, or until they’re golden brown and smell heavenly. Don’t forget to set a timer so you don’t end up baking them into oblivion.
- Once they’re done, remove them from the oven and let them cool on a wire rack.
Cool completely before serving to your dog. Those tails will wag like crazy, and trust me, that’s the best reward.
Optional Add-ons
While your pups are enthusiastically waiting for their homemade peanut butter treats, why not jazz things up a bit with some tasty optional add-ons?
A drizzle of honey adds that sweet twist, and oats give crunch for added joy.
Try mixing in some mashed bananas or pumpkin too.
Trust me, they won’t just wag their tails; they’ll be over the moon.
Who can resist?
Baking Time Adjustments
Sometimes, even the best bakers have to adjust their plans, especially when it comes to those tasty peanut butter dog treats. You might think you nailed it, but your oven’s quirks can throw a wrench in your timeline. If the treats look a bit doughy, don’t panic. A few extra minutes could do the trick, but keep a close eye. Burned treats aren’t as fun as they sound.
Also, remember that different sizes matter—tiny treats take less time than big ones. If you’re unsure, check them a couple of minutes early to avoid surprises.
And if your pup’s giving you that cute head tilt during the wait, don’t worry. It’s all part of the baking experience. You’ll want to find that perfect golden brown, not a sad, dark lump.
Frequently Asked Questions
Can I Use Almond Butter Instead of Peanut Butter?
Yes, you can use almond butter instead of peanut butter. Just make sure your dog isn’t allergic to almonds. It’ll still make a tasty treat, but adjust the recipe if needed for consistency and flavor preferences.
How Should I Store the Dog Treats?
You should store the dog treats in an airtight container, keeping them in a cool, dry place. For longer freshness, refrigerate them. Just make sure to let them cool completely before sealing.
Are These Treats Suitable for Dogs With Allergies?
They might not be suitable for dogs with allergies, especially if your pup has a sensitivity to peanuts or gluten. Always check the ingredient list and consult your vet before introducing new treats to their diet.
How Long Do These Treats Last?
These treats last about one to two weeks at room temperature in an airtight container. If you refrigerate them, they can last up to a month. Freezing extends their freshness even longer.
Can I Freeze the Peanut Butter Dog Treats?
Yes, you can freeze the peanut butter dog treats! Just make sure they’re cooled completely, then store them in an airtight container or freezer bag. They’ll last a couple of months in the freezer.