Making your own dog treats is not only fun, it’s surprisingly easy too. If you’ve ever been baffled by the ingredients in store-bought snacks, you’re not alone. You can feel good whipping up tasty goodies like peanut butter and pumpkin treats or cheesy chicken bites. Trust me, your pup will appreciate the effort. If you think you can’t cook, think again. You might be surprised how simple it really is to get started. Want to discover some yummy recipes that’ll have your dog begging for more?
Why Homemade?
When you think about it, why not spoil your furry friend with homemade treats? Easy homemade dog treats aren’t just a fun activity; they’re a way to show your pup just how much you care. You can control the ingredients, ensuring you’re using healthy options without any weird additives. Plus, they’ll taste way better than store-bought ones. Your dog will appreciate that little extra effort, trust me. Homemade banana dog treats specifically are great because they can provide important vitamins and nutritional benefits for your pup. Additionally, many homemade dog treat recipes incorporate natural ingredients that are beneficial for your dog’s health. Creating these treats can also be a great way to include quality ingredients that you know will nourish your pet.
Imagine the joy on your dog’s face when they catch a whiff of fresh peanut butter biscuits straight out of the oven—or whichever flavor you choose. It’s all about customizing to their tastes! And hey, it doesn’t take a culinary genius to whip these up. If I can manage it without burning the kitchen down, so can you! So, grab those ingredients, put on your favorite playlist, and let’s create some tail-wagging goodness together.
The best part? You’ll find that homemade treats can be healthier than many store-bought options, giving you peace of mind about what your pup is eating. Your pup will love you even more.
Delicious Dog Treat Ideas
Got a sweet tooth? Try some sweet potato chews or banana and oat biscuits—trust me, they’re a hit, even if I’ve accidentally tried one myself (not my best moment). These homemade peanut butter and banana dog treats are not only easy to make, but they are also packed with nutritional benefits that your furry friend will love. Furthermore, pumpkin can also provide essential vitamins that contribute to your dog’s overall well-being. Additionally, homemade ice cream with dog-safe ingredients like yogurt can be a refreshing treat for hot days. Furthermore, pumpkin is a great source of fiber and vitamins that can aid in your dog’s digestion and overall health.
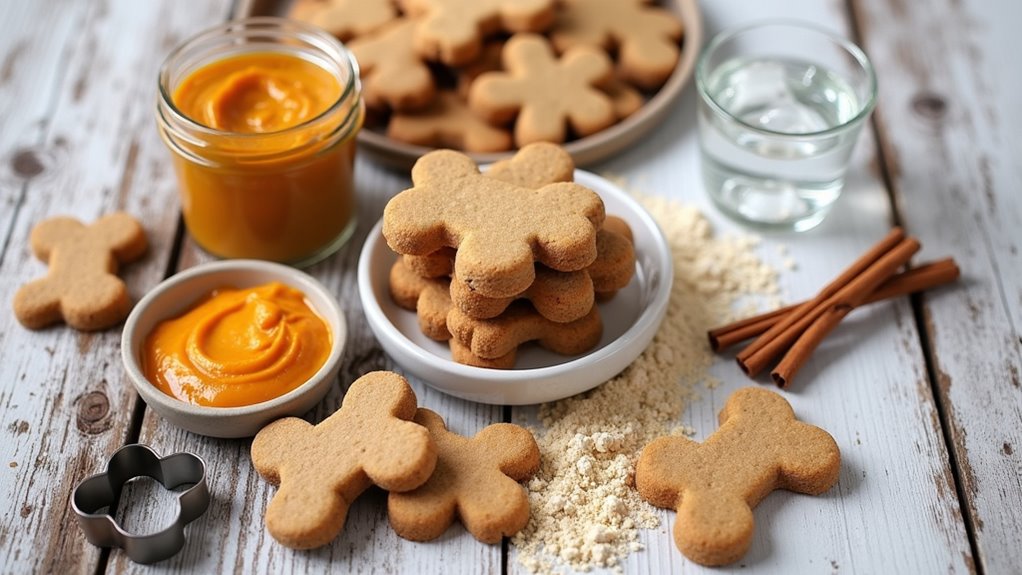
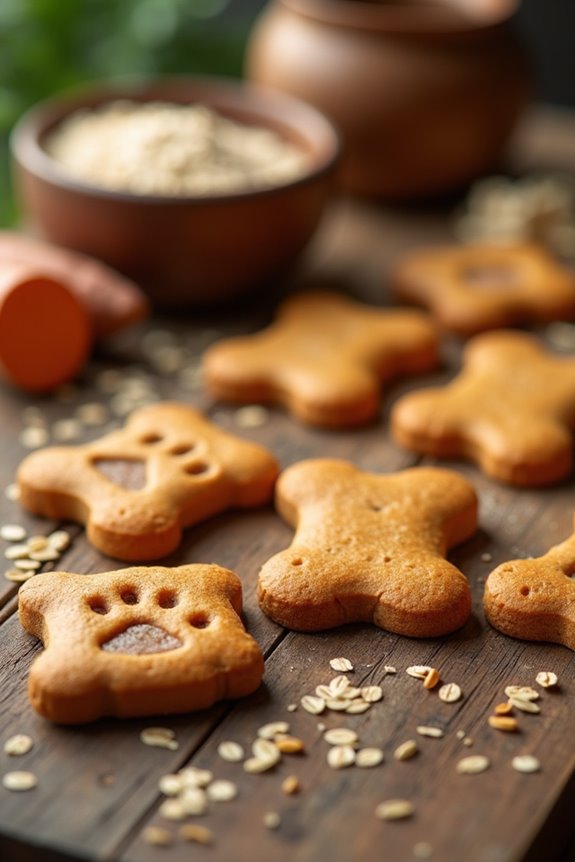
1. Peanut Butter and Pumpkin Treats
Let’s whip up some delicious peanut butter and pumpkin treats that your dog will absolutely love. You’ll need just a few simple ingredients, and I’ll share step-by-step instructions so you won’t feel lost in the kitchen. Plus, I’ll throw in some fun optional add-ons to make these goodies even more special—because why not spoil your furry friend a little? To make these treats even more exciting, you can try adding peanut butter apple sauce to the mixture for a flavorful twist! Did you know that two-ingredient dog treats are not only easy to make but also offer a nutritious alternative to store-bought snacks?
Ingredients
When it comes to whipping up some delicious dog treats, peanut butter and pumpkin is a winning combo. Not only do dogs love the taste, but these ingredients also come with some health benefits.
Pumpkin is great for digestion, and peanut butter is a delightful source of protein. It’s basically a treat worth wagging a tail for, isn’t it?
So, let’s get to the fun part—the ingredients. We want to keep it simple here, so your furry friend can enjoy these homemade goodies without any fuss.
Here’s what you’ll need:
- 1 cup of whole wheat flour (or a gluten-free alternative if needed)
- ½ cup of pumpkin puree (make sure it’s pure pumpkin and not the spiced pie mix)
- ¼ cup of peanut butter (look for unsweetened, xylitol-free options)
- 1 egg (large and fresh, just like your pup wants)
- ¼ cup of water (or maybe a bit more if the dough is too dry)
And that’s it! With just a handful of ingredients, you can create bakery-worthy treats fit for any canine connoisseur.
Easy peasy, right? Now, let’s roll that dough and get baking!
Step by Step Instructions
- Preheat your oven to 350°F (175°C) so it’s nice and warm by the time you’re ready to bake.
- In a large mixing bowl, combine 1 cup of pumpkin puree and 1/2 cup of peanut butter. Use a spatula to mix until smooth—it’s okay if it looks a bit like a Jackson Pollock painting.
- Add 2 cups of whole wheat flour and 1/2 teaspoon of cinnamon to the bowl. Stir until just combined. (Don’t overmix; the dough should be slightly crumbly but hold together.)
- If the dough feels too sticky, sprinkle a little more flour in and gently knead it with your hands. Just don’t go overboard or you’ll end up with dry treats, and that’s no fun for anyone.
- Roll the dough out on a floured surface to about 1/4 inch thick. Use cookie cutters to shape the treats—bones, paws, or whatever your heart desires. Just know you might end up with a few “creative” shapes.
- Place the cut-out shapes onto a baking sheet lined with parchment paper. Leave a little space between them, so they don’t decide to hold hands while baking.
- Bake for 25–30 minutes, or until the treats are golden brown and the aroma fills your kitchen (you might’ve to resist the temptation to taste them yourself).
- Remove the treats from the oven and let them cool on a wire rack. Patience is key here; if they’re too hot, you risk burning a tongue…and that’s not fun for anyone.
- Cool completely before serving to your dog. They’ll practically be sitting at your feet, begging for a taste—just like kids at a cookie jar.
Optional Add-ons
After you’ve mastered the basic pumpkin and peanut butter treats, why not sprinkle a little creativity into the mix?
Try adding some shredded carrots for crunch or even a dash of cinnamon for that extra warmth.
Your pup won’t know what hit them! Just remember, everything in moderation.
A little twist could turn those basic treats into gourmet goodies they’ll crave.
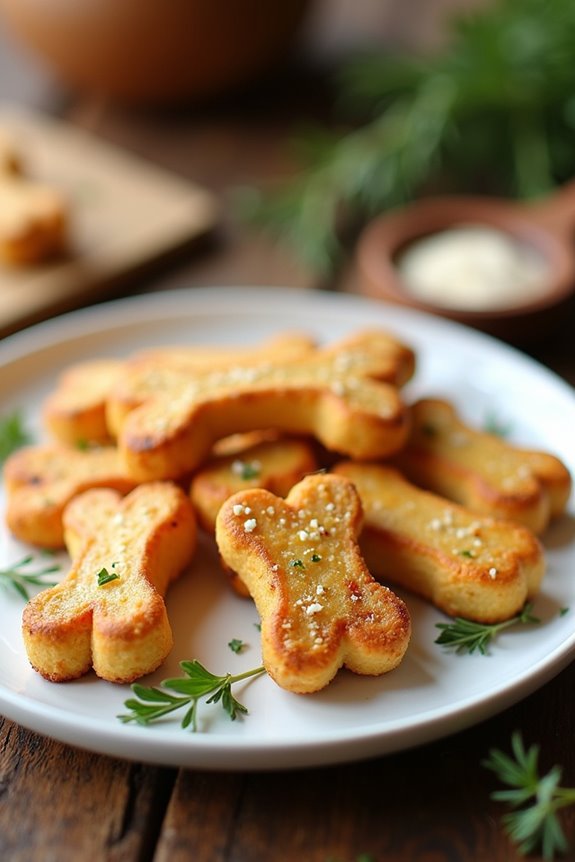
2. Cheesy Chicken Bites Recipe
Let’s whip up some Cheesy Chicken Bites that your pup will go nuts for. You’ll need a few simple ingredients and a step-by-step guide that makes the process a breeze. And if you’re feeling adventurous, I’ll toss in some optional add-ons to really kick these treats up a notch.
Ingredients
When you think of homemade dog treats, nothing beats the mouthwatering combination of cheese and chicken. Your furry friend is bound to wag their tail in delight. This Cheesy Chicken Bites recipe isn’t only simple to whip up, but it also uses ingredients that are easy to find and perfectly safe for your pup. So, let’s grab our aprons and get ready to spoil our dogs a little. Here’s what you’ll need:
- 1 cup of cooked, shredded chicken
- 1 cup of whole wheat flour
- ½ cup of shredded cheddar cheese
- 1 egg
- 2 tablespoons of chicken broth (low sodium is best)
- 1 tablespoon of olive oil
That’s it—easy-peasy! With these ingredients, you’re just moments away from treating your fur baby to something special. Now, who’s ready to become their pup’s favorite chef?
Step by Step Instructions
Get ready to treat your pup to something truly special with these cheesy chicken bites. Not only are they easy to make, but your dog will be barking for more! Follow these steps, and soon you’ll have a batch of tasty dog treats that are sure to impress.
1. Preheat your oven to 350°F (175°C) so it’s nice and warm when your treats are ready to go in.
2. In a medium pot, boil 1 cup of water for cooking your chicken.
3. Add 1 cup of chopped chicken breast to the boiling water and cook for about 10–15 minutes, or until fully cooked and no longer pink in the center.
(Make sure you’re not trying to serve your furry friend raw chicken—we want to keep those tails wagging, not stomachs churning).
4. Drain the chicken and allow it to cool slightly before shredding it into small pieces.
5. In a mixing bowl, combine the shredded chicken with 1 cup of shredded cheddar cheese, 1/2 cup of oat flour, and 1 egg.
Mix well, ensuring everything is well incorporated. (Just picture your dog watching with anticipation—pressure’s on. No pressure).
6. Spread the mixture onto a parchment-lined baking sheet and flatten it out to a 1/4-inch thickness.
7. Use a cookie cutter (or a knife, hey, no judgments here) to cut the treats into fun shapes.
8. Bake for 25–30 minutes, or until golden brown and firm to the touch.
(Trust me, the smell wafting through your kitchen will be heavenly!).
9. Remove the treats from the oven and let them cool completely on a wire rack.
10. Once they’re cool, serve them up to your furry friend and watch those tail wags of joy!
(And maybe snap a quick pic for social media—because, let’s be honest, your dog is more Instagram-worthy than you are).
Optional Add-ons
While cheesy chicken bites are already a hit, why not elevate them with some tasty add-ons? You could mix in some diced carrots or sweet potatoes for extra nutrition.
How about a sprinkle of parsley for fresh breath? You might even try adding a bit of peanut butter for a sweet twist. Your pup will love the flavor variety, and you’ll feel like a dog treat genius.
3. Sweet Potato Chews Recipe
If you’re looking for a tasty treat your pup will love, sweet potato chews are a fantastic option.
They’re simple to make with just a few ingredients, but don’t worry—I’ll walk you through every step.
And hey, if you’re feeling adventurous, I’ll toss in some fun add-ons to jazz them up even more!
Ingredients
Making sweet potato chews for your furry friend isn’t just easy, it’s also a lot of fun. There’s something oh-so-satisfying about creating treats that aren’t only tasty but also good for your pup.
Plus, your dog will love you even more for it. So, let’s gather some simple ingredients, and get started on this drool-worthy adventure.
- 2 medium-sized sweet potatoes (Try to find ones that feel firm and sturdy, just like your dog’s loyalty)
- 1 tablespoon of olive oil (This will help the chews crisp up nicely)
- 1 teaspoon of cinnamon (Just a pinch of this adds a delightful flavor; trust me, your pup will have a perky tail)
- A dash of salt (If you want, but dogs usually don’t need it. Just a tiny pinch for flavor, if you’re feeling fancy)
- Optional: A sprinkle of peanut butter (Make sure it’s xylitol-free, of course. It’s a dog’s best friend, just like you)
And there you have it! These ingredients aren’t only safe, but they’re also packed with goodness.
Step by Step Instructions
- Preheat your oven to 350°F (175°C) so it’s nice and warm for baking those treats.
- Peel and chop 1 large sweet potato into small cubes (the smaller, the faster they cook).
- Boil a pot of water, then add the sweet potato cubes and cook for about 15 minutes or until they’re soft enough to mash.
- Drain the sweet potatoes and let them cool for a few minutes until they’re not too hot to handle.
- In a large mixing bowl, mash the sweet potato using a fork or potato masher until it’s smooth and creamy (no lumps here please).
- Add 1 ¼ cups of whole wheat flour and 1 egg to the bowl, and mix everything together until a dough forms (don’t be afraid to get your hands in there).
- If the dough is too sticky, sprinkle in a little more flour until it’s manageable—not a sticky mess.
- Roll out the dough on a floured surface to about ¼ inch thick, then use cookie cutters to cut out fun shapes (you know your pup would love a bone or paw print).
- Place the shapes on a baking sheet lined with parchment paper, making sure they’re spaced out (nobody likes to be squished).
- Bake in the preheated oven for 25–30 minutes, or until the treats are golden brown and hard to the touch.
- Let the treats cool completely before serving to your dog (we don’t want to burn those little tongues).
Enjoy the tail wags and happy barks from your pup!
Optional Add-ons
While your sweet potato treats are cooling, why not elevate snack time with some tasty add-ons?
You could mix in peanut butter or drizzle some yogurt on top for a creamy twist.
Or try crumbling some treats, giving your pup a crunchy layer.
If your kitchen’s a mess already, what’s a little extra flour? Your dog won’t mind—trust me.
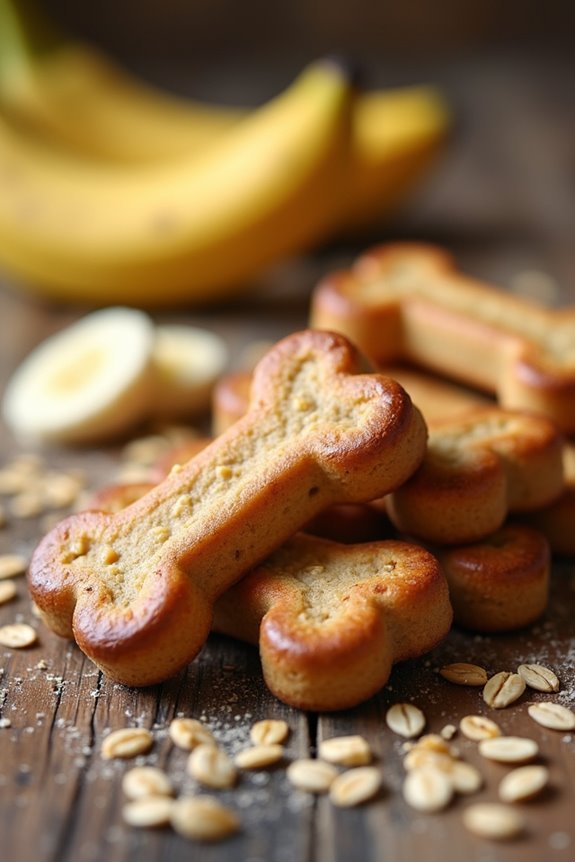
4. Banana and Oat Biscuits
Ready to whip up some scrumptious Banana and Oat Biscuits for your pup? You’ll only need a few simple ingredients, and I promise, it’s easier than putting together a jigsaw puzzle—trust me, I’ve been there and got stuck on the border pieces. Let’s break it down step by step, and if you’re feeling adventurous, I’ll throw in some fun optional add-ons too!
Ingredients
If your furry friend loves treats (and let’s be honest, who doesn’t?), then these banana and oat biscuits will have them tail-wagging in no time.
They’re super easy to make—perfect for those moments when you want to give your pup a little something special without breaking the bank or the rules of safe doggie cuisine.
Plus, you probably already have most of these ingredients tucked away in your kitchen. So, let’s gather what you need!
- 1 ripe banana (the mushier, the better)
- 1 cup rolled oats
- 1/4 cup peanut butter (make sure it’s xylitol-free)
- 1/4 cup water (or a splash more, if you need it)
- 1/2 cup whole wheat flour
With these simple ingredients, you’ll create a tasty masterpiece that’s not only fun for your dog, but also safe and nutritious.
Who knew you could go from kitchen novice to dog treat chef in just a few short steps? Enjoy the snuggles and the slobbery kisses that come with a homemade treat.
Step by Step Instructions
- Preheat your oven to 350°F (175°C). This is essential—no one wants soggy treats.
- In a large mixing bowl, mash 2 ripe bananas with a fork until smooth. Picture a banana smoothie—only, you know, for your dog.
- Add 1 cup of rolled oats to the mashed bananas. Stir to combine until it looks like a lovely, sticky mixture.
- Mix in 1 cup of whole wheat flour. This is where the magic happens; the dough will start to come together.
- Pour in 1/4 cup of water to help blend everything. If it feels too dry, add a splash more—your dog won’t mind a little extra moisture.
- Use your hands to knead the dough in the bowl for about 1 minute. It should be slightly tacky but not overly sticky. Think of it like a science experiment.
- On a floured surface, roll out the dough to about 1/4 inch thick. The less perfect it is, the more rustic (and homemade) it will look.
- Cut out shapes using cookie cutters or just a knife if you’re feeling super casual. Bone shapes are always a hit—who doesn’t love a good dog bone?
- Place the cut shapes onto a baking sheet lined with parchment paper. No one wants a stick-on accident.
- Bake for 25–30 minutes until they’re golden brown and your kitchen smells like a bakery. Cooking magic at work.
- Let the treats cool completely on a wire rack. Patience is a virtue—your pup won’t enjoy a hot biscuit.
- Store the leftovers in an airtight container. Or, if you’re like me, just watch them disappear.
Cool completely before serving to your dog. They’ll love you for it, probably with sloppy kisses and more tail wags than you can count.
Optional Add-ons
While your banana and oat biscuits are delightful on their own, there are plenty of ways to jazz them up and make them even more tail-wag-worthy.
Consider adding a bit of peanut butter for that extra richness, or sprinkle some cinnamon for a cozy flavor.
If you’re feeling adventurous, try mixing in shredded carrots—your pup might just think they’re gourmet treats.
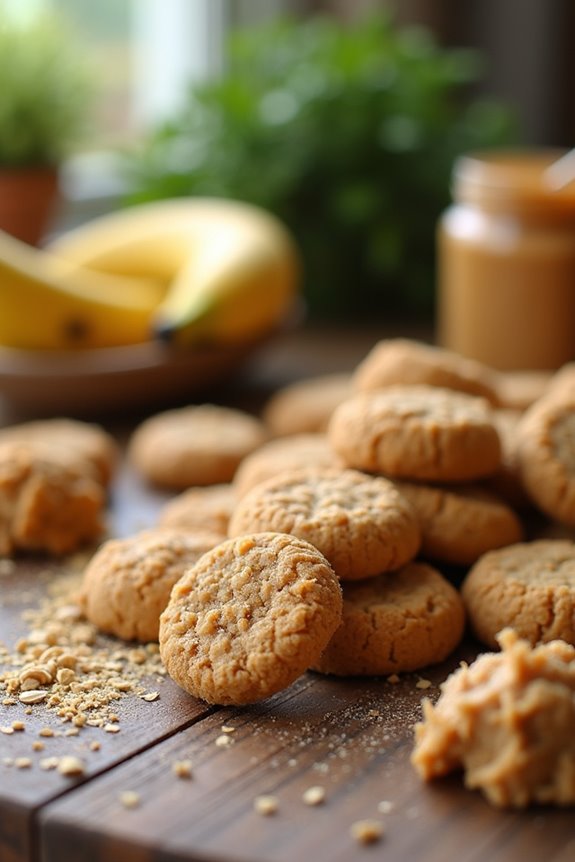
5. Peanut Butter and Banana Bites
Ready to whip up some Peanut Butter and Banana Bites that’ll make your pup’s tail wag? You just need a few simple ingredients, easy-to-follow instructions, and maybe some fun add-ons if you’re feeling adventurous. Let’s get started on making these tasty treats that’ll have your furry friend begging for more!
Ingredients
When it comes to whipping up some tasty treats for our furry friends, it’s all about keeping things simple and safe. These Peanut Butter and Banana Bites are a perfect example of a delicious and nutritious snack that your pup will love. With just a handful of easy-to-find ingredients, you’ll have everything you need for a tail-wagging good time. Just imagine your dog, eyes wide, tail wagging, anticipating those yummy bites! Are you ready? Let’s gather the goods.
- 1 ripe banana, mashed (the riper, the better—dogs love that natural sweetness)
- 1 cup of peanut butter (make sure it’s Xylitol-free; that stuff is a no-go for pups)
- 2 cups of whole wheat flour (or you can use oat flour if your dog is sensitive to wheat)
- 1/4 cup of rolled oats (just the plain ones; we don’t want anything fancy here)
- 1/4 cup of water (may adjust based on consistency)
- 1 egg (to help bind it all together; yes, we’re getting fancy with protein!)
Step by Step Instructions
- Preheat your oven to 350°F (175°C) so it’s nice and warm for your treats.
- In a large mixing bowl, mash 1 ripe banana with a fork until smooth. You want it creamy but not like baby food, right?
- Add ½ cup of peanut butter to the mashed banana, and mix them together until well-combined. Trust me, the smell will make you want to plunge into the bowl yourself.
- In a separate bowl, combine 1 cup of whole wheat flour and ½ cup of oats. Whisk them together until blended.
- It’s a simple mix, but it gives your dog those wholesome vibes.
- Gradually fold the dry mixture into the banana and peanut butter blend.
- Do this gently, it’s like introducing two friends for the first time—they need to get familiar without a rough start (Don’t overmix—it should be slightly thick).
- Scoop the batter by the tablespoon onto a parchment-lined baking sheet, giving them some space since they’ll expand a bit.
- Flatten each scoop slightly with the back of a spoon; you want them to cook evenly.
- Bake in the preheated oven for about 15–20 minutes, or until they start to turn golden brown.
- You’ll know they’re ready when your kitchen starts smelling like a dog-friendly bakery!
- Remove the treats from the oven and let them cool on a wire rack.
- Cool completely before serving to your dog. They’ll appreciate the wait; trust me.
Optional Add-ons
While you might think homemade dog treats are simple enough on their own, why not jazz them up a bit?
Imagine your pup savoring peanut butter and banana bites. Just mash a ripe banana, mix it with peanut butter, and fold in some oats. Roll them into little balls and bake.
Trust me, your furry friend won’t be able to resist these tasty additions.
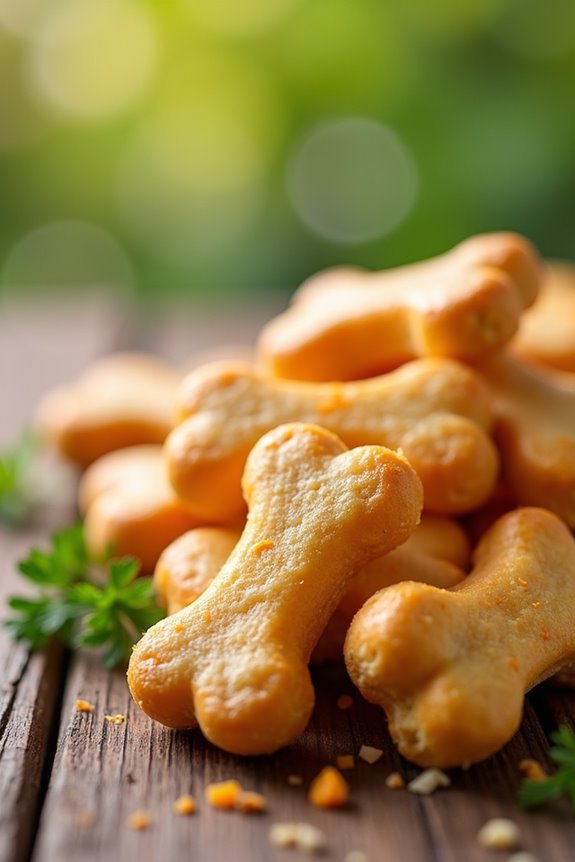
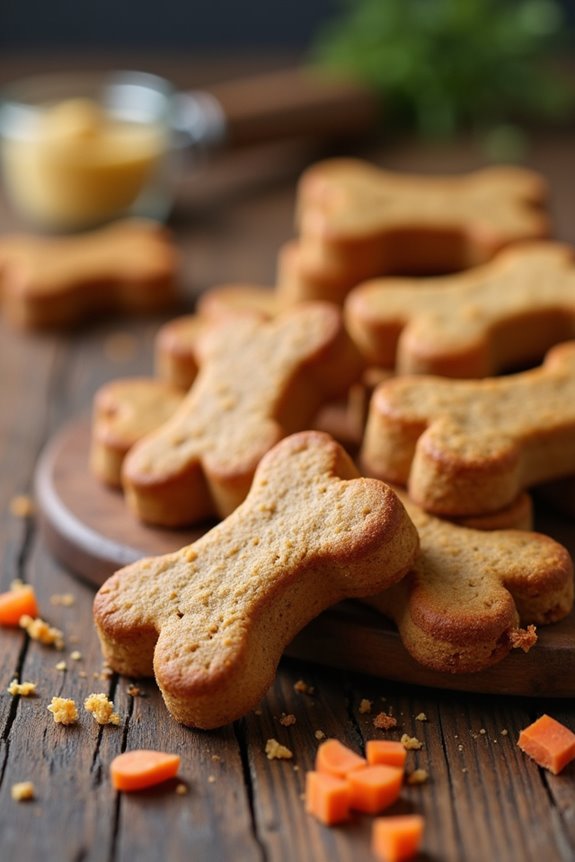
6. Carrot and Apple Treats
When it comes to treating your pup with something fresh and tasty, carrot and apple treats are a game-changer. You’ll love how easy they’re to whip up, and your furry friend definitely won’t complain about the deliciousness. So, let’s gather those simple ingredients, walk through the steps, and maybe throw in some fun add-ons while we’re at it, shall we?
Ingredients
Making homemade dog treats can be a delightful adventure, and trust me, your furry friend will thank you with tail wags and happy barks.
Let’s plunge into the simple yet tasty ingredients for these carrot and apple treats. They’re not just easy to make; they’re packed with flavor and nutrition, and best of all, there’s no need to hunt for rare ingredients in fancy stores.
So, without further ado, here’s what you’ll need:
- 1 cup of shredded carrots (you can use fresh or pre-packaged, your choice)
- 1 cup of unsweetened applesauce (make sure it’s plain, with no added sugars or spices)
- 2 cups of whole wheat flour (just the regular kind; easy-peasy)
- 1 egg (for binding and a little protein boost)
- 1 tablespoon of peanut butter (ensure it’s xylitol-free, as that’s a no-go for pups)
Now that you’ve got your ingredients lined up, get ready to whip up some treats that will have your dog doing tricks for more.
Trust me, if I can make these, anyone can, even if you keep mistaking the flour for powdered sugar (oops, guilty as charged).
Step by Step Instructions
- Preheat your oven to 350°F (175°C) so it’s nice and hot when you’re ready to bake.
- Gather your ingredients: 1 cup of grated carrots, 1 cup of finely chopped apples (make sure to remove the seeds!), 1 ½ cups of whole wheat flour, 1 egg, and 1/4 cup of unsweetened applesauce.
- In a large mixing bowl, combine the grated carrots and chopped apples. Mix them well until they’re evenly distributed.
- Add the egg and applesauce to the bowl. Stir everything together until it’s well combined (don’t worry if it looks a bit messy).
- Gradually add the whole wheat flour, stirring until a firm dough forms. If it’s too sticky, sprinkle in a little more flour until it holds together—but don’t overmix it.
- Dust your countertop with a bit of flour, then transfer the dough onto it. Roll out the dough to about 1/4 inch thick.
- Use a cookie cutter in fun shapes (like bones or paws!) to cut out your treats. Don’t forget to place them on a baking sheet lined with parchment paper.
- Bake the treats in your preheated oven for 25–30 minutes, or until they’re golden brown and firm to the touch.
- Remove the baking sheet from the oven and let the treats cool on a wire rack.
- Cool completely before serving to your dog, and watch their tail wag in delight.
Optional Add-ons
Everyone loves a good twist on a classic, right?
If you want to jazz up your dog treats, consider adding grated carrots or diced apples to your mix. These tasty add-ons create a crunchy texture and a hint of sweetness your pup can’t resist.
Plus, it’s an easy way to sneak in some extra vitamins.
Who knew treat-making could be this fun?
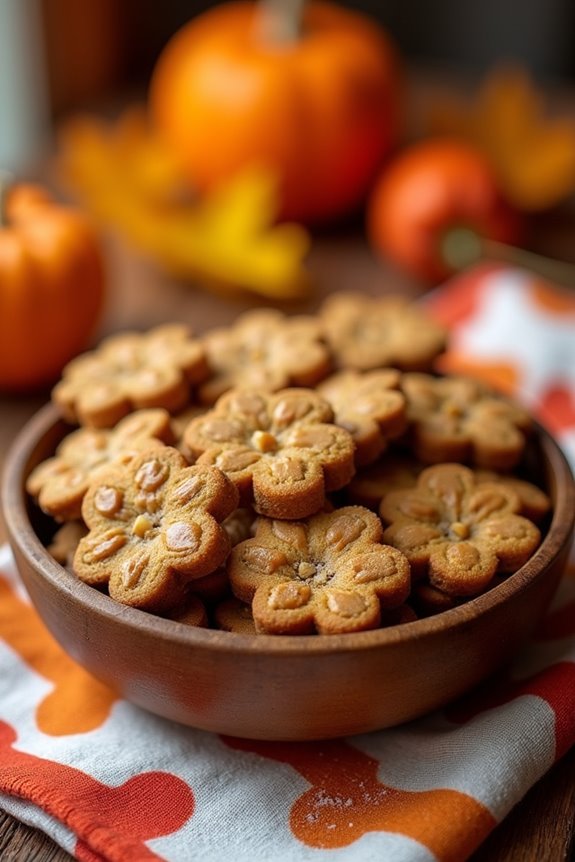
7. Pumpkin & Peanut Butter Snacks
Alright, dog lovers, let’s get into these pumpkin and peanut butter snacks that your furry friend will adore. You’ll need just a handful of ingredients, and I promise, it’s easier than figuring out how to open a stubborn jar of peanut butter. Stick around for some step-by-step instructions and maybe even a few optional add-ons to make it extra special for your pup.
Ingredients
If your pup loves a tasty snack (and what dog doesn’t?), these pumpkin and peanut butter treats are a fantastic way to bring some joy to their day. Plus, they’re super easy to make with just a few simple ingredients that you might already have in your pantry. Let’s get wagging with what you need:
- 1 cup of pumpkin puree (not the spiced stuff; just plain pumpkin)
- 1 cup of creamy peanut butter (make sure it’s free of xylitol, which is toxic to dogs)
- 2 ½ cups of whole wheat flour (or use oat flour for a gluten-free option)
- 1 large egg
- 1 tablespoon of honey (optional, but trust me—it adds a nice sweetness)
- 1 teaspoon of cinnamon (this is purely for a delicious scent, but cinnamon is generally safe for dogs in small amounts)
Step by Step Instructions
- Preheat your oven to 350°F (175°C). This is the exciting part—getting the kitchen warmed up and the delicious smells on the way.
- In a large mixing bowl, combine 1 cup of pumpkin puree and 1/2 cup of peanut butter. Make sure it’s unsweetened and natural peanut butter; your pup will thank you later.
- Add 2 eggs to the mixture. Don’t worry about being fancy here—just crack them in.
- Gradually mix in 2 1/2 cups of whole wheat flour. It helps to do this little by little—(this keeps you from getting flour clouds in your face—trust me).
- Stir in 1/2 teaspoon of cinnamon. This isn’t just for taste; it gives the treats a warm, lovely aroma.
- If you want to add a little twist, fold in some water if the dough is too dry (about 1-2 tablespoons should do). You want it to be a workable, slightly sticky dough—almost like cookie dough, not loose soup.
- Roll out the dough to about 1/4 inch thick on a lightly floured surface. Think of this as your canvas for doggy masterpieces.
- Use cookie cutters to cut out fun shapes. Stars, bones, or whatever you fancy!
- Place the cutouts on a baking sheet lined with parchment paper. Leave a little space between them—they do need their room, after all.
- Bake for 25–30 minutes, or until they’re golden brown. This is the moment you can smell the irresistible aroma drifting through your home—try not to eat one yourself.
- Once done, let the treats cool on a wire rack. Trust me, waiting is hard.
- Cool completely before serving to your dog. Just imagine their wagging tail when they get their first taste. Perfect!
Optional Add-ons
After your kitchen smells like a delightful bakery thanks to those freshly baked treats, it’s time to think about how you can jazz things up even more with some fun optional add-ons.
Why not mix in creamy peanut butter or pumpkin puree? Both are tasty and healthy.
Your pup will go wild for the combo, and you’ll totally be the hero of snack time.
Quality Ingredients Matter
When it comes to whipping up homemade dog treats, the quality of your ingredients really matters. You wouldn’t want your pup munching on anything you wouldn’t eat, right?
Opt for whole, natural ingredients like oatmeal, pumpkin, and peanut butter—trust me, your furry friend can taste the difference. If you’re using flour, choose whole wheat or oat flour for a healthier option.
Choose whole, natural ingredients like oatmeal, pumpkin, and peanut butter for treats your pup will adore!
And let’s not forget about the “extras” —they should be just as exceptional. Fresh herbs or even a hint of cinnamon can elevate those treats to gourmet status.
Now, I still can’t figure out how my dog can sniff out a bad batch before I even bake them. It’s like they’ve superpowers.
Frequently Asked Questions
Can I Use Substitutes for Common Ingredients in Dog Treats?
Absolutely, you can use substitutes! If you lack certain ingredients, try alternatives like pumpkin for peanut butter or oats instead of flour. Experimenting keeps treat-making fun, and your pup won’t mind the changes!
How Long Do Homemade Dog Treats Typically Last?
Homemade dog treats generally last about one week at room temperature and up to three weeks in the fridge. If you want them to last longer, consider freezing them for up to three months.
Are There Any Foods Dogs Should Avoid in Treats?
Yes, dogs should avoid treats containing chocolate, grapes, raisins, onions, garlic, and artificial sweeteners like xylitol. These foods can be toxic and harmful to your furry friend’s health, so always check ingredients before giving treats.
Can I Freeze Homemade Dog Treats for Later Use?
Yes, you can freeze homemade dog treats for later use! Just store them in airtight containers or freezer bags to keep them fresh. When you’re ready, thaw them before giving them to your pup.
How Can I Make Treats for Dogs With Allergies?
To make treats for dogs with allergies, choose hypoallergenic ingredients like oats, sweet potatoes, or pumpkin. Avoid common allergens like wheat and dairy. Always consult your vet to guarantee it’s safe for your pup.