If you’ve ever thought about sprucing up your home with some dog-inspired flair, you’re in for a treat. Just imagine cozy throw pillows featuring your pup’s breed or a quirky wall hook made from your favorite leash. It’s not just decor; it’s a way to celebrate your furry friend. But it doesn’t stop there. Trust me, you won’t want to miss out on these creative ideas that’ll make your space as unique as your dog. Curious yet?
Breed-Inspired Decor Concepts
When you think about decorating with your favorite dog breed in mind, it’s easy to get carried away, isn’t it?
Imagine infusing your home with personalized touches that reflect those lovable traits. You could try wall art showcasing your breed or use fabric featuring your pup’s face for cushions.
Plus, drawing ideas dog-themed can spark endless creativity. Picture a framed portrait of your dog beside a cozy blanket that matches their coat color. Incorporating essential gear for crafting homemade dog treats can also inspire creative cooking sessions to treat your furry companion. A dog treat maker machine can be a fantastic addition to your kitchen, allowing you to create a variety of delicious snacks for your pets.
If you’re feeling adventurous, you could create a gallery wall focused on breed history or silly dog quotes that make you chuckle.
Have you ever considered painting your dog’s silhouette on a feature wall? It might just be a delightful way to show off your furry friend. Additionally, incorporating essential gear for effective dog training can enhance your home decor with functional elements that also reflect your love for dogs.
Our Collection
Our collection features paw-print patterned textiles that are just begging for a cozy spot on your couch, and can you imagine how charming those dog bowl-themed centerpieces would look at dinner? With everything from leash-inspired wall hooks to playful throw pillows, it’s all about making your space feel just as loved as your furry friend. Consider including luxury dog furniture bed options to elevate your pet’s comfort and style in your home. Adding luxury dog bed furniture can further enhance the aesthetic and functionality of your living space. To ensure your dog is well-behaved, consider using advanced dog training collars, which can greatly aid in effective training techniques.
1. Paw-Print Patterned Textiles
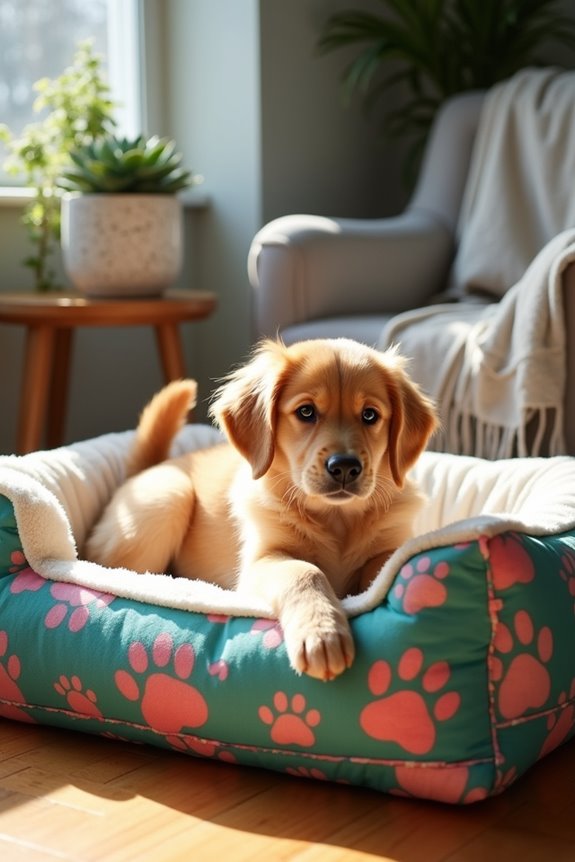
Every dog deserves a cozy spot to call their own, and what better way to show your love than by making a custom paw-print patterned dog bed? This easy DIY project is budget-friendly and allows you to add a personal touch to your home. Plus, your furry friend will definitely appreciate the new comfort zone. Let’s jump in!
Materials Needed:
- 2 yards of paw-print patterned fabric (you can go wild with colors or styles)
- 2 large pillow inserts or foam padding (make sure it’s dog-friendly)
- Scissors
- Sewing machine or needle and thread (if you want to channel your inner seamstress)
- Measuring tape
- Fabric pins or clips
- Optional: bias tape (for a polished edge)
Step-by-Step Instructions:
- Measure: Start by measuring your dog’s length from nose to tail, then add about 10 inches for wiggle room. This will be the length of your fabric.
- Cut Fabric: Cut two rectangles from your paw-print fabric based on your measurements. Each rectangle should be the length you just measured and 30 inches wide (standard bed width for comfort, but adjust based on your pup’s size).
- Pin Fabric: With the right sides (the pretty sides) facing each other, pin or clip the two fabric pieces together. Make sure you leave one side unpinned for easy stuffing.
- Sew It Up: Sew around three sides, leaving the fourth open. Don’t worry about perfection; any crooked seams are a badge of craft honor. If you’re using bias tape, now’s the time to attach it to the edges for a cute finish.
- Turn It Inside Out: Once you’ve sewn it up, gently pull the fabric through the open end to turn it right side out. It’ll look like a big fluffy pillow case.
- Stuff It: Now for the fun part! Stuff your bed with the pillow inserts or foam. You can make it as plush or as firm as your pup likes. Don’t be shy, give it a few shakes to even things out.
- Close It Up: Finally, fold in the fabric edges of the open end and sew it shut. Your dog bed is ready, and your pooch may think they’ve just been gifted a throne fit for a furry king or queen.
Optional Add-ons/Variations:
Feeling bold? Why not switch up the paw-print with some fun star or polka-dot fabric? Or you could add a touch of personality by sewing your dog’s name on the bed with some contrasting fabric. Let your creativity roam free. Additionally, consider including a luxury dog treat dispenser to pamper your fur baby even further.
Pro Tip:
When making beds for dogs, always verify the fabric is machine washable. Trust me, those “accidents” happen, and you’ll thank yourself later. Plus, it’s just a lot easier to clean up when they can lounge in style without worrying about stains. Elevate your pup’s diet with a premium dog food subscription to show them you care in more ways than one! Moreover, premium dog food brands are designed to meet all your dog’s nutritional needs.
With your DIY paw-print dog bed complete, kick back and watch your pup snuggle in, tail wagging with joy. Who knew a little fabric and stuffing could bring so much happiness?
2. Canine Silhouette Wall Art
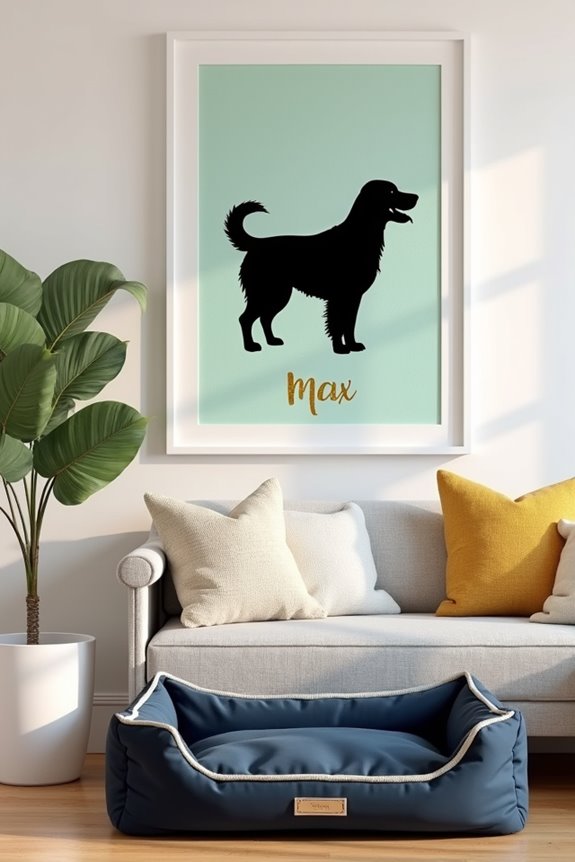
Are you looking to add a touch of your pup’s personality to your home decor? Well, making a Canine Silhouette Wall Art piece is a delightful DIY project that won’t only brighten up your walls but also serve as a daily reminder of your furry friend. You can also enhance your pup’s experience by providing them with a cozy haven in the form of luxury dog beds, ensuring they are comfortable while you work on your creative project. Additionally, dressing your dog in luxury dog clothing can further showcase their unique style as part of your home’s aesthetic.
This art is a budget-friendly way to create visually appealing decor while expressing your love for dogs, and it’s a great conversation starter, too! Additionally, consider treating your pup to some premium dog food, such as those specifically formulated for goldendoodle nutrition, to keep them healthy and happy while you work on your creative project.
Materials Needed:
- Black cardstock or craft paper
- A canvas or frame (size of your choice)
- Pencil
- Scissors or craft knife
- Glue stick or tape
- Print or photo of your dog (for reference)
- Optional: decorative background paper or paint (to complete your canvas)
Step-by-Step Instructions:
- Choose Your Dog’s Profile: Find a clear side profile of your pup or use a photo for reference. This could be one where they’re sitting or standing proudly—just aim for that perfect doggy pose.
- Trace the Silhouette: Using a pencil, carefully trace around the outline of your dog on the black cardstock. If you’re feeling bold, you can freehand it, but who are we kidding, tracing usually leads to less anxious moments (and more fabulous results).
- Cut It Out: With your scissors or craft knife, carefully cut along the outline. Take your time with this step; nobody wants a wonky silhouette. Remember, if you’re nervous about cutting, channel your inner toddler and go slow—it’s a great excuse to take a break!
- Prepare Your Canvas: If you’re using a decorative background, adhere the paper or paint your canvas first. Let it dry completely. A bright or contrasting background can make your silhouette pop like it’s just walked right off the page.
- Glue the Silhouette: Once your canvas is ready, use your glue stick or tape to secure the silhouette onto the center. Make sure it’s nice and straight; snagging a dog’s silhouette at a funny angle isn’t the best look.
- Display Your Art: Finally, hang your new canine masterpiece on the wall or place it on a shelf. Watch your friends admire it as they ponder how you managed to make them feel all warm and fuzzy inside.
Optional Add-ons/Variations:
Feeling a flare for creativity? You could customize this project by adding your dog’s name in a fun font at the bottom of the silhouette.
Or consider using a patterned background paper for added interest; think paw prints or polka dots that reflect your dog’s wild side.
Pro Tip:
If you’re unsure about cutting the cardstock, use a lighter weight paper for practice. That way, if you mess up (we’ve all been there), you can quickly start over without feeling guilty about wasting materials.
And don’t forget to make a few extra silhouettes for gifts—your dog lover friends will thank you.
Now, get crafting and let your dog’s spirit shine on your walls!
3. Dog Bowl-Themed Centerpieces
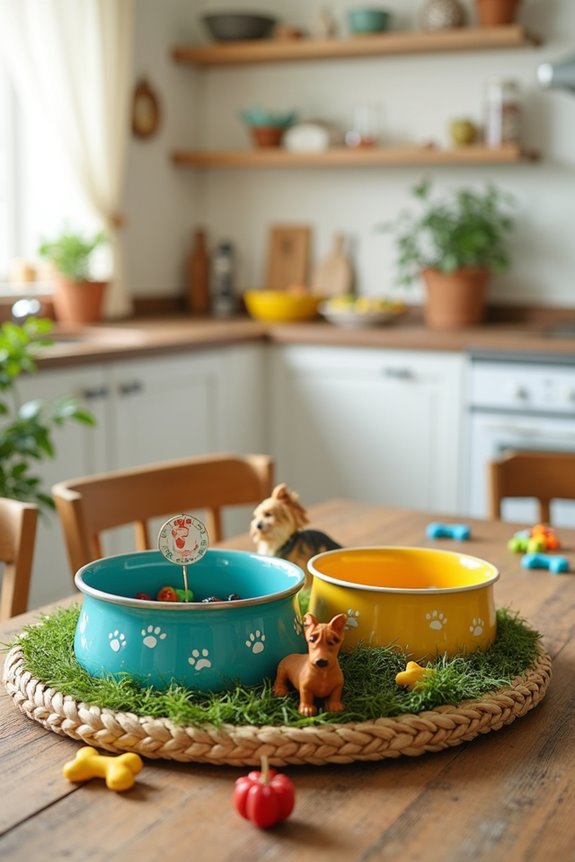
Looking for a charming and practical centerpiece for your dining table or coffee table? Dog Bowl-Themed Centerpieces are an adorable way to incorporate your love for dogs into your home decor. Not only does this DIY project provide a lovely decorative element, but it also gives you a handy spot to store your pup’s toys, treats, or even food bowls, all while making your space feel more inviting. It’s a win-win for you and your furry friend! Plus, creating your own treats using a premium dog treat maker can make the project even more enjoyable and rewarding for you and your dog.
Materials Needed:
- Two or more dog bowls (different sizes if you like)
- A sturdy base (such as a wooden or circular tray)
- Decorative filler (e.g., faux grass, pebbles, or sand)
- Dog-themed decorations (like small toys, figurines, or even photos of your pooch)
- Hot glue gun (optional, for added stability)
- Acrylic paint (if you want to customize your bowls)
- Paintbrush (if painting)
- Clear sealant (to protect your paint, if you decide to paint)
Step-by-Step Instructions:
- Choose Your Bowls: Pick out the dog bowls you want to use. If they’re plain, you might consider giving them a fun makeover with some paint. A bright color or a playful pattern can really elevate your centerpiece.
- Paint the Bowls: If you’re custom-painting, lay down some newspaper and coat your bowls in acrylic paint. Let them dry completely. This part is essential because nobody likes drippy or sticky surfaces—yikes!
- Arrange the Base: Grab the tray or base you’ve selected. You want it to be sturdy enough to hold everything, but also good-looking. It sets the scene for your doggy display.
- Add Decorative Filler: Take your decorative filler and spread it evenly in the base of the tray. This acts as a bed for your bowls and decorations, giving a lovely, finished look. It’s like creating a cozy environment—just like your dog deserves.
- Position the Bowls: Place your dog bowls onto the filler inside the tray. If you want to add a bit more oomph, you could use hot glue to secure them down, but be careful—you don’t want to ruin your bowls.
- Decorate!: Now the fun part! Arrange your small dog-themed decorations around the bowls. This could be toy figurines, a picture of your dog, or even DIY decorations like painted rocks with dog quotes on them—get creative!
- Set It Up: Finally, place your adorable dog bowl-themed centerpiece on your desired table. Step back and appreciate your handiwork, and maybe take a photo for the ‘gram.
Optional Add-ons/Variations:
Feel free to switch out your decorations with the seasons or your dog’s temperament. For instance, in the fall, you could add mini pumpkins, and during the holidays, maybe some festive lights or ornaments. The possibilities are endless—this can become a fun yearly tradition!
Pro Tip:
If your bowls are going to hold treats or toys, consider using a sealant on your paint job to keep it looking fresh and vibrant for longer. And remember, it may seem simple, but a well-placed centerpiece can be a great conversation starter. So, don’t shy away from sharing the story of how your puppy inspired this creation.
Now, roll up your sleeves and get crafting—it’s time to celebrate your beloved pup in style.
4. Dog-Themed Throw Pillows
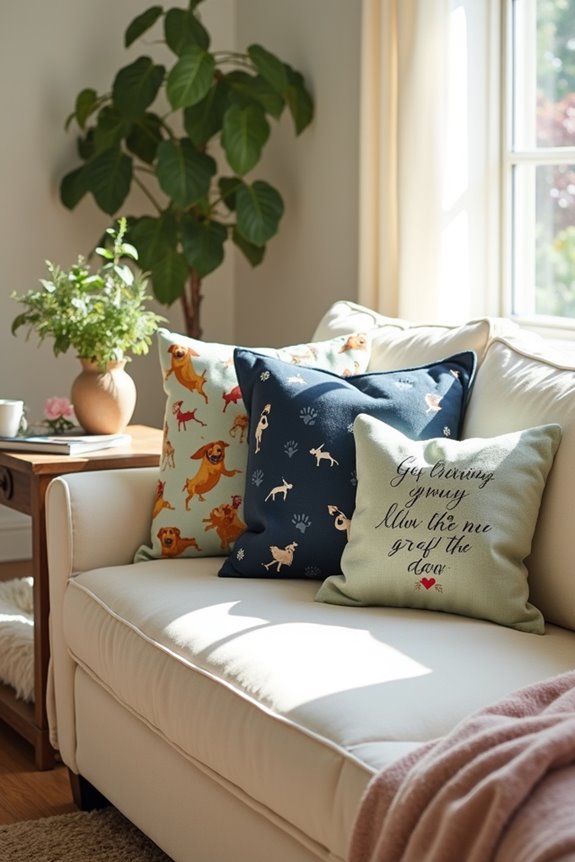
Looking to add some comfy flair to your living space while celebrating your canine companion? Dog-themed throw pillows are the perfect DIY project to showcase your love for dogs. Not only do they make your couch or bed feel extra cozy, but they also serve as a fun and charming decor piece that sparks conversations. Additionally, implementing elements like an invisible dog fence system can help keep your furry friends safe while they enjoy your beautifully decorated home. Investing in a high-end outdoor dog kennel can further enhance your pet’s outdoor experience and safety.
Plus, creating your own pillows can save you some cash compared to those pricey designer options. Incorporating high end dog supplies into your decor can elevate the overall aesthetic of your space.
Materials Needed:
- Pillow inserts (available at craft stores or online)
- Fabric of your choice (preferably cotton or canvas for durability)
- Fabric scissors
- Sewing machine or needle and thread for hand sewing
- Fabric paint or iron-on transfers (for personalizing)
- Measuring tape or ruler
- Pins
- Iron (to smooth out fabric)
Step-by-Step Instructions:
- Choose Your Fabric: Select a fabric that speaks to you—maybe something with cute puppy patterns, or go adventurous with a bold color. Aim for a size that suits your pillow insert, and buy enough for the front and back pieces.
- Measure and Cut: Measure out two squares (or rectangles, depending on your design) slightly larger than your pillow insert. For example, if your insert is 18×18 inches, cut your fabric to 19×19 inches for a little wiggle room. Cut away with confidence, just try not to “accidentally” make them cat-shaped.
- Decorate: Before you start stitching, consider jazzing up your fabric with fabric paint or iron-on transfers. You could paint adorable dog paws or apply a funny quote that reflects your pup’s personality. Let your creativity roam free!
- Pin and Sew: Pin your two fabric pieces together, right sides facing each other. Leave a gap (about 4-5 inches) on one side for turning and inserting the pillow. Sew around the edges, being careful not to go too close to the edge—nobody likes a frayed pillow.
- Turn It Inside Out: This is where the magic begins. Carefully turn your pillow cover inside out through the gap you left. A pair of scissors can help gently push the corners out to make them nice and sharp.
- Stuff and Close: Insert your pillow into the case. Make sure it’s fluffy and full because nobody enjoys a sad-looking pillow. Once it’s comfortably in place, fold in the edges of the gap and sew it closed. You can do this by hand or with your sewing machine. Voilà!
- Final Touches: Give your pillow a quick iron to smooth out any wrinkles, and then place it on your couch, bed, or wherever you want your dogs to feel cozy… and for humans to be jealous.
Optional Add-ons/Variations:
- Mix and Match: Don’t feel limited to one design. Use various fabrics for a patchwork effect. Consider seasonal themes or even coordinating with your home decor.
- Personalized Messages: Instead of just images, why not add your dog’s name or a little fun fact about them? It adds a personal touch that’s sure to get some smiles.
Pro Tip:
If you’re sewing by hand, double-check your stitches after adding the pillow insert—this is a prime opportunity for a durability upgrade, especially if your pup is a notorious pillow destroyer.
And if you’re using fabric paint, make sure to pre-wash your fabric to avoid any surprise bleeding or fading later. Happy crafting!
5. Leash-inspired Wall Hooks

If you’re a dog owner, you know just how many leashes, collars, and other dog-related essentials can clutter up a space. Say goodbye to the chaos and hello to stylish organization with these leash-inspired wall hooks. They’re not only practical but also a fun way to celebrate your love for your furry friend while adding a decorative touch to your home. Incorporating luxury dog accessories into your decor can create a cohesive and sophisticated look, while using luxury dog training equipment ensures that your pup is set up for success. Additionally, using premium dog health supplements can support your pet’s overall well-being and vitality.
Plus, making your own can save you money and give your space a unique flair that store-bought items can’t quite match.
Materials Needed:
- Wooden hooks or pegs (available at craft stores)
- Sturdy piece of wood or a repurposed wooden board for the base
- Paint or wood stain (choose colors that match your decor)
- Sandpaper (if you’re using raw wood)
- Screws or strong adhesive
- Screwdriver
- Measuring tape
- Level
- Brush (if painting)
- Pencil
Step-by-Step Instructions:
1. Select Your Base****: Start by finding a sturdy piece of wood. You can use a reclaimed wood board for that rustic look or a smooth plank for a modern feel.
2. Prepare the Surface: If using raw wood, take your sandpaper and smooth out any rough edges. This isn’t just for aesthetics—nobody wants a splintered hand while reaching for their dog’s leash.
3. Paint or Stain: Apply your paint or wood stain to the wood base. Don’t forget to let it dry completely; a hasty project can lead to unsightly drips. If you’re feeling inspired, you can get artsy and paint some paw prints or dog silhouettes too.
4. Mark the Hook Positions: Using your measuring tape, decide where you’ll place the hooks. Most people find that spacing them about 6-8 inches apart works well to avoid jumbling them together. Use a pencil to lightly mark the spots.
5. Attach the Hooks: If you’re using screws, drill holes where you marked and then carefully attach your hooks to the base. If you’re going the adhesive route, make sure to follow the glue’s instructions to get a strong bond.
Either way, precision is key; no one wants a hook that’s hanging on by a thread.
6. Level and Mount**: Grab your level** and hold your new masterpiece against the wall to ascertain it’s straight. Mark where to drill into the wall, install anchors if needed, and secure your hook board tightly.
7. Final Touches: Once everything’s secured, hang your dog leashes, collars, or even your pup’s favorite toys. Take a step back, admire your handiwork, and perhaps treat your dog to a long walk—after all, they were your inspiration.
Optional Add-ons/Variations:
- Try using different shapes for the hooks, like dog bones or paw prints, to make it even more thematic.
- Use multiple colors for the base or hooks, matching them to your dog’s collar or your home decor. This way, your project feels even more personalized.
Pro Tip:
When preparing your hooks, consider adding a small tray at the bottom of your board to catch any stray dog treats or toys. It keeps everything organized and makes visits from friends easier—no one wants to trip over a ball while admiring your fabulous DIY skills.
6. Dog-Inspired Ceramic Figurines
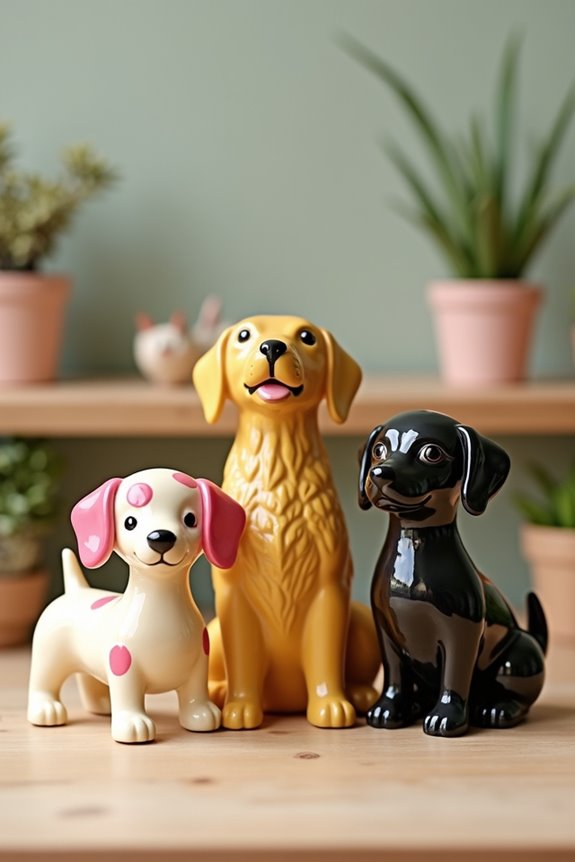
If you’re a dog lover, there’s nothing quite as delightful as seeing your favorite breed captured in ceramic form. These charming dog-inspired figurines not only celebrate your furry friends in a creative way but also add a whimsical touch to your home décor. Additionally, having a pet friendly sectional sofa can enhance the comfort of your living space while expressing your love for pets. To keep your dogs healthy, don’t forget the importance of proper dog dental care products.
Plus, creating your own is often more budget-friendly than store-bought versions, allowing you to craft something unique while keeping your wallet happy. Let’s get started.
Materials Needed:
- Air-dry clay or polymer clay
- Rolling pin
- Shape cutters or dog templates (optional)
- Acrylic paint or glaze
- Paintbrush
- Small sculpting tools (to add details like eyes or fur texture)
- Oven (if using polymer clay)
- Clear sealant (for a lasting finish)
Step-by-Step Instructions:
- Prepare Your Workspace: Find a clean, dry area to work on, and cover your surface with parchment paper. It’s a small step that saves you from doughy disasters that might stick everywhere.
- Roll Out the Clay: Take your air-dry or polymer clay and roll it out into a flat slab about half an inch thick. Keep it even, or the figurine might come out looking like a lumpy potato instead of a cute pup.
- Cut the Shapes: Using your cutters or dog templates, cut out the shapes of your chosen breed. If you’re feeling adventurous, you could freehand it. Just keep in mind that not every dog can be a masterpiece on the first try.
- Add Details: Grab those sculpting tools and have some fun! Carve out features like eyes, ears, or even a cute little tail. Your unique touch is what’ll make each piece special, so get creative.
- Let It Dry or Bake: If you’re using air-dry clay, let your figurines sit out until they’re completely dry—this can take up to 24 hours. If you chose polymer clay, follow the package instructions to bake it until hardened.
- Paint and Seal: Once your figurines are dry or baked, it’s time to bring them to life with paint. Choose colors that match your home or your pup’s personality. After drying, seal your pieces with a clear sealant for durability.
- Display Your Masterpieces: Find a cozy spot to showcase your newly crafted dog figurines. They can sit on a shelf, your desk, or maybe even greet guests on the entrance table like proud little sentinels.
Optional Add-ons/Variations:
- Consider mixing up the colors and patterns. Maybe a polka-dotted dachshund or a pink poodle? The sky’s the limit when it comes to customization.
- Try experimenting with various sizes. You could create a whole dog family set, from a tiny chihuahua to a larger golden retriever.
Pro Tip:
If you’re working with kids, using air-dry clay can be a lifesaver. It’s non-toxic, and you don’t have to stress about oven safety.
Plus, if they create a “unique” dog that doesn’t resemble a dog at all, it’s all part of the charm. Just embrace the creative chaos—every figurine tells a story.
To enhance your pet-related projects, consider investing in premium food containers to keep your furry friends’ meals fresh and organized.
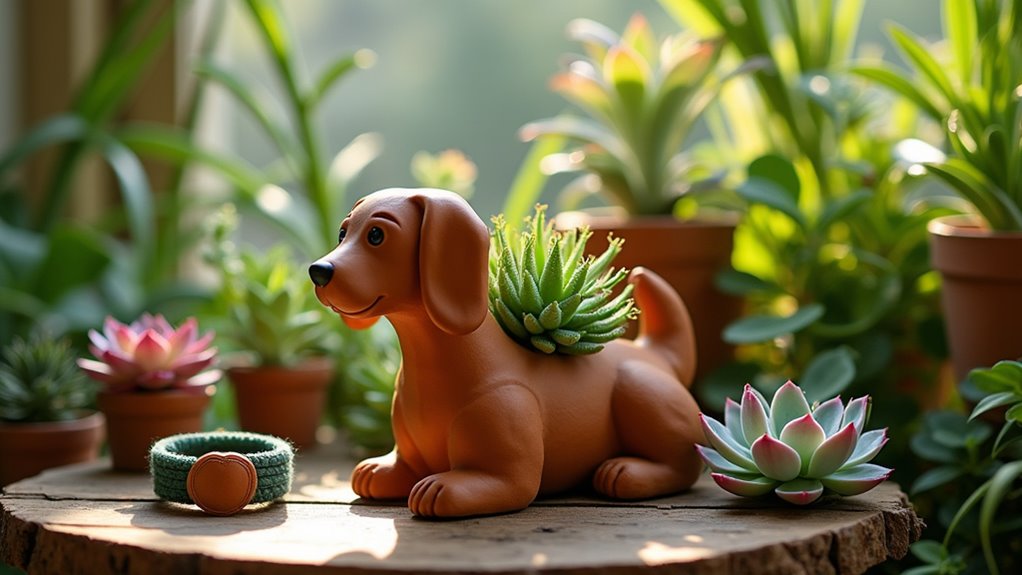
7. Dog-shaped Planters
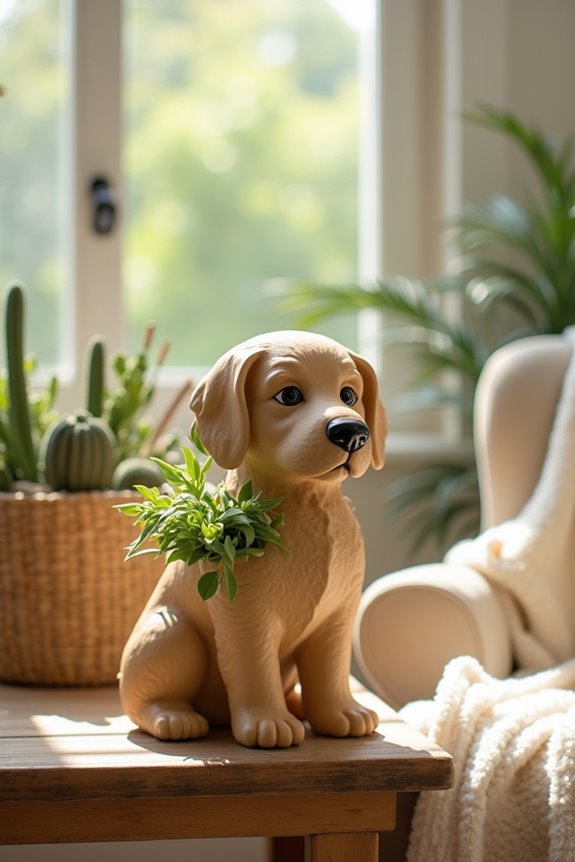
Do you have a knack for nurturing plants and an endless love for dogs? Why not combine the two with delightful dog-shaped planters? Not only do these creative containers add a playful touch to your home décor, but they also provide a cozy home for your favorite greenery. Plus, making them can save you money compared to buying fancy ones at the store — and who doesn’t want to impress friends with unique, handcrafted items? Let’s dig in.
Materials Needed:
- A clay or ceramic planter (any shape will do, but a simple oval works best)
- Sculpting clay (air-dry or polymer)
- Paint (acrylic or spray paint)
- Paintbrush
- Craft knife or sculpting tools
- Clear sealant or waterproof wax (if using air-dry clay)
- Hot glue gun (optional)
Step-by-Step Instructions:
- Start With Your Base: Grab your plain planter. This will be the body of your adorable pooch. If you have mud-covered feet from your puppy, it’s a good idea to rinse that off before starting to avoid any stains.
- Sculpt the Features: Roll out pieces of your sculpting clay to create the ears, snout, tail, and paws. Remember, your dog’s features don’t have to be perfect. Embrace your inner artist. Some might call it ‘abstract’ art; others might call it ‘too much caffeine’ art.
- Attach the Features: Using a bit of water (for air-dry clay) or a hot glue gun (for polymer clay), attach the features to the planter. This is where your dog starts to take shape. Position the ears at a tilt for that classic “Who’s a good boy?” look.
- Add Personality: Use your sculpting tools to carve in details like eyes and nostrils. This is the fun part! If your dog has big, fluffy fur, maybe you’ll want to add some texture with a simple dabbing technique. Just remember, don’t overthink it; you want it to resemble a dog, not a science project.
- Let It Dry/Bake: Allow your pieces to dry according to your clay’s instructions. If you used polymer clay, pop it in the oven as per the instructions. Just don’t forget it in there; nobody wants burned pups.
- Paint Your Creation: Once it’s fully dry or baked, grab your paint and go to town! Choose colors that resonate with your pup’s personality (or your home aesthetic). If you’re anything like me, don’t be surprised if you end up with more paint on your hands than on the planter. Premium dog food will help keep your dog’s fur shiny for the best look when showing off your creations.
- Seal It Up: If you used air-dry clay, apply a clear sealant to protect your art from water and dirt. It’s like a little doggy raincoat, keeping your creation safe. Additionally, using a dog recovery suit can keep your pet comfortable while you’re away.
- Plant Some Greenery: Now, fill your adorable planter with some lush foliage. Succulents are great since they’re low-maintenance, just like my dog who thinks doggie naps are a competitive sport.
Optional Add-ons/Variations:
- Consider customizing your dog-shaped planter by playing around with colors and patterns. How about a polka-dotted pug or a tie-dye terrier?
- You could also experiment with adding accessories like tiny collars, which you can create with strands of yarn or painted bits of clay.
Pro Tip:
If you’re using air-dry clay, make sure it’s in a dry location while it hardens. A damp environment is a solid way to ruin your masterpiece before it even gets to show off its plant baby.
Investing in some waterproof wax can also extend the life of your planter, so your pup can enjoy nature year-round.
Let your creativity run wild, and enjoy the process of making something truly special. Who knew gardening could be this much fun?
Extra Tips & Ideas
While you might think you’ve got everything planned out for your dog’s design, there’s always room for a few more creative touches.
Have you considered adding a quirky dog-shaped welcome mat? It’s a fun way to greet guests and show off your style.
Or, how about a cozy dog nook with custom pillows? Your pup will love having a special spot, especially if it includes premium dog coat materials that ensure comfort and style. To enhance the look, you could use luxury designer dog beds that make a chic statement while providing ultimate comfort.
You might even try painting a mural of your dog’s breed in a playful scene. Trust me, anyone seeing it will grin.
And don’t stress about perfection – it’s all about personality. If your paint job ends up looking like a Picasso, call it “abstract art.” Plus, consider incorporating luxury dog bunk beds for a stylish and comfortable resting place for your pup.
Frequently Asked Questions
How Can I Choose the Right Dog Breed for My Lifestyle?
To choose the right dog breed, consider your activity level, living space, and time for training. Research breeds that match your lifestyle, then meet some dogs to see which personality fits you best.
What Are Some Popular Dog-Themed Color Schemes?
For dog-themed color schemes, consider earthy tones like browns and greens for a cozy feel, or opt for vibrant reds and blues for a playful vibe. You’re sure to create something fun and inviting!
Where Can I Find Unique Dog Decor Items?
You can find unique dog decor items at local boutiques, online marketplaces like Etsy, and specialty pet shops. Don’t forget to check thrift stores for one-of-a-kind treasures that can add charm to your space!
Are There Dog Design Trends for Each Season?
Yes, there are dog design trends for each season. You’ll find earthy tones in fall, vibrant florals in spring, cozy textures for winter, and nautical themes in summer. Keep your pet’s style fresh all year round!
How Can I Incorporate My Dog’s Personality Into My Decor?
Seventy percent of dog owners say their pets influence home decor. To incorporate your dog’s personality, choose colors matching their fur, display their photos, and add personalized items like custom artwork or unique toy baskets.
Conclusion
So, why not let your dog’s spirit guide your decorating adventure? Each piece, from whimsical wall art to cozy dog beds, can reflect their unique personality, transforming your space into a warm, welcoming haven. Isn’t it fun to think of your pup as a muse? Just imagine: every glance at that paw-print pillow brings a smile, or those leash hooks keep everything organized. Embrace the joy of celebrating your furry friend through design, and let the creativity roll in.