Did you know dogs can get as bored as humans when stuck in the same routine? It’s true. That’s why creating a fabulous yard for your furry friend is so important. Imagine your pup zooming through an obstacle course or splashing in a dog-friendly water feature. Sounds enticing, right? Whether you’re looking to spruce up your yard or completely transform it, there are plenty of inspiring ideas to make their tail wag. Let’s explore these fun options together.
Playful Obstacle Courses Included
When it comes to designing the perfect dog yard, why not think outside the box? One of the best dog yard ideas you can implement is a playful obstacle course.
Picture your pup zooming through tunnels, leaping over mini hurdles, and weaving around cones—it’s a blast for them and great exercise. You don’t need fancy equipment; just grab some low-cost materials like PVC pipes or even repurpose old furniture. For more elaborate setups, consider investing in quality outdoor dog playground equipment that can provide even more fun and challenge. Having a variety of fun dog playground equipment can keep your pup engaged and excited during playtime. Consider adding dog agility equipment to your setup for additional skill development and versatility.
Your dog will love the challenge, and you’ll enjoy watching their antics. Plus, setting up the course? It’s a great excuse to flex those DIY muscles, even if you’re more “where’s the manual?” than “home improvement expert.”
Our Collection
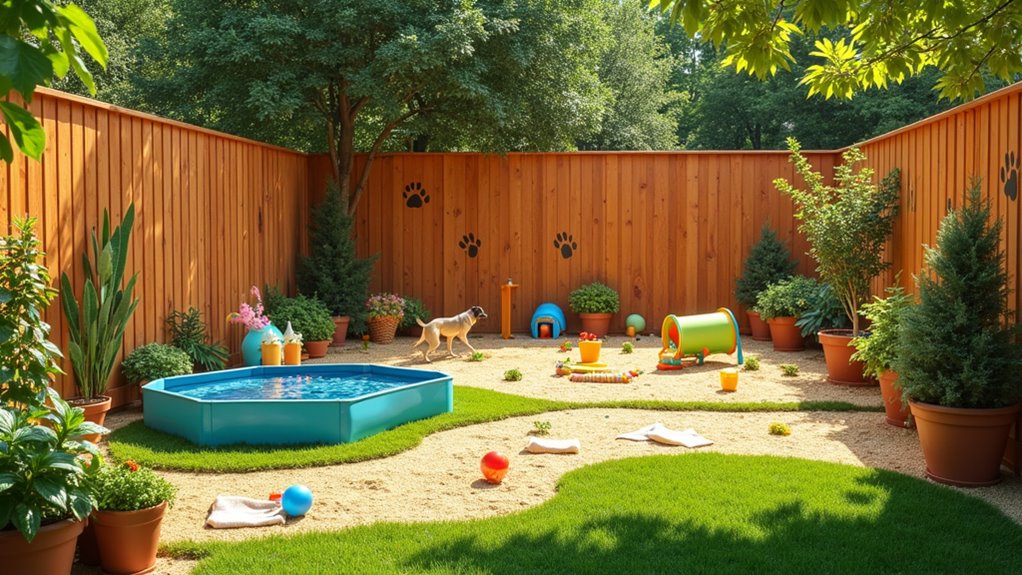
When you think about creating the perfect dog yard, envision this: agility training equipment, sensory exploration stations, and even dog-friendly water features. To enhance your outdoor dog play area, consider adding safe fencing options to keep your pup secure while they enjoy their space. Sound like a dream come true for your pup? Our collection brings together everything your furry friend needs for fun, relaxation, and a bit of mischief. Additionally, incorporating premium dog ramps into your yard design can provide comfort and accessibility for senior pets. To ensure a comfortable environment for all dogs, consider integrating effective incontinence products that cater to pups with special needs.
1. Agility Training Equipment
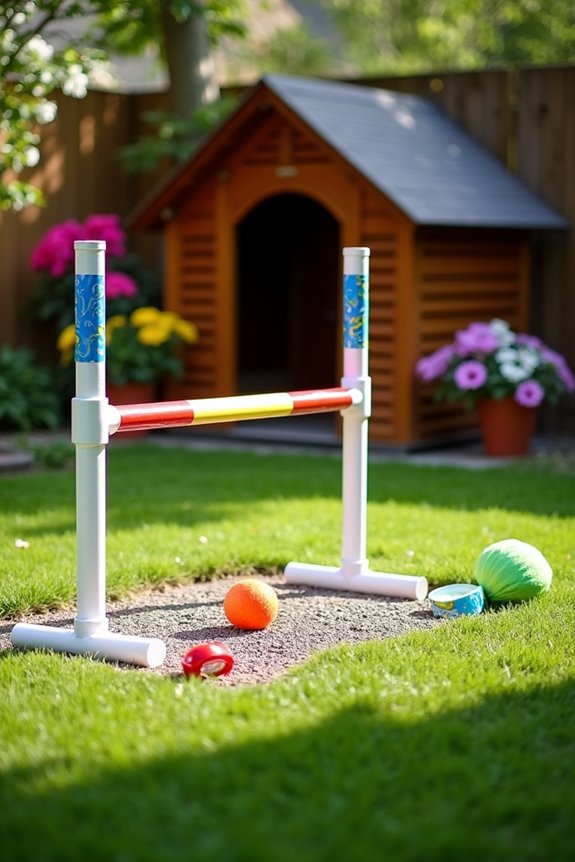
If you want to keep your furry friend fit and engaged, why not create your very own agility jump? Not only does it provide a fun challenge for your pup, but it also saves you money compared to store-bought equipment. Plus, who doesn’t enjoy a little quality time crafting with their buddy? Let’s get jumping! Adding premium dog toys alongside agility equipment can make training sessions even more exciting for your pet. Additionally, the right premium dog food brands can enhance your dog’s energy levels during training.
Materials Needed:
- 2 PVC pipes (at least 10 feet each)
- 2 PVC pipe connectors (90-degree elbows)
- 2 PVC caps
- 1 PVC T-joint
- Tape measure
- Saw (a hacksaw works great)
- Spray paint (optional, for flair)
- Sandpaper (to smooth any rough edges)
- Drill and bits (to make holes for adjusting heights)
- Rope (for securing the jump height if desired)
Step-by-Step Instructions:
- Measure and Cut the PVC: Cut one pipe into four 2-foot lengths. These will be the vertical posts. From the second pipe, cut two 4-foot pieces for the horizontal jump bar.
- Assemble the Base: Take two of your 2-foot lengths and attach them to the T-joint. Attach the remaining two ends of these pipes into the elbow connectors. This forms the two vertical sides of your jump.
- Attach the Horizontal Bar: Insert the two 4-foot lengths into the top holes of the elbow connectors. This will be your jump bar. Make sure these are tight but not overly forceful—nobody wants their dog’s leap to send the whole thing tumbling down (hello, chaos).
- Cap It Off: Place the PVC caps over the bottom openings of the vertical posts to give your jump some stability and prevent any sharp edges from showing. Trust me, your dog will thank you.
- Adjustable Heights (Optional): If you want to make your jump adjustable, use the drill to create holes in the vertical posts at various heights. You can then use the rope to tie around the jump bar, keeping it secure at your desired height.
- Spray Paint (Optional): Once the jump is assembled, you can spray paint it in bright, fun colors. Your dog may not care about its aesthetic appeal, but let’s be honest—it’ll look so much cooler in your yard.
- Smooth and Secure: Give everything a quick once-over with sandpaper to eliminate any splinters, and you’re ready to roll. Safety first, right?
Optional Add-ons/Variations:
- If you want to add a bit more flair, consider using a patterned duct tape instead of spray paint, or you could add fabric flourishes for a pop of color.
- You could also create multiple jump bars at different heights for a more advanced agility course setup as your pup gets the hang of it.
Pro Tip:
Make sure to place your jump on a soft surface like grass or a dog mat to reduce injury risks if your pup jumps or lands awkwardly. And remember, training is about building confidence—start low, and let your dog shine as they conquer every hurdle you set up!
Creating a DIY agility jump doesn’t just give your dog an outlet for their energy but also serves as a fantastic bonding project. Plus, you might even impress your friends with your newfound DIY skills (or at least, they won’t judge you too harshly when you accidentally cut the PVC too short). Additionally, investing in a premium outdoor dog kennel can complement your agility training setup by providing a safe and secure space for your pup when they need a break.
2. Sensory Exploration Stations
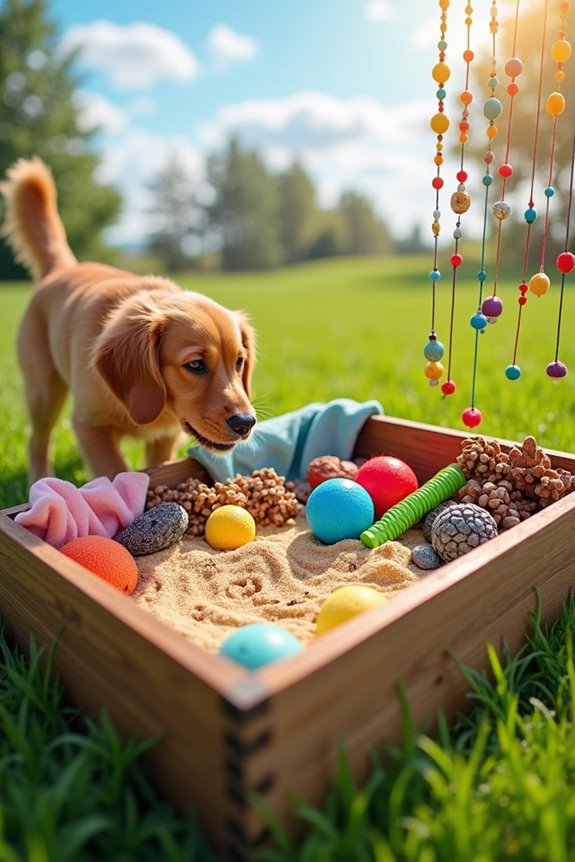
Creating a sensory exploration station for your dog is a fantastic way to engage their minds and keep them entertained right in your backyard.
Think about it – dogs thrive on stimulation, and this DIY project not only encourages mental exercise but also gives you a stylish addition to your outdoor space. Plus, it’s budget-friendly, allowing you to save some cash while spoiling your furry friend. Adding a dog seatbelt tether can ensure that your pup stays safe while enjoying their new outdoor adventure.
Materials Needed:
- Shallow plastic bin or wooden box
- Variety of dog-safe toys (balls, ropes, squeaky toys, etc.)
- Natural elements (dried leaves, grass, sticks, pine cones)
- Sand or gravel (optional, if you want a digging area)
- Soft, colorful fabrics or mats (for comfort)
- Small containers or bowls (to hold toys or treats)
- Spray paint (optional, for personal touches)
- Drill (if creating any holes in wood)
Step-by-Step Instructions:
1. Choose Your Base: Start by selecting either a shallow plastic bin or a wooden box. This will be the main container for your sensory station. If you’d like a more natural look, the wooden box is a great option, but make sure it’s dog-safe and untreated.
2. Add Natural Elements: Fill the base with a mix of natural elements. Think about adding dried leaves, twigs, and even a few pine cones or small rocks. These add texture and a variety of scents to keep your dog intrigued.
Just confirm everything is non-toxic and safe for your pup.
3. Include Toys and Fabrics: Toss in a selection of dog-safe toys. You can hide some treats in small containers for an added scavenger hunt effect.
Don’t hesitate to layer in different textures using soft fabrics or mats inside the box. Your pup will love to explore and dig around for hidden treasures.
4. Create a Digging Area: If you’re feeling a bit adventurous, consider adding a section of sand or gravel if you have room. A little digging station can provide endless fun for dogs that love to burrow.
Just be sure to supervise them to avoid any sand munching.
5. Customize with Color: If you’re using a wooden box, feel free to get creative and give it a fresh coat of spray paint. Bright colors can entice your dog, and let’s be honest, they look good in your yard too.
Just make sure your paint is non-toxic and safe for pets.
6. Testing Time: Once everything is set up, introduce your dog to the station. Encourage them to sniff and explore.
Be ready for some tail wagging and playful antics as they plunge into their new sensory paradise!
Optional Add-ons/Variations:
– You can swap out the toys and natural elements from season to season. Fall could bring in small pumpkins, while summer might mean beach toys.
Keeps it fresh and exciting!
– For a little added flair, add in some wind chimes or colorful flags around the sensory area to engage your dog’s visual senses too.
Pro Tip:
For durability, consider treating any wood with a pet-safe sealant to protect it from the elements.
And always supervise your dog during exploration to confirm they’re safe and having fun. After all, better safe than sorry, right?
Creating a sensory exploration station isn’t just a project; it’s a smart way to enrich your dog’s life and make the most of your time together.
3. Dog-Friendly Water Features
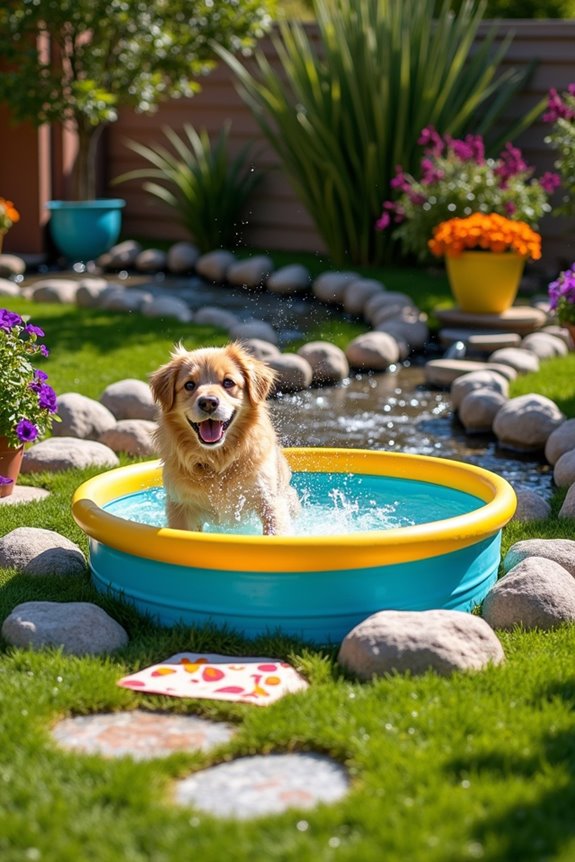
Creating a dog-friendly water feature in your yard is a delightful way to keep your pup cool and entertained on hot days. Whether it’s a small splash pad, a gentle stream, or a simple kiddie pool, having a water feature adds a rejuvenating touch to your outdoor space while providing your furry friend with a safe environment to play and cool off. Additionally, you can create matching sewing machine dog clothing to enhance their joy during playtime. Investing in an orthopedic luxury dog bed ensures your pup has a comfortable resting spot after all that fun. Consider complementing their dietary needs with luxury dog food for yorkies that helps maintain their health and energy levels for all those outdoor adventures.
Plus, it enhances the aesthetic of your backyard, saving you from those bland patches of grass that always seem to scream for attention.
Materials Needed:
- Kiddie pool or large basin (for smaller features)
- Flexible hose (for creating a gentle stream or fountain)
- Water source (tap or hose)
- Non-toxic paint or sealant (for any wooden features)
- Landscaping rocks or gravel (for decorative borders)
- Waterproof outdoor mats (to keep the area clean and safe)
- Plants (optional, for added beauty and shade)
Step-by-Step Instructions:
1. Choose the Location: Start off by picking a location that gets some sun but has some shade nearby, too. Dogs want to splash but also need a cool place to escape the heat.
2. Select Your Feature: Decide on what type of water feature fits your backyard. A kiddie pool is the simplest, but if you’re feeling crafty, you could dig a small pond or create a fountain with a pump and hose.
3. Set Up the Base: If you’re using a kiddie pool, place it down where you want it. For any other types of water features, you’ll need to prepare the space. Dig the area to accommodate your desired depth and shape, and make sure it fits well in your yard.
4. Add Landscaping: Surround your water feature with landscaping rocks, gravel, or even potted plants. This not only looks pretty but also helps keep dirt from splashing back into the water.
Trust me, nobody wants a muddy dog after a day of fun.
5. Fill It Up: Connect your hose to fill up the pool, or if you’ve created a stream, connect the pump and let the water flow. Remember to check for any leaks—nobody likes an empty pool.
6. Test and Introduce: Give the setup a test run. Once everything looks good, gently introduce your dog to the water feature. Watch them as they explore, splash, and hopefully shake off water everywhere (including on you, of course).
Optional Add-ons/Variations:
- If you want to jazz things up, consider painting your kiddie pool in fun colors or patterns. Just be sure to use non-toxic paint.
- Have some fun with different textures: add some smooth stones or soft mats around the feature to give your dog a variety of surfaces to walk on and enjoy.
Pro Tip:
Make sure your water feature has a way to drain or can be easily emptied. This will help keep the water clean and pure, and it saves you from playing a not-so-fun game of catch with algae later on.
Plus, regularly changing the water can be an adorable excuse for your pup to have even more splashing fun while you maintain their backyard paradise.
4. Cozy Shaded Rest Areas
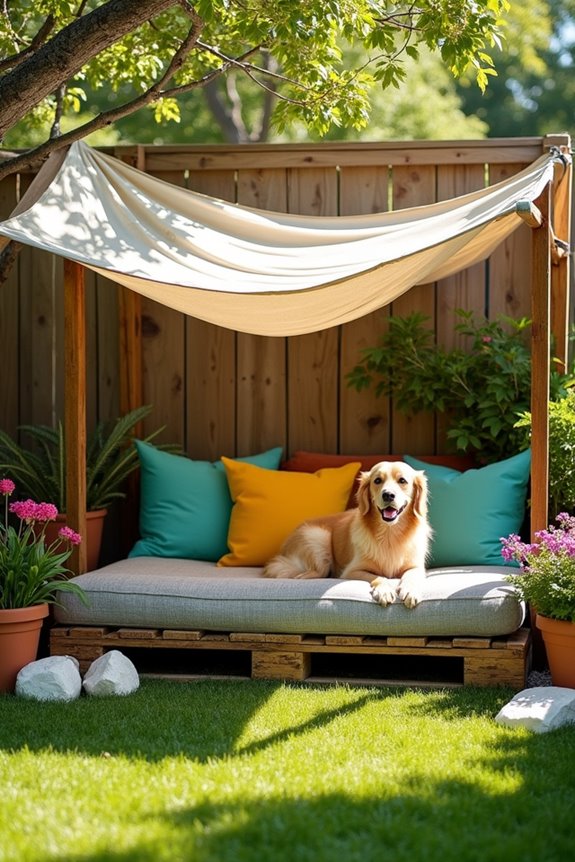
Creating a cozy shaded rest area in your yard is a wonderful way to give your dog a comfortable spot to relax, especially on those steamy afternoons when the sun seems to be relentless. This DIY project isn’t only practical for your pup’s comfort but can greatly enhance your backyard aesthetics. Think of it as a little haven for your furry friend, saving you money on fancy pet furniture and giving your yard a touch of elegance at the same time. Additionally, having a professional carpet cleaner machine can help maintain the cleanliness of your outdoor space, ensuring your pup’s resting area stays fresh and tidy.
Materials Needed:
- Wooden pallets (or old furniture that can be upcycled)
- Outdoor cushions or dog beds (make sure they’re washable)
- Tarps or outdoor fabric (for creating a canopy)
- Rope or heavy-duty string (for securing the fabric)
- Optional: Plant pots or decorative stones (for added charm)
- Tools: Saw (if cutting pallets), drill, screws (if assembling)
Step-by-Step Instructions:
- Select Your Location: Find a spot in your yard that offers a mix of sun and shade. It’s important that your pup can chill under some cover but still enjoy the fresh air.
- Gather Your Base: If using wooden pallets, stack them to create a low platform. You can use one pallet as the base and another as a backrest for added support. Secure it with screws to keep it stable. (Safety first, right?)
- Create the Canopy: Use tarps or outdoor fabric to fashion a cozy canopy. You can drape it over a sturdy tree branch or use stakes in the ground to hold it up. Just make sure it’s securely fastened—no one wants a surprise shade collapse.
- Add Comfy Touches: Place outdoor cushions or a soft dog bed on the platform to make it snuggly. You might want to throw in a blanket or two for that extra cozy vibe. Just imagine your dog lounging in style—pure bliss.
- Personalize the Space: Take it a step further by surrounding the shaded area with potted plants or decorative stones. It won’t only look good, but it’ll also create a serene environment for your pup to unwind.
- Test It Out: Show your furry friend their new rest area and watch their reaction. With a bit of luck, they’ll jump right in and make themselves at home!
Optional Add-ons/Variations:
- Consider painting the pallets in fun colors that match your home’s exterior. Just be sure to use non-toxic paint if your pup likes to chew on things.
- If you want to go beyond fabric, use ivy or other climbing plants as a natural canopy (just make sure they’re pet-safe) for a lush, green option.
Pro Tip:
To keep your shaded area in great shape, use waterproof outdoor fabric for the cushions and covers. It’ll make clean-up a breeze, especially if your dog decides to dig in the dirt before lounging. And you can always toss the cushions in the wash—no need to fear any muddy paw prints here!
5. Interactive Digging Boxes
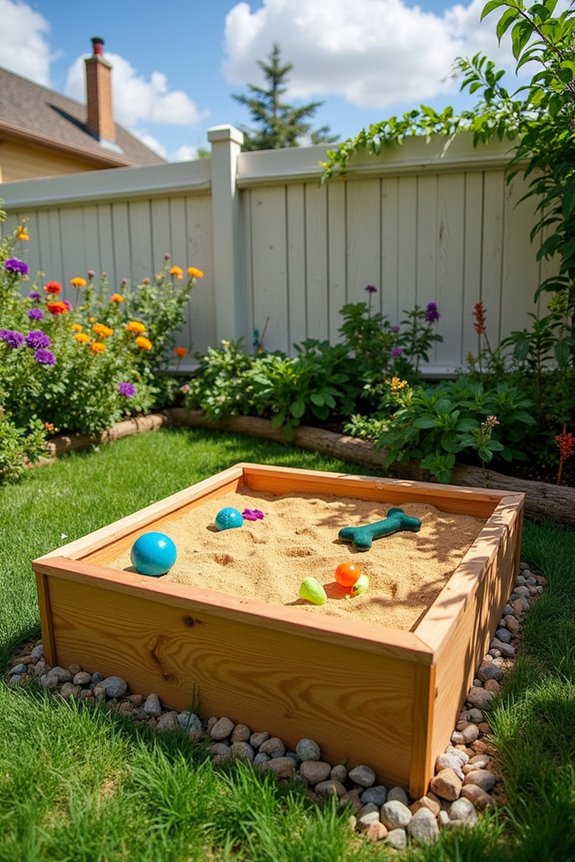
If your dog loves to dig (and let’s be honest—what dog doesn’t?), creating an interactive digging box can be a fantastic way to keep them entertained while protecting your garden from their enthusiastic paws. Plus, it gives them an appropriate place to dig and explore, saving your flowerbeds from the onslaught of furry enthusiasm. This DIY project is perfect for dog owners looking to save money on expensive pet toys while providing their fur babies with hours of fun. Including a healthy diet of premium dog food can also contribute to your dog’s overall happiness, while providing them with natural chewing options can promote dental health.
Materials Needed:
- A large wooden box or sturdy plastic container (make sure it’s safe for pets)
- Clean play sand or non-toxic soil
- Old toys or chewables (like balls, bones, or plush toys)
- Optional: Small logs or rocks (for added texture)
- Tools: Drill (for air holes), shovel (for mixing)
Step-by-Step Instructions:
- Choose Your Container: Start by selecting an appropriate box or container. A wooden sandbox or a large plastic bin works great. Confirm it’s deep enough for your pup to dig without hitting the bottom too quickly.
- Ventilation Is Key: If you’re using a wooden box, consider drilling some air holes in the sides to keep the air flowing in and out. We don’t want your dog feeling
6. Puzzle Toys for Mental Stimulation
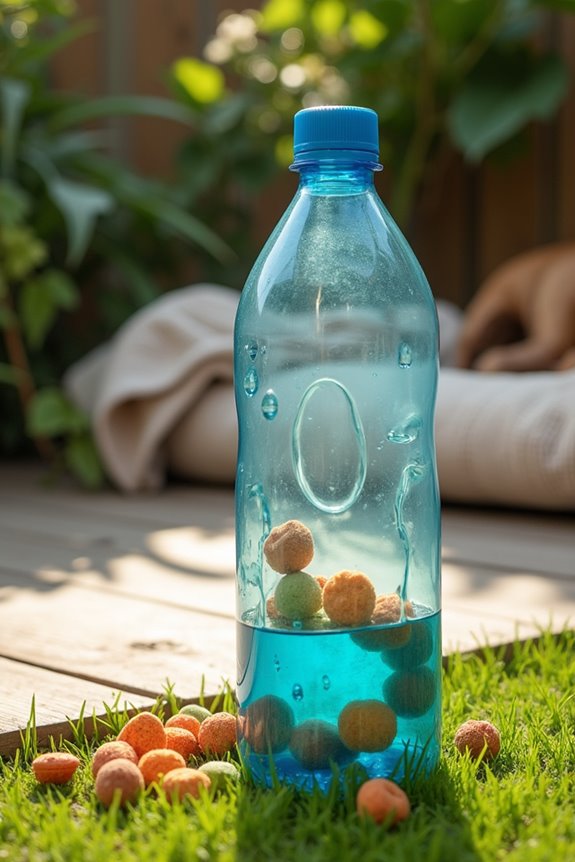
Every dog deserves a workout for their mind, just like they do for their bodies. That’s why making DIY puzzle toys can be a game-changer for dog owners looking to reduce boredom and anxiety. These engaging toys keep your furry friend entertained and challenged, while also saving you a trip to the pet store. Plus, it’s a great way to bond with your pup while showcasing your crafty skills. Additionally, using high-quality materials can enhance your dog’s excitement during playtime with their luxury dog leash. Investing in premium dog enrichment toys can further stimulate their senses and reinforce positive behavior. Quality dog training equipment can also provide additional structure during playtime, ensuring your pup remains focused and engaged.
Materials Needed:
- An empty plastic bottle (like a water or soda bottle)
- Dog-friendly treats or kibble
- Scissors (adult supervision recommended if kids are involved)
- A towel or sock (optional, for added challenge)
- Non-toxic glue (optional, for more complex designs)
Step-by-Step Instructions:
- Prepare the Bottle: Start by cleaning your plastic bottle thoroughly to guarantee it’s safe for your furry friend. If your pup is a chewer, consider using a thicker bottle for added durability.
- Cut Some Holes: Using scissors, carefully cut a few small holes (about 1-2 inches in diameter) around the lower half of the bottle. These openings should be big enough for your dog to get the treats out but not so big that they spill everywhere right away. Think of it as a doggy treasure map!
- Add the Treats: Fill the bottle with a handful of your dog’s favorite treats or kibble. Shake it a little to spread them about; this helps create some noise that entices your pup to play.
- Seal It Up: If you want to make it a bit more challenging, you can add a towel or sock inside the bottle before filling it with treats. This way, your dog has to figure out how to get through the fabric to reach the goodies.
- Encourage Exploration: Present the puzzle toy to your canine companion. Show them how to roll it around, and remember—it might take a little time for them to understand. Patience is key here; they may give you that adorable “What is this?” head tilt.
- Supervise Playtime: Confirm your pup stays safe while they figure it out. Some dogs might get a little too enthusiastic and need a watchful eye.
Optional Add-ons/Variations:
- For a more colorful twist, why not wrap the bottle in some fabric or colored tape? It adds flair and can make it less slippery for those enthusiastic paws.
- Looking for a different shape? Use a cardboard box with holes cut into it, fill it with treats, and challenge your dog to dig them out. Just be sure to supervise to avoid any accidental munching on cardboard.
Pro Tip:
Always monitor your dog while they’re playing with the puzzle toy. If they start chewing on the plastic or fabric pieces, it may be time to intervene.
And remember, using treats your dog doesn’t usually get can add that extra excitement and keep their interest piqued longer. You might just end up with a dog that’s begging for more brain games.
7. Interactive Play Zones
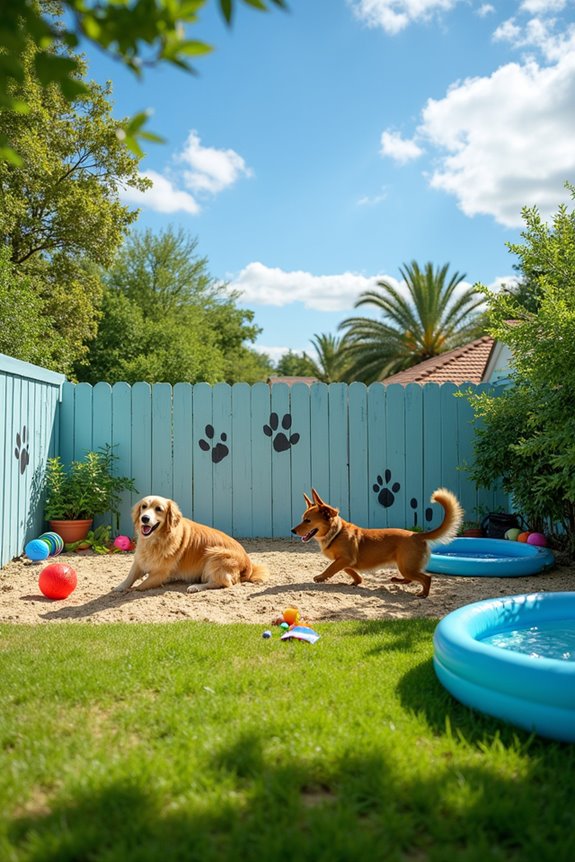
Want to elevate your dog’s yard experience? An interactive play zone is just the thing. Not only does it provide your furry friend with a space to run and play, but it can also save you money spent on fancy dog parks. Plus, it becomes a social hub for both your four-legged pals and their humans. Let’s roll up our sleeves and make a dog paradise right in your backyard!
Materials Needed:
- Dog-safe fencing (PVC or wooden panels)
- Non-toxic paint or wood stain (optional)
- Outdoor dog toys (like balls, ropes, or agility equipment)
- A bag of dog-friendly gravel or sand (for digging areas)
- Garden stakes (to mark corners)
- Measuring tape
- Shovel
- Hammer (if using wooden fencing)
- Paintbrush (if you’re painting)
Step-by-Step Instructions:
- Choose Your Space: Find an area of your yard that’s safe for your dog to play in—away from any toxic plants or clutter. Level ground is ideal, but your pup won’t mind a bit of adventure.
- Plan Your Layout: Using your measuring tape, map out the size of your play zone. Consider splitting it into sections for different activities, like a digging area for busy paws or a space to run for those speedy sprints.
- Set Up the Fencing: If you’re using fencing, install it around your designated play zone. Secure it well with stakes or a hammer for wooden posts. Your dog should have freedom but still be safe from traffic or neighbors who don’t understand our canine companions.
- Add Fun Features: Toss in some outdoor dog toys and equipment to stimulate play. Think tunnels for running through, balls for chasing, or even an obstacle course for those adventurous pups.
- Create a Digging Zone: If your pup loves to dig (you know who you are, Mr. Fluffy!), designate a small area filled with dog-friendly gravel or sand. This gives them a space to dig their hearts out without turning your flower beds into a crater.
- Personal Touch: If you’re feeling crafty, add a splash of personality by painting the fence with non-toxic colors or playful designs. Maybe some paw prints or bone shapes? Go wild or keep it chic—it’s all up to you.
- Supervise and Adjust: Once your play zone is finished, let your pup explore it while you supervise. Keep an eye on how they interact with the space, making notes of areas they love or potential hazards. You might find you need to adjust or tweak things as they play.
Optional Add-ons/Variations:
- Want to really impress? Create a splash zone with a kiddie pool for summer fun. Just be sure to have towels on hand—fur can get everywhere, and water will only add to that delightful mess.
- Or consider planting dog-friendly herbs around the play zone for them to sniff and nibble on. Mint and basil are dogs’ favorites and can double as treats.
Pro Tip:
Use durable materials! Opt for rot-resistant wood if you’re going for a wooden fence or select UV-resistant PVC. You’ll want your interactive play zone to last through different weather conditions, so invest a little where it counts. Your dog will thank you every time they splash or dig in their new play area.
Now, step back and watch the joy on your pup’s face. Isn’t that what it’s all about?
Extra Tips & Ideas
While you’re busy designing the perfect dog yard, it’s easy to get caught up in the basics like fences and grass. But don’t forget the little touches that make it special!
Consider planting dog-friendly herbs—like mint or rosemary—which can provide a sensory experience for your pup. You could even set up a splash pad for those hot days; trust me, watching your dog frolic in the water is priceless.
Need shade? A simple canopy can be a lifesaver, especially if your dog’s anything like mine and refuses to sit still.
And why not create a cozy corner with some comfy dog beds? Think of it as your dog’s personal lounge. They deserve it, right?
Frequently Asked Questions
What Are the Best Plants for a Dog-Friendly Yard?
The best plants for a dog-friendly yard include lavender, rosemary, and snapdragons. They’re non-toxic and provide natural scents and textures. Avoid azaleas, lilies, and oleander, as they can harm your furry friend.
How Can I Keep My Dog Safe in the Yard?
To keep your dog safe in the yard, fence it securely, remove toxic plants, and supervise playtime. Aren’t you curious how happy your pup will be exploring a safe, inviting space? Regularly check for hazards, too!
What Size Yard Do I Need for a Dog?
You’ll need at least 200 square feet for smaller dogs and 400 to 500 square feet for larger breeds. However, more space lets your dog play freely, so aim for as much room as possible.
Are There Any Toxic Materials to Avoid in Dog Yards?
Yes, you should avoid materials like untreated wood, certain plants (like azaleas and lilies), cocoa mulch, and any chemicals or fertilizers not labeled as pet-safe. Always prioritize your dog’s safety when designing your yard.
How Can I Keep My Dog’s Yard Clean and Odor-Free?
Start by selecting suitable surfaces; sprinkle sand or gravel to soak up smells. Scoop poop daily, use enzymatic cleaners, and plant odor-neutralizing herbs. These simple steps will keep your dog’s domain delightful and fresh!
Conclusion
Creating a doggy paradise in your yard isn’t just about throwing down a few toys. It’s like crafting a delicious recipe—each ingredient counts! So why not mix in some agility courses, sprinkle in sensory stations, and top it off with cozy spots for your pups to relax? Your dogs will thank you with wagging tails and joyful barks. They deserve a space where they can roam, play, and feel at home. Let your imagination run free—your furry friends will love it.