
If you’ve ever watched your pup eye your snack like it’s the best thing ever, you know they deserve something tasty and healthy, right? Homemade dog treats are the perfect way to show your furry friend some love. They’re simple to whip up, and trust me, the joy in your dog’s eyes is worth every bit of effort. Let’s explore seven irresistible recipes that’ll not only make tails wag but are also packed with nutrition. Ready to get started?
Why Homemade?
Why go homemade when it comes to dog treats? Well, for starters, you know exactly what’s in them. No mystery fillers or ingredients you can’t pronounce.
With homemade dog treat recipes, you can tailor them to your pup’s preferences, maybe my dog prefers peanut butter over pumpkin. Without a doubt, creating these little masterpieces can be a fun weekend project.
Image flour flying everywhere, your dog’s happy dance as the scent wafts through the house. Plus, you save money! Seriously, boutique dog treats can cost a fortune, and who’s got that kind of cash to burn?
When you whip up goodies yourself, you also control the quality. Just pick fresh, healthy ingredients, and voilà! You’ve got treats your dog will drool over.
And as a bonus, the joy of seeing your furry friend enjoy something you made? Priceless.
Dog Treat Recipes Collection
Now that you’ve decided to make your own dog treats, let’s explore some tasty recipes your pup will love.
Whether it’s the rich Peanut Butter Delight or the chewy Sweet Potato Chews, there’s something for every four-legged friend in this collection.
Get ready to whip up some deliciousness, because your dog is in for a real treat!
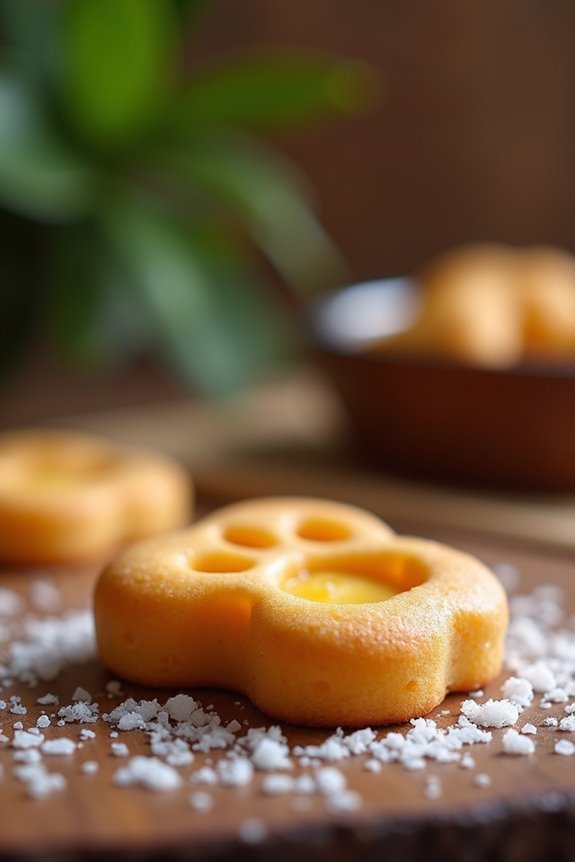
1. Peanut Butter Delight
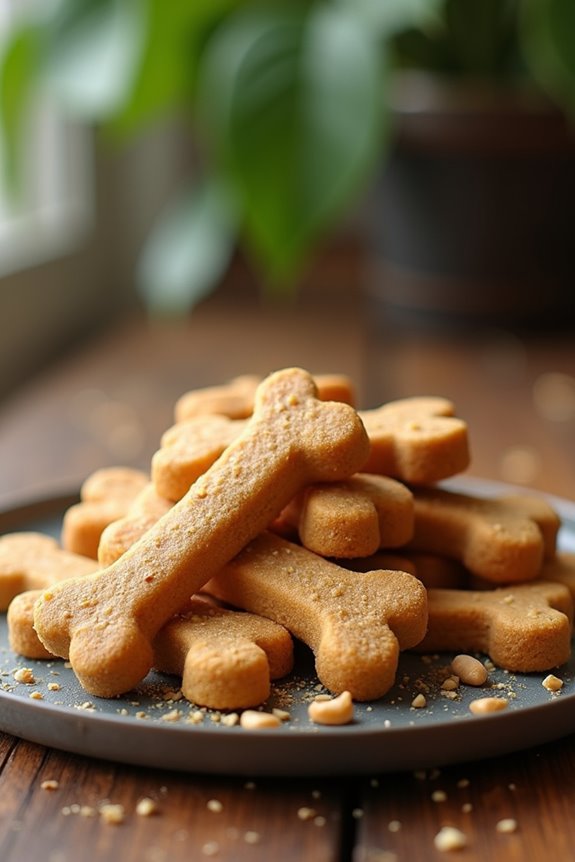
When it comes to making Peanut Butter Delight for your furry friend, you’ll want to gather a few simple ingredients. Don’t worry, the process is as easy as spreading peanut butter on toast, and I promise your pup will wag their tail in approval. Plus, you can jazz it up with some optional add-ons if you’re feeling adventurous—who doesn’t love a little extra flair? Using premium dog baking supplies can elevate the quality of your treats even further!
Ingredients
Looking to whip up some delicious peanut butter treats that your furry friend will adore? Well, you’ve come to the right place. Making dog treats can be super easy, and trust me, your pup will appreciate the effort.
Plus, the best part? You probably have many of these ingredients lying around your kitchen already. So, let’s gather what we need and get to baking!
- 1 cup of whole wheat flour
- 1/2 cup of peanut butter (make sure it’s xylitol-free, please)
- 1/4 cup of rolled oats
- 1/4 cup of chicken broth (low-sodium is ideal)
- 1 egg
- 1 tablespoon of honey (optional, but who doesn’t love a little sweetness?)
Now, gather those ingredients and get ready to impress your canine companion. Trust me, they’ll be wagging their tails in delight!
Step by Step Instructions
1. Preheat your oven to 350°F (175°C) to get it nice and toasty while you mix everything else.
That smell of freshly baked goodies is going to be unforgettable.
2. In a large mixing bowl, combine 1 cup of peanut butter and 1 cup of unsweetened applesauce.
Use a spatula or wooden spoon to mix until they’re completely combined and smooth. You could use a blender, but hey, we’re keeping it simple here.
3. Add in 2 cups of whole wheat flour and 1/4 cup of honey to the peanut butter mixture.
Stir until a dough forms. Don’t worry if it looks a little crumbly at first — keep mixing and it’ll come together.
4. If the dough is too sticky, sprinkle in a bit more flour until it’s quite workable.
You want a nice dough that isn’t too wet, so you can roll it out easily (and avoid sticky paws).
5. Lightly flour your countertop or a clean surface, then roll out the dough to about 1/4-inch thickness.
Think of it as rolling out dough for cookies, just without the temptation to nibble on it.
6. Use fun cookie cutters to cut out shapes, or just go for squares if you’re in a hurry.
Place the treats on a baking sheet lined with parchment paper — no sticking, please.
7. Bake your treats in the preheated oven for about 20-25 minutes, or until they turn golden brown.
You’ll know they’re ready when your kitchen starts to smell like peanut butter heaven.
8. Once baked, remove the treats from the oven and let them cool on a wire rack.
Patience, my friend—this is the hardest part.
9. Cool completely before serving to your dog.
Seriously, let them cool down, or you might get some very disappointed puppy eyes looking up at you.
Optional Add-ons
Adding some fun twists to your dog treat recipe can make a world of difference, especially when your furry friend gives you those enthusiastic puppy eyes.
Consider adding pumpkin puree for fiber, or a sprinkle of cinnamon for a taste bud explosion. Even a dash of bacon bits could make tails wag.
You’ll be the treat hero, and your pup will love you even more.
2. Sweet Potato Chews
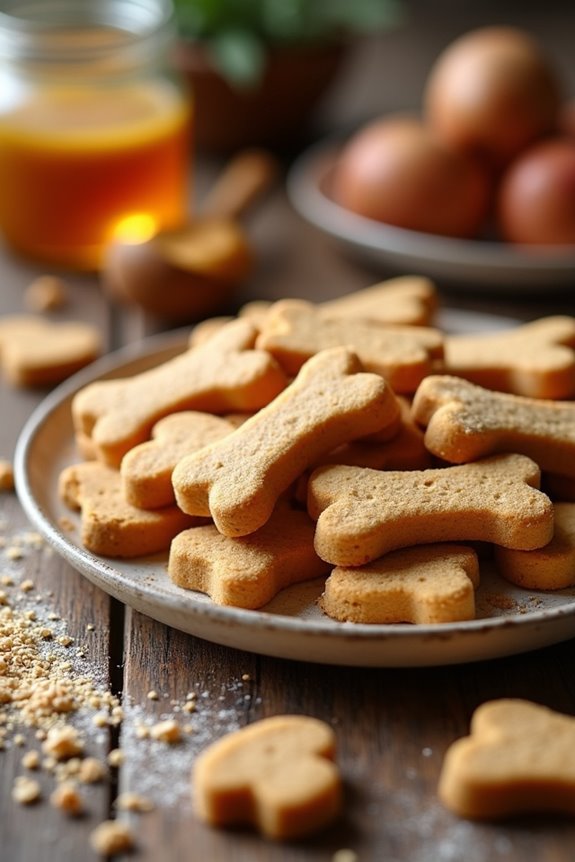
Now, let’s whip up some tasty sweet potato chews that your pup will drool over. You’ll love how simple the ingredients are and how easy it’s to follow the step-by-step instructions—trust me, if I can do it, so can you. Plus, we’ll toss in a few optional add-ons to really level up these treats; your dog might just think you’re a gourmet chef. With the right tools, like a premium air fryer, you can even make these treats healthier and deliciously crispy!
Ingredients
When it comes to whipping up some tasty treats for your furry friend, sweet potato chews come to mind. Not only are they yummy, but they’re also packed with nutrients that can keep your pup healthy and happy. Plus, they’re super easy to make, which means more time for belly rubs and playtime. Let’s explore the ingredients!
- 1 cup of sweet potatoes, peeled and cut into thin slices
- 1 tablespoon of coconut oil, melted
- 1 tablespoon of honey (optional, if your dog can handle it)
- ¼ teaspoon of cinnamon (just a pinch for flavor)
- Water, as needed for boiling
These ingredients aren’t only safe but also easy to find at your local grocery store. You might even have some of them already hanging out in your kitchen. Now, let’s get cooking, and who knows, maybe you’ll find yourself snacking on a few too. (Just kidding… maybe.) 🐾
Step by Step Instructions
- Preheat your oven to 350°F (175°C). This is the first step toward deliciousness—let’s get that heat going.
- Wash and peel 2 large sweet potatoes. You want them clean and ready for their big moment.
- Cut the sweet potatoes into small cubes, about 1-inch in size. The smaller they are, the quicker they cook, and who doesn’t love a speedy treat?
- Place the sweet potato cubes in a large pot and cover them with water.
- Bring the water to a boil over medium-high heat. This step can take a few minutes, so maybe dance a little while you wait.
- Boil the sweet potatoes for about 15–20 minutes, or until they’re soft enough to poke with a fork. They should be tender but not falling apart.
- Drain the sweet potatoes and let them cool for a couple of minutes. We don’t want you burning your fingers here—patience is key.
- Mash the sweet potatoes in a bowl until smooth. Feel free to use a fork, potato masher, or even your favorite kitchen gadget if you’re feeling fancy.
- Measure out 2 cups of the mashed sweet potato and add 1 ½ cups of whole wheat flour to the bowl.
- Mix everything together until a dough forms. If the dough is too sticky, you can add a little more flour, but don’t overdo it.
- Roll out the dough on a floured surface to about ¼ inch thick. It should be as even as a pancake, but without the syrup—this is for your pup, after all.
- Use cookie cutters to create fun shapes, or simply cut the dough into squares. Your dog won’t mind the aesthetics, but you can impress your friends with your culinary creativity.
- Place the shaped treats on a baking sheet lined with parchment paper. Make sure they’re spaced apart, because no one likes a treat that’s stuck together.
- Bake in the preheated oven for 25–30 minutes, or until the edges are slightly golden brown. The aroma wafting through your kitchen will be quite the treat too.
- Let the chews cool on a wire rack for a bit. Trust me, patience pays off here; you want them cool enough for the taste-testers.
- Cool completely before serving to your dog. They’ll be begging for them in no time—trust me, you’ll be the hero of treat-time.
Optional Add-ons
You might think those sweet potato chews are perfect just the way they are, but there’s a whole world of optional add-ons that can take them from tasty to tail-wagging fantastic.
Consider mixing in some peanut butter, adding shredded cheese, or even a sprinkle of cinnamon.
Your pup won’t know what hit them, and honestly, you might sneak a taste too!
3. Carrot and Apple Bites

Ready to whip up some tasty Carrot and Apple Bites for your pup? You’ll need just a few simple ingredients, and I’ll walk you through the steps to create these delightful treats. Plus, if you’re feeling adventurous, I’ll share some optional add-ons to really make those tails wag. To make your pup’s experience even more special, consider pairing these treats with luxury dog accessories that will elevate their style.
Ingredients
Making homemade dog treats can be a fun and rewarding experience for both you and your furry friend. Plus, with just a few simple ingredients, you can whip up something delicious and healthy.
For these Carrot and Apple Bites, here’s what you’ll need:
- 1 cup finely grated carrot
- 1 cup unsweetened applesauce
- 2 cups whole wheat flour
- 1/2 cup oats
- 1/4 cup peanut butter (make sure it’s xylitol-free)
- 1 egg
These ingredients aren’t only easy to find, but they also make your pup’s tail wag with joy. Seriously, who doesn’t want to see that excitement?
The applesauce and carrots blend nicely to create a treat that’s moist and tasty, while the peanut butter adds that creamy goodness that dogs just can’t resist.
Step by Step Instructions
- Preheat your oven to 350°F (175°C) to get it ready for the treats. This step is essential—nobody likes waiting around for the oven to heat up while their dog’s nose is twitching in anticipation.
- In a mixing bowl, combine 1 cup of finely grated carrots and 1 cup of finely shredded apples. It should smell delightful, like a fresh spring morning.
- Add 2 cups of whole wheat flour to the carrot and apple mixture. Mix until combined, ensuring there are no rogue carrot shreds trying to escape.
- In a separate bowl, beat 1 large egg and then stir in 1/4 cup of peanut butter (make sure it’s xylitol-free, dogs’ most disliked no-no). Pour this mixture into the dry ingredients.
- Stir everything together with a spatula, folding gently until a dough forms. Don’t worry if it looks a bit crumbly; that’s just part of the rustic appeal.
- If the dough is too dry, add a splash of water until it comes together but don’t drown it.
- Roll the dough out on a floured surface to about 1/2 inch thick. Use cookie cutters to make fun shapes or just cut it into squares if you’re feeling too lazy for fancy shapes.
- Place the cut-out treats on a baking sheet lined with parchment paper, leaving a bit of space between each one—think of them as little doggie friends needing personal space.
- Bake in the preheated oven for 25–30 minutes, or until the edges turn a lovely golden brown. Your kitchen will smell amazing, and your dog will likely be your shadow at this point.
- Remove the treats from the oven and let them cool on a wire rack.
Cool completely before serving to your dog, unless you want a very unhappy pup with a scorched tongue.
Optional Add-ons
If you’re enthusiastic to elevate your dog’s treat game, consider tossing in a handful of optional add-ons to those Carrot and Apple Bites.
A sprinkle of cinnamon adds warmth, while some peanut butter can create a creamy texture.
Want to sneak in some greens? Finely chopped spinach works wonders. Your pup won’t know what hit ‘em; they’ll be begging for more in no time.
4. Chicken and Rice Crunchies

Ready to whip up some tasty Chicken and Rice Crunchies for your pup? You’ll need just a handful of ingredients, and I promise it’s simpler than trying to teach them to fetch. Let’s break down the step-by-step instructions and even toss in some optional add-ons to kick it up a notch.
Ingredients
Making homemade dog treats can be such a rewarding experience. Not only are you showing your furry friend some love, but you also get to know exactly what’s going into their snacks. For these Chicken and Rice Crunchies, you’ll need a few simple ingredients that you probably already have in your pantry.
Let’s make your pup’s taste buds dance.
- 1 cup cooked chicken, shredded (leftover rotisserie chicken works wonders)
- 1/2 cup cooked rice (white or brown, whatever is on hand)
- 1/4 cup chicken broth (low-sodium, because we don’t want to overload on salt)
- 1/2 cup whole wheat flour (if your dog has allergies, feel free to swap it out for oat flour)
- 1 egg, beaten (it’s like a bonding moment between you and your pup)
- 1/4 cup shredded carrots (for a touch of sweetness and color)
- A pinch of parsley (not only for freshness but also for their breath; win-win!)
Now, you’re all set to whip up some crunchy goodness that your dog will absolutely love.
It’s like cooking for your human family, only with a lot more tail wagging involved.
Let’s get baking!
Step by Step Instructions
1. Preheat your oven to 350°F (175°C). This is the perfect temperature for crunchiness—your dog is going to love it.
2. Boil 1 cup of water in a small saucepan. Allow those bubbles to dance while we prepare the other ingredients.
3. In a large mixing bowl, combine 1 cup of cooked chicken (shredded) and 1 cup of cooked rice. Make sure they’re mixed well, as if they’re about to star in a buddy movie.
4. Slowly add the boiling water to the chicken and rice mixture. Watch out for steam—it sneaks up on you when you’re least expecting it.
5. Stir in 1 cup of whole wheat flour one little scoop at a time. Mix it until it comes together into a dough (it should feel slightly sticky but manageable).
Don’t overmix the batter—it should be just combined, like two friends catching up after a long time.
6. If you’re feeling adventurous, fold in 1/4 cup of chopped parsley or carrots for some extra flair. Just make sure they’re finely chopped for easy munching.
7. Lightly flour your counter and turn out the dough. Roll it out to about 1/4 inch thickness. Don’t worry about making it perfect—no one’s going to judge you.
8. Use cookie cutters to cut out shapes. If your dog has a favorite shape, now’s the time to impress them.
9. Place the cutouts onto a baking sheet lined with parchment paper. Give them a bit of space to breathe; they don’t want to be cramped.
10. Bake for 25–30 minutes, or until golden brown. If you start to smell something delicious wafting through your kitchen, that’s a good sign!
11. Remove from the oven and let them cool on a rack—trust me, patience pays off.
Cool completely before serving to your dog. They’ll thank you with woofs and tail wags, I guarantee it.
Optional Add-ons
While your dog treats are already shaping up to be a hit, there’s always room for a little extra creativity.
Think about adding some pureed pumpkin for fiber or a sprinkle of peanut butter for flavor.
Maybe those leftover bacon bits could find a new home. Your pup won’t mind!
Just don’t go too wild—remember, moderation is key.
Happy baking!
5. Savory Pumpkin and Oat Bites
Ready to whip up some delicious Savory Pumpkin and Oat Bites for your furry friend? This easy recipe uses simple ingredients you probably have on hand, plus I’ll walk you through step-by-step instructions to make it a breeze. And if you’re feeling adventurous, I’ll share some optional add-ons that’ll have your pup begging for more. Don’t forget to gather your dog cake baking supplies to elevate your baking game!
Ingredients
Let’s whip up some tasty Savory Pumpkin and Oat Bites that your dog will absolutely love.
Trust me, these will have your furry friend wagging their tail in excitement! Gathering your ingredients is super simple, and you likely have a few of them already hanging out in your pantry.
Here’s what you need:
- 1 cup of canned pumpkin (not pumpkin pie filling, please)
- 2 cups of rolled oats
- 1/2 cup of peanut butter (make sure it’s xylitol-free)
- 1/4 cup of chicken broth (low sodium is best)
- 1 egg
Just picture your pup’s face when they get a whiff of these delicious bites!
It’s such a joy to spoil them with wholesome snacks that are easy to make and, let’s be honest, far healthier than any store-bought treats.
Now, let’s jump into the next steps and get baking!
Step by Step Instructions
- Preheat your oven to 350°F (175°C). This guarantees it’s nice and hot for those tasty treats.
- Gather your ingredients: pumpkin puree, oats, and any additional mix-ins like peanut butter. You’ll want everything ready to go.
- In a large bowl, combine 1 cup of pumpkin puree and 2 cups of oats. Mix until well combined. It should be a little sticky but not overly gooey.
- If you’re adding peanut butter (a real crowd-pleaser), mix in about 1/4 cup. Stir this in until it’s fully integrated. Don’t be shy, get in there and mash it a bit.
- Once your mixture is ready, use a spoon or your hands to form small, bite-sized balls, about the size of a golf ball. This can get messy, but your dog won’t mind a little flour on your cheek.
- Place the balls on a baking sheet lined with parchment paper, spacing them about an inch apart. They won’t spread much, so don’t stress about it.
- Flatten each ball slightly with your fingers. This helps them cook evenly—plus, they might look a bit more like “cookies” for your pup.
- Bake in the preheated oven for 20–25 minutes, or until they appear firm and slightly golden. Keep an eye on them; no one wants burnt dog treats—yikes.
- Remove from the oven and let your treats cool on the baking sheet for about 10 minutes.
Then transfer them to a wire rack to cool completely.
Cool completely before serving to your dog. Don’t worry, they’ll be worth the wait.
Optional Add-ons
After whipping up a batch of those pumpkin and oat bites, you might be itching to jazz them up even further.
Why not toss in some desiccated coconut or a sprinkle of cinnamon? You could even try adding peanut butter for an extra kick.
Your pup’s gonna love it, and who wouldn’t want to see their tail wag even more? It’s a win-win, right?
6. Peanut Butter and Banana Bites
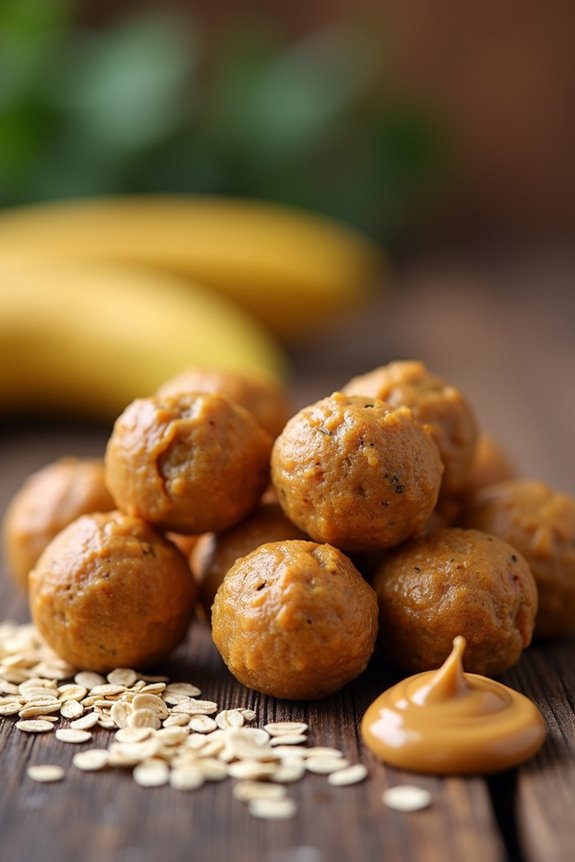
Let’s whip up some Peanut Butter and Banana Bites that your pup will absolutely love. You’ll only need a few ingredients, and I promise, it’s easier than trying to teach your dog to roll over. So, grab some peanut butter, ripe bananas, and let’s go through the steps to make these tasty treats, plus some fun add-ons if you’re feeling adventurous. Plus, having the right dog treat baking equipment can make the entire process smoother and more enjoyable!
Ingredients
When it comes to whipping up some delightful treats for your furry friend, you can’t go wrong with peanut butter and banana bites. They’re simple to make, totally tasty for your pup, and the perfect way to show them some love without breaking the bank. Plus, how often do you get to say you’re baking for your dog? So grab your apron—let’s get to it with these tail-wagging ingredients:
- 1 ripe banana, mashed (the riper, the better!)
- 1 cup whole wheat flour (but you can use oat flour for a gluten-free option)
- 1/2 cup unsweetened peanut butter (make sure it’s xylitol-free)
- 1/4 cup rolled oats
- 1/4 cup water (or a little more if the dough feels dry)
Step by Step Instructions
- Preheat your oven to 350°F (175°C). This gets things heating up nicely while you prep the rest.
- In a large bowl, mash 2 ripe bananas with a fork until you get a smooth consistency, but don’t stress if a few chunks remain. Your dog won’t mind at all.
- Add 1 cup of peanut butter (make sure it’s xylitol-free, so no sneaky sugars) to the mashed bananas.
- Mix in 1 ½ cups of whole wheat flour. You might need a little elbow grease here, so channel your inner baker.
- Stir until just combined—don’t overmix! It should look like a thick dough, almost like cookie dough.
- Roll the dough into small balls, about the size of a tablespoon. If they aren’t perfectly round, just remember your dog won’t judge your culinary art skills.
- Place the balls onto a lined baking sheet, spacing them about 2 inches apart. Flatten them slightly with the back of a fork to create cute little paw prints or just cozy, flattened treats.
- Bake in your preheated oven for 15–20 minutes, or until they turn golden brown. Keep an eye on them so they don’t turn into tiny, hard rocks.
- Remove from the oven and let the treats cool on the baking sheet for a few minutes before transferring them to a wire rack.
- Cool completely before serving to your dog—trust me, those excited puppy eyes will be worth the wait!
Optional Add-ons
There are so many fun ways to jazz up your peanut butter and banana dog treats, and your furry friend will thank you for it.
Try adding a dash of cinnamon for some extra flavor, or toss in a few chopped apples for crunch.
If you’re feeling wild, a sprinkle of flaxseed boosts their health!
Experiment and see what your pup loves most.
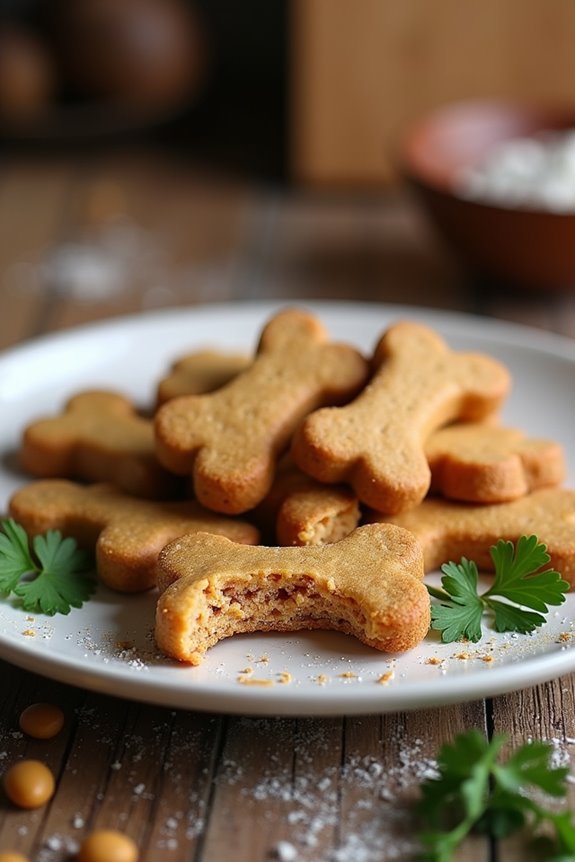
7. Cheesy Bacon Biscuit Treats
Let’s whip up some Cheesy Bacon Biscuit Treats that your pup will go bananas over. You’ll need just a few simple ingredients, and I promise it’s as easy as pie—well, easier than pie, really. Once we break down the steps, you might even wonder how you lived without these little bites of joy, and don’t forget about those optional add-ons to make them even more drool-worthy.
Ingredients
Making cheesy bacon biscuit treats for your furry friend is easier than you might think. With just a handful of ingredients that are safe and tasty for dogs, you can whip up a batch that’s sure to make tails wag.
Now, let’s get to the good stuff—the ingredients.
- 1 cup whole wheat flour
- ½ cup shredded cheddar cheese
- ¼ cup cooked bacon, crumbled (make sure it’s cooked and fully cooled)
- 1 egg
- 2 tablespoons chicken broth (low sodium is best)
- 1 tablespoon olive oil
Now, you might be wondering if your pup will appreciate these goodies as much as you appreciate the smell of bacon cooking in your kitchen. Spoiler alert: they totally will.
Just imagine the joy on their little faces when you pull these out of the oven. So, let’s get those tails wagging with these simple ingredients, shall we?
Step by Step Instructions
- Preheat your oven to 350°F (175°C) to get it nice and warm for baking those scrumptious treats.
- In a large mixing bowl, combine 2 cups of whole wheat flour, 1/2 cup of shredded cheese, and 1/2 cup of cooked, crumbled bacon. Mix well until everything is evenly distributed (think cheese and bacon love at first sight).
- In a separate bowl, whisk together 1/2 cup of chicken broth, 1 egg, and 1 tablespoon of olive oil. Make sure they’re well combined—no eggy stragglers allowed.
- Pour the wet ingredients into the dry ingredients and stir until a dough forms. Don’t overdo it; just mix until everything is combined and it’s somewhat sticky (like a friendly hug from your dough!).
- Lightly flour a clean surface and turn the dough out onto it. Knead the dough gently for a minute or so until it holds together (but don’t go all gym-class on it; we want treats, not a workout).
- Roll out the dough to about 1/2 inch thick. You don’t need a perfect rectangle; just make sure it’s even so the treats bake nicely.
- Use cookie cutters to cut out your favorite shapes. Start with a bone, of course—because what else would you use for dog treats?
- Place the cut-out shapes on a parchment-lined baking sheet, leaving a little space between them. They need room to grow—don’t squish ‘em together.
- Bake in the preheated oven for 25–30 minutes, or until they’re golden brown and your kitchen smells like a savory paradise.
- Remove the treats from the oven and let them cool on a wire rack.
Cool completely before serving to your dog. Trust me, no one wants a mouthful of burnt bacon-flavored disappointment.
Optional Add-ons
Once those cheesy bacon biscuit treats are out of the oven and cooling, you might start thinking about how to make them even more exciting for your furry friend.
Toss in some pumpkin puree for extra flavor, or sprinkle shredded cheese on top before baking. Got leftover bacon bits? Toss ’em in!
Your pup won’t know what hit ’em. Treats like these are love served crunchy.
Use Fresh Ingredients Daily
While fresh ingredients may seem like just one more thing on your already long to-do list, using them daily can seriously elevate your dog’s treat game.
Think about it: fresh fruits and veggies not only bring vibrant flavor but also pack in nutrients. When you’re whipping up goodies for your pup, consider tossing in some chopped carrots or sweet potatoes.
You’ll be amazed at how your dog perks up at the smell of fresh ingredients, like it’s a five-star restaurant.
Imagine your dog doing the happy dance because you’ve mixed in some juicy blueberries or diced apples.
And hey, I’m no chef, but I can manage a treat or two without burning the house down—or at least I try.
Frequently Asked Questions
How Do I Store Homemade Dog Treats?
You can store homemade dog treats in an airtight container at room temperature for up to a week. For longer freshness, refrigerate or freeze them in a sealed bag, ensuring you thaw them when needed.
Can I Use Regular Flour for Dog Treats?
Yes, you can use regular flour for dog treats, but consider alternatives like whole wheat or oat flour for better nutrition. Just make sure your pup isn’t sensitive to any ingredients you choose!
How Often Can I Give My Dog Treats?
You can give your dog treats daily, but moderation is key. Aim for about 10% of their daily calorie intake from treats, ensuring you keep their overall diet balanced and nutritious for their health.
Are These Treats Safe for Puppies?
Yes, these treats are generally safe for puppies, but always check the ingredient list. You’ll want to avoid any harmful additives. Introducing new treats slowly helps guarantee they’re well-tolerated by your growing pup.
What if My Dog Has Allergies?
If your dog has allergies, avoid ingredients you know trigger reactions. Opt for hypoallergenic recipes using safe alternatives. Always consult your vet before trying new treats, ensuring your pup stays happy and healthy.