If you’ve ever watched your pup’s eyes light up for a treat, you know the power of a good snack. Why settle for store-bought when you can whip up homemade goodies that’ll have their tails wagging? Trust me, I’ve had my fair share of kitchen disasters, but when it comes to dog treats, it’s like a whole new world. Let’s explore some delightful recipes that not only taste good but also cater to your furry friend’s needs. Interested?
Why Homemade?
When it comes to making snacks for your furry friend, you might wonder, why bother with homemade treats?
Well, let’s face it—store-bought dog snacks often have mystery ingredients that even your dog can’t pronounce. You really want to know what’s going into those tasty bites, right?
By crafting dog snacks homemade, you control the ingredients, ensuring your pup gets nutritious goodies packed with love. Additionally, creating homemade treats allows you to explore various recipes that cater to different tastes and preferences. You can even make peanut butter apple sauce treats that are both delicious and safe for your dog. These simple recipes can often be made in under an hour, making it an easy option for busy pet owners.
Plus, your kitchen will smell amazing, and you can release your culinary skills, however limited they may be. Remember that time you burnt toast? Think of this as your redemption arc.
You could whip up peanut butter biscuits that are so good, your dog might even forget the last time you made them spoiled.
Homemade treats can be healthier and more customizable, so why not try it? It’s a fun way to bond, and hey, your dog will think you’re a superstar—no cape required. Additionally, many dogs have dietary restrictions, making nutrient control an important factor for their health and well-being.
Snack Preparation Guide
Ready to treat your furry friend?
You’ve got some tasty options like Peanut Butter Delight and Pumpkin Banana Bites that’ll have their tails wagging in no time. These recipes require simple ingredients that are easy to source and perfect for any occasion. Additionally, bananas are not only a great flavor but also provide essential nutrients for your dog’s health, making them a fantastic choice in homemade treats. Homemade oven dog treats can also be a fun bonding activity for you and your pup as you prepare their favorite snacks together.
Let’s whip up these delicious snacks together; your pup won’t believe the yummy surprises waiting for them. Additionally, making dog treats at home can be a healthier option compared to store-bought ones that often contain additives.
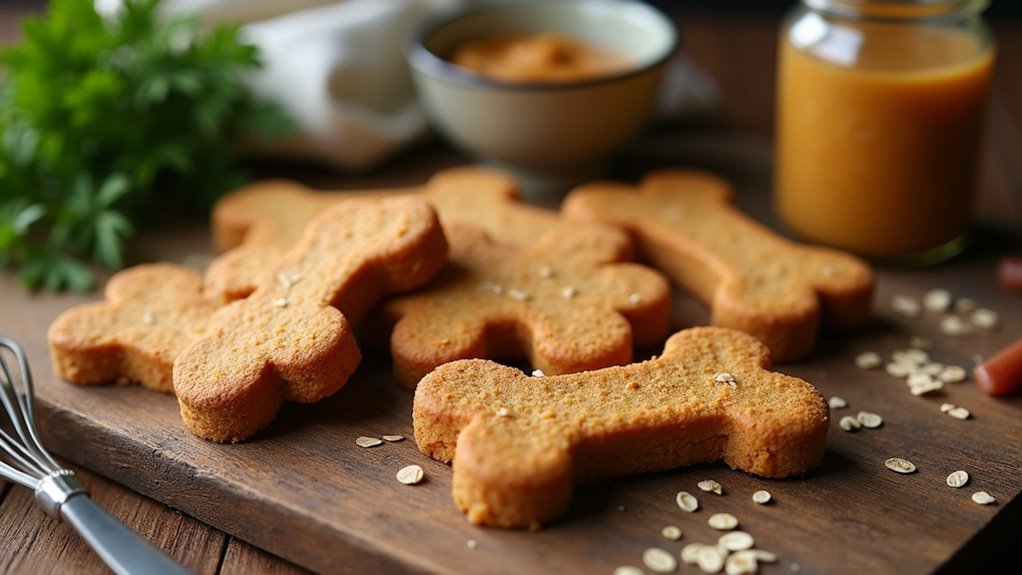
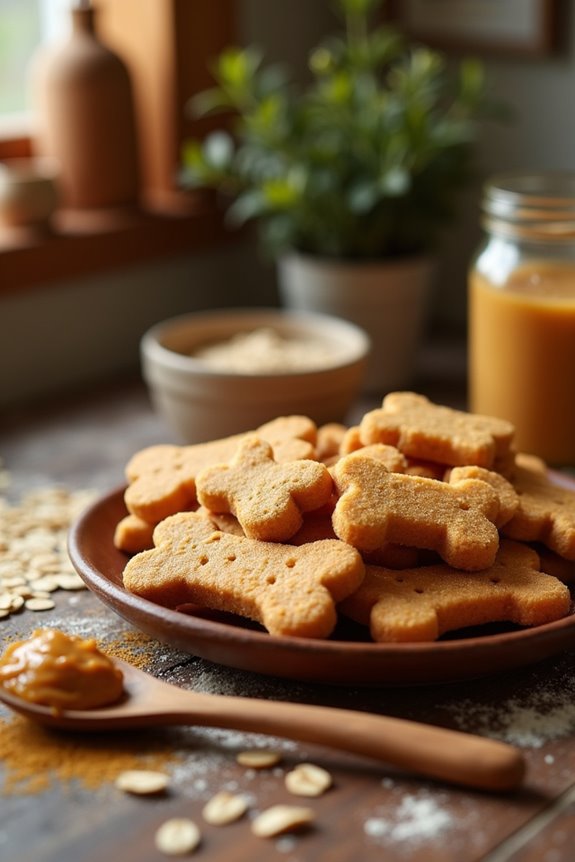
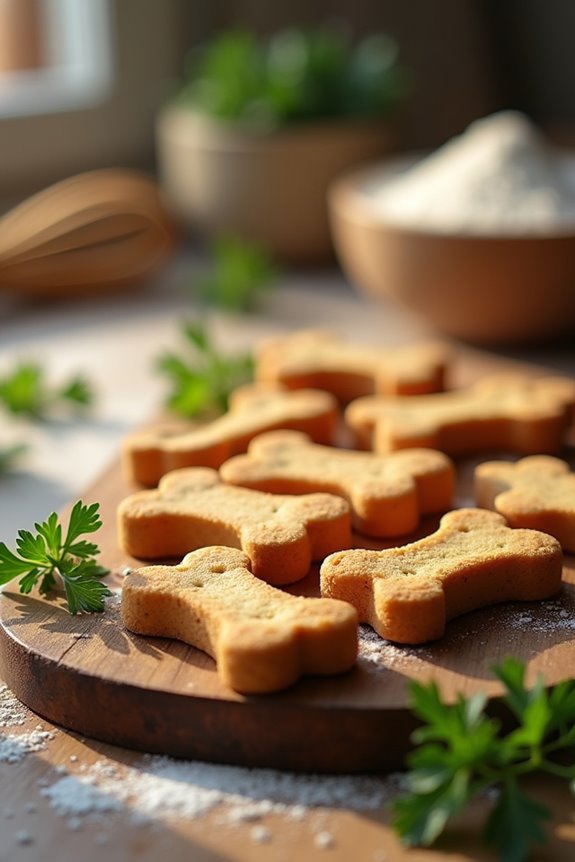
1. Peanut Butter Delight
Are you ready to whip up some Peanut Butter Delights that’ll have your pup wagging their tail with joy? First, you’ll need a few simple ingredients and a couple of steps, plus some fun optional add-ons if you’re feeling adventurous. Did you know that homemade peanut dog treats can be made with just peanut butter, flour, and eggs? Making these treats is not only easy but also allows you to customize them with special ingredients like homemade bacon dog biscuits for an extra flavor kick. Let’s get into the nitty-gritty of how to make these tasty treats your dog will adore, shall we?
Ingredients
If your pup loves peanut butter as much as mine does, you’re in for a treat. This Peanut Butter Delight recipe is super easy to whip up, and trust me – your tail-wagging friend will be begging for more.
Who knew homemade dog snacks could be this simple? Grab these ingredients, and let’s get this snack party started.
- 1 cup of whole wheat flour
- 1/2 cup of natural peanut butter (make sure it’s xylitol-free!)
- 1/4 cup of rolled oats
- 1/4 cup of chicken broth (low sodium is best)
- 1 egg
- 1 tablespoon of honey (optional for a little sweetness)
These items are all dog-friendly and pretty easy to find.
Now, I can’t promise that making these snacks won’t result in a bit of flour on your shirt or a doggy nose poking around the kitchen, but hey, those are just signs of a great time, right?
Happy baking!
Step by Step Instructions
To whip up a batch of Peanut Butter Delight snacks for your furry friend, get ready for some delicious (and dog-approved) fun. This simple recipe is perfect for beginners, and your pup will love you for it. Now, let’s explore the steps.
- Preheat your oven to 350°F (175°C) to get it toasty before baking your treats.
- In a mixing bowl, combine 1 cup of peanut butter (make sure it’s xylitol-free) and 1 cup of oats. Stir until well blended; it should look rich and creamy.
- Add in 1 cup of whole wheat flour and 1 beaten egg. Mix until a sticky dough forms; don’t worry if it’s a little messy—it’s part of the fun.
- Sprinkle a bit of flour on your countertop (or any clean surface) to prevent sticking.
- Turn the dough onto the floured surface and knead it gently for about 1-2 minutes. This helps combine everything together—just don’t overdo it.
- Roll the dough out to about ¼-inch thick, then grab your favorite cookie cutters and cut out treats in fun shapes. Let your creativity shine here (a bone shape is pretty classic, but maybe a star for something special?).
- Place the cutouts on a baking sheet lined with parchment paper—this makes cleanup a breeze.
- Bake in the oven for 20–25 minutes, or until the treats are golden brown. Your kitchen will smell amazing—just wait for it.
- Once done, take them out and let them cool on a wire rack until completely cool.
Cool completely before serving to your dog. Trust me, your pup will be doing backflips for these treats.
Optional Add-ons
While your Peanut Butter Delight snacks are already a hit as they are, why not take them up a notch?
You could sprinkle in some pumpkin puree for extra flavor, or toss in oats for texture.
Feeling fancy? Add a dash of cinnamon.
Just think—your pup’s treat could go from good to tail-wagging fantastic. Your dog will definitely appreciate the effort.
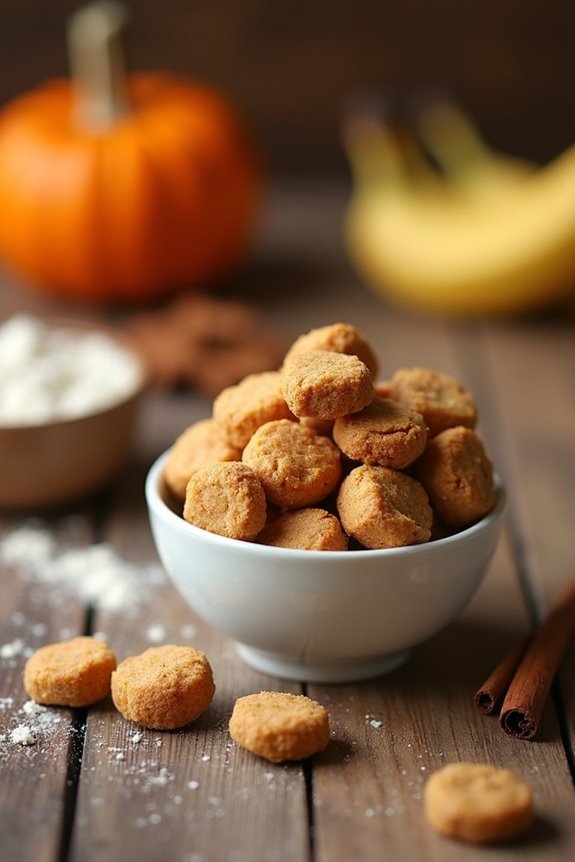
2. Pumpkin Banana Bites
Ready to whip up some Pumpkin Banana Bites for your pup? You’ll need just a few simple ingredients, and I promise, it’s easier than wrestling with a stubborn leash. Let’s break down the step-by-step instructions, plus I’ll share a couple of optional add-ons to make these treats extra special.
Ingredients
Making your dog some tasty pumpkin banana bites is a wonderful way to show your furry friend some extra love. Plus, they’re super simple to whip up, so you won’t need a PhD in canine cuisine.
Here’s what you’ll need to gather from your kitchen or local grocery store:
- 1 cup of mashed ripe banana (about 2 medium bananas)
- 1 cup of pure pumpkin puree (not the spiced pie filling)
- 2 cups of rolled oats
- 1 tablespoon of honey (optional, if your dog likes a little sweetness)
- 1 teaspoon of cinnamon (just a pinch for flavor, but skip it if your dog has a sensitive tummy)
And there you have it! With these easy-to-find ingredients, you’re ready to make a delightful treat that your pup will wag their tail about.
Step by Step Instructions
- Preheat your oven to 350°F (175°C) to get things warming up nicely while you prepare the ingredients.
- In a mixing bowl, combine 1 cup of mashed pumpkin and 1 ripe banana. Use a fork to mash until smooth. (Don’t hold back, really go for it—your arm might get a little workout!)
- In another bowl, mix together 2 cups of whole wheat flour and a pinch of cinnamon. Whisk them together to guarantee they’re well combined. (And no, a whisk isn’t just for egg-beating.)
- Gradually fold the dry mixture into the pumpkin-banana mix. (Be gentle! Don’t overmix—there’s no need for a workout here, just until everything is blended.)
- If the dough looks a bit dry, add a splash of water or a drizzle of olive oil. Stir until it comes together nicely. (Think of it like giving your dough a hug.)
- Line a baking sheet with parchment paper to prevent sticking. This isn’t the part where you get clever and skip it; nobody wants a sticky mess.
- Using a tablespoon, scoop out the dough and place onto the prepared baking sheet, spacing them about an inch apart. (You could even use your hands if you’re feeling adventurous.)
- Bake in the preheated oven for 25–30 minutes, or until they’re firm to the touch and slightly golden on the bottom. (Don’t wander too far; you’ll want to keep an eye on them!)
- Remove from the oven and let the bites cool on a wire rack. (Seriously tempting, but let’s not burn any paws here.)
- Cool completely before serving to your dog; they’ll appreciate the extra wait. It’s all about the homemade love.
Optional Add-ons
While the pumpkin banana bites can stand out on their own as tasty treats for your pup, why not elevate them a little with some optional add-ons?
You could mix in a drizzle of honey or a sprinkle of cinnamon for extra flair.
Even a dash of peanut butter can turn these bites into a drool-worthy snack.
Your dog will think you’re a kitchen genius.
3. Chewy Chicken Treats
Ready to whip up some delightful chewy chicken treats for your pup? You’ll love how simple it’s to gather the ingredients and follow the step-by-step instructions. Plus, I’ll toss in a few optional add-ons to make those tails wag even faster.
Ingredients
Making chewy chicken treats for your pup isn’t only fun but also a great way to show you care. Plus, it’s a fabulous way to use some simple ingredients you probably already have at home. Here’s what you need to whip up a batch of these tail-wagging goodies.
- 2 cups cooked chicken, shredded (leftover chicken from your dinner? Perfect)
- 1 cup whole wheat flour (no need to get fancy, plain old flour works)
- 1/2 cup oats (these are great for some extra fiber)
- 1/2 cup chicken broth (low-sodium is best, but you do you)
- 1 large egg (let’s give those treats some structure)
- 1 tablespoon peanut butter (just make sure it’s xylitol-free)
There you have it! All you need are these simple ingredients, and you’re all set to make your dog’s day even brighter.
Just thinking about those happy puppy faces is making me smile, isn’t it? Now, let’s get cooking.
Step by Step Instructions
- Preheat your oven to 350°F (175°C). This is the perfect temperature for making delicious treats that will make your pup’s tail wag.
- Boil about 1 cup of water in a small pot. You’ll need this to cook the chicken—stay close, so you don’t accidentally start a mini geyser.
- Once the water is boiling, add 1 cup of chopped, boneless, skinless chicken breast. Cook the chicken for about 12-15 minutes, or until it’s no longer pink in the center. It should be tender and easy to shred.
- While the chicken is cooking, gather your ingredients: 1 cup of whole wheat flour, 1/4 cup of powdered chicken broth, and 1 egg. You can find that egg hanging out in your fridge, hopefully not on vacation like the last one you lost.
- After the chicken is done, carefully drain the water and let it cool for a few minutes. Shred the chicken into small pieces using two forks. It’s okay to taste a little bit—your dog won’t mind sharing.
- In a large bowl, mix the shredded chicken, whole wheat flour, powdered chicken broth, and egg together. Stir well until everything is combined and forms a thick dough. (It should feel a bit sticky but not too wet; if it’s too sticky, sprinkle in more flour.)
- Lightly flour a clean surface and roll out the dough to about 1/4 inch thick. You could use a rolling pin if you have one, or, let’s be honest, the bottom of a glass works just fine.
- Use cookie cutters (bone-shaped if you have them, but any shape is great) to cut out your treats. Place the shaped treats on a parchment-lined baking sheet.
- Bake in the preheated oven for 25–30 minutes, or until they’re golden brown and firm to the touch. Your kitchen should start smelling pretty irresistible by now.
- Once baked, take the treats out of the oven and let them cool completely on a wire rack. No one likes a burned tongue, least of all your dog.
Cool completely before serving to your dog. Store any leftovers in an airtight container to keep them fresh.
Optional Add-ons
Although you might think homemade dog snacks are all about the basics, there are plenty of optional add-ons to easily elevate those chewy chicken treats into something really special.
Consider mixing in some pumpkin puree for fiber or a dash of parsley for fresh breath.
Want extra flavor? Try a sprinkle of cheese.
Your pup won’t know what hit them. Who knew cooking could be this fun?
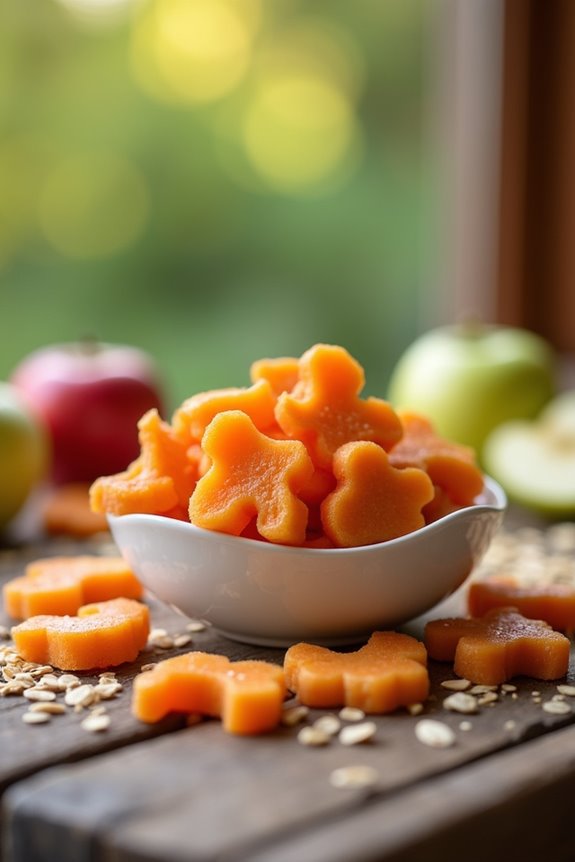
4. Sweet Potato Chews
Ready to whip up some tasty sweet potato chews for your pup? You won’t believe how simple it is—with just a few ingredients and a couple of steps, you’ll have a drool-worthy snack in no time. Plus, if you’re feeling adventurous, I’ll share some fun add-ons to make those chews even more special.
Ingredients
When it comes to whipping up some tasty and healthy snacks for your furry friend, sweet potato chews are an absolute winner. Not only are they packed with nutrients, but they’re also super easy to make.
Plus, your dog will go bananas for them. Seriously, my pup can sniff out these treats from a mile away. Now, let’s explore the ingredients you’ll need for this delightful recipe!
- 2 large sweet potatoes (about 500 grams)
- 1 tablespoon olive oil (optional, for extra flavor)
- A sprinkle of cinnamon (just a pinch—too much can be overpowering)
- ¼ cup of peanut butter (make sure it’s xylitol-free)
- 1 tablespoon of honey (only if your dog isn’t diabetic)
And there you have it! These straightforward ingredients are safe and readily available.
Just think about how excited your dog will be as you prepare these little chews. So easy, right? Now, let’s get cooking!
Step by Step Instructions
- Preheat your oven to 250°F (120°C). Yes, that’s low and slow—just like your dog on a lazy Sunday.
- Wash and peel 1-2 medium sweet potatoes. Look at you, already getting your hands dirty!
- Cut the sweet potatoes into 1/4-inch thick slices. Think of them as mini frisbees for your dog (but not quite as fun to throw).
- Arrange the slices in a single layer on a baking sheet. Give them some space; nobody likes to be crowded, especially not your pooch.
- Bake for 2-3 hours, flipping the slices halfway through to guarantee they dry evenly. Keep an eye on them; you’re looking for a chewy texture rather than a crispy chip.
- Check for doneness—they should be firm yet pliable, not rock-hard. If they feel like they’ve had a good bake, you’re good to go.
- Remove the baking sheet from the oven, letting the chews cool on a wire rack.
- Once they’re completely cool, store the chews in an airtight container. Who knew homemade dog snacks could be this easy?
Cool completely before serving to your dog. They’ll probably think you’re a culinary genius with these treats!
Optional Add-ons
After mastering the art of sweet potato chews, why not level up your homemade dog snacks with some fun add-ons?
You could sprinkle cinnamon for a flavor boost, or mix in coconut oil for that shiny coat.
A handful of finely chopped parsley? Great for fresh breath!
Just remember, don’t overdo it; your pup might think they’re getting gourmet treats every day.
5. Apple Oatmeal Bites
Ready to whip up some delicious Apple Oatmeal Bites for your furry friend? You’ll need just a few simple ingredients, and I promise, it’s easier than trying to teach your dog to sit (trust me, I’ve been there). Let’s walk through the step-by-step instructions, and maybe explore some fun optional add-ons to really jazz things up.
Ingredients
Making homemade dog snacks can be a delightful way to show your furry friend just how much you care.
And what better way to get started than with these Apple Oatmeal Bites? They’re simple to whip up and a great way to sneak in some healthy ingredients.
Here’s what you’ll need:
- 1 cup rolled oats
- 1 medium apple, cored and finely chopped (choose a sweet one, like a Fuji or Gala)
- 1/2 cup unsweetened applesauce
- 1/4 cup peanut butter (make sure it’s xylitol-free)
- 1/4 cup water (or a little more if the mixture is too dry)
- 1/2 teaspoon cinnamon (optional, but your dog might just love it)
These ingredients are pretty much pantry staples, making it easy to gather everything you need without a full-on grocery adventure.
Just imagine the wagging tail you’ll see when your pup catches a whiff of these tasty bites.
Happy baking!
Step by Step Instructions
- Preheat your oven to 350°F (175°C). Get that heat going, so your treats will bake perfectly.
- In a large bowl, mix together 1 cup of rolled oats and 1 cup of whole wheat flour. Trust me, this is the base of something your pup will love.
- Grab an apple, peel it, and dice it into tiny pieces. Then, fold the apple into your oat and flour mixture.
- In a separate bowl, whisk together 1 egg and ½ cup of unsweetened applesauce. This is where the magic happens, bringing moisture to your snacks.
- Pour the wet ingredients into the dry ones, stirring just until combined (don’t overmix; we want a charming, rustic look).
- Line a baking sheet with parchment paper for easy cleanup (thank yourself later for this).
- Spoon small portions of the batter onto the prepared baking sheet, giving them some space to spread a little. You can use a tablespoon for this; it’s a handy tool for size control.
- Bake in the preheated oven for about 20–25 minutes, or until the edges are golden brown and your entire kitchen smells like a cozy bakery.
- Remove from the oven and let the bites cool on a wire rack. This cooling period is key, as we don’t want any burnt tongues around here.
- Cool completely before serving to your dog—trust me, it’s worth the wait for both of you.
Optional Add-ons
While the basic Apple Oatmeal Bites are delicious on their own, adding a few optional ingredients can take them to the next level of flavor and nutrition.
Consider mixing in a bit of peanut butter for creaminess, or sprinkle cinnamon for a cozy aroma. You can even toss in some shredded carrots.
Your pup will think they’re gourmet treats, and you’ll feel like a baking genius.
6. Savory Beef Liver Treats

Ready to whip up some savory beef liver treats for your pup? You’ll need just a few simple ingredients to get started, and I’ll walk you through each step so you don’t end up with a chaotic kitchen disaster. Plus, I’ll toss in some optional add-ons to make these snacks even more irresistible—your furry friend won’t know what hit them.
Ingredients
Making your furry friend’s day a whole lot better with homemade treats is easier than you think.
These savory beef liver treats aren’t only tasty, but they’re also packed with nutrients. Your dog will be wagging their tail in approval, trust me.
So, let’s plunge into what you’ll need for this tail-wagging recipe.
- 1 cup beef liver, cut into small pieces
- 1 cup whole wheat flour (or oat flour for a gluten-free option)
- 1/2 cup unsweetened applesauce
- 1 large egg
- 2 tablespoons beef broth (low sodium)
- 1 tablespoon dried parsley (optional, for a touch of green)
Now you’ve got everything ready to go.
Grab these simple ingredients, and let’s create some delicious snacks that your pup will drool over.
Can’t wait to hear how your dog gobbles them up!
Step by Step Instructions
- Preheat your oven to 350°F (175°C). You want it nice and warm to bake those tasty treats.
- Line a baking sheet with parchment paper. This makes cleanup a breeze and helps the treats not stick.
- Place 1 pound of beef liver in a blender or food processor. Cut it into smaller chunks if you need to—it should fit without any wrestling matches.
- Blend the liver until smooth. Think of it like a creamy smoothie, but for your pup.
- In a mixing bowl, combine the blended liver with 1 cup of whole wheat flour and 1 egg. Stir it well until everything is mixed together.
- If the mixture seems too thick, add a splash of water until it’s scoopable but not runny. Just imagine saving a cookie dough disaster.
- Scoop out tablespoon-sized portions of the mixture and place them on the prepared baking sheet. Make sure to leave some space in between, like giving them room to dance.
- Bake in the preheated oven for 25–30 minutes, until they’re firm and slightly darker around the edges, but not burnt (nobody wants to eat charred liver).
- Remove from the oven and let them cool on the baking sheet for a few minutes before transferring them to a wire rack.
- Cool completely before serving to your dog. Trust me, you want to avoid the “hot snack” fiasco.
And there you have it, homemade savory beef liver treats that will make your furry friend go wild!
Optional Add-ons
Adding a few optional ingredients to your savory beef liver treats can take them from tasty to tail-waggingly incredible.
Consider mixing in some pureed pumpkin for fiber, or a sprinkle of peanut butter for a flavor twist.
You might even toss in a pinch of turmeric for its health benefits.
Your pup won’t know what hit ’em. Trust me, they’ll thank you with slobbery kisses.
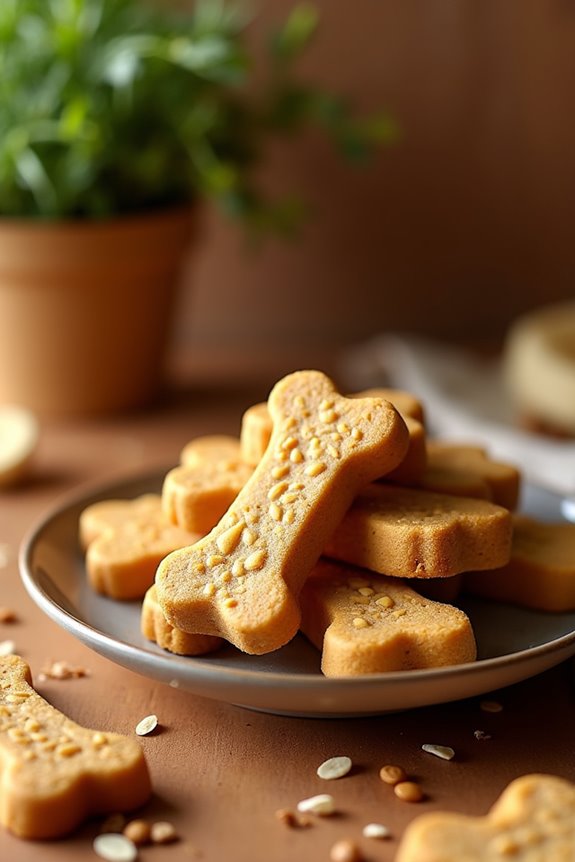
7. Nutty Bacon Biscuits

Now that you’ve mastered the savory beef liver treats, let’s whip up some Nutty Bacon Biscuits that’ll have your pup begging for more. You’ll need a handful of simple ingredients, a few easy steps, and maybe some optional add-ons if you’re feeling adventurous. Ready to see what makes these biscuits so special?
Ingredients
Making Nutty Bacon Biscuits for your pup isn’t just about treating them right; it’s about treating them with love. The right ingredients can make all the difference, ensuring these homemade goodies are tasty and safe.
Just imagine how much your furry friend will wag their tail when they catch a whiff of these delightful snacks! Here’s what you need to whip these delicious treats up:
- 1 cup whole wheat flour
- 1/2 cup rolled oats
- 1/4 cup crunchy peanut butter (make sure it’s xylitol-free)
- 1/4 cup cooked, crumbled bacon
- 1/4 cup unsweetened applesauce
- 1 egg, beaten
These ingredients are easy to find and won’t break the bank, plus they’re safe for your fluffy buddy.
Just think about them munching on these tail-wagging biscuits. Now, how could you resist that?
Step by Step Instructions
1. Preheat your oven to 350°F (175°C) to get it nice and cozy for your doggy treats.
2. Line two baking sheets with parchment paper (this helps with cleanup—thank me later).
3. In a medium bowl, mix together 1 cup of whole wheat flour and 1/2 cup of rolled oats until they’re well combined.
4. In a separate bowl, whisk together 1/2 cup of unsweetened peanut butter, 1/4 cup of bacon grease or fat (can you imagine your pup’s excitement?), and 1/4 cup of water.
5. Add the wet mixture into the dry ingredients, stirring until everything is evenly mixed.
(It might be a bit thick—it’s totally fine.)
6. Knead the dough lightly on a floured surface until it’s smooth, about 2 minutes.
7. Roll out the dough to about 1/4 inch thick, then use cookie cutters to create fun shapes.
(You might find that some shapes are just right for treats and others resemble… well, let’s just say they’re unique.)
8. Place the biscuits on your prepared baking sheets, leaving a little space between each one.
9. Bake for 25–30 minutes, or until the biscuits are golden brown and firm to the touch.
10. Remove from the oven and let the treats cool on the baking sheet for a few minutes before transferring them to a wire rack.
Cool completely before serving to your dog, and watch their tail wag with joy!
Optional Add-ons
You’ve got your homemade dog biscuits baking away, filling your kitchen with that mouthwatering peanut butter aroma—seriously, I wouldn’t blame you for wanting to sneak a taste.
Now, think about adding some crumbled bacon or a dash of cinnamon. Those little extras can elevate the flavor, making your pup’s tail wag even harder.
Who knew spoiling them could be this much fun?
Use Fresh, Quality Ingredients
While it might be tempting to reach for that bag of store-bought treats, nothing beats the joy of whipping up some homemade snacks with fresh, quality ingredients. You wouldn’t eat something that’s been sitting on a shelf for ages, right? Your pup deserves better, too. Fresh veggies, lean meats, and whole grains pack a nutritional punch that processed treats simply can’t match.
Think about it: if you use ripe bananas instead of dried ones, or fresh chicken instead of mystery meat, your dog will thank you. Not only are these ingredients tastier, but they’ll also make your canine companion wag their tail like it’s a metronome.
And hey, it’s super easy. Just chop, mix, and bake. Sure, you mightn’t be a culinary genius, but pouring peanut butter into a bowl? You’ve got this.
Your furry friend’s happiness is worth every messy kitchen moment.
Frequently Asked Questions
How Often Can I Give My Dog Homemade Snacks?
You can give your dog homemade snacks daily, but moderation’s key. Limit them to about 10% of their daily caloric intake. Be mindful of your dog’s overall diet to maintain a healthy balance.
Can I Use Alternative Flours for My Dog Treats?
Yes, you can use alternative flours like oat, coconut, or almond flour for your dog treats. Just make sure your dog isn’t allergic to any ingredients, and adjust the recipe accordingly for the best results.
Are There Any Harmful Ingredients to Avoid?
Yes, avoid harmful ingredients like chocolate, grape, and onion. Be cautious with nut butters, avocado, and excessive salt. Always check for xylitol in sweeteners, as it’s toxic to dogs. Stick to safe, dog-friendly ingredients!
How Should I Store Homemade Dog Snacks?
You should store homemade dog snacks in an airtight container. Keep them in a cool, dry place or refrigerate them for longer freshness. Always label with date to guarantee you use them before they spoil.
Can These Snacks Be Frozen for Later Use?
Yes, you can freeze these snacks for later use! Just make certain they’re properly sealed in an airtight container or bag. When you’re ready, thaw them in the fridge before serving to your furry friend.