Have you ever thought about whipping up a special cake for your pup? It’s not just any cake; it’s a delicious, dog-safe creation made with wholesome ingredients. Imagine this: whole wheat flour, natural peanut butter, and sweet mashed bananas coming together in a pan. Sounds tempting, right? Stick around, and I’ll share some fantastic recipes that’ll make tails wag and hearts swell. After all, your furry friend deserves a treat that’s as special as they are.
Why Homemade?
When it comes to treating your pup, why not whip up something special at home? You know what’s better than store-bought treats? Homemade goodies!
When you cook for your dog, you have full control over the ingredients. It means no hidden preservatives or nasty additives. Plus, you get to tailor the flavors to match your pup’s taste buds. Ever seen your dog’s tail wag with excitement? That’s pure joy, my friend. Baking your own goodies can also lead to unique flavor combinations that your pup will adore. Not to mention, you can also use dog-safe ingredients to ensure their treats are nutritious and wholesome. Additionally, you can experiment with homemade dog biscuits that are both delicious and healthy for your furry friend.
Cooking for your pup means full ingredient control—no hidden nasties, just pure joy tailored to your furry friend’s taste!
And let’s be honest, your kitchen is just waiting for a tasty baking adventure. Sure, I once mistook salt for sugar while making cookies, but dog treats? They’re super forgiving. Mixing flour, peanut butter, and a little pumpkin can’t go too wrong. Additionally, using the best dog food for allergies can ensure that your pup has safe and delicious treats tailored to their needs.
When you bake, you’re creating memories, fostering bonds, and giving your furry friend a reason to smile. So, throw on that apron; it’s time to make something delightful your pup will love.
Delicious Dog-Friendly Recipes
When you’re whipping up something special for your pup, you can’t go wrong with some tail-wagging recipes. Imagine their eyes lighting up at a slice of Peanut Butter Delight Cake or a chewy Banana Oatmeal Pupcake. Trust me, these dog-friendly treats are easy to make and pack a whole lot of flavor for your furry friend. Plus, these recipes often incorporate wholesome ingredients like natural peanut butter that are safe for dogs and make their tails wag even more! Additionally, incorporating healthy ingredients into your dog’s cake can provide them with essential nutrients. You can even consider making homemade dog ice cream to pair with these delightful cakes, creating a special treat that your pup will adore. Using dog-safe cake designs ensures that your celebrations are both fun and safe for your pet, creating memorable experiences that both you and your pup will cherish for years to come!
1. Peanut Butter Delight Cake
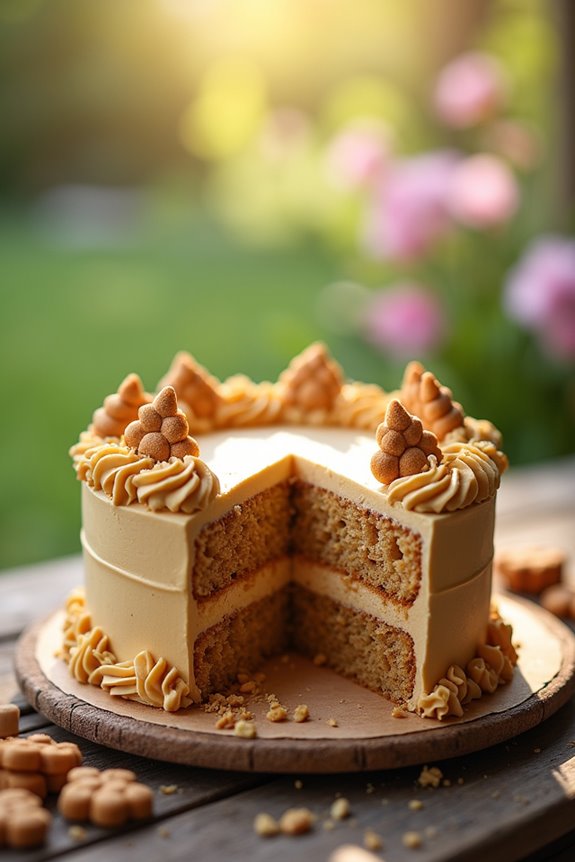
Get ready to whip up something special with this Peanut Butter Delight Cake recipe.
You’ll need just a few simple ingredients, and I promise your pup will be begging for more. Plus, we’ll go over some fun optional add-ons to really make their taste buds dance. Additionally, incorporating ingredients like peanut butter can enhance the flavor and provide health benefits for your furry friend. Peanut treats are not only delicious but also a great source of protein for your dog.
Ingredients
Making a special cake for your pup is a delightful way to show them just how much you care. Trust me, when your furry friend smells that peanut butter, they’re going to wag their tail with pure joy.
Plus, this recipe is super easy to whip up, and you probably already have most of the ingredients. So let’s get to it!
- 1 cup whole wheat flour (or oat flour for gluten-free pups)
- 1/2 cup natural peanut butter (no added sugar or xylitol, please)
- 1/4 cup honey (a little sweetness goes a long way)
- 1/2 cup unsweetened applesauce (something furry friends love)
- 1 large egg (for binding it all together)
- 1/2 teaspoon baking powder (helps it rise, just like all that love you give them)
Now, just picture your dog’s excited face when you serve this up. It’s worth it, right?
Step by Step Instructions
1. Preheat your oven to 350°F (175°C). This is where all the magic will happen, so let’s get that heat going right away.
2. In a large mixing bowl, combine 1 cup of whole wheat flour, 1/2 cup of unsweetened peanut butter, and 1 cup of unsweetened applesauce. Use a sturdy spoon or spatula to mix everything—it can get a bit sticky, so don’t hesitate to use those muscles.
3. In a separate bowl, whisk together 1/2 teaspoon of baking powder and 1/4 cup of water. Make sure it’s well combined; we want all the little bubbles to have a chance to rise later.
4. Pour the wet ingredients into the flour mixture and mix until just combined (Don’t overmix the batter—it should be slightly lumpy).
5. Grease a round cake pan with a bit of peanut butter or oil to prevent sticking. You wouldn’t want your masterpiece to cling to the pan like an overzealous puppy to your leg.
6. Spoon the batter into the prepared cake pan, smoothing the top with a spatula to make it nice and even.
7. Bake in the preheated oven for 25–30 minutes, or until a toothpick inserted in the center comes out clean. You’ll know it’s done when it’s golden brown and smells like a peanut butter dream.
8. Once baked, remove the cake from the oven and let it cool in the pan for about 10 minutes.
Then, flip it onto a wire rack to cool completely.
9. After cooling, slice the cake into dog-friendly pieces, making sure they’re the perfect size for your furry friend.
10. Cool completely before serving to your dog. Trust me, no one wants to see their pup blow on a cake like it’s too hot to handle.
Optional Add-ons
While you might think a simple cake is perfect as it is, why not kick it up a notch with some optional add-ons that can transform your pup’s dessert into an absolute delight?
Consider mixing in some mashed bananas for sweetness or a dollop of pumpkin puree for extra flavor. Your four-legged friend will surely appreciate the added treats, and you might even snag some slobbery kisses.
2. Carrot and Apple Treat Cake

Ready to whip up something tasty for your furry friend? This Carrot and Apple Treat Cake combines wholesome ingredients and is super easy to make. Stick around, and I’ll walk you through the ingredients, step-by-step instructions, and even some optional add-ons to make it extra special.
Ingredients
Got a pup who’s always begging for a tasty treat? Well, seek no further. This Carrot and Apple Treat Cake isn’t only easy to whip up, but it’s also packed with dog-friendly goodness that your furry friend will love.
No mysterious ingredients here; just wholesome, simple items that you can feel good about. Now, let’s gather what we need for this paw-sitively delightful cake.
- 1 cup finely grated carrots
- 1 cup unsweetened applesauce
- 2 cups whole wheat flour
- 1/2 cup rolled oats
- 1/4 cup unsweetened peanut butter
- 1/4 cup water (add more as needed)
With these ingredients on hand, you’ll be just a whisk away from creating a cake that’ll have your dog wagging their tail in delight.
How could you resist those big, puppy-dog eyes, right?
Step by Step Instructions
1. Preheat your oven to 350°F (175°C) to get those cozy baking vibes going.
2. Gather your ingredients: you’ll need 2 cups of whole wheat flour, 1 cup of finely grated carrots, 1 cup of unsweetened apple sauce, 1/2 cup of unsweetened peanut butter, 2 eggs, and a dash of cinnamon for that extra flavor boost.
3. In a large mixing bowl, combine the whole wheat flour, grated carrots, and a small sprinkle of cinnamon.
4. In another bowl, whisk together the apple sauce, peanut butter, and eggs until smooth (don’t worry if your mixture looks a little funky—trust the process).
5. Fold the wet ingredients into the dry ingredients gently until just combined.
(Be careful not to overmix; we want a tender cake, not a workout!).
6. Grease a 9-inch round cake pan with a bit more peanut butter, or use cooking spray to guarantee an easy release later.
7. Pour the batter into the prepared cake pan, spreading it evenly and making sure there are no lumps.
(This is the part where you might accidentally channel your inner cake artist—get in there!).
8. Bake in the preheated oven for about 25–30 minutes or until a toothpick inserted in the center comes out clean (the cake will slightly spring back when touched).
9. Once baked, remove the cake from the oven and let it cool in the pan for about 10 minutes before transferring it to a wire rack.
10. Cool completely before serving to your dog, and don’t forget to snap a photo of that happy tail—it’ll be adorable.
Optional Add-ons
If you’re looking to take your dog’s cake experience to the next level, why not add a twist with a delicious carrot and apple treat cake?
You’ll mix grated carrots with unsweetened applesauce, and it’s a flavor explosion your pup will adore. Plus, those precious wiggly tails? Totally worth it.
Experiment a bit—maybe toss in some peanut butter, too. Your dog’s taste buds will thank you!
3. Pumpkin Spice Celebration Cake
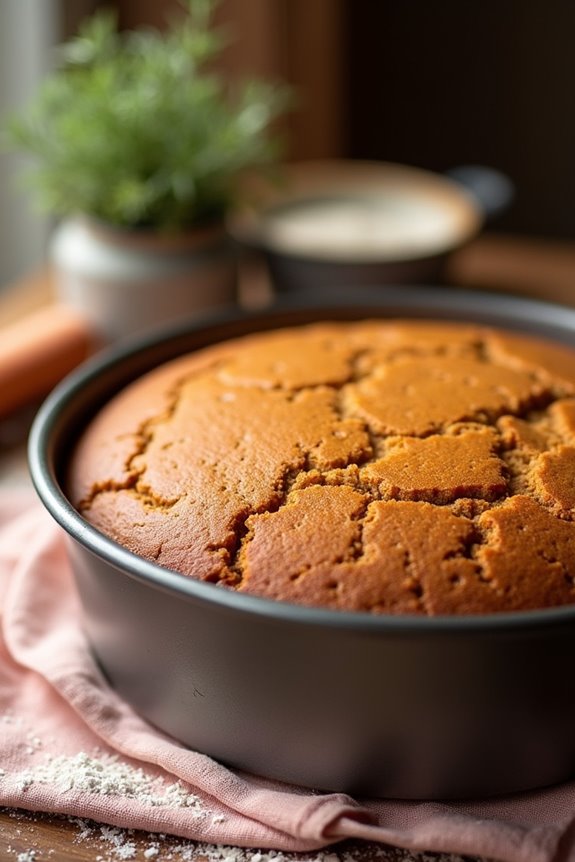
Ready to whip up a Pumpkin Spice Celebration Cake for your furry friend? This dog-friendly recipe includes simple ingredients that’ll have tails wagging in no time. We’ll walk through each step—and don’t worry, I promise it’s easier than trying to keep your pup from stealing a slice when it’s done.
Ingredients
When you want to whip up a special treat for your furry friend, using safe and wholesome ingredients is key. This Pumpkin Spice Celebration Cake isn’t only dog-friendly but also packed with flavors they’ll love.
So, let’s gather what we need to make your pup’s day a little brighter. Here’s what you’ll need:
- 1 cup of pure pumpkin puree (not the spiced pie filling, just plain pumpkin)
- 1 cup of oat flour (you can blend rolled oats to create your own)
- 1/4 cup of unsweetened applesauce (for moisture and sweetness)
- 1/4 cup of peanut butter (make sure it’s xylitol-free!)
- 2 tablespoons of coconut oil (melted, if you want a softer texture)
- 1 teaspoon of cinnamon (just a hint of spice)
- 1 egg (for binding everything together)
I mean, how easy is that? You probably have most of these ingredients lying around your kitchen anyway.
Just a little mixing and you’re on your way to baking your pup a cake that will have them wagging their tails in delight. Let’s get going!
Step by Step Instructions
Start by preheating your oven to 350°F (175°C). This guarantees it’s perfect for baking when you’re ready.
- Gather all your ingredients: whole wheat flour, unsweetened pumpkin puree, eggs, peanut butter, and cinnamon.
- In a mixing bowl, combine 2 cups of whole wheat flour with 1 cup of pumpkin puree, 2 eggs, ½ cup of peanut butter, and 1 teaspoon of cinnamon.
- Whisk everything together until just combined (Don’t overmix the batter—it should be slightly lumpy).
- Grease a cake pan with a bit of cooking spray or a splash of oil to prevent sticking.
- Pour the batter into the greased cake pan, spreading it evenly with a spatula.
- Bake in the preheated oven for 25–30 minutes, or until a toothpick inserted in the center comes out clean.
- Remove the cake from the oven and let it cool in the pan for about 10 minutes; then transfer it to a wire rack to cool completely.
Cool completely before serving to your dog, and don’t forget to save a slice for yourself. It’s a labor of love, after all.
Optional Add-ons
It’s amazing how a little creativity can turn a simple dog cake into a true celebration—especially when you add some festive flair.
Try topping your cake with a dollop of plain yogurt or a sprinkle of cinnamon.
You could even fold in bits of pumpkin or apple.
Your pup will appreciate the extra effort, and trust me, it’ll look adorable too.
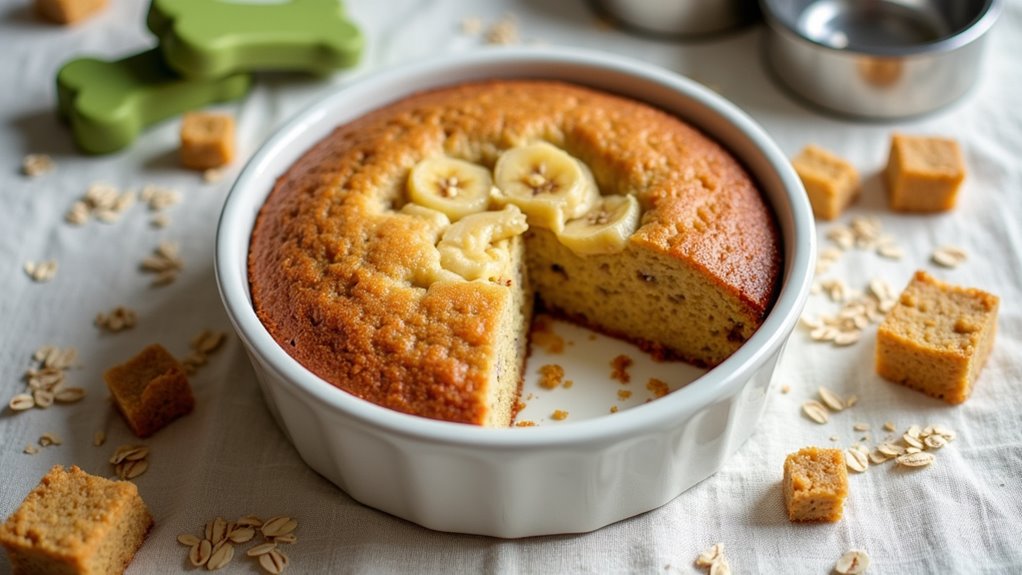
4. Banana Oatmeal Pupcake Recipe

Ready to whip up something special for your furry friend? This Banana Oatmeal Pupcake recipe isn’t only super easy, but it’s also packed with wholesome ingredients that make tails wag.
You’ll love how simple the step-by-step instructions are, plus I’ll share some fun optional add-ons to really make those pupcakes pop.
Ingredients
Alright, fellow dog lovers, let’s whip up a treat that your furry friend will go bananas for—literally! This delightful Banana Oatmeal Pupcake recipe isn’t just packed with yummy flavors for your pup, but it’s also super easy to make. Your kitchen will smell like a bakery, and your dog will thank you with slobbery kisses. So, grab your mixing bowl and let’s get started. Here are the ingredients you’ll need to make these tasty little cakes:
- 1 ripe banana, mashed (the riper, the better – your dog will love that sweet flavor)
- 1 cup rolled oats (cutting out the gluten means less chances of tummy troubles)
- 1/2 cup unsweetened applesauce (no sugar, just pure pup-friendly goodness)
- 1/2 teaspoon baking powder (helps those little cakes rise, just like your excitement)
- 1 egg (helps everything stick together, kind of like how you stick with your pup through thick and thin)
These ingredients are all safe for your dog, and you probably already have most of them at home. It’s a win-win! Alright, let’s get to baking so we can treat our best pals!
Step by Step Instructions
- Preheat your oven to 350°F (175°C) to get things warming up for your pup’s special treat.
- Grab a mixing bowl and mash 2 ripe bananas until they’re smooth, like a creamy puppy smoothie—no lumps, please.
- In the same bowl, add 1 cup of rolled oats, 1/2 cup of unsweetened applesauce, and 1/4 cup of peanut butter (make sure it’s xylitol-free, as that stuff is a no-go for dogs).
- Mix those ingredients together until well combined—your arm might feel like it has its own workout plan, but it’s worth it for your furry friend!
- In a separate bowl, whisk together 1/4 cup of water and 1/2 teaspoon of baking powder—this is our secret lift for the fluffy goodness.
- Fold the wet mixture into the banana-oat mixture gently (don’t overmix; a little lumpiness is okay, just like my attempts at yoga).
- Line a muffin tin with paper liners or grease it with a bit of coconut oil to prevent sticking—trust me, a sticky pupcake will lead to drama.
- Spoon the batter into the muffin cups, filling them about 3/4 of the way full (you want them fluffy, not overflowing, just like my ambitions before I’ve had coffee).
- Bake for 20-25 minutes, or until the tops are golden brown and a toothpick inserted comes out clean (a little crumb is okay!).
- Once baked, remove the pupcakes from the oven and let them cool in the pan for 5 minutes before transferring to a wire rack.
- Cool completely before serving to your dog—let’s not burn those precious puppy tongues!
Now, sit back and watch as your pup enjoys their homemade delight; I mean, who can resist a good homemade treat? Not this dog mom, that’s for sure.
Optional Add-ons
After those yummy pupcakes cool down, you might find yourself thinking, “What else can I add to make these even more paw-sitively delightful?”
Thankfully, there’s a world of optional add-ons just waiting for your creativity! Try mixing in some mashed bananas for a sweet twist, or even a spoonful of peanut butter for that nutty richness.
Your pup won’t know what hit ‘em!
5. Cheesy Bacon Pupcake Delight

Are you ready to whip up something your pup will drool over? The Cheesy Bacon Pupcake Delight is packed with mouthwatering ingredients that’ll make your furry friend’s tail wag like crazy. Let’s break down the simple steps and tasty add-ons that can take this treat from great to unforgettable.
Ingredients
Making a pupcake for your furry friend can be a delightful experience. It’s one of those small ways we can show love to our dogs, and they definitely appreciate a special treat.
The Cheesy Bacon Pupcake Delight is a simple recipe that combines ingredients that aren’t just tasty but also safe for dogs. Let’s explore what you’ll need for this tail-wagging treat.
- 1 cup whole wheat flour
- 1/2 cup unsweetened applesauce
- 1/2 cup shredded cheddar cheese
- 1/4 cup cooked and crumbled bacon
- 1/2 cup low-sodium chicken broth
- 1 egg
These ingredients are easy to find at your local grocery store, and you probably have some of them already in your pantry.
If your dog’s tail doesn’t start wagging at the very thought of cheesy bacon goodness, I’m not sure what will. Just remember, moderation is key, even for those adorable furballs.
Step by Step Instructions
- Preheat your oven to 350°F (175°C) so it’s warm and cozy, just like your pup after a good romp outside.
- Grease a muffin tin with cooking spray or a dab of oil (puppies love a touch of grease, right?).
- In a mixing bowl, combine 1 cup of whole wheat flour and 1 teaspoon of baking powder, then stir until it’s mixed evenly—kind of like how you mix love into every treat.
- In another bowl, whisk together 1/2 cup of unsweetened applesauce, 1/4 cup of peanut butter (make sure it’s dog-safe—no xylitol), and 1/2 cup of shredded cheese until it’s smooth and creamy—think of it as a cheesy hug for your pup.
- Gradually fold the dry ingredients into the wet ingredients (this is where you want it to come together, not a gluten dance party—keep it gentle).
- Add in 1/2 cup of crumbled cooked bacon (yes, bacon) and mix until everything is just combined—don’t go overboard; a little lumpy is just fine.
- Spoon the batter into the prepared muffin tin, filling each cup about 3/4 full—this is where the magic happens.
- Bake for 25–30 minutes or until the tops are golden brown and a toothpick comes out clean (you’re looking for perfection here, but your dog isn’t judging).
- Once baked, let the pupcakes cool in the tin for 10 minutes before transferring them to a wire rack.
- Cool completely before serving to your dog and watch the wagging tails take off.
Optional Add-ons
While your pupcakes are baking and filling your kitchen with that mouthwatering aroma, why not take things up a notch?
Imagine adding some cheesy bacon bits to the batter. It’s like a mini breakfast party for your pup.
Mix in a dollop of peanut butter frosting, and watch their tails wag in delight. Your furry friend won’t be able to resist that savory goodness.
6. Savory Sweet Potato Delight

Ready to whip up a treat that’ll make your pup’s tail wag? Let’s go over the ingredients you’ll need, simple step-by-step instructions, and a few optional add-ons that could make this savory sweet potato delight even more special. Trust me, your dog will be begging for seconds, and who can resist that adorable face?
Ingredients
If you’re looking to whip up something special for your furry friend, this Savory Sweet Potato Delight is a fantastic choice. Not only is it delicious, but it’s also packed with wholesome ingredients that are tail-wagging good.
Let’s gather what we need to make this delightful dog cake that will have your pup begging for more!
- 1 cup of cooked and mashed sweet potato
- 1/2 cup of whole wheat flour (or oat flour for gluten-free)
- 1/4 cup of peanut butter (make sure it’s free from xylitol)
- 1/4 cup of unsweetened applesauce
- 1/2 teaspoon of cinnamon
With these simple staples, you can create something that your dog will love just as much as you love giving them special treats.
And trust me, the kitchen will smell great while you’re at it. Just remember: no chocolate or sneaky ingredients that could harm your pup. Keep it safe and tasty!
Step by Step Instructions
Ready to whip up a delightful treat for your furry friend? This sweet potato cake isn’t only dog-friendly but also bursting with flavor. Let’s get started with these easy-to-follow steps!
- Preheat your oven to 350°F (175°C). This guarantees the cake bakes evenly.
- Boil 1 cup of diced sweet potatoes in a pot of water until tender—about 15 minutes should do the trick.
- While the sweet potatoes are cooking, gather your ingredients: 1 ½ cups whole wheat flour, 1 teaspoon baking powder, 1 teaspoon cinnamon, 1/4 cup peanut butter (make sure it’s xylitol-free!), and 1/4 cup unsweetened applesauce.
- Once the sweet potatoes are soft, drain them and mash them in a mixing bowl until smooth. (This part can be a little messy, but that’s all part of the fun, right?)
- In your bowl with the mashed sweet potatoes, mix in peanut butter and applesauce until well blended.
- In a separate bowl, whisk together the whole wheat flour, baking powder, and cinnamon. This aids in distributing the baking powder evenly.
- Gradually fold the dry ingredients into the wet mixture until just combined. (Don’t overmix—the batter should stay a bit thick and lumpy, like a wobbly pudding.)
- Grease an 8-inch round cake pan lightly with coconut oil. Pour the cake batter into the pan, spreading it evenly.
- Bake for 25-30 minutes, or until the top is firm to the touch and a toothpick inserted in the center comes out clean.
- Once baked, remove the cake from the oven and let it cool in the pan for about 10 minutes before transferring it to a wire rack.
Cool completely before serving to your dog. Trust me, no one wants a puppy to burn their tongue on a hot cake—it’s just a disaster waiting to happen!
Optional Add-ons
Want to take your dog’s sweet potato cake to the next level? Try mixing in some natural peanut butter or finely chopped carrots for a boost of flavor.
You could even sprinkle some oats on top for that extra crunch. Your pup will think it’s the ultimate treat.
And really, who wouldn’t want to pamper their furry friend with a delightful surprise?
7. Peanut Butter Banana Bliss
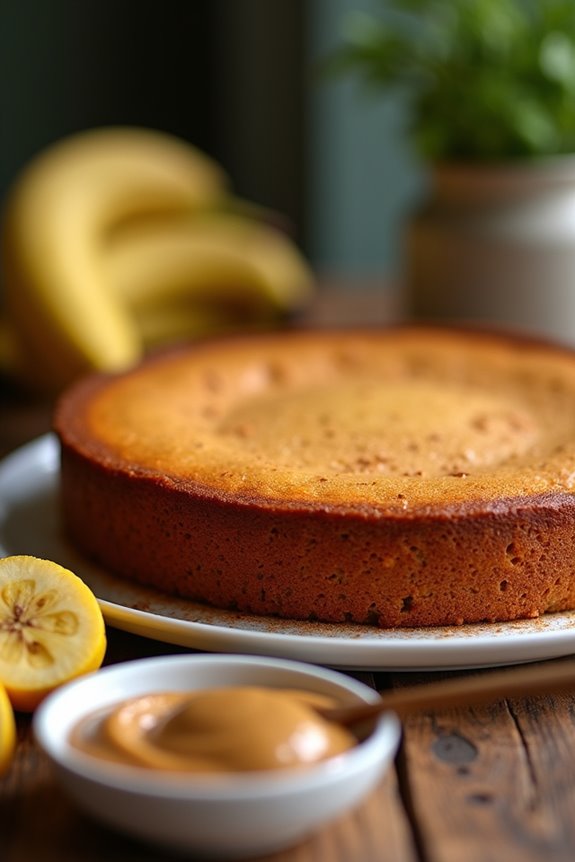
Ready to whip up something your pup will absolutely adore? Let’s talk about the ingredients you’ll need for this Peanut Butter Banana Bliss, along with some simple steps to get it just right. And hey, if you want to get creative, I’ve got some optional add-ons that’ll make your dog’s tail wag even faster.
Ingredients
Looking to whip up something special for your furry friend? This Peanut Butter Banana Bliss cake isn’t only tail-wagging good but also super easy to make.
Your pup will be thrilled, and you can feel good serving it up because every ingredient is safe and healthy.
So, let’s get to it. Here’s what you need:
- 1 ripe banana, mashed (the riper, the better, trust me)
- 1 cup of natural peanut butter (make sure it’s xylitol-free, please)
- 1 cup of whole wheat flour (or any dog-safe flour you have on hand)
- 1/4 cup of unsweetened applesauce (the secret to keeping it moist)
- 1/4 cup of water (as needed, for the perfect consistency)
- 1 egg (for that binding magic)
- Optional: a few dog-friendly treats for decoration (because it’s a special occasion, right?)
Easy peasy, right? Gather these simple ingredients, and you’re all set to make a scrumptious cake that will make your dog’s tail go wild.
Step by Step Instructions
- Preheat your oven to 350°F (175°C). This is the first step toward creating a yummy treat for your pup.
- In a medium bowl, mash 2 ripe bananas with a fork until mostly smooth. A little texture is fine—your dog won’t judge you for any lumps.
- Add 1 cup of unsweetened peanut butter to the mashed bananas. Make sure it’s dog-safe, without xylitol, of course. It’s for your dog, after all, not a human delicacy.
- Beat in 1 egg until fully combined. This will help bind all the tasty ingredients together—no clever escape routes for the mix allowed.
- Gradually stir in 1 cup of whole wheat flour. Use a spatula to fold it gently until just combined (don’t overmix—this isn’t a yoga class for batter).
- Pour the mixture into a greased 8×8 inch baking pan, spreading it evenly. Consider this pan your puppy’s stage for a show-stopping performance.
- Bake in the preheated oven for 25–30 minutes, or until the edges start to pull away from the pan and the top turns a delightful golden brown. Keep an eye on it—no dog wants burnt cake.
- Remove it from the oven and let it cool in the pan for 10 minutes before transferring it to a wire rack. Patience is key; we want to avoid any pup scorchings.
- Once completely cool, cut into bite-sized pieces for your dog. Smaller is better for their little mouths, and who wants a messy cake-splosion everywhere?
- Cool completely before serving to your dog. They won’t care about presentation, trust me; they’re just here for the flavor. Enjoy watching their tail wag with joy!
Optional Add-ons
While your pup’s cake is cooling, why not jazz it up with some Optional Add-ons that make the Peanut Butter Banana Bliss even more delightful?
Think about drizzling a little honey or adding diced apples for extra crunch. You could even sprinkle some shredded coconut on top.
Your dog won’t be able to resist! After all, every cake needs a fancy touch, right?
Baking Time and Temperature
When you finally get to the baking part, it’s essential to keep an eye on both the time and temperature. Preheat your oven to 350°F (175°C). It’s like giving your cake a warm hug before it bakes.
Pour your batter into a greased pan, then pop it in the oven. Set a timer for about 25 to 30 minutes. But don’t just sit back and scroll through your phone.
Check your cake a few minutes early. Every oven’s a little different, kind of like dogs—some are just more temperamental! When you insert a toothpick, it should come out clean if it’s ready. If it’s got batter clinging to it, well, back into the oven it goes.
Trust me, you don’t want a gooey disaster. So, stay vigilant, and soon you’ll have a tail-wagging, dog-safe cake that’s worth the wait. Plus, your pup will love you for it!
Frequently Asked Questions
Can I Use Regular Flour Instead of Whole Wheat Flour?
You can use regular flour instead of whole wheat flour, but it may alter the texture and flavor of your recipe. Whole wheat flour adds more nutrients, so consider that when making your choice.
How Many Servings Does This Cake Recipe Make?
This cake recipe makes about 8 servings. However, if you’re looking to share with friends or family, feel free to adjust the portions based on how many people you plan to serve.
Is It Safe to Add Peanut Butter?
Yes, it’s safe to add peanut butter, as long as it’s unsweetened and doesn’t contain xylitol. Dogs usually love it, and it can enhance the flavor of the cake you’re making for them.
Can I Freeze the Dog Cake for Later?
Yes, you can freeze the dog cake for later use. Just let it cool completely, wrap it tightly, and store it in the freezer. When you’re ready, thaw it in the refrigerator before serving.
What Ingredients Should I Avoid Completely?
You should avoid chocolate, xylitol, onions, garlic, grapes, and raisins completely. These ingredients can be toxic to dogs, posing serious health risks. Always double-check any recipe to confirm your pet’s safety.