Losing a dog can feel like losing a part of yourself, doesn’t it? It’s tough to find ways to celebrate those furry friends who’ve brought so much joy. But don’t worry; I’ve got some heartfelt design ideas up my sleeve that are perfect for honoring their memory. From paw print keepsakes to custom jewelry, there’s something here for every pet lover. Let’s explore these creative ways to keep their spirit close.
Memorial Paw Print Keepsakes
Creating a memorial paw print keepsake is one of the most heartfelt ways to remember your furry friend. You can capture that sweet paw shape forever, and it’s simpler than you think. Start by gathering some air-dry clay—trust me, no baking required.
Roll it out, then carefully press your dog’s paw into the clay. Don’t forget to include their name and the date; you want to immortalize their spirit.
Once it hardens, consider adding a splash of paint or a decorative border. It’s one of those dog remembrance ideas that transforms a simple keepsake into a cherished memory.
Plus, ain’t it comforting to have something tangible to hold? It’s like they’re still right there with you. You can also enhance this keepsake by adding a custom pet memorial statue, which further honors your beloved pet’s memory.
Our Collection
When you’re looking to cherish your pup’s memory, our collection has something special for everyone. You might find customized engraved dog tags to keep their spirit close, or a memorial shadow box display to showcase your favorite moments together. Ever thought about a custom pet portrait? It’s like having a piece of your best friend right on your wall, reminding you of all those tail-wagging days. Our personalized pet memorial sculptures are also a beautiful way to honor your beloved companion forever. To elevate how you remember your furry friend, consider a luxury dog treat maker, making special moments even sweeter.
1. Customized Engraved Dog Tags

Customized Engraved Dog Tags (Our Collection)
Creating customized engraved dog tags for your furry friend is a heartfelt DIY project that not only showcases their unique personality but also adds an extra layer of safety. In the event that your pup gets lost, having a personalized tag with your contact information can be a real lifesaver (not to mention a monetary saver compared to buying ready-made ones!). Additionally, these tags can be a part of a luxury dog accessory set that elevates your pup’s style. Moreover, ensuring that your dog has a premium diet can help maintain their overall health and wellbeing.
Plus, it’s a fun way to remember your best buddy, giving them a little extra style that you’ll enjoy seeing every day.
Materials Needed:
- Blank metal dog tags (found at craft stores or online)
- Engraving tool or engraving pen
- Ruler or measuring tape
- Stencil or marker for design
- Keyring or dog collar attachment
- Cloth for cleaning
- Optional: Paint or colored markers for decoration
Step-by-Step Instructions:
- Choose Your Tag: Pick a blank dog tag that you think fits your pup’s personality. Is your dog more of a sleek silver or playful pink? This is your moment to shine.
- Design Your Tag: Before you start engraving, use a ruler to measure the area where you’ll engrave. Lightly mark it with a stencil or marker. Think about what you want to include: your dog’s name, your phone number, maybe even a cute little phrase like “Adventure Buddy!”
- Get Ready to Engrave: Grab your engraving tool. If you’ve never used one before, practice on a scrap piece of material first, so you don’t end up with a tangled mess that looks like someone tried to carve a turkey.
- Engrave Your Design: Carefully start engraving along your marks. Take deep, steady breaths – this is art, not a race. Remember, you might get a bit of hand cramp, but every groove tells your dog’s story, right?
- Clean Your Tag: Wipe off any metal shavings or marker residue with a cloth. You want this tag to shine like your dog’s sweet face after a romp in the park.
- Attach to Collar or Keyring: Attach your shiny new tag to your dog’s collar or hang it on a keyring for easy access. Don’t forget to admire your handiwork and maybe snap a picture for the ‘gram (you know, for evidence).
- Celebration Time: Let your dog strut their stuff proudly. They’re now the proud owner of the fanciest tag on the block. Don’t be surprised if they start demanding a fancy ‘paw-ty’ in your backyard.
Optional Add-ons/Variations:
- Color It Up: Use colorful paint or markers to add a splash of personality to the sides of your tag. You could even add glitter for that extra pizzazz (because who doesn’t love a little sparkle?).
- Patterns & Shapes: Instead of a traditional rectangular tag, look for fun shapes like bones or hearts. You can also layer multiple tags together for a funky, layered look.
Pro Tip:
If you make a tiny mistake while engraving (because we all do at some point), just turn it into a quirky design element. A little heart around a small “oops” can be charming and make the tag even more unique to your pooch. Additionally, consider adding your pup’s favorite premium supplies alongside the tag for complete safety and style.
2. Memorial Shadow Box Display
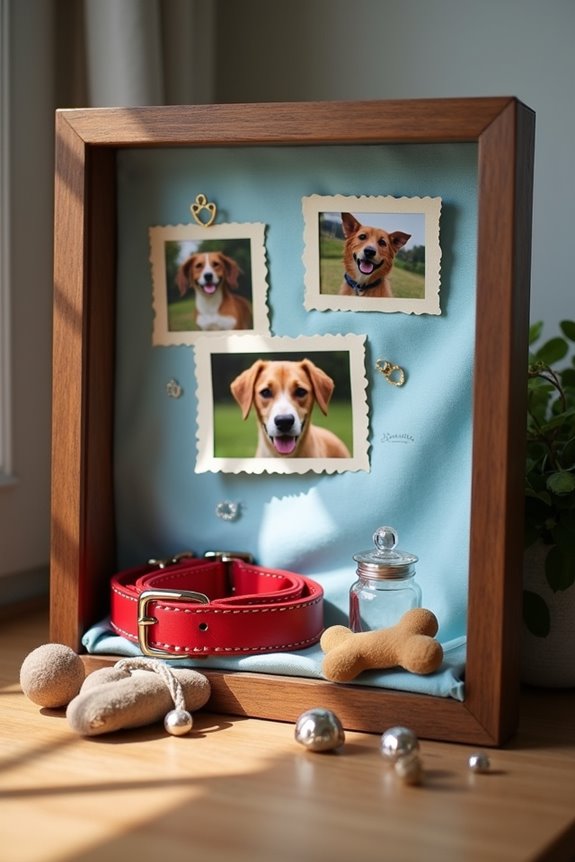
Creating a memorial shadow box display for your cherished pup is a wonderful way to honor their memory while also showcasing some of your favorite mementos. This DIY project not only allows you to turn your memories into a beautiful keepsake, but it also adds comfort and warmth to your home as a tribute to your beloved friend. Plus, it’s a heartfelt way to save those precious doggy treasures that might otherwise gather dust in a drawer. Additionally, consider including dog cake baking supplies to celebrate their special moments, such as birthdays or adoption anniversaries, in a delightful way. In fact, luxury dog cake supplies can elevate your celebrations, ensuring they are as special as your pup. Including luxury dog training equipment in your home can enhance your pup’s overall experience, making your tribute even more meaningful.
Materials Needed:
- A shadow box frame (available at craft stores or online)
- Photos of your dog (printed or developed)
- Small trinkets (like their collar, toys, or a lock of fur)
- Decorative background paper or fabric
- Glue (craft glue or hot glue gun)
- Scissors
- Tweezers (for fiddly bits)
- Optional: Decorative stickers or charms for embellishments
Step-by-Step Instructions:
- Gather Your Treasures: Search your home for all those little memories – photos of your pup, their collar, favorite toy, or any keepsake that reminds you of your time together. It’s like a treasure hunt, but for your heart.
- Choose Your Layout: Open the shadow box and lay out your items before gluing anything down. Arrange the photos, trinkets, and other mementos until you find a design that feels just right. You might find yourself moving things around a few times, and that’s totally okay.
- Prepare the Background: If you’d like to add some personality, cut a piece of decorative paper or fabric to fit the back of the box. Glue it down securely with your chosen adhesive. This step is like giving your display a cozy blanket, making it feel just right.
- Secure Your Items: Start by gluing down your photos first. Use enough glue to keep them in place but not too much that it spills out the sides (that might be a little messy, and trust me, no one wants glue in their fur). Next, glue your trinkets, using tweezers to manage the tiny bits if need be.
- Embellish Your Display: If you want to add that extra pop, pull out your decorative stickers or charms. It’s like putting the cherry on top of your dog-friendly sundae. Choose items that resonate with your dog’s personality – were they a playful pup, or a regal snoozer?
- Seal It Up: Once everything is glued down and you’re satisfied with your masterpiece, gently place the shadow box cover back on. Make sure it’s secured tightly, because you’ll want this display to last as long as the love you carry in your heart.
- Find the Perfect Spot: Decide where this beautiful tribute belongs in your home. Some choose a special spot on a mantel, while others may opt to keep it close by, like your bedside table. Wherever it lands, make sure it brings a smile to your face when you see it.
Optional Add-ons/Variations:
- Color Coordination: Use themed colors that match your home decor or your dog’s personality, creating an even more cohesive display. If your pup was a spunky red, maybe pair that with a stylish patterned fabric.
- Seasonal Switch-Ups: Consider making your shadow box seasonal – swap out items or photos for different times of the year. It’s like a gallery of memories that never goes out of style.
Pro Tip:
Before you glue everything down, take a picture of your layout with your phone. This way, if something goes awry during the assembly (like the infamous glue spill), you can still recreate your design without a hitch.
3. Personalized Photo Frame
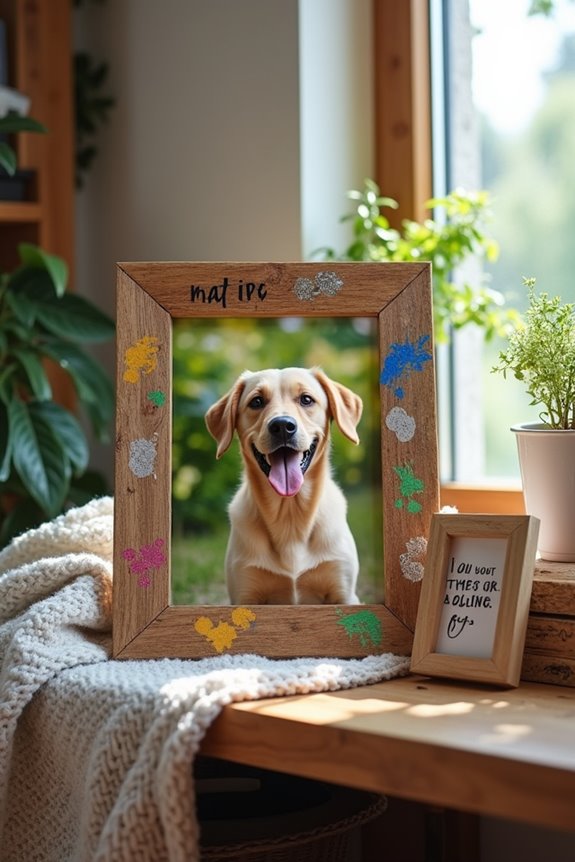
A personalized photo frame is an intimate way to celebrate your dog’s unique spirit, turning their photos into cherished art pieces that make your home feel extra special. Not only does this DIY project save you money on pricey custom frames, but it also adds a personal touch that’s truly heartwarming—a daily reminder of your beloved furry friend. Plus, consider pairing your frame with some premium dog chew toys to create a complete tribute to your canine companion. Luxury dog toys are also available for those looking to elevate their pet’s style.
Materials Needed:
- A wooden photo frame (choose a size that fits your favorite picture)
- Acrylic paint (in colors you love or that remind you of your dog)
- Paintbrush or sponge brush
- Decorative embellishments (like stickers, washi tape, or prints of paw prints)
- Photos of your pup (print them out in the size of your frame)
- Mod Podge (or any clear drying glue for sealing)
- Scissors
- Optional: Picture hanging hardware if you want to display it on the wall
Step-by-Step Instructions:
- Pick the Perfect Frame: Start with a simple wooden frame, naked and ready for some tender loving care. If it’s not quite your style, don’t worry; we’re about to change that.
- Get Creative with Color: Grab your acrylic paints and brush, and begin painting the frame. Feel free to freestyle the colors, because who’s judging? You can use one solid color, or make it as funky as a rainbow if your pup’s personality calls for it. Remember, a splash of color can really brighten a wall.
- Add Texture and Fun: While the frame dries, gather your embellishments. Think paw print stickers, glittery decorations, or even a playful quotation about dogs. Arrange them around the frame until you’re happy with the layout before gluing anything down. It’s like putting together a puzzle—a happy puzzle.
- Seal the Deal: Once you’re satisfied with your decorations, seal everything in place with a coat of Mod Podge. Apply it lightly over the paint and embellishments for a glossy finish. Just like your pup loves a good belly rub, this step really gives your frame some loving care.
- Insert Your Pup’s Picture: Now comes the best part. Insert that adorable picture of your dog like it’s the main event. Maybe it’s them making a goofy face or striking that regal pose. Secure the back of the frame, and just like that, you’ve created a piece of art.
- Hang or Display Your Frame: If you’re in the mood for showcasing your masterpiece, hang it up on the wall or place it on a shelf. Each time you pass by, it’ll be like a warm hug from your furry friend.
Optional Add-ons/Variations:
- Go Monochrome: Instead of using multiple colors, consider painting the frame in a single bold color that matches your home decor. A sleek black or white frame can lend a chic look.
- Themed Frames: If your pup has a favorite theme—like beach days or winter walks—use decorations that evoke that vibe. Think seashells or snowflakes to remind you of fun times.
Pro Tip:
When using paint, allow each layer to dry completely before adding more touches to avoid running colors or a sticky mess. It’s like cake; you wouldn’t frost it while the layers are still warm, right?
Plus, creating a photo frame together can be a fun bonding experience—just keep an eye on those paintbrushes; they might look like toys to your dog.
With this DIY project, you’re not just honoring your dog’s memory, but you’re also adding a heartfelt decoration to your home that brings joy every day. Happy crafting!
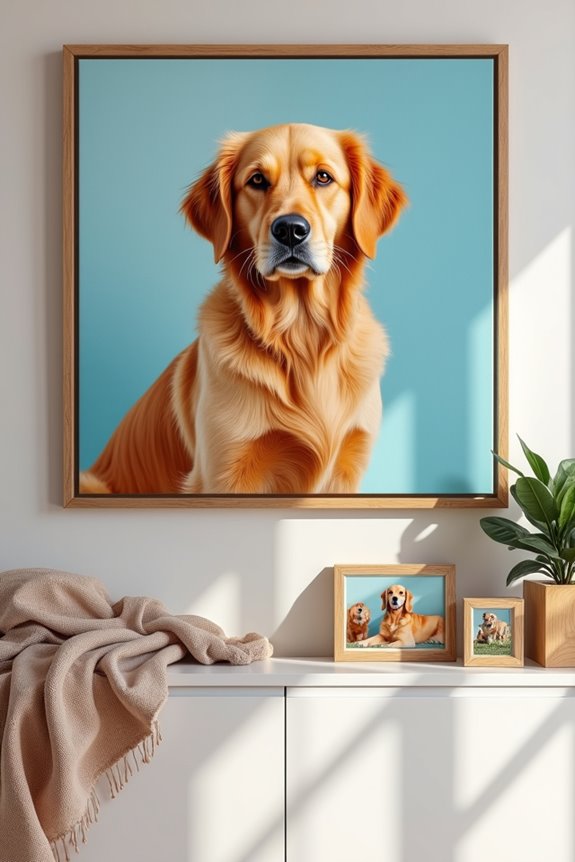
4. Custom Pet Portraits
Materials Needed:
- Canvas or heavy art paper (choose the size you prefer)
- Acrylic paints or colored pencils (in colors that suit your pup)
- Paintbrushes (various sizes for detail work)
- A photo of your dog (make sure it shows their personality)
- Palette or mixing tray (for paints)
- Water cup (to rinse brushes)
- Pencil and eraser (for sketching)
- Optional: Frame (to display your finished masterpiece)
Step-by-Step Instructions:
- Choose Your Canvas: Pick a canvas or heavy art paper that fits your space and mood. Want a small corner piece or a big statement? The choice is yours.
- Sketch Your Pup: Using the pencil, lightly sketch the outline of your dog based on the photo. Don’t worry about being perfect; this is all about capturing their essence. If you mess up, just erase it—like your dog erases all the rules of your house.
- Pick Your Colors: Now it’s time to get those paints out. Look at your dog’s photo to see the various shades that bring your pup to life. This can get messy, but remember, art isn’t about clean hands.
- Start Painting: Begin with a base color for your dog’s coat. Use larger brushes for this part and feel free to think outside the lines—like your dog when they see a squirrel. Once that’s dry, you can layer on other colors to add depth and dimension. Remember to consider how a dog grooming tub professional can help make clean-up easier!
- Detail Work: Grab your smaller brushes and turn your attention to the finer details—this includes those adorable eyes, the bright shine on their nose, and of course, any quirky features. This stage can take a bit of time, but it’s where your dog’s personality really shines through.
- Final Touches & Drying: Once you’re satisfied with your portrait, set it aside to dry completely. Maybe go celebrate by giving your pup a back-scratch (they deserve it for being your muse).
- Show Off Your Masterpiece: If you’ve opted for a frame, now is the time to put it in. Hang it on the wall or showcase it on a shelf, giving your pup the spotlight they always wanted.
Optional Add-ons/Variations:
- Different Styles: Want a more whimsical feel? Try using watercolors for softer edges or even markers for bold lines. Change it up based on what you feel reflects your dog’s personality best.
- Background Fun: Instead of leaving the background plain, you could paint a scene that represents something your dog loves—a park, the beach, or even just imaginary squirrels.
Pro Tip:
If you’re feeling nervous about tackling this project, consider doing a practice sketch on paper first. This way, you can play around with shapes and colors without any pressure. Also, don’t forget to take breaks and come back with fresh eyes—sometimes you’ll see those small adjustments that make a big difference. Plus, consider pairing your artwork with luxury dog furniture to create a stylish display that shows off both your artistic flair and your pup’s charm.
5. Commemorative Garden Stone
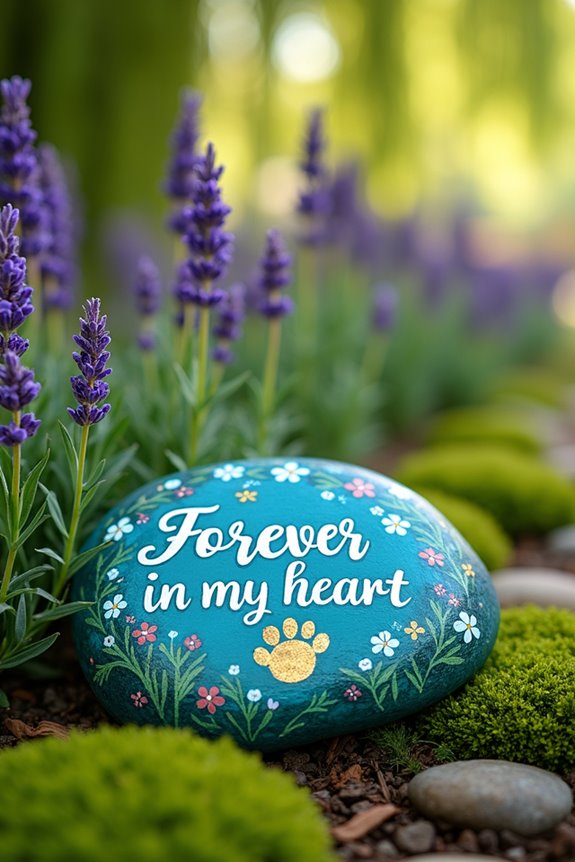
Creating a commemorative garden stone is a heartfelt way to honor the memory of your beloved dog. This DIY project not only beautifies your space but also provides a comforting and personal touch to your garden or yard. It’s a lovely way to keep your pup’s spirit alive while enhancing your outdoor decor — and it’s usually much more affordable than buying a ready-made stone. Plus, getting your hands a little dirty feels so rewarding, doesn’t it?
Materials Needed:
- Smooth, flat stone (you can find these at craft stores or even in your yard)
- Outdoor paint or permanent markers (for durability)
- Paintbrushes (various sizes for detail)
- Sealer (clear acrylic spray or a paint-on sealant)
- Pencil (for sketching designs)
- Optional: Stencils or stamps (for added creativity)
Step-by-Step Instructions:
- Select Your Stone: Find a smooth, flat stone that speaks to you. The size can range from a cute little pebble to a larger statement piece—it’s all about how you want to showcase your memories.
- Clean the Stone: Give your stone a good wash and let it dry thoroughly. Dirty stones are just not the mood you want for this sentimental project.
- Sketch Your Design: Using a pencil, lightly sketch the words, symbols, or images you’d like to include. Maybe add your pup’s name, a paw print, or a sweet phrase like “Forever in my heart.” This step helps you visualize the final product.
- Start Painting: Now comes the fun part. Grab those outdoor paints or permanent markers and begin to fill in your design. Take your time—if you aren’t satisfied with an area, let it dry, and paint over it. It’s like giving your art a do-over, just like how our dogs do with their toys.
- Add Personal Touches: Sometimes, less is more, but if you’ve got creative juice flowing, decorate your stone further! You could add flowers, hearts, or anything that reminds you of your pup!
- Seal the Stone: Once your masterpiece has dried completely (this is essential unless you want a swirling mess), apply a clear acrylic spray or paint-on sealant to protect it from the elements. Trust me; you don’t want your artwork washed away the very first rainy day.
- Display with Love: Find a special spot in your garden or yard to place your commemorative stone. It could be under a favorite tree where your pup loved to lay or close to the flowers they enjoyed sniffing. Maybe even a cozy corner of your patio where you shared lazy afternoons.
Optional Add-ons/Variations:
- Incorporate Color: Consider using different colors or even painting the whole stone in your pet’s favorite color. You can also create a blend of hues for a rainbow effect that adds vibrancy to your garden.
- Create a Series: If you have multiple pets, why not make a series of stones? Each could have its own design or color scheme, turning your garden into a lovely tribute.
Pro Tip:
When using outdoor paints, check if they’re non-toxic and pet-friendly. You want your stone to be a safe reminder for both you and future furry friends enjoying the space.
Plus, this is a great way to show your love for animals both big and small. Happy crafting!
6. Customized Pet Memorial Jewelry
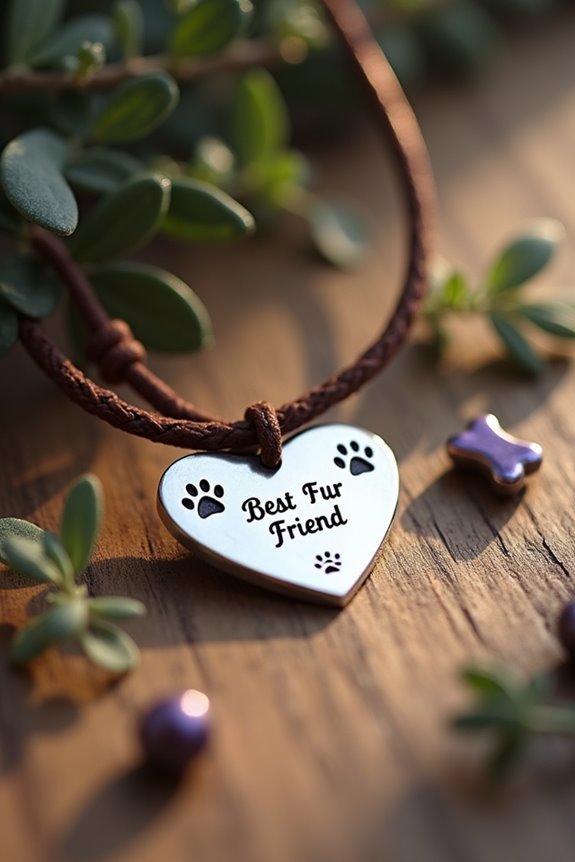
Customized Pet Memorial Jewelry (Our Collection)
Creating customized pet memorial jewelry is a beautiful way to carry a piece of your beloved dog with you wherever you go. This DIY project offers dog owners the chance to commemorate their furry friends in a stylish, personal way that honors their memory while also providing some emotional comfort. Plus, it’s a wonderful alternative to store-bought options, typically saving you money and enabling you to infuse your own creativity. Additionally, utilizing a professional sewing machine can enhance your ability to incorporate fabric elements into your memorial pieces. Furthermore, choosing premium small dog food can contribute to your pet’s health and well-being. Incorporating a dog bike carrier basket into your daily routine can also help maintain an active lifestyle that your pup would have loved.
Materials Needed:
- Metal or leather pendant (available at craft stores or online)
- Engraving tool or metal stamps (if you want to personalize it)
- Chain or leather cord (for wearing as a necklace)
- Jump rings (to attach your pendant to the chain)
- Plier (for closing jump rings)
- Optional: Paint or ink (for adding color or designs)
- Optional: Clear coat spray (for added durability)
Step-by-Step Instructions:
- Choose Your Pendant: Pick a metal or leather pendant that speaks to you. It could be a simple heart, a paw print, or something uniquely shaped that reminds you of your pup.
- Decide on Personalization: Think about what you want to engrave or stamp on the pendant. It could be your dog’s name, a special date, or a short phrase that captures your bond, like “Best Fur Friend.”
- Get to Work on Personalizing: If you’re using an engraving tool, gently carve your chosen words into the surface of the pendant. If you’re stamping, make sure to align your stamps carefully and apply even pressure—trust me, it creates a better impression.
- Add Color (Optional): If you want to spice things up with some color, use paint or ink for added flair. Just make sure to follow up with a clear coat spray once it’s dry to seal those precious hues.
- Attach to the Chain: Slip a jump ring through the hole in the pendant, then attach it to your chain or leather cord. Use your pliers to close the jump ring securely, ensuring your creation is safe and sound.
- Wear with Love: Put on your beautiful piece of jewelry as a daily reminder of the love you shared with your dog. Whether you wear it out or keep it close to your heart, it will bring you comfort and joy.
Optional Add-ons/Variations:
- Consider adding a small charm or bead that represents something special from your dog’s life, like a little bone or a heart.
- Experiment with different materials for the pendant, such as wood or clay, to give it a more personalized touch.
Pro Tip:
When working with engraving tools, always wear protective eyewear. It’s a simple way to keep yourself safe while expressing your heartfelt creativity.
And remember, if you make a mistake, don’t sweat it. Sometimes those little quirks add character to your unique piece.
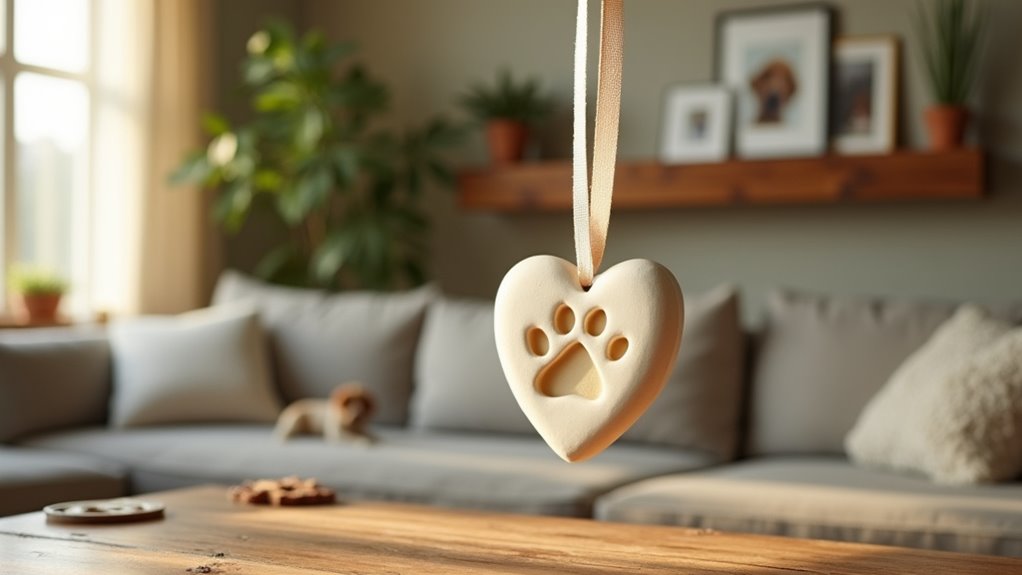
7. Ceramic Paw Print Ornament
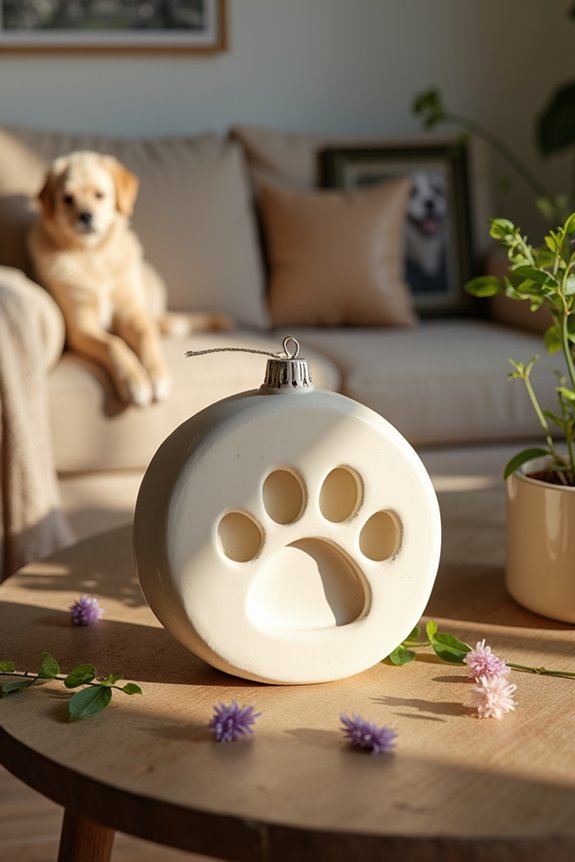
If you’re looking for a touching way to celebrate your furry friend‘s life, creating a ceramic paw print ornament is a beautiful DIY project. Not only does it allow you to capture your dog’s adorable paw print forever, but it also serves as a lovely keepsake that can brighten up your home.
Plus, this project saves you money compared to buying a pre-made ornament, and it’ll bring a wave of comfort every time you see it.
Materials Needed:
- Air-dry clay or polymer clay
- Rolling pin
- Plastic knife or cookie cutter (to create desired shapes)
- A straw (for making a hole for hanging)
- Non-toxic paint (if you’d like to add color)
- Clear sealant (to protect the finished ornament)
- A small bowl of water (for smoothing the edges)
- A cardboard or paper plate (for drying)
Step-by-Step Instructions:
1. Prep the Clay: Start by taking your air-dry or polymer clay and knead it with your hands until it’s soft and pliable. This step helps avoid any lumps that could cause issues later on.
2. Roll It Out: Use a rolling pin to flatten the clay to about 1/4 inch thick. Try to keep it as even as possible. The flatter it is, the better the paw print will show up.
3. Create the Paw Print: Gently press your dog’s paw into the center of the flattened clay, using enough pressure to leave a clear imprint. If your pup is wiggly (as mine often is), you might’ve to bribe them with a treat first!
4. Cut and Shape: Use your plastic knife or cookie cutter to shape the ornament around the paw print. You can make it in a traditional round shape or go for something unique, like a dog bone or heart.
5. Add a Hole: Take the straw and poke a hole in the top of the ornament. This is where you’ll string it up later, so make sure it’s big enough to fit your hanging material.
6. Let It Dry: Place your ornament on a cardboard or paper plate and Let It Dry. If you’re using air-dry clay, it can take anywhere from a few hours to a couple of days.
Just be patient; good things come to those who wait. If using polymer clay, follow the instructions for baking time.
7. Paint & Seal (Optional): Once dry, this is your chance to customize! Grab your non-toxic paint and give your ornament a splash of color. After it’s dry, spray it with a clear sealant to protect it – this will help keep it looking shiny and new.
Optional Add-ons/Variations:
- If your dog has a distinct fur color, why not roll out some extra clay and make a tiny heart or bone charm in that color to hang alongside the ornament? You can even add your dog’s name to it.
- Experiment with different textures: use fabric or textured materials to impress patterns into the clay before rolling it out.
Pro Tip:
While you’re at it, keep a bowl of water nearby when shaping and smoothing. If you notice any cracks or rough edges, dipping your fingers in the water helps to smooth everything out nicely.
And, if you think your pup might be too curious about the drying ornament, place it on a high shelf or out of reach—our furry friends can be surprisingly crafty themselves!
Creating this ceramic paw print ornament as a tribute to your dog not only serves as a heartfelt reminder of their presence but also offers a therapeutic crafting escape. Enjoy channeling those memories into a special keepsake that you’ll treasure for years to come.
Extra Tips & Ideas
While reminiscing about your beloved dog, you might wonder how to turn those precious memories into something tangible. Consider creating a memory box filled with photos, toys, and a favorite blanket. You can even add little notes recalling silly moments—trust me, you’ll laugh and cry.
How about making a personalized photo album or a scrapbook? It’s like reliving all the fun again. For a special touch, include a section dedicated to their favorite toys or luxury dog furniture that can help symbolize the comfort they brought into your life. A beautiful way to commemorate their spirit is to invest in custom dog memorial statues that serve as lasting tributes to their joy.
If you’re feeling crafty, try painting a tribute rock for your garden. Sure, it might turn out a bit lopsided, but hey, it adds character, right?
Finally, don’t forget to share stories with friends. Sometimes, sharing can lighten the heart. After all, your dog deserves to be remembered not just in your home, but in your laughter too. To further elevate your remembrance, consider incorporating luxury dog kennel furniture which can beautifully honor your pet’s memory while enhancing your living space.
Frequently Asked Questions
What Materials Are Best for Creating a Dog Memorial?
For creating a dog memorial, consider materials like wood, stone, metal, or ceramic. These options offer durability and aesthetic appeal, ensuring your tribute lasts while maintaining a personal touch that reflects your dog’s spirit.
How Can I Involve My Children in the Remembrance Process?
You can involve your children by creating special memory boxes together, drawing pictures or writing letters to your dog, and planting flowers in a memorial garden. These activities foster connection and help them process their feelings.
Are There Specific Colors Associated With Pet Memorials?
Yes, certain colors are often associated with pet memorials. You might consider using blue for tranquility, green for renewal, or purple for spirituality. Choose colors that resonate with you and your family’s memories of your pet.
Where Can I Find Local Artisans for Custom Memorial Designs?
You’ll find local artisans for custom memorial designs by visiting craft fairs, galleries, or community events. Remember, every cloud has a silver lining; connecting with your community can lead to heartwarming creations that honor your beloved pet.
How Long Does It Typically Take to Receive a Custom Memorial?
It typically takes two to six weeks to receive a custom memorial, depending on the artisan’s workload and complexity of the design. Communicate your timeline clearly to guarantee the best results for your project.
Conclusion
Creating memorials for your beloved dog can be a truly healing experience, turning grief into beautiful tributes. Remember, it’s all about honoring their spirit in a way that feels right to you. Whether you’re crafting a paw print keepsake that rivals a masterpiece or filling a shadow box with treasured memories, each piece tells their story. So grab your supplies, let your creativity flow, and celebrate the love you shared—because every pup deserves to be remembered in style.