If your pup’s always looking for a cool treat, why not whip up some homemade dog popsicles? They’re super easy to make, and you might even have some ingredients lying around. From banana to pumpkin, it’s like a fun cooking experiment that happens right in your kitchen. Plus, your furry friend will appreciate the love when they savor every icy bite. Interested in learning how to make these delightful snacks? Let’s explore 7 doggone tasty recipes together.
Why Homemade?
You might wonder why you should bother making dog popsicles at home instead of just grabbing some from the store. Well, let’s be real—those store-bought options can be loaded with artificial ingredients, and your pup deserves better.
With a simple dog popsicles recipe, you can whip up tasty goodies with fresh ingredients that you can control. Plus, it’s kind of therapeutic, right? Mixing up yogurt, peanut butter, or even pureed fruit turns into a fun bonding experience. You can even try incorporating wholesome ingredients like sweet potato dog treats for a nutritious twist! Additionally, using peanut butter apple sauce dog treats can enhance the flavor while adding a healthy touch! Many homemade dog ice cream recipes also offer healthier alternatives to sugary treats that can be harmful to your dog. Not only will you have peace of mind knowing what’s in them, but you’ll also unleash your creativity in the kitchen.
You’ll get to see your dog’s eyes light up as they taste-test new flavors—there’s nothing quite like that joy. And honestly, who doesn’t love a good excuse to get messy in the kitchen?
Delicious Frozen Treats Collection
Get ready to cool down those dog days with some tasty frozen treats! You can whip up delightful options like Peanut Butter Banana Delight or Coconut Mango Chill Pops that will have your pup wagging their tail in approval. Who wouldn’t want to spoil their furry friend with a Pumpkin Spice Delight or a Chicken Broth Freeze Treat on a hot day? Making these treats is a breeze, as they only require a few simple ingredients that are sure to delight your canine companion! High-quality dog treats can play a crucial role in training, ensuring your furry friends learn effectively while enjoying their special frozen rewards. Additionally, incorporating soft dog treats homemade into your treats can take your pup’s treat game to an entirely new level! Plus, incorporating homemade cheese dog biscuits can take your pup’s treat game to an entirely new level!
1. Peanut Butter Banana Delight
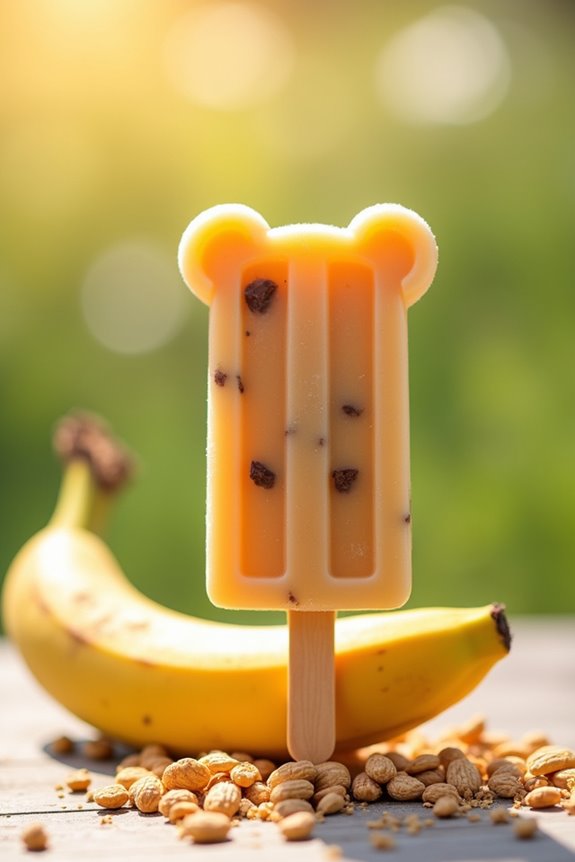
Ready to whip up a tasty treat for your pup? Let’s chat about the Peanut Butter Banana Delight, which is super easy to make and your dog will love it. You’ll need just a few simple ingredients, then I’ll walk you through the steps, and we can even consider some fun add-ons to make it extra special. These treats are not only delicious but also packed with nutritious ingredients that are great for your dog’s health. Additionally, using homemade peanut dog treats can ensure your furry friend enjoys high-quality snacks without any harmful additives.
Ingredients
When it comes to treating your pup to something truly special, nothing beats a homemade popsicle. This Peanut Butter Banana Delight isn’t only delicious but also super easy to whip up.
Your furry friend will be wagging their tail with joy, and you might even want to sneak a taste yourself. So, let’s gather our ingredients and get ready to create a frozen treat that’s sure to impress.
- 1 ripe banana, mashed
- 1/2 cup peanut butter (check that it’s xylitol-free, please)
- 1 cup low-fat plain yogurt (unsweetened is best)
- 1/2 cup water or chicken broth (low sodium, of course)
- Optional: a handful of blueberries or chopped apples for added flavor
Just imagine, your dog slurping up this tasty treat on a hot day; it’s the best kind of moment.
As you gather these simple ingredients, remember that you’re creating something special. Plus, you’ll be the cool dog parent everyone envies.
And honestly, who doesn’t love a frozen snack on a warm day? Your pup deserves the best after all.
Step by Step Instructions
Let’s make a delightful frozen treat for your pup with this Peanut Butter Banana Delight recipe. It’s simple, tasty, and your furry friend will love it as a perfect summer snack. Follow these easy steps to whip up this paw-some popsicle.
- Gather all your ingredients: 1 ripe banana, 1/2 cup peanut butter (make sure it’s xylitol-free), and 1 cup plain yogurt.
- Peel the banana and slice it into chunks. (It doesn’t have to be perfect; just chunk it up.)
- Place the banana pieces, peanut butter, and yogurt in a blender or mixing bowl.
- Blend or mix the ingredients until smooth and creamy (think frosting consistency—yummy!).
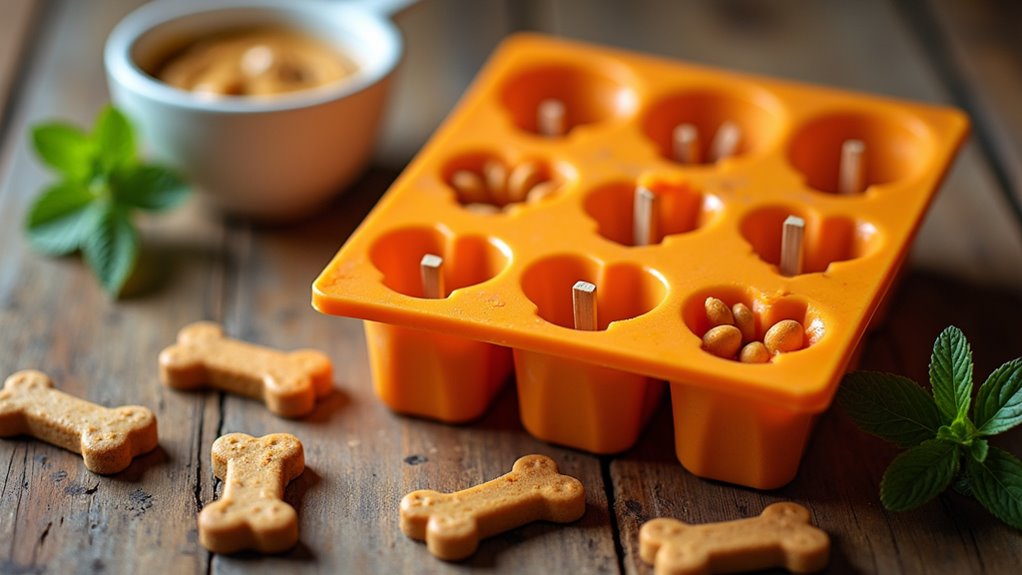
- Grab your popsicle molds and fill each mold with the mixture, leaving a little space at the top.
- Insert wooden sticks into the molds (don’t worry if the mixture moves a bit; it’s all good).
- Carefully place the filled molds in the freezer.
- Freeze for at least 4-6 hours, or until they’re solid. (Trust me, the wait will be worth it when you see your pup’s excitement.)
- Once frozen, remove the popsicles from the molds by gently pulling the stick and twisting.
- Serve immediately, or store any extras in an airtight container in the freezer for later.
Cool completely before serving to your dog, and watch them wag their tail in delight.
Optional Add-ons
After whipping up those tasty Peanut Butter Banana Delight popsicles, you might find your creativity kicking in.
Why not toss in some chopped carrots or blueberries for extra fun? You could even drizzle a bit of yogurt on top.
Go wild! Your pup won’t complain about a little texture variety. Just remember, the more unique, the better – right?
Happy experimenting!
2. Fruit and Yogurt Bliss
Now that your pup’s enjoyed the Peanut Butter Banana Delight, it’s time to switch things up with a revitalizing treat: Fruit and Yogurt Bliss.
You’re gonna love how simple it’s to whip up these popsicles using just a few tasty ingredients and some straightforward steps.
Plus, I’ll share some optional add-ons to take these icy delights to the next level, because why not spoil your furry friend a little more?
Ingredients
Your furry friends deserve something special on a hot day, right? These fruit and yogurt popsicles aren’t only easy to make but delicious and safe for your dog! Trust me, your pup will wag their tail in excitement when they get a taste of these invigorating treats.
Let’s keep it simple, so here’s what you need to whip these up.
- 1 cup unsweetened plain yogurt (preferably Greek for that creamy texture)
- 1 ripe banana, sliced (easy to mash, and packed with potassium)
- 1 cup diced strawberries, fresh or frozen (because who doesn’t love strawberries?)
- 1 tablespoon honey (optional, for a touch of sweetness—most dogs love it)
- ½ cup of water (to help blend everything together if needed)
That’s it! Just gather these ingredients, and you’re a step closer to giving your pup a frosty joy they won’t forget.
Step by Step Instructions
- Gather your ingredients: choose your favorite fruits (like bananas, berries, or apples) and plain yogurt (preferably low-fat and non-toxic for dogs).
- Wash and chop the fruits into small pieces (you shouldn’t have chunks larger than your pup’s nose).
- In a mixing bowl, combine the chopped fruits and yogurt.
- Stir the mixture gently until the fruits are evenly distributed in the yogurt (this is where the magic starts to happen).
- Grab some silicone molds or ice cube trays, and spoon the mixture into each cavity, filling them about three-quarters full (make sure to avoid overflow or you’ll get a yogurt explosion).
- Insert popsicle sticks into the center of each mold (this helps your pup hold on to their frozen treat).
- Place the molds in the freezer and let them freeze for at least 4 hours, or until solid (you can do a little happy dance while you wait).
- Once frozen, gently twist the molds to release the popsicles (if they’re stubborn, run a little warm water over the outside of the mold).
- Serve the popsicles to your pup and watch their tail go crazy (they might even do a little spin).
Cool completely before serving to your dog. Enjoy the big smiles all around!
Optional Add-ons
When it comes to whipping up frozen treats for your dog, who wouldn’t want to get a little creative?
Think about adding yummy ingredients like bananas, blueberries, or a dollop of yogurt. They’re not only tasty but also healthy.
Just remember, your pups will definitely beg for more, and you might find yourself rationing their delights, or they’ll never let you rest.
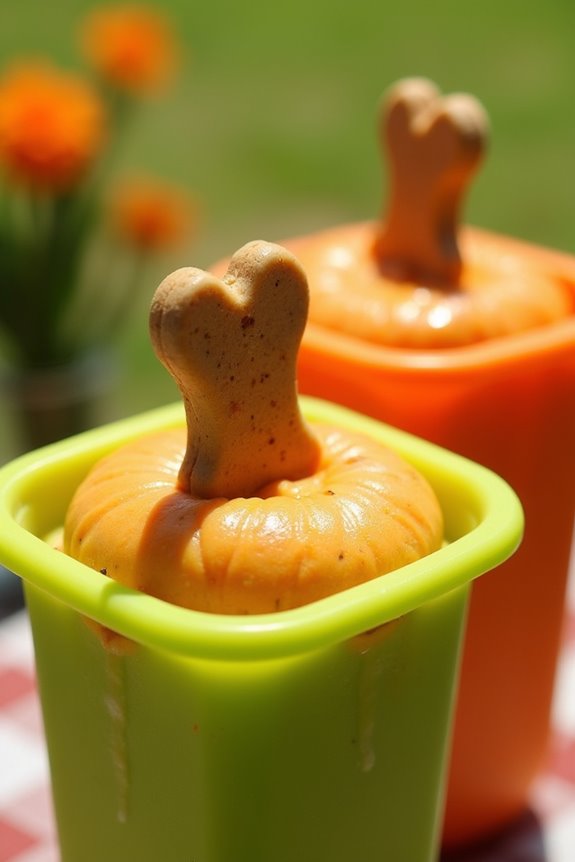
3. Pumpkin Spice Delight for Dogs
Ready to whip up a tasty treat your pup will love? We’re talking about Pumpkin Spice Delight – a simple recipe packed with all the good stuff, and with just a few ingredients, you can make something special for your furry friend. Plus, I’ll share step-by-step instructions and some optional add-ons to really wow them, because who doesn’t want a little extra fun?
Ingredients
Get ready for a tail-wagging treat that’s easy to whip up and absolutely adored by furry friends. This Pumpkin Spice Delight for dogs isn’t only scrumptious, but it’s also packed with goodness. Trust me, your pup will think they’re getting a special ice cream, but you’ll know it’s a wholesome, healthy snack. Let’s dig into what you’ll need for this invigorating treat.
- 1 cup of pure pumpkin puree (not the spiced pie filling, please)
- 1 cup of plain yogurt (unsweetened, and make sure it’s dog-safe)
- 1 tablespoon of honey (optional, but most dogs will love it)
- ½ teaspoon of cinnamon (just a hint to get that pumpkin spice vibe)
- 1 banana, mashed (because who can resist a sweet banana?)
- 1 cup of water (to blend it all up nicely)
Step by Step Instructions
To make a delightful Pumpkin Spice Delight for your furry friend, you’ll need a few simple ingredients and some easy steps. Don’t worry if you’re new to cooking—this recipe is straightforward enough for anyone. Get ready to whip up a frozen treat your dog will love!
- Gather your ingredients: plain pumpkin puree, unsweetened peanut butter, and plain yogurt. Make sure everything is dog-friendly and free from sweeteners like xylitol.
- In a mixing bowl, add 1 cup of pumpkin puree, 1 cup of plain yogurt, and 1/4 cup of peanut butter.
- Use a whisk to mix everything together until smooth. (No lumps, please—your dog prefers creamy treats.)
- Grab your ice cube trays or silicone molds.
- Pour the pumpkin mixture into the molds, filling each slot about three-quarters full.
- If you want to jazz things up, drop a small biscuit or treat into each mold for some extra fun!
- Carefully place the filled molds in the freezer. Let them freeze for about 4–6 hours or until solid. (You can check, but it’s best to give them time to freeze completely.)
- Once frozen, gently pop the treats out of the molds. If they’re a bit stuck, run warm water over the bottom for a few seconds to loosen them up.
- Serve the frozen treats to your dog on a hot day or as a special surprise.
Cool completely before serving to your dog. It’s a tasty way to keep them happy!
Optional Add-ons
Why settle for just a basic Dog Popsicle when you can elevate your furry friend’s treat game with some fun add-ons?
Try mixing in some pumpkin puree for a taste that’ll make those tails wag. You could also sprinkle in a dash of cinnamon—can you imagine their excitement?
These little extras not only enhance flavor but also make for adorable treats. Your pup will love you more!
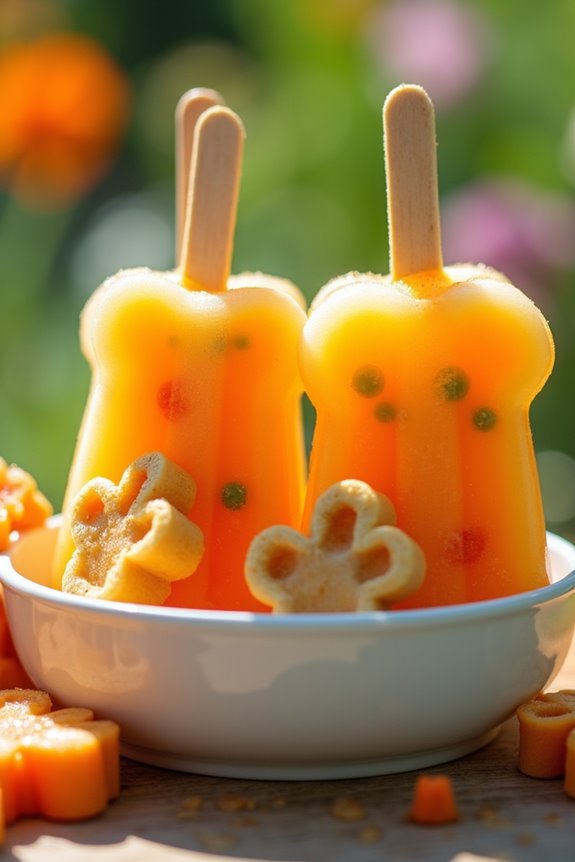
4. Chicken Broth Freeze Treat
Ready to treat your pup to something special? Chicken broth freeze treats aren’t just easy to make, but they’re also a surefire way to get tails wagging. Let’s grab those ingredients and walk through each step together, and, of course, we’ll chat about some fun optional add-ins too.
Ingredients
Want to whip up a delightful frozen treat for your pup? Making a dog popsicle with chicken broth is easy! Not only will your furry friend enjoy it, but it’s also a revitalizing way to keep them cool on those hot days.
So, let’s get right to it! Here’s what you need:
- 2 cups low-sodium chicken broth (the kind that your dog can actually eat, please avoid the flavored with onions)
- 1/2 cup plain, unsweetened yogurt (yep, dogs can have dairy in moderation; just make sure they can handle it)
- 1/4 cup peanut butter (make sure it’s xylitol-free, that stuff is no joke)
- 1/2 cup diced apples (remove the seeds and core, because, safety first, right?)
- 1/4 cup chopped carrots (dogs love these; they’re like little crunchy surprises)
- Optional: A few sprigs of parsley (for a fresh twist and nice breath, if you’re into that sort of thing)
Now that you’re all set with ingredients, get ready to treat your pup to a tail-wagging good time!
Who knew keeping your dog happy could be so simple?
Step by Step Instructions
- Gather your ingredients: chicken broth (preferably low-sodium), and optional add-ins like diced carrots or peas for extra flavor and nutrition (your pup will love it).
- Pour the chicken broth into a mixing bowl. If you notice any floating fat, skim it off for a healthier treat.
- If using add-ins, chop the carrots or peas into small, bite-sized pieces. Then, mix them into the bowl of broth—this is where things get exciting for your dog!
- Select your molds or ice cube trays. Pour the chicken broth mixture into each mold, filling them about three-quarters full (leave some room for expansion as they freeze).
- If you have a few extra moments, you can drop in some dog-friendly treats on top of the mixture. Just make sure to keep an eye on where they land, so they don’t sink too deep.
- Place the filled molds in the freezer and let them freeze for about 4–6 hours, or until completely solid (you’ll know they’re ready when they look like tiny frozen treasures).
- Once frozen, remove the treats from the molds by gently twisting them or running warm water over the outsides for a few seconds (patience is key here, but it’ll be worth it).
- Serve them to your dog as an exciting summertime treat or a fun reward after a long walk.
- Remember to supervise your pup while enjoying their popsicle, just to make sure they don’t devour it in one overzealous gulp.
- Cool completely before serving to your dog (or keep them for a hot day as a special surprise).
Optional Add-ons
When it comes to making delicious frozen treats for your furry friend, think of add-ons as the cherry on top—or in this case, the crunchy carrot bits and vibrant peas mixed in with your chicken broth.
These little extras add texture and flavor. Your pup won’t just wag their tail; they’ll be doing happy dances!
Who knew being a dog chef could be this rewarding?
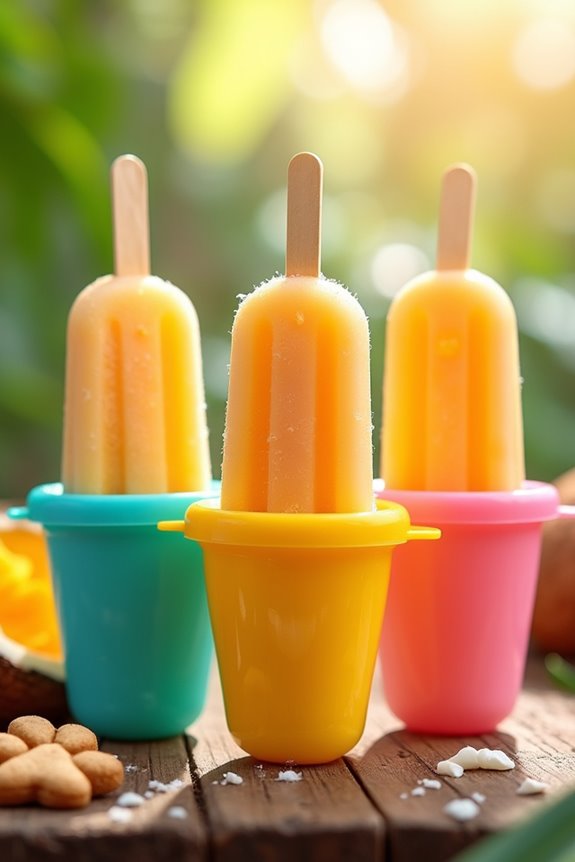
5. Coconut Mango Chill Pops
Now that your pup has enjoyed some Chicken Broth Freeze Treats, let’s switch it up with Coconut Mango Chill Pops.
Imagine this: revitalizing mango and creamy coconut, all blended together for a tasty treat your dog will love.
Ready to try it out? Let’s go through the ingredients, step-by-step instructions, and some fun add-ons to make these pops even more exciting.
Ingredients
Treating your pup to something special can be such a joy, especially on those hot summer days. Just imagine them munching on a flavorful Coconut Mango Chill Pop, tail wagging in delight.
These popsicles aren’t only super tasty but also easy to whip up. Plus, you’ll only need a few simple ingredients – no secret ingredients or fancy cooking skills required.
Let’s explore what you’ll need for this paw-some recipe.
- 1 ripe mango, peeled and diced
- 1 cup coconut water (unsweetened)
- ½ cup plain yogurt (unsweetened, non-fat is good)
- 1 tablespoon honey (optional and remember, only for dogs over a year old)
- 1 tablespoon shredded coconut (unsweetened)
That’s it! Now, before you start blending up this deliciousness, take a moment to appreciate how simple it is.
Your dog will thank you, but honestly, you’re kind of treating yourself too by creating such a fun and invigorating snack.
Get ready to see those happy doggy faces when you serve these up.
Step by Step Instructions
1. Gather your ingredients: 1 cup coconut milk, 1 ripe mango (peeled and diced), and 1 tablespoon honey (if your dog isn’t on a sugar-restricted diet).
2. Blend the coconut milk and mango together in a blender until smooth and creamy, around 30 seconds.
(Hmm, make sure it looks like a tropical drink you’d want yourself.)
3. Taste the mixture—if it’s not sweet enough for you, consider adding a dash more honey.
(But let’s not make it a sugar rush for your pup, okay?)
4. Pour the blended mix into your favorite popsicle molds, filling them about three-quarters full to leave room for expansion.
5. Insert sticks into the molds and make sure they stand upright.
6. Place the molds carefully in the freezer. Freeze for at least 4–6 hours or until completely solid.
7. To remove the popsicles, run warm water over the outside of the molds for about 10 seconds—this should help loosen them nicely.
8. Serve to your dog as a revitalizing treat on a hot day.
(Cool completely before serving to your dog—nobody wants a pup with a brain freeze.)
Optional Add-ons
If you’re feeling adventurous, there are some delightful optional add-ons that can take your Coconut Mango Chill Pops to the next level. Try adding diced bananas or a sprinkle of peanut butter; your pup will think it’s heaven. You could even toss in some blueberries for a colorful touch. Trust me, making these extra-tasty is totally worth it, and your dog will thank you.
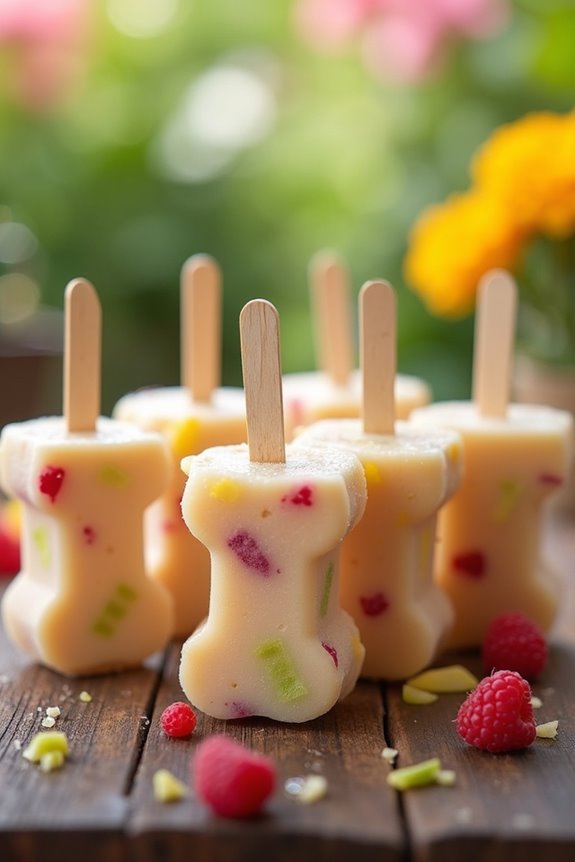
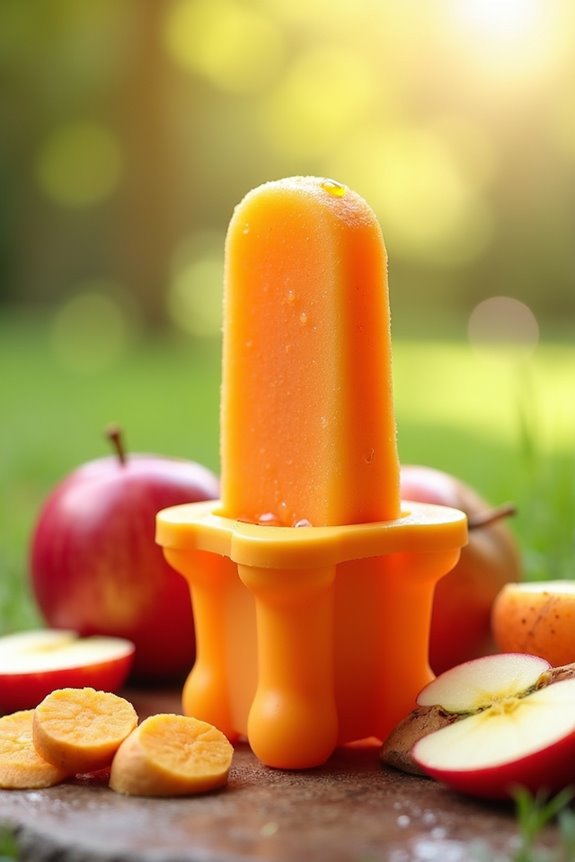
6. Sweet Potato and Apple Freeze
Ready to whip up a rejuvenating treat for your pup? In this section, you’ll gather the tasty ingredients, follow some easy steps, and maybe even toss in a few fun add-ons.
I mean, who wouldn’t want to see their dog’s tail wag as they enjoy a sweet potato and apple freeze?
Ingredients
When it comes to making our furry friends happy, these sweet potato and apple popsicles hit the spot. They aren’t only super simple to whip up, but they also create a frozen treat that will have your pup wagging their tail in excitement. Plus, they’re packed with wholesome goodness that you can feel good about giving to your dog. Let’s explore the ingredients you’ll need.
- 1 medium sweet potato (cooked and mashed)
- 1 medium apple (cored and chopped, no seeds)
- 1 cup plain yogurt (unsweetened, low-fat is a great option)
- 1 tablespoon honey (make sure it’s safe for dogs)
- 1/4 cup water (to help blend everything smoothly)
Step by Step Instructions
These sweet potato and apple popsicles are an awesome treat for your furry friend, especially on a warm day. They’re simple to make and packed with nutrition. Let’s get started!
- Preheat your blender or food processor by ensuring it’s clean and ready to use. (You don’t want any lingering ingredients from your last culinary adventure, trust me.)
- Peel and chop 1 large sweet potato into small cubes.
- Boil a pot of water and add the sweet potato cubes. Cook for about 10-15 minutes until they’re fork-tender. (They should feel soft, kinda like how you feel after a long day.)
- While the sweet potatoes are boiling, grab 1 medium-sized apple, core it, and chop it into small pieces. (Don’t forget to keep those pesky seeds out; no one wants that.)
- Once the sweet potatoes are done, drain them and let them cool for a few minutes.
- In your blender or food processor, combine the cooled sweet potato cubes, chopped apple, and about ½ cup of water.
- Blend everything until it’s smooth and creamy. (Think ice cream texture—how great does that sound?)
- Pour the mixture into ice cube trays or silicone molds.
- (Silicone molds are your best friends here; they make popping those treats out a breeze.)
- Gently tap the trays on the counter to remove any air bubbles.
- Place the trays in the freezer and let them freeze for at least 4 hours or until solid. (You might want to do a little happy dance while you wait. Just don’t get too wild.)
- When you’re ready to serve, gently pull the popsicles from the molds.
- Cool completely before serving to your dog. (We wouldn’t want to burn those precious puppy tongues, right?)
Enjoy watching your pup blissfully enjoy their homemade treat. You’re basically a dog chef now.
Optional Add-ons
Why stick to just sweet potato and apple when you can jazz up those popsicles with some delightful add-ons?
Toss in some plain Greek yogurt for creaminess or a splash of peanut butter for extra flavor.
You could even sneak in some blueberries for a burst of sweetness.
Trust me, your pup will think you’ve become a gourmet chef.
Who knew popsicles could be so fun?
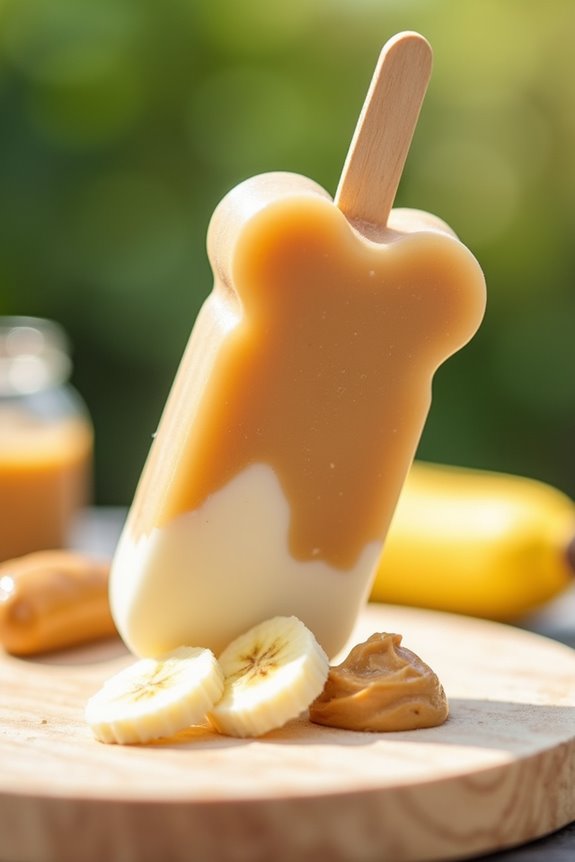
7. Peanut Butter and Pumpkin Treat
Ready to whip up something special for your pup? The Peanut Butter and Pumpkin Treat isn’t only easy to make, but it’s also a tail-wagging delight packed with great ingredients. Let’s break down what you’ll need, step-by-step instructions, and a few fun optional add-ons that’ll make your dog’s day even brighter.
Ingredients
When it comes to making delicious and dog-friendly popsicles, you want to use ingredients that aren’t only tasty but also safe for your furry friend. This recipe for peanut butter and pumpkin treats combines flavors that dogs simply adore.
Plus, they’re easy to whip up and perfect for those hot days when your pup needs to cool off. Just gather these simple ingredients, and you’ll be on your way to making a frozen delight that will have your dog wagging their tail in excitement.
- 1 cup pumpkin puree (ensure it’s pure pumpkin, not the spiced pie filling)
- ½ cup natural peanut butter (look for one without xylitol, though I’m sure your dog has better taste than that)
- 1 cup plain yogurt (unsweetened and without artificial flavors)
- ½ cup water (to help blend everything smoothly)
- ½ ripe banana (mashed; because who can resist a little sweetness?)
That’s it! You’ll find everything right at your grocery store, making this a no-fuss treat for both you and your pup.
Who knew spoiling your dog could be so simple?
Step by Step Instructions
- Gather all your ingredients: 1 cup of pure pumpkin puree, 1 cup of unsweetened peanut butter, and 1 cup of low-sodium chicken or vegetable broth. Don’t forget, quality ingredients matter for those tail-wagging treats.
- In a mixing bowl, combine the pumpkin puree and peanut butter. Mix thoroughly until smooth and creamy. (Think of it as a fun arm workout—you’ve got this!)
- Gradually add the chicken or vegetable broth to the mixture. Stir well until everything is blended together. The consistency should be pourable but still thick (it shouldn’t just slide right off the spoon).
- Pour the mixture into ice cube trays or silicone molds—whatever you have on hand. Make sure not to overfill; leave a teensy bit of space at the top for expansion as they freeze.
- Place the filled trays in the freezer. Let them freeze for at least 4-6 hours, or until solid. (Now’s a good time to admire your culinary prowess—be honest, you’re pretty impressive!)
- Once frozen, carefully remove the treats from the trays. If they’re stuck, run warm water over the outside of the molds for a few seconds to loosen them up. They should pop right out!
- Store the popsicles in a resealable plastic bag or airtight container in the freezer. They can last for up to 3 months, but I bet they won’t last that long.
- Cool completely before serving to your dog. Remember, we want happy puppers, not faceplanting ones. Enjoy the joy you bring to their day!
Optional Add-ons
If you want to take your dog popsicle game to the next level, you’ll love the idea of adding a few extra flavors that can turn a simple treat into a tail-wagging extravaganza.
Try mixing in peanut butter for creamy goodness or pumpkin for a healthy boost. Your pup will think it’s gourmet, while you’ll feel like a frozen treat wizard.
Bliss all around!
Freeze for Optimal Texture
To get that perfect dog popsicle texture, it’s all about how you freeze your ingredients. Start by pouring your blended mixture into molds, but don’t overfill them. Those popsicles need space to expand, or you’ll end up with a mess that could rival your dog’s post-playtime fur.
Mastering the dog popsicle texture boils down to proper freezing—don’t overfill those molds or you’ll create a tasty disaster!
Once filled, cover the molds with plastic wrap or lids. This helps prevent freezer burn, which, let’s be honest, nobody wants in their crunchy treats.
Now, chill it out. Freeze for at least four to six hours. I learned the hard way—impatience leads to soupy popsicles that no pup wants to indulge in. Maybe even take a little dance break while you wait, who doesn’t love a good kitchen shimmy?
After they’ve frozen, wiggle them out with a bit of warm water for easy removal. Your fur baby will thank you, and you might just win the title of “best treat maker” in your household.
Frequently Asked Questions
Can I Use Any Fruits or Vegetables for Dog Popsicles?
You can use many fruits and vegetables for dog popsicles, but avoid grapes, raisins, onions, and avocados. Stick with dog-friendly options like bananas, blueberries, carrots, and sweet potatoes for a tasty and safe treat.
How Long Can I Store Homemade Dog Popsicles?
You can store homemade dog popsicles in the freezer for up to two months. Just make sure they’re sealed tightly in an airtight container to keep them fresh and prevent freezer burn. Enjoy serving them!
Are There Any Ingredients to Avoid When Making Dog Popsicles?
Yes, avoid ingredients like chocolate, xylitol, grapes, raisins, and onions, as they’re toxic for dogs. Stick to dog-friendly fruits, vegetables, and yogurt to guarantee your pup enjoys safe and delicious popsicles without any harm.
Can Puppies Eat Dog Popsicles Too?
Yes, puppies can eat dog popsicles, but be cautious with the ingredients. Stick to puppy-safe options and avoid harmful ingredients like chocolate or xylitol. Always supervise them while enjoying their chilly treats to guarantee safety.
How Do I Introduce Popsicles to My Dog?
Introduce popsicles to your dog gradually. Start by offering small pieces and monitor their reaction. If they enjoy it, you can try different flavors. Always supervise to guarantee they don’t choke or have any adverse reactions.