You know your pup deserves a tasty treat, right? Why not whip up some homemade dog ice cream? It’s easy, fun, and way healthier than those store-bought options packed with who-knows-what. Plus, you’ll earn serious bonding points with your furry friend. I mean, who wouldn’t want to share a freezing delight like Peanut Butter Banana Delight or Coconut Mango Bliss? Shall we jump into the recipes and let the drooling (and tail wagging) begin?
Why Homemade?
Why Homemade? Making a dog ice cream recipe at home not only saves you money but also lets you control what goes into those tasty treats. Imagine whipping up a creamy concoction with just a few ingredients—trust me, it’s easier than it sounds. You can skip the artificial flavors and sugars that store-bought versions often have.
Your pup won’t know the difference, but their belly will thank you. Plus, you can get creative. Got leftover bananas? Blend ‘em up. You can even sneak in yogurt for probiotics.
And let’s be real, watching your dog slurp up their homemade ice cream is one of life’s simple joys. You’ll feel like a superstar chef, even if your kitchen looks like a tornado hit it.
Who knew mixing bananas and peanut butter could be a culinary triumph? Give it a whirl; your pup will love you for it.
Ice Cream Creations for Dogs
Got a pup that deserves a sweet treat?
You’ll love whipping up some Ice Cream Creations for Dogs, like the Peanut Butter Banana Delight or the Coconut Mango Bliss.
With so many flavors to choose from, including Pumpkin Spice Pup Treats and Apple Cinnamon Delight, your four-legged friend is in for a tail-wagging surprise.
1. Peanut Butter Banana Delight

Ready to spoil your pup with a scrumptious treat? The Peanut Butter Banana Delight isn’t just easy to whip up, but it’s packed with flavors your dog will drool over. Let’s gather those ingredients, walk through the steps together, and maybe even chat about some fun add-ons to make this creation even more paw-some.
Ingredients
If you’re ready to treat your furry friend to a revitalizing Peanut Butter Banana Delight, gather these easy-to-find ingredients first. All these tasty elements come together to create a creamy, wag-worthy dessert that your pup will adore. Here’s what you’ll need to whip up this doggie ice cream treat:
- 2 ripe bananas, mashed (the softer, the better)
- ½ cup unsweetened peanut butter (make sure it’s xylitol-free)
- 1 cup plain yogurt (go for non-fat if you can)
- 1 tablespoon honey (optional, but your dog may appreciate the extra sweetness)
- ½ cup of water (to help blend everything smoothly)
With this simple list, you’re all set to make a delightful summer treat for your four-legged buddy. Plus, it’s a great way to use up those bananas that might otherwise become an overripe science experiment on your countertop. Who knew cooking for dogs could be this easy?
Step by Step Instructions
Want to treat your furry friend to something special? This Peanut Butter Banana Delight ice cream will have their tails wagging in no time. It’s easy to whip up and perfect for a sunny day. Now, let’s plunge into the steps.
- Gather all your ingredients: 1 ripe banana, 1 cup of plain yogurt (unsweetened and unflavored), and 2 tablespoons of peanut butter (make sure it’s xylitol-free!).
- Peel the banana and break it into chunks. Trust me, bananas don’t like to play cooperative, so be careful not to let them slip right out of your hands.
- Put the banana chunks in a blender or food processor—your dog will be drooling before we even get to the good stuff.
- Add the yogurt and peanut butter to the blender with the banana.
- Blend the mixture on high until it’s smooth and creamy, about 30 seconds. You want it to be as smooth as that lovely doggie grin!
- Grab some ice cube trays or silicone molds. Pour the blended mixture into them, filling each compartment but leaving a little space at the top (they’ll expand slightly).
- Place the trays in the freezer and let them chill for at least 4 hours or until solid.
- Once frozen, pop out a treat and serve it to your happy pup. You might want these for yourself, but they’re strictly canine approved!
Optional Add-ons
While your Peanut Butter Banana Delight ice cream is already a hit with your pup, adding a few optional ingredients can elevate this treat to canine gourmet status.
Try mixing in some pureed pumpkin for extra fiber or a sprinkle of cinnamon for flavor. A few mini dog biscuits on top? Instant wow factor.
Trust me, your furry friend will think you’re a culinary genius.
2. Coconut Mango Bliss

Ready to treat your furry friend to something special? Coconut Mango Bliss isn’t just a fun name; it’s a tropical delight made from simple ingredients that will have your dog wagging their tail with excitement.
Let’s get into the easy step-by-step instructions, and don’t worry, you might even want a scoop or two for yourself.
Ingredients
If your pup is going to enjoy a cool treat on a hot day, why not make it extra special with this Coconut Mango Bliss ice cream? It’s simple to whip up and uses just a few dog-friendly ingredients that are easy to find at your local store. Your furry friend will thank you with those happy tail wags. So, here’s what you need:
- 1 cup full-fat coconut milk
- 1 ripe mango, peeled and chopped (make sure there are no pits)
- 1 tablespoon honey (optional, but adds a nice touch)
- 1 tablespoon peanut butter (look for the unsweetened kind)
- A sprinkle of cinnamon (just a hint for flavor)
Just gather these ingredients, and you’re all set to make a delightful treat that will have your dog drooling. Trust me, it’s so simple, even I can manage it without losing the kitchen!
Step by Step Instructions
- Gather all your ingredients: ripe mango, coconut milk, and honey (if using). You’ll also need a blender, measuring cups, and an ice cube tray or silicone molds.
- Peel and chop the mango into small pieces. Aim for about one cup. It should look vibrant and juicy, just begging to be blended.
- In your blender, combine the chopped mango and a can of coconut milk. If your dog has a sweet tooth, add a spoonful of honey for extra flavor—just remember, less is more.
- Blend everything on high speed until you have a smooth, creamy mixture. Look for that dreamy, silky texture—no lumps allowed.
- Taste the mixture (it’s safe, I promise) to check sweetness and adjust if needed. If it’s a bit thick, add a splash of water or more coconut milk to help it along.
- Carefully pour the mixture into your ice cube tray or silicone molds. Don’t worry too much about spillage; the kitchen floor can use a little love too.
- Cover the tray with plastic wrap to prevent freezer odors from sneaking in. Place it in the freezer and let it chill for at least 4 hours, or until solid.
- When it’s time to serve, remove the ice cream from the freezer. Pop out a cube or two for your pup. You might’ve to warm the bottom of the tray slightly under warm water to release it.
- Cool completely to room temperature before serving to your dog. Nobody likes a frozen surprise.
- Watch your doggo enjoy the treat, and take a moment to feel like the best pet parent ever.
Optional Add-ons
When it comes to treating your dog to something extra special, why not jazz up that creamy coconut mango goodness with some fun optional add-ons?
Toss in small chunks of banana or a sprinkle of peanut butter for a flavor burst.
Want to get fancy? A few dried blueberries can elevate the experience.
Your pup’s tail will wag with joy, and you might feel a bit fancy too.
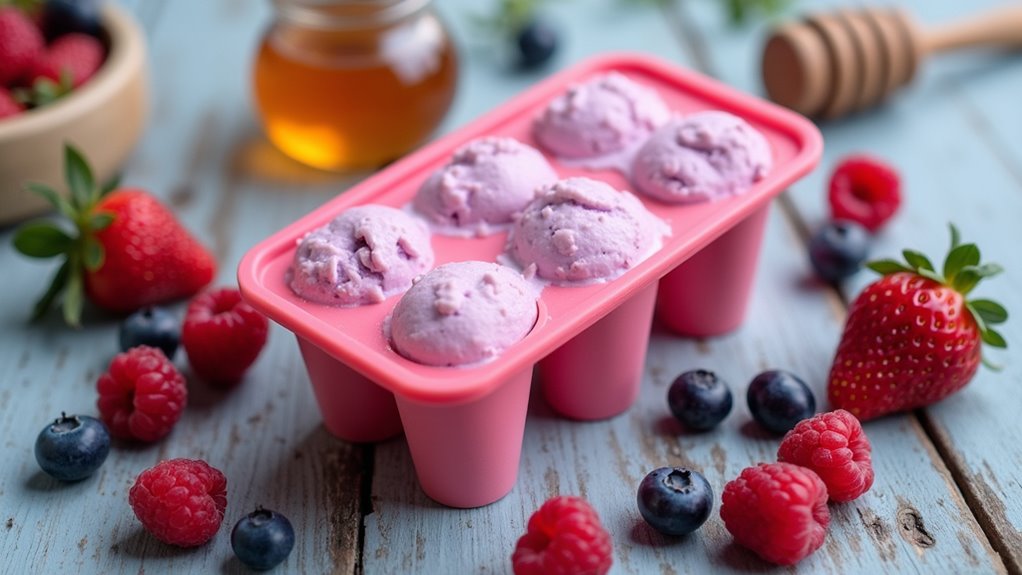
3. Yogurt Berry Crunch Treats

Let’s whip up some Yogurt Berry Crunch Treats that’ll have your pup wagging their tail in delight. You’ll need some tasty ingredients, and I promise the step-by-step instructions are as easy as pie—or should I say, ice cream? And if you’re feeling adventurous, there are plenty of optional add-ons to make these treats even more special for your furry friend. To make the process even easier, check out a dog ice cream maker that can streamline the creation of these delightful snacks.
Ingredients
Looking to whip up a treat your furry friend will love? These Yogurt Berry Crunch Treats aren’t only simple but also packed with flavors that dogs go woof over. Plus, making them can be a fun bonding moment—just watch out for that charming face waiting enthusiastically for a taste. Gather up these easy-to-find ingredients, and let’s get that tail wagging.
- 2 cups plain Greek yogurt
- 1 cup blueberries (fresh or frozen)
- 1 ripe banana, mashed
- 1 tablespoon honey (optional, for a little sweetness)
- 1/2 cup rolled oats
- 1/4 cup peanut butter (make sure it’s xylitol-free)
Step by Step Instructions
1. Gather your ingredients: Greek yogurt, blueberries, strawberries, and a little honey (make sure the honey is dog-safe—no added sugars or artificial ingredients).
2. In a mixing bowl, add 2 cups of Greek yogurt.
3. Gently fold in 1 cup of mixed berries (fresh or frozen will work).
Try to mix evenly, but remember, it’s okay if some berries stay whole—your dog may love a berry surprise.
4. Drizzle in 1 tablespoon of honey and mix thoroughly (this adds just a touch of sweetness).
5. Spoon the mixture into ice cube trays or silicone molds. Fill each section about three-quarters full to allow for expansion in the freezer.
6. Tap the tray lightly on the counter to remove any air bubbles that might get trapped (trust me, less air means better texture).
7. Cover the trays with plastic wrap or a lid, then pop them into the freezer.
8. Freeze for at least 4-6 hours, or until solid (longer is fine; just try to resist nibbling—though, no judgment if you do).
9. Once frozen, carefully remove the treats from the trays.
If they stick, run warm water over the bottom of the tray for a few seconds.
10. Serve to your pup and watch their tail wag with joy.
Cool completely before serving to your dog.
Optional Add-ons
While you’re busy whipping up those delicious yogurt berry treats, why not take things up a notch with some optional add-ons that’ll make your dog feel like they’re indulging in a gourmet dessert?
Toss in some crumbled dog biscuits for crunch, or drizzle a little unsweetened peanut butter. Your pup won’t mind the extra calories. Trust me, they’ll love you for it.
4. Pumpkin Spice Pup Treats
If you’re ready to treat your pup to something special, Pumpkin Spice Pup Treats are a must-try.
With just a few simple ingredients and step-by-step instructions, you’ll whip up something that’ll make their tails wag in delight.
Don’t forget to think about those optional add-ons to really jazz up the treat—because who doesn’t want to spoil their fur baby a little more?
Ingredients
Alright, so let’s whip up some delightful Pumpkin Spice Pup Treats that your furry friend will absolutely adore.
These treats are like little scoops of happiness, and they’re made with ingredients that aren’t only tasty but also safe for your pooch.
Plus, who could resist that pumpkin flavor? It’s fall in a bowl, sans the annoying sweater weather.
Let’s plunge into the essentials you’ll need for this tail-wagging recipe.
- 1 cup pure pumpkin puree (not the spiced kind; we don’t want to confuse our pups)
- 1 cup plain yogurt (unsweetened and unflavored, please)
- 2 tablespoons honey (make sure it’s dog-friendly, as some dogs are allergic)
- 1 teaspoon cinnamon (a pinch of spice goes a long way)
- ¼ cup peanut butter (smooth and unsweetened is best)
There you have it! Just a handful of wholesome ingredients that will have your pup drooling with anticipation.
Now, let’s get ready to make some pumpkin bliss that’s sure to have tails wagging and paws dancing.
Step by Step Instructions
2. In a large mixing bowl, combine 1 cup of pumpkin puree with 1 cup of Greek yogurt. This duo is a flavor party waiting to happen.
3. Add 1/4 cup of peanut butter to the mix. (Your dog might think you’re making a treat just for them, and hey, they could be right!)
4. Drizzle in 1 tablespoon of honey, followed by 1 teaspoon of cinnamon. These warm spices will get tails wagging.
5. Mix everything together until smooth. A whisk works great here, but a sturdy spoon is fine too.
(No need to whip it into a frenzy—just a nice, creamy consistency is perfect.)
6. Pour the mixture into ice cube trays or silicone molds. Fill them up but leave a little space at the top for expansion.
7. Place the trays in the freezer and let them freeze for about 4 hours, or until solid.
(You might want a cute distraction while you wait; I often contemplate life choices and snack options.)
8. Once frozen solid, remove the ice cream treats from the molds. You can run warm water over the underside of the trays for easier release.
9. Serve one to your dog. They’ll be over the moon!
(Make sure to cool completely before serving to your dog.)
10. Store any extra treats in a freezer bag or container. They’ll last for a few weeks, but trust me, they won’t last that long in your house!
Optional Add-ons
Once you’ve mastered the basic recipe for your pup’s delicious pumpkin ice cream, why not take it up a notch? You could add a sprinkle of cinnamon or a spoonful of peanut butter for extra flavor. Maybe toss in some crumbled dog biscuits or freeze little apple chunks. Your furry friend deserves a treat that’s just as special as they are, right?
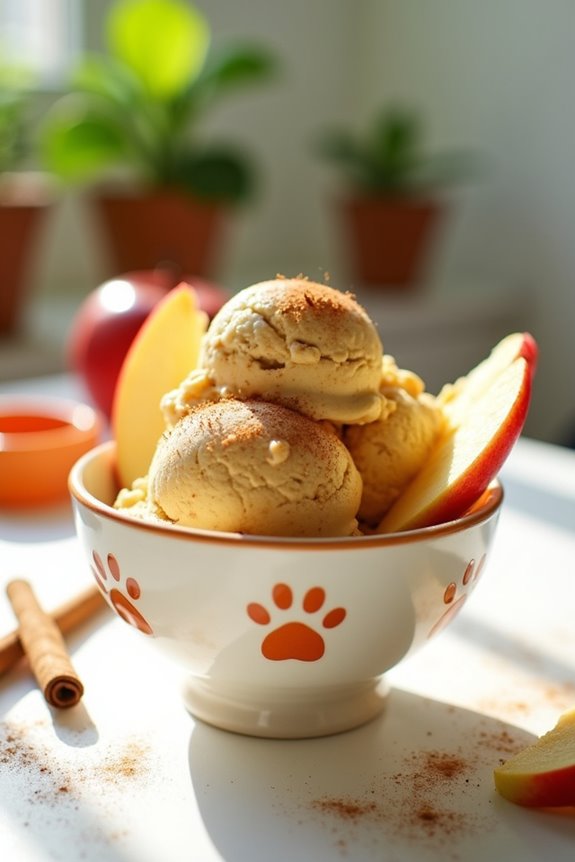
5. Apple Cinnamon Delight
Ready to whip up something special for your furry friend? Apple Cinnamon Delight isn’t only a tasty treat, but it’s super simple to make too. Let’s go through the ingredients, step-by-step instructions, and a few optional add-ons that’ll make your pup’s tail wag even more.
Ingredients
Making this yummy Apple Cinnamon Delight for your furry friend is so simple! You probably have most of these ingredients in your pantry right now, and if not, a quick trip to the store will do the trick. Trust me, your pup will thank you for this sweet treat.
Ready? Here’s what you’ll need:
- 2 cups of unsweetened applesauce
- 1 tablespoon of honey (optional, for a little extra sweetness)
- 1 teaspoon of ground cinnamon
- 1 cup of plain Greek yogurt
- 1 tablespoon of peanut butter (make sure it’s xylitol-free)
These ingredients aren’t only dog-friendly but also super easy to mix together.
Just picture it: creamy, fruity, and with a dash of spice. I know, it sounds delightful, right? So grab your mixing bowl, and let’s get this party started for our pups!
Step by Step Instructions
- Gather all your ingredients: ripe apples, cinnamon, yogurt (unsweetened, plain), and water. Don’t forget to double-check that everything is dog-friendly.
- Preheat your blender, well, not literally. Just get it out and ready to work its magic, it’s about to mix up some deliciousness.
- Core and chop the apples into small pieces. You want them manageable, not massive chunks—your pup isn’t a bear, after all.
- Place the chopped apples into the blender. Throw in about a pinch (or two) of cinnamon. Smell that? That’s the good stuff.
- Add one cup of yogurt and one cup of water into the blender. The yogurt gives it that creamy texture that your dog is going to go wild for.
- Blend the mixture until smooth, or until you can’t see any big apple chunks (no sneaky bites for Fido). A minute or two should do it.
- Pour the blended mixture into an ice cube tray or silicone molds—using fun shapes can make it even more exciting for your dog.
- Freeze the tray for at least 4 hours, or until solid. You know they’re ready when you can easily pop one out without any mushy drama.
- Once frozen, pop out the ice cream treats and store them in an airtight container in the freezer.
Cool completely before serving to your dog. These little delights should make tails wag with joy. Enjoy watching your pup savor every frosty bite!
Optional Add-ons
While your pup might go bananas for the base recipe of apple cinnamon ice cream, you can take it to the next level with a few optional add-ons that’ll have their tails wagging even more.
Try mixing in some peanut butter, or toss in a few small freeze-dried strawberries. Just imagine their excited faces as they dig into their upgraded treat.
You’ll be their hero!
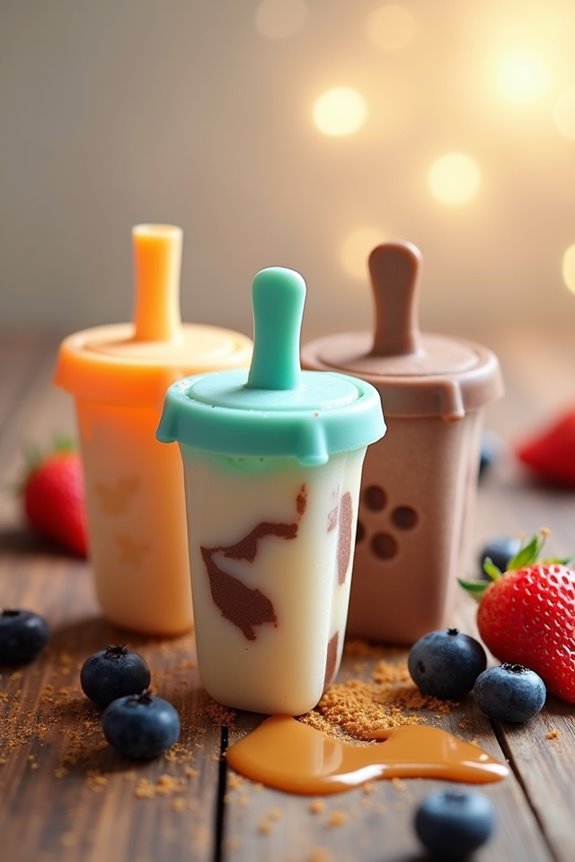
6. Peanut Butter Carob Swirl

Alright, let’s whip up something delicious for your pup with our Peanut Butter Carob Swirl. You’ll love how simple it’s to create, especially when you gather those tasty ingredients. Plus, I’ll share step-by-step instructions and even some fun add-ons to make it extra special for your furry friend.
Ingredients
Making dog ice cream is one of the simplest joys, isn’t it? Treating your pup to a delicious and safe icy treat is about to become your new favorite kitchen activity.
So, let’s gather what we need for this delightful Peanut Butter Carob Swirl. The ingredients are simple and wholesome, perfect for your furry friend who definitely deserves a yummy snack after all those adorably silly antics.
- 1 cup plain yogurt (make sure it’s unsweetened and preferably low-fat)
- 1/2 cup natural peanut butter (avoid xylitol; it’s super toxic for dogs)
- 1/4 cup carob powder (the dog-friendly, chocolate substitute – no chocolate here, folks)
- 2 tablespoons honey (optional, but only if your pup is over one year old)
- 1 banana, mashed (the sweeter, the better for that creamy texture)
Get your pup ready — you’re about to whip up a taste of heaven that he’ll be wagging his tail for!
Just imagine the tail-wagging happiness when he gets a treat that not only tastes great but is also full of good-for-him ingredients. Oh, the happiness will be real, and the mess? Well, that’s just part of the fun, right?
Happy ice cream making!
Step by Step Instructions
1. Gather all your ingredients: peanut butter, yogurt, carob, and honey. Make sure your peanut butter is dog-friendly—no xylitol, please.
2. In a medium bowl, mix 1 cup of yogurt and ½ cup of peanut butter. Whisk it together until it’s smooth and creamy.
(You might want to taste-test to see if it’s paw-sitively perfect for your pup—just a little lick, though.)
3. In a separate small bowl, melt 2 tablespoons of carob. You can do this in the microwave in 10-second bursts, stirring in between until it’s smooth.
4. Slowly pour the melted carob into the yogurt mixture. Gently fold it in to create a swirled effect.
(Think of it as painting, but without the mess—mostly.)
5. Pour the mixture into ice cube trays or silicone molds, filling them about three-quarters full. Leave some space for expansion as they freeze.
6. Freeze the trays for at least 3-4 hours, or until they’re completely solid. This is the perfect time to check on your dog and play fetch—just saying.
7. Once frozen, remove the treats from the molds. If you’re struggling, run warm water over the outside of the tray for a few seconds to help release the icy goodness.
8. Serve a treat to your pup and watch their tail wag with delight.
9. Cool completely before serving to your dog.
(Your furry friend will thank you for the patience—trust me.)
Optional Add-ons
After whipping up a batch of those delightful peanut butter and carob ice cream treats, you might find yourself wondering how to kick things up a notch.
Why not add a sprinkle of crushed biscuits or chopped fruit? It’s like giving your pup a surprise party in a bowl.
Trust me, they’ll love the extra crunch and flavor. Who wouldn’t want that?
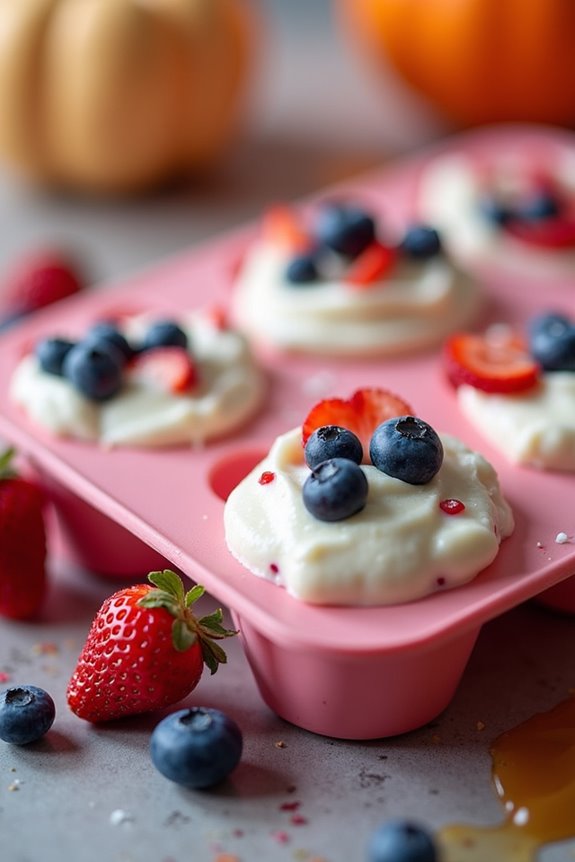
7. Berry Yogurt Freeze
Ready to whip up a scrumptious treat for your furry friend? The Berry Yogurt Freeze isn’t just easy to make, it’s packed with yummy ingredients that will have your pup wagging their tail in delight. Let’s break down the ingredients, step-by-step instructions, and some fun add-ons that could take this icy snack to the next level.
Ingredients
We all want to give our furry friends a little taste of summer fun, right? Making ice cream for dogs isn’t just about keeping them cool; it’s a wonderful way to bond and show them how much you care.
Let’s whip up a Berry Yogurt Freeze that will have their tails wagging in delight. The best part? The ingredients are simple, delicious, and super safe for your pup. Here’s what you’ll need:
- 2 cups of plain, unsweetened yogurt (look for low-fat if you prefer)
- 1 cup of mixed berries (strawberries, blueberries, and raspberries work beautifully)
- 2 tablespoons of honey (only if your dog is over one year old)
- 1 ripe banana, mashed
- 1 tablespoon of peanut butter (make sure it’s xylitol-free)
Gather these goodies, and you’re already halfway to making your pup’s day a whole lot cooler.
Just picturing their happy dance as they gobble this treat is enough to make anyone smile, isn’t it? Now, let’s get to the fun part of blending and freezing!
Step by Step Instructions
1. Gather your ingredients: 1 cup of plain yogurt, 1/2 cup of mixed berries (fresh or frozen), and 1 tablespoon of honey (optional).
2. Blend the berries: Place the mixed berries into a blender or food processor. Blend until smooth, about 30 seconds.
(If you’re using frozen berries, let them thaw a bit first.)
3. Combine yogurt and berries: In a mixing bowl, whisk together the yogurt and blended berries until well combined.
Make sure there are no lumps—unless you like your dog’s treats a little chunky.
4. Add honey: If your dog enjoys a hint of sweetness, fold in the tablespoon of honey.
(Test a tiny spoonful yourself—it might just remind you of summer.)
5. Pour into molds: Carefully pour the mixture into silicone molds or ice cube trays.
(Silicone molds are so much easier to pop out later!)
6. Freeze: Place the molds in the freezer and let them freeze for at least 3-4 hours, or until the mixture is solid.
(Time for a quick Netflix break while you wait.)
7. Check consistency: Once frozen, poke a toothpick or your finger into one to see if it’s rock hard.
If it is, congratulations—you’ve just made doggy ice cream!
8. Serve: Pop the treats out of the molds and serve to your pup.
Don’t forget to snap a photo of your dog’s excited face for the gram.
9. Cool completely before serving to your dog.
(Trust me, nobody wants to see a sad pup with a brain freeze.)
Optional Add-ons
If you want to take your dog’s ice cream experience to the next level, why not jazz it up with some optional add-ons?
Toss in blueberries or diced strawberries for a fruity twist.
Want a crunchy kick? Some crushed dog biscuits on top could do the trick.
Your pup will think you’re a culinary genius, and honestly, who doesn’t want that?
Perfect Portion Sizes
When it comes to serving up homemade dog ice cream, getting the portion sizes just right can feel like a real maze. You want your pup to enjoy every tasty bite without going overboard. A good rule of thumb? Aim for about half a cup per serving, especially if you’re trying out new flavors.
You wouldn’t want to send your dog into a sugar rush, right? And if you’ve got a tiny dog, cut that down to a quarter cup.
But if you ever find yourself in the “uh-oh, I accidentally gave too much” club—don’t panic. Just take a step back and adjust.
You could even freeze the leftovers in ice cube trays for quick treats later. Trust me, your dog will think you’re a genius.
Portioning might seem tricky at first, but with practice, you’ll find that perfect scoop in no time. Just remember: happy pups, happy life.
Frequently Asked Questions
Can I Use Regular Ice Cream Ingredients for Dog Ice Cream?
You can’t use regular ice cream ingredients for dog ice cream. Many ingredients, like sugar and chocolate, are harmful to dogs. Stick to dog-friendly ingredients to make a safe and tasty treat for your furry friend.
How Can I Safely Store Leftover Dog Ice Cream?
You can safely store leftover dog ice cream in an airtight container in the freezer. Just make sure it’s well-sealed to prevent freezer burn. When ready, let it thaw a bit before serving to your pup!
Are There Any Dogs That Shouldn’t Eat Ice Cream?
Yes, some dogs shouldn’t eat ice cream. Dogs with lactose intolerance, allergies, or specific health conditions should avoid it. Always consult your vet before giving your dog any new treats to guarantee their safety.
How Often Can I Feed My Dog Ice Cream?
You can treat your dog to ice cream once in a while, maybe once a week. Just guarantee it’s a special occasion and monitor for any digestive issues to keep your furry friend happy.
Can I Make a Dairy-Free Version of Dog Ice Cream?
Yes, you can definitely make a dairy-free version of dog ice cream! Use coconut milk, blended fruits, or peanut butter for a creamy texture. Just verify all ingredients are safe for dogs before serving. Enjoy!