So, you’re thinking about building a dog house for your furry friend, huh? Well, you’ve come to the right place. From charming cedar roofs to rustic pallet designs, there’s a world of DIY ideas to explore that even a novice like me can tackle (with maybe a few extra trips to the hardware store). Who knows, your pup might end up with the coziest spot on the block. Let’s plunge into these plans, shall we?
Cedar-Shingle Roof Design Ideas
When you think about adding a cedar-shingle roof to your dog house, you might imagine it looking a little like a cozy cottage. Isn’t that just adorable? Cedar shingles not only give a lovely aesthetic, but they also provide excellent insulation for your pup.
If you’ve got some dog house DIY plans in mind, consider starting with a sturdy frame. Measure your roof carefully; nobody wants a wonky rooftop that looks like it’s about to slide off.
Next, use a sturdy adhesive to secure the tiles, overlapping them like you’d layer lasagna. Don’t forget to finish the edges for that polished look.
With a little patience, you’ll create a charming abode your furry friend will love—even if they’re too busy chasing squirrels to notice.
Our Collection
Now that we’ve checked out those cedar-shingle roofs, let’s talk about our collection.
You’ll find everything from rustic pallet wood designs to unique arc-shaped roofs that’ll make your pup feel like the king of the castle.
And if you’re into eco-friendly options, why not try a recycled tire dog house or even throw in a solar-powered ventilation system?
1. Rustic Pallet Wood Design
If you’re looking for a way to pamper your pup without breaking the bank, then this rustic pallet wood dog house project is just the ticket. Not only does it provide your furry friend with a cozy spot to call their own, but it also gives your backyard a unique and charming touch.
Plus, who doesn’t love a good DIY project that can impress visitors and make your dog feel like royalty? Additionally, creating this dog house can enhance your outdoor space just as much as a premium outdoor dog house would.
Materials Needed:
- 4 wooden pallets (make sure they’re dog-safe and not treated with harmful chemicals)
- Hammer
- Nails (or screws, if you prefer a more sturdy build)
- Circular saw (or handsaw)
- Sandpaper (medium and fine grit)
- Measuring tape
- Paint or wood stain (optional)
- Paintbrush (optional)
- Wood glue (optional for added sturdiness)
- Roof shingles (optional for weather protection)
Step-by-Step Instructions:
- Gather Your Pallets: Start by selecting the best-looking pallets from your stash. Look for ones that are clean and undamaged. You want a sturdy foundation for your dog’s new home.
- Disassemble for Materials: Carefully break down the pallets using a hammer or pry bar. You’ll need the slats, so keep them intact as much as possible. Just think of it as a puzzle that will eventually come together…without any missing pieces, hopefully.
- Create the Base: Use two pallets side by side to form a solid base. Lay them flat and attach them together with nails or screws. This will give your dog a sturdy floor to stand on.
- Build the Walls: Start with the front wall. Cut more slats to size and attach them to a frame made from two additional pallets standing upright. Make sure to leave a door opening (maybe 16” wide and 24” high) so your pup can waltz in and out with style.
- Add the Roof: Take more slats or larger pieces of wood and create a sloped roof, securing it firmly on top. If you’re feeling fancy, you could even add some roof shingles for that extra touch of coziness. Your dog deserves the best, after all.
- Sand For Comfort: Once the structure is complete, sand down all sharp edges with medium-grit sandpaper followed by fine-grit. We’re not trying to send your dog to the vet with splinters, right?
- Finishing Touches: Now it’s time to personalize! You can paint or stain the wood however you like. This could be the moment to channel your inner artist. Maybe your dog’s name on the front or some paw prints?
Optional Add-ons/Variations:
- Rustic Paint Job: Instead of a plain wood finish, you could paint the house in fun colors or patterns matching your decor. How about a bright blue for those Instagram stories?
- Cozy Bedding: Add a comfy dog bed inside or even some soft blankets to make it extra inviting. Your dog will thank you for the upgrade.
Pro Tip:
Before starting, check your local regulations about pet housing. Sometimes, there are guidelines to follow, especially for size and materials—better safe than sorry.
And don’t forget to puppy-proof it by ensuring no sharp edges remain; a patched-up dog house is less charming than a cozy, splinter-free haven.
Building this rustic pallet dog house won’t only save you money but will give your four-legged friend a unique place to hang out. And trust me, there’s nothing more rewarding than watching your dog patrol their very own palace. Happy crafting!
2. Custom Color Schemes
If your pup is getting a stylish new dog house, why not give it a splash of personal flair? This DIY project allows dog owners to create a cozy abode that not only keeps their furry friend comfortable but also enhances their backyard aesthetic. With vibrant colors or calming natural tones, choosing the right color scheme can transform a simple wooden dog house into a fashionable retreat. Plus, it’s a budget-friendly way to express your style. Additionally, pairing your custom dog house with premium dog food brands can ensure your pup stays healthy and happy.
Materials Needed:
- Exterior paint or wood stain in your chosen colors
- Paintbrushes (various sizes)
- Primer (if you’re going from a dark color to light)
- Clear waterproof sealant (optional)
- Painter’s tape
- Drop cloths to protect your workspace
Step-by-Step Instructions:
- Choose Your Colors: Decide on a color scheme that complements your outdoor space. You could go for a bright and bold look, or stick to earthy tones for that rustic vibe.
- Prep Your Dog House: Make certain the dog house is clean and dry. If you’ve used wood stain in the past, allow it to cure fully before applying new colors. This can be a great time to check for any rough spots that might need a little sanding.
- Primer Time: If you’re painting over a dark base, start by applying a primer. This will help the new paint adhere better and show your colors more vibrantly.
- Tape and Protect: Use painter’s tape to mask off areas you don’t want to paint, like the edges or around the door frame. This helps keep everything neat and tidy, giving it that professional finish.
- Get Painting: Begin with your base color, applying it evenly with your brushes. Don’t rush—add a second coat if necessary after the first one dries. And remember, it’s okay if it’s not perfect—your pup won’t judge you.
- Decorate With Details: Once the main color is dry, you can add additional patterns, like stripes or paw prints, using stencils or freehand. Let your imagination roam wild—this is where your artistic side can shine.
- Seal It Up: Once you’ve let everything dry, seal the paint with a waterproof coat to help it withstand the elements. Your dog’s house should be as tough as your love for them, right?
Optional Add-ons/Variations:
- Fabric Accents: Consider adding a colorful fabric covering around the entrance or a little curtain for extra flair. Not only does it look cute, but it also gives your pup added coziness when the wind blows.
- Themed Designs: Create a seasonal theme—maybe autumn leaves in warm browns or bright summer blues with fun patterns, depending on the season or special holidays.
Pro Tip:
Always use pet-safe paints and stains to guarantee your furry friend is safe from harmful chemicals. It’s also a good idea to let the dog house air out for a bit before introducing your pup to their freshly painted palace. After all, we all want to avoid any surprise allergic reactions or paint fumes, don’t we?
Adding a personal touch to your dog house not only makes it special for your pet, but it reflects your love and creativity as an owner—so get painting and make that dog house a masterpiece!
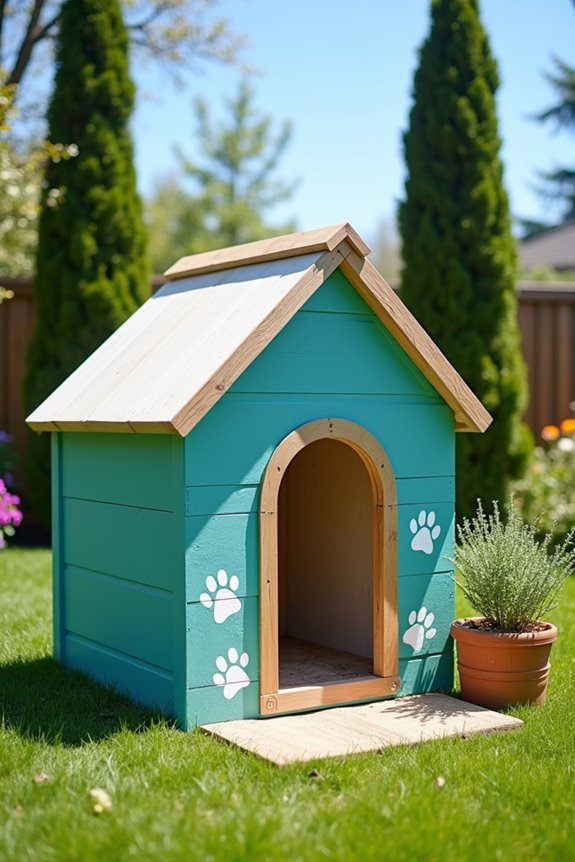
3. Unique Arc-Shaped Roof Design
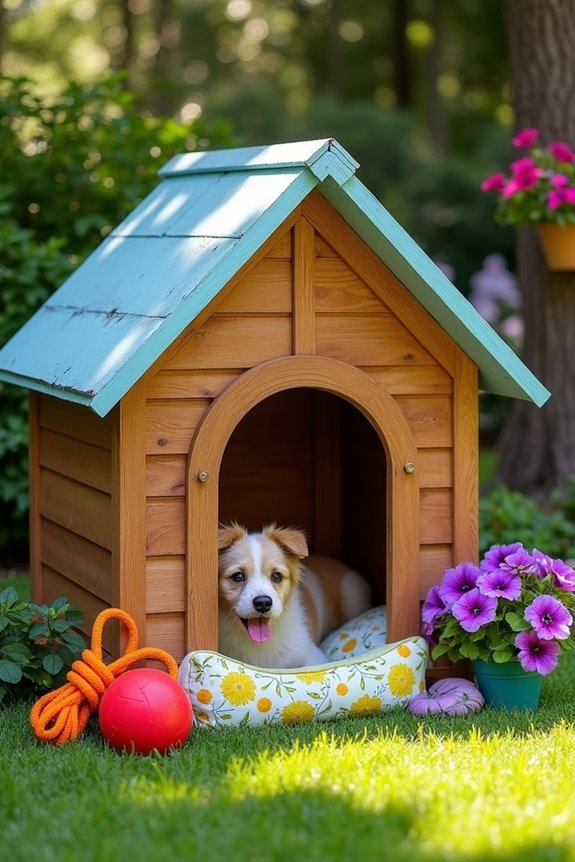
Are you ready to elevate your pup’s outdoor residence to a whole new level? The unique arc-shaped roof dog house isn’t only aesthetically pleasing but also functional. With this DIY project, you’ll create a cozy, stylish haven that stands out in your backyard. Plus, you’ll save money on store-bought options while providing your furry friend with a comfy retreat. Additionally, consider incorporating some premium dog toys to keep your pup entertained in their new space.
Materials Needed:
- 2 sheets of plywood (3/4 inch thick, for the body)
- 1 piece of plywood (1/2 inch thick, for the roof)
- 2 x 4 lumber (for the frame and supports)
- Wood screws
- Exterior wood glue
- Hammer and nails
- Circular saw or jig saw
- Tape measure
- Sandpaper
- Exterior paint or wood stain
- Waterproof sealant
- Ruler or straight edge
Step-by-Step Instructions:
- Measure and Cut the Base: Start by determining the size of your dog house. Use the tape measure to mark and cut two squares or rectangles for the base. For medium dogs, aim for 3 feet by 4 feet. The size of your dog house matters; it needs to fit your pup snugly but be big enough for them to turn around!
- Create the Walls: Cut four pieces of plywood for the walls, making them tall enough to create the arc shape. It can help to make the back wall taller than the front for that appealing slope. Once your pieces are cut, sand down any rough edges to keep your pup safe.
- Build the Frame: Use the 2 x 4 lumber to create a sturdy frame for your dog house. Attach the frame to the base for strength. Think of it like building the bones of the house – a solid structure means a cozy home for your buddy.
- Attach the Walls: Secure each wall to the frame and base using wood screws. Make sure everything is level and aligned for that picture-perfect look. If I’d a nickel for every time I forgot to level something… well, let’s just say I wouldn’t need to build my own dog house.
- Arc that Roof: Now for that charming roof. Cut your final piece of plywood into two curved shapes for the arc. Be careful here – a jigsaw works wonders, and a steady hand is key. Attach these to the top, creating an inviting roof shelter against rain and sun.
- Paint and Seal: Once the structure is complete, it’s time for the artistic touch. Get your favorite exterior paint or stain, and give it a good coat (or two). Let it dry completely before adding a layer of waterproof sealant – think of it as putting your dog house in a little protective suit!
- Final Touches: Now that your dog house is built and painted, consider a soft welcome mat or a comfy bed inside. It’ll make your dog’s new home even more inviting, like a little oasis just for them.
Optional Add-ons/Variations:
- Breezy Windows: Cut out small windows on either side of the dog house and cover them with mesh. This way, your pet can enjoy some fresh air while staying safe and sound.
- Colorful Flair: Use fun, outdoor-friendly fabrics to create a small curtain for the entrance. It’ll add a cute touch and help keep the wind at bay.
Pro Tip:
One quick thing to keep in mind—always test your paint and sealant on a scrap piece of wood first. It’ll give you an idea of how colors will turn out and verify it’s safe for your furry friend.
This small step can save you a lot of time and heartache. Because let’s face it, nobody wants to be repainting a dog house while their pooch looks on, judging silently with those adorable puppy eyes.
4. Recycled Tire Dog House
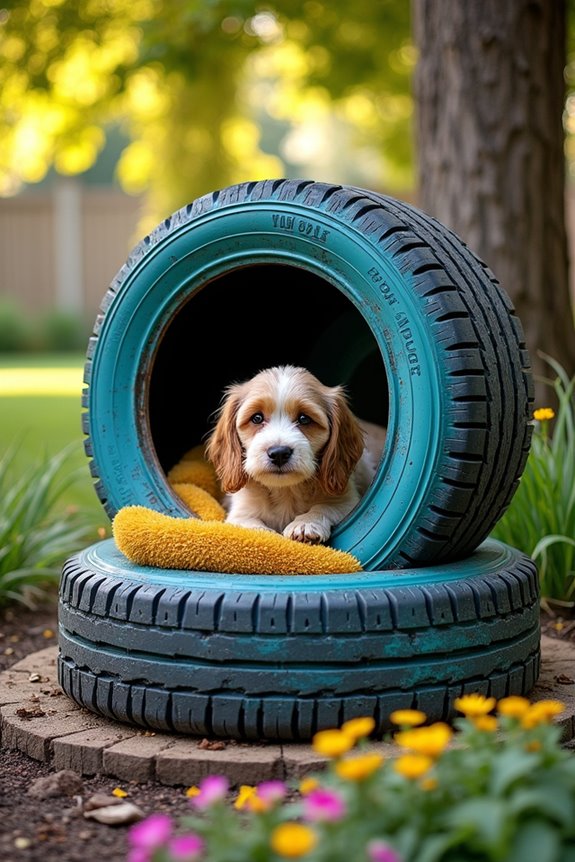
Are you looking for a smart way to provide your dog with a cozy home while also being kind to the planet? The recycled tire dog house ticks all the boxes!
It’s not only an affordable DIY option, but also helps reduce waste. Plus, your furry friend will appreciate having a unique, comfy spot to relax. Let’s show Mother Earth some love while keeping our pups happy!
Materials Needed:
- 2 old tires (preferably a larger size for medium to big dogs)
- Plywood sheet (for the base)
- Exterior wood screws
- Non-toxic paint (optional, for aesthetics)
- Hammer
- Circular saw (or handsaw)
- Drill
- Sandpaper
- Waterproof sealant (for extra protection)
Step-by-Step Instructions:
1. Prepare the Tires: Start by cleaning the tires thoroughly. If you’re like me, you’ll probably find all sorts of interesting dirt inside.
Once cleaned, check for any sharp edges and sand them down to keep your pup safe.
2. Cut the Base: Using your circular saw, cut a piece of plywood to form the base. The size should be just a bit larger than the footprint of the tires to avoid any awkward wobbling. Around 3 feet in diameter works well.
3. Stack the Tires: Take one tire and place it flat on your plywood base. Now, stack the second tire right on top of the first.
This creates a nice, cozy chamber for your pup. You don’t want your dog guessing how to get in.
4. Secure the Tires: Use screws to attach the tires firmly to the base, making sure they’re stable.
If they start wobbling, you’ll have a puppy rodeo on your hands. And trust me, no one wants that chaotic scene.
5. Create an Entrance: Use your saw to cut out a door on the front of the top tire. It should be big enough for your dog to enter comfortably but still keep in that sense of security.
You can add a flap later if you want extra protection from wind and rain.
6. Finish with Paint: If you’re feeling artsy, paint the outside of the tires for a splash of color.
I always say a pop of color can distract from my questionable painting skills – might as well make it fun!
7. Seal It Up: Finally, apply a waterproof sealant on the base and any cut edges for durability.
This helps to keep it nice and dry inside, which is the last thing we want is a soggy pup.
Optional Add-ons/Variations:
– Consider adding a roof or covering using a large piece of plywood or other materials to provide extra shade.
You can even plant some flowers around it to add some charm.
– Paint the tires in bright or coordinating colors, or let your kids or grandkids decorate them with non-toxic designs.
Pro Tip:
Want your dog to absolutely love their new house? Add some comfy bedding or a plush blanket inside.
It’ll give them a cozy place to curl up after all those wild chases for squirrels.
And remember, always confirm the materials you use (like paint) are safe for pets.
5. Solar-Powered Ventilation System
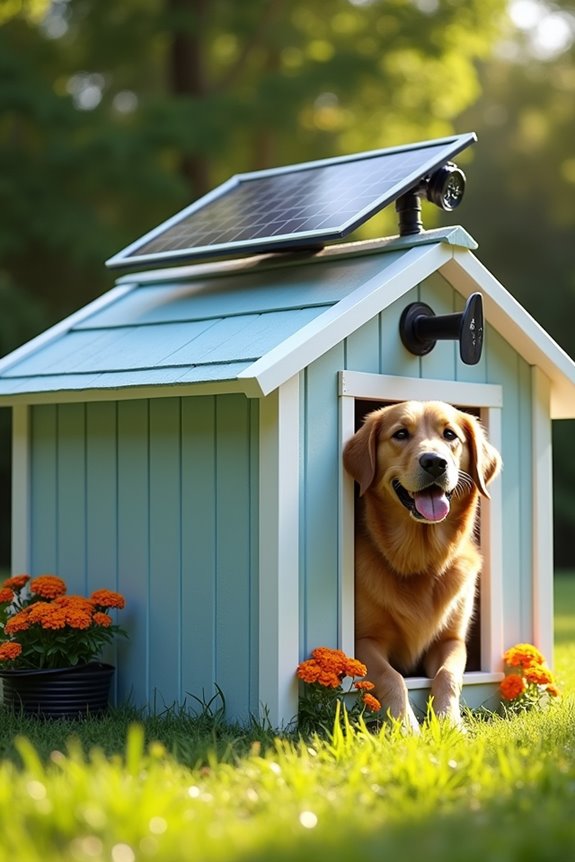
If you want to keep your pup comfortable year-round, why not consider a solar-powered ventilation system? This DIY project is a game changer, especially for those hot summer days when your furry friend needs a cool retreat. Not only will this improve their outdoor experience, but it also saves you money on electricity by harnessing the power of the sun. Let’s make your dog’s home a cozy haven, shall we? Additionally, investing in premium dog gear can further enhance your dog’s adventures and comfort outdoors.
Materials Needed:
- Small solar panel (around 10-20 watts)
- 12V DC fan (make sure it’s weatherproof)
- Plastic or metal conduit pipe (for wiring)
- Wire connectors
- Electrical tape
- Drill with drill bits
- Screws
- Sealant (waterproof)
- Optional: On/off switch for convenience
Step-by-Step Instructions:
- Choose the Right Spot: Pick a sunny spot on your dog house for the solar panel. Ideally, it should face south or west so it gathers maximum sunlight. Trust me, a shady dog house doesn’t do much good when summer hits.
- Mount the Solar Panel: Use screws to attach the solar panel to the roof of the dog house. You want to make sure it’s secured well because no one likes a solar panel that goes flying during a windy day, right?
- Drill a Hole for the Fan: Take your drill and make a hole near the roof where you want to install the fan. This needs to be large enough to fit the fan snugly without any gaps. A little struggle is OK; sometimes it takes a bit of elbow grease.
- Install the Fan: Place the fan into the hole you just drilled and secure it with screws. To make sure your pup doesn’t get startled by the fan noise, consider placing it at the top of the dog house—out of sight, out of mind.
- Run the Wiring: Feed the wiring for the fan down through the conduit pipe. This keeps everything tidy and protects it from the elements. Attach the other end of the wiring to the solar panel following its instructions, then connect them using wire connectors.
- Seal the Edges: Use waterproof sealant around the fan and any holes to prevent rainwater from seeping in. You wouldn’t want your dog’s shelter becoming a swimming pool, now would you?
- Test it Out: Now’s the fun part. Allow the solar panel to charge up for a good sunny day. After a few hours, check if the fan runs smoothly when exposed to the sun. If it’s blowing strong, give yourself a pat on the back. Your pup is going to love this upgrade.
Optional Add-ons/Variations:
- Consider adding an on/off switch to the inside of the dog house for better control. It’s handy if you want to turn off the fan during cooler nights.
- Get creative with ducting! You can add flexible ducting to bring in fresh air directly from outside or even create a little cooling tunnel for a fun twist.
Pro Tip:
Always check the fan and solar panel connections regularly. Being a bug enthusiast, I’ve found spiders love to make web homes in those nooks. Clean it out every few weeks to keep your dog’s cozy home working its best—unless your pup likes a little extra company from nature.
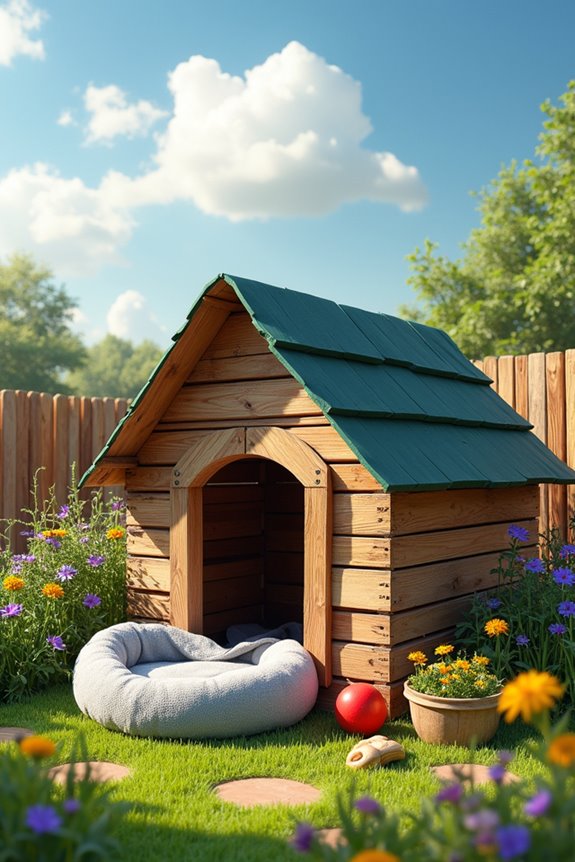
6. Insulated Winter Dog House
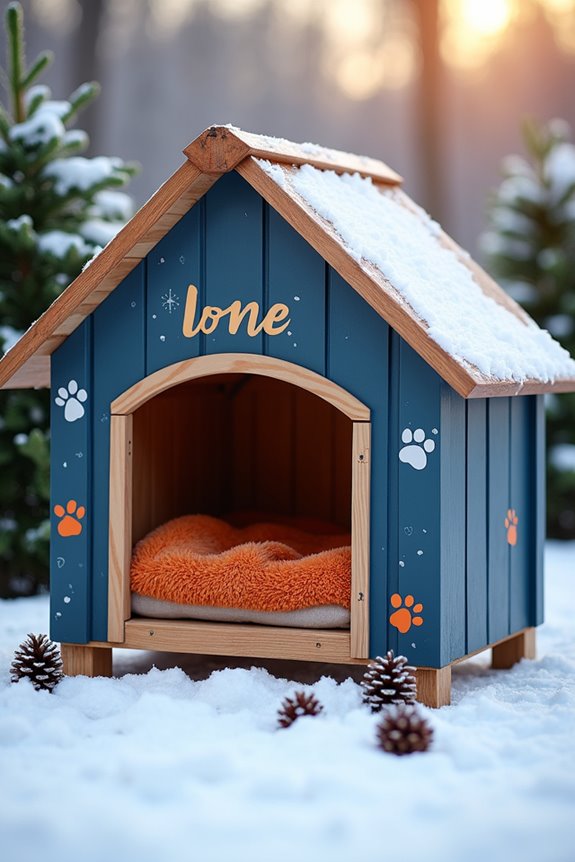
As winter rolls in, guaranteeing your furry friend has a warm and cozy home becomes crucial. Crafting an insulated dog house is a perfect DIY project that not only shelters your pup from frosty temperatures, but it also keeps their spirit high while saving on heating bills. Let’s make certain your pup is snug as a bug and ready to take on whatever winter throws their way.
Materials Needed:
- Plywood (for walls and roof)
- Rigid foam insulation (1 to 2 inches thick)
- Weatherproof exterior paint or sealant
- Wood screws
- Hinges (if you want a door)
- Drill
- Saw (circular or hand saw)
- Measuring tape
- Sandpaper (to smooth any rough edges)
- Optional: Dog bed for extra comfort
Step-by-Step Instructions:
- Measure and Plan: First things first, decide how big you want the dog house to be. Measure your dog while they’re lying down—this guarantees there’s enough space. Draw up a simple plan with dimensions. Trust me, it helps to have a blueprint when you’re in the thick of it.
- Cut the Pieces: Using your saw, cut the plywood into the needed pieces: sides, front, back, and roof. Remember, you’ll want two walls (sides), a front, a back, and a slanted roof to let the snow slide off easily. Run your sandpaper along the edges to smooth things out—nobody wants a doghouse with splinters.
- Add Insulation: Now, it’s time for the magic part—insulation. Cut the rigid foam insulation to fit snugly between the walls you just made. Fit it in like a puzzle piece to guarantee your furry friend stays warm and cozy. A nice snug fit prevents chilly air from sneaking in.
- Assemble the Dog House: Take your pieces and assemble them using wood screws. Make sure the front part has an opening for the door. Giggle a little if things don’t align perfectly; hey, it’s a dog house, not a palace, right?
- Seal It Up: One of the final touches is applying weatherproof paint or sealant to protect from the winter elements. Give your house a fun color, maybe even your dog’s favorite shade—who says dog houses can’t be stylish?
- Install the Roof: Attach the roof by screwing it down. Guarantee it overhangs a bit to keep out rain and snow. If you’re feeling fancy, you can add hinges to create a roof that opens for easy access when cleaning or checking on your pup.
- Add a Cozy Bed: Toss in a warm dog bed, some soft blankets, or favorite toys to make it feel like home. Trust me; your dog isn’t just going to use it as a house—it becomes their personal palace.
Optional Add-ons/Variations:
- Paint your dog house with fun designs, or even your dog’s name. Personalization can really add character and make it a unique space.
- Consider adding a flap door to keep out drafts. You could even craft one using an old shower curtain or a piece of fabric—super easy, yet effective.
Pro Tip:
Make certain to elevate the dog house off the ground a few inches. This helps with drainage during winter melts and also keeps your pup up and away from any cold drafts. A little detail can go a long way in keeping your buddy comfy. Plus, who doesn’t love a well-thought-out dog house?
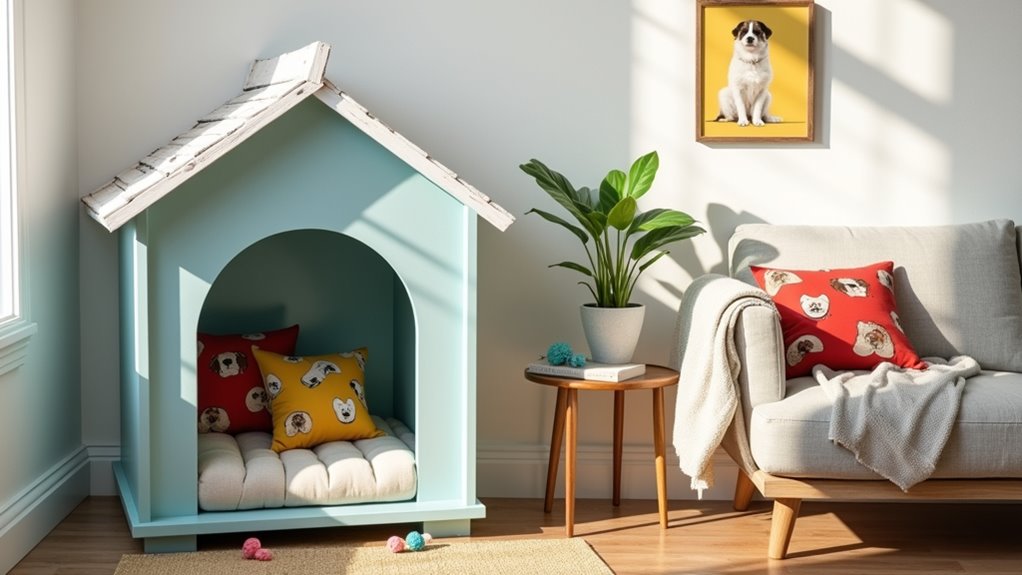
7. Indoor Dog House Options
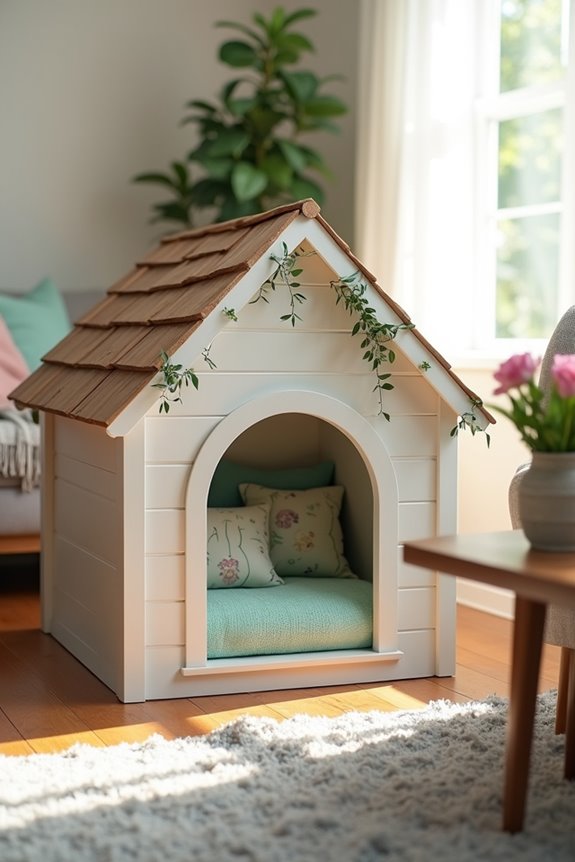
Creating a cozy indoor dog house is a fantastic way to provide your pup with a designated space that feels like their own haven. Not only does it enhance your home decor by adding a touch of cuteness, but it also keeps your dog comfy and safe from the hustle and bustle of daily life. Plus, it’s a fun project that’s sure to bring a smile to both you and your furry friend.
Materials Needed:
- Plywood or MDF boards
- Wood screws
- Drill
- Saw (circular or hand saw)
- Measuring tape
- Sandpaper
- Weatherproof paint or wood stain (optional)
- Dog bed or blankets for comfort
- Decorative pillows (optional for flair)
Step-by-Step Instructions:
- Measure Your Space: Find a good spot in your home where the dog house can fit. Measure by thinking about how big your furry pal is—because let’s be honest, a Great Dane and a Chihuahua are in very different league sizes. Make a plan with your measurements; it might look wonky if you skip this step, and that’s not what we want.
- Cut the Pieces: Now it’s time for some cutting action. Use your saw to cut the plywood or MDF into parts for walls, a base, and a roof. Aim for a base that’s sturdy and walls tall enough for your dog to stand without hitting their head. Give those edges a good sanding—splinters are the enemy, and we want nothing but comfort in this new nest.
- Build the Structure: Take the base and attach the walls using wood screws. Start with the back wall, then attach the sides. Add the front last, leaving a dog-sized opening for entry. If it feels like a game of architecture gone wrong, remember, it’s a dog house, not the Eiffel Tower.
- Seal and Decorate: If you want to protect the wood from the inevitable drool and other accidents, go ahead and paint or stain it. Pick a fun color that matches your decor or your dog’s personality. Maybe Fido has a favorite shade? Go wild, craftsman.
- Add a Roof: Attach a simple roof to keep out any unwanted rain or puppy splashes. You might want to reflect on making the roof a bit slanted (for style points) or even add hinges for easy access when it’s time for cleaning. Who knows what treasures are hiding in there—dog toys lost to time or rogue treats?
- Add Comfort: Make this house a home by throwing in a comfy dog bed or a couple of soft blankets. Maybe stuff it with some decorative pillows while you’re at it—everyone likes to feel a little fancy sometimes, right?
- Show Off Your Creation: Slip your pup inside and watch them wiggle with delight. Don’t forget to snap some pictures—this masterpiece definitely deserves a spot on the ‘gram, and who knows, your dog might just become the next social media sensation.
Optional Add-ons/Variations:
- Personalize It: Customize your dog house by painting your dog’s name on the door or by adding some fun decals that reflect their personality. Ponder using different wood types for a unique look—like going rustic with barn wood or sleek with modern finishes.
- Cozy Details: Think about adding a small canopy or a mini porch out front. It transforms the dog house into an even more charming getaway that gives your pup a place to chill out and bark at the squirrels.
Pro Tip:
Always double-check that screws are securely fastened. You don’t want any adventurous pups pulling pieces apart or, even worse, getting splinters during their infamous zoomies. Also, reflect on using non-toxic paint and finishes to keep it safe for your beloved furry companion.
Extra Tips & Ideas
While building a dog house can feel like a giant puzzle, there are plenty of tips and ideas that can make the process smoother and, let’s face it, a bit more fun.
Think about your pup’s personality—will they prefer a cozy corner or a spacious lounge? You could even add a little flair with paint or fun decals; your dog deserves a stylish pad.
Remember to include insulation for those chilly nights; nobody likes a drafty home.
And here’s a tip: if you mess up, embrace it. It adds character, right? Use leftover materials for a trendy “rustic” look… or just call it “creative.”
Feel free to personalize the space; after all, it’s their home.
Happy building!
Frequently Asked Questions
What Tools Do I Need for Building a Dog House?
You’ll need a saw, hammer, drill, screws, nails, measuring tape, level, and safety goggles. Additionally, consider having wood glue, sandpaper, and an outdoor waterproof finish to guarantee your dog house lasts through the elements.
How Long Does It Take to Build a Dog House?
It typically takes you about a weekend to build a dog house. Depending on your experience and the complexity of the design, it could range from a few hours to a couple of days.
What Materials Are Best for a Dog House?
Using wood, insulation, and metal roofing makes the best dog house. Statistically, homes built with treated plywood last 20% longer, ensuring your pup stays cozy and safe for years while you showcase your craftsmanship.
How to Ensure My Dog Stays Comfortable Inside?
To keep your dog comfortable, provide adequate insulation, guarantee proper ventilation, and use soft bedding. Consider their size and keep the space cozy. Regular temperature checks will help you maintain the ideal environment for your pup.
Can I Customize the Size for Different Dog Breeds?
You can customize the size like tailoring a suit. Just measure your dog from nose to tail and add extra room for comfort and movement. Create a perfect fit that suits their unique personality!
Conclusion
So there you have it—a few fun and creative dog house designs that really make your pup’s pad special. Did you know that nearly 80% of dog owners believe their furry friends deserve their own space? That’s a big deal. It’s not just a house; it’s a cozy retreat. Whether you go all out with a solar-powered model or keep it simple with pallets, your pooch will appreciate the effort. And hey, you might even enjoy the process, too.