
Have you ever thought about baking a cake for your dog? It’s a fun way to celebrate special days or just because. Imagine your pup’s tail wagging furiously when they catch a whiff of those delicious aromas. From Peanut Butter Banana Delight to Cheesy Chicken flavors, the options are endless and healthy too. Trust me, no one will judge your baking skills when it comes to dog treats—even if your last cake fell flat. Want to know how to create these tasty masterpieces?
Why Homemade?
Why go through the trouble of making homemade dog cakes when you can just grab a box at the store? Well, think about it—your pup deserves the best, right?
A dog friendly cake recipe lets you customize ingredients, ensuring your furry friend gets healthy, tasty treats without any sneaky additives. You control the flavors, and let’s be honest, it’s more fun. Imagine lifting that whisk, feeling like a culinary genius—until flour’s everywhere. Homemade treats also allow you to experiment with unique flavor combinations that your dog will love. Making your own treats can be more cost-effective than buying pre-packaged options.
Plus, you can brag a little, say you made it yourself. You can even add your dog’s favorite peanut butter or pumpkin! Additionally, you can create cakes that include gentle remedies to help soothe an upset stomach if your dog has dietary sensitivities.
And the joy on their face when they devour it? Priceless. Honestly, store-bought cakes just can’t compete with the love and effort you put into a homemade masterpiece. Not to mention, you can create cakes with natural ingredients that are beneficial for your dog’s health, giving you peace of mind as a pet owner.
Delicious Dog Cake Options
When it comes to baking for your furry friend, you’ve got some delicious options to choose from. Imagine a Peanut Butter Banana Delight that makes their tail wag faster than ever, or a Carrot Cake for Dogs that’ll have them begging for another slice. Let’s explore these mouthwatering treats, from Pumpkin Spice Pup Cake to Sweet Potato Delight, and see which one will crown your pup’s next birthday bash. To make your baking journey even smoother, consider these homemade dog treats that are quick and easy to prepare. Don’t forget, you can whip up an easy three-ingredient dog cake that will have them barking for more! Using dog safe ingredients ensures that every bite is healthy and enjoyable for your pet, and you can be sure that these cakes are tail-waggingly delicious for all pups.
1. Peanut Butter Banana Delight
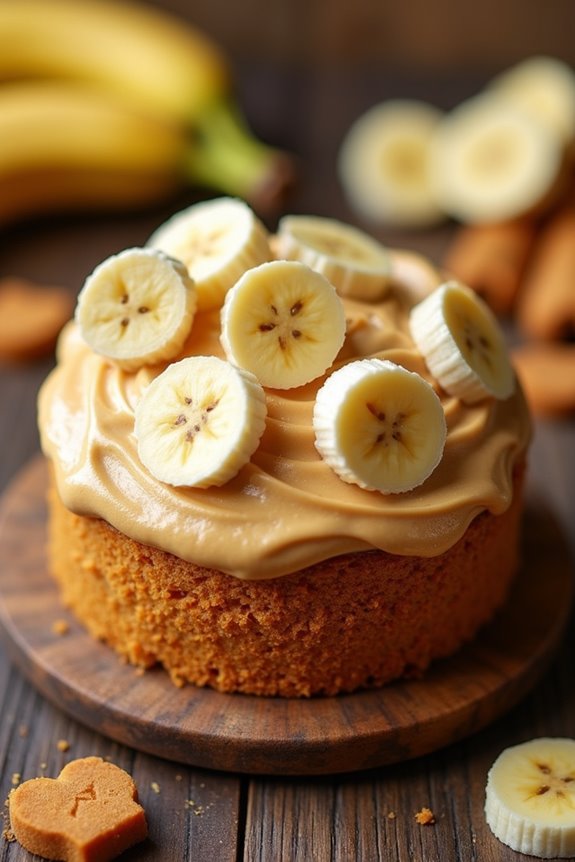
Alright, let’s talk about making a Peanut Butter Banana Delight for your pup.
You’ll need just a few simple ingredients, and I promise, it’s super easy to whip up. Plus, dogs love peanut butter because it’s an excellent source of protein and healthy fats, making this treat nutritious! If you’re feeling extra fancy, I’ll share some fun optional add-ons to make it even more special for your furry friend. Additionally, using homemade dog treats can be a healthier option for your pet.
Ingredients
Hey there, fellow dog lovers! If you’re looking to whip up a delightful cake that will make your pup’s tail wag like there’s no tomorrow, then you’re in the right place.
This Peanut Butter Banana Delight recipe isn’t just simple but packed with flavors that your furry friend will absolutely adore. Plus, the best part? You probably have most of these ingredients in your pantry right now.
Let’s explore what you’ll need to create this paw-some treat.
- 1 ripe banana, mashed (the more spotty, the better!)
- 1 cup unsweetened peanut butter (make sure it doesn’t contain xylitol)
- 1 cup whole wheat flour (or oat flour for a gluten-free option)
- 1/2 cup unsweetened applesauce
- 1/4 cup water (or low-sodium chicken broth for extra flavor)
- 1 egg (for binding everything together beautifully)
Now, isn’t that a simple list? With these ingredients gathered, you’re already halfway to cake time.
Trust me, your dog will think you’re the world’s best chef! Just don’t forget to sample a little spoonful of the mix—strictly for quality control, of course.
Happy baking!
Step by Step Instructions
- Preheat your oven to 350°F (175°C) and line a cake pan with parchment paper. Trust me, this saves you from an epic cleanup later on.
- In a large mixing bowl, mash 2 ripe bananas until smooth. The riper, the better—think brown spots rather than the shiny yellow, like they’re auditioning for a banana bread role.
- Add ½ cup of unsweetened peanut butter (make sure it doesn’t contain xylitol) to the mashed bananas. Bonus points if you sneak a little taste for yourself—it’s dog-friendly after all.
- Pour in 1 egg and stir until everything is combined. No need for an arm workout here; just gentle mixing will do.
- Gradually mix in 1 cup of whole wheat flour and ½ cup of oats. It should look thick and ready to spoil your pup, but don’t overmix the batter—suspicious lumps are okay.
- If you want to add a little flair, fold in some chopped apples or carrots now. Just think of this as a culinary surprise for your furry friend.
- Pour the mixture into your prepared cake pan and smooth the top with a spatula. Impressively glossy surfaces really take the cake (pun intended).
- Bake for 25–30 minutes, or until the cake springs back when gently pressed in the center and turns a lovely golden brown. Your nose will let you know it’s time—trust me.
- Once baked, let the cake cool in the pan for a few minutes before transferring it to a wire rack. No rushing here; we want it to set properly and not turn into a sad pancake.
- Cool completely before serving to your dog. I mean, we don’t want them to burn their precious tongues, do we?
Optional Add-ons
When you think about throwing an unforgettable birthday bash for your pooch, adding a few optional ingredients can transform your dog-friendly cake into a real showstopper.
Imagine smearing that cake with creamy peanut butter or adding mashed bananas for extra flavor.
Just picture your pup’s delighted tail wagging. It’s a simple way to elevate their celebration and make it truly memorable.
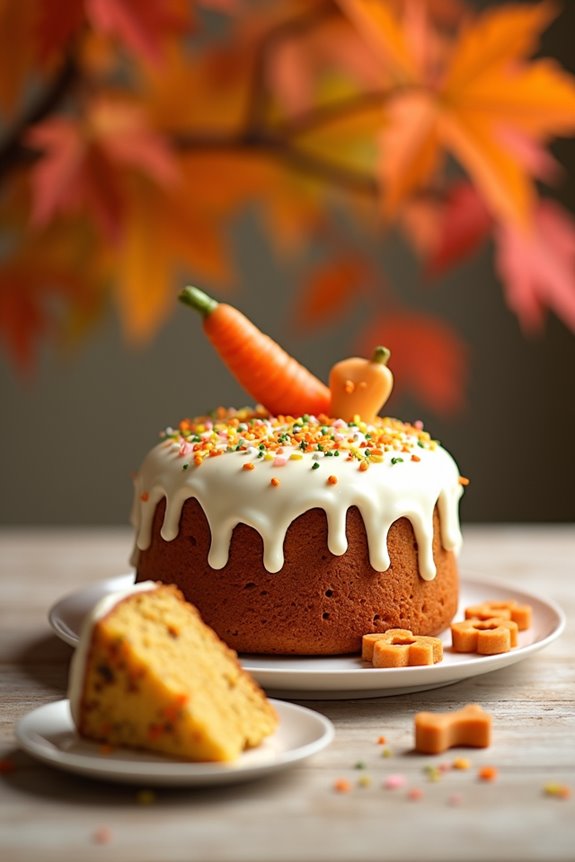
2. Carrot Cake for Dogs
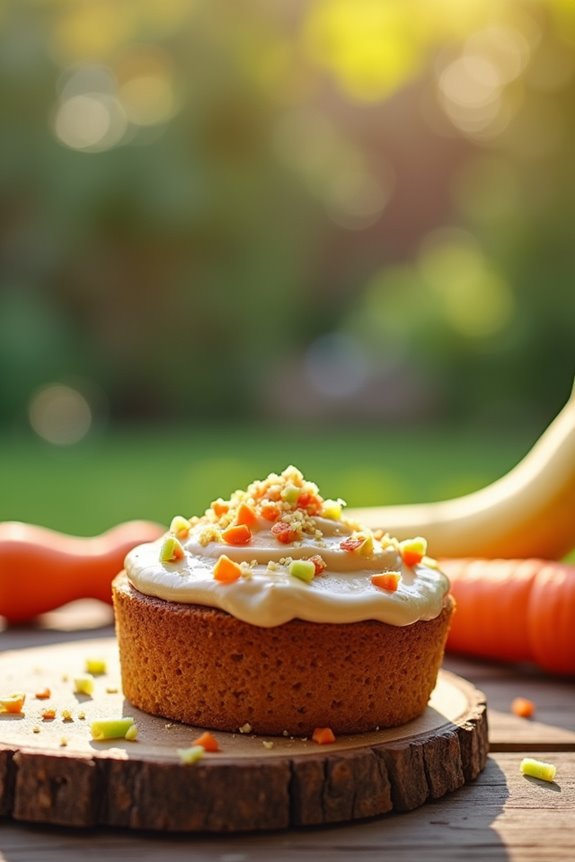
If you’re looking to whip up a tasty treat your pup will love, carrot cake is a fantastic choice. Packed with wholesome ingredients, it’s not just delicious, but also easy to make—seriously, even if you’ve burned toast before, you can totally nail this one. Let’s break down the ingredients, step-by-step instructions, and a few optional add-ons to make your dog’s day even sweeter.
Ingredients
Is your furry friend ready for a special treat? Let’s whip up a delicious carrot cake just for them. This cake is easy to make and uses ingredients you probably have in your kitchen already.
Plus, it’s super healthy for your dog, so you can feel good about giving them a slice… or two. Here’s what you’ll need to get started:
- 1 cup finely grated carrots
- 1 cup whole wheat flour (make certain it’s dog-friendly)
- ½ cup unsweetened applesauce
- 1 large egg
- ¼ cup peanut butter (just make sure it doesn’t have xylitol)
- 1 tablespoon honey (optional, but pups love it)
With these simple ingredients, you’ll be on your way to creating a tail-wagging masterpiece.
Seriously, my dog always sniffs around the kitchen when I bake this. It’s like they know something thrilling is coming.
And trust me, watching them devour a piece is a treat for you, too!
Step by Step Instructions
1. Preheat your oven to 350°F (175°C) and grease a round cake pan with a bit of coconut oil or non-stick spray. A well-greased pan means less drama when it’s time to remove the cake.
2. In a large mixing bowl, combine 1 cup of whole wheat flour, 1 teaspoon of baking powder, and a pinch of cinnamon. Whisk until well mixed, and don’t worry if it looks a little dusty; that’s just the flour getting cozy with the spices.
3. In a separate bowl, mash 1 cup of cooked, pureed carrots (about 2 medium carrots) until smooth. If you find yourself sampling the carrots, know that they really do taste sweet, but your dog thinks they’re a gourmet treat.
4. Add 1/4 cup of unsweetened applesauce and 1/4 cup of peanut butter (make sure it’s xylitol-free) to the mashed carrots. Mix until everything is well blended. If you find the peanut butter sticking to your spoon, well, that’s what you get for trying to mix things up.
5. Gradually fold the flour mixture into the carrot mixture. Stir until just combined. (Don’t overmix the batter—it should be slightly lumpy. Embrace the lumps; they’re part of the character.)
6. Pour the batter into your prepared pan and spread it out evenly. This is where you can imagine your dog wagging their tail in anticipation.
7. Bake for 25–30 minutes, or until a toothpick inserted in the center comes out clean. The cake should look golden brown and smell like a delicious secret.
8. Once baked, remove the cake from the oven and let it cool in the pan for 10 minutes. Then, carefully transfer it to a wire rack to cool completely.
Patience is key here; your dog won’t mind waiting a bit longer for their treat.
9. Finally, once cooled, feel free to frost it with dog-friendly yogurt or just serve it as is. Take a moment to admire your creation; this masterpiece is sure to score you some serious tail wags.
Cool completely before serving to your dog. Enjoy the happy barks!
Optional Add-ons
Carrot cake isn’t just for humans; it can be a delightful treat for your furry friend too.
Think about adding some cooked carrots or applesauce for extra flavor. You could sprinkle in a bit of peanut butter, just don’t go overboard.
Your pup might look at you with those big eyes, begging for another slice, and who could resist?
3. Pumpkin Spice Pup Cake
Ready to whip up a Pumpkin Spice Pup Cake that’ll make your dog’s tail wag in delight? You’ll need some simple ingredients, easy step-by-step instructions, and maybe a few fun add-ons to make it extra special. Let’s get baking, because nothing says “I love you” quite like a homemade treat for your furry friend.
Ingredients
Who doesn’t want to treat their furry friend to something special?
This Pumpkin Spice Pup Cake isn’t just a regular cake; it’s a celebration of all things delicious for your beloved dog.
With simple ingredients that you might already have in your kitchen, it’s perfect for any occasion, whether it’s a birthday or just because.
So, let’s jump into what you’ll need to whip up this tail-wagging delight.
- 1 cup canned pumpkin (not pumpkin pie filling, please)
- ½ cup natural peanut butter (the kind without added sugar or xylitol)
- 2 cups whole wheat flour (or oat flour for a gluten-free option)
- 1 teaspoon cinnamon (this adds a warm fall flavor without harming our pups)
- 1 teaspoon baking soda (to give it some rise)
- 1 cup unsweetened applesauce (makes the cake moist and yummy)
- 1 large egg (binds everything together)
There you have it!
Simple, safe, and sure to make your canine companion wag their tail in delight.
Remember, while we humans might drool over a double chocolate cake, this is just for them.
Step by Step Instructions
1. Preheat your oven to 350°F (175°C) and prepare an 8-inch round cake pan by greasing it lightly. You want that cake to slide out smoothly, right?
2. In a large mixing bowl, combine 1 cup of pumpkin puree, 1/4 cup of peanut butter (make certain it’s xylitol-free), and 2 eggs. Whisk them together until the mixture is smooth and creamy.
3. In another bowl, mix 1 1/2 cups of whole wheat flour and 1 teaspoon of baking powder. Stir them well to guarantee even distribution (nobody likes a surprise flour clump).
4. Gradually fold the dry mixture into the wet mixture. Gently combine until just incorporated, but don’t overmix—the batter should look somewhat lumpy, like it’s got little puppy dog bumps.
5. Pour the batter into the prepared cake pan and spread it evenly with a spatula. It should look nice and even; let’s not give those pups any wobbly cake slices.
6. Bake in the preheated oven for 25–30 minutes, or until the top springs back when lightly touched and a toothpick inserted into the center comes out clean. Your house will smell amazing—just wait until your dog catches a whiff!
7. Remove the cake from the oven and let it cool in the pan for about 10 minutes.
Then, carefully transfer it to a wire rack to cool completely.
8. Once cooled, you can decorate it with dog-friendly frosting, like a mix of Greek yogurt and peanut butter if you’re feeling adventurous.
9. Cool completely before serving to your dog. You want them to enjoy every bite, not burn their little tongues!
Optional Add-ons
If you’re looking to take your dog’s cake experience to the next level, consider jazzing things up with some optional add-ons.
For a delightful twist, try adding pumpkin puree or a sprinkle of cinnamon for a pumpkin spice pup cake. You could even top it with dog-safe yogurt frosting.
Your pup won’t just love it; they’ll think you’re a five-star chef!
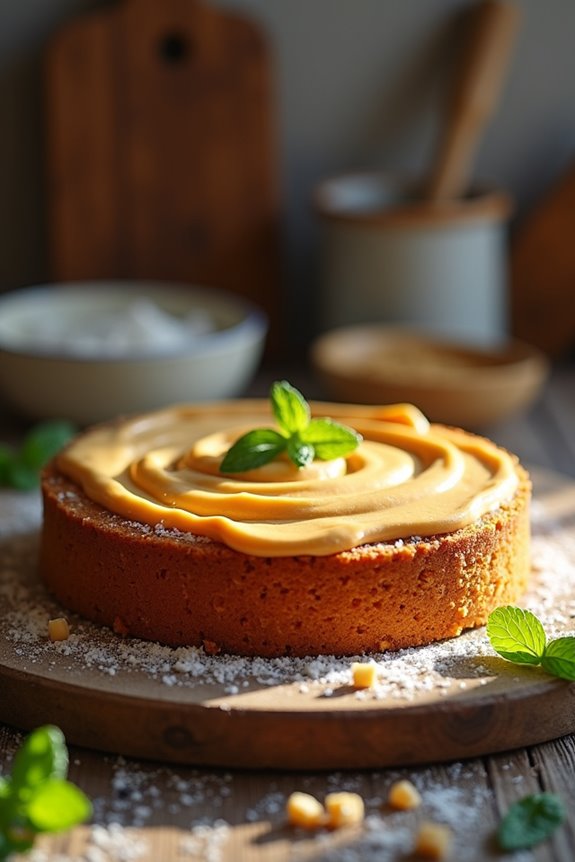
4. Sweet Potato Delight for Dogs
Let’s whip up something special for your furry friend with this Sweet Potato Delight. Using simple ingredients like sweet potatoes, flour, and eggs, you’ll create a cake that’ll have their tails wagging in no time. Plus, if you’re feeling adventurous, I’ll share some fun optional add-ons to jazz it up even more—because what’s a celebration without a little pizzazz?
Ingredients
When it comes to treating our furry friends, crafting a cake that’s both scrumptious and safe is key. This Sweet Potato Delight for Dogs recipe is a hit—trust me, it’ll have tails wagging and puppy eyes sparkling.
Plus, the best part? You probably have most of these ingredients hanging around your kitchen already. So, grab your mixing bowl and let’s get started. Here’s what you’ll need:
- 1 cup mashed sweet potato (about 1 medium-sized, cooked)
- 1 ½ cups whole wheat flour (make sure it’s safe for any dietary restrictions)
- 1/4 cup unsweetened applesauce (no sugar added, please)
- 1/4 cup peanut butter (just double-check that it’s xylitol-free)
- 1 egg (nature’s perfect binder)
- 1/2 teaspoon cinnamon (not too much; we don’t want a spice overload)
Do you see that selection? Only simple, wholesome goodness for your pooch.
The sweet potato adds chewiness, the peanut butter brings that creamy delight, and I mean, who doesn’t love a little applesauce? Happy baking, and get ready for some serious tail wagging.
Step by Step Instructions
- Preheat your oven to 350°F (175°C). This sets the stage for a perfectly baked cake that your pup will love.
- Grease a cake pan lightly with a bit of non-stick spray or a small amount of coconut oil. This will help the cake slide right out after it’s baked.
- Boil a small pot of water. Once it’s boiling, add your sweet potatoes. Cook them until they’re fork-tender, about 15 minutes.
- While the sweet potatoes are cooking, gather your dry ingredients: whole wheat flour, baking powder, and cinnamon.
- In a mixing bowl, mash the sweet potatoes once they’re cooked and cooled slightly. You want a smooth texture, but don’t overdo it (a few lumps are okay!).
- In the same bowl, mix in the eggs, apple sauce, and honey. Stir until everything is well combined.
- Gradually whisk in your dry ingredients until just mixed (remember, don’t overmix; we want it to be cozy, not tough).
- Pour the batter into your prepared cake pan. Spread it evenly, smoothing the top with the back of a spoon.
- Bake in your preheated oven for 25 to 30 minutes, or until the top is golden brown and a toothpick comes out clean when inserted in the center.
- Let the cake cool in the pan for about 10 minutes, then carefully transfer it to a wire rack to cool completely.
- Once it’s cool, slice it up for your dog or serve them a fancy piece with a little peanut butter spread on top—because why not make it extra special?
Cool completely before serving to your dog. Enjoy watching their tail wag in delight.
Optional Add-ons
Sometimes, a little extra something can turn a good dog cake into an unforgettable one.
Why not add sweet potato? It’s not only tasty but also packed with nutrients. Just mash it up and fold it into your batter.
Your pup will love the flavor, trust me. There’s something magical about seeing their eyes light up when they taste something special.
Enjoy the wagging tails.
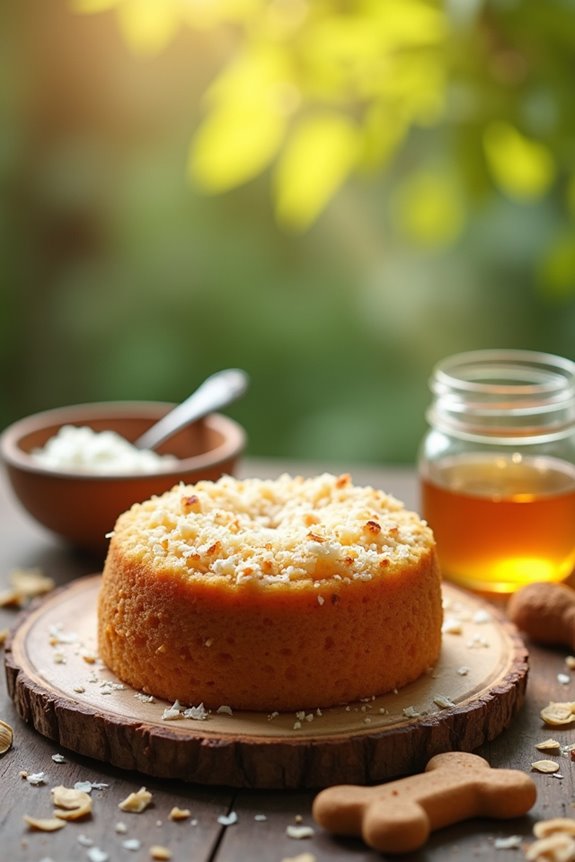
5. Peanut Butter Coconut Bliss
You’re in for a treat with this Peanut Butter Coconut Bliss recipe—your pup will be begging for more. Let’s gather some simple ingredients, and I’ll walk you through the step-by-step instructions, plus a few optional add-ons if you’re feeling adventurous. Who knew dog-friendly baking could be this easy and fun?
Ingredients
When it comes to whipping up a delicious cake for your furry friend, you want to grab ingredients that aren’t only tasty but also safe.
The Peanut Butter Coconut Bliss cake is a delightful way to treat your pup. Let’s make sure you have everything ready for this tail-wagging treat. Here’s what you’ll need:
- 1 cup whole wheat flour (or a gluten-free alternative if your dog has a sensitive tummy)
- 1/2 cup unsweetened peanut butter (make sure it’s xylitol-free)
- 1/4 cup coconut oil (melted, because we like it smooth)
- 1/4 cup honey (just a touch of sweetness, right?)
- 1/2 cup unsweetened shredded coconut (for that tropical twist your dog probably dreams about)
- 1/2 cup unsweetened applesauce (perfect for moisture and flavor)
Gather these ingredients, and you’re all set to create something your dog will love.
Oh, and don’t be surprised if they start drooling the moment they catch a whiff of that peanut butter. I mean, who wouldn’t?
Step by Step Instructions
1. Preheat your oven to 350°F (175°C) to get things nice and toasty for your pup’s cake.
2. Grease a 6-inch round cake pan with some oil or non-stick spray to prevent any sticky situations later on.
3. In a large mixing bowl, combine 1 cup of whole wheat flour, 1/2 cup of unsweetened peanut butter, and 1/4 cup of coconut oil (melted). Stir until well mixed.
4. Crack one large egg into the bowl, then add 1/2 cup of natural yogurt, and 1/3 cup of honey. Mix everything together until smooth and creamy—don’t be afraid to channel your inner cake master.
5. Slowly fold in 1/2 cup of shredded coconut, being gentle so you don’t deflate all that glorious goodness.
6. Pour the batter into the greased cake pan and spread it evenly. You want it to bake nice and flat, just like that time you tried making an artisanal pizza (oops).
7. Bake in the preheated oven for about 25–30 minutes or until the top is golden brown and a toothpick comes out clean when inserted (the classic test for cake perfection).
8. Once baked, remove the cake from the oven and let it cool in the pan for about 10 minutes.
After that, transfer it to a wire rack to cool completely.
9. Once cooled, serve it to your furry friend as a special treat—just remember, moderation is key here.
Cool completely before serving to your dog.
Optional Add-ons
Imagine your pup’s face lighting up as they sniff that delightful, home-baked treat. Adding peanut butter and shredded coconut to your dog cake? Pure bliss.
You’ll enhance the flavor and texture, making it irresistible. A spoonful of Greek yogurt on top? So creamy.
Trust me, they’ll give you those puppy eyes like you’ve just won the treat lottery. Your baking skills? Totally worth it.
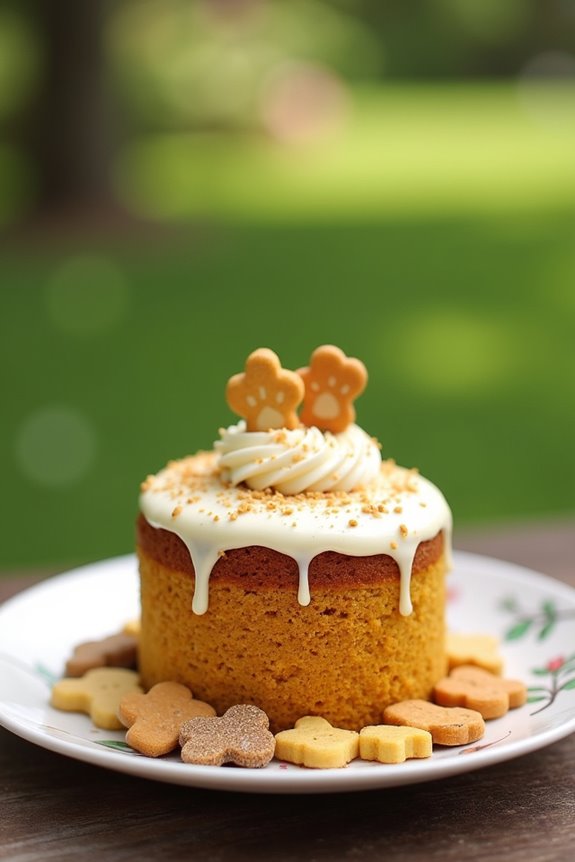
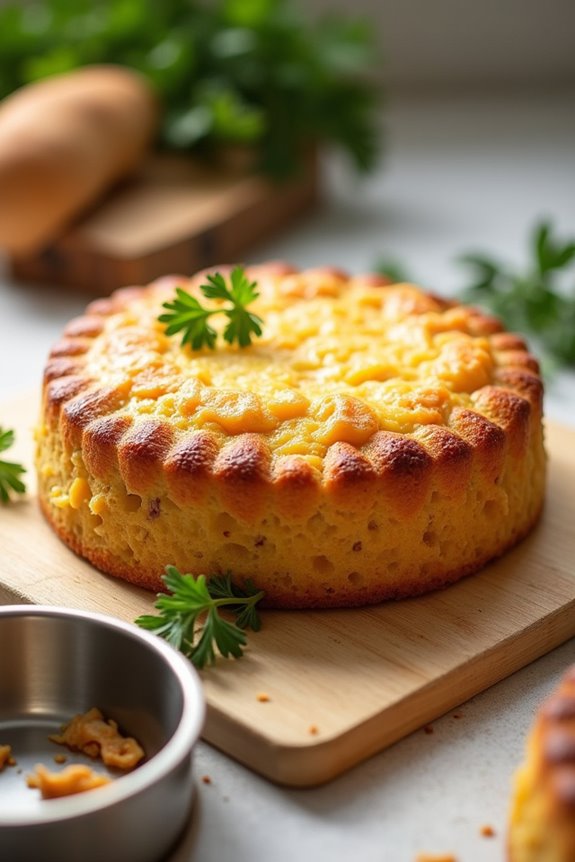
6. Cheesy Chicken Delight Cake
Alright, let’s whip up a Cheesy Chicken Delight Cake that your pup will adore.
You’ll need some everyday ingredients, and crafting this treat is easier than you might think. Ready to get started with the step-by-step instructions and a few fun optional add-ons that’ll make this cake even tastier?
Ingredients
Making a cake for your furry friend can be a delightful experience, especially when you see their little tail wagging with excitement. This Cheesy Chicken Delight Cake isn’t only scrumptious but also super simple to whip together. Let’s check out what you’ll need to make this tail-wag-worthy treat.
- 1 cup of rolled oats
- 1/2 cup of shredded, low-fat cheddar cheese
- 1 cup of cooked, shredded chicken (boneless and skinless, please)
- 1/2 cup of unsweetened applesauce
- 2 large eggs
- 1 tablespoon of olive oil
- 1 teaspoon of baking powder
That’s it! Sam’s gonna love this cheesy creation, and you’ll feel good knowing it’s made from safe and healthy ingredients. Just picture the joy in their eyes as you slice the cake. It’s almost worth making twice – but, maybe not on a Tuesday, because who wants to share cake with a dog when there’s Netflix and snacks for humans waiting?
Step by Step Instructions
- Preheat your oven to 350°F (175°C) to get things warmed up for our tasty treat.
- Grab a medium mixing bowl and add 1 cup of whole wheat flour, 1 cup of shredded cooked chicken (make sure it’s plain, with no seasoning), and 1 cup of shredded cheese (cheddar works great).
- In another bowl, whisk together 1 cup of low-sodium chicken broth and 2 eggs until they’re nicely combined.
- Pour the egg and broth mixture into the flour mix, and stir until everything is just combined. Don’t overmix – we want a little texture in our batter.
- Grease a round cake pan to make sure our delightful creation doesn’t stick like your dog does when they see a squirrel.
- Pour the batter into the prepared cake pan, spreading it out evenly.
- Bake in the preheated oven for 25–30 minutes or until the top is golden brown (trust me, it’ll smell amazing).
- Once it’s done, take the cake out of the oven and let it cool in the pan for about 10 minutes before transferring it to a wire rack.
- Cool completely before serving to your dog—nobody likes a burnt tongue (or a soggy cake).
And there you have it! Your furry friend is going to love this cheesy chicken delight cake.
Optional Add-ons
Your dog’s cake can be a blank canvas ready for fun add-ons that will make it even more scrumptious.
Think of mixing in shredded cheese, bits of cooked chicken, or some peanut butter.
Why not toss in some carrots for crunch? Your pup will love the surprise flavors.
Just imagine the tail wags and happy barks when they dig in!
7. Banana Oatmeal Wag Bake
Ready to whip up something special for your furry friend? The Banana Oatmeal Wag Bake isn’t only super easy to make, but it uses ingredients you probably already have on hand. Let’s break down what you’ll need, step by step instructions, and maybe even throw in some optional add-ons to make it extra tasty for your pup.
Ingredients
When it comes to making a delicious and tail-wagging cake for your furry friend, you want to keep it simple yet effective.
This Banana Oatmeal Wag Bake is full of goodness that your pup will love—and it’s something you can whip up with just a few everyday ingredients. Trust me, their little noses will be in the air, sniffing for that mouthwatering aroma!
So, let’s explore what you need:
- 2 ripe bananas, mashed
- 1 ½ cups rolled oats
- ½ cup unsweetened apple sauce
- 1 tablespoon honey (optional, but it adds a nice touch)
- 1 teaspoon cinnamon (just a pinch for extra flavor)
- 1 large egg
Gather these ingredients, and you’ll be on your way to creating a delightful treat that even the pickiest pooch will approve of.
Just remember, while you’re baking away, keep an eye on your pup—they might be lurking around, hoping for some sneaky bites before their cake is even ready.
We’re not saying it’s going to be easy, but just maybe, some flour will end up on your kitchen floor!
Happy baking!
Step by Step Instructions
- Preheat your oven to 350°F (175°C) and prepare an 8-inch round cake pan by greasing it lightly with cooking spray.
- In a medium mixing bowl, mash 2 ripe bananas until smooth, but don’t worry if there are a few lumps (that’s what gives it character).
- Add 1 ½ cups of rolled oats to the mashed bananas and mix well.
- Crack in 1 egg and add ½ cup of unsweetened natural peanut butter. Stir until it’s all combined into a lovely, gooey mixture.
- Pour in ½ cup of low-sodium chicken or vegetable broth and mix again until everything is evenly integrated (you want a nice, thick batter).
- Spoon the batter into the prepared cake pan, smoothing the top with a spatula.
- Bake for 25–30 minutes, or until the cake is golden brown and a toothpick inserted into the center comes out clean.
- Remove the cake from the oven and let it cool in the pan for about 10 minutes, then gently transfer it to a wire rack to cool completely.
- Once cooled, feel free to decorate with a little peanut butter spread on top, or get creative with dog-safe treats.
- Cool completely before serving to your dog. They’ll love you for this tasty treat!
Optional Add-ons
If you thought the banana oatmeal wag bake couldn’t get any better, think again.
You can easily elevate this treat by adding in peanut butter, shredded carrots, or even a sprinkle of cinnamon. Each option adds a unique twist and shows your pup just how much you care.
Who doesn’t love a customizable cake? Seriously, your dog will be drooling in no time.
Perfect Cake Cooling Techniques
Cooling a cake might seem simple, but a few clever techniques can make a world of difference. First, let it rest in the pan for about 10 minutes. This helps it firm up a bit, making it easier to remove without any disasters.
After that, flip it onto a wire rack. Sounds easy, right? But if you’re like me and somehow managed to flip an empty pan instead a few times—trust me, use a plate for extra support.
Now, here’s where magic happens. A wire rack allows air to circulate around your cake, cooling it evenly. Place it in a draft-free spot to avoid any unexpected temperature swings.
And if your cake’s a tad too warm for frosting—don’t worry. You can always pop it in the fridge for about 15 minutes. Patience is key, and it’s worth the wait for that perfect slice, especially when you’re making something special for your pup!
Frequently Asked Questions
Can I Use Regular Flour Instead of Whole Wheat Flour?
Yes, you can use regular flour instead of whole wheat flour. Just keep in mind that it might alter the texture and taste slightly, but it should still work well in most recipes. Enjoy baking!
How Do I Know if My Dog Is Allergic to Specific Ingredients?
You’ll notice allergic reactions like vomiting, diarrhea, or itching after your dog eats a specific ingredient. To identify allergies, consult your vet and consider an elimination diet to pinpoint offending ingredients effectively.
What Size Cake Should I Make for My Dog?
You should make a small to medium-sized cake for your dog, depending on their size and how many pups you plan to serve. Remember, it’s all about moderation and keeping tails wagging!
How Can I Store Leftover Dog Cake Properly?
You can store leftover dog cake in an airtight container in the fridge for up to three days. For longer storage, freeze slices wrapped in plastic wrap or foil, then place them in a freezer-safe bag.
Can I Freeze Dog Cakes for Later Use?
Yes, you can freeze dog cakes for later use! Just wrap them tightly in plastic wrap or aluminum foil, then place them in an airtight container. Thaw in the fridge before serving to your pup.