Let’s be honest: dog food storage can be a bit of a mess. You want your pup’s chow handy, but that doesn’t mean it has to look like a tornado hit the kitchen. Ever think about how storage can be stylish? From chic canisters to wooden chests, there are so many options. Stick around to find out how to transform your pet food bins into a reflection of your home’s style and maybe even spark a bit of joy.
Bespoke Canister Styles
When it comes to storing your pup’s food, there’s no one-size-fits-all approach, and you might be surprised at just how many fun canister styles are out there.
From sleek stainless steel to rustic wooden options, you can really find a fit that matches your kitchen vibe. Premium dog food storage solutions often feature innovative designs that meet both style and functionality.
Ever think of a colorful canister that doubles as decor? Genius, right? You could even go for a vintage tin—charming and nostalgic, just like your grandma’s kitchen!
Don’t overlook quirky shapes either; a bone-shaped canister adds a whimsical touch. Investing in premium pet food storage for your furry friend can elevate not just the aesthetic but also the practicality of your storage solutions.
Think about airtight seals too. You want your dog’s food fresh, and who wouldn’t want to prevent a hungry critter raid? A well-designed storage system can also help maintain food quality by preventing moisture and pests from getting in.
Our Collection
When it comes to storing your pup’s grub, you’ve got options that range from chic to charming. Imagine stacking modern food bins that fit neatly in your kitchen, or maybe that vintage wooden chest that looks like it belongs in a rustic cabin. A premium dog food storage cabinet will enhance your pet’s eating experience while ensuring a stylish addition to your home. Additionally, investing in a quality dog food storage cabinet will help maintain the freshness of your dog’s food while keeping it organized and easily accessible. A well-designed storage solution can also prevent food contamination and help you avoid waste.
1. Modern Stackable Food Bins

Creating your own stackable dog food storage bins isn’t just a fun project; it’s a practical solution for dog owners who want to keep their furry friends’ food organized and fresh. Plus, it adds a modern touch to your home décor that makes your space look a whole lot better. Imagine those plain, bulky bags of dog food transformed into stylish bins that you can show off rather than hide. Let’s explore how you can make this happen, shall we?
Materials Needed
- 2 to 3 medium-sized plastic storage bins with lids (clear ones are great!)
- Non-toxic paint or adhesive vinyl (in fun colors or patterns)
- Measuring tape
- Sandpaper (if you’re using plastic, pick a fine-grit)
- Paintbrush (if using paint)
- Scissors (for vinyl)
- Permanent marker (for labeling)
- Optional: Dog food scoop (to keep nearby)
Step-by-Step Instructions
- Choose Your Bins: First up, choose two or three of those medium-sized plastic storage bins. You want something easy to grab but big enough to hold a decent amount of kibble.
- Prep the Surface: If you’re planning on painting, give your bins a gentle sanding using fine-grit sandpaper. This helps the paint stick better. Think of it as a spa day for your bins.
- Get Creative: Now it’s time to paint or apply your adhesive vinyl. If you’re using paint, grab your brush and go wild! Use multiple colors for a fun vibe or keep it sleek and simple with one color. If vinyl is more your style, carefully cut it into shapes or letters for a personalized touch.
- Label, Label, Label: Once everything is dry, grab that permanent marker and label each bin. “Dog Treats,” “Kibble,” or maybe even “Best Dog Ever’s Dinner.” Your pup can’t read, but it’ll make you smile every time you serve dinner.
- Stack Them Up: Once the bins are labeled, you can stack them. Play around with how they fit together and where they look best. Maybe you want the treats on top for easy access during snack time?
- Final Touches: Finally, place your bins in a corner or pantry where they’re easily accessible. You might throw in that dog food scoop for convenience, making mealtime a breeze. Remember, a good dog food storage container can also enhance the organization and overall aesthetic of your space. Plus, using a premium dog food subscription ensures you always have quality food ready to fill those stylish bins.
Optional Add-ons/Variations
Why not paint the bins in your dog’s colors, or maybe even with paw prints? You could also use stenciled letters to label them rather than handwriting, adding a more polished look. If you’re feeling extra crafty, jazz up the lids with some faux fur or a cute fabric for a cozy touch.
Pro Tip
Make sure to choose bins with a good seal to keep your dog’s food fresh and bug-free. It’s a little thing that makes a huge difference in keeping your pal’s meals tasty. And while you’re at it, keep the food scoop near the bin—it saves you from the occasional, “Where did I put that thing?” Additionally, investing in high quality dog food storage ensures that your bins are durable and long-lasting, keeping your pup’s meals in optimal condition.
2. Vintage Wooden Pet Food Chests

Are you a dog owner who craves a touch of nostalgia in your home? These Vintage Wooden Pet Food Chests are perfect for storing your pup’s kibble while adding a rustic charm that complements your décor beautifully. Not only do they keep pet food organized and fresh, but they also save money over time by protecting food from pests and moisture. Additionally, using a suitable dog food storage container helps maintain your dog’s diet by preventing contamination. Plus, investing in a dog food maker appliance allows you to craft custom meals that support your dog’s health. Consider using high-quality, luxury dog food for yorkies to truly elevate your pup’s mealtime experience.
Let’s explore how you can create your very own charming pet food chest.
Materials Needed
- 1 vintage wooden chest or crate (you can find these at flea markets or online)
- Sandpaper (medium to fine-grit)
- Non-toxic wood stain or sealant (optional)
- Paintbrush (if staining)
- Heavy-duty plastic liner or fabric (to protect the interior)
- Measuring tape
- Permanent marker (for labeling)
- Small dog food scoop (for added convenience)
Step-by-Step Instructions
1. Find Your Perfect Chest: Scour local thrift stores, flea markets, or online marketplaces for a vintage wooden crate or chest. Look for one that’s sturdy but has a bit of character — maybe some charming dents or scratches that tell a story.
2. Prep the Wood: Once you have your chest, give it a good sanding with medium-grit sandpaper. This helps to smooth out rough spots and makes it safe for your furry friend. If you want to get fancy, sand it down more for a sleek finish.
3. Get Creative with Finish: If you’re feeling adventurous, apply a non-toxic stain or sealant with your paintbrush to give it a richer tone or protective layer. It’s like putting on your best outfit for a special occasion!
Allow it to dry completely before moving on.
4. Protect the Inside: Line the interior with a heavy-duty plastic liner or fabric. This helps safeguard against spills and makes it easier to clean out any crumbs. You want it to be functional and stylish, just like your dog deserves.
5. Label with Love: Grab that permanent marker and label the chest clearly with your pup’s name or simply “Dog Food.” You could even draw a cute paw print! It adds a personalized touch that reminds you of your best friend every time you feed them.
6. Fill It Up: Time to fill your stylish new chest with dog food! Keep your dog food scoop nearby, so you can easily dispense their meals without fumbling around.
7. Show Off Your Creation: Place your new vintage food chest in a convenient spot, whether it’s in your kitchen or pantry. Enjoy the compliments from friends and family on your unique décor piece that has a purpose.
Optional Add-ons/Variations
Feeling extra crafty? You can paint designs or patterns on the exterior for a pop of personality—think paw prints, flowers, or even your dog’s portrait.
You could also switch out the liner for a fun fabric that matches your home setup, like a cheerful plaid or solid color.
Pro Tip
Ensure that the chest is high enough off the ground to avoid any moisture damage. A little investment in a small square pad for the base can keep your wooden chest safe from accidental spills or humidity.
Plus, it adds extra durability, so you can enjoy it for years to come.
With a project like this, your dog’s mealtime becomes an expression of your style and love. You’ll wonder why you didn’t try it sooner!
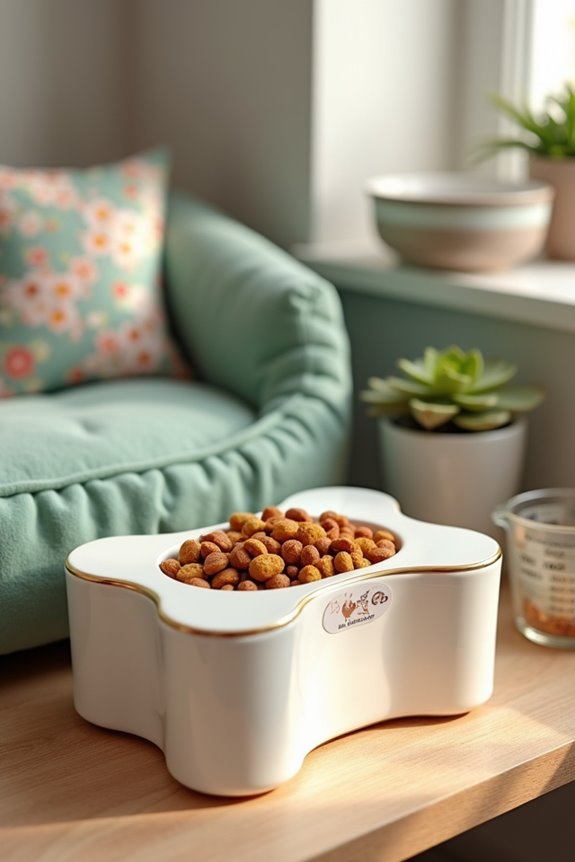
3. Sleek Ceramic Food Jars
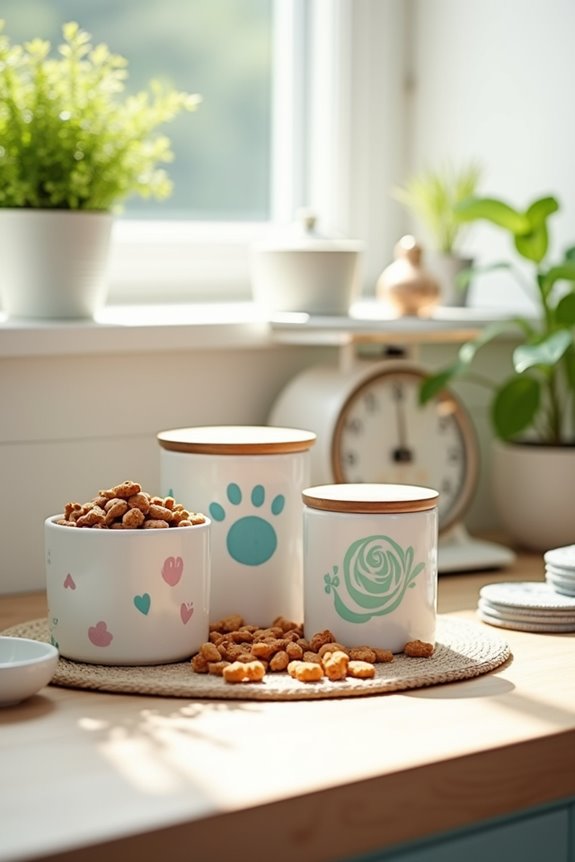
As pet owners, we all want to keep our furry friends‘ food fresh and organized while adding a stylish touch to our home decor. These sleek ceramic food jars aren’t only practical, but they also elevate the aesthetic of your kitchen or feeding area. Additionally, investing in a luxury dog bed can really enhance your pup’s comfort. The right orthopedic dog bed can provide the necessary support for your greyhound’s joints and muscles, ensuring they sleep peacefully. Moreover, opting for luxury dog beds large ensures that your dog has ample space to sprawl out comfortably. Plus, they help you save money by keeping food safe from pests and moisture. Let’s explore this fun DIY project — it’s easy, chic, and oh-so-functional!
Materials Needed
- 2 to 3 ceramic jars with lids (choose your favorite size)
- Non-toxic paint (for personalizing your jars)
- Paintbrush or sponge
- Stencil letters or vinyl lettering (for labeling)
- Clear sealant (optional for added durability)
- Sandpaper (fine-grit)
- Soft cloth (for wiping surfaces)
Step-by-Step Instructions
1. Choose Your Jars: Start by selecting 2 to 3 ceramic jars in sizes that suit your dog’s feeding needs. You can find them at thrift stores, home goods stores, or online. Aim for jars that have lids to keep food sealed and fresh.
2. Prep the Jars: Give the jars a good clean with warm, soapy water and a soft cloth. Once they’re dry, lightly sand the area where you plan to paint or add labels. This helps paint adhere better — no one likes peeling paint.
3. Get Creative with Paint: Now comes the fun part! Use non-toxic paint to personalize your jars. You could go for a solid color to match your kitchen or get playful with patterns. A paw print or bone design could add a cute touch.
Just remember to allow the paint to dry completely.
4. Label with Style: Use stencil letters or vinyl lettering to clearly label each jar with your dog’s name, such as “Buddy’s Kibble” or “Bella’s Treats.” If you’re feeling artsy, hand-painting the letters can add a charming touch, just be sure to use paint that won’t smudge off.
5. Seal It Up: If you want added durability (especially if your kitchen is as chaotic as mine), apply a clear sealant over the paint once it’s dry. It helps protect your beautiful handiwork from scratches and food splatters, making sure it lasts.
6. Fill with Love: Now, it’s time to fill your ceramic jars with your dog’s favorite kibble or treats. This step isn’t just functional; it’s oh-so-satisfying to see those jars filled up, waiting to be opened.
7. Show Off Your Stylish Jars****: Find a cute spot on the kitchen counter or a dedicated pet corner to display your new ceramic jars. Enjoy the little compliments from guests and the satisfaction of having a chic, organized feeding area.
Optional Add-ons/Variations
- You can customize your jars using different color schemes or even try out a chalk paint for a rustic look – it’s chalkboard-like, so you can re-label them with ease!
- Consider using drawer knobs or cute bronze handles as decorative additions to your jar lids. It could turn your jars into unique pieces!
Pro Tip
To keep your jars really fresh, consider placing silicon gel packs at the bottom of the jars (out of the food’s reach). They absorb moisture and help maintain the crunchiness of your dog’s kibble for longer.
It’s a little trick I learned that makes a big difference, and it’s so worth it.
With a touch of creativity and some simple materials, these sleek ceramic food jars can transform your dog’s feeding routine into a stylish, organized experience. Plus, each time you reach for the kibble, you’ll get that warm feeling of satisfaction.
Who knew that feeding your pup could look this good?
4. Colorful Multi-Compartment Storage Bins
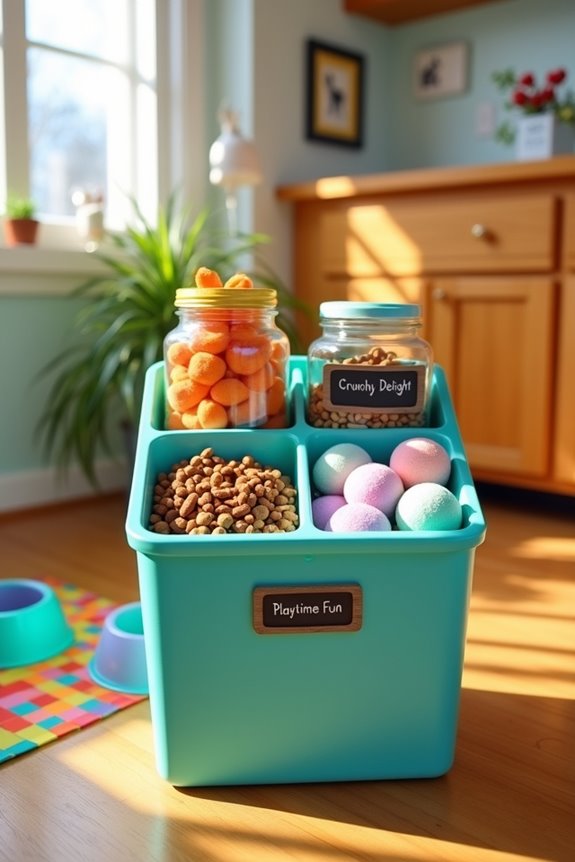
Are you tired of your dog’s food and treats taking over your kitchen? Well, let’s get organized with these colorful, multi-compartment storage bins! Perfect for busy pet owners, these bins not only keep your furry friend’s goodies neatly stored, but they also brighten up your space and create a clutter-free zone. Plus, premium pet food containers help keep food fresh and manageable, saving you money. Additionally, investing in dog training equipment can enhance your pet’s learning experience. Let’s explore this simple DIY project that will declutter your life and bring a splash of color to your home, especially if you’re also excited about making treats with a luxury dog treat maker.
Materials Needed
- 1 large multi-compartment storage bin
- Small containers or jars (to fit compartment sizes)
- Labels (chalkboard labels or printable ones)
- Non-toxic markers or chalk (for writing)
- Decorative tape or washi tape (optional)
- Scissors (for cutting tape or labels)
Step-by-Step Instructions
- Choose Your Bin: Start by selecting a bright, multi-compartment storage bin. Look for one with adjustable size options or bins that have a variety of compartment sizes, so you can store everything from kibble to treats — and maybe your human snacks, too (I won’t judge).
- Organize Your Containers: Start placing small containers or jars into each compartment. You can use jars for treats, while a larger container can hold the kibble. Confirm they fit snugly, but not so tight that you can’t pull them out when it’s snack attack time.
- Label Everything: Using chalkboard labels or printable ones, clearly label each compartment. Think fun, creative names like “Woof-licious Treats” or “Chow Time.” This way, you’ll know exactly where to reach when your dog gives you those big, pleading puppy eyes.
- Decorate If You Wish: If you want to add a personal touch, use decorative tape or washi tape to outline the edges of the compartments or highlight your labels. It can look really cute and feel a little more personalized. Plus, it gives you an excuse to visit the craft store — as if you needed one.
- Fill It Up: Time to stock up your bin with your dog’s food and treats. Pour in the kibble, toss in the toys, and fill up those compartments with everything your pup loves. Watching it all come together is almost as satisfying as giving your dog a treat after a good behavior.
- Find Your Spot: Place the storage bin in a convenient location, whether that’s in the kitchen, laundry room, or a tight corner by their feeding station. Just make sure it’s not somewhere your furry accomplice can get into it at midnight. We all know they can sniff out treats like pros.
Optional Add-ons/Variations
- Color Coordination: Go wild with a rainbow of storage bins. You can use different colors for various types of food/treats. For instance, blue for kibble, pink for treats, and green for chew toys. The colors won’t only help organize, but they’ll look fabulous, too.
- Themes: Select a theme that matches your decor or your dog’s personality. Whether it’s rustic chic, modern minimalism, or bright and whimsical, let your storage bins reflect that vibe.
Pro Tip
When labeling, consider using waterproof labels, so if they get splashed during feeding times, you won’t have to redo them. Plus, you can save some cash by repurposing jars you already have at home instead of buying new ones — that’s a win-win for both your wallet and the planet.
With this DIY project, you’ll not only declutter your kitchen but also impress everyone with your clever organization skills. Cheers to cleaner spaces and happy pups!
5. Personalized Engraved Storage Containers
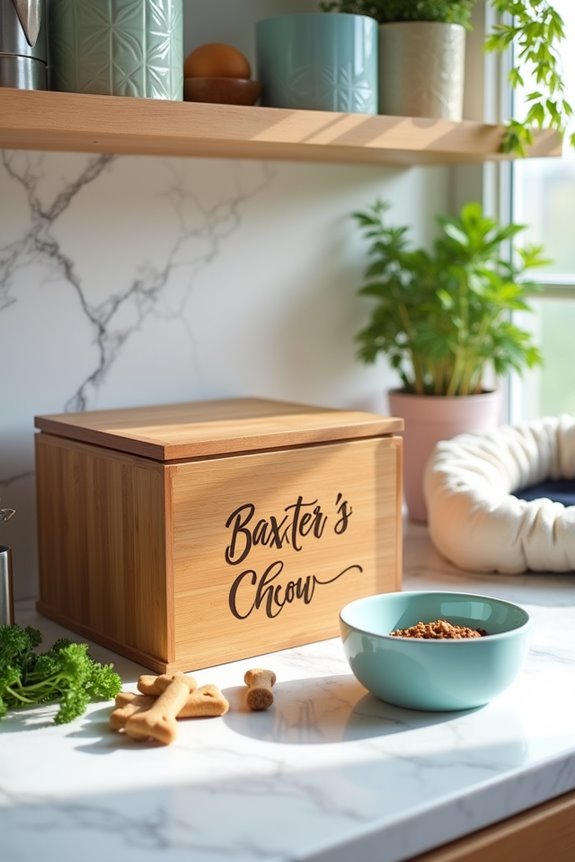
Every dog owner dreams of a neat and stylish way to store their pup’s food, right? If you want to combine functionality with a bit of flair, personalized engraved storage containers might be just the solution for you. They can be paired beautifully with a luxury dog food station to enhance the overall dining experience. Not only do they keep your furry friend’s grub fresh, but they also add a personalized touch to your home. Imagine a chic container with your dog’s name proudly displayed, making your kitchen feel a bit more “you.” To enhance your pup’s special day even more, consider pairing it with some luxury dog birthday supplies, which can make celebrations even more memorable. For a truly unique experience, pair it with a luxury dog treat dispenser that makes mealtime exciting.
Ready to elevate your dog food storage game? Let’s get started!
Materials Needed
- Wooden or metal container (with a lid)
- Engraving tool (or a local engraving service)
- Sandpaper (optional, for smoothing edges)
- Non-toxic paint or wood stain (optional, for a pop of color)
- Brush or cloth (for applying paint or stain)
- Measuring tape
- Pencil (for marking the engraving area)
Step-by-Step Instructions
1. Choose Your Container: Select a wooden or metal storage container that suits your style. It should have a secure lid to keep your dog’s food fresh.
Think about size too – make sure it’s big enough for your pup’s favorite kibble.
2. Prep the Surface: If your container is wooden, lightly sand any rough edges to avoid splinters.
We all want to avoid scrapes—especially on our precious fingers.
3. Measure & Mark for Engraving: Use the measuring tape to find the center of the surface where you want to do the engraving. Mark it with a pencil so that your dog’s name (or maybe a cute phrase like “Canine Cuisine”) will be perfectly placed.
4. Engrave Away: If you’re using an engraving tool, follow the manufacturer’s instructions. Carefully carve out the name into the surface, taking your time for a neat finish.
If you’re not feeling up to the DIY route, check with a local engraving service to create that professional touch.
5. Paint It Up (Optional): If you’d like to color your container, feel free to use non-toxic paint or wood stain. Give it a good coat, and let it dry before sealing the engraving.
You want all that hard work to shine through, not get covered in paint.
6. Fill ‘Er Up: Once everything is dried and set, fill your newly personalized container with your dog’s food.
It’s a proud moment when you see the fruits of your labor come together — it’s like giving your pup a fancy gourmet meal each day.
7. Show it Off: Place your engraved container in a visible spot, like your kitchen or near your dog’s feeding station.
It’ll not only be functional but also serve as a cute decor piece that shows off your love for your furry friend.
Optional Add-ons/Variations
Want to personalize further? Consider using stencils or vinyl decals with dog-themed designs or patterns alongside the name.
Maybe a cute paw print or a bone design will add some extra flair.
And if you’re feeling adventurous, experiment with different types of wood-like bamboo, or even try a color-treated metal container for a modern vibe.
Pro Tip
Make sure the container has an airtight seal—this keeps food fresh longer and prevents pesky bugs from crashing your dog’s dinner party.
Plus, when you’re buying your food, consider purchasing in bulk to save some cash. Just store the larger bag in your newly decorated container and refill as needed.
Creating personalized engraved storage containers for your dog’s food not only tidies up your space but also showcases your unique style, celebrating that special bond between you and your pup.
6. Themed Pet Food Containers
Are you tired of your dog’s food storage looking as boring as last month’s leftovers? Let’s jazz things up with some themed pet food containers! These stylish options not only keep your dog’s kibble fresh but also add a fun touch to your home décor. It’s a win-win situation for you and your pooch—because who wouldn’t want a snazzy container to serve as a conversation starter with guests? Adding a touch of elegance with luxury pet furniture can complement your chic food storage choices. Plus, investing in premium dog fashion accessories can elevate your pup’s style even further. Furthermore, luxury dog accessories can enhance the overall aesthetic of your home while providing functional benefits for your pup.
Materials Needed
- Themed storage container (e.g., bone-shaped, dog print, or playful colors)
- Food-safe sealant (if container isn’t pre-treated)
- Measuring cup (to easily portion your dog’s food)
- Labels or stickers (optional, for personalization)
- Funnel (for mess-free filling)
Step-by-Step Instructions
- Choose Your Theme: Pick a themed container that reflects your dog’s personality or your own style. Whether it’s quirky, classic, or modern, make sure it brings a smile every time you see it.
- Check for Safety: If you’re using a new container, verify it’s food-safe. A good rule of thumb is to check the bottom for identification regarding safety standards or use a food-safe sealant to be extra cautious.
- Label It Up: If your container doesn’t already have a fun label, consider using stickers or creating one. You can even write your dog’s name in a funky font or style to add some flair.
- Portion It Out: Use your measuring cup to fill the container with your dog’s favorite kibble. This not only prevents spills but also makes it easier for you to monitor their portions.
- Seal It Up: Make sure the lid or cover fits snugly. The tighter the seal, the fresher the food for your furry friend. It’s like giving them a tiny treasure chest to explore every mealtime.
- Find the Perfect Spot: Place your cute container near your dog’s feeding station or in an easily accessible spot in your kitchen. It needs to be visible enough to admire but out of the way enough to keep your space tidy.
Optional Add-ons/Variations
- Color Customization: If you’re feeling adventurous, paint or cover your container with fabric in a matching theme. Maybe you love nautical designs or want something with a floral pattern. Go wild; your creativity is the limit!
- Mix and Match: Consider creating a series of containers for different types of pet food (kibble, treats, supplements) using different themes.
Pro Tip
Keep in mind that a good seal is essential. A tightly closed container not only keeps your dog’s food fresh but also prevents it from attracting unwanted guests like pesky bugs.
If you live in a humid area, consider adding some dehumidifying packs in your container—better safe than sorry, right?
With a snazzy, themed pet food container in your home, you’ll be the envy of all your dog-owning friends, and your pup will surely appreciate the stylish upgrade to mealtime.
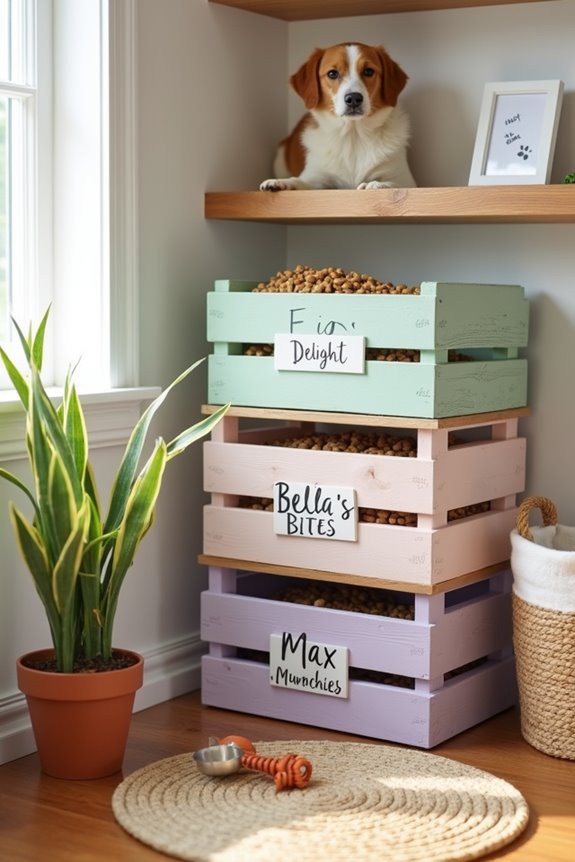
7. Space-saving Vertical Storage Solutions
Materials Needed
- Wooden crates or stackable storage bins (the cuter, the better)
- Sandpaper (for smoothing rough edges)
- Food-safe sealant or paint (suitable for interiors)
- Measuring cup (for easy pouring)
- Nails or wood screws (if necessary for assembly)
- Drill or hammer (to secure the crates/bins)
- Labels or chalkboard paint (optional for fun customization)
Step-by-Step Instructions
- Choose Your Crates: Start by selecting a few wooden crates or stackable bins. Look for ones that inspire you, whether it’s rustic charm or sleek modern design. You’ll want to make sure they can comfortably hold your pup’s kibble.
- Prep Your Crates: Sand down any rough edges or splinters—the last thing you need is for your pooch to get a splinter while looking for food. Safety first, right?
- Seal or Paint: Apply a food-safe sealant if you’re using wood, or go wild with some fun paint. Maybe you want a pop of color that matches your kitchen decor or something playful to catch your dog’s attention. Let it dry completely before moving on.
- Assemble Your Stack (if needed): If you’re stacking your crates, secure them with nails or screws for stability—always want those treasures to stay put when your pup comes sniffing around.
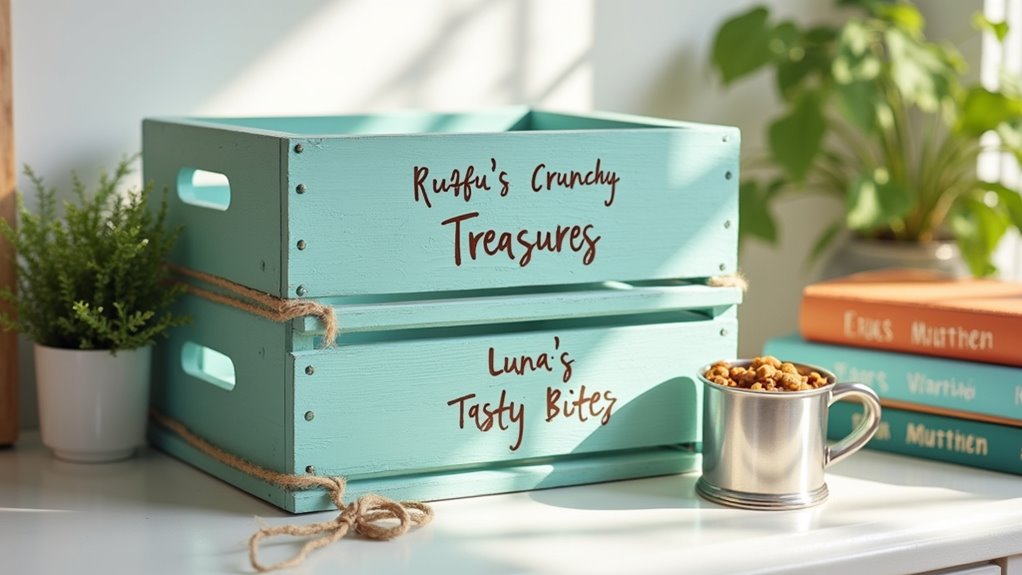
- Label Away: To make feeding time even easier, consider labeling each crate or adding chalkboard paint. Imagine this: your dog’s food labeled with a name, like “Rufus’s Crunchy Treasures.” Fun, right?
- Find the Right Spot: Place your vertical storage near your dog’s feeding area but out of the way of daily traffic. You want it to be easily accessible, but also tidy and eye-catching. A happy medium.
- Fill with Love (and Kibble): Use your measuring cup to fill each crate with your dog’s favorite food. This allows you to monitor portions while keeping everything contained. Just like a treasure chest—exciting, right?
Optional Add-ons/Variations
- Playful Colors: Feel free to get creative with colors! You could take inspiration from your dog’s coat or even theme according to your favorite season—think pastel colors for spring or warm tones for autumn.
- Personal Touch: Attach some decorative rope or jute around the crates for a rustic look, or consider stenciling cute dog quotes on the sides. Who wouldn’t want to smile while checking food levels?
Pro Tip
Always keep in mind that a lid or cover can help maintain freshness, especially when storing kibble. If your crates don’t have natural lids, you can easily make simple covers from fabric or lightweight wood.
This way, you guarantee your dog’s food stays as tasty as the day you bought it—every bite counts.
Extra Tips & Ideas
While you might think that storing dog food is as simple as tossing the bag in a corner, there are actually a ton of creative and practical tips to make it easier, more organized, and even a little stylish.
Ever thought about using a vintage suitcase? It’s quirky, and you get extra storage for toys too.
Or how about repurposing a glass jar for treats? It looks cute and keeps them fresh. Plus, consider using luxury dog backyard equipment to create a dedicated play area, making feeding time even more enjoyable. Using an automatic dog food dispenser can also save time and help ensure your dog stays well-fed.
Don’t forget to label containers; it’s like giving your dog’s chow a name—way cooler than “dog food.”
And if you’re like me, you’ll appreciate using a scoop to avoid those “accidental spills.”
Keep the food in a cool, dry spot too—because who wants moldy kibble, right? Additionally, consider using premium dog food dispensers to streamline feeding time and maintain freshness.
Frequently Asked Questions
How Can I Prevent Pests From Accessing Dog Food Storage?
To prevent pests from accessing dog food storage, use airtight containers, keep storage areas clean, and regularly inspect for signs of infestation. Avoid leaving food out and guarantee your dog’s feeding area stays tidy.
What Is the Best Material for Dog Food Containers?
Think of dog food containers as fortresses; sturdy stainless steel or BPA-free plastic works best. They’re durable, easy to clean, and keep your furry friend’s kibble fresh while warding off pesky intruders.
Can I Use Regular Kitchen Storage for Dog Food?
Yes, you can use regular kitchen storage for dog food, but make sure it’s airtight. This keeps the food fresh and prevents pests. Just check that it’s safe and easy for you to access.
How Often Should I Clean My Dog Food Storage Containers?
You should clean your dog food storage containers every couple of months. Many don’t realize that residue can attract pests. Regularly washing them with soap and water keeps your dog’s food fresh and safe.
Are There Eco-Friendly Options for Dog Food Storage?
You can choose eco-friendly options like bamboo or recycled plastic containers. Also, look for airtight glass jars that keep food fresh while being safe for the environment, ensuring your dog’s nutrition stays exceptional.
Conclusion
In the end, your dog’s food storage can be more than just a necessity—it can be a charming part of your home. Think of it like a treasure chest, holding not just kibble, but love and care for your furry friend. Whether you choose a sleek canister or a rustic chest, you’re not just organizing; you’re adding a bit of personality to your space. So, why not let your dog’s dining essentials shine? After all, they deserve a stylish spot too.