Have you ever thought about whipping up some tasty cupcakes just for your dog? It’s not just about spoiling them—it’s a chance to use healthy ingredients they can actually enjoy. Imagine your pup’s enthusiasm as they plunge into a homemade treat, free from all those weird additives. And the best part? You can mix and match flavors to find their favorite. So, are you ready to get started on something that’ll make their tail wag? Let’s explore some delicious options.
Why Homemade?
When it comes to treating your furry friend, wouldn’t you want the best? Homemade cupcakes are the way to go. You know exactly what goes into them, so no mystery ingredients that could upset their tummy.
Plus, it’s way more fun baking together in the kitchen. Your dog will appreciate your efforts, even if you accidentally drop half the batter on the floor. Hey, nobody’s perfect, right? Baking these cupcakes also offers a chance to engage your pup in interactive fun, turning it into a delightful experience together.
Baking with your pup is a delightful mess, and trust me, they won’t mind a little batter on the floor!
Using fresh ingredients means you can avoid artificial flavors or preservatives that come in store-bought treats. Have you ever read those ingredient lists? It’s like a chemistry experiment. Baking these treats at home provides a healthier alternative to store-bought options that may not prioritize your dog’s well-being. Additionally, homemade treats give you the opportunity to incorporate natural ingredients that can enhance flavors and nutrition. Plus, incorporating superfoods like carrots can boost your pup’s health with nutritional benefits that they’ll love. This is especially true when you choose ingredients that are specifically beneficial for dogs, such as whole grains and certain fruits.
Making these cupcakes lets you tailor them to your dog’s tastes. Some pups love peanut butter, while others might be all about pumpkin. Imagine their eyes lighting up when they catch a whiff of what you’re whipping up. It’s messy, it’s a tad chaotic, but trust me, it’s totally worth it for your best friend.
Cupcake Varieties Overview
When it comes to dog cupcakes, you’ve got some tasty options to contemplate.
Think about whipping up Peanut Butter Dog Cupcakes for that classic flavor your pup loves, or how about Pumpkin Spice Pupcakes for a fall-inspired treat? Each variety, from Sweet Potato Delight to Carrot Ginger, brings its own charm, making it hard to resist baking them all. Additionally, homemade treats like dog ice cream provide a refreshing option for warm days, ensuring your pup stays cool while enjoying something delicious. Did you know that homemade dog treats can be healthier than store-bought options? Using natural ingredients ensures that your dog gets the best of nutritious recipes without any hidden preservatives. Remember, baking a special dog birthday cake is a delightful way to celebrate your furry friend’s special day.
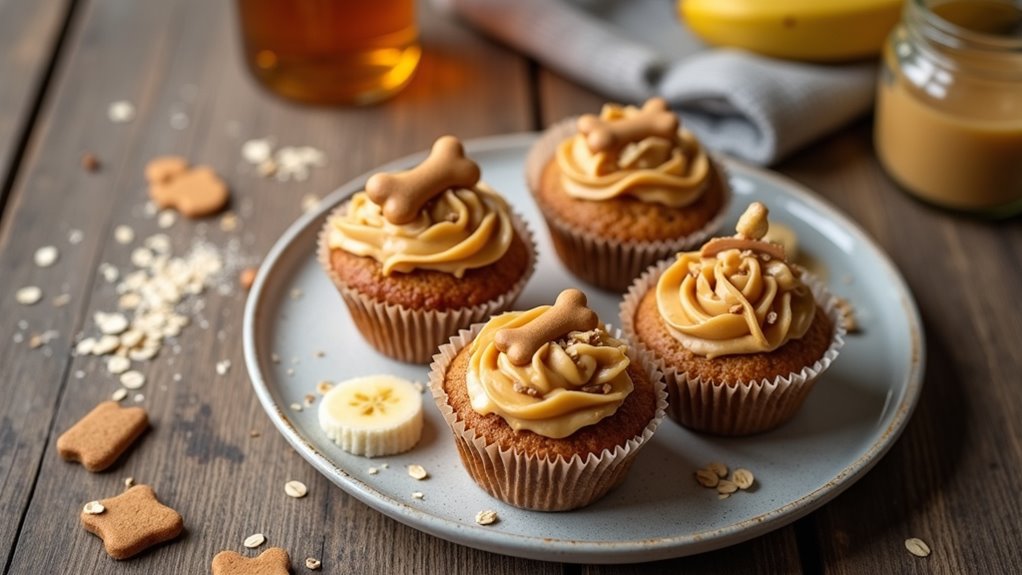
1. Peanut Butter Dog Cupcakes

When it comes to peanut butter dog cupcakes, you’ve got some delicious options to explore. From the right ingredients to step-by-step instructions and fun add-ons, making these treats can be a breeze. Did you know that bacon dog biscuits are a popular choice among dog owners and can also be incorporated into your baking? Have you ever thought about how a little banana or some yogurt could kick things up a notch? You can also consider incorporating homemade dog treats for an extra special touch that your furry friend will love!
Ingredients
Making dog cupcakes is a delightful way to treat your furry friend. With a simple recipe, you can whip up some tasty peanut butter cupcakes your pup will adore.
Let’s gather the essentials, shall we? Here are the ingredients you’ll need:
- 1 cup whole wheat flour – Because we want to keep it wholesome, right?
- 1/2 cup unsweetened peanut butter – The star of the show, and it’s dog-approved!
- 1/4 cup unsweetened applesauce – A little sweetness without the sugar, perfect for pups.
- 1/2 teaspoon baking powder – Just a pinch to help them rise a tad.
- 1/2 cup water – For moisture, because nobody likes a dry cupcake, not even our canine companions.
- 1 egg – Eggs are great for protein and help bind everything together nicely.
Now, you might be wondering, “Can I substitute any of these?”
Well, if you fancy some experimentation, feel free, but let’s keep it safe for our four-legged friends. Enjoy the process, and I bet your dog will be tail-waggingly happy with the results.
Step by Step Instructions
- Preheat your oven to 350°F (175°C). This guarantees your cupcakes rise beautifully.
- Gather your ingredients: whole wheat flour, peanut butter, honey, vegetable oil, and eggs. Don’t forget to give them a good look—nothing worse than forgetting the peanut butter, right?
- In a mixing bowl, combine 1 cup of whole wheat flour and 1 teaspoon of baking powder. Whisk gently to combine—think of it as giving them their first dance.
- In another bowl, mix together ½ cup of peanut butter, ¼ cup of honey, and ⅓ cup of vegetable oil. Stir until it’s smooth and creamy like the happiest peanut butter you’ve ever seen.
- Add 1 egg to the wet mixture. Whisk until everything is well combined—go for that perfect homogenous blend.
- Gradually fold the dry ingredients into the wet ingredients. (Remember, don’t overmix. A few lumps are okay, just like your dog’s fur after a muddy park day.)
- Line a cupcake pan with paper liners. Trust me, it makes clean-up a breeze.
- Spoon the batter into the liners, filling them about two-thirds full. You want enough room for them to rise, but not overflow like that one time you boiled pasta too heartily.
- Bake for 15-20 minutes, or until a toothpick inserted in the center comes out clean. Your kitchen should smell like a warm hug by now.
- Remove from the oven and let cool in the pan for about 5 minutes before transferring to a wire rack. This will prevent them from sticking—nobody likes a cupcake that clings to the pan like a toddler at a goodbye.
- Cool completely before serving to your dog. Patience is key; you don’t want to burn your pup’s little tongue. Enjoy the moment when your furry friend dives into the treat you made just for them!
Optional Add-ons
Sometimes, your dog deserves a little something extra in their cupcake life. Think about adding mashed bananas or shredded carrots for a burst of flavor.
You could also sprinkle on some crushed dog-safe treats for a crunchy topping. Feeling fancy? Top with a dollop of peanut butter.
Customize each cupcake—your pup will appreciate it more than you can imagine. Plus, who doesn’t love spoiling their furry friend?
2. Pumpkin Spice Pupcakes

If you’re looking to whip up some tasty Pumpkin Spice Pupcakes, you’re in for a treat.
With just a few simple ingredients and straightforward steps, you’ll have your furry friend begging for more.
Plus, don’t forget about those optional add-ons that can take these pups to the next level—because who doesn’t want to spoil their pooch a little?
Ingredients
When it comes to whipping up something special for your furry friend, pumpkin spice pupcakes are a delightful option. They’re not just delicious – they’re also super easy to make with a few simple ingredients that are safe for your pup.
So, let’s gather what you need and get to baking those tail-wagging treats.
- 1 cup whole wheat flour
- 1/2 cup canned pumpkin (not the spiced pie filling)
- 1/2 teaspoon baking powder
- 1/4 cup unsweetened applesauce
- 1/4 cup peanut butter (make sure it’s xylitol-free)
- 1/4 teaspoon cinnamon (just a hint for the aroma!)
- 1 egg
You see, only the best for our best friends. Imagine their wagging tails and enthusiastic eyes as the aroma fills your kitchen – it’s like pure joy, right?
Just make sure you keep that chocolate for your own cake, because these little cupcakes are all about the pumpkin goodness for your pup.
And, you might just love it so much that you’ll be tempted to try a bite yourself. But remember, they can’t have your treats, so let’s stick to the recipe that’s meant for them.
Happy baking!
Step by Step Instructions
- Preheat your oven to 350°F (175°C) and let it warm up while you prepare the cupcake batter.
- In a mixing bowl, combine 1 cup of whole wheat flour and a teaspoon of baking powder. Give it a quick stir to mix the dry ingredients.
- In another bowl, blend together ½ cup of pureed pumpkin (canned works fine) and ½ cup of natural peanut butter (make sure it’s xylitol-free!).
- Add in 2 eggs to the pumpkin and peanut butter mixture. Whisk everything together until it’s creamy and well-combined.
- Gradually add the dry mixture to the wet ingredients, folding gently until just combined (don’t overmix—that’s a no-no for batter perfection).
- If you want, sprinkle in a little cinnamon for that extra cozy flavor and fold it in.
- Line a cupcake pan with silicone or paper liners for easy removal, and scoop the batter into each cup, filling them about ¾ full.
- Bake in the preheated oven for 25-30 minutes, or until a toothpick inserted in the center comes out clean (that’s how you know they’re done).
- Once baked, remove the cupcakes from the oven and let them cool in the pan for about 10 minutes.
- After they’ve cooled a bit, take the cupcakes out of the pan and place them on a wire rack to cool completely.
Cool completely before serving to your dog. Happy pups mean happy bakers!
Optional Add-ons
Creating your dog’s treats can be as fun and creative as baking for yourself, especially with the optional add-ons for those pumpkin spice pupcakes.
Think peanut butter drizzles, yogurt frosting, or even a sprinkle of cinnamon.
Let’s face it, your pup won’t mind the “extras.”
Plus, who could resist those puppy-dog eyes staring at those delicious creations?
Your furry friend will love you even more!
3. Sweet Potato Delight Pupcakes

Ready to bake something special for your furry friend? Sweet Potato Delight Pupcakes aren’t just tasty; they’re packed with nutrients, too. Let’s look at the ingredients you’ll need, step-by-step instructions to create these treats, and a few optional add-ons to make them even more irresistible.
Ingredients
If you’re looking to spoil your furry friend with a scrumptious and tail-wagging treat, these Sweet Potato Delight Pupcakes are a great way to go. They’re simple to whip up, and I must say, your pup will be the judge of whether they’re a hit or a miss.
Let’s gather some easy-to-find ingredients.
- 1 cup mashed sweet potato (cooked and cooled)
- 1 cup whole wheat flour (make sure it’s dog-friendly)
- 1/4 cup peanut butter (smooth and unsweetened, please)
- 1/4 cup unsweetened applesauce
- 1/4 cup water (or low-sodium chicken broth for extra flavor)
- 1 egg (large, of course)
- 1 teaspoon baking powder
With these ingredients in tow, you’ll be well on your way to creating pupcakes that will have your dog doing backflips—and let’s be real, probably begging for more without remorse.
Trust me, this is as easy as it gets. Pretty much foolproof, even for someone like me who once mistook salt for sugar (yikes). Let’s get baking!
Step by Step Instructions
- Preheat your oven to 350°F (175°C). This is an essential step, so don’t skip it—no one likes a cold pupcake.
- Line a muffin tin with cupcake liners. If you don’t have liners, a splash of non-stick cooking spray will do the trick.
- In a medium saucepan, bring about 2 cups of water to a boil. We’ll need this to cook our sweet potato.
- While waiting for the water to boil, peel and cube 1 medium sweet potato. The smaller the cubes, the faster it cooks—so channel your inner chef here.
- Once the water is boiling, add the sweet potato cubes and cook for 15-20 minutes, or until they’re fork-tender. (You’ll know they’re ready when your fork slides in like butter.)
- Drain the sweet potatoes, then mash them in a bowl until smooth. A potato masher works well, but you can also use a fork if you’re feeling strong.
- In a large mixing bowl, combine 1 cup of the mashed sweet potato, 1/4 cup of peanut butter (make sure it’s dog-friendly, no xylitol, please), and 1/4 cup of honey.
- Whisk together these ingredients until well combined. You want a nice, creamy mixture—smooth is the goal here.
- In a separate bowl, mix 1 cup of whole wheat flour and 1/2 teaspoon of baking powder. If flour were a club, this would be the secret handshake.
- Gradually fold the dry ingredients into your wet mix. Do this gently—think of it as coaxing a shy dog out from under the couch.
- Once combined, scoop the batter into the prepared muffin tin, filling each liner about 2/3 full.
- Bake in your preheated oven for 25–30 minutes, or until a toothpick inserted in the center comes out clean. Keep an eye on those little beauties—they should be golden brown on top.
- Remove from the oven and let them cool in the tin for about 5 minutes. Then, transfer to a wire rack to cool completely.
- Cool completely before serving to your dog. They’re going to love these—trust me, your pup will think you’re a culinary genius (just don’t tell them it was so easy).
Optional Add-ons
You’ve nailed the basics with these sweet potato pupcakes, but why stop there?
Consider adding a dollop of peanut butter on top or mixing in some crushed oats for texture.
If your pup’s feeling fancy, a sprinkle of cinnamon could jazz things up.
You might even toss in some mashed bananas.
Get creative; your dog’s tail will definitely wag in appreciation.
4. Apple Cinnamon Pupcakes

Now, let’s whip up some delightful Apple Cinnamon Pupcakes that’ll have your pup wagging their tail in joy. You’ll only need a few simple ingredients and easy step-by-step instructions; trust me, it’s as fun as a game of fetch. Plus, I’ll share some optional add-ons to make these treats extra special—because who doesn’t want to spoil their furry friend a little?
Ingredients
When it comes to whipping up a special treat for your furry friend, these Apple Cinnamon Pupcakes are a delightful option. Not only are they filled with simple, safe ingredients, but they’ll also have your pup wagging their tail in excitement. Here’s what you’ll need, and trust me, it’s super easy to find everything at your local grocery store.
- 1 cup whole wheat flour
- 1 medium apple, peeled and finely chopped
- 1 teaspoon ground cinnamon
- 1/2 cup unsweetened applesauce
- 1/4 cup peanut butter (make sure it doesn’t contain xylitol)
- 1/2 cup water
- 1 egg
Step by Step Instructions
- Preheat your oven to 350°F (175°C). This is the kickoff to baking deliciousness, so let’s get those warm vibes going.
- Gather all ingredients: whole wheat flour, unsweetened applesauce, peanut butter, cinnamon, and eggs. Make sure you have everything in one place. Trust me, it saves you from that frantic last-minute search.
- In a mixing bowl, whisk together 1½ cups of whole wheat flour and 1 teaspoon of cinnamon. Get it nice and combined, so your pupcakes will have even flavor throughout.
- In another bowl, mix 1 cup of unsweetened applesauce, ½ cup of peanut butter, and 1 egg. Stir until it’s smooth and creamy (you’re looking for a thick but pourable consistency).
- Fold the wet ingredients into the dry ingredients. Don’t overmix; you want it just combined with some lumps (about 20 folds will do the trick).
- Line a muffin tin with dog-friendly cupcake liners. This makes clean-up easier—thank me later.
- Spoon the batter into each liner, filling them about two-thirds full. This allows room for rising while they bake.
- Bake for 20–25 minutes or until a toothpick inserted comes out clean. You’re aiming for a golden brown color; keep an eye on those little guys towards the end.
- Remove from the oven and let them cool in the pan for about 10 minutes, then transfer to a wire rack to cool completely.
- Once they’re cool, it’s time for your dog to indulge in these delightful treats. Cool completely before serving to your dog; no one wants puppy burns.
Optional Add-ons
While whipping up those original doggie delights, you might find yourself tempted to explore some optional add-ons that can take your basic pupcakes to a whole new level.
Imagine this: apple cinnamon pupcakes. Just mix in some unsweetened applesauce and a sprinkle of cinnamon. Your pup’ll feel like it’s their birthday every day.
Trust me, they’ll be begging for more puppy-approved goodness.
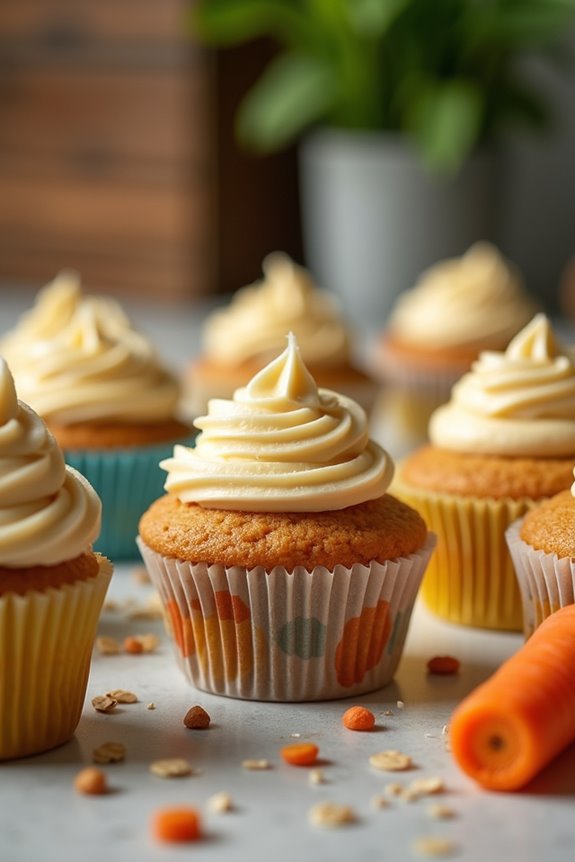
5. Carrot Ginger Dog Cupcakes
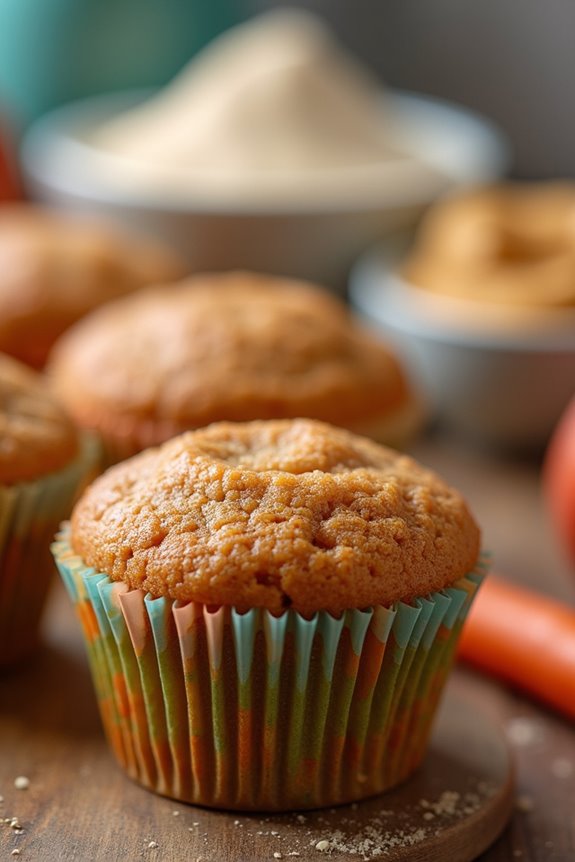
Now that you’ve whipped up those tasty Apple Cinnamon Pupcakes, let’s talk about a flavor combo that’s sure to get your pup’s tail wagging: Carrot Ginger Dog Cupcakes.
You’re gonna love how simple it’s to gather the ingredients, follow the easy step-by-step instructions, and even toss in some optional add-ons for a little extra flair.
Ready to get your baking game on?
Ingredients
When it comes to whipping up something special for your furry friend’s birthday or just a regular Tuesday, these carrot ginger dog cupcakes make a delightful treat.
Plus, who could resist those happy puppy faces? So, let’s explore what you’ll need to make these tasty little delights.
Gather these simple, pup-friendly ingredients and get ready to bake like a pro—well, sort of.
- 1 cup whole wheat flour
- 1 medium carrot, grated (roughly 1/2 cup)
- 1/2 teaspoon ground ginger
- 1/2 cup unsweetened applesauce
- 1/4 cup peanut butter (make sure it’s xylitol-free)
- 1/4 cup honey (optional, if your dog isn’t sensitive to sugars)
- 1 egg, beaten
It’s really that simple. Just picture all those delicious smells wafting through your kitchen as you blend these together.
And honestly, you might even find yourself sneaking a lick of that peanut butter. Who can blame you? Happy baking!
Step by Step Instructions
1. Preheat your oven to 350°F (175°C). The first step is vital; we want those cupcakes to bake evenly and come out fluffy.
2. Line a muffin tin with cupcake liners. This makes for easy removal and keeps things clean. No one likes a mess, am I right?
3. In a mixing bowl, combine 1 cup of whole wheat flour, 1/4 cup of oats, and 1/2 teaspoon of baking powder. Whisk them together until well mixed.
Don’t worry if you throw a little oat dust in the air; it happens to the best of us.
4. In a separate bowl, mash 1 medium carrot and then mix in 1 egg, 1/4 cup of unsweetened applesauce, and 1 tablespoon of grated ginger. Stir until all ingredients are well blended.
It should look like a delicious carrot smoothie—kind of.
5. Fold the wet mixture into the dry ingredients. Gently mix until just combined (Don’t overmix it; we’re not making a cement mixer here.
A few lumps are perfectly fine).
6. Spoon the batter evenly into the lined muffin tins, filling each cup about two-thirds full. This helps them rise without overflowing.
It’s all about precision.
7. Bake in the preheated oven for 20-25 minutes, or until a toothpick comes out clean. You’re looking for that perfect golden-brown color—just like my last attempt at baking, which wasn’t so pretty.
8. Once baked, remove the cupcakes from the oven and let them cool in the pan for about 5 minutes before transferring them to a wire rack.
Patience, my friend; they need to cool down.
9. Cool completely before serving to your dog. Trust me, no one wants a puppy with burnt tongue.
Share your tasty creations and watch your furry friend go wild.
Optional Add-ons
Have you ever thought about jazzing up your dog’s cupcake experience? Why not try adding some grated carrots and a hint of ginger?
Not only do they add flavor, but they make those cupcakes extra special, too. You might even wonder if your pup’s smiling after a bite.
Go ahead, spoil them a little—don’t we all love a tasty treat?
6. Banana Oatmeal Dog Cupcakes
Ready to whip up some tasty Banana Oatmeal Dog Cupcakes?
You’ll gather simple ingredients, follow easy step-by-step instructions, and even explore some fun optional add-ons to make them extra special.
Trust me, your pup won’t be able to resist these delightful treats, and you’ll feel like a baking pro in no time.
Ingredients
Making dog cupcakes is a fun way to treat your furry friend.
Honestly, who doesn’t love spoiling their pets a little? This Banana Oatmeal Dog Cupcake recipe isn’t only easy but also whips up in no time.
With simple ingredients you probably already have, you’re on your way to creating tasty little goodies your pooch will love.
So, without further ado, here’s what you’ll need:
- 1 ripe banana, mashed (the riper, the better)
- 1 cup rolled oats
- 1/2 cup unsweetened peanut butter (make sure it’s xylitol-free)
- 1/2 cup unsweetened applesauce
- 1/2 teaspoon baking powder
- 1/4 cup water (or as needed for consistency)
These ingredients come together to create soft, moist cupcakes that your dog will drool over.
I mean, can you imagine their wagging tails and big puppy eyes waiting for a taste?
Just grab these items from your kitchen or the store, and let’s get baking!
Step by Step Instructions
- Preheat your oven to 350°F (175°C). This is the first step to ensuring your dog cupcakes bake up perfectly.
- Gather all your ingredients—bananas, oatmeal, honey, egg, and peanut butter. Make sure everything’s measured out and ready to go, so you’re not scrambling later.
- In a large mixing bowl, mash the ripe bananas with a fork until smooth. It should look like baby food, which is oddly satisfying.
- Whisk in the peanut butter and honey until everything is combined. It should be creamy and slightly sticky.
- Beat in the egg until well combined. This will help bind the batter together so you don’t end up with a crumbly mess.
- Gradually fold in the oatmeal until you see it’s evenly mixed throughout. Don’t overmix the batter—it should be slightly lumpy.
- Line a muffin tin with cupcake liners or grease it well to prevent sticking. No one wants a cupcake disaster when you’re trying to impress your furry friend.
- Spoon the batter evenly into the prepared muffin tin, filling each cup about two-thirds full. You want them to rise and not overflow.
- Bake in the preheated oven for 20–25 minutes, or until the tops are golden brown and a toothpick comes out clean when inserted.
- Once baked, let the cupcakes cool in the tin for about 5 minutes, then transfer them to a wire rack to cool completely. Patience is key here.
- Cool completely before serving to your dog. Trust me, the wait is worth it when you see their happy tail wag.
Optional Add-ons
While the classic banana oatmeal dog cupcakes are a big hit with most furry friends, you might be wondering how to switch things up a bit.
Consider adding peanut butter for a nutty twist or some shredded carrots for a crunchy surprise. You could even toss in a few blueberries—your pup will think they’re getting dessert at a fancy dog café.
It’s all about creativity!
7. Peanut Butter Banana Bonanza

Now that you’ve whipped up some Banana Oatmeal Cupcakes, let’s move on to the Peanut Butter Banana Bonanza.
You’ll love how simple it’s to gather the ingredients, follow the step-by-step instructions, and maybe even throw in some optional add-ons for extra fun.
Who knew treat time could be so exciting for your pup?
Ingredients
Who doesn’t love the smell of fresh baked goods?
And guess what—your furry friend deserves a tasty treat too! Today, we’re whipping up some delightful Peanut Butter Banana Bonanza cupcakes, which aren’t just yummy but also safe for dogs. Your pup will be wiggling with joy at the first whiff of these fragrant goodies.
So, let’s gather some simple ingredients so we can bake something special together.
- 1 cup of whole wheat flour
- 1 ripe banana, mashed
- 1/2 cup of natural peanut butter (make sure it’s xylitol-free)
- 1/4 cup of unsweetened applesauce
- 1/2 teaspoon of baking soda
- 1 egg
And there you have it! With these straightforward ingredients, you’ll be on your way to creating a batch of doggy delights that will make tails wag and hearts soar.
Just remember: these cupcakes are meant for sharing the love, so don’t let your pup get too greedy, or you might just find a little peanut butter smudge on your couch!
Now, let’s get to baking.
Step by Step Instructions
- Preheat your oven to 350°F (175°C) so it’s nice and cozy when your cupcakes are ready to bake.
- Gather your ingredients: you’ll need peanut butter, mashed bananas, oats, honey, and some flour. Let’s get that kitchen vibe going!
- In a large bowl, mix 1 cup of peanut butter (smooth and spreadable, not crunchy, unless you really want a surprise crunch) with 2 ripe mashed bananas. Use a fork for a thorough mash—just no lumps, please.
- Add 1/3 cup of honey to the banana-peanut butter mix, and whisk until smooth and creamy. Think of it as a little love potion for your pup.
- In another bowl, combine 1 cup of oats and 1 1/2 cups of flour (whole wheat works best). Stir it gently so they mingle.
- Slowly fold the dry ingredients into the wet mixture. Take your time—don’t overmix the batter. It should be a bit thick but not like cookie dough.
- Line your muffin tin with cupcake liners or grease them lightly if you’re feeling adventurous. It’s always a gamble, but we love a risk (just kidding, please grease them).
- Fill each liner about two-thirds full with the batter. This helps them rise beautifully without overflowing, so your kitchen doesn’t turn into a cupcake volcano.
- Bake for 25–30 minutes, or until golden brown on top. You can do the “toothpick test”—just stick one in; if it comes out clean, they’re ready to emerge from the oven.
- Remove the cupcakes from the oven and allow them to cool in the pan for about 10 minutes, then transfer them to a wire rack.
- Cool completely before serving to your dog. (Trust me, an overzealous pup doesn’t need a hot cupcake moment—it’s just a messy affair.)
Optional Add-ons
If you thought the Peanut Butter Banana Cupcakes were a hit, wait until you hear about the optional add-ons that can take them to a whole new level.
You might sprinkle in some carob chips for extra sweetness or add oats for a chewy bite.
Need a little crunch? Top them with crushed dog biscuits. Your pup won’t know what hit them.
Use Fresh, Dog-Safe Ingredients
When you’re whipping up a batch of cupcakes for your furry best friend, choosing fresh, dog-safe ingredients is as essential as picking the right flavor.
You wouldn’t want to use anything that could upset their tummy, right? Stick to the basics—like whole wheat flour, unsweetened applesauce, and natural peanut butter. These ingredients not only keep your pup safe but also make those cupcakes taste paw-some.
Got some ripe bananas? Perfect for adding moisture and sweetness.
Just remember, no chocolate or xylitol; that stuff’s a definite no-go for dogs. Imagine giving your pup something that could make them feel sick—yikes.
Frequently Asked Questions
How Long Can I Store Dog Cupcakes?
You can store dog cupcakes in an airtight container in the fridge for up to five days. If you freeze them, they’ll last for about two to three months. Just thaw them before serving!
Can I Freeze Dog Cupcakes?
Yes, you can freeze dog cupcakes! Just wrap them individually in plastic wrap, then store them in an airtight container. They’ll stay fresh for about two to three months, ready for your pup’s next special treat.
What if My Dog Has Allergies?
If your dog has allergies, you’ll want to carefully choose ingredients. Always opt for allergy-friendly substitutes, and consult your vet before trying new recipes. Safety’s key, so keep your pup’s health in mind!
How Often Can I Give My Dog Cupcakes?
You can give your dog cupcakes as an occasional treat, around once a week or during special events. Just watch for any signs of allergies and adjust accordingly to keep your furry friend healthy.
Can I Use Regular Frosting for Dog Cupcakes?
You shouldn’t use regular frosting for dog cupcakes. It often contains ingredients that can be harmful to dogs, like sugar and chocolate. Instead, opt for dog-safe frosting made from yogurt or peanut butter.