Did you know that dog owners spend an average of $245 a year just on collars? That might seem a bit excessive, considering you can create trendy, personalized collars right at home. Why not make your furry friend the talk of the dog park with a collar that reflects their unique personality? Let’s explore some delightful DIY ideas that’ll have you crafting like a pro—without the hefty price tag or the fancy store-bought options.
Whimsical Patterns for Collars
When it comes to dog collars, whimsical patterns can really make your pup stand out—like a walking piece of quirky art.
Imagine your dog strutting down the street in a collar covered in cute cupcakes or vibrant polka dots. You might think that kind of creativity is just for the pros, but with some simple dog collar DIY tutorials, you can jump right in.
Grab some fabric, scissors, and a basic collar for your pup, and don’t forget to channel your inner Picasso! Just remember, mismatched patterns can be charming, too.
If you mess up, your dog won’t care. Honestly, they’ll just appreciate the effort—or maybe the treats you’re bribing them with to wear it.
Our Collection
Let’s talk about the unique dog collars in our collection that can make your pup stand out.
Whether you’re thinking of a personalized name tag collar or something fun like glow-in-the-dark designs, there’s really a stylish option for every furry friend.
And who wouldn’t love a tropical floral print that just screams summer vibes?
1. Personalized Name Tag Collars
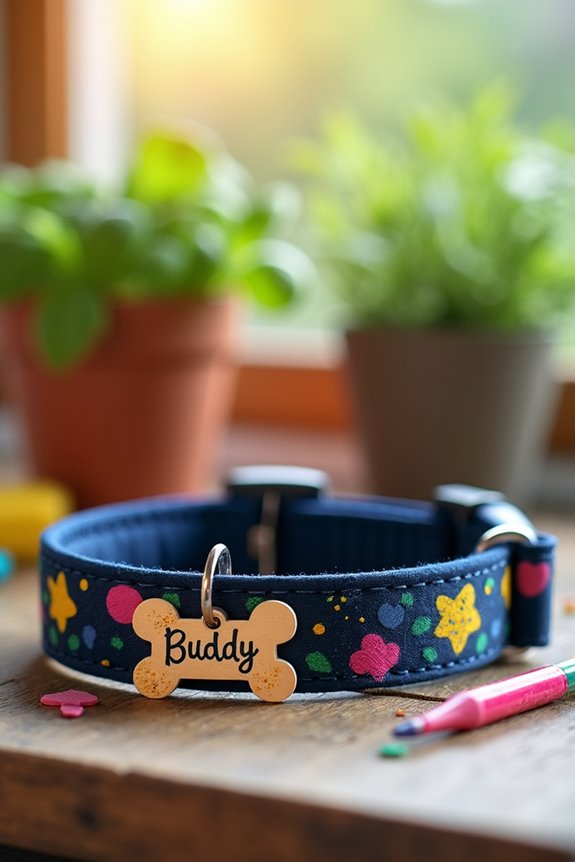
Let’s face it: a personalized dog collar not only makes your pooch look fabulous but also keeps them safe. Imagine that moment of panic when your furry friend decides to go on an unexpected adventure. A collar with a name tag guarantees that your precious buddy gets home safe and sound.
Plus, you can save money on store-bought collars and give your dog a unique style that reflects their personality. How cool is that? In fact, creating personalized collars can be done while enjoying time in your kitchen with a high-end food processor to whip up some homemade treats for your furry friend.
Materials Needed:
- A plain collar (nylon or leather)
- Fabric paint or permanent markers
- Stencils or stickers (optional for design)
- Cloth tape (for tape measures)
- Scissors
- Keychain rings (if you want to add the tag)
- Cardstock or sturdy paper (for making name tags)
- Hole puncher (for name tag, if needed)
- Clear sealant spray (optional to protect your artwork)
Step-by-Step Instructions:
1. Prepare Your Workspace: Find a clean, flat surface to set up your project. Lay down some old newspaper or a cloth to catch any stray paint or marker accidents. Trust me, they happen.
2. Choose Your Design: Decide how you want to personalize your collar. Will it be a single name, a fun quote, or perhaps their adorable nickname? Sketch it out on paper first so you have a plan.
3. Get Creative: Using fabric paint or permanent markers, begin decorating your collar. If you’re using stencils or stickers, secure them down and color in.
Don’t stress about being perfect; the uniqueness of it adds character. Plus, if you mess up, you can always call it “abstract” art.
4. Make a Name Tag: Cut a piece of cardstock into a fun shape for your dog’s name tag. Use the hole puncher to make a hole at the top and write your dog’s name (and your phone number, just in case) on it. Bonus points for using glitter or fun patterns.
5. Attach the Name Tag: Use a sturdy keychain ring to attach the name tag to the collar. Make sure it’s securely fastened because, well, we understand how those rambunctious pups can get sometimes.
6. Seal It In: If you want your masterpiece to last, spray a light coat of clear sealant over the painted areas. Don’t skip this step unless you want your collar to look like a sad masterpiece after a few muddy adventures.
7. Final Touches: Let everything dry completely, and then check the collar for any sharp edges or excess paint. You want your furry friend’s neck to be as comfy as possible, not a fashion hazard.
Optional Add-ons/Variations:
- Change up the colors based on your dog’s fur—soft pastels for a fluffy white dog or bold colors for a sleek black pup. You can even splatter paint for a funky tie-dye effect; playfully chaotic is the name of the game.
- Consider adding a charm, like a little bone or paw print, to your collar to elevate the look. This is where the eye-catching bling comes in.
Pro Tip:
Always double-check the collar size and adjust it appropriately. A collar that’s too tight can be uncomfortable and even dangerous for your furry friend. You want them to strut their stuff, not feel restricted.
And there you have it! Your very own personalized name tag collar, made with love (and a dash of DIY spirit). Now your dog is ready to be the talk of the park, and you’ll get to bask in the glow of your crafty triumph. Happy crafting!
2. Leopard Print Fabric Collars

Who doesn’t love a little flair? If you’re looking to add some style and pizzazz to your pup’s wardrobe, a leopard print fabric collar is a fantastic DIY project. Not only is it trendy, but it’s also a fun way to express your dog’s wild side. Plus, making it yourself can save you some cash and give your furry friend a comfy, stylish accessory that perfectly fits them! Remember, it’s also important to consider dog diapers for females in heat, as they can be necessary for maintaining cleanliness during certain times.
Materials Needed:
- A plain nylon or fabric collar (make sure it fits snugly)
- Leopard print fabric (enough to cover the collar)
- Fabric glue or a hot glue gun
- Scissors
- Measuring tape (to ascertain a good fit)
- Ribbon (optional, for extra flair)
- Sewing needle and thread (if you want to stitch instead of glue)
- Fray check (optional, to prevent fabric edges from fraying)
Step-by-Step Instructions:
- Measure and Cut: Measure your collar’s length and cut a piece of leopard print fabric that’s slightly longer than the collar itself. You’ll want enough fabric to wrap around and tuck under for adhesion or sewing.
- Prepare the Fabric: If your fabric has edges that might fray, apply a bit of fray check along the cut edges and let it dry. This helps keep your collar looking fabulous for much longer.
- Attach the Fabric: Apply fabric glue or use the hot glue gun to attach the fabric to the collar. Start at one end of the collar, laying the fabric down smoothly. Wrap it around, making sure the fabric lays flat. If you’re using a hot glue gun, be careful; those things can be hotter than the Sahara.
- Secure the Ends: Once you’ve wrapped the fabric completely around the collar, tuck the end under and secure it with more glue. Wait a moment for it to dry before moving on. This little step stops any rogue fabric from flapping in the wind.
- Add Extra Style (Optional): If you want to take it up a notch, sew or glue a matching ribbon along the edge of the collar for an added touch. This creates a contrasting style that brings focus to the fabulous leopard print.
- Let It Dry: Give your collar plenty of time to dry before you let your furry friend wear it. You want the fabric secure and snug; no one likes a collar that goes rogue mid-walk.
- Check for Comfort: Before the big reveal, check the collar for any rough edges or spots that might scratch or irritate your dog’s neck. We want them to strut their stuff without any discomfort, right?
Optional Add-ons/Variations
Feeling adventurous? Try using different animal prints—like zebra or snake—based on your dog’s style. You can also combine prints for a fun patchwork design or even use solid fabrics for a contrasting look. Get creative!
Pro Tip:
When using glue, make sure to apply it sparingly. Too much can cause fabric to go all lumpy, which definitely won’t earn you any points in the fashion department. Also, make sure the collar size is comfortable; after all, no one wants a fashionista needing a neck rub because their collar’s too tight.
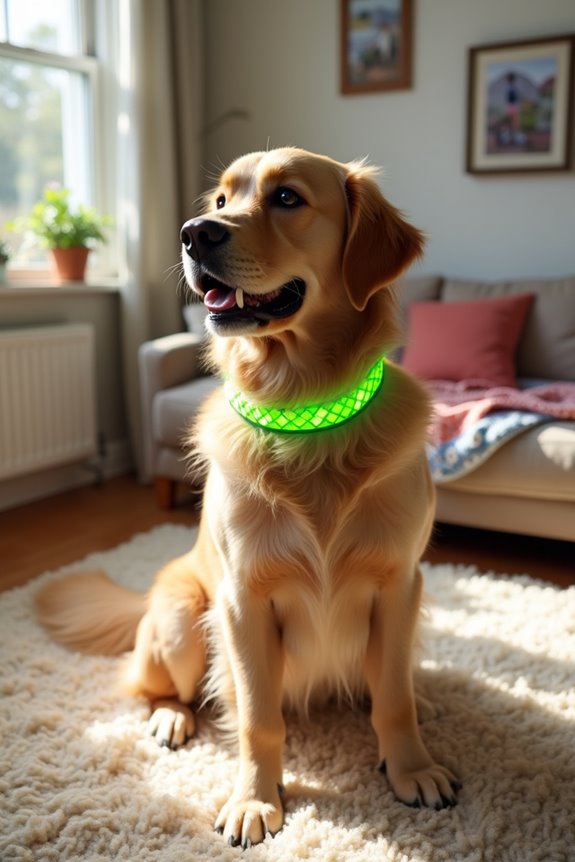
3. Glow-in-the-dark Collars

Imagine walking your dog at night, the moon shining down and stars twinkling, when suddenly, your pup flickers like a nighttime star themselves, lighting up the path with a glow-in-the-dark collar. This DIY project not only adds a cool factor to your dog’s accessories but also improves their safety during evening walks. Plus, it’s a budget-friendly way to keep your furry friend stylish and visible, helping to avoid those accidental trips over mischievous bushes or sneaky squirrels. To further pamper your pup, consider pairing this with luxury dog food for yorkies, ensuring they enjoy a complete luxury experience.
Materials Needed:
- A plain nylon or fabric collar (the right size for your pup)
- Glow-in-the-dark fabric paint or glow-in-the-dark ribbon
- Paintbrush (if using fabric paint)
- Scissors
- Measuring tape
- Optional: Mini LED strip (for a more high-tech option)
- Optional: Clear sealant spray (to protect the paint)
Step-by-Step Instructions:
- Measure Your Collar: First, take the measuring tape and verify the length of your collar. This guarantees you know how much glow-in-the-dark material you’ll need. If you’re using a ribbon, cut it a bit longer than the collar for easy attachment.
- Prepare Your Workspace: Lay down some old newspapers or a drop cloth. Trust me, getting glow-in-the-dark paint on your dining room table isn’t a happy surprise.
- Apply Glow-in-the-Dark Paint: If you’re going the paint route, grab your paintbrush and apply a nice even coat of glow-in-the-dark fabric paint on one side of the collar. Keep it thick enough for a good glow, but don’t go overboard—you’re not trying to drown it. Let this dry for a few hours or until the paint feels solid to the touch.
- Attach Glow-in-the-Dark Ribbon (if using): If you opted for the ribbon, simply glue or sew it to the collar, wrapping it around completely. Make sure you secure both ends well. Give it a little tug—if it stays put, you’re golden.
- Seal It (Optional): If you’re feeling fancy, spray a clear sealant over the painted area (or the entire collar) to protect it from wear and tear. This can keep the glow a bit longer and help your creation survive those wild playtimes.
- Charge It Up: Before letting your dog wear it, expose the collar to light for a while. Sunlight or a bright lamp is great. The longer it charges, the better it’ll glow.
- Final Check: Inspect for any rough spots or paint drips. You’re looking for comfort—no one wants their dog to be sporting a collar that feels like sandpaper on their delicate neck.
Optional Add-ons/Variations
Feeling creative? You could personalize this collar with your dog’s name or a fun design using glow-in-the-dark fabric markers.
Or, if your pup is a tiny fashionista, layer different colors of glow-in-the-dark ribbon to create patterns that really pop once the sun goes down.
Pro Tip
For added safety, especially in darker areas, consider combining the glow-in-the-dark feature with a reflective collar. It’s like having a double feature for your pup. Not only will they be glowing like a superstar, but they’ll also reflect light from cars, making evening strolls a breeze. Plus, you’ll be assured that drivers will see your furry friend from a distance.
4. Reflective Safety Collars
If you’ve ever found yourself worrying about your furry friend darting into the night, reflective safety collars are a fantastic DIY solution that combines safety with style. These collars not only keep your dog visible during twilight walks but also add a splash of personality. They’re budget-friendly, improving your dog’s safety without breaking the bank, and you’ll feel great knowing your pup is strutting in style.
Moreover, these collars are essential for ensuring that your pet is visible during low light conditions, reflecting light from car headlights and other sources to enhance safety.
Materials Needed:
- A plain nylon or fabric collar (make sure it fits your dog)
- Reflective tape or fabric (available at craft stores)
- Scissors
- Measuring tape
- Optional: Fabric glue or needle and thread
- Optional: Clear water-resistant sealant spray
Step-by-Step Instructions:
1. Measure the Collar: Use the measuring tape to find the length of your collar. This will help you decide how much reflective material you need. Accurate measurements help you avoid the dreaded “too short” disaster.
2. Prep Your Workspace: Lay out some newspaper or a drop cloth over your workspace. The last thing you want is a little sparkle getting everywhere—especially not on your favorite couch.
3. Cut the Reflective Material: Cut your reflective tape or fabric to the appropriate size, making sure it’s long enough to go around the collar but not too long that it overlaps in a heavy, awkward way.
4. Attach the Reflective Material: If you’re using tape, simply peel off the backing and press it firmly onto the collar. If you’re going the fabric route, use fabric glue or sew the edges to secure it in place.
Double-check that it’s sticking smoothly with no wrinkles; we’re aiming for chic, not chaotic.
5. Seal It (Optional): If you want some extra durability, spray a light coat of clear sealant over the collar, particularly if you’re afraid of wear and tear. It’s like an invisible protective shield for your collar.
6. Final Inspection: Give the collar a once-over. Make sure everything is securely attached, with no rough edges poking out. You wouldn’t want your best buddy to feel uncomfortable while flaunting their newfound glow.
7. Ready for Adventure: Let your dog sport this collar on their next walk. As the sun sets, you’ll appreciate seeing them shine bright, knowing they’re safe and looking stylish.
Optional Add-ons/Variations:
Why not explore the world of color?
You can mix and match different colors of reflective tape or fabrics to create a collar that echoes your pup’s personality. Or, you can even jazz it up with some fun patterns – think polka dots or stripes – using fabric paint, leading to a truly unique creation.
Pro Tip:
When applying reflective material, it often helps to warm it slightly with a hairdryer (on a low heat) to make it more flexible and easier to apply.
Just be careful not to get it too hot—no one wants a melted collar fiasco. Safety first, fashion second, right?
There you go! With these reflective collars, you’ll have both a safe pooch and an adorable accessory all rolled into one. Happy crafting!
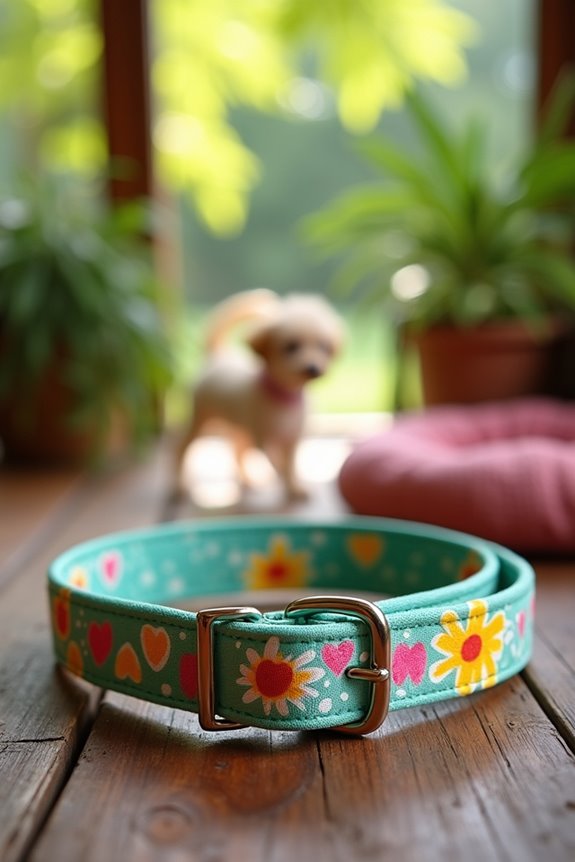
5. Tropical Floral Print Collars
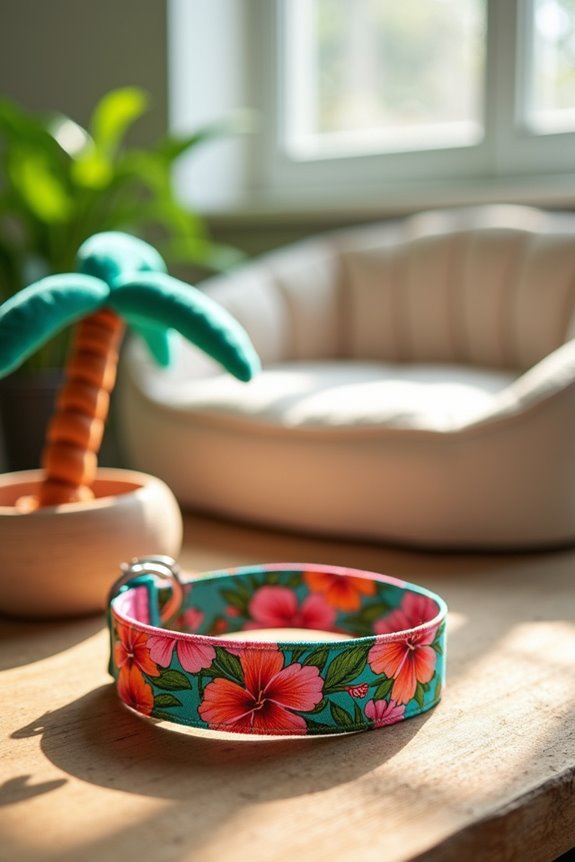
If you’re looking to jazz up your pup’s accessory game, then a tropical floral print collar is the way to go. Not only does it add a burst of color and personality to your dog’s look, but it also brings a slice of summer into your home, no matter the season. Additionally, consider pairing this vibrant collar with a luxurious dog stairs bed for ultimate comfort and style.
Plus, making your own collar can save you some bucks while allowing you to tailor it perfectly to your furry friend’s size and style. Let’s plunge into this easy and fun DIY project together.
Materials Needed:
- Plain nylon or fabric collar (make sure it’s the right size for your dog)
- Tropical print fabric (you can find plenty of options at fabric stores)
- Scissors
- Measuring tape
- Fabric glue or needle and thread (if you feel like sewing)
- Iron (to smooth out the fabric)
- Optional: Clear water-resistant sealant spray (for a bit more durability)
Step-by-Step Instructions:
1. Measure Your Collar: Grab that measuring tape and measure the length of your collar. This will help you cut the right size of the fabric. Trust me, underestimating can lead to an awkwardly short floral fiasco.
2. Prep the Fabric: Lay out the tropical fabric on a flat surface. If you’re channeling your inner artist, iron it out to smooth out those pesky wrinkles. You want your collar looking chic, not like it just came back from a tropical storm.
3. Cut the Fabric: Cut the fabric to match the length and width of your collar, adding an extra inch on either side for some overlap. The last thing you want is to have the collar fall apart on a rambunctious romp.
4. Attach the Fabric: Here’s the crafty part. If you’re using fabric glue, apply a thin layer along the collar and press the fabric onto it. You can either fold the edges over to create a clean finish or let them hang for a more boho look.
If you’re sewing, simply thread your needle and stitch the fabric in place, making sure it’s nice and secure.
5. Seal It (Optional): If you’re concerned about wear and tear from outdoor adventures, give your collar a light coat of clear sealant once everything is dry. This will help your masterpiece last longer than that one plant you forgot to water.
6. Final Check: Give it the once-over. Make sure everything is secure, and there are no loose edges. You wouldn’t want your pup to catch their fur or, worse, trip on some stray fabric while they’re trying to impress the neighbor’s dog.
7. Show it Off: You’re all set! Slide that fabulous tropical collar around your dog’s neck, and prepare for compliments. That little cutie is going to strut like they’ve just come back from a lavish beach vacation.
Optional Add-ons/Variations:
Feeling super creative? Try mixing different tropical prints or even adding embellishments like buttons or beads for a bit of flair.
You could also use contrasting thread colors if you’re sewing to really personalize your design.
Pro Tip:
If your dog has a habit of rolling in the mud or getting drenched during walks, consider using a washable fabric. It saves you from the horror of having to throw away a muddy collar and gives your dog a fresh start after each wash, just like your favorite vacation memories.
6. Geometric Shape Design Collars
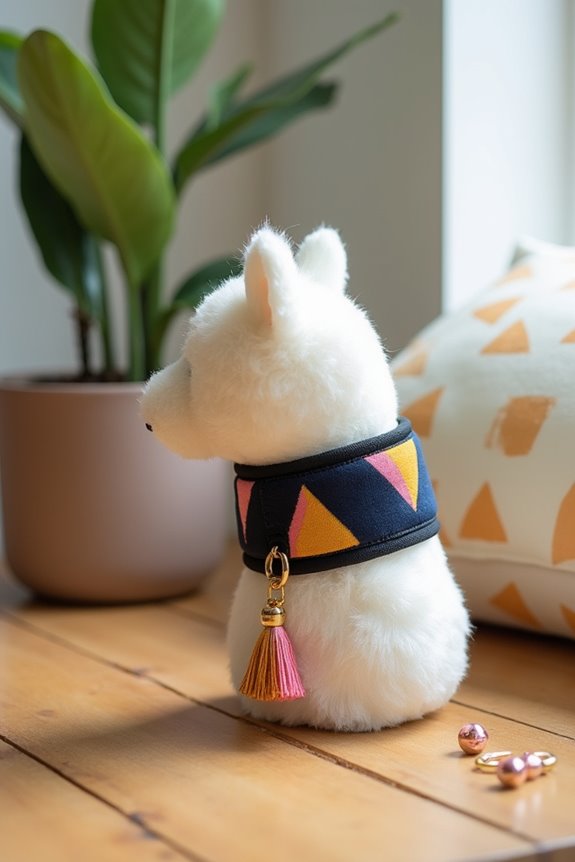
Looking to release your inner designer? A geometric shape design collar is the perfect way to express your pup’s personality while adding a trendy touch to their everyday look. This DIY project isn’t just about style — it’s a fantastic way to save some cash while making sure your furry friend is comfortable in a collar that fits them just right.
Let’s roll up our sleeves and create some modern flair for our four-legged companions.
Materials Needed:
- Plain nylon or fabric collar (pick one that fits your dog snugly)
- Geometric printed fabric (check out fabric stores or online for fun patterns!)
- Scissors
- Measuring tape
- Fabric glue or a sewing kit (if you’re feeling crafty)
- Iron (for a smooth finish)
- Optional: Embellishments like tassels or beads for extra pizzazz
Step-by-Step Instructions:
- Measure Your Collar: First off, grab your measuring tape and check the length of your collar. This helps prevent a “too tight” situation, which, let’s face it, is a recipe for disaster.
- Get Your Fabric Ready: Lay your geometric fabric on a flat surface and give it a good ironing. We want it looking crisp, not like it just rolled out of bed.
- Cut the Fabric: Cut the fabric to match the collar’s length and width, but make sure to add an extra inch or so to each side. This gives you a little wiggle room to fold it over for a clean finish.
- Attach the Fabric: Now comes the fun part. Apply fabric glue along the collar, or if you’re sewing, stitch it in place. You can either fold down the edges for a polished look or let them hang for a funky vibe — totally your call.
- Let It Dry: If you used glue, be patient and let everything dry. Trust me, you want that glue to hold fast, or you’ll be stuck doing this project again after Fido rolls in the mud.
- Final Check: Once dry, give your collar a thorough inspection. Confirm everything is secure, with no edges flopping around. We want your pup to strut their stuff, not trip over their own style.
- Time to Shine: Slide that fashionable collar onto your pooch. It’s showtime! Take a few pictures to capture your dog’s new look — you’ll want to remember this moment, especially when they strut past the neighbor’s dog.
Optional Add-ons/Variations:
Want to take it a step further? Consider mixing and matching fabrics – combine polka dots with stripes, or use a bold color underneath a sheer geometric overlay for a layered look.
Maybe even add some cute tassels or beads for an extra dash of personality!
Pro Tip:
Make sure to check the collar regularly for wear and tear, especially if your pup loves to play rough. A little fabric glue can go a long way in fixing minor issues, but keeping an eye out can save you from a major DIY fiasco.
After all, the goal is to keep your stylish collar looking fabulous, just like your dog!
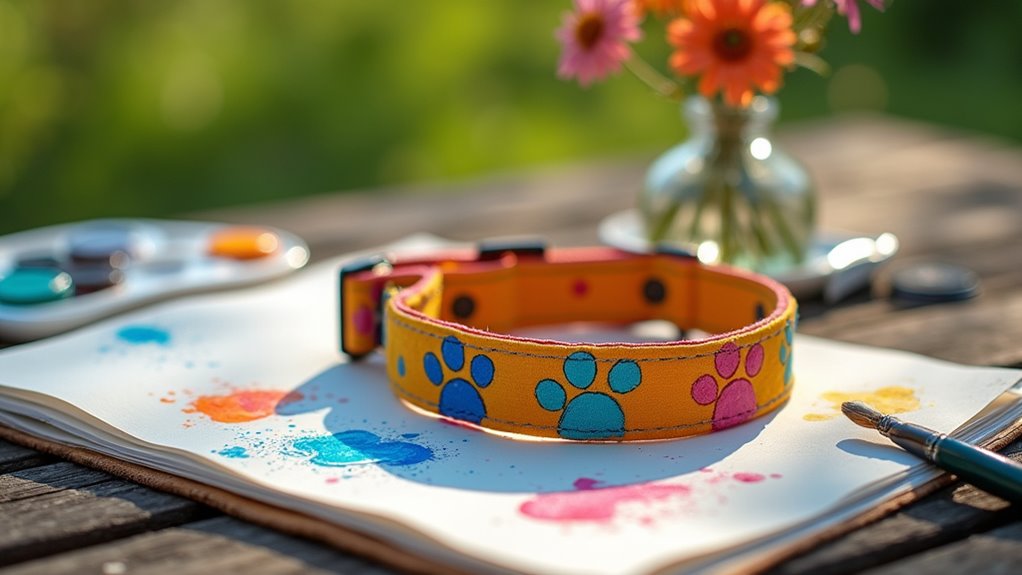
7. Hand-painted Custom Design Collars
If you’re looking to add a personal touch to your dog’s wardrobe, why not try creating a hand-painted custom design collar?
This DIY project not only allows you to express your creativity but also guarantees that your pup has a one-of-a-kind accessory that’s sure to turn heads during your daily walks.
Plus, it’s a budget-friendly way to upgrade their collar without breaking the bank.
Materials Needed:
- A plain, fabric dog collar (light-colored works best)
- Fabric paint (water-resistant options are ideal)
- Paintbrushes (varied sizes)
- Stencils (optional, for those who want a little guidance)
- Paper towels (for any accidental spills)
- Water cup (to rinse brushes)
- Clear fabric sealer spray (for durability)
- Old newspaper or cardboard (to protect your workspace)
Step-by-Step Instructions:
1. Prepare Your Workspace: Start by covering your workspace with old newspapers or cardboard.
We don’t want any surprise paint splatters on the dining table, right? Sorry, Mom.
2. Clean the Collar: Make sure your collar is clean and dry.
If it’s been through the mud, give it a quick wash — don’t let your masterpiece be inspired by dirt.
3. Plan Your Design: Sketch out your design on paper first.
You could go for paw prints, hearts, or even your pup’s name.
This is your time to shine creatively. Remember, it’s just paint; if you mess up, it’s only a collar.
4. Start Painting: Grab your fabric paint and paintbrush.
If you’re using stencils, secure them on the collar and start filling in.
For freehand, take a deep breath and channel your inner Picasso.
Apply thin, even layers for the best results.
5. Let It Dry: Once you’ve painted your collar, Let It Dry completely — sometimes patience is key.
This usually takes about a couple of hours, but feel free to watch an episode of your favorite show while waiting.
You’ve earned it.
6. Seal the Deal: After the paint is dry, give it a protective spray with clear fabric sealer.
This step is vital if you want your design to survive rainy days at the park or your pup’s sudden mud baths.
7. Final Inspection: Take a good look at your creation; make sure everything is dry and secure.
No one wants an art project that melts away after one use.
Now it’s time to see how your dog feels about their new look.
Optional Add-ons/Variations:
Feeling adventurous?
Try using glow-in-the-dark fabric paint for those evening walks or opt for adding glitter to your design for a little sparkle.
Both will surely make your pup the life of the dog park — with or without the added attention.
Pro Tip:
If you want your collar to last even longer, consider putting it in a mesh laundry bag before washing it in the future.
Safe and sound, your paw-some creation can withstand the dirt and keep looking fresh for those daily adventures.
Extra Tips & Ideas
While you might think that a simple dog collar needs little more than a basic design, there’s so much room for creativity and personalization.
Think about adding charms—some jingling bling that your pup might just hate stepping on. You can also explore different materials, like fabric or leather—just make sure it’s comfy.
Stencils and fabric paints can turn a plain collar into a masterpiece; who doesn’t love a good polka dot? Consider matching collars for your pets—totally adorable, right?
If you feel overwhelmed, start with a simple idea and build from there. Trust me, my first attempt ended up as a tangled mess.
Keep it fun, don’t stress, and enjoy the process of making something truly unique for your furry friend.
Frequently Asked Questions
What Materials Are Best for Making Durable Dog Collars?
You’ll want to use materials like nylon webbing, leather, or polyester for durable dog collars. These materials offer strength and resistance to wear. Don’t forget to choose sturdy buckles and secure stitching to enhance durability!
Can I Personalize Collars for Different Dog Breeds?
You can personalize collars for different dog breeds by choosing colors and patterns that reflect their personalities, using breed-specific sizes, and adding unique tags or charms to match their traits and your style.
How Do I Measure My Dog for a Collar?
To measure your dog for a collar, use a flexible measuring tape around their neck. Make certain it’s snug but not tight, adding an inch or two to guarantee comfort and room for growth.
Are There Safety Concerns With DIY Dog Collars?
Sure, those charming DIY dog collars can be delightful, but you should consider safety first. Avoid materials that could irritate your dog’s skin and guarantee the collar fits properly to prevent accidents or injuries.
How Often Should I Change My Dog’s Collar?
You should change your dog’s collar every few months or whenever it shows signs of wear and tear. Regular checks guarantee it fits properly and remains comfortable, keeping your furry friend safe and happy.
Conclusion
So, are you ready to grab some supplies and release your inner craft wizard? These collar ideas aren’t just about looking cute; they can reflect your pup’s personality and keep them safe too. Imagine your dog strutting around in a collar that’s a perfect mix of flair and functionality. And hey, if it doesn’t turn out as planned—who doesn’t love a good laugh, right? Now go on, create something paws-itively amazing. Your furry friend will thank you!