Have you ever thought about how your pup could strut their stuff in a unique outfit that you made yourself? DIY dog clothes are not only fun, but they let you flex your creative muscles while keeping your furry friend cozy. Imagine this: you sewing a cute fleece-lined coat, only to realize it looks more like a potato sack than a stylish doggy jacket. But don’t worry—every flop has its lessons, and I’ve got plenty of tips to keep you on track for success.
Seasonal Dog Outfit Ideas
When the seasons change, it’s time to rethink your furry friend’s wardrobe. You wouldn’t want to let your pup miss out on fall’s cozy vibe, would you?
Look into seasonal fabrics like fleece for warmth or lightweight cotton for those sunny days. Don’t shy away from playful color combinations, either—think pumpkin orange with deep browns or light pastels for spring.
Mixing patterns can be a risky venture, but it’s all about fun. Remember, it’s your pet’s style that might distract from your own questionable fashion choices. And let’s face it, if they could pick, they’d probably rock a superhero cape.
Our Collection
Are you ready to see what we’ve whipped up in our collection?
We’ve got everything from a cozy paw-print sweater design to a stylish floral print summer dress—perfect for every occasion.
You’ll love how each piece combines comfort and cuteness, making your pup the envy of the dog park.
1. Paw-Print Sweater Design

Have you ever wondered how to keep your furry friend warm while flaunting some serious style? Well, search no more. This DIY Paw-Print Sweater is a delightful way to keep your pup cozy, save a few bucks, and even add a personal touch to their wardrobe that no store-bought item can match.
Plus, think about the compliments you’ll get—everyone loves a dog in a cute sweater! Additionally, consider enhancing your pup’s overall health with subscription services offering premium dog food that can complement their stylish appearance.
Materials Needed
- An old sweater (your comfy one that’s seen better days)
- Scissors
- Sewing needle and thread (or a sewing machine, if you’re feeling brave)
- Fabric marker or paint (in a contrasting color)
- Paw print stencils (you can make these with paper)
- Measuring tape
- Pins (to hold things in place)
- Iron (for crisp lines)
Step-by-Step Instructions
- Select Your Sweater: Grab that old sweater you’re no longer wearing. Make sure it’s clean and in decent shape because your pup deserves it, after all.
- Measure Your Pup: Use the measuring tape to get your dog’s neck width and chest circumference. Jot these numbers down. You want to make a snug fit without causing any drama during their wardrobe showcase.
- Cut It Down: Now, lay the sweater flat and carefully cut off the sleeves and hem, leaving a loose tube. Make sure not to cut right up to the seam to avoid a sweater disaster.
- Create Armholes: Measure down from the neckline about 5-6 inches, depending on how long your dog’s torso is. Cut small, rounded openings for the armholes. You’ll want to check for size – no one likes a tangled leg.
- Add Paw Prints: Time to break out the stencils. Place the paw print stencil on the sweater where you’d like it to go, secure it with pins, and trace around it with the fabric marker or paint. If you’re feeling adventurous, why not mix up different colors?
- Sew it Up: If you went for the sewing machine, now’s a good time to skillfully sew around the edges of your armholes to prevent fraying. If you don’t have a machine, no worries—hand sewing will do. Just be as precise as possible, unless puppy-chic is the goal.
- Iron it Down: Carefully iron the fabric prints to set the paint or marker. Give yourself a moment to admire your work—you did it!
Optional Add-ons/Variations
Feeling creative? Why not personalize your paw-print sweater even further? You could try using different shapes—hearts, stars, or even your dog’s name in funky letters.
Oh, and if you’re really bold, use a patterned sweater as the base. Think plaid or polka dots that scream personality. Your dog is basically a fashion icon in the making.
Pro Tip
Make sure to wash your DIY sweater gently, preferably by hand. This will keep the paw prints looking sharp and maximize the lifespan of the fabric.
And let’s be honest, nobody wants to deal with a tangled mess of yarn and threads after a round in the washing machine.
2. Fleece-lined Winter Coat

As the chilly months roll in, there’s nothing quite like wrapping your furry friend in a cozy fleece-lined winter coat. Not only does it keep them warm during those brisk walks, but it also saves you money on store-bought options. Plus, there’s a certain pride in seeing your pup strut their stuff in something you’ve made! Who wouldn’t want to be the talk of the dog park this winter, especially when you can pair it with luxury dog boots for added style and protection?
Materials Needed
- Fleece fabric (you can find this in a variety of colors)
- Old coat (for pattern reference; optional)
- Scissors
- Sewing needle and thread (or a sewing machine)
- Measuring tape
- Pins (to hold fabric in place)
- Fabric chalk or marker
- Velcro or buttons (for closure)
Step-by-Step Instructions
- Measure Your Dog: Using the measuring tape, find out your dog’s neck size, chest circumference, and back length. Don’t forget to get the wiggle factor in there—they’ll need to move around!
- Create a Pattern: If you’re using an old coat as a reference, lay it flat and trace its outline onto a piece of paper. You can also do this directly onto a piece of fleece, but keep in mind to add a bit of seam allowance.
- Cut the Fabric: Once you have your pattern ready, cut two pieces of fleece according to those measurements. Don’t be scared to zigzag around corners—it’ll add character (and the dogs won’t mind).
- Sew the Pieces Together: Pin your pieces together—right sides facing each other—then sew along the edges. Leaving armholes is essential; just remember to give your pup some breathing (and wagging) room.
- Add a Closure: At this point, you’ll want to attach your chosen closure. If you’re using Velcro, sew it onto the opening. If you’re going for buttons, make sure to create corresponding buttonholes. Just picture your pup channeling their inner fashionista.
- Trim and Finish: Cut any excess fabric and tidy up the seams with a zigzag stitch to avoid fraying. Don’t worry if it’s not perfect; just like cooking, sewing often involves a bit of improvisation.
- Try it on: Gently pop your new creation on your pup and adjust for comfort. Make sure to check that they can move freely and that the coat isn’t too tight.
Because let’s face it—the last thing you want is a confused little furball.
Optional Add-ons/Variations
Feeling crafty? Why not add a fun pocket where your pup can store their treats (or where you can put their ID)?
Or switch it up with different fleece patterns—checkered prints for a classic look or bright colors to match your own winter coat. Let your creativity soar!
Pro Tip
Before sewing, always double-check your dog’s measurements. It’s easy to underestimate how much room they need for all that energy.
And remember, fleece is forgiving; it stretches, so if in doubt, go a little bigger. Happy crafting!
3. Dog Bandana With Bowtie

Does your furry friend need a little extra flair? A DIY dog bandana with a bowtie can be a game-changer! Not only does this project keep your pup looking stylish, but it’s also a great way to break out your crafting skills without breaking the bank. Plus, it’s an easy project that enhances your dog’s comfort while adding some fun to their wardrobe. Now, let’s roll up those sleeves! Additionally, when considering premium dog food for your Goldendoodle, ensure their diet complements their playful lifestyle.
Materials Needed
- Cotton fabric (choose your favorite design)
- Scissors
- Measuring tape
- Sewing needle and thread (or a sewing machine)
- Pins (to hold fabric in place)
- Fabric chalk or marker
- Iron (to smooth out the fabric)
- Bowtie template (you can easily find one online or create your own)
Step-by-Step Instructions
- Measure Your Dog: Start by measuring your dog’s neck circumference. This is key to ensuring a comfortable fit. Add a couple of inches for wiggle room and overlap for tying.
- Cut the Fabric: Using your measurements, cut a rectangle for the bandana (about twice the width of your desired bandana) and a separate piece for the bowtie (a template should help with this).
- Prepare the Bandana: Fold the edges of the bandana and iron them down for a smooth finish. Pin them in place so they don’t slip when you sew them.
- Sew the Bandana: Sew along the edges of the bandana, about a quarter-inch from the edge. Make sure to reinforce those corners to keep it sturdy when your pup is strutting his stuff.
- Make the Bowtie: Fold the bowtie fabric into the shape you want (don’t forget to iron it!). Sew along the edges, leaving a small gap to turn it inside out. Once turned, stuff it and sew the opening closed.
- Attach the Bowtie: Pin the bowtie to the center of the bandana and sew it securely. You want that thing to stay put, especially when your dog dashes around like a little tornado.
- Final Touches: Give your whole creation a final press with the iron for a polished look. Now it’s all ready for your pup’s big debut.
Optional Add-ons/Variations
Feeling adventurous? Why not add a matching leash attachment or embellish your bandana with some fabric paint?
You could also experiment with seasonal prints—think spooky patterns for Halloween or festive designs for the holidays. The sky’s the limit, so let your imagination run wild!
Pro Tip
Before you start, make sure to pre-wash your fabric. This keeps it soft and helps prevent any surprise shrinkage after you’ve put in all that hard work.
Trust me, no one wants a bandana that fits like a constricting turtleneck after the first wash. Happy crafting, and may your pup be the star of the neighborhood!
4. Customizable Dog Rain Jacket

Does your pup hate getting caught in the rain? Say goodbye to soggy walks and chilly days with a DIY customizable dog rain jacket! It’s a fantastic way to keep your furry friend dry while giving them a bit of a fashion statement. Not only is this project practical, but it also saves you money on store-bought jackets that mightn’t fit just right or suit your dog’s unique personality. Plus, who doesn’t love a cute pup in a slicker? You can elevate your pup’s style with premium dog supplies to complement their new rain jacket!
Materials Needed
- Waterproof fabric (nylon or polyester works great)
- Scissors
- Measuring tape or ruler
- Sewing needle and thread (or a sewing machine)
- Pins (to hold fabric in place)
- Velcro strips or snap buttons (for closures)
- Fabric chalk or marker
- Iron (to smooth out the fabric)
- Patterns/template for the jacket (you can find or design your own)
Step-by-Step Instructions
- Measure Your Dog: Start by measuring your dog’s back length, neck circumference, and chest girth. This is vital for a snug fit, so be sure to jot those numbers down.
- Cut the Fabric: Using your dog’s measurements, cut out two rectangles: one for the body and one for a hood (if you want that extra protection). Be sure to add extra inches for seam allowances and adjustments.
- Prepare for Sewing: Fold and pin the edges of both fabric pieces to prevent fraying and give you a clean finish. An iron is great here—you want those folds to be nice and crisp.
- Sew the Body: Starting with the main body piece, sew along the sides, leaving openings for the legs. Reinforce those seams, as they’ll take a bit of action during walks in the rain.
- Make & Attach the Hood: If you’re opting for a hood, take that second piece of fabric, fold it, and sew along the edges. Attach it to the back of the body piece, aligning it well so it doesn’t flop around.
- Add Fastenings: Use Velcro strips or snap buttons to create easy closures around the neck and chest areas. Make sure they’re secure but still comfortable for your pup.
- Final Adjustments: Turn the jacket inside out for a finished look, give it one last iron, and check for any rough edges. After that, it’s time for a fitting! Adjust any areas as needed, and let your pup strut their stuff.
Optional Add-ons/Variations
Feeling adventurous? How about adding a fun flare? You could line the inside with a cozy fleece for extra warmth, or add reflective strips for those late-night walks.
And why not go wild with colors and patterns? Dogs deserve some pizzazz, right?
Pro Tip
Always pre-wash your fabric before sewing—this won’t only guarantee it’s clean and soft for your dog but also minimizes any shrinking or color bleeding after they’ve braved a storm or two.
And if you’re worried about durability, adding some extra stitching will help keep everything together, even during your pup’s most vigorous zoomies.
5. Floral Print Summer Dress

Is your pup ready for a summer fashion upgrade? A DIY floral print summer dress is the perfect way to keep your furry friend looking delightful on those sunny strolls. Not only does it make a cute statement, but it also allows you to save some cash while guaranteeing a comfy, customized fit. Let’s get crafting! Plus, your pup can rock their fabulous outfit while sporting a luxury designer dog collar to complete the look.
Materials Needed
- Lightweight cotton fabric with a floral print
- Scissors
- Measuring tape
- Sewing needle and thread (or a sewing machine)
- Pins
- Fabric chalk or marker
- Ribbon or elastic for the waistband
- Pattern/template for the dress (you can find or create one)
Step-by-Step Instructions
- Measure Your Dog: Start by measuring your dog’s neck circumference, chest girth, and back length. This will guarantee you create a dress that fits them perfectly. Note these measurements down, so you don’t lose track of them—trust me, I’ve been there!
- Cut the Fabric: Using your measurements, cut out two pieces of fabric: one for the main dress and another for the lining. Remember to add a little extra around the edges for seam allowances—this isn’t the time to skimp!
- Pin & Sew Seams: With the good side of the fabric facing each other, pin the two pieces together along the sides and top. Leave the bottom open. This is where the magic happens. Sew along the pinned edges, reinforcing those seams, because who knows what kind of adventures your pup will get into.
- Create a Waistband: Cut a piece of ribbon or elastic the length of your pup’s waist (plus a bit for tying if you’re using ribbon). Attach it to the dress by folding the top fabric over the ribbon or elastic and sewing it down. This will create the perfect fit while keeping it stylish.
- Finish Edges: Flip the dress inside out for a neat finish. Sew the bottom hem to keep those edges tidy, unless, of course, you like the ‘ruff’ look—then don’t mind me!
- Final Adjustments: Check the fit on your dog. Is it snug but comfortable? If needed, make any adjustments before letting your pup showcase their new outfit.
Optional Add-ons/Variations
Want to make your dress even more fabulous? Consider adding lace trim or a cute pocket on the side. You could even experiment with different floral patterns or colors to match your dog’s personality. After all, summer is about bright colors and fun prints!
Pro Tip
When sewing, always do a test run on a scrap piece of fabric to guarantee your stitches hold up. And, if your dog is a little wriggler, think about adding a Velcro strap or snap to keep everything secure. We don’t want any wardrobe malfunctions on your afternoon walk!
Now, roll up those sleeves and get started. Your pup’s about to be the best-dressed dog in the park. You might even want a matching outfit (just a thought). Happy crafting!
6. Reflective Safety Vest

Every dog owner knows how significant it’s to keep our furry friends safe, especially during those evening walks or morning jogs when visibility can be a challenge.
A DIY reflective safety vest not only helps keep your pup visible to passing cars and cyclists, but it also saves you money compared to store-bought options, while guaranteeing a snug and comfortable fit. Let’s keep our buddies safe while looking oh-so-stylish!
Materials Needed
- Reflective fabric or reflective tape
- Lightweight, breathable fabric (like mesh or nylon)
- Scissors
- Measuring tape
- Sewing needle and thread (or a sewing machine)
- Pins
- Fabric chalk or marker
- Velcro or buckle for closures
- Pattern/template for the vest (you can find or create one)
Step-by-Step Instructions
1. Measure Your Dog: Measure your pup’s neck, chest girth, and the length from the neck to the base of the tail. Trust me, the last thing you want is a vest that’s too tight or too loose.
Jot those numbers down as if they’re a secret formula for canine happiness. Spoiler alert: they are!
2. Cut the Fabric: Use your measurements to cut out pieces of the lightweight fabric for the vest. You’ll need a front and back piece.
If you’re adding reflective tape, cut strips of it to sew onto the vest later. Make sure to leave some extra fabric edges for seams—this isn’t a race against time.
3. Pin and Sew the Pieces Together: With the good side of the fabric facing each other, pin the pieces together, aligning the edges.
Sew along the pinned edges, usually around the shoulders and chest area, making sure to leave the bottom open. Reinforce those seams, because who knows what your adventurous pooch could get into.
4. Add Reflective Elements: Now for the fun part—attach your reflective tape or fabric to the vest.
This can be in the form of stripes or shapes, whatever suits your dog’s personality. Sew these onto the vest carefully so they’ll stay put during all those activities your dog gets up to.
5. Create Closures: Attach Velcro or a buckle at the neck and chest to secure the vest.
This makes sure that while your dog is busy chasing squirrels, their new gear stays in place. It’s vital for both their comfort and safety. Showcase your best sewing skills, even if that means giving yourself a pep talk about not being a sewing expert.
6. Check the Fit: Slip the vest onto your dog and verify it’s snug but breathable.
If it seems a bit loose or tight, make any necessary adjustments before letting your pooch strut their stuff. After all, comfort is key to keeping those tails wagging.
Optional Add-ons/Variations
Want to give your pup’s vest a little extra flair? Consider adding some fun patches or even a pocket for treats.
You could also experiment with different colors or patterns of the reflective fabric—make it reflective and fashionable. Your dog deserves to feel as fabulous as they really are!
Pro Tip
When using reflective materials, remember to test them out during the evening or in low-light conditions before going on a walk.
This way, you’ll know just how visible your pup is. Plus, it might give you an excuse to flaunt your dog’s new gear in front of the neighbors. Who could resist a furry fashion show?
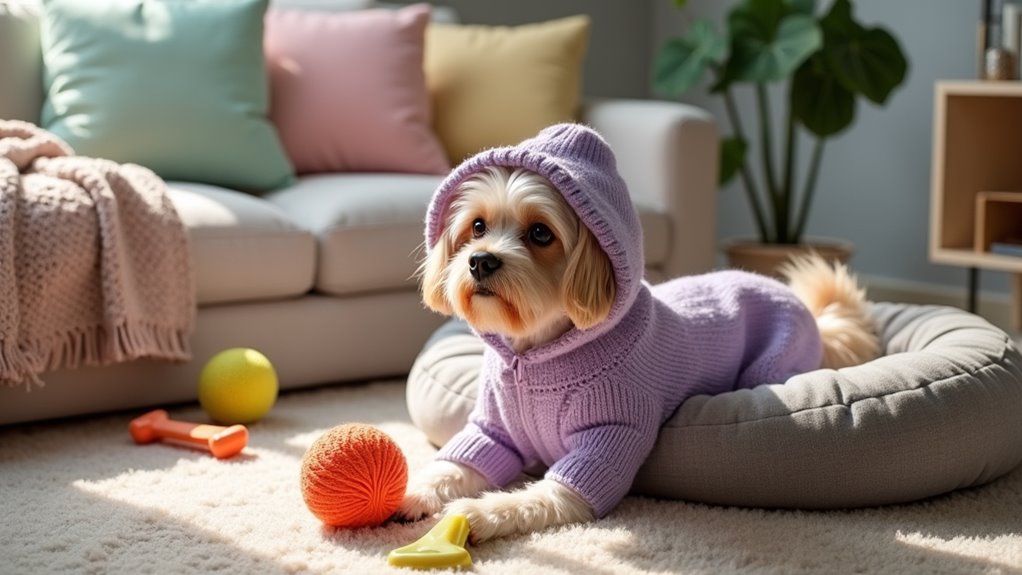
7. Knitted Dog Hoodie Design

Every dog deserves a cozy sweater, especially when the weather turns chilly. A knitted hoodie isn’t just stylish; it’s practical too. This handy DIY project will save you money, keep your dog warm and snug, and give your space that charming homemade vibe.
Plus, there’s something deeply satisfying about creating something with your own two hands, right?
Materials Needed
- Soft yarn (in your pup’s favorite color)
- Knitting needles (size depends on the yarn, often size 8-10)
- Scissors
- Measuring tape
- Yarn needle for weaving in ends
- Stitch markers (optional, but helpful)
- A simple knitting pattern (you can find many free ones online)
Step-by-Step Instructions
- Measure Your Dog: Grab that measuring tape again and take note of your dog’s neck size, chest girth, and back length (from neck to base of the tail). This step is key, especially if you want to avoid a sweater that looks like it could fit a giraffe.
- Choose Your Pattern: Find an easy beginner-friendly hoodie pattern online that matches your pup’s measurements. If you’re feeling adventurous, you can merge different patterns or add some embellishments.
- Cast On: Following your chosen pattern, cast on the number of stitches specified. This means you’ll start the hoodie by looping yarn around the needles. Just breathe—messing up the cast on is more common than you think, so don’t fret if you have to start over.
- Knit the Body: Using a basic knitting stitch (usually stockinette or ribbing), knit until you’ve reached the desired length for the body of the hoodie. If you feel your focus waning, try knitting while binge-watching your favorite show—multitasking at its finest.
- Shape the Hood: Once you’ve knitted the body, follow your pattern to create the hood. This usually involves decreasing stitches to form a rounded shape. Try to keep those stitches even — trust me, you’ll thank yourself later when it doesn’t look like a dog beanie.
- Finish Off: When you’ve completed the hood, bind off your stitches and weave in all those pesky loose ends with your yarn needle. No one wants to see a cut yarn fraying like it’s hanging on for dear life, right?
- Try It On: Slip the hoodie onto your pup and make sure it fits well—snug but not too tight. Do a little twirl with them so they can strut in style. They might give you that trademark canine side-eye, but deep down, they’ll appreciate the warmth.
Optional Add-ons/Variations
- Color Blocking: Why use just one color? Try combining three or four to create a fun, eye-catching design.
- Personalized Patches: Embroider your dog’s name or a cute saying on the back for a personal touch.
Pro Tip:
Always wash the yarn before you start knitting, especially if it’s wool. This helps prevent any surprise shrinkage once your hoodie is done.
Plus, some yarn can be a bit rough. Pre-washing will make sure it’s soft against your pup’s skin—all part of the puppy pampering package.
Extra Tips & Ideas
While diving into DIY dog clothes can feel a bit challenging, it’s actually a fun adventure that allows your creativity to shine.
Consider your fabric choices carefully—soft, breathable materials are a must. Who wants a grumpy pup in itchy clothes?
When it comes to sewing techniques, don’t worry if you’re not a pro. Simple stitches can do wonders, and you can always add fun details, like appliqués or patches, to spice things up.
Here’s a tip: if you mess up, embrace it. Who knows? That accidental cut could turn into a cool design feature.
Finally, don’t forget to measure your dog properly; a snug fit is key. Your furry friend will be strutting their stuff in no time.
Frequently Asked Questions
What Materials Are Best for Making Dog Clothing?
For making dog clothing, choose soft, breathable fabrics like cotton or fleece. Utilize basic sewing techniques such as straight stitching and hemming. This guarantees comfort and durability, keeping your pup stylish and cozy.
How Do I Measure My Dog for Custom Outfits?
To measure your dog for custom outfits, use a size guide. Focus on key areas: neck, chest, and length. Consider your dog’s body shape to guarantee a perfect fit and maximum comfort.
Can I Use Old Clothes for Dog Outfits?
Absolutely, you can use old clothes for dog outfits! Upcycling clothes not only saves money but also adds a unique touch to dog fashion. Just make certain the fit is comfortable and safe for your furry friend.
How Do I Care for Homemade Dog Clothes?
You’ll want to check the washing instructions for each fabric. Use gentle cycles and cold water to maintain your creations. Air-dry or use low heat to guarantee fabric maintenance and keep your homemade dog clothes looking great.
Are There Any Safety Concerns With Dog Clothing?
Yes, there are safety concerns with dog clothing. Over 30% of pet owners report wardrobe hazards, like choking or overheating. Always verify your dog’s comfortable, and check for loose parts to enhance dog clothing safety.
Conclusion
So, whether you’re stitching a cozy paw-print sweater or crafting a breezy floral dress, remember: your dog’s outfit is like their personality, unique and full of life. These DIY projects aren’t just about fabric and thread; they’re symbols of love and creativity. Each stitch tells a story, and every embellishment adds a bit of whimsy. Immerse yourself in sewing, embrace the playful chaos, and celebrate the joy of dressing up your furry friend. After all, every pup deserves a stylish wardrobe, right?