If your dog has a penchant for chomping on shoes, it’s time to get crafty in the kitchen. Making durable homemade dog chews can be fun and super rewarding. Plus, who wouldn’t want their pup to have something tasty to gnaw on instead of their favorite sneakers? Trust me, I’ve had my fair share of run-ins with chewed-up footwear. So, get ready to whip up treats that’ll keep their tails wagging and your shoes safe. Let’s get started, shall we?
Why Homemade?
When you think about it, why settle for store-bought dog chews that might be loaded with mystery ingredients?
You love your pup, so why not make dog chews homemade, where you control every single ingredient? It’s way easier than it sounds—seriously. Just grab some chicken, sweet potatoes, or even peanut butter. Mix, bake, and voilà! You’ve got treats your dog will go wild for. Moreover, homemade dog food recipes provide a variety of nutritious options tailored to your dog’s preferences.
Plus, doing it yourself saves money. Sure, the first batch might look like a science experiment gone wrong, with maybe a few too many burnt edges—or was that just my attempt at sweet potato chews?
But practice makes perfect. You’ll impress both your pup and yourself. And think about how proud you’ll feel whipping up these delicious delights while others are just grabbing that plastic package off the shelf.
Homemade dog chews aren’t just about ingredients; they’re about the love and care you put into every bite you share. Moreover, incorporating homemade probiotics in your dog chews can enhance your pup’s gut health and improve their overall wellbeing.
Creative Dog Chew Ideas
Looking for a fun way to spoil your pup? You can whip up some tasty treats that’ll have their tails wagging, like peanut butter and pumpkin chews or sweet potato chews. Not only are these treats simple to make at home, but they also provide a healthy alternative to store-bought options. Just imagine those little faces lighting up when they get to munch on homemade chicken and carrot bites or even frozen banana yogurt chews—your kitchen will be their happy place. Plus, consider making some delectable frozen berry dog treats to keep them cool during warm summer days! Additionally, your furry friends will love peanut butter apple sauce treats as they combine the delicious taste of peanut butter with the sweetness of apples, making them perfect for training or just as a reward. You might also want to try three ingredient dog treats that are incredibly easy to prepare and ensure your dog enjoys nutritious snacks.
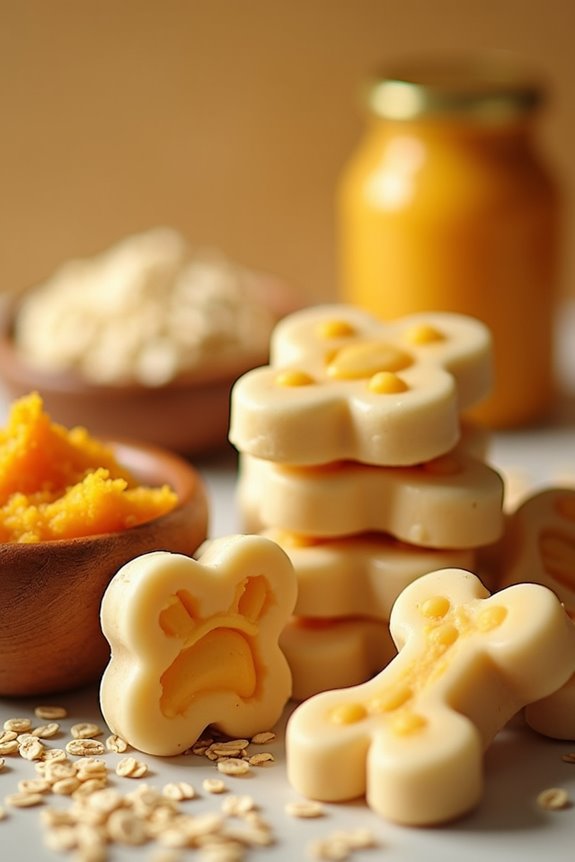
1. Peanut Butter and Pumpkin Chews
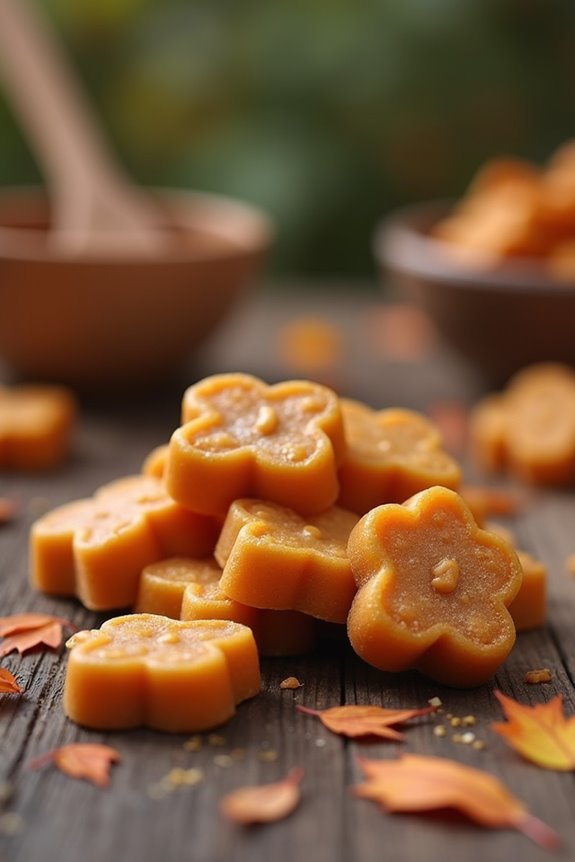
Let’s whip up some delicious Peanut Butter and Pumpkin Chews that’ll have your pup wagging their tail in delight. You’ll need just a few simple ingredients, and I promise you, it’s easier than convincing your dog to stop chasing its tail. In addition to pumpkin, you can also use banana and peanut butter for a variation your dog will love. Ready to get started? I’ll guide you through step-by-step instructions, plus throw in some optional add-ons for a little extra fun. These treats will not only satisfy your dog’s taste buds but are also packed with nutritional benefits that promote overall health. Plus, using homemade dog treats is a great way to ensure your pup is eating safe, wholesome ingredients. Did you know that natural dog treats can also support dental health by helping to clean your dog’s teeth while they chew?
Ingredients
Making your own dog chews can be super satisfying, not to mention a fun way to spoil your furry friend. Just think about it: you get to combine healthy ingredients, create something unique, and know exactly what goes into these treats. So, are you ready to whip up some Peanut Butter and Pumpkin Chews? Let’s gather our supplies.
- 1 cup natural peanut butter (make sure it’s xylitol-free)
- 1 cup canned pumpkin (not pumpkin pie filling, that’s a no-go)
- 2 cups oat flour (you can easily make this by blending rolled oats)
- 1 egg (large, because why not give Fido a little extra protein)
- 1 tablespoon honey (optional, but a little sweetness never hurt)
See? Easy peasy. Just grab these ingredients, and you’re well on your way to earning some serious “best dog parent” points. You might even end up with a few leftover treats yourself—after all, who doesn’t love the smell of fresh peanut butter and pumpkin baking in the oven? Just kidding, at least I hope you’re not planning to snack on dog treats. But hey, no judgment here!
Step by Step Instructions
- Preheat your oven to 350°F (177°C) to prepare for baking these tasty treats.
- In a large mixing bowl, combine 1 cup of whole wheat flour and 1/2 cup of rolled oats. This is where the chewiness begins!
- Add 1/2 cup of canned pumpkin (not the spiced pie mix, please—dogs don’t want dessert like we do) and 1/3 cup of peanut butter into the bowl.
- Mix everything together until combined. You may need to use your hands to really get in there—don’t worry, it’s a workout and a fun mess!
- Pour in 1/4 cup of water to help bring it all together. If your dough feels too crumbly or dry, add just a little more water—like a splash more, not a tidal wave.
- Roll the dough out on a lightly floured surface, and aim for about 1/4 inch thickness. Too thick and they’ll take an eternity to bake; too thin, and they’ll just crumble.
- Use cookie cutters to cut out fun shapes or just a simple knife to make squares—whatever floats your boat and looks good in your dog’s eyes!
- Line a baking sheet with parchment paper and arrange your cutouts on it. Give them some space; they’ll puff up a bit while baking.
- Bake in the preheated oven for 25–30 minutes, or until the edges turn golden brown. Keep a close watch after the 25-minute mark; no one wants burnt dog chews.
- Once baked, remove from the oven and let them cool on a wire rack. Your kitchen will smell amazing, trust me.
- Cool completely before serving to your dog, which might be the hardest step of all—watching your pup stare at you with those big, hopeful eyes while you play the waiting game!
Optional Add-ons
When it comes to spoiling your pup, there’s always room for a little creativity, right?
Try whipping up some peanut butter and pumpkin chews. Just mix a cup of pumpkin puree with half a cup of peanut butter and a few oats.
Roll ’em into balls and bake. Your dog will think you’re a culinary genius, but we both know the truth. It’s that easy.
2. Sweet Potato Chews

If you’re looking for a tasty treat your dog will love, sweet potato chews are a fantastic choice.
We’ll go over what ingredients you need, step-by-step instructions, and even some fun optional add-ons to jazz things up.
Trust me, making these at home is easier than it sounds, and your pup will thank you with those happy tail wags!
Ingredients
Are you ready to whip up some delicious and healthy chews for your furry friend? Sweet potato chews aren’t only a hit among pups but also super easy to make.
With just a few simple ingredients, you can treat your dog to something special without all those funky additives. So, let’s gather what we need for these tasty treats that will make tails wag and hearts melt.
- 1 large sweet potato (or about 2 cups when sliced)
- 1 tablespoon of coconut oil (optional, gives it a rich flavor, but not necessary)
- 1 teaspoon of cinnamon (a dash is delightful, just for a hint of warmth)
- 1 tablespoon of peanut butter (make sure it’s xylitol-free)
- A sprinkle of parsley (for fresh breath, because who doesn’t want that?)
That’s it—easy peasy. Just think about how much your pupper will love gnawing on these!
Imagine their wagging tail as you serve up this homemade goodness. You’ll be the dog’s favorite chef in no time, even if you mostly just microwave leftover pizza for dinner.
Yes, I see you over there!
Step by Step Instructions
- Preheat your oven to 250°F (120°C). A slow and low bake is the secret to perfect chews.
- Wash and peel 2 large sweet potatoes. Give them a good scrub—your pup deserves clean treats.
- Slice the sweet potatoes into thin strips, about 1/4 inch thick. Too thick, and they’ll be chewy; too thin, and they won’t last.
- Arrange the sweet potato strips on a baking sheet lined with parchment paper. Keep them spaced out—like avoiding awkward conversations at a party.
- Bake the sweet potato strips in the oven for 2-3 hours. Flip them halfway through for even baking. Look for a slightly crispy texture, but don’t go for burnt.
- Check for doneness by letting them cool; they should harden as they cool down. No soft spots allowed—your dog wants to chew!
- Remove from the oven and let them cool on the tray for about 30 minutes. Just a bit longer, pup—good things come to those who wait.
- Store in an airtight container in the fridge. They’ll last about a week (but I doubt your dog will let them hang around that long).
Cool completely before serving to your dog. Enjoy watching them savor each chewy bite!
Optional Add-ons
Creating your own sweet potato chews is just the beginning of a tasty adventure for your pup.
Why not add some peanut butter for extra flavor? Or sprinkle in a dash of cinnamon for a little pizzazz? You could even blend in some carrots for those extra vitamins.
Your dog will love you for it, trust me—just keep an eye on those shoe chewings.
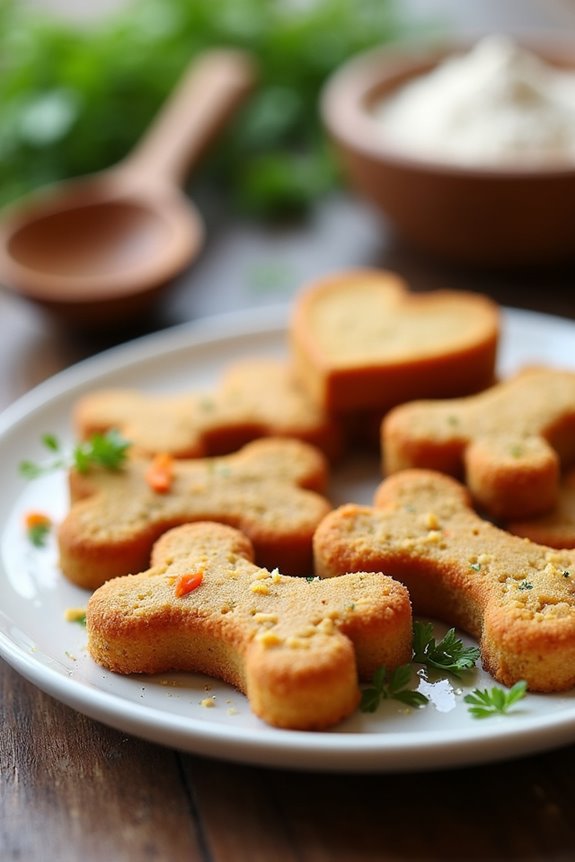
3. Chicken and Carrot Bites

Ready to whip up some tasty Chicken and Carrot Bites for your pup? You’ll need just a handful of simple ingredients, and I promise, it’s easier than finding the remote in the couch cushions. We’ll go through step-by-step instructions, plus some fun optional add-ons to make these treats even better for your furry friend.
Ingredients
When it comes to making delicious homemade dog chews, using simple and wholesome ingredients can really make all the difference.
Plus, your pup will be wagging their tail in delight when you whip up these Chicken and Carrot Bites. Here’s what you’ll need to gather.
Don’t worry, these items are as easy to find as that elusive sock your dog always seems to steal!
- 1 cup cooked, shredded chicken (perfect for using up leftovers)
- 1/2 cup grated carrots (I like to use the pre-packaged kind for speed)
- 1 cup whole wheat flour (just check for any allergies first)
- 1/4 cup low-sodium chicken broth (because flavor matters)
- 1 egg (your baking buddy, for binding everything together)
- 1 tablespoon parsley, finely chopped (a sprinkle of freshness)
These ingredients create a tasty and nutritious treat that your furry friend will love.
Plus, they’re pretty simple to find at your local grocery store.
Now, just to clarify, you can totally adjust these based on your pup’s preferences or dietary needs—because, let’s face it, we all have those picky eaters in the house, right?
Step by Step Instructions
- Preheat your oven to 350°F (175°C) so it’s nice and toasty when you’re ready to bake.
- In a medium saucepan, bring about 2 cups of water to a boil. This will be the boiling pot of magic for your carrots.
- While waiting for the water to boil, chop 1 cup of carrots into small pieces—think tiny bites for tiny doggie mouths.
- Add the chopped carrots to the boiling water and cook for about 5–7 minutes, just until they’re tender, not mushy. (Nobody wants sloppy chews, right?)
- Drain the carrots and let them cool for a minute. You don’t want to burn your pup’s little tongue.
- In a large mixing bowl, combine 1 cup of shredded cooked chicken and the cooked carrots.
- Add 1 egg and 1 cup of whole wheat flour to the mixing bowl. You’re going for a dough-like consistency here.
- Mix everything together until it forms a sticky, cohesive dough. (If it’s too dry, add a bit of water—a splash, not a tidal wave.)
- Turn out the dough onto a lightly floured surface and knead it gently for a minute or two, just enough to bring it all together.
- Roll the dough out to about ¼ inch thick and cut it into fun shapes or bite-sized squares. Get creative—your pup doesn’t care if it’s shaped like a bone or a heart.
- Place the shapes on a baking sheet lined with parchment paper, spreading them out slightly—give them some room to breathe.
- Bake for 25–30 minutes or until they’re golden brown and firm to the touch.
- Remove from the oven and let them cool on a wire rack. They need to be completely cooled to be safe and tasty for your dog.
Cool completely before serving to your dog. Just imagine their tail wagging in excitement.
Optional Add-ons
If you think your pup wouldn’t mind a little twist on the classic chicken and carrot bites, you’re absolutely right.
Mix in some peanut butter for a creamy delight or sprinkle in oats for added crunch. Even a dash of cinnamon makes it special.
Your dog won’t care if it’s “gourmet.” Just watch those tail wags. You might need a taste tester, though.
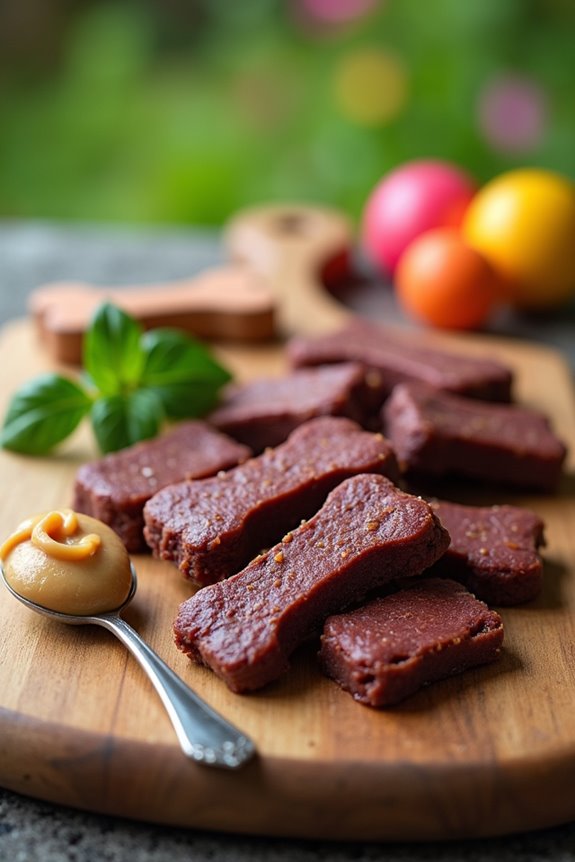
4. Beef Liver Training Treats
If you’re looking to whip up some beef liver training treats, you’re in for a treat—your dog will love them. First, you’ll gather a few simple ingredients and then follow some straightforward steps to make these tasty bites. And hey, if you’re feeling adventurous, I’ve got some optional add-ons to really amp up the flavor.
Ingredients
Creating homemade dog chews isn’t only a fun project, but it’s also a great way to show your furry friend just how much you care.
These beef liver training treats are packed with flavor, making them perfect for rewarding your pup during training sessions—or just because they gave you that adorable puppy-dog look.
Trust me, your dog will be wagging their tail in approval.
Now, let’s gather some simple ingredients.
- 1 cup beef liver, cut into small pieces
- 1 cup oats, finely ground (you can use a blender)
- 1 large egg
- 1 tablespoon parsley, chopped (fresh or dried works)
- 1 tablespoon flaxseed meal (optional, but it’s great for their coat)
And there you have it!
Get these ingredients, and you’re on your way to making some delicious treats for your pooch.
Just thinking about those happy barks makes me smile.
Oh, and don’t you worry about being a chef extraordinaire; if I can do this, so can you.
Happy cooking!
Step by Step Instructions
- Preheat your oven to 200°F (93°C). This low temperature will help us dry out the liver treats without overcooking them.
- Rinse the beef liver thoroughly under cold water. This step removes any residual blood and guarantees your treats smell more inviting to your pup.
- Slice the beef liver into small, bite-sized pieces, about 1-inch squares. Think of them as training treat nuggets!
- Place the liver slices in a large mixing bowl. Get those pieces in there, don’t worry about being neat—dogs don’t care about aesthetics.
- Optional: If you want to make the treats even more enticing, mix in a spoonful of peanut butter or some dog-friendly herbs. Just a little twist, right?
- Line a baking sheet with parchment paper. This prevents sticking and makes clean-up easier. Thank me later.
- Arrange the liver pieces in a single layer on the baking sheet. Make sure they’ve some space between them—no one likes a sticky training treat (not even dogs).
- Bake the liver in the preheated oven for about 4-6 hours, checking occasionally. You want them to dry out until they’re firm but not burnt.
- Once they’re dried and shriveled slightly, you’ll know they’re ready. Let them cool on the baking sheet for a bit.
- Once completely cool, store the liver treats in an airtight container in the fridge for up to a week—or freeze for longer-lasting chews.
Cool completely before serving to your dog. They’re going to love you for this!
Optional Add-ons
While you’re already on the path to making some fantastic beef liver treats, why not take it a step further with a few optional add-ons?
You could mix in some oats for texture or a spoonful of peanut butter for a flavor boost. Your pup will love them even more.
Plus, it adds a little surprise—who doesn’t enjoy a tasty twist?
5. Frozen Banana Yogurt Chews
If you’re looking for a delicious way to treat your pup, frozen banana yogurt chews might just be the answer.
They’re super simple to whip up, with just a few ingredients you probably already have at home.
Plus, you can get creative with add-ons—what dog wouldn’t love a little peanut butter or some blueberries tossed in?
Ingredients
If you’re looking to whip up something special for your furry friend, these Frozen Banana Yogurt Chews are a breeze to make. Not only are they delicious, but they’re also healthy. Your pup will be wagging their tail in excitement. So, let’s get down to business. Here’s all you need to gather for this tail-wagging treat:
- 2 ripe bananas, mashed (the riper, the better; dogs love that sweet flavor)
- 1 cup plain yogurt (make sure it’s unsweetened and contains no artificial sweeteners)
- 1 tablespoon honey (optional, if your dog doesn’t have a sweet tooth—just skip it)
- 1 tablespoon peanut butter (unsweetened, of course; check for xylitol-free)
- A few training treats or pieces of kibble (for added fun when you serve them)
- A splash of water (to help mix things up, but don’t drown it)
Step by Step Instructions
- Gather your ingredients: ripe bananas, plain yogurt (Greek or regular), and any optional add-ins like peanut butter or pureed pumpkin.
- Peel the ripe bananas and place them in a mixing bowl.
- Mash the bananas with a fork until they’re smooth, leaving just a few tiny chunks for texture (your dog will love the bits).
- In a separate bowl, whisk together the yogurt until it’s creamy and smooth.
- Fold the mashed bananas into the yogurt mixture gently, ensuring they’re well combined (you want every spoonful to be a tasty delight).
- If you’re adding optional ingredients like peanut butter or pumpkin, mix those in now until well incorporated.
- Spoon the mixture into silicone molds or ice cube trays, filling each cavity to the brim (go ahead, pile it up a bit).
- Tap the mold on the counter a few times to release any air bubbles (a little pat can go a long way).
- Place the filled molds in the freezer and let the chews freeze for at least 3-4 hours or until completely solid.
- Once frozen, gently remove the chews from the molds (you might need to twist and wiggle a bit).
- Store the chews in an airtight container or a zip-top freezer bag in the freezer until you’re ready to treat your pup.
- Serve one chew at a time, and watch your dog’s tail wag with joy (don’t forget, moderation is key).
Cool completely before serving to your dog.
Optional Add-ons
When you’re whipping up these frozen banana yogurt chews, why not let your creativity run wild?
Mix in some peanut butter for extra flavor or toss in crushed dog-safe treats for crunch.
Feeling adventurous? Try adding pumpkin puree or even some blueberries. Your pup will love the surprise.
Just remember, what tastes great to you mightn’t be what they’re into.
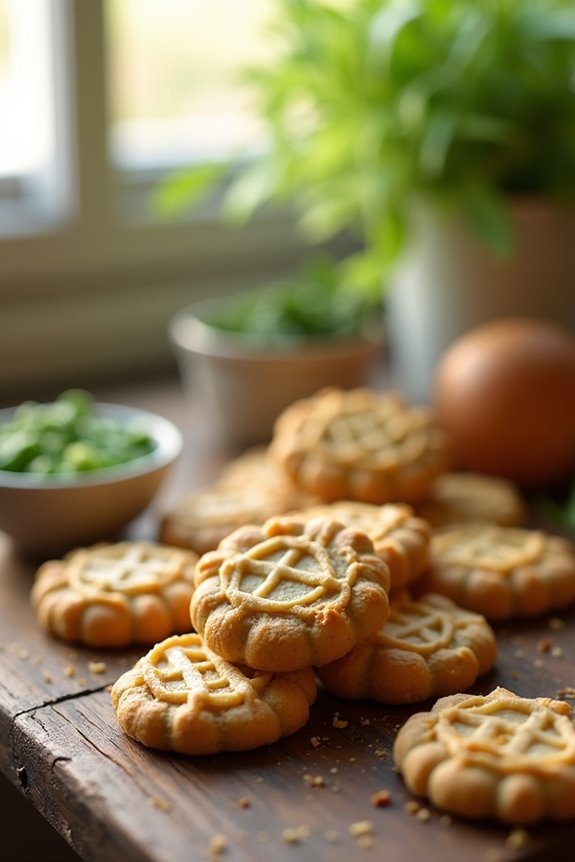
6. Chewy Carob and Oat Bites
Ready to whip up some tasty Chewy Carob and Oat Bites for your pup? You’ll need a few simple ingredients and I promise it’s easier than it sounds—trust me, I’ve managed it without setting off the smoke alarm. Let’s walk through the steps together, and I’ll share some fun add-ons you can toss in to make them even more drool-worthy.
Ingredients
When it comes to treating our furry friends, simplicity is key—especially with homemade dog chews. These Chewy Carob and Oat Bites aren’t only delicious but also packed with goodness. You probably have many of these ingredients right in your kitchen, which makes whipping up a batch that much easier.
Let’s explore what you’ll need to make these tasty treats for your pup.
- 1 cup rolled oats
- 1/2 cup unsweetened carob powder
- 1/4 cup unsweetened applesauce
- 1/4 cup peanut butter (make sure it’s free of xylitol)
- 1/4 cup honey (optional, but it can make the bites a touch sweeter)
- 1/4 cup water (you may need a little more, depending on the consistency)
Just mix these simple ingredients together, and you’ll soon be the Picasso of dog treats in your kitchen.
Trust me, both you and your dog will love the delightful aroma of these bites baking away, and let’s be honest—it’s really hard to resist the idea of snacking on something that also smells great!
Step by Step Instructions
- Preheat your oven to 350°F (175°C) to get it nice and toasty while you prepare the ingredients.
- In a mixing bowl, combine 1 cup of rolled oats and 1/2 cup of carob powder. You know you’re on the right track when the mixture looks like a cozy brown beach.
- In another bowl, whisk together 1/2 cup of peanut butter and 1/2 cup of water. Feel free to channel your inner chef and use natural peanut butter—just skip the sugar and salt, okay?
- Gradually pour the peanut butter mixture into the dry ingredients. Mix until you have a thick, doughy consistency (you might want to use your hands here; it’s like playdough, minus the taste).
- Scoop out tablespoon-sized amounts of the mixture and roll them into little balls. Imagine you’re crafting tiny energy bites for your doggo—it’s all in the spirit of creativity.
- Place the rolled bites on a parchment-lined baking sheet, spacing them about an inch apart. They need their personal space to expand while baking.
- Use the back of a fork to flatten each ball gently. Look for a cute crisscross pattern—it’s like giving each bite its own unique personality.
- Bake in the preheated oven for 15-20 minutes, or until they’re firm and slightly golden on the bottom. Give them a little peek around the 15-minute mark so you don’t accidentally create doggy rocks.
- Allow the chewy bites to cool on a wire rack. Patience is key here—the longer they cool, the better the texture.
- Cool completely before serving to your dog. Seriously, you don’t want to burn those pupper paws. Enjoy watching your furry friend love these treats as much as you enjoyed making them.
Optional Add-ons
There are so many exciting ways to jazz up your homemade dog chews that your pup will think they’re gourmet treats.
Why not try chewy carob and oat bites? Mix a cup of oats with a tablespoon of carob powder and some mashed banana.
Shape them into bite-sized pieces, bake until firm, and watch your dog’s eyes light up. It’s like doggy dessert time, every time.
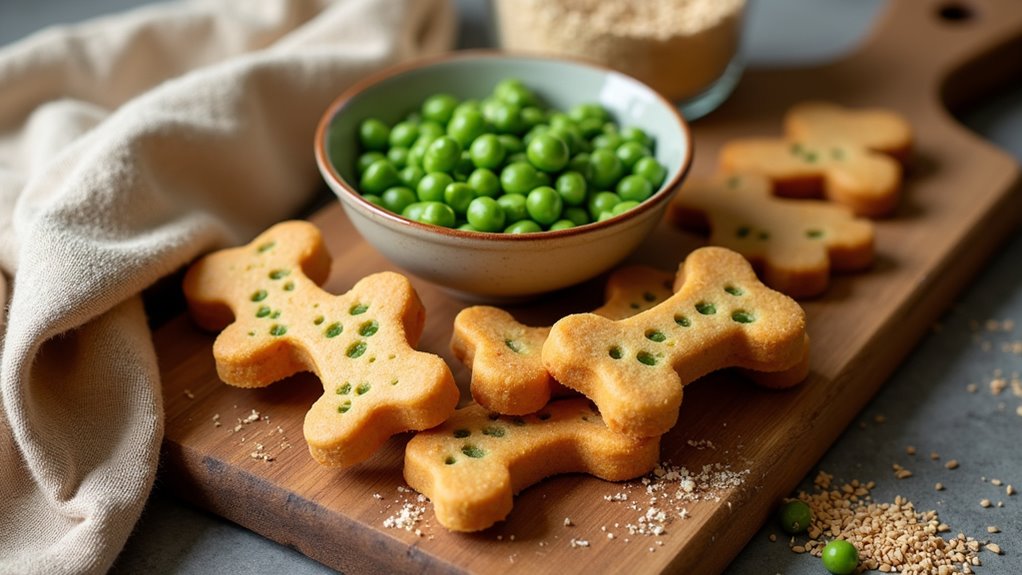
7. Chicken and Sweet Pea Chews
Ready to whip up some Chicken and Sweet Pea Chews for your pup? You’ll need a few simple ingredients and step-by-step instructions that’ll make you feel like a kitchen pro—don’t worry, even if you’ve burned toast before. And hey, I’ll throw in some optional add-ons to keep things fresh and exciting for your four-legged friend, so let’s get cooking!
Ingredients
Making homemade dog chews is a fun way to pamper your furry friend, and trust me, they’ll love every bite.
Plus, it’s super easy to whip up these Chicken and Sweet Pea Chews with just a few simple ingredients that you probably already have in your kitchen.
So, roll up your sleeves and let’s plunge into this delightful recipe.
- 1 cup of cooked, shredded chicken (make sure it’s plain, no spices)
- 1 cup of cooked sweet peas (fresh or frozen, just avoid any added salt)
- 2 cups of whole wheat flour (or a gluten-free flour if your pup has sensitivities)
- 1 tablespoon of olive oil (good for that shiny coat, right?)
- 1 egg (for binding everything together)
- ½ cup of chicken broth (low-sodium, please)
- 1 teaspoon of dried parsley (optional, but it can be a nice touch)
With these ingredients in hand, you’re all set to create a batch of tasty treats that your dog will enthusiastically wag their tail for.
Just think about the endless love and tail wagging you’ll receive for this labor of love.
Who knew cooking could be so rewarding?
Step by Step Instructions
1. Preheat your oven to 350°F (175°C) while you gather your ingredients. This step is super important—it warms up that oven for perfect baking.
2. In a medium pot, bring 2 cups of water to a boil. Can you smell that? Just wait; it’s about to get delicious.
3. Add 1 cup of sweet peas to the boiling water. Let them cook for about 5 minutes, until they’re tender. Remember, we’re not trying to make mush; we want a little bite left in those peas!
4. Drain the sweet peas and let them cool for a moment. You don’t want hot peas causing a culinary disaster.
5. In a large mixing bowl, combine 1 cup of shredded cooked chicken (that leftover rotisserie you were saving is perfect), 1 cup of whole wheat flour, and the cooled peas.
Get your hands in there and mix it up well. (Don’t be shy; the mess is worth it.)
6. Add 1 egg to the mixture and stir until everything is fully combined. It should be a bit sticky, like a well-earned reward for both you and your dog.
7. On a floured surface, roll out the dough to about ¼ inch thick. We want these chews to have a nice chewiness—to entice those tails to wag.
8. Use cookie cutters to shape the chews into fun forms. The more creative you get, the more your dog will appreciate it!
9. Place the shaped chews on a lined baking sheet.
Try not to overcrowd them; give each one a little space to do their thing.
10. Bake in the oven for 25–30 minutes or until they’re golden brown. Keep an eye on them; ovens can be sneaky like that.
11. Remove the chews from the oven, and let them cool on the baking sheet for a few minutes. You want those beauties to not burn your dog’s mouth off.
12. Transfer the chews to a wire rack and let them cool completely before serving them to your dog.
Trust me, the wait will build up the excitement.
Your homemade chicken and sweet pea chews are now ready for your furry friend to enjoy! Happy tail wagging!
Optional Add-ons
Once you’ve mastered the base recipe for homemade chicken and sweet pea chews, why not spice things up a little?
Try adding a sprinkle of flaxseed for fiber or some shredded carrots for crunch.
Your pup will love those extra flavors. Plus, it’s a great way to use up leftovers.
Experimenting’s half the fun, isn’t it? Who knew dog treats could be so gourmet?
Use High-Quality Ingredients
When it comes to homemade dog chews, using high-quality ingredients is a no-brainer. You wouldn’t want to bite into a stale snack yourself, right? The same goes for your pup.
Using high-quality ingredients for homemade dog chews ensures your pup enjoys tasty, nutritious snacks just like you would!
Look for fresh meats like chicken or beef, and skip the junky fillers; dogs can’t digest them well anyway. You might consider ingredients like sweet potatoes or carrots for a nutritious crunch.
When you pick the best ingredients, you’re not just treating your dog to something special; you’re also keeping their health in check. Does your dog love peanut butter? Opt for the natural stuff without added sugar or salt.
Trust me, that little taste boost can turn an ordinary chew into a tail-wagging extravaganza.
And hey, your shoes will thank you. When you use simple, wholesome ingredients, you’re saying “goodbye” to destructive chewing habits and “hello” to tasty fun!
Frequently Asked Questions
How Long Will These Homemade Chews Last Before Spoiling?
Homemade chews typically last about one to three weeks, depending on ingredients and storage. Keep ’em in the fridge to extend freshness, and always check for any signs of spoilage before giving them to your dog.
Can I Freeze Homemade Dog Chews for Later Use?
Yes, you can freeze homemade dog chews for later use. Just make sure you wrap them tightly to prevent freezer burn. Thaw them in the fridge when you’re ready to give them to your dog.
Are There Any Allergy Concerns With Common Ingredients?
Yes, there are allergy concerns with common ingredients. You should watch for reactions to items like peanut butter, gluten, or certain meats. Always check with your vet if your dog has known allergies before introducing new treats.
How Can I Tell if My Dog Likes a Chew?
You can tell if your dog likes a chew by observing their behavior. If they chew enthusiastically, wag their tail, or return for more, they’re enjoying it. Disinterest or avoidance usually means it’s not a favorite.
What Should I Do if My Dog Swallows a Large Piece?
If your dog swallows a large piece, don’t panic. Monitor them closely for any signs of distress. Contact your vet immediately for guidance, as they can advise you on the best course of action.