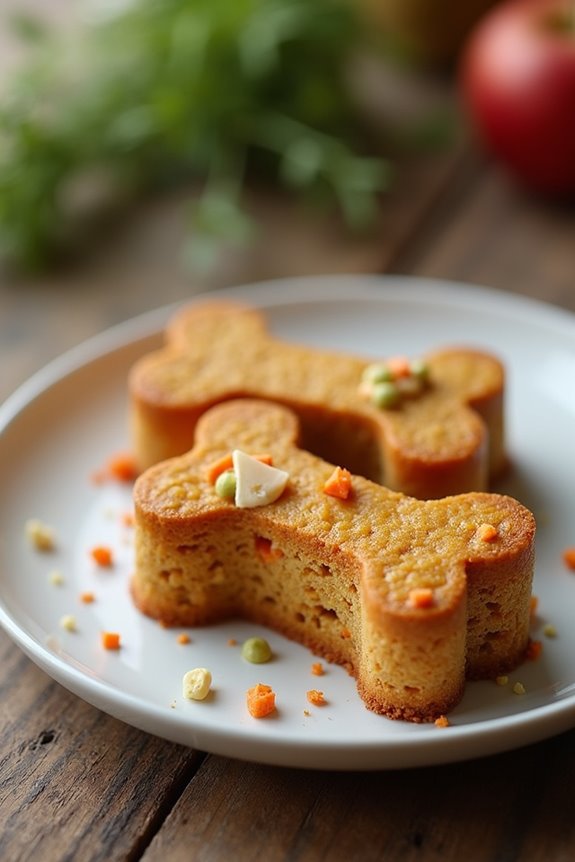
When it comes to celebrating your pup’s special day, the cake isn’t the only star of the show. Ever thought about how to jazz it up a little? A simple dog cake can transform into a festive masterpiece with just a few creative toppers. You’ve got options—dog-friendly treats, vibrant fruits, and maybe even a cute mini toy. Curious about what else you can do to make your dog’s cake truly unforgettable? Let’s explore those ideas.
Why Homemade?
Why bother with store-bought when you can whip up a homemade dog cake topper that’s not only adorable but also full of love? You’ve got the chance to create a unique masterpiece that showcases your pup’s personality. Plus, let’s be real—who wouldn’t want a cake adorned with a tiny fondant bone or a cute little paw print? It’s all about that personal touch.
When you make your own dog cake topper, you can customize it to fit any theme or color scheme. Grab some simple supplies like gum paste or icing, and you’re halfway there. Additionally, incorporating delicious dog cupcakes into the celebration can enhance the treat experience for your furry friend. Remember that homemade treats allow you to ensure the ingredients are safe and healthy for your pup. Plus, it creates an opportunity for paw-some memories that you’ll cherish as much as your pup enjoys his special day. Consider using dog-friendly flavors like peanut butter or pumpkin to make the cake and toppers even more irresistible.
You’ll probably find yourself laughing at the wobbling creation, wondering how it turned into a wonky masterpiece. But that’s the charm, right? It’s all part of the fun.
Dog-Friendly Cake Recipes
When it comes to whipping up a dog-friendly cake, you’re in for a treat! Imagine your pup’s tail wagging as they dig into a Peanut Butter Banana Delight or a Sweet Potato Delight Cake. It’s important to remember that certain dog breeds are more suitable for families with kids, as they tend to have gentle and playful temperaments. In addition to cakes, don’t forget about delicious homemade sweet potato dog treats, which can be a fantastic complement to your pup’s special day. Trust me, these recipes aren’t just easy; they’ll have you feeling like an exceptional baker, even if you’ve burned toast before. Plus, your furry friend will absolutely love these delicious homemade cakes, making every celebration special! For an extra frosty treat, consider adding some delicious homemade ice cream to the celebration as well.
1. Peanut Butter Banana Delight
Making a Peanut Butter Banana Delight for your pup is easier than you might think. You’ll need just a few simple ingredients, and I promise, your dog won’t know the difference between this cake and a treat from the bakery. In addition, using ingredients like peanut butter and banana can provide your dog with healthy fats and essential nutrients. Homemade dog food recipes often include wholesome ingredients that promote a happy and healthy lifestyle for your furry friend. Let’s walk through the step-by-step instructions so you can whip up this tasty masterpiece, plus some fun optional add-ons if you’re feeling adventurous.
Ingredients
Here’s a delightful recipe for a dog-friendly cake that your furry friend will absolutely adore. Let’s whip up something tasty using simple ingredients that are safe for pups. Trust me, your dog will be wagging their tail in excitement.
- 1 cup of whole wheat flour
- 1 ripe banana, mashed (the riper, the better)
- 1/4 cup of peanut butter (make sure it’s xylitol-free)
- 1/4 cup of unsweetened applesauce
- 1/2 teaspoon of baking powder
- 1/4 cup of water (as needed, for mixing)
And there you have it, the basics for a tasty treat! Just remember to keep it simple and always check those labels to avoid anything harmful. Now your pooch can enjoy a slice of happiness without any worries. Who’s ready to celebrate with a cake? Your dog will think they hit the jackpot!
Step by Step Instructions
1. Preheat your oven to 350°F (175°C). This is an important first step; a properly heated oven helps the cake rise beautifully.
2. In a mixing bowl, mash 1 ripe banana until smooth. You want it to look like a creamy puree—trust me, your dog will appreciate the effort.
3. Add 1 cup of whole wheat flour to the mashed banana, followed by ½ cup of unsweetened peanut butter.
Try not to graze too much on the peanut butter—it’s for your pup, not a snack for you!
4. Pour in 1/4 cup of unsweetened apple sauce to keep the cake moist. Just imagine how soft and tasty each bite will be.
5. Mix all the ingredients together until combined. Don’t overmix the batter—it should be a bit thick, but that’s perfectly fine.
6. Grease or line an 8-inch round cake pan with parchment paper. This helps guarantee your cake doesn’t get stuck; no one likes a cake disaster.
7. Pour the batter into the prepared pan, spreading it evenly with a spatula. Give it a little wiggle to help it settle.
8. Bake in your preheated oven for 25-30 minutes, or until a toothpick inserted into the center comes out clean.
Keep an eye on it—it should be golden brown and slightly spring back when touched.
9. Once baked, remove the cake from the oven and let it cool in the pan for about 10 minutes.
Then, carefully transfer it to a wire rack to cool completely.
10. Cool completely before serving to your dog. This is essential, as a hot cake isn’t safe for your furry friend’s sensitive palate.
Now, get ready to watch your pup go crazy for this delicious treat you made just for them.
Optional Add-ons
Optional add-ons can elevate your dog’s cake from delightful to downright drool-worthy.
Consider drizzling peanut butter on top or adding banana slices for a pop of flavor. You might even sprinkle some crushed dog-friendly treats for crunch.
Trust me, your pup won’t be able to resist. Plus, seeing that wagging tail when they plunge into it? Priceless.
Who knew baking could be so fun?
2. Carrot and Apple Treat
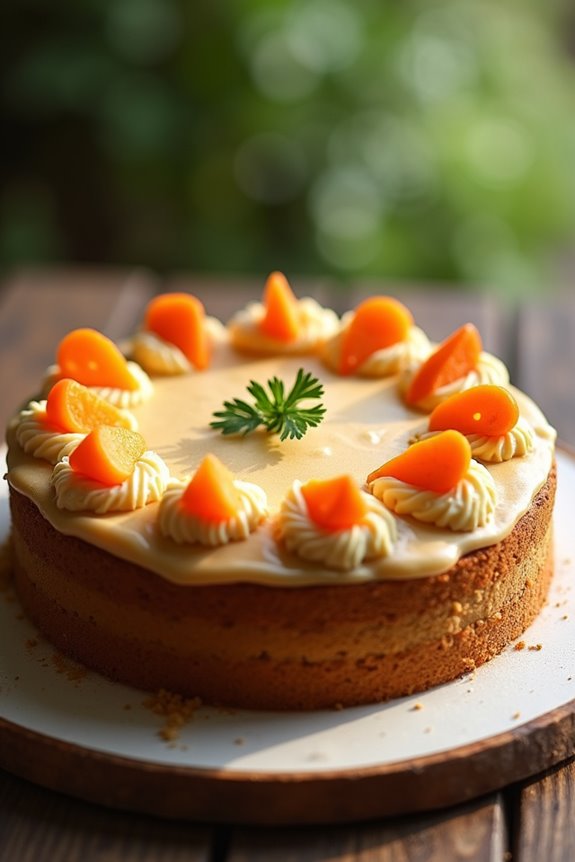
Ready to whip up a Carrot and Apple Treat for your pup? You’ll need some simple ingredients, like fresh carrots and juicy apples, to get started. Let’s take a step-by-step look at how to make this yummy, dog-friendly cake, and maybe throw in some optional add-ons for that extra flair.
Ingredients
When you’re ready to whip up a delightful cake for your furry friend, you want to make sure the ingredients are both tasty and safe. This dog-friendly carrot and apple treat isn’t only easy to make but also a hit with the pups.
Let’s gather the essentials from your kitchen and get baking!
- 1 cup grated carrots (about 2 medium carrots)
- 1 cup unsweetened applesauce
- 1 ½ cups whole wheat flour
- 1 tablespoon honey (just a touch for sweetness)
- 1 teaspoon baking powder
- 1 large egg
- 2 tablespoons coconut oil (melted, if solid)
These ingredients are simple, wholesome, and easy to find. Carrots give your cake a nice texture while adding some nutritional goodness, and the applesauce keeps it moist.
And don’t worry about the honey—it’s just a smidge for flavor, not a sugar bomb. If you’re wondering, yes—your dog can totally enjoy this without the scary stuff that’s best left off the menu.
Let’s get that tail wagging!
Step by Step Instructions
- Preheat your oven to 350°F (175°C). This step is essential—no one wants a cold cake.
- Grease an 8-inch round cake pan with a bit of coconut oil or cooking spray. You want that cake to slide right out, don’t you?
- In a large mixing bowl, combine 1 cup of whole wheat flour and 1 tablespoon of baking powder. Whisk them together so they play nice.
- In another bowl, mix 1/2 cup of finely grated carrots and 1/2 cup of finely chopped apples. They should be looking like they’re ready for a party.
- Add 1/4 cup of unsweetened applesauce and 1/4 cup of peanut butter to the fruit and veggie mixture. Stir until everything is well combined.
- Gently fold the dry flour mixture into the wet mixture. Remember, don’t overmix the batter—it should be slightly lumpy, not pancake smooth.
- Pour the batter into your greased cake pan. Make sure it’s spread evenly, so your pups get a uniform treat.
- Bake in the preheated oven for 25–30 minutes. Your cake should look golden brown and spring back lightly when touched.
- Remove the cake from the oven and let it cool in the pan for about 10 minutes.
- Then, flip it over onto a wire rack to cool completely.
- Once it’s cooled down, serve it up to your dog. You could cut it into fun shapes with cookie cutters for added flair—who doesn’t like a little creativity?
- Cool completely before serving to your dog. Enjoy the happy tail wags!
Optional Add-ons
If you’re looking to take your dog’s cake to the next level, adding a few optional ingredients can really pump up the flavor—and the cuteness factor.
Why not mix in some shredded carrots or diced apples? They’re healthy, yummy, and your pup will adore them.
Plus, don’t forget a sprinkle of cinnamon for extra pizzazz. Trust me—furry friends love a little creativity.
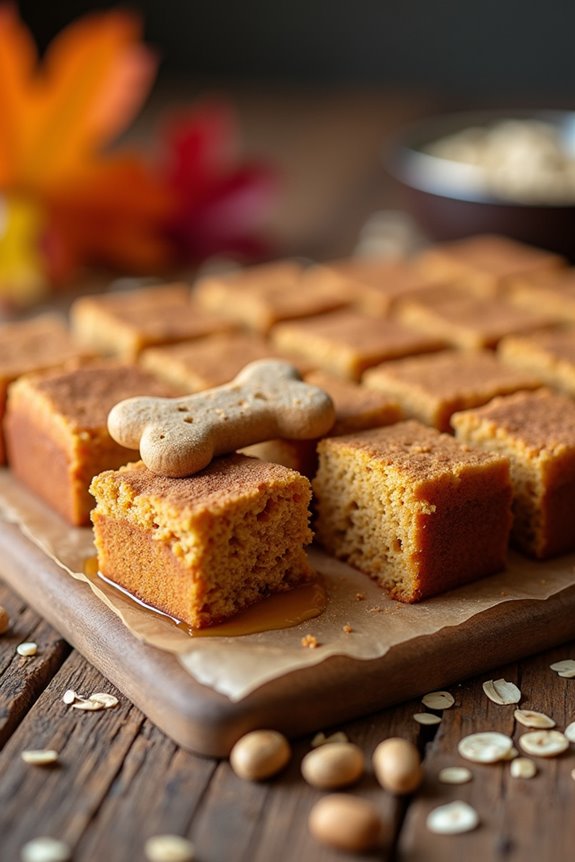
3. Oatmeal Pumpkin Biscuit Bars
Looking for a delicious way to treat your pup? Oatmeal pumpkin biscuit bars are a fantastic dog-friendly option that’s not only healthy but super easy to whip up. Let’s break down the ingredients and step-by-step instructions so you can get baking and pamper your furry friend with some homemade goodness.
Ingredients
You know how we all love treating our furry friends to something special? Well, I’ve got just the thing. These Oatmeal Pumpkin Biscuit Bars are easy to whip up and totally dog-approved. Plus, they’re made with ingredients that aren’t only safe but also healthy for your pup.
Let’s make tails wag with this delightful recipe.
- 1 cup rolled oats
- 1/2 cup pure pumpkin (not pumpkin pie filling, remember!)
- 1/4 cup unsweetened applesauce
- 1/4 cup peanut butter (make sure it’s xylitol-free)
- 1/2 teaspoon cinnamon
- 1 egg, slightly beaten
- 1/4 cup flour (whole wheat or oat flour works great)
Now that you have your ingredients, you’re all set to get baking. Don’t worry if your kitchen doesn’t look like a Pinterest dream—that happens to the best of us.
Once those bars are in the oven, your dog will be giving you the classic “what’s cooking?” look. And trust me, it’ll be worth every floury moment.
Step by Step Instructions
1. Preheat your oven to 350°F (175°C). Make sure to allow it some time to warm up while you prep the ingredients.
2. In a large bowl, mix together 2 cups of rolled oats, 1 cup of pumpkin puree, and 1/2 cup of peanut butter until you have a smooth consistency.
(Your arms might be getting a workout here, but it’s worth it!)
3. Add 1/4 cup of honey and 1/2 teaspoon of cinnamon to the mixture, then blend until everything is just combined.
(You want it unified, not like a jigsaw puzzle.)
4. In a separate bowl, whisk 1/4 cup of water and 1 egg together. This will help bring everything together smoothly.
5. Fold the egg mixture into the oat mixture until fully combined.
(Don’t overmix; we want to keep some texture.)
6. Line an 8×8 inch baking dish with parchment paper.
Pour the batter into the dish and spread it evenly. Smooth the top with a spatula.
7. Bake in the preheated oven for 25–30 minutes, or until the edges are golden brown and a toothpick comes out clean from the center.
8. Once baked, remove from the oven and let it cool in the pan for about 10 minutes before transferring to a wire rack.
9. Allow the entire pan to cool completely before serving to your dog.
(Trust me—the wait is hard, but you want to avoid puppy-related kitchen chaos!)
Optional Add-ons
There’s nothing like a deliciously crafted dog cake to celebrate your furry friend’s special occasion, and spicing it up with optional add-ons can take your Oatmeal Pumpkin Biscuit Bars from good to drool-worthy.
Think peanut butter drizzle or yogurt frosting. You’ll have them begging for more, and hey, who can resist a sprinkle of carob chips?
Just make sure to save some for yourself.
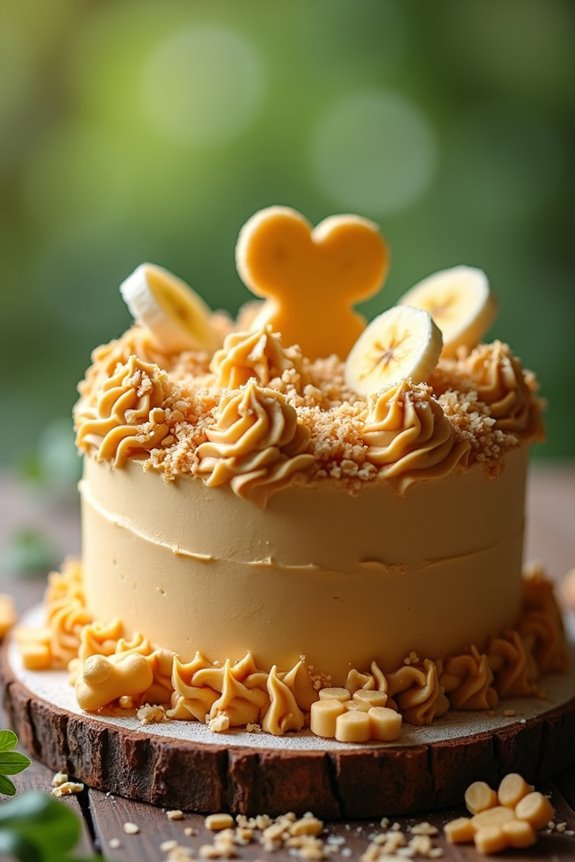
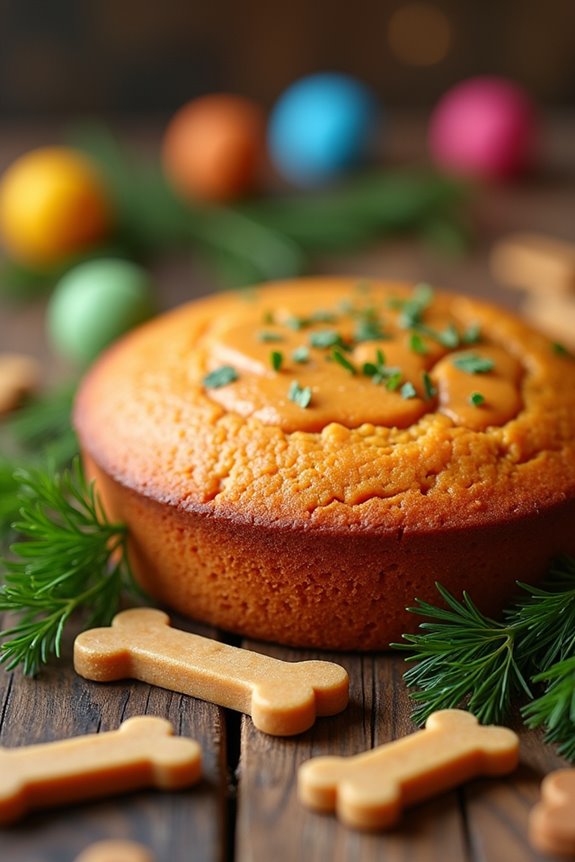
4. Sweet Potato Delight Cake
Now let’s talk about whipping up a Sweet Potato Delight Cake for your furry friend. You’ll need some simple ingredients, and trust me, it’s a lot easier than it sounds—just follow the step-by-step instructions, and you’ll be a doggie cake hero in no time. Plus, if you’re feeling adventurous, I’ll share some optional add-ons that’ll take this cake from tasty to tail-wagging irresistible.
Ingredients
So, you’re ready to whip up a delicious Sweet Potato Delight Cake for your furry friend? Fantastic choice! Sweet potatoes aren’t only tasty but also packed with nutrients that can make your pup’s tail wag with joy.
Plus, did you know that they can be easier to find than that elusive LEGO piece you step on every other week?
Anyway, here’s what you’ll need to make this yummy dog-friendly delight:
- 1 cup mashed sweet potatoes (about 1 large sweet potato)
- 1 1/2 cups whole wheat flour (or oat flour, if gluten-free is your thing)
- 1/4 cup unsweetened applesauce (yes, the stuff you often forget in the pantry)
- 1/4 cup peanut butter (make sure it’s xylitol-free; we love our pups, not gum that’s bad for them)
- 1/2 cup water (or more if the batter feels too thick; think of it like a revitalizing splash for summer)
- 1 egg (don’t worry, nobody’s judging your cooking skills; just crack it straight in)
Gather these up, and you’re halfway to creating a cake that will make your dog feel like the king or queen of the house.
Just wait until your four-legged buddy sees it. Pure magic!
Step by Step Instructions
- Preheat your oven to 350°F (175°C) so it’s nice and warm when you’re ready to bake.
- In a medium pot, boil a couple of peeled sweet potatoes until they’re soft, about 15–20 minutes. You want them mashable, not just glorified rocks.
- Once cooked, drain the sweet potatoes and let them cool a bit, or risk burning your fingers.
- Then, mash them in a bowl until smooth.
- In a large mixing bowl, combine the mashed sweet potatoes, 1/4 cup of peanut butter (make sure it’s xylitol-free), and 1/4 cup of unsweetened applesauce.
- Mix until everything is well incorporated.
- Whisk in 2 eggs until fully blended.
- Don’t be shy, give it some elbow grease—your dog is worth it.
- In another bowl, mix 1 cup of whole wheat flour and 1 teaspoon of baking powder.
- Fold this flour mixture into your sweet potato batter slowly (this helps avoid a flour explosion on your countertop).
- Grease a round cake pan with a bit of peanut butter or non-stick spray.
- Pour the batter into the pan, smoothing the top with a spatula.
- Bake for 25–30 minutes or until a toothpick inserted into the center comes out clean.
- If it looks golden brown, you’re probably in good shape.
- Once baked, remove the pan from the oven and let it cool for about 10 minutes before transferring the cake to a wire rack.
- Cool completely before serving to your dog.
- They won’t know what hit them!
Optional Add-ons
When it comes to making your Sweet Potato Delight Cake extra special for your furry friend, think of optional add-ons as the cherry on top—well, more like a dog-safe treat on top.
You can sprinkle some chopped apples or blueberries for a burst of flavor.
Or how about a dollop of yogurt? Your pup will be tail-wagging thrilled with any choice you make.
5. Peanut Butter Carob Cake
You’re going to love making this Peanut Butter Carob Cake for your furry friend.
With just a few simple ingredients and some easy step-by-step instructions, you’ll have a wag-worthy treat in no time. Plus, you can toss in some optional add-ons to make it even more special—after all, who doesn’t want to spoil their dog a little?
Ingredients
Making a delightful dog cake that’s not only tasty but also safe for our furry friends is easier than you might think. This peanut butter carob cake is perfect for special occasions or just to show your pup some love.
Gather these ingredients, and let’s get baking—your dog will thank you with plenty of tail wags.
- 1 cup whole wheat flour
- 1/2 cup peanut butter (make sure it’s xylitol-free)
- 1/4 cup carob powder
- 1/2 cup unsweetened applesauce
- 1/4 cup water
- 1 teaspoon baking powder
- 1 egg
With these simple ingredients, you’re on your way to putting a smile on your dog’s face.
Just imagine the joy when they see that cake and you’re the one responsible for it. Talk about being a superstar pet parent.
Now, if only I could get my dog to help clean up the kitchen afterward…
Step by Step Instructions
- Preheat your oven to 350°F (175°C). This will guarantee a warm, cozy environment for your cake.
- Grease two round cake pans with a bit of oil or cooking spray. This helps to keep your cake from being an uninvited mess when it comes time to serve.
- In a mixing bowl, combine 1 cup of whole wheat flour and 1/2 cup of carob powder. Whisk these together until they’re evenly mixed—no one wants lumpy cakes, right?
- In another bowl, mash together 1 ripe banana and 1/2 cup of unsweetened peanut butter until smooth. Trust me, this is the secret to a rich, tasty cake!
- Add 1/2 cup of honey and 1/2 cup of water to the banana-peanut butter mixture. Mix well until everything is nicely blended.
- Gradually fold the dry ingredients into the wet mixture. Don’t overmix the batter—it should be slightly lumpy, like me after Thanksgiving dinner!
- Pour the batter evenly into the prepared cake pans. Give them a gentle shake to settle the batter down.
- Bake for 25–30 minutes or until a toothpick inserted in the center comes out clean. Your kitchen will smell absolutely heavenly during this time.
- Allow the cakes to cool in the pans for about 10 minutes before transferring them to a wire rack to cool completely. Patience is key here.
- Once cool, feel free to add your favorite dog-friendly frosting—perhaps a bit of yogurt or peanut butter on top.
Cool completely before serving to your dog, and watch their tail wag like crazy!
Optional Add-ons
Once your cakes have cooled, it’s time to jazz things up with some optional add-ons that’ll make your peanut butter carob cake even more delightful for your furry friend.
Consider topping it with a dollop of creamy peanut butter or a sprinkle of carob chips. You could even throw on some dog treats for that extra flair.
Your pup will think it’s a celebration.
6. Peanut Butter Yogurt Frosting
If you’re looking to whip up a dog-friendly frosting that’s easy and downright delicious, peanut butter yogurt frosting is the way to go.
You’ll want to gather just a few simple ingredients, and trust me, your pup will be wagging their tail in no time.
Ready to learn how to make it step by step and maybe even sneak in some fun optional add-ons?
Ingredients
Making a tasty and safe cake for our furry friends is always a joy. This peanut butter yogurt frosting is the perfect addition to any doggy cake or cupcake. Plus, it’s super simple to whip up with just a few ingredients that you might already have at home.
Let’s explore what’s needed to make this delightful topping.
- 1 cup plain yogurt (make certain it’s unsweetened)
- ½ cup peanut butter (just verify it’s xylitol-free, as that can be harmful)
- 1 tablespoon honey (optional, for added sweetness but only if your dog is over one year)
- 1 tablespoon coconut oil (melted – dogs love the taste and it helps bring everything together)
There you go! With just these ingredients, you’ll have a frosting that not only looks nice but is also safe for your pup to enjoy.
Just picture the tail wags as you create this! Remember, though, moderation is key, even with dog-friendly options. So, maybe don’t let them plunge in headfirst like I once did with a giant chocolate cake on my birthday.
Dog cakes aren’t quite like ours, but trust me, your pup will think they’re in heaven!
Step by Step Instructions
1. Preheat your oven to 350°F (175°C) and grab your favorite mixing bowl; it’s time to whip up something tail-wagging good.
2. In a large bowl, mix together 1 cup of whole wheat flour, 1/2 cup of unsweetened applesauce, 1/4 cup of peanut butter, and 1/2 cup of unsweetened yogurt until combined.
(Don’t be shy—use your muscles!)
3. In a separate small bowl, whisk an egg and then add it to your main mix.
Stir everything together until you have a smooth batter.
(Try not to overmix—just until it all looks like one big happy family.)
4. Lightly grease a round cake pan or line it with parchment paper for easier removal because, let’s face it, nobody wants a broken cake.
5. Pour the batter into the prepared pan, smoothing it out with a spatula if needed.
(It should look nice and even.)
6. Bake in the preheated oven for about 25–30 minutes or until a toothpick inserted in the center comes out clean.
(The edges might be just a tad golden brown; that’s your cue.)
7. While the cake is baking, prepare the peanut butter yogurt frosting.
In a bowl, mix together 1/2 cup of peanut butter and 1/2 cup of yogurt until smooth and creamy.
(You can taste it—just to make sure it’s dog-approved, right?)
8. Once the cake is done, take it out of the oven and allow it to cool in the pan for about 10 minutes before transferring it to a wire rack.
9. Cool completely before spreading the frosting on top—dogs can’t wait, but trust me, this cake needs to chill first.
10. Slice it up and watch those tails wag with joy over your homemade goodness.
Optional Add-ons
While you’re already in the kitchen baking that tail-wagging cake, why not take it a step further and jazz things up with some optional add-ons?
You could whip up a quick peanut butter yogurt frosting. Just mix one cup of Greek yogurt with half a cup of peanut butter, and spread it over the cake.
Your pup will think it’s heaven on a plate.
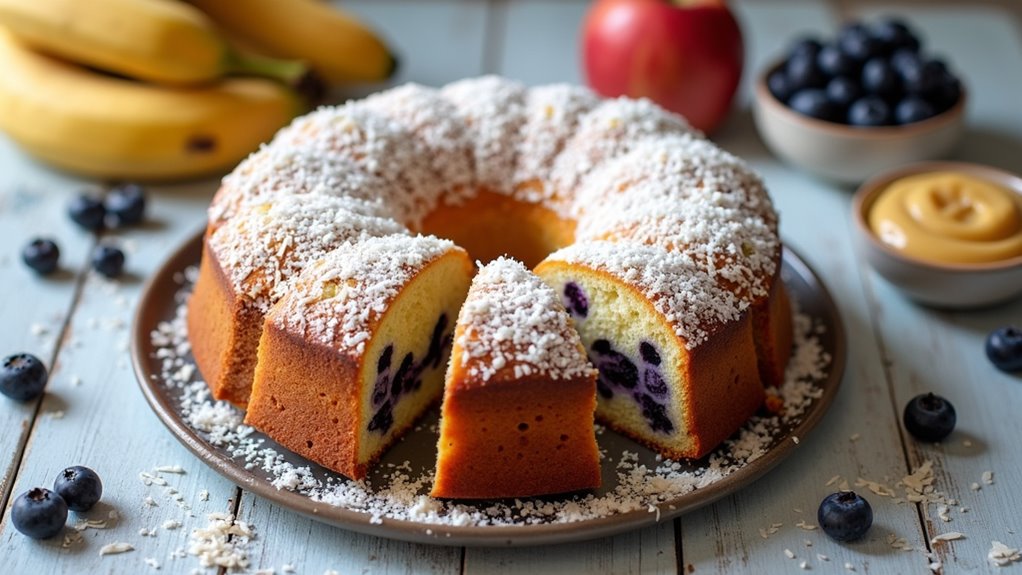
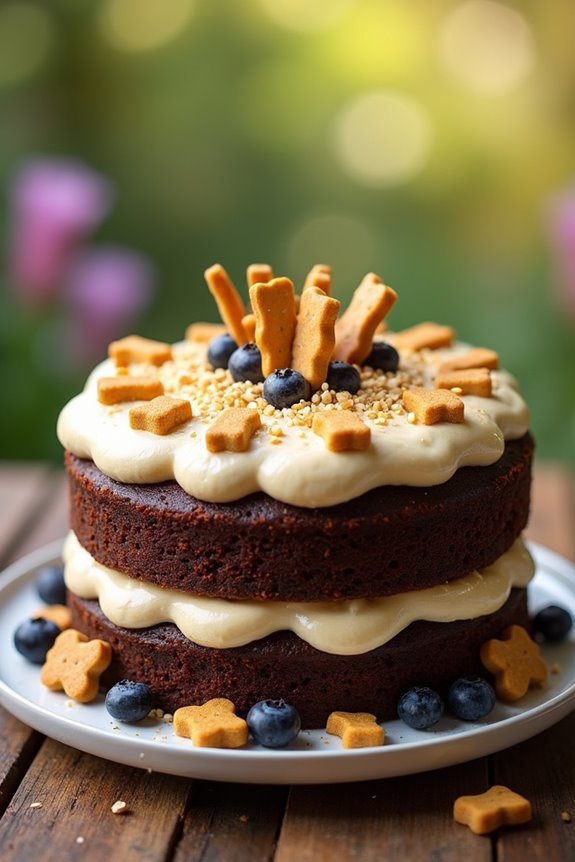
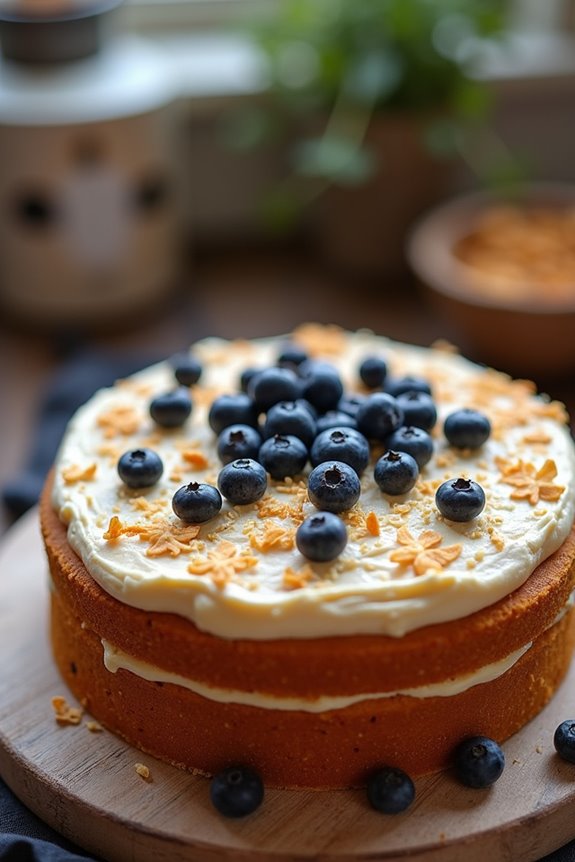
7. Blueberry Coconut Cake
Ready to whip up a Blueberry Coconut Cake for your pup? You’ll need a few simple ingredients and some easy step-by-step instructions, but don’t worry—it’s a piece of cake, literally. If you want to take it up a notch, I’ll share some fun optional add-ons to make it even tastier for your furry friend.
Ingredients
When it comes to making a dog-friendly cake, you want to keep it simple and safe. This Blueberry Coconut Cake is packed with flavor and good-for-your-pup ingredients that will have their tails wagging in no time. You might even get a few licks of approval, and believe me, that’s the highest compliment from our furry friends.
Here’s what you’ll need:
- 1 cup whole wheat flour (make sure it’s dog-safe)
- 1/2 cup unsweetened applesauce
- 1/4 cup shredded coconut (unsweetened, of course)
- 1/2 cup blueberries (fresh or frozen, just avoid any moldy ones)
- 1/4 cup coconut oil (melted, because who doesn’t want a little glam in their cake)
- 1 egg (free-range if you’re feeling fancy)
- 1 teaspoon baking powder
And there you have it, a drool-worthy lineup of ingredients. They’re not just wholesome; they’re super easy to grab at the store.
I mean, who can say no to a little cake, right? Just look out for the blueberries—they like to hide in the produce section, probably wearing sunglasses.
Step by Step Instructions
- Preheat your oven to 350°F (175°C). This is the first step to golden deliciousness.
- Grease a round cake pan with some coconut oil or non-stick spray. You want to make certain that your cake doesn’t pull a “I’m stuck” trick on you later.
- In a mixing bowl, mash 1 ripe banana. This is going to be the secret ingredient for sweetness.
- Add 1 cup of unsweetened applesauce to the mashed banana, and mix well. You want it smooth and combined.
- Stir in 1 cup of shredded coconut. This adds a great texture and flavor.
- In another bowl, combine 1 cup of whole wheat flour and 1 teaspoon of baking powder. Give it a whisk to distribute everything evenly.
- Gradually add the dry ingredients to the wet mixture. Fold gently until just combined (Don’t overmix; it’s okay if a few lumps remain).
- Gently stir in 1 cup of fresh blueberries. They’re the stars of the show, after all!
- Pour the batter into the prepared cake pan and spread it evenly.
- Bake in the preheated oven for 25–30 minutes, or until a toothpick inserted in the center comes out clean. You’re looking for that perfect golden-brown finish.
- Remove the cake from the oven and let it cool in the pan for about 10 minutes.
- Then, transfer it to a wire rack to cool completely.
- Once cooled, slice it up and let your dog enjoy the fruits of your labor.
Cool completely before serving to your dog. They’ll definitely tail-wag their approval.
Optional Add-ons
Adding optional extras to your dog-friendly blueberry coconut cake can make the baking experience even more fun and tailored to your pup’s taste.
Consider tossing in grated carrots for crunch, or a sprinkle of cinnamon for a little kick. You could even layer in some peanut butter for extra love.
The possibilities are endless! It’s like a pup party in cake form. What’s not to love?
Use Quality Dog-Safe Ingredients
Making a cake for your furry best friend? First things first, you want to use quality dog-safe ingredients. Think peanut butter, pumpkin, or mashed bananas. These aren’t only delicious for your pup but also healthy! Avoid chocolate, xylitol, and anything toxic—our fur babies deserve only the best.
When I made a cake for my dog’s birthday, I panicked briefly in the grocery aisle, scrolling through all those labels. It turns out, simple is often tastiest. I blended whole wheat flour, mashed pumpkin, and plain yogurt. The way his tail wagged? Priceless.
You can also throw in some oats or carrots for extra crunch. Always taste-test, if you dare. Just a tiny bit, of course. Just imagine that goofy face lighting up when he tries your masterpiece.
Using safe ingredients guarantees his special day is tail-wagging good!
Frequently Asked Questions
What Size Cake Topper Is Best for Larger Cakes?
For larger cakes, a cake topper around 6 to 8 inches tall works best. This size guarantees it stands out, enhances your cake’s presentation, and adds a balanced touch without overwhelming the overall design.
Can I Customize a Cake Topper With My Dog’s Name?
Yes, you can customize a cake topper with your dog’s name! Many online services and local shops offer personalized options. Just choose the style and size you want, and they’ll create something special for your celebration.
Where Can I Find Unique Dog-Themed Cake Toppers?
You can find unique dog-themed cake toppers at specialty pet shops, online marketplaces like Etsy, or custom design websites. Checking local bakeries may also yield surprising, one-of-a-kind options tailored for your furry friend’s celebration.
How Do I Attach a Cake Topper Securely?
You can attach a cake topper securely by using a small amount of frosting or royal icing as glue. Press the topper gently into the frosting, ensuring it’s stable and won’t tip over during the celebration.
Are There Edible Cake Toppers Made From Dog-Safe Ingredients?
Yes, there are edible cake toppers made from dog-safe ingredients, like rice paper or carob. You can find them online or at pet stores, ensuring your furry friend enjoys a tasty and safe celebration!