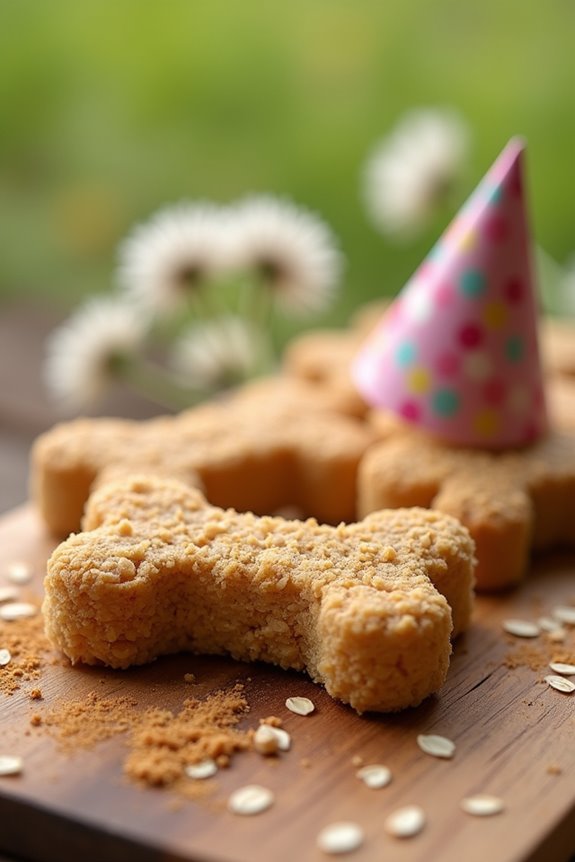
Is your pup’s birthday around the corner? You’re in for a treat—quite literally! Making homemade dog birthday treats can be a fun way to show your furry friend some love. After all, what’s better than watching those wagging tails when they catch a whiff of delicious Peanut Butter Rover Delights? Plus, you can skip the guilt trip often associated with store-bought goodies. Curious yet? Let’s explore some mouthwatering recipes your dog will absolutely adore.
Why Homemade?
Why go homemade for your dog’s birthday treats? Think about it—you want your furry friend to enjoy something special and healthy, right? Store-bought dog birthday treats can be packed with preservatives and questionable ingredients, which just isn’t fair to your pup.
By making your treats at home, you’ve got total control over what goes in them. You can use fresh, wholesome ingredients that you feel good about. Plus, making homemade dog cakes allows you to incorporate natural ingredients that are beneficial for your dog’s health. A simple three-ingredient cake can be a great option for a quick and easy treat. Additionally, many homemade dog cake recipes ensure that your pet gets the best nutrition possible.
Plus, creating your own dog birthday treats can be a fun bonding activity. Remember that time you tried to bake a cake for yourself, and flour ended up everywhere? Well, now it’s for your pup, and they won’t care about the mess. You’ll laugh, you’ll get a bit messy, and best of all, your dog will go crazy for those homemade goodies. And let’s not forget, delicious treats can bring extra joy to their special day.
And let’s be honest, nothing says ‘party’ quite like treats made just for them.
Dog Treat Recipes Collection
Get ready to whip up some tail-wagging treats that your pup will love. Did you know that making homemade bacon dog biscuits is a fantastic way to spoil your furry friend while ensuring they enjoy every bite?
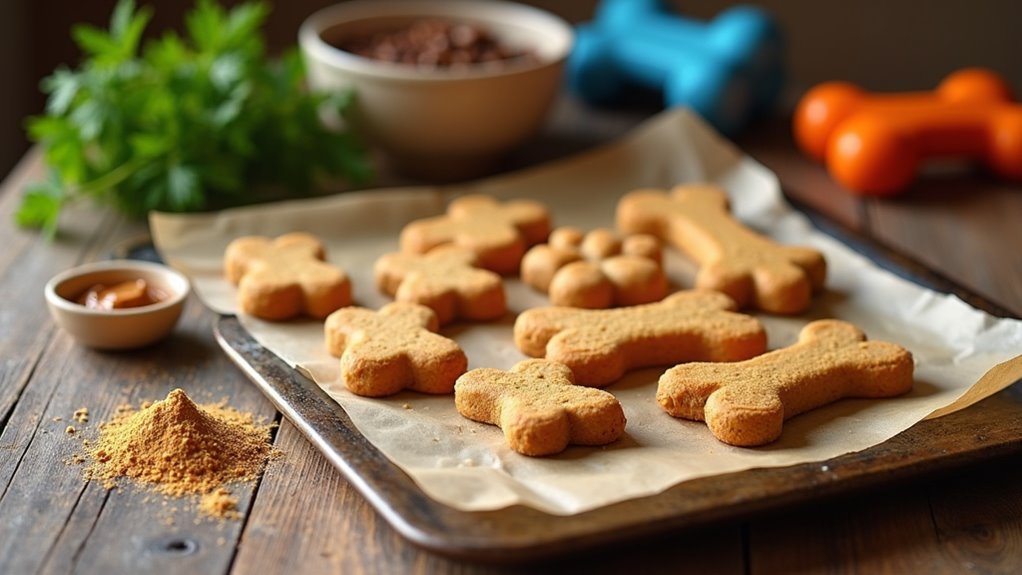
Think Peanut Butter Rover Delights and Pumpkin Oatmeal Dog Biscuits—talk about a flavor explosion! These recipes are not only delicious, but they’re also made with wholesome ingredients that you can feel good about giving your furry friend. Additionally, these treats can be made without any preservatives or artificial flavors, ensuring you offer your dog natural goodness with every bite.
With these recipes, you can turn your kitchen into a doggy bakery, making their special day even sweeter. Plus, your furry friend will go wild for the homemade cheese dog biscuits, adding a cheesy twist to your dog treat repertoire.
1. Peanut Butter Rover Delights
When you whip up Peanut Butter Rover Delights, you’ll need a few simple ingredients, but don’t worry—nothing too fancy here. Just follow the step-by-step instructions, and your dog will be drooling in no time. Feel free to toss in some optional add-ons for a little pizzazz; after all, isn’t that what dog birthday treats are all about? Adding nutrient-rich ingredients like apple sauce will not only enhance the flavor but also provide your furry friend with some extra health benefits. Additionally, using peanut butter treats as a base can increase the overall enjoyment for your pup.
Ingredients
When it comes to whipping up a special treat for your dog’s birthday, keeping it simple and safe is key. These Peanut Butter Rover Delights aren’t just tasty; they’re loaded with love and all the good stuff, perfect for celebrating your furry friend.
Let’s dive right into the ingredients you’ll need to make these scrumptious snacks.
- 2 cups whole wheat flour
- 1 cup unsweetened peanut butter (make sure it doesn’t have xylitol)
- 1/2 cup unsweetened applesauce
- 1/2 cup water
- 1 large egg
- 1 tablespoon honey (optional, for a little extra sweetness)
That’s it—easy-peasy, right? You probably already have some of these items in your pantry, and if not, they’re all super easy to find.
Remember to stick to the safe ingredients I mentioned, because we want to keep our furry pals happy and healthy.
Imagine the joy on your pup’s face as they munch on these delights; it’ll have you grinning from ear to ear. Happy baking!
Step by Step Instructions
- Preheat your oven to 350°F (175°C). This is essential; nobody wants to bake in a cold oven, trust me.
- In a mixing bowl, combine 1 cup of peanut butter and 1/2 cup of unsweetened applesauce. Mix until well blended—this might take a minute or two. Just think of it as a mini workout.
- Add 2 cups of whole wheat flour and 1/2 teaspoon of baking powder to the bowl. Stir them together, but don’t overmix. You want a nice dough—it should be soft but not overly sticky (a little tacky is fine).
- As you mix, if the dough feels too dry, add a splash of water. If you feel like you’re wrestling with the dough, don’t worry; that’s normal.
- Lightly flour your counter or a cutting board. Turn the dough out onto the floured surface and roll it out to about 1/4 inch thick. Use a rolling pin if you have one; if not, a wine bottle works in a pinch.
- Use cookie cutters to cut out shapes. Bone shapes are classic for dog treats, but any shapes will do!
- Then, place the cutouts on an ungreased baking sheet, leaving a little space between each cookie.
- Bake in your preheated oven for 25-30 minutes, or until they turn golden brown. Keep an eye on them—you don’t want them to turn into crunchy rocks.
- Once they’re baked, take them out and allow the treats to cool on the baking sheet for a few minutes before transferring them to a wire rack. This is the part where you pretend to be patient.
- Cool completely before serving to your dog. They need to be room temperature; we don’t want any tongue burns here.
Your furry friend is going to love these! Enjoy the doggie celebration.
Optional Add-ons
Since your dog’s birthday is a special occasion, why not take those peanut butter treats up a notch?
You can mix in some pumpkin puree or even mashed bananas for a fun twist.
Try adding carob chips as a surprise.
Trust me, your pup will think they’ve hit the jackpot.
After all, birthdays are meant for indulgence, right?
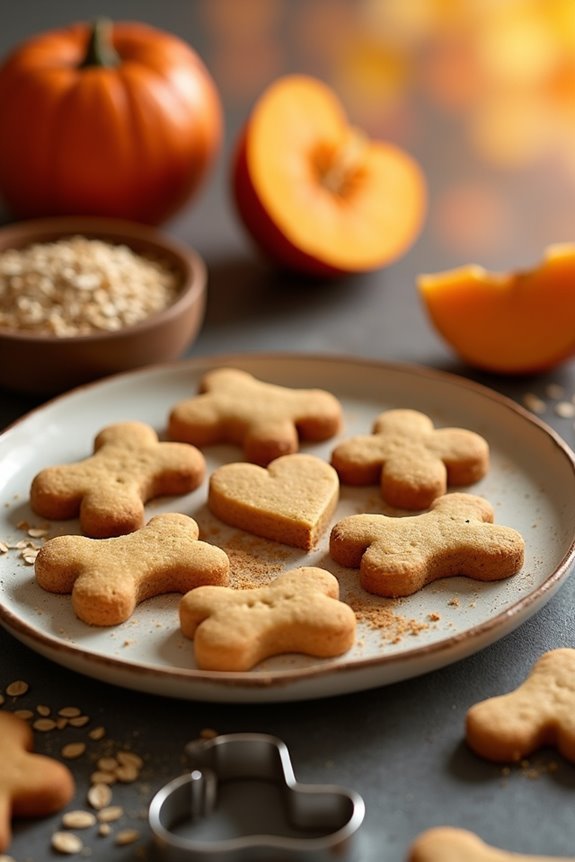
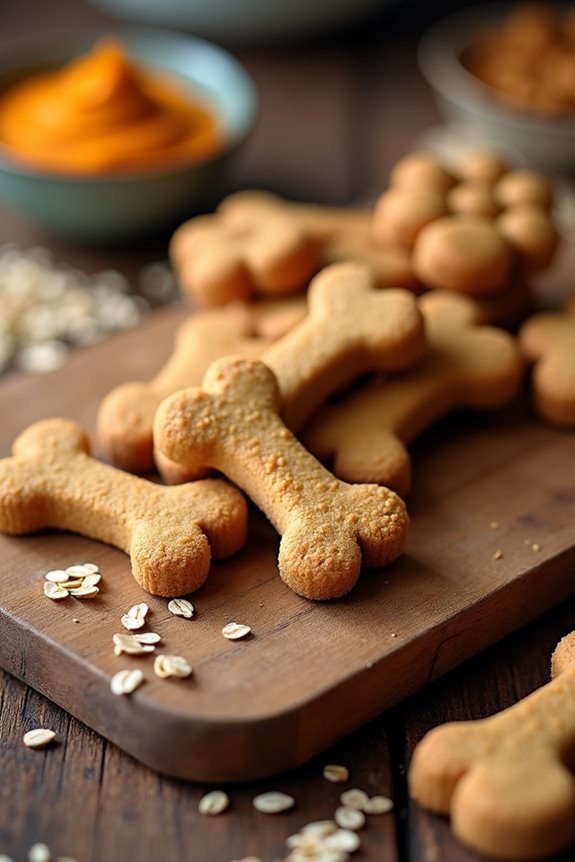
2. Pumpkin Oatmeal Dog Biscuits
Now let’s bake some Pumpkin Oatmeal Dog Biscuits that’ll have your furry friend wagging their tail in anticipation. Grab your ingredients, and don’t worry—I’ll lay out step-by-step instructions so you can’t mess this up! Plus, I’ll throw in some optional add-ons for that extra personal touch, because why not?
Ingredients
Who doesn’t love baking for their furry friends? Making homemade dog treats allows you to choose the best ingredients, so you can feel good about what your pup is munching on.
These pumpkin oatmeal dog biscuits aren’t just tasty, they’re healthy too. Plus, they make your kitchen smell amazing—just wait until you try them. Let’s gather what we need to whip up these delicious bites.
- 1 cup canned pure pumpkin (not the spiced pie filling)
- 2 cups rolled oats
- 1/2 cup whole wheat flour
- 1/4 cup peanut butter (make sure it doesn’t contain xylitol)
- 1/2 cup chicken or vegetable broth (low sodium is best)
- 1 egg
Now that you have the ingredients, you’re well on your way to making your pup’s birthday a little more special.
Trust me, every tail will be wagging for these treats, and who knows, you might even snag a few sniffs while you’re at it. Let’s get to baking!
Step by Step Instructions
- Preheat your oven to 350°F (175°C) to get things warming up for your dog’s special treats.
- In a large mixing bowl, combine 1 cup of pumpkin puree and 2 eggs. Mix them well until fully blended (the mixture should look consistent).
- Add in 2 1/2 cups of rolled oats and 1/4 cup of flour. Stir everything together until it forms a dough (it might get a bit sticky, but that’s normal).
- If you’re feeling adventurous, fold in some peanut butter for an extra tasty twist. Just a tablespoon or two will make the treats irresistible!
- Roll out the dough on a floured surface to about 1/4 inch thick. Don’t stress too much on this step—it’s okay if it’s not perfect.
- Use a cookie cutter to cut out shapes for your dog biscuits. Let’s make them fun; bones or paws can be super cute.
- Place the cut-out shapes on a baking sheet lined with parchment paper. Make sure they’re a little spaced apart; they don’t need to be too cozy in the oven.
- Bake the dog treats for 25-30 minutes, or until they turn golden brown. You’ll know they’re ready when the whole kitchen starts smelling like a cozy autumn day.
- After baking, allow the biscuits to cool on the baking sheet for about 10 minutes. Then transfer them to a wire rack (this helps to crisp them up a bit—because who doesn’t love a crunchy treat?).
- Cool completely before serving to your dog. Trust me, you don’t want to be the one to burn their little tongue.
Now, sit back and watch your pup enjoy the delicious birthday treats that you’ve made with love.
Optional Add-ons
When you’re whipping up those delicious pumpkin oatmeal dog biscuits, why not get a little creative with some optional add-ons?
Think peanut butter for extra flavor, or even some mashed banana for sweetness. You might toss in a few chopped carrots or a sprinkle of cinnamon.
Your pup won’t complain about a little extra love, right? Just remember, moderation is key.
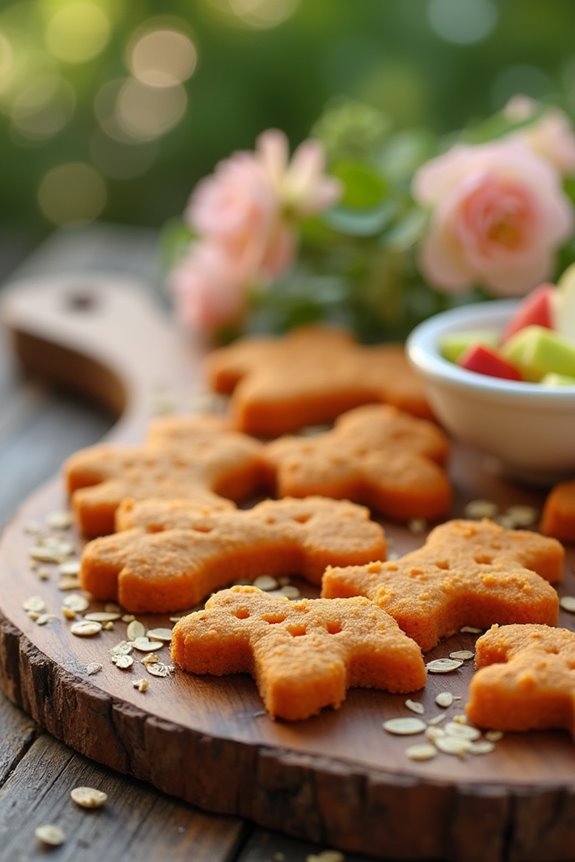
3. Sweet Potato Chewies
Making Sweet Potato Chewies is a fun way to treat your pup, and it’s easier than you think.
You’ll need just a few simple ingredients and some straightforward steps, plus there are optional add-ons if you want to get creative.
Who knew spoiling your furry friend could be so satisfying?
Ingredients
Making sweet potato chewies for your furry friend can be such a delight. Dogs adore these chewy treats, and they’re packed with goodness too.
So, let’s get to the fun part—gathering your ingredients. Don’t worry; I promise they’re all super easy to find at your local grocery store.
- 1 medium sweet potato (about 1 cup when mashed)
- 1 cup whole wheat flour
- 1/4 cup rolled oats
- 1/4 cup unsalted peanut butter (make sure it’s xylitol-free)
- 1 egg
Now that you have everything you need, just take a moment to admire your ingredient lineup. Your dog is going to feel like a superstar on their special day!
Plus, the aroma in your kitchen will make you question why you ever settled for store-bought treats. I mean, what’s not to love about baking with healthy, simple ingredients?
Ready to create some magic? Let’s get baking!
Step by Step Instructions
Start your pup’s birthday celebration with these delicious Sweet Potato Chewies. They’re easy to make and packed with flavor that your furry friend will love.
- Preheat your oven to 350°F (175°C). Get that lovely warmth going while you prepare the dough.
- Peel and chop 1 large sweet potato into chunks. This is going to be the heart of your treats.
- Boil the sweet potato chunks in water for about 15 minutes, or until they’re nice and tender. You’ll know they’re ready when you can easily pierce them with a fork.
- Drain the sweet potatoes and mash them in a bowl until smooth. Try not to taste too much—your dog deserves all the yummy goodness.
- In a separate bowl, mix 1 cup of whole wheat flour and 1/4 cup of rolled oats. Whisk them together until they’re blended nicely.
- Gradually fold the mashed sweet potatoes into the flour mixture. Make sure everything is combined well, but don’t overmix. We want some texture in there!
- If the dough feels too sticky, sprinkle a little more flour until it’s manageable.
- Roll the dough out on a floured surface to about 1/2 inch thick. Not too thin, or they’ll be crunchy instead of chewy.
- Use cookie cutters to create fun shapes, or just cut them into squares if you’re feeling lazy (we’ve all been there).
- Place your treats on a lined baking sheet, leaving a bit of space between each one.
- Bake in the oven for 25–30 minutes, until they turn golden brown and the edges are slightly crisp.
- Let the chewies cool completely on a wire rack before serving them to your dog. Trust me, the wait is worth it!
Enjoy watching your pup munch down on their special birthday treat!
Optional Add-ons
While your sweet potato chewies are already a hit with your pup, why not take them to the next level with some optional add-ons that’ll make them even more irresistible?
Try mixing in peanut butter or yogurt, maybe a sprinkle of cinnamon for extra flavor.
Your dog will think they’re at a gourmet treat shop, and let’s be honest, who wouldn’t enjoy that?
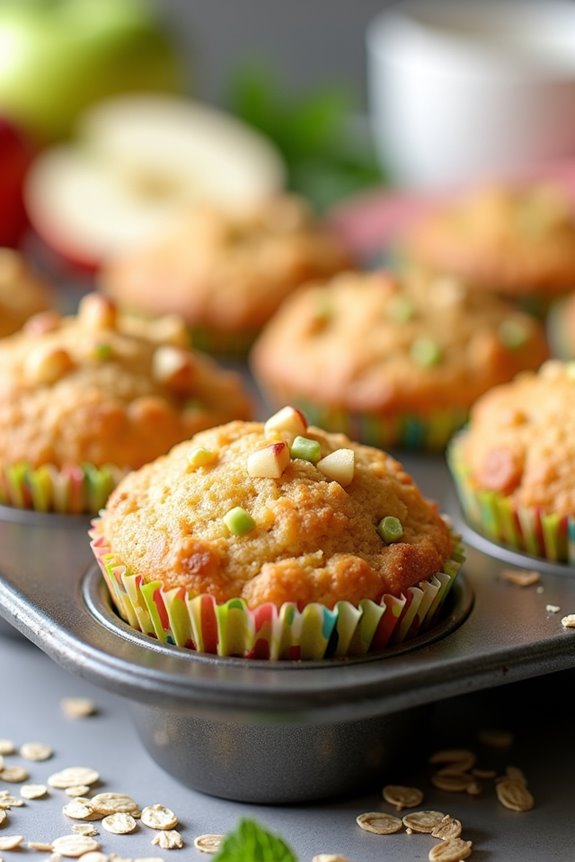
4. Apple Cinnamon Pupcakes
Now that we’ve enjoyed those Sweet Potato Chewies, let’s whip up some delicious Apple Cinnamon Pupcakes for your pup’s special day.
You’ll love how simple the ingredients are, and trust me, they’ll have your furry friend wagging with happiness.
Plus, I’ll share my step-by-step guide and some optional add-ons that’ll take these treats to the next level, making you the hero of the dog park.
Ingredients
Ready to whip up some delightful Apple Cinnamon Pupcakes for your furry friend’s special day? Trust me, your pup is going to love you a little more for this.
It’s all about using ingredients that aren’t just tasty but safe too. So, let’s gather what we need for this delicious doggy treat. Here’s what you’ll want to grab from your kitchen or local store:
- 1 cup whole wheat flour
- 1 medium apple, peeled, cored, and finely chopped
- 1/2 cup unsweetened applesauce
- 1/4 cup peanut butter (make sure it’s xylitol-free)
- 1/2 teaspoon ground cinnamon
- 1 egg
There you have it! Simple, wholesome ingredients that will make your pup’s birthday a little sweeter.
Just imagine their wagging tail and happy face when they get a whiff of these delicious pupcakes baking in the oven. Now, who can resist that?
Step by Step Instructions
- Preheat your oven to 350°F (175°C) so it’s nice and warm for the pupcakes. While you’re at it, line a muffin pan with paper liners or give it a light spray with cooking oil.
- In a large mixing bowl, combine 1 cup of whole wheat flour and ½ teaspoon of baking powder. This will be the base for those tasty little cakes your pup will love.
- In another bowl, whisk together 1 grated apple (make sure to remove the seeds and core), ¼ cup of unsweetened apple sauce, 1 tablespoon of honey, and 1 egg. Mix until it’s well combined and looks a bit like a fruit smoothie.
- Pour the wet mixture into the dry ingredients, and gently fold them together. Don’t overmix—the batter should be lumpy and look a little rustic, just like your dog’s favorite stick.
- Add ½ teaspoon of ground cinnamon to the mix for that delicious aroma, and give it a little stir. You want those flavors to mingle without taking things too far.
- Spoon the batter into your prepared muffin pan, filling each liner about two-thirds full. This guarantees they’ve room to rise without spilling over.
- Bake in the preheated oven for 25–30 minutes, or until a toothpick inserted into the center comes out clean. Keep an eye on them; you want them golden brown, not burnt to a crisp.
- Once baked, remove the pupcakes from the oven and let them cool in the pan for about 5 minutes.
- Then transfer them to a wire rack to cool completely.
- Cool completely before serving to your dog. Trust me, no one wants a burnt mouth—including your furry friend. Enjoy the wagging tails!
Optional Add-ons
While you might think pupcakes are perfect on their own, there’s a world of optional add-ons to kick things up a notch and keep those tails wagging even harder.
Consider drizzling some peanut butter or yogurt on top. You could even sprinkle crushed dog treats or add a few blueberries for a pop of flavor.
Your pup won’t know what hit ‘em.
5. Tasty Banana Peanut Butter Treats
Ready to whip up some tasty banana peanut butter treats for your pup? You’ll love how simple the ingredients are, and it’s a fun way to get your furry friend involved in the kitchen.
We’ll walk through the step-by-step instructions, and even sprinkle in some optional add-ons to make these treats extra special.
Ingredients
When it comes to treating your furry friend on their special day, it’s all about the simple pleasures.
These tasty banana peanut butter treats aren’t just scrumptious, but also super easy to whip up. Imagine how happy your pup will be when that delightful aroma fills the kitchen. Plus, they’re made with just a handful of wholesome ingredients you likely have at home.
Let’s explore what you’ll need for this pup-approved recipe!
- 1 ripe banana, mashed
- 1/2 cup natural peanut butter (make sure it’s xylitol-free)
- 1 cup whole wheat flour (or oat flour for a gluten-free version)
- 1/4 cup unsweetened applesauce
- 1/4 cup water (you might need a little more or less)
- 1 tablespoon honey (optional, for a touch of sweetness)
And there you have it, folks! Just a few simple ingredients to show your furry pal some birthday love.
Don’t forget to get ready for some tail-wagging excitement when these treats come out of the oven!
Step by Step Instructions
- Preheat your oven to 350°F (175°C). A warm oven helps our treats bake just right.
- In a mixing bowl, mash 2 ripe bananas until they’re smooth. This is your base, and trust me, the stink will have everyone in the house knowing something delicious is on the way.
- Add ½ cup of peanut butter (make sure it’s dog-safe and without xylitol). Mix until the bananas and peanut butter are combined well. Your elbow grease will pay off here; it should be creamy and luscious.
- Stir in 1 cup of oats. Use a spatula to fold them gently into your mixture. This is where the magic begins, so get ready to rise to the occasion.
- If you want extra flair, toss in a ¼ cup of shredded carrots or a spoonful of honey for sweetness. Dogs love a surprise.
- On a floured surface, roll out the dough to about ½ inch thick. If it gets too sticky, just sprinkle a little more flour. Nobody likes a sticky situation—not even your dog.
- Cut the dough into fun shapes using cookie cutters. Stars, bones, or even little hearts, the choice is yours. Make it a festive occasion.
- Line a baking sheet with parchment paper and place the cut-out treats on it, spacing them evenly. They need a little room to breathe—think of it as personal space for your furry friend.
- Bake in the preheated oven for 25–30 minutes, or until they turn golden brown. Your kitchen will smell incredible during this time, and possibly have your dog giving you the sad, “Where’s mine?” eyes.
- Let the treats cool on a wire rack. Once cooled completely, your delicious rewards are ready to be served to your pup.
Optional Add-ons
Adding a few optional ingredients to your banana and peanut butter dog treats can turn an already delicious recipe into something truly special.
Ever thought about tossing in some oatmeal for crunch?
Or maybe a splash of honey for sweetness?
These little tweaks can keep your pup guessing, and trust me, they’ll adore every bite.
Your kitchen might just become their favorite place.
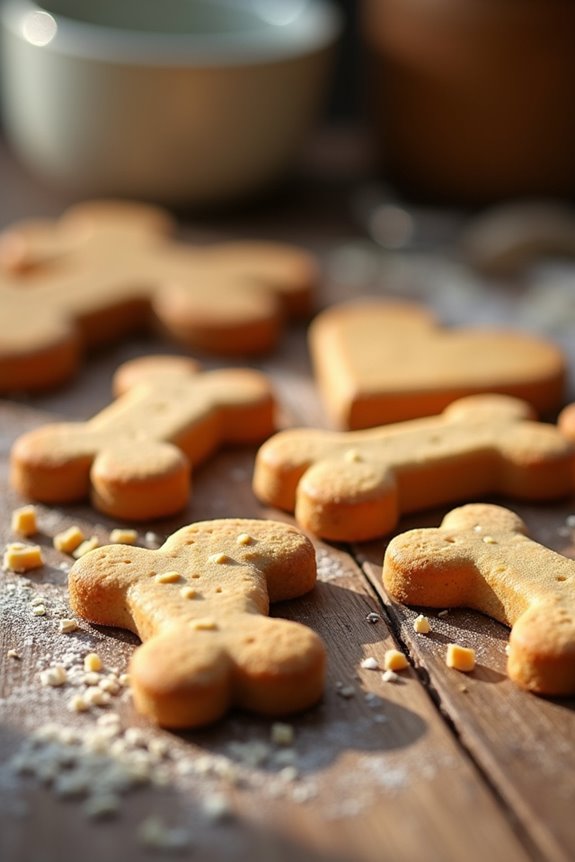
6. Chicken and Rice Biscuits
Ready to whip up some chicken and rice biscuits that your furry friend will adore? You’ll need just a few simple ingredients, and I’ve got step-by-step instructions that make it easy peasy, even for those of us who sometimes burn toast. Oh, and don’t forget about those optional add-ons; they can really take your treats to the next level!
Ingredients
When it comes to spoiling our furry friends, homemade treats are the way to go. These Chicken and Rice Biscuits aren’t only simple to make but also a delightful surprise for your pup on their special day. Trust me, they’ll be wagging their tails with joy as soon as they catch a whiff of these tasty snacks. So, roll up your sleeves and let’s gather the ingredients!
- 1 cup cooked chicken, shredded
- 1 cup cooked white rice
- 1/2 cup whole wheat flour
- 1/2 cup oats
- 1/4 cup chicken broth (low sodium)
- 1 egg
Now, I know some of these ingredients are staples in your kitchen, but feel free to look through your pantry and make sure everything’s on hand—because nothing quite says, “I love you” like baking for your best buddy. Plus, nothing beats the smell of fresh dog biscuits baking in the oven. Just imagine your pup’s excitement—it’s like having a personal cheerleader!
Step by Step Instructions
- Preheat your oven to 350°F (175°C). This will help your biscuits rise nicely and become golden brown.
- In a medium pot, bring 1 cup of water to a boil. It’s like getting a hot bath ready for your chicken.
- Add 1 cup of rice to the boiling water, reduce the heat to low, and cover the pot. Cook for about 15-20 minutes until the rice is tender and the water has evaporated.
- While the rice is cooking, chop 1 cup of cooked chicken into small pieces. It’s okay if you nibble on some—you deserve a reward too.
- In a large mixing bowl, combine the cooked rice, chopped chicken, and 1 cup of whole wheat flour.
- Stir in 1 beaten egg (make sure to give it a good whisk). This will help bind everything together.
- Mix until everything is well combined. Just don’t overmix—aim for a slightly chunky texture.
- Roll the mixture out on a lightly floured surface until it’s about ½ inch thick.
- Use cookie cutters to cut out fun shapes. Bones, hearts, or silly monsters—your choice.
- Place the biscuits on a parchment-lined baking sheet, giving them some space. They might puff up a bit, and we don’t want them clashing.
- Bake in the preheated oven for 25–30 minutes, or until they turn golden brown and your kitchen smells amazing.
- Remove the biscuits from the oven and let them cool on a wire rack.
Cool completely before serving to your dog. They’ll love you for it!
Optional Add-ons
Have you ever thought about how you can jazz up those homemade dog treats?
Try adding some peanut butter or sweet potato to your chicken and rice biscuits. You’ll find that your pup’s tail wags harder for the extra flavor. Just mix in a couple tablespoons.
Want to be fancy? Sprinkle some parsley for freshness—it’s a treat worth barking about, even if you’re no MasterChef.
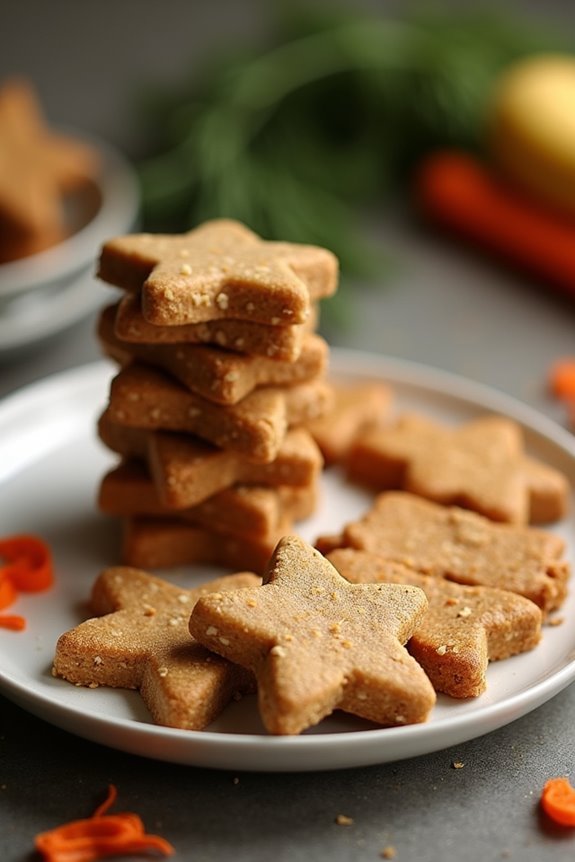
7. Nutty Carob Biscuit Bites
Get ready to whip up some Nutty Carob Biscuit Bites that your pup will absolutely love. You’ll want to gather a few simple ingredients, and I promise you’ll have a blast mixing them together. So, let’s jump into the step-by-step instructions and talk about some fun optional add-ons that could take these treats to a whole new level.
Ingredients
When it comes to creating the perfect birthday treats for your furry friend, a few simple ingredients go a long way. These Nutty Carob Biscuit Bites aren’t just scrumptious, they’re also tail-waggingly healthy.
So, let’s gather up these easy-to-find ingredients that will have Fido begging for more.
- 1 cup whole wheat flour (or oat flour for a gluten-free option)
- 1/2 cup carob powder (no chocolate here, just tasty carob)
- 1/3 cup creamy peanut butter (make sure it’s xylitol-free)
- 1/2 cup water (adjust as needed for dough consistency)
- 1/4 cup rolled oats (for a little extra chewiness)
- 1 egg (for binding all those yummy ingredients together)
Now, just imagine your pup’s enthusiastic little face as these treats bake in the oven. It’s like waiting for Christmas morning, but with more drooling.
The best part? You probably have most of these items in your kitchen already. Then it’s just about mixing, rolling, cutting, and baking – super easy, right?
Just don’t blame me if your pup suddenly thinks every day is their birthday!
Step by Step Instructions
- Preheat your oven to 350°F (175°C) so it’s nice and hot when it’s time to bake.
- In a large mixing bowl, combine 1 cup of whole wheat flour and 1/4 cup of carob powder. Give it a good whisk to blend the dry ingredients well.
- In a separate bowl, mix together 1/2 cup of unsweetened peanut butter (make sure it’s dog-safe, no xylitol) and 1/4 cup of water until it’s creamy and smooth.
- Pour the peanut butter mixture into the dry ingredients, and stir until combined. Don’t overmix—just fold it gently until everything is moistened.
- If your dough feels too sticky, add a little more flour, or if it’s too crumbly, splash in a bit more water. It should be a pliable dough that you can roll out.
- Lightly flour your countertop, then roll out the dough to about 1/4 inch thick. You can use cookie cutters for fun shapes, or just cut it into squares with a knife.
- Place the shaped biscuits onto a baking sheet lined with parchment paper. Make sure to leave some space between them—these little bites need room to breathe.
- Bake in the preheated oven for 25–30 minutes, or until the edges are golden brown. It’s hard to resist taking a peek, but try to wait until the timer goes off.
- Once they’re golden, remove the tray from the oven and let the treats cool on a wire rack.
- Cool completely before serving to your dog, and watch those tails wag with excitement.
Optional Add-ons
Adding special ingredients to your dog’s birthday treats doesn’t just elevate their flavor; it also turns them into a delightful culinary adventure.
Try mixing in some nutty carob, which is safe for dogs and adds a chocolatey taste without the harmful effects.
Want to get fancy? Toss in a handful of oats or pumpkin.
Your pup won’t be able to resist these tasty bites!
Perfecting Treat Texture
While you might think achieving the perfect treat texture for your dog’s birthday treats is all about the ingredients, it’s actually just as much about the technique.
Think about it: a crunchy biscuit or a chewy morsel can make a world of difference. Don’t be afraid to experiment with baking times. A minute too long? You’ll get a rock. Too short? You might as well serve dough.
Experimenting with baking times is key; a minute can turn a treat from crunchy delight to a rock-hard disaster!
Mixing techniques matters too. Combining dry and wet ingredients evenly helps achieve that golden middle ground—firm yet digestible. And hey, if you want to add some veggies, shred or puree them well; nobody wants bits that’ll stick in Fido’s teeth.
And don’t forget to let them cool thoroughly before serving. Warm treats might smell irresistible, but you’ll have a dog bouncing off the walls, anticipating a snack attack.
Trust me, I’ve been there. It’s a wild ride.
Frequently Asked Questions
Can I Use My Dog’s Favorite Flavors in Treats?
Absolutely, you can use your dog’s favorite flavors in treats! Incorporating those flavors makes the treats more enticing. Just guarantee all ingredients are safe and healthy for your pup to enjoy their special snacks.
Are There Any Allergies to Consider When Making Treats?
Yes, you should definitely consider allergies when making treats. Check with your vet if your dog has any specific allergies, like wheat or certain proteins, to guarantee the treats are safe for your furry friend.
How Long Do Homemade Dog Treats Last?
Homemade dog treats usually last about one week at room temperature. If you refrigerate them, they can last up to two weeks. For longer storage, consider freezing them, which can extend their freshness for months.
Can I Freeze Dog Birthday Treats for Later Use?
Yes, you can freeze dog birthday treats for later use! Just be certain they’re well-packed to prevent freezer burn. When you’re ready to spoil your pup, simply thaw them out and watch them enjoy!
How Do I Know if My Dog Likes a New Treat?
You’ll know your dog likes a new treat when they enthusiastically approach it, sniff around, and wag their tail. If they munch happily and look for more, you’ve definitely found a winner!