So, you’re gearing up to celebrate your dog’s big day, huh? That’s awesome. Dogs bring so much joy, don’t they? Just think about all those wagging tails and slobbery kisses. It’s only fitting to honor your furry best friend with some heartfelt quotes that capture how much they mean to you. Want to know what makes them special? Let’s explore some quotes that perfectly reflect that bond.
Why Homemade?
When you think about celebrating your furry friend’s birthday, why not go homemade? It’s way more personal, plus you’ll score major points for creativity.
Imagine crafting a heartfelt, paw-some dog birthday card with a sweet quote that captures your love. You could write something like, “To the best friend who always wagged my worries away.” A little humor never hurt either. Why not add a joke about how dog years make them a wise sage?
Homemade treats don’t just show you care; they’ll make your pup’s tail wag like crazy. You know what they say: “A happy dog is a well-fed dog.” Plus, these treats can be made with simple and wholesome ingredients that you can trust. Homemade bacon dog biscuits are a great way to combine nutrition and flavor. Additionally, making delicious homemade peanut treats can provide a delightful and nutritious option that your dog will love! Plus, whipping up homemade dog snacks allows you to tailor each recipe to your dog’s unique tastes.
Plus, you can skip questionable ingredients that store-bought options might have. Remember, it’s all about those little touches that make the day special, from personalized decorations to your own spirited celebrations.
It’s your chance to pull out all the stops and make a birthday they’ll never forget.
Dog Treat Recipes Collection
Ready to spoil your pup with some homemade treats? You’ll love trying out recipes like Peanut Butter Banana Treats or those Cheesy Chicken Jerky Strips that’ll have tails wagging in no time. Plus, making homemade cheese dog biscuits is a fantastic way to show your furry friend just how much you care while ensuring they’re enjoying healthy, natural ingredients. Another great option is to incorporate wholesome ingredients like oats and pumpkin, which are beneficial for your dog’s digestion. In addition, using ingredients such as bacon can add an extra layer of flavor that your dog will absolutely adore! For added variety, you can experiment with simple two-ingredient combinations that are both easy to prepare and nutritious.
Let’s explore some tasty options that aren’t just delicious, but also super easy to whip up—after all, who doesn’t want a happy, healthy birthday pup?
1. Peanut Butter Banana Treats
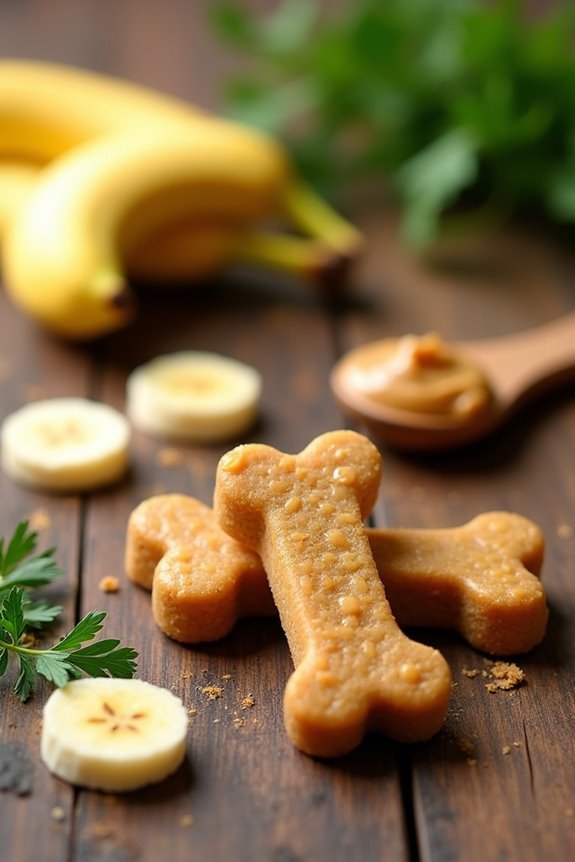
Ready to whip up some yummy treats for your pup? You’ll need just a few simple ingredients like peanut butter and bananas, but don’t worry—these are things you probably already have in your pantry. As an added bonus, you can also incorporate delicious apple sauce to create a variety your dog will love! These peanut butter and banana dog treats are not only tasty but also healthy for your furry friend. Let’s talk step-by-step instructions to get your furry friend tail-wagging happy, plus a couple of optional add-ons to make these treats even more special.
Ingredients
Alright, so you’ve decided to whip up some tail-wagging Peanut Butter Banana Treats for your pup’s birthday. Smart move!
These treats aren’t just easy to make; they’re a sure way to make those furry faces light up with joy. Let’s gather our ingredients—that’s the fun part, right?
- 1 cup of whole wheat flour (or oat flour if your pup has a wheat sensitivity)
- 1 ripe banana, mashed (the riper, the sweeter, trust me)
- 1/2 cup of natural peanut butter (make sure it’s xylitol-free—you want your dog’s tummy happy)
- 1/4 cup of chicken or beef broth (low sodium is best)
- 1/4 cup of rolled oats (because texture is everything)
- Optional: a sprinkle of cinnamon (for a little extra sweetness—don’t worry, it’s dog-approved!)
With these simple ingredients, you’re on your way to creating something that’ll have your pooch prancing around in delight.
Just imagine the wagging tails and puppy eyes as they taste the deliciousness. Happy baking!
Step by Step Instructions
To make these Peanut Butter Banana Treats for your furry friend, follow these easy steps. Your dog will be wagging their tail in delight before you know it. Let’s kick things off and get baking!
- Preheat your oven to 350°F (175°C) to give those treats a warm, cozy environment to bake in.
- In a large mixing bowl, mash 1 ripe banana with a fork until smooth—aim for a consistency that resembles baby food.
- Add 1 cup of natural peanut butter to the mashed banana and mix well until creamy and well combined.
- Slowly stir in 2 cups of whole wheat flour to the banana-peanut butter mixture—don’t worry, it may take a little muscle. (Use a spatula to help combine everything if needed.)
- Pour in 1/4 cup of unsweetened applesauce to moisten the mixture, folding it in gently until everything is mixed nicely.
- Dust your countertop with a little flour and knead the dough for a minute or two until it’s nice and firm. (If it’s too sticky, sprinkle a bit more flour on top.)
- Roll out the dough to about 1/4 inch thick—this gives the treats a nice bite, not too hard, not too soft. (You can use cookie cutters to make fun shapes!)
- Place the shaped dough on a baking sheet lined with parchment paper.
- Bake for 20-25 minutes, until the treats are golden brown and your house smells like a peanut butter dream.
- Remove them from the oven and allow to cool on a wire rack for a while.
Cool completely before serving to your dog. Now watch that tail wag with joy!
Optional Add-ons
Making those delicious Peanut Butter Banana Treats is already a great way to celebrate your dog’s birthday, but why stop there?
Try adding a fun twist—sprinkle some bacon bits on top or mix in a dash of cinnamon for flavor. Your pup mightn’t know the difference, but you’ll feel like a gourmet pet chef.
Plus, it’ll make their tail wag even more!
2. Carrot and Apple Bites
So, you’re ready to treat your pup to some Carrot and Apple Bites, huh?
These chewy delights use simple ingredients, and I bet your dog will be begging for more.
Let’s break down the easy steps and think about some fun add-ons to make them even tastier.
Ingredients
Making these Carrot and Apple Bites for your pup isn’t only simple, but it will also send their tails wagging with joy.
Plus, these two ingredients are super nutritious and perfect for a healthy treat. You might even find yourself sneaking a bite or two… not that I did.
Here’s what you’ll need to whip these up:
- 1 cup finely grated carrots (yeah, the orange ones that make your fingers a bit messy)
- 1 cup unsweetened applesauce (make sure it’s apple-y goodness without added sugar)
- 2 cups whole wheat flour (or oat flour if your dog has a gluten sensitivity)
- 1/4 cup peanut butter (just verify it doesn’t have xylitol; that’s a no-no for pups)
- 1/4 cup water (just enough to really bring everything together)
- 1 egg (a little protein boost for your furry friend)
Once you’ve gathered all these goodies, you’ll be all set for a fun baking adventure—because let’s face it, our dogs deserve the best, don’t you think?
Step by Step Instructions
1. Preheat your oven to 350°F (175°C). This is the first step in creating those tasty treats.
2. Gather your ingredients: 1 cup of finely shredded carrots, 1 cup of chopped apples (remove seeds), 1 cup of whole wheat flour, and 1 egg. Make sure everything is fresh.
3. In a mixing bowl, combine the shredded carrots and chopped apples. Mix them well, so all those flavors get to know each other.
4. Crack the egg into the carrot-and-apple mixture. Stir it in until it’s all blended nicely (but don’t forget—these treats aren’t going to the dog park, so no egg shells allowed).
5. Gradually add in the whole wheat flour, mixing as you go until a dough forms. It should be a bit sticky but still manageable.
(If it’s too sticky, just sprinkle a little extra flour).
6. On a floured surface, knead the dough gently for about a minute. This part isn’t about working out, just make it come together nicely.
7. Roll out the dough to about 1/2 inch thick. If you find it’s sticking, don’t be shy with the flour.
8. Use a cookie cutter to cut out shapes. (Bones? Hearts? The choice is yours! Just remember, no matter what shape you pick, your pup will think they’re the best treats ever).
9. Place the cut-out shapes on a baking sheet lined with parchment paper. Make sure they’re spaced apart, giving them room to breathe.
10. Bake in the preheated oven for 25-30 minutes, or until the edges are golden brown.
(You might even want to sniff around a bit to see if your kitchen smells doggone good).
11. Once baked, remove them from the oven and let them cool on a wire rack. This will take a few moments, and trust me—your dog is going to be impatient.
12. Cool completely before serving to your dog.
(Patience is a virtue, especially when those delicious treats are involved).
Optional Add-ons
When it comes to treating your pup, there are plenty of fun optional add-ons to amp up those Carrot and Apple Bites.
Try adding peanut butter for extra flavor, or a sprinkle of cinnamon to jazz things up. You could even throw in some oats for texture.
Trust me, your dog will be over the moon, and you might just taste test a bite (no judgment).
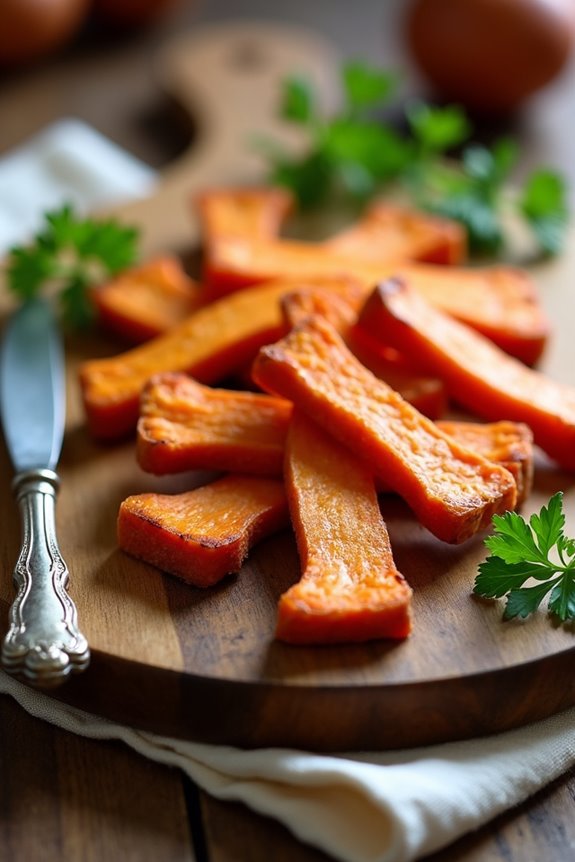
3. Sweet Potato Chews
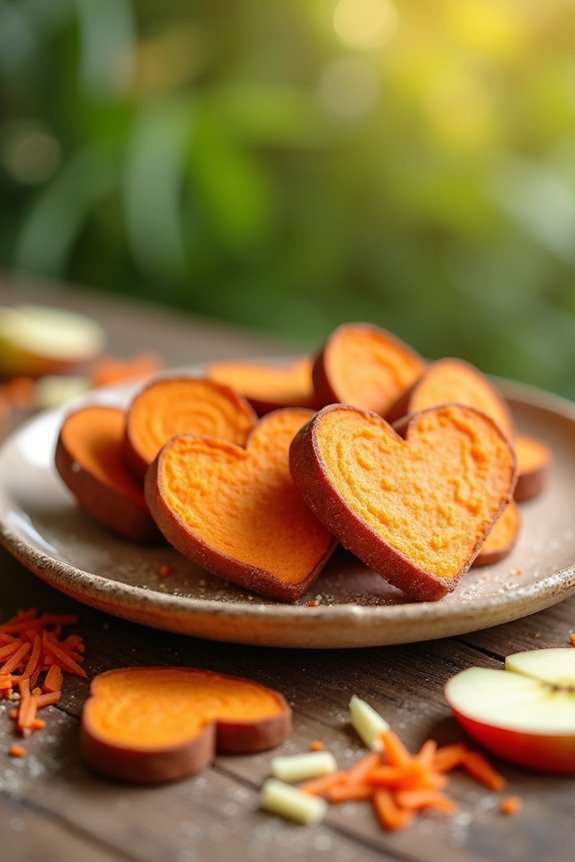
Ready to whip up some tasty sweet potato chews for your pup? You’ll need just a few simple ingredients, and I promise it’s easier than it sounds. With step-by-step instructions and some fun optional add-ons to keep things interesting, your furry friend will be wagging their tail with joy.
Ingredients
When it comes to spoiling our furry friends, making homemade dog treats with wholesome ingredients is a great way to show love. These sweet potato chews aren’t only easy to make but also full of flavor that pups will go crazy for.
Let’s get into the goodness, shall we? Here’s what you’ll need to whip up these chewy delights:
- 2 medium sweet potatoes (about 1 cup mashed)
- 2 cups whole wheat flour (or oat flour for gluten-free)
- 1 large egg
- 1/4 cup coconut oil (melted, if solid)
- 1/2 teaspoon cinnamon (optional, but it can give an extra flavor boost)
- 1 tablespoon honey (for a touch of sweetness)
Mixing these ingredients together will be a labor of love, and trust me, your pup will appreciate every bite.
It’s honestly hard to mess this up—just take your time, and maybe even let your furry friend watch from the kitchen floor, tail wagging, like they’re the head chef. If only they could pitch in, right?
Just be prepared for them to beg for a taste while you bake (but it’s clear that no pup can resist the aroma of sweet potatoes).
Step by Step Instructions
To treat your furry friend to some delicious homemade sweet potato chews, follow these straightforward steps. These chews aren’t only tasty but also healthy for your pup. Let’s get started!
- Preheat your oven to 250°F (120°C). You want it low and slow for those chews.
- Wash two medium-sized sweet potatoes. You wouldn’t serve dirty veggies, right?
- Slice the sweet potatoes lengthwise into 1/4-inch thick strips. Aim for uniformity so they cook evenly.
- Arrange the slices on a baking sheet lined with parchment paper. Leave a little space between them; they need room to breathe.
- Bake for about 2 hours, flipping the slices halfway through. You’re looking for a slight crisp but still a bit chewy.
- Check for doneness around the two-hour mark. They should be golden and fairly firm. If they’re looking a little too soft, give them another 15 minutes.
- Turn off the oven and leave the chews inside to cool completely. This helps them firm up a bit more.
- Once cooled, store them in an airtight container. They can last for about a week, but I’m betting your dog will devour them way before then.
Cool completely before serving to your dog. Enjoy watching them wag their tail with joy!
Optional Add-ons
Adding some fun twists to your sweet potato chews can elevate them from ordinary to extraordinary, trust me.
Try mixing in peanut butter or a sprinkle of cinnamon—the flavors will make your pup’s tail wag like crazy.
Feeling fancy? Shape them into hearts for a birthday treat.
Who knew a veggie could turn into such a celebration? Your dog deserves it, right?
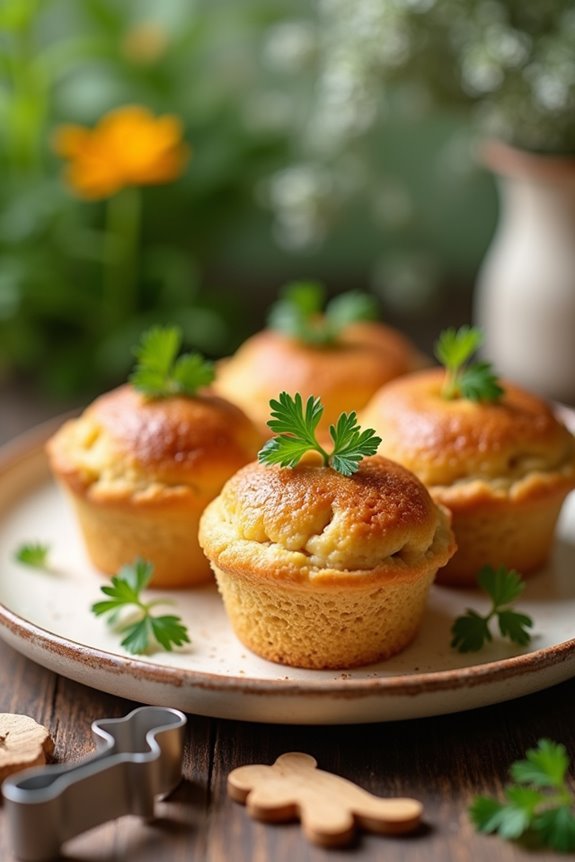
4. Pumpkin Parsley Pupcakes
Ready to whip up some tasty Pumpkin Parsley Pupcakes for your furry friend’s special day? You’ll need a few simple ingredients, plus I’ll guide you through each step, so you won’t feel overwhelmed. And hey, if you’re feeling adventurous, I’ll toss in some optional add-ons to really make those pupcakes pop.
Ingredients
When it comes to celebrating your pup’s birthday, nothing says love like delicious homemade treats.
These Pumpkin Parsley Pupcakes aren’t only tasty but also easy to whip up with ingredients you probably already have around the house. Plus, your furry friend will love them; they might even leave a little doggy dance in joy.
Ready to bake? Let’s gather the goodies!
- 1 cup canned pumpkin (pure pumpkin, not pumpkin pie filling)
- 2 cups whole wheat flour
- 1/2 cup chopped fresh parsley
- 1/4 cup peanut butter (make sure it’s xylitol-free)
- 2 large eggs
- 1 teaspoon baking powder
- 1/2 cup water (or as needed for consistency)
Look at that, just a few simple ingredients that mean big fun for your pup.
And if you happen to spill some flour, well, that’s just part of the innocent chaos, right? We’re all friends here! Happy baking!
Step by Step Instructions
- Preheat your oven to 350°F (175°C). Get that warmth going; your pupcakes will need it.
- In a mixing bowl, combine 1 cup of pumpkin puree and 1 cup of whole wheat flour. Make sure you’re using plain pumpkin, not the spiced pie filling. No cinnamon or sugar for these little furballs.
- Add 1/4 cup of chopped fresh parsley to the mixture. This decor is good for your dog’s breath—who doesn’t want that?
- In a separate bowl, whisk together 1/4 cup of unsweetened apple sauce and 1 egg. If you’re scrambling for egg skills, just remember: crack, beat, and smile—it’s that simple!
- Fold the wet ingredients into the dry ingredients gently until just combined (Don’t overmix the batter—it should be slightly lumpy). Think of it as a love poem to your dog, short and sweet.
- Line a 12-cup muffin tin with paper liners or grease it lightly. Cozy homes for those pupcakes, right?
- Spoon the batter evenly into the muffin cups, filling each about 3/4 full. They need room to rise and shine, after all.
- Bake in the preheated oven for 25–30 minutes, until a toothpick comes out clean. They should have a golden top, a bit like a sun-kissed summer day.
- Remove from the oven and let them cool in the tin for about 10 minutes. The tantalizing aroma is bound to get your pup’s tail wagging.
- Carefully transfer the pupcakes to a wire rack and let them cool completely before serving to your dog.
(Trust me, no one likes a too-hot treat—especially the furry ones.)
Get ready for some happy tail wags!
Optional Add-ons
Adding optional ingredients to your dog’s birthday pupcakes can elevate their special day from delightful to downright paw-some.
Why not toss in some mashed bananas for sweetness, or a sprinkle of peanut butter for that extra flavor?
You might even add a few peas for a colorful crunch.
Your pup will love every bite, and you’ll feel like a cake-baking superstar.
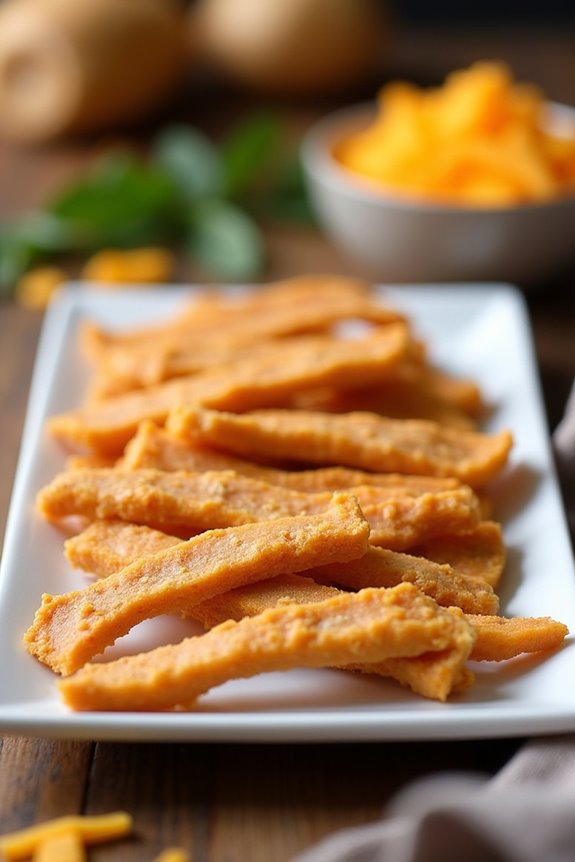
5. Cheesy Chicken Jerky Strips
Ready to whip up some Cheesy Chicken Jerky Strips for your pup’s special day? You’re gonna love how simple it’s with just a few key ingredients, and those tempting optional add-ons can take it to another level. Let’s walk through this tasty recipe step by step, ensuring your dog gets a treat that’s not just yummy, but made with loads of love.
Ingredients
When it comes to spoiling our furry friends, making delicious treats at home is a game changer. These Cheesy Chicken Jerky Strips aren’t just simple to whip up but are also packed with flavors dogs love.
You’ll feel like a gourmet chef in your own kitchen while your pup gets to enjoy some serious culinary goodness. Ready to gather your ingredients? Let’s get started.
- 1 pound boneless, skinless chicken breast
- 1 cup shredded cheese (cheddar or mozzarella works great)
- 1 tablespoon olive oil
- 1 teaspoon dried parsley (optional for a pop of color)
- 1/2 teaspoon garlic powder (no, this isn’t bad for dogs—it’s a teaspoon! Just kidding, leave this out for dog safety, stick with parsley)
Now that you have everything laid out, you’re just steps away from making your pup’s birthday (or any day) extra special.
Just imagine their wagging tail and happy face when they get a taste of these homemade goodies. It’s a win-win for everyone!
Step by Step Instructions
- Preheat your oven to 175°F (80°C) to create a low and slow cooking environment for the jerky. This step is key for that perfect chewy texture.
- Take two boneless, skinless chicken breasts and rinse them under cold water. Pat them dry with a paper towel to remove excess moisture.
- Slice the chicken into thin strips, about 1/4 inch thick. Try to keep them uniform—don’t worry, perfection isn’t required, but even sizes help with cooking.
- In a mixing bowl, combine the chicken strips with 1 cup of shredded cheese, like cheddar or mozzarella. Trust me, it’s going to be cheesy goodness.
- Add a pinch of salt and mix everything until the chicken is coated with cheese. (Consider using your hands for that extra melt-in-your-mouth magic.)
- Line a baking sheet with parchment paper. This will save you some elbow grease during cleanup, and who doesn’t love that?
- Lay the chicken strips on the baking sheet in a single layer. Leave a little space between them for airflow—no chicken mash-ups here.
- Bake in the preheated oven for 2-3 hours. You want to keep an eye on them until they’re chewy but not brittle. If they start getting too crispy, pull them out a little early.
- Once done, let the strips cool on the baking sheet for a bit. They’ll firm up as they cool.
- Cool completely before serving to your dog. Trust me, they’ll be drooling with anticipation!
Optional Add-ons
After those delicious Cheesy Chicken Jerky Strips have been baked and cooled, you might be wondering how to take your dog’s treat game to the next level.
Consider adding a sprinkle of parsley for freshness, or mix in some pumpkin puree for extra flavor. Trust me, your pup will think they’ve hit the jackpot. Just remember to share, or they might give you the side-eye.
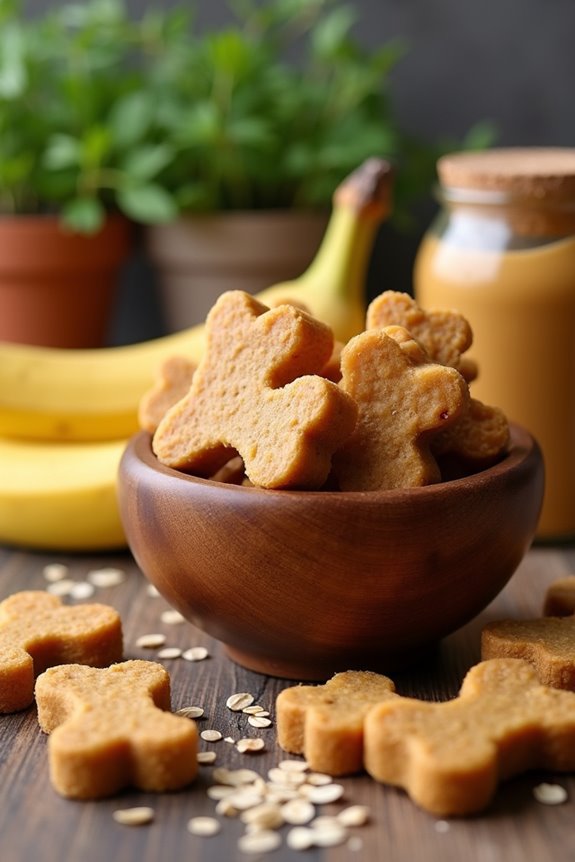
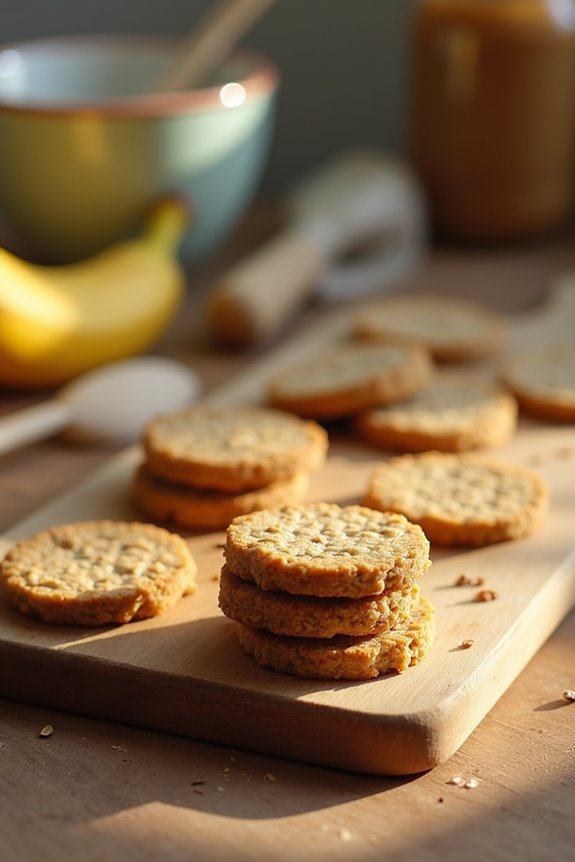
6. Banana Oatmeal Delight
Ready to whip up something special for your pup? The Banana Oatmeal Delight isn’t just tasty, it’s packed with wholesome goodness that’s easy to make. Let’s go over the ingredients, step-by-step instructions, and some fun optional add-ons that’ll make your dog’s birthday unforgettable.
Ingredients
Making delicious treats for your furry friend can be such a rewarding experience, and trust me, they’ll love you for it. Plus, these Banana Oatmeal Delights are super easy to whip up, even for those of us who might burn toast on a good day.
So, let’s gather our ingredients—a few simple, dog-friendly items that you can find in your pantry or grab from the store. Here’s what you’ll need:
- 1 ripe banana (the riper, the better; think brown spots!)
- 1 cup rolled oats
- 1/2 cup peanut butter (make sure it’s xylitol-free)
- 1/4 cup unsweetened applesauce
- 1/4 cup water (you might need a little extra if the dough gets too thick)
Just a heads-up: your dog might be drooling by now, and who can blame them?
Let’s get to baking these tasty treats!
Step by Step Instructions
To whip up a batch of Banana Oatmeal Delight dog treats, gather your ingredients and let’s get started. Your pup will thank you for it, trust me. Here’s how to make these scrumptious snacks step by step:
- Preheat your oven to 350°F (175°C). A warm oven is essential to get those treats just right, so don’t skip this step!
- In a mixing bowl, mash 2 ripe bananas using a fork until smooth. It should be somewhat creamy—think baby food consistency, not a disaster.
- Add 1 cup of rolled oats to the mashed bananas. Give them a good stir until the oats are fully coated in banana goodness.
- Mix in 1/4 cup of unsweetened peanut butter. You can always sneak a spoonful for yourself (but only if your dog isn’t watching).
- If you want to add a little extra flavor, feel free to mix in a sprinkle of cinnamon or even a tablespoon of honey. Just keep it dog-friendly.
- Stir everything together until well combined. This is where the magic happens—everything should stick together nicely without being gooey.
- Line a baking sheet with parchment paper for easy cleanup. Seriously, save yourself the scrubbing later.
- Scoop small amounts of the mixture and form into little balls or flatten them into shapes. Aim for about 1-inch in size; remember, they’re treats, not cannonballs.
- Place the shaped mixture on the prepared baking sheet, spacing them about 1 inch apart. They won’t spread much, but we want to give them a little room.
- Bake in the oven for 20-25 minutes, or until the edges are golden brown. Don’t wander too far—your nose will alert you when they’re nearly done.
- Once baked, let them cool on the baking sheet for a few minutes before transferring to a wire rack.
- Cool completely before serving to your dog. Patience is key—let your pup drool just a bit longer while the treats cool down.
There you go! A simple and straightforward way to spoil your furry friend with homemade treats. Happy baking!
Optional Add-ons
When it comes to customizing your Banana Oatmeal Delight treats, the options are nearly endless.
Want to make them extra special? Toss in some peanut butter or sprinkle cinnamon for a delightful twist.
Feeling adventurous? Try adding a few blueberries or pumpkin puree. Your pup will love the variety, and let’s be real, you might end up snacking on them too. Who knew dog treats could tease our taste buds?
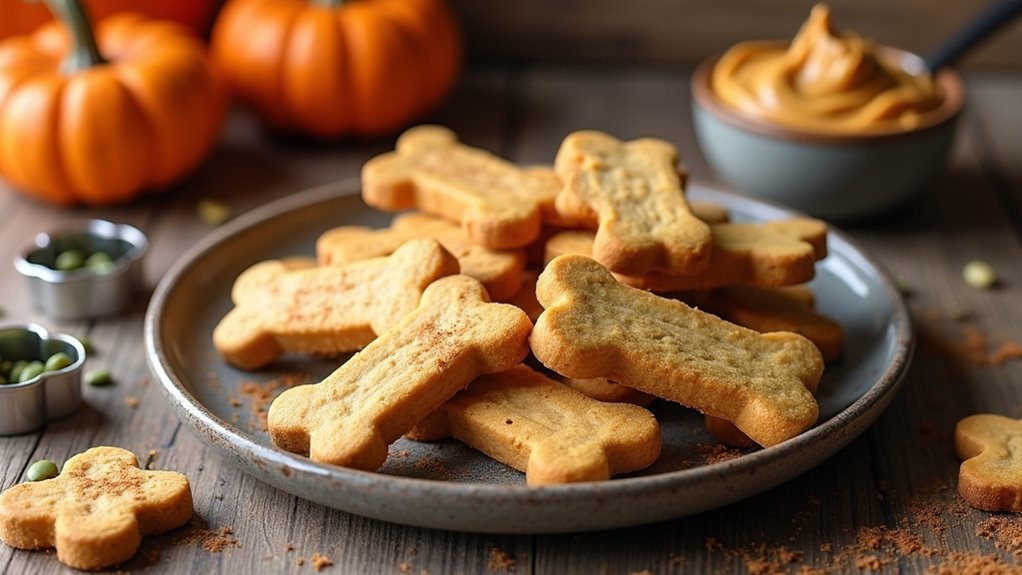
7. Peanut Butter and Pumpkin Biscuits
Ready to treat your pup to something special? Peanut butter and pumpkin biscuits aren’t just tasty but also simple to whip up. Grab your ingredients, and I’ll walk you through each step, plus some fun add-ons to make those tails wag even harder.
Ingredients
When it comes to whipping up a special treat for your furry friend, these Peanut Butter and Pumpkin Biscuits are a winner. Your pup will be wagging his tail in delight, and honestly, who can resist those puppy eyes? With just a few simple ingredients, you can create something delicious, healthy, and oh-so-fun to bake together.
So, let’s grab our aprons and plunge into the ingredient list.
- 1 cup of whole wheat flour (or oat flour for a gluten-free option)
- 1/2 cup of canned pumpkin puree (not pie filling, just pure pumpkin)
- 1/2 cup of natural peanut butter (make sure there’s no xylitol, it’s a no-go for dogs)
- 1/4 cup of rolled oats
- 1/4 cup of low-sodium chicken broth (or water if you’re in a pinch)
- 1 egg
And there you have it, folks. Six fuss-free ingredients that you can easily grab at any store.
Now, just think about the excitement on your pup’s face when you present them with these homemade goodies. It’s like baking magic, but without the need for a wand or spellbook.
Just some love, a bit of patience, and definitely some lucky doggy moments ahead. Happy baking!
Step by Step Instructions
To whip up some delightful Peanut Butter and Pumpkin Biscuits for your furry friend’s big day, follow these easy steps. Your pup will be wagging their tail in excitement for these tasty treats. Grab your ingredients, and let’s get baking!
- Preheat your oven to 350°F (175°C). Get that kitchen warmed up for some tasty doggy goodness.
- In a large mixing bowl, combine 1 cup of pure pumpkin puree, 1/2 cup of peanut butter (make sure it’s xylitol-free), and 2 eggs. Mix until everything is well blended and smooth.
- In another bowl, stir together 3 cups of whole wheat flour and 1 teaspoon of cinnamon. Make sure there are no lumps—nobody likes a surprise clump of flour!
- Gradually add the dry ingredients to the pumpkin mixture. Blend until just combined (don’t overmix—this isn’t a cake).
- Roll out the dough on a lightly floured surface to about 1/2 inch thick. You know you’ve nailed it when it’s not too sticky but also not like a rock.
- Use cookie cutters to cut out your desired shapes. Should you find yourself munching on the leftover scraps, just remember, it’s all for a good cause… right?
- Place the biscuits on a baking sheet lined with parchment paper. Give them a little space because they’ll puff up a tad.
- Bake in the preheated oven for 25–30 minutes or until the biscuits are golden brown. Give them a peek around 20 minutes in—your kitchen should smell divine by now.
- Once done, remove them from the oven and let them cool on a wire rack.
- Cool completely before serving to your dog. Watching their eyes widen in joy as they crunch into one of these will be the highlight of your baking adventure. Enjoy the wagging tails!
Optional Add-ons
While baking those Peanut Butter and Pumpkin Biscuits is a fantastic way to show your furry friend some love, adding a few special touches can elevate their birthday celebration even more.
Try drizzling melted carob on top or sprinkling some chopped, dog-safe fruits. Your pup won’t know what hit them!
Trust me, they’ll be thanking you with slobbery kisses. Isn’t that what it’s all about?
Use Fresh, High-Quality Ingredients
Using fresh, high-quality ingredients can truly make a world of difference in your dog’s birthday treats. Think about it: wouldn’t you rather serve your pooch something that’s not only tasty but also healthy? Imagine baking a cake with whole wheat flour, peanut butter, and ripe bananas. Oh, the tails that would wag!
You don’t need to be a gourmet chef; just pay attention to what you’re mixing in. Avoid artificial flavors—your pup deserves better. Swap out those processed store-bought treats with real, recognizable ingredients. Fresh carrots, sweet potatoes, or apples can add a burst of flavor and nutrition.
And if you end up nibbling on the leftovers yourself—it’s a win-win, right? After all, who says you can’t enjoy a dog-friendly “cookie” now and then?
Frequently Asked Questions
What Are Some Fun Ways to Celebrate My Dog’s Birthday?
Throw a playful party with homemade treats, interactive games, and dog-friendly decorations. Invite fellow canine buddies, capture moments with a photo booth, and pamper your pooch with a new toy for a perfect celebration.
Can I Invite Other Dogs to My Pet’s Birthday Party?
Inviting other dogs can make the celebration even more fun. Just guarantee they get along and have a safe space to play. Don’t forget treats and games to keep everyone entertained and happy!
How Do I Choose the Perfect Birthday Gift for My Dog?
Consider your dog’s personality and preferences. Choose toys that match their play style, treats they’ll love, or comfort items for relaxation. Personalizing a gift can make it even more special, ensuring it’s truly perfect for them.
Are Dog Birthday Parties Becoming a Popular Trend?
Yes, dog birthday parties are definitely becoming a popular trend! Many pet owners are celebrating their furry friends with themed parties, special treats, and fun activities, making these gatherings a delightful experience for both dogs and their humans.
What Should I Include in a Dog Birthday Party Invitation?
Include your dog’s name, the party date and time, location, RSVP details, and any fun activities planned. You might also mention a dress code or if guests should bring treats for their furry friends!