Planning your dog’s birthday party can feel overwhelming, right? But don’t stress; a few simple decorations can transform your space into a puppy paradise. Ever thought about using paw print banners and colorful balloons? They really set the mood. And those adorable cake toppers shaped like bones? Total game-changers. You’ll want everything to reflect your pup’s personality, trust me. So, what are some must-haves for the ultimate celebration? Let’s explore.
Why Homemade?
When you think about throwing a birthday bash for your furry friend, have you ever wondered why homemade decorations might just be the way to go? For starters, creating your own dog birthday decorations gives you a personal touch that store-bought just can’t match.
Plus, it’s a fun way to bond with your pup and show off your creativity. Imagine hanging up bone-shaped banners or paw print balloons you made yourself. So much cuter, right? Additionally, making your own decorations can be a great way to use up leftover materials from past crafting projects that might otherwise go to waste. Not to mention, you could create themed decorations inspired by your dog’s favorite flavor profiles, such as nourishing recipes from homemade dog food ideas. Creating a festive atmosphere will make the event truly special for both you and your pet, as it encapsulates the joy of celebration that feeding stations can provide.
You can tailor colors and themes to match your dog’s personality too. Got a little diva? Glittery décor it is!
And let’s be real, it’ll probably impress your guests more than anything from the big box store. Homemade doesn’t need to be perfect either—let’s embrace those crooked edges and messy glue.
It’s all about celebrating your canine companion, not winning an art contest. So roll up those sleeves and get crafty; your dog will love it! Plus, it can be a wonderful way to remember your beloved pet with heartfelt tributes that capture their spirit.
Dog Treat Ideas
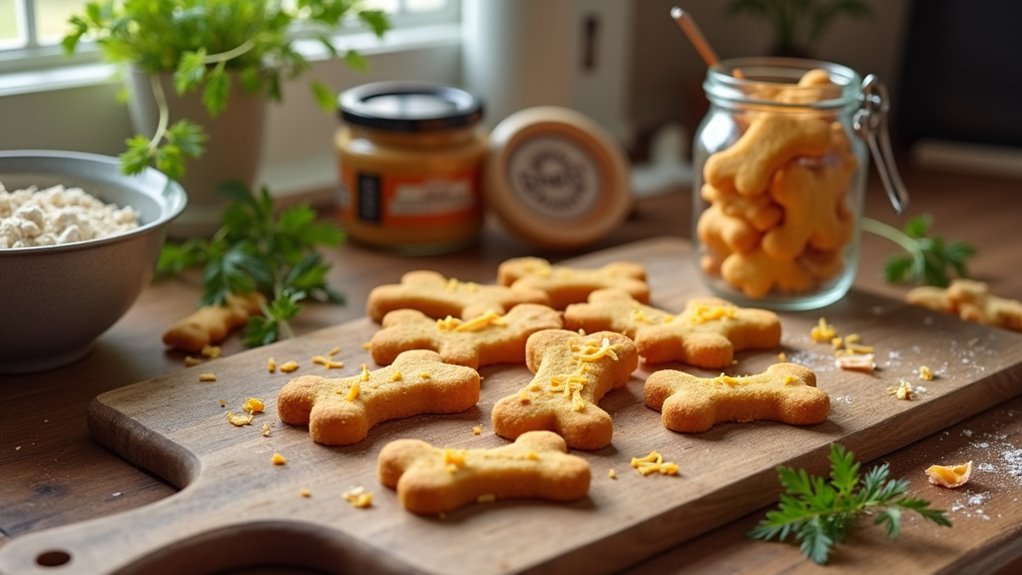
When it comes to your dog’s birthday, don’t forget about the treats—after all, what’s a party without some yummy goodies? You can whip up some delightful peanut butter dog treats or even make sweet potato chews that will have their tails wagging. Just imagine their faces when you present those carrot and apple bites or pumpkin and oatmeal cookies; it’s pure joy, right? Dogs love the taste of pumpkin, which also provides nutrient-rich benefits for their overall health. These benefits include promoting healthy digestion and offering vitamins that are good for their skin and coat. You can also try making homemade sweet potato dog treats that are not only delicious but healthy for your furry friend! These homemade treats can be tailored to your dog’s taste preferences and dietary needs by using simple ingredients that are safe for them.
1. Peanut Butter Dog Treats
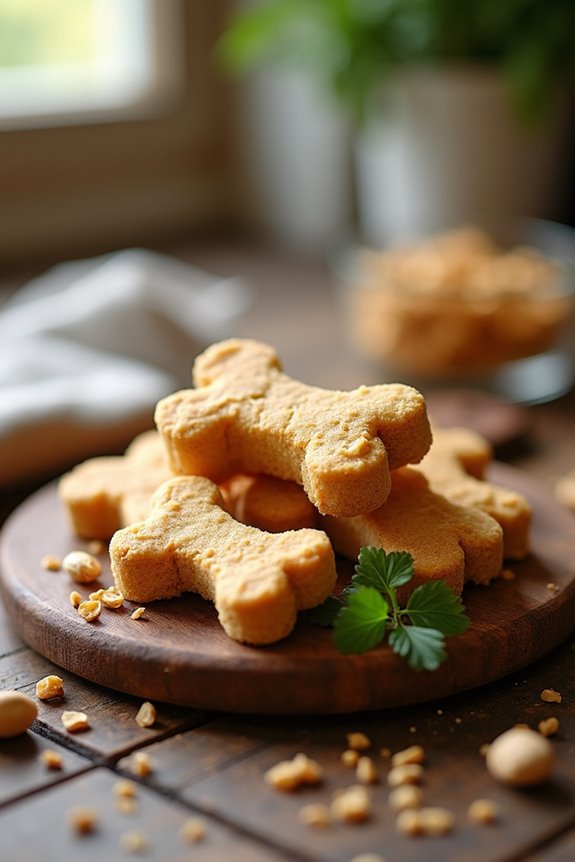
If you’re looking to whip up some delicious peanut butter dog treats for your pup’s birthday, you’ve come to the right place. These treats can also be made using peanut butter apple sauce for added flavor and nutrition. With just a few simple ingredients and easy step-by-step instructions, you’ll have your furry friend wagging their tail in no time. And hey, don’t forget about those optional add-ons—nothing like a little sprinkle of creativity to make those treats extra special. Additionally, these treats can also be made in fun shapes with dog-friendly cookie cutters for an added festive touch.
Ingredients
If you’re looking to whip up something special for your furry friend’s birthday, peanut butter dog treats are a paw-sitively perfect choice. Not only do they smell great, but dogs go absolutely wild for them.
And the best part? Most of these ingredients are probably already hanging out in your pantry, just waiting for their moment to shine. So let’s gather what you need, and let the treat-making adventure begin!
- 1 cup whole wheat flour (or an alternative like oat flour for gluten-free)
- 1/2 cup unsweetened peanut butter (make sure it doesn’t contain xylitol)
- 1/4 cup chicken or beef broth (low sodium is best)
- 1/4 cup rolled oats
- 1 large egg
With just these simple ingredients, you’re well on your way to creating some tail-wagging goodness that’ll have your pup barking for more.
Trust me, they’ll think you’ve turned into the world’s best chef. And who knows, maybe you’ll earn the title of ‘Dog Treat Master’ in their eyes, even if it’s a title only a two-pound Chihuahua can bestow.
Step by Step Instructions
- Preheat your oven to 350°F (175°C) to get it nice and warm for those treats.
- In a large mixing bowl, combine 1 cup of peanut butter with 2 cups of whole wheat flour.
- Add in 1/2 cup of unsweetened applesauce and 1/4 cup of water.
- Mix all the ingredients until a dough forms; don’t worry if it’s a bit sticky.
- Use a rolling pin to roll out the dough on a floured surface to about 1/2 inch thick.
- Cut out shapes using cookie cutters; go for bones or just whatever makes you smile (your dog will love them regardless).
- Place the cutouts on a parchment-lined baking sheet, leaving space between them.
- Bake for 20-25 minutes, or until the edges are golden brown and your kitchen smells like peanut butter heaven.
- Remove the treats from the oven and let them cool on a wire rack (because patience is a virtue… even for us dog lovers).
- Cool completely before serving to your dog. They’ll be so thrilled, you might just be their new best friend.
Optional Add-ons
Once you’ve whipped up those delicious peanut butter dog treats, why stop there?
You could make a doggy cupcake tower or drizzle some peanut butter over their usual kibble.
Remember, dogs adore variety! Try adding yogurt or smashed bananas to the mix; your pup will be over the moon.
Honestly, if they could talk, they’d be begging for more! So, why not treat them?
2. Sweet Potato Chews
If you’re looking to whip up something special for your pup’s birthday, sweet potato chews are a fantastic choice. You’ll need just a few ingredients, and trust me, your dog will be wagging their tail in approval. Let’s walk through the simple steps, and I’ll even share some optional add-ons to make them extra tasty.
Ingredients
Creating sweet potato chews for your furry best friend isn’t just a fun activity; it’s a delicious way to show them you care. Plus, sweet potatoes are like gold for dogs—loaded with vitamins and fiber, they’re a hit for a reason.
So, let’s plunge into the simple ingredients you’ll need to whip up these treats that will make your pup’s tail wag like crazy.
- 2 medium sweet potatoes
- 1 tablespoon olive oil (optional for a little extra flavor)
- ½ teaspoon cinnamon (optional, but dogs can handle it!)
- Water as needed for rinsing and baking tray prep
There you have it—just a few easy items that you probably have in your kitchen already!
Remember, keep it simple, and pay close attention to those sweet potatoes. They’ll make all the difference, trust me—your dog will thank you in slobbery kisses.
Now, let’s get started on those chews and make some tails wag!
Step by Step Instructions
1. Preheat your oven to 250°F (120°C). This low temperature is key for drying the sweet potatoes perfectly.
2. Wash and scrub 2-3 medium sweet potatoes. You want them nice and clean since they’ll be a delicious treat for your pup.
3. Slice the sweet potatoes into 1/4-inch thick rounds or strips. (Try to keep them uniform so they cook evenly—but hey, no one’s judging your knife skills here.)
4. Line a baking sheet with parchment paper or a silicone mat. This will help prevent sticking—think of it as sweet potato yoga—no sticking allowed.
5. Arrange the sweet potato slices in a single layer on the prepared baking sheet, giving them space to breathe (they don’t want to be crowded).
6. Bake in the preheated oven for 2-3 hours, flipping them halfway through. You’re looking for them to be dried out but still chewy, not rock hard.
(The smell wafting through your home? That’s just your secret ingredient: love.)
7. Once done, let them cool on the pan for a bit. (Don’t burn your hands; we still need you to serve those treats.)
8. Transfer the sweet potato chews to a wire rack to cool completely before serving.
Cool completely before serving to your dog. Enjoy watching them wag their tails in delight; it’s what happy tails are made of.
Optional Add-ons
While sweet potato chews are already a hit with your furry friend, why not take them to the next level with some optional add-ons that might just make your pup’s tail wag even faster?
Try drizzling a bit of peanut butter on top or sprinkling cinnamon for extra flavor.
Trust me, the look on their face will be priceless—like they’ve found doggy heaven.
3. Carrot and Apple Bites
Now that you’ve whisked up those sweet potato chews, let’s shift gears to something crunchy and revitalizing: carrot and apple bites.
These treats aren’t just simple to make but also packed with flavor your pup will love. With a few basic ingredients, step-by-step instructions, and maybe a fun optional add-on, you’ll have your furry friend celebrating in style.
Ingredients
When you’re planning a special celebration for your pup, whipping up some homemade treats is a great way to show them just how much you care.
These Carrot and Apple Bites not only smell delightful, but they’re also packed with goodness. Plus, your furry friend will definitely appreciate the thought you put into their birthday goodies.
So let’s gather up some simple, healthy ingredients that will make those tails wag in no time.
- 1 cup finely grated carrots
- 1 cup peeled and finely chopped apples (make sure to remove seeds)
- 1 cup whole wheat flour (or oat flour for a gluten-free option)
- 1/2 cup rolled oats
- 1/4 cup unsweetened applesauce
- 1/4 cup water (adjust as needed for dough consistency)
- 1 tablespoon honey (optional, for a little sweetness)
There you go! Not too many items, and all easy to find. Just a quick trip to the grocery store, and you’re set.
Telling you to keep those apples out of puppy’s reach while chopping is a must, right? We wouldn’t want them snatching the snack before it even hits the oven.
Happy baking!
Step by Step Instructions
1. Preheat your oven to 350°F (175°C). Trust me, your pup will appreciate the warm, fresh vibes.
2. Gather all your ingredients: 1 cup of grated carrots, ½ cup of unsweetened applesauce, and 1 cup of whole wheat flour. Get ready for some culinary creativity.
3. In a medium bowl, mix the grated carrots and applesauce together until well combined. You might want to use a spatula or a big spoon – whatever feels right.
4. Gradually fold in the whole wheat flour until the mixture is just combined.
(Remember, don’t overmix—it should be a bit shaggy, like the hairstyle you rocked in high school.)
5. Line a baking sheet with parchment paper. This will keep things from sticking and make cleanup a breeze.
6. Scoop out small amounts of the dough and roll them into bite-sized balls, about the size of a golf ball.
Or just use your hands—who needs fancy tools, anyway?
7. Place the dough balls on the prepared baking sheet, spaced about 2 inches apart. They’re not going to spread like cookies…but give them some personal space.
8. Use a fork to gently flatten each ball. You should leave a little groove…think little paw prints for added charm.
9. Bake in the preheated oven for 20–25 minutes, or until they’re firm and golden brown.
Your kitchen will fill with the wonderful aroma of fresh-baked delights—try not to eat them all yourself.
10. Remove from the oven and let cool completely before serving to your dog.
You wouldn’t want to burn their fancy pup tongue, would you?
Optional Add-ons
If you’re looking to jazz up those homemade treats, consider adding a delightful twist with carrot and apple bites.
Just grab some grated carrots, mix ’em with finely chopped apples, and combine them with a little peanut butter.
Roll ’em into bite-sized balls, and watch your pup go wild.
Trust me, they’ll love them more than your last failed baking attempt.
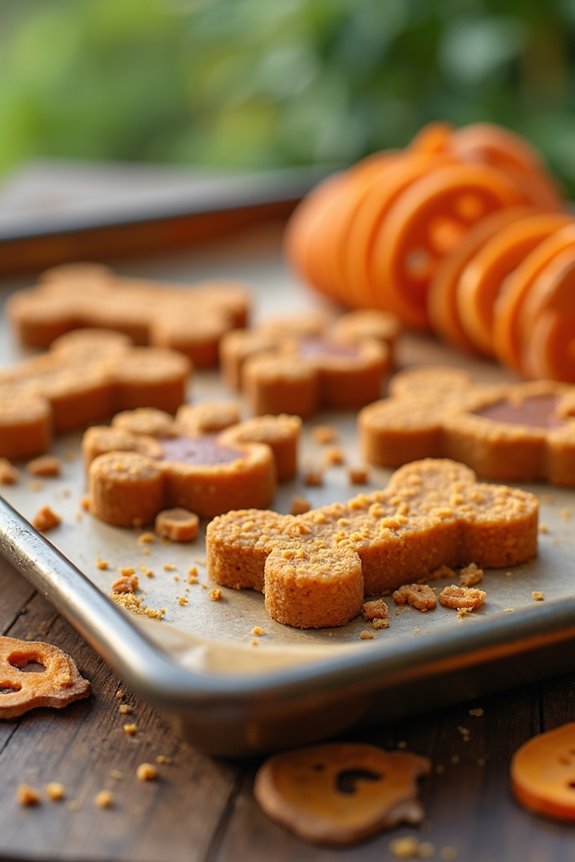
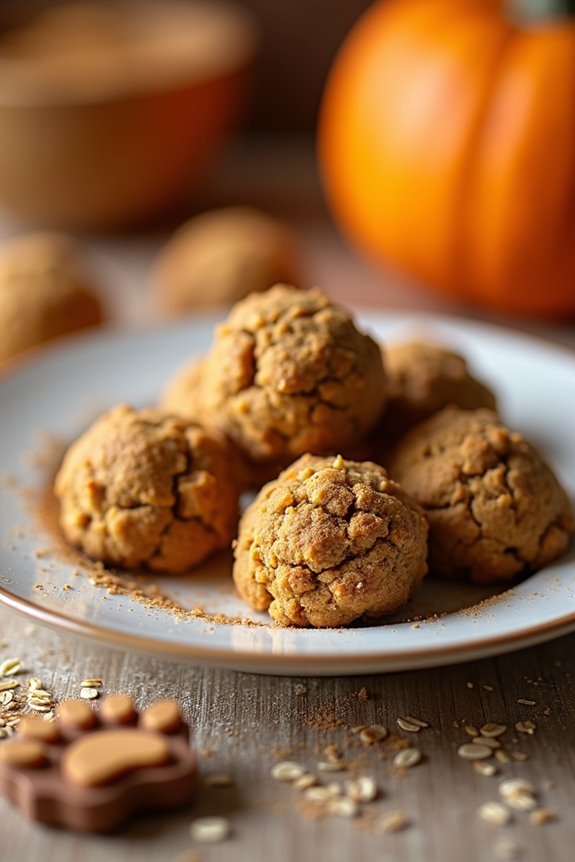
4. Pumpkin and Oatmeal Cookies

You’re in for a treat with these pumpkin and oatmeal cookies, perfect for your pup’s special day.
Let’s break down the ingredients and go through the step-by-step instructions so you can whip up a batch that’ll have them tail-wagging in no time.
And hey, if you want to spice things up a bit, you might even consider some optional add-ons to make these cookies extra special.
Ingredients
When it comes to doggie birthday treats, making cookies is a fun way to show your pup just how much you care. These pumpkin and oatmeal cookies aren’t only super easy to whip up, but they’re also packed with tasty goodness that’s safe for your furry friend.
Trust me, your dog will thank you for these delightful little snacks. Plus, the kitchen will smell amazing while you bake them. You might just find yourself sampling a bite (though, that’s probably not recommended).
Here’s what you’ll need:
- 1 cup of canned pumpkin (make sure it’s 100% pumpkin, not pumpkin pie filling)
- 2 cups of oats (old-fashioned or quick oats work well)
- 1/4 cup of peanut butter (look for xylitol-free)
- 1 egg (large, and organic if possible)
- 1/2 teaspoon of cinnamon
- 1/4 cup of water (you may need a little more or less depending on the consistency)
With these simple ingredients on hand, you’re ready to bake up some tail-wagging birthday treats that will make your pup’s day extra special.
Just remember, a little cookie goes a long way in doggo world—keep the portion sizes appropriate.
Happy baking!
Step by Step Instructions
- Preheat your oven to 350°F (175°C) so it’s nice and warm when your treats are ready to go in.
- Gather all your ingredients: pumpkin puree, oatmeal, flour, eggs, and any dog-friendly spices like cinnamon.
- In a large mixing bowl, combine 1 cup of pumpkin puree, 1 cup of oats, and 1 cup of whole wheat flour.
- Crack one egg into the mixture and stir until all ingredients are well combined (you want everything to be evenly mixed, like a happy family reunion).
- If you’re feeling adventurous, sprinkle in a pinch of cinnamon for a little extra flavor.
- Scoop out the dough with a spoon and form small balls (about the size of a golf ball) and place them on a baking sheet lined with parchment paper.
- Gently flatten each ball with your fingers—don’t worry about making them perfect; it’s the thought that counts, right?
- Bake in the preheated oven for 25–30 minutes, or until the edges are golden brown and your kitchen starts smelling like a cozy autumn morning.
- Once baked, remove the cookies from the oven and let them cool on a wire rack (this step is essential—hot cookies can be dangerous but also irresistible).
- Cool completely before serving to your dog; trust me, their patience will be worth it when they get their paws on these tasty treats.
Optional Add-ons
Adding a few optional ingredients to your pumpkin and oatmeal cookies can elevate them from tasty treats to paw-some delights that your dog will love even more.
Consider adding some peanut butter for a rich flavor or cinnamon for a hint of spice. Your pup won’t know what hit them!
Just watch those tails wag as they savor every bite. You might just want a taste yourself.
5. Frozen Yogurt Treats
Ready to cool off your pup with some frozen yogurt treats? You’ll need just a few simple ingredients and then follow the easy steps to whip up a batch that’ll have tails wagging. Don’t forget—optional add-ons can really make these treats pop, so feel free to get creative!
Ingredients
If you’re looking for a revitalizing treat to make your dog’s birthday extra special, these frozen yogurt treats are just the ticket.
They’re simple to whip up and your pup will love them—trust me, they’ll have tail wags galore. Plus, you probably have most of these ingredients sitting in your kitchen right now.
- 2 cups plain yogurt (unsweetened and unflavored)
- 1 ripe banana, mashed
- 1/2 cup peanut butter (make sure it’s xylitol-free)
- 1/2 cup diced strawberries or blueberries (fresh or frozen)
- Optional: a splash of honey for sweetness (ensure it’s safe for dogs)
See? Easy-peasy.
Just blend these tasty ingredients and freeze them in cute molds or ice cube trays. Then, let your furry friend savor their delicious birthday surprise while you fill your camera roll with their adorably enthusiastic expressions.
Who needs a cake when you can have a doggo masterpiece like this?
Step by Step Instructions
1. Gather all your ingredients: plain yogurt, mashed ripe bananas, and peanut butter (make sure it’s xylitol-free).
You’ll need a mixing bowl, a blender (or food processor), and silicone molds or ice cube trays.
2. In a mixing bowl, combine 1 cup of plain yogurt and 1 mashed banana.
3. Add 2 tablespoons of peanut butter to the mixture. (A little extra peanut butter never hurt anyone, right?)
4. Use a whisk or fork to mix everything together until it’s smooth and well combined.
(A few lumps are okay, but aim for mostly creamy.)
5. If you’re feeling adventurous, toss in some dog-friendly add-ins like blueberries or diced apples at this stage.
6. Pour the mixture into your silicone molds or ice cube trays, filling them about three-quarters full.
(Leave a bit of space for expansion when they freeze.)
7. Gently tap the molds on the counter to remove any air bubbles—trust me, your pup doesn’t want a crunchy surprise.
8. Place the molds in the freezer and let them freeze solid for at least 4 hours, or until completely firm.
(This is the perfect time to sneak a few dog treats for yourself, right?)
9. Once frozen, carefully pop the treats out of the molds.
(If they’re stubborn, running warm water over the bottom of the molds can help.)
10. Store the treats in an airtight container in the freezer until it’s time to celebrate your dog’s big day.
Cool completely before serving to your dog. Enjoy the tail wags and happy barks!
Optional Add-ons
Have you ever wondered how you can make your dog’s special day even more festive?
Try whipping up some frozen yogurt treats. Just mix plain yogurt with your pup’s favorite fruits, pour it into silicone molds, and freeze.
Voila, instant happiness! Your furry friend won’t mind that they look like lopsided ice cubes.
Trust me, they’ll savor every drool-worthy bite.
6. Nutty Banana Biscuit Bites
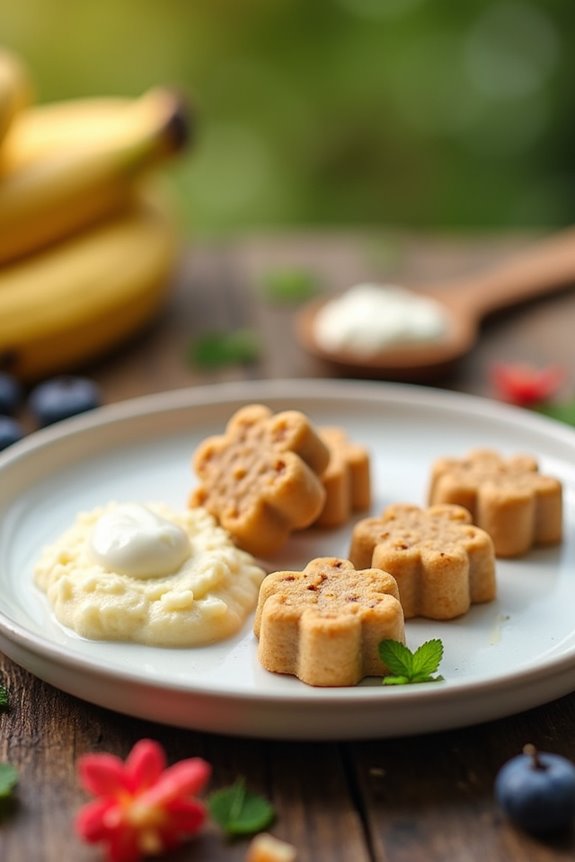
Ready to whip up some Nutty Banana Biscuit Bites for your pup? You’ll need a few simple ingredients and just follow these easy steps to make a treat that’ll have their tail wagging. And hey, if you want to get a little fancy, I’ll share some fun optional add-ons you can toss in for an extra burst of flavor!
Ingredients
When it comes to whipping up a delicious doggy treat for your furry friend’s birthday, you want something that’s both tasty and safe.
These Nutty Banana Biscuit Bites aren’t only easy to make, but they’re also loaded with ingredients that your pup will love. Plus, you hardly need to be a master chef to create these delights.
So, let’s gather our ingredients and get started on this tail-wagging adventure.
- 1 ripe banana, mashed (the riper, the better for that sweet taste)
- 1 cup rolled oats (make sure they’re plain, we don’t need any extra sugar)
- ½ cup peanut butter (as long as it’s xylitol-free, your pup will power through this)
- ½ cup whole wheat flour (or any dog-friendly flour you prefer)
- 1 egg (for binding and all that good stuff)
- ¼ cup chopped walnuts (optional, and be sure they’re unsalted and unflavored)
There you have it, a simple shopping list that won’t make you pull your hair out in confusion.
Just imagine your dog’s tail wagging and the playful puppy eyes watching you as you bake these.
It’s like having your own trusty sous-chef, except, well, a bit furrier.
Ready to jump into some woof-tastic baking? Let’s do it.
Step by Step Instructions
- Preheat your oven to 350°F (175°C) to get it nice and warm while you mix the ingredients.
- In a large mixing bowl, mash two ripe bananas until smooth—don’t worry if there are a few lumps; it adds character to the biscuits.
- Stir in ½ cup of natural peanut butter—make sure it’s dog-friendly and contains no xylitol. Mix well until combined.
- Add 1 ½ cups of whole wheat flour to the banana-peanut butter mixture. Use a spatula to fold it in gently (no need to overdo it; we want a thick dough).
- Slowly pour in ¼ cup of water to help it all come together. If the dough feels too dry, add just a little more water, but not too much, or you’ll end up with a gooey mess!
- Roll the dough out on a lightly floured surface until it’s about ¼ inch thick. Cut out shapes with your favorite cookie cutter—try a bone or paw print for that paw-some touch.
- Place the cut-out biscuits on a parchment-lined baking sheet, making sure to leave a bit of space in between each one.
- Bake in the preheated oven for 25 to 30 minutes, or until the edges are golden brown and the kitchen smells like heaven (or as close to heaven as dog biscuits can get).
- Remove the baking sheet from the oven and let the treats cool for a few minutes before transferring them to a wire rack.
- Cool completely before serving to your dog, and watch their tail wag with excitement as they enjoy their special birthday treat.
Optional Add-ons
While the Nutty Banana Biscuit Bites are already delightful on their own, why not amp up the fun with a few tasty add-ons?
Try drizzling some peanut butter on top or sprinkle a little shredded coconut for a tropical twist.
Or, mix in cooked bacon bits—your pup won’t know what hit ’em.
Trust me, they’ll be wagging their tails in joy.
7. Cheesy Bacon Dog Biscuits
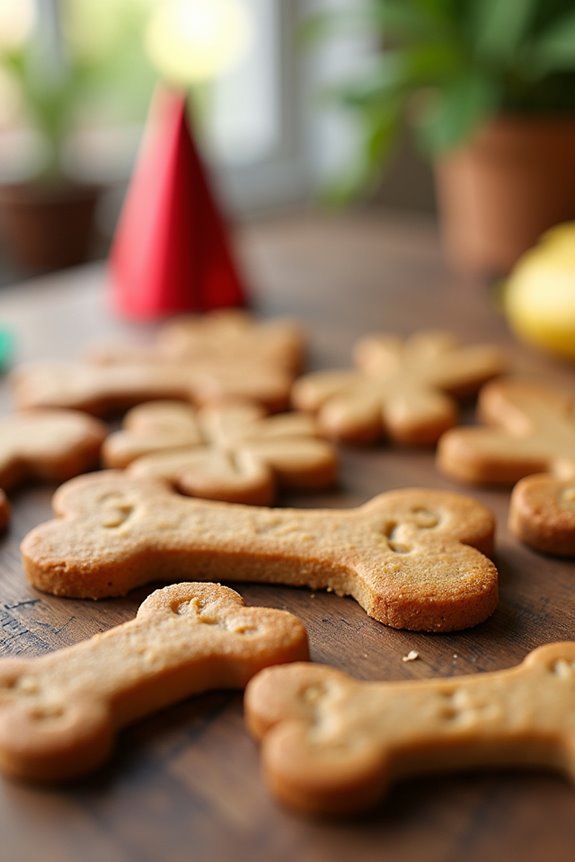
You’re about to whip up some cheesy bacon dog biscuits that’ll have your pup’s tail wagging in no time. First, let’s gather the ingredients—trust me, your kitchen will smell like bacon heaven. And don’t worry, I’ll guide you through each step and even toss in a few optional add-ons to make these treats extra special.
Ingredients
What’s better than celebrating your pup’s birthday with some scrumptious cheesy bacon dog biscuits? They’re not just a treat; they’re a way to show your fluffy friend how much you care.
Plus, they’re super easy to whip up with ingredients you probably already have lying around. So, let’s get down to business and gather these simple, dog-friendly items.
- 2 cups whole wheat flour
- 1 cup shredded cheese (like cheddar or mozzarella)
- ½ cup cooked and crumbled bacon (make sure it’s plain, no seasoning)
- 1 large egg
- ½ cup chicken broth (low sodium, please)
- 2 tablespoons olive oil
- Optional: 1 teaspoon dried parsley for a little flair
Just imagine your dog’s happy little tail wag as you pull these treats out of the oven. Seriously, I can almost hear the excitement!
Choosing ingredients that are safe and tasty is key, and trust me, your dog will sense the love baked right in.
Step by Step Instructions
- Preheat your oven to 350°F (175°C), because you want those biscuits baking up nice and warm, just like a cozy doggy hug.
- In a mixing bowl, combine 2 cups of whole wheat flour, 1 cup of shredded cheese, and 1 cup of crumbled bacon. It’s like a cheesy bacon party, and all you need is an invite.
- In a separate bowl, whisk together 1/2 cup of unsalted peanut butter, 1/2 cup of water, and 1 egg. Make sure it’s smooth and well-mixed (no lumps, please—we’re not making bacon lumps).
- Pour the wet ingredients into the dry ingredients and stir until just combined. Don’t overmix—remember, you want these biscuits to stay fluffy and delightful.
- Lightly flour your work surface, then roll out the dough to about 1/4 inch thick. Cut out shapes with cookie cutters (bone-shaped if you’re feeling fancy) and place them on a greased baking sheet, spacing them an inch apart.
- Bake in the preheated oven for 25–30 minutes, or until the treats are golden brown. Just imagine the heavenly aroma filling your kitchen—your dog could probably smell it from a block away!
- After baking, take them out and let the biscuits cool on a wire rack. You want them cooled completely before letting your furry friend dig in; no one likes a burnt tongue or a hyper dog because of warm biscuits.
- Store any leftovers in an airtight container for up to a week. Just try not to eat them all yourself; they might smell good, but these treats are strictly for your pup!
Optional Add-ons
While you might think those cheesy bacon dog biscuits are perfect just as they are, there’s a whole world of optional add-ons to contemplate that can take them to the next level.
Consider drizzling some peanut butter on top or mixing in pumpkin puree for a holiday flair.
Your pooch will think you’re a gourmet chef. Trust me, the tail wags will be worth it.
Dog-Friendly Party Favors
When you’re planning a doggy birthday party, it’s not just about the cake and decorations; party favors for the furry guests can really take things to the next level.
Imagine the delight on their little faces when they receive a goodie bag packed with treats. You can fill these bags with homemade dog biscuits—just mix peanut butter, flour, and eggs. Don’t worry if they come out shaped like a blob; dogs don’t care about aesthetics.
Consider adding a squeaky toy or two. Who doesn’t love a squeaky surprise? You might even throw in a dog bandana, just to make them feel extra special.
But remember, presentation is key—wrap everything up in colorful tissue paper or in cute little boxes. Your pooch’s pals will wag their tails with joy, and you’ll bask in the happiness of a successful celebration.
After all, isn’t that what it’s all about?
Frequently Asked Questions
What Are the Best Themes for a Dog Birthday Party?
Some of the best themes for a dog birthday party include “Paw-ty in the Park,” “Fetch Fiesta,” and “Woof Wonderland.” You’ll enjoy creating fun activities and decorations that suit your pup’s personality and charm!
How Can I Involve My Dog’s Friends in the Celebration?
Invite your dog’s friends by sending out cute invitations. Set up a play area, provide treats, and organize fun games. Let everyone mingle and enjoy, making sure each pup feels included and special during the celebration!
What Safety Precautions Should I Take During the Party?
Keep sharp objects out of reach, supervise interactions between dogs, and guarantee all food is safe for pets. Have fresh water available and create a comfortable space for resting to prevent overstimulation. Enjoy the celebration!
How Do I Keep Dogs Entertained During the Event?
Set up games like fetch or agility courses, and provide various toys. You could create a doggy play area with pups of similar sizes. Don’t forget treats to keep everyone motivated and engaged during the fun!
Can I Include Non-Dog Guests at the Birthday Party?
You can include non-dog guests at the party. Just make sure they’re comfortable around dogs, and provide activities for everyone. It’ll create a fun atmosphere for both two-legged and four-legged friends!