Imagine your dog strutting around in a bandana that showcases their unique personality—like a mini fashionista on four legs. Crafting a dog bandana isn’t just about style; it’s a fun way to bond with your furry friend. You might wonder where to start or if you’ll make a total mess. Don’t worry, I’ve got your back. Let’s plunge into some creative DIY ideas that’ll have both you and your pup looking chic and cute.
Fun Pattern Combinations
When you’re dressing your pup in a snazzy bandana, why not have some fun with patterns?
Mixing and matching prints can elevate your dog bandana DIY to a whole new level. Imagine polka dots paired with vibrant florals or stripes combined with playful paw prints.
Don’t overthink it; just grab some fabric scraps and start experimenting. You might be amazed at how well those mismatched patterns flow together.
If you’re feeling adventurous, try using a bandana with one bold pattern on one side and a contrasting one on the reverse.
Your pup’s bound to turn heads. Plus, you’ll have a blast watching their little personality shine through that fashionable flair—why should humans have all the fun, right?
Our Collection
Let’s talk about our collection of dog bandanas, because your pup deserves some serious style.
From playful floral prints to trendy plaid and even fun geometric shapes, there’s something here for every furball’s personality.
And don’t forget those personalized embroidery options; imagine how cute your dog will look in a bandana that has their name stitched right on it.
1. Floral Print Bandana Design

Let’s face it, dogs deserve to feel fabulous too. A DIY floral print bandana isn’t just a stylish accessory but also a practical item that keeps your furry friend trendy while allowing them to express their personality.
Plus, making your own bandana is kind on the wallet. Why spend a fortune on store-bought options when you can create a unique piece right from your living room? Let’s get started.
Materials Needed:
- 1 yard of floral print fabric (cotton works best)
- Scissors
- Measuring tape or ruler
- Fabric chalk or a marker
- Sewing machine or needle and thread
- Iron (for crisp edges)
- Dog’s collar for sizing (optional)
Step-by-Step Instructions:
- Measure Your Pup: Grab that measuring tape and find out how wide your dog’s neck is. If you’re feeling adventurous, throw in a little extra for some wiggle room—after all, nobody likes a choker.
- Cut the Fabric: Cut a square piece of fabric, about 22 inches by 22 inches. This will give you plenty of material to play with, and trust me, a little extra fabric goes a long way in making a stylish point.
- Fold and Iron: Take the square and fold it diagonally to form a triangle. Press it with an iron to make it nice and crisp. This step might seem tedious, but it makes a huge difference in how your bandana will look.
- Sew the Edges (Optional): If you want to avoid fraying, sew a straight stitch along the two shorter edges of the triangle. This isn’t necessary if you’re using fabric that doesn’t fray much, but hey, if you’re already sewing, why not?
- Show Off Your Work: Flip the bandana right side out, and voilà—you’ve got a stylish floral bandana! Time for a little fashion show. Simply tie it around your dog’s neck—preferably, under their collar for added security.
- Shake and Strut: Now that your pup is all dressed up, let them strut their stuff around the house or outside in the yard. Nothing beats the sight of a dog flaunting a pretty floral print bandana while you snap a million photos.
Optional Add-ons/Variations:
- Use contrasting fabrics or color combinations to create a really vibrant look. Imagine a light pink floral paired with a bold yellow—fabulous!
- Add some removable embellishments—like small patches or little bows—for a unique twist. The options are endless, and it allows you to create something totally personal!
Pro Tip:
When tying the bandana, be mindful not to make it too tight. You want your pup to be comfy and free to move around. Keep one finger between the bandana and your dog’s neck for a perfect fit.
No one wants a fashion accessory that doubles as a chokehold. Trust me, your dog will thank you for it.
Now that you’ve got the scoop, get those creative juices flowing and make your dog the most stylish pooch on the block! Happy crafting!
2. Plaid Fabric Bandana Design
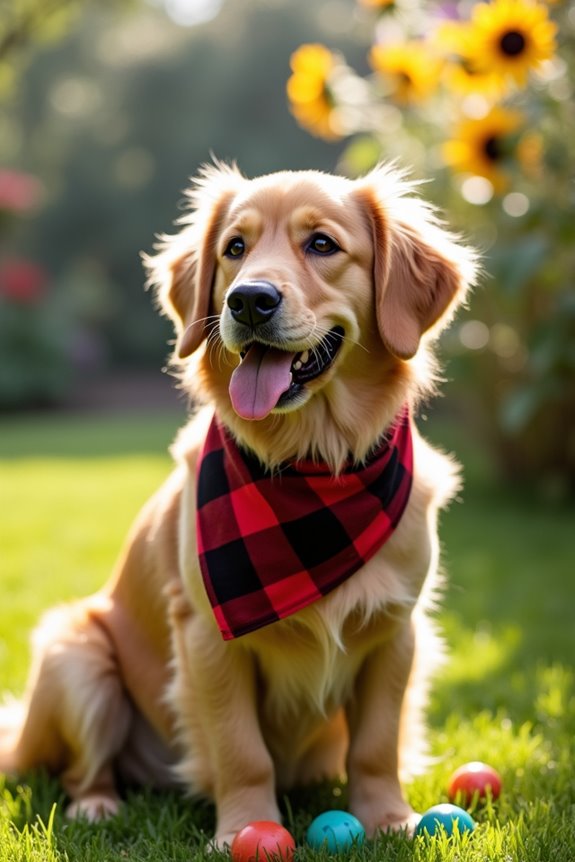
Let’s be honest, plaid can make any dog look instantly adorable. Crafting a DIY plaid fabric bandana not only keeps your furry friend looking dapper but also saves a few bucks while letting you tap into your creative side. With just a few simple materials and steps, you can accessorize your pup without breaking the bank. Now, who wouldn’t want that? Plus, using a service like carpet cleaning machine professional will help maintain the cleanliness of your home while your dog shows off their stylish new accessory!
Materials Needed:
- 1 yard of plaid fabric (cotton works well)
- Scissors
- Measuring tape or ruler
- Fabric chalk or a marker
- Sewing machine or needle and thread
- Iron (for smooth edges)
- Pet collar for sizing (optional)
Step-by-Step Instructions:
- Get Your Measurements: Start by measuring your dog’s neck. Don’t forget to add a little extra for comfort—no one likes a stuffy bandana, right?
- Cut the Fabric: Snip out a square piece of the plaid fabric. Aim for about 22 inches by 22 inches. That size gives you enough fabric to craft a stylish look without going overboard—you don’t want it to double as a cape.
- Fold and Iron: Once you have your square, fold it diagonally to form a triangle. Iron it down to make sure those creases hold—they’ll make a world of difference in the final look, trust me.
- Sew the Edges (Optional): Want to keep things neat and tidy? Run a straight stitch along the two shorter edges of your triangle. This step helps prevent fraying, especially if you chose a fabric that’s a little rebellious.
- Display Your Creation: Turn the bandana so it’s right side out, and there you go—a snazzy plaid bandana ready to be worn! Tie it around your pup’s neck—best practice is to do it beneath their collar for some extra security.
- Time for a Photo Op: Let your dog strut around in their new accessory. You might even find yourself laughing at how their personality shines through—who knew a bandana could be so expressive?
Optional Add-ons/Variations:
- Mix it up with a pop of color. How about combining a classic plaid with a bright solid fabric? Pair a blue plaid with a sunny yellow for a look that really stands out.
- Consider adding cute patches or fabric paint to create a unique design that reflects your dog’s personality. Let’s face it, every pup is a superstar, and their accessories should show it.
Pro Tip:
When tying the bandana, make sure it’s snug but not too tight. A good rule of thumb is to be able to fit two fingers between the bandana and your dog’s neck. Comfort is key—after all, you want your furry friend strutting their stuff, not scratching at a constricting accessory.
3. Geometric Shapes Bandana Design

Are you ready to give your furry friend a fun and trendy makeover? This DIY geometric shapes bandana isn’t only stylish but also a great way for you to save some cash. Plus, it adds a modern twist to your pup’s wardrobe that will have everyone asking where you got it. Let’s jump in and get started!
Materials Needed:
- 1 yard of geometric pattern fabric (cotton or cotton blend)
- Fabric scissors
- Measuring tape or ruler
- Fabric chalk or marker for marking
- Sewing machine or needle and thread
- Iron (to smooth out the fabric)
- Pet collar for fitting (optional)
Step-by-Step Instructions:
- Measurements Matter: Grab your measuring tape and measure your dog’s neck, adding an extra inch or two for their comfort. You don’t want them feeling choked, do you?
- Cut Out the Fabric: Cut a square piece of the geometric fabric, about 25 inches by 25 inches. This size is perfect for creating that playful look without overwhelming your pup.
- Create the Triangle: Fold the square diagonally to create a triangle. Give it a good iron to smooth out any wrinkles and to keep those edges crisp. Trust me, crisp edges make all the difference.
- Sew the Edges (Optional): If you’re feeling particularly crafty, sew along the two shorter sides of the triangle to prevent fraying. Just a simple straight stitch will do the trick and help your bandana last longer.
- Flip it Right Side Out: Turn your triangle inside out so that the patterned side is showing. Voila! Your geometric bandana is almost ready to rock.
- Tie it On: Finally, tie it around your dog’s neck. It’s best to position it underneath their collar for extra security. There’s nothing worse than a bandana slipping and turning into a scarf!
- Capture the Moment: With your dog looking sharp and stylish, don’t forget to snap some photos. You’ll want to remember how adorable they look in their new accessory.
Optional Add-ons/Variations:
- For a pop of personality, consider layering a solid color bandana underneath or flipping it around so you see both the geometric pattern and the solid color. This double-layer look adds a bit of flair.
- Add some fabric paint doodles or stamps to personalize it even more! Let your inner artist shine and create something truly unique.
Pro Tip:
When tying the bandana, make sure it’s snug enough to stay in place but still comfortable; you should be able to fit two fingers between the bandana and your dog’s neck.
And if your pup has long hair, they might appreciate a more secure tie to prevent it from slipping. Just think of it as giving them a little extra flair. Not only will your dog look fantastic in their geometric bandana, but you’ll also feel good knowing that you made it yourself and could even complement it with premium dog food makers to enhance your pup’s overall well-being.
4. Bandana With Personalized Embroidery

Looking for a way to add a personal touch to your dog’s wardrobe? This DIY embroidered bandana will do just that and help you express your pup’s personality! Not only is it a budget-friendly alternative to boutique pet accessories, but it also guarantees your furry friend has a one-of-a-kind item that’s truly special. With the right fabric and creativity, you can easily create luxury dog accessories that your pup will love to wear.
Plus, who doesn’t love the satisfaction of making something yourself? Let’s plunge into this fun and memorable project.
Materials Needed:
- 1 yard of fabric (cotton or cotton blend is best)
- Colorful embroidery thread
- Embroidery needle
- Fabric scissors
- Measuring tape or ruler
- Fabric chalk or marker for marking
- Sewing machine or needle and thread (for the bandana edges)
- Iron (to smooth out the fabric)
- Embroidery hoop (optional for easier stitching)
- Pet collar for fitting (optional)
Step-by-Step Instructions:
1. Measure Your Pup: Start by measuring your dog’s neck so that you can create a bandana that fits just right. Don’t forget to add an extra inch or two for comfort. You want them strutting in style, not choking!
2. Cut the Fabric: Cut a square piece of fabric, about 25 inches by 25 inches. This size works great for most dog sizes, but you can adjust it based on your pup’s dimensions. A well-fitted bandana is important!
3. Form the Triangle: Fold the square diagonally to turn it into a triangle shape. Give it a good iron to make sure there are no wrinkles. A smooth surface means easier embroidery later on.
4. Get Creative with Embroidery: Now comes the fun part! Use fabric chalk to sketch out your design, whether it’s your dog’s name, a fun phrase, or a cute dog motif. Secure your fabric in the embroidery hoop, if you’re using one, and go to town stitching.
Don’t worry if you’re not a pro; a little friendly wonkiness adds character.
5. Sew the Edges (Optional): If you want to fortify your bandana and prevent fraying, you can sew along the two shorter sides of the triangle using a simple straight stitch. This is especially helpful if your pup gets a little rowdy.
6. Flip It: If you’ve sewn the edges, turn your bandana right side out so the embellished side is showing. It’s starting to look fancy!
7. Wear It Proudly: Tie the bandana around your dog’s neck, ideally under their collar for extra security. Make sure it’s snug yet comfy—after all, this is about making your pup look good and feel happy.
Optional Add-ons/Variations:
- Think about using different fabric colors or patterns to complement your dog’s personality. You could even mix and match fabrics for a fun layered look.
- Why not combine embroidery with some fabric paint? Add a splash of color around the stitched area for a vibrant touch.
Pro Tip:
Always check the tightness of the bandana around your dog’s neck; it should be snug but breathable. A good rule of thumb is to guarantee you can fit two fingers comfortably between the bandana and your dog’s neck.
Keeping them comfy makes for a happier, more stylish pup.
There you have it—the ultimate personalized accessory for your furry best friend. Now go create something wonderful that showcases just how special your dog is!
5. Animal Print Bandana Design
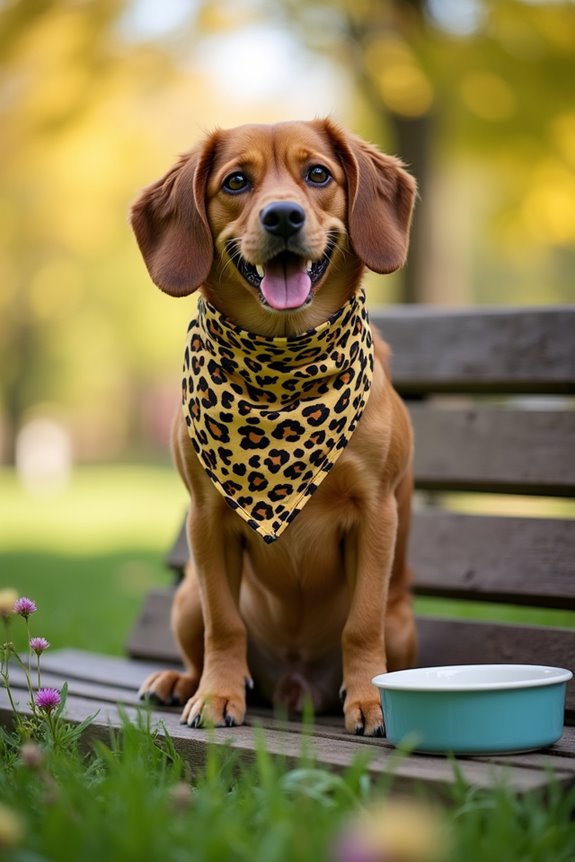
If you’re looking to give your dog a wild flair, then this DIY animal print bandana project is just the thing. Not only does it allow you to express your dog’s inner beast, but it’s a cost-effective way to add some pizzazz to their wardrobe. Plus, think of how adorable they’ll look with a chic bandana around their neck while prancing through the park. Who wouldn’t want that?
Materials Needed:
- 1 yard of fabric (animal print pattern, of your choice)
- Bandana pattern (you can make one or find templates online)
- Fabric scissors
- Sewing machine or needle and thread
- Measuring tape or ruler
- Fabric chalk or marker for marking
- Iron (to smooth out the fabric)
- Pet collar for fitting (optional)
Step-by-Step Instructions:
- Pick Your Pattern: Grab your animal print fabric and choose a print that brings out your dog’s personality. From leopard spots to zebra stripes, it’s time to channel your inner fashion designer.
- Measure and Cut: Measure your dog’s neck to know how much fabric you need. A square piece of about 25 inches by 25 inches is a safe bet for most pups. Carefully cut your fabric with fabric scissors, taking your time—this is the fun part!
- Shape It Up: Fold the square piece of fabric diagonally to create a triangle. Give it a little iron to guarantee there are no wrinkles. Trust me, your dog will appreciate the effort.
- Sew It Up: If you want a more polished look, you can sew a straight stitch along the two shorter edges of the triangle. It’s easy and will keep the edges from fraying. Just remember to keep a steady hand; you’ve got this!
- Get Creative: While you’re sewing, consider adding your own artistic flair. Use fabric markers or extra scraps of fabric to create accents or even embroider a fun phrase. If your dog is a little diva, maybe “Queen of the Savannah” is in order.
- Dress to Impress: Slide the bandana around your dog’s neck, ideally tucked under their collar for added security. Make it snug, but be sure your pup can still breathe easily. After all, nobody wants a fashion emergency, right?
Optional Add-ons/Variations:
- Experiment with different animal prints—think bold tiger, classy giraffe, or even fun cow spots.
- Mix and match colors for a completely unique look that’ll make your pup the talk of the dog park.
- Consider adding a matching bow tie or decorative embellishments to coordinate with the bandana.
Pro Tip:
If you want to save a few bucks, raid your local fabric scrap store. Sometimes, you can score leftover pieces that are perfect for a dog bandana, without breaking the bank. And always make sure your fabric is washable; because let’s be honest, dogs can be messy. Happy crafting!
Additionally, consider complementing your dog’s stylish new bandana with dog-themed kitchenware that showcases your love for dogs throughout your home!
6. Tie-Dye Bandana Design

If you’re looking to add a splash of color and creativity to your dog’s wardrobe, then this tie-dye bandana project is perfect for you. Not only will it save you money compared to store-bought styles, but it allows you to express your artistic side while ensuring your furry friend always looks fabulous.
Plus, who doesn’t love a vibrant accessory on their pup? Did you know a well-designed invisible dog fence system can enhance your pet’s safety while they flaunt their new fashion statement?
Materials Needed:
- 1 yard of plain cotton fabric (white or light color works best)
- Fabric dye (in your favorite colors)
- Rubber bands or string (for folding)
- Plastic gloves (to keep your hands clean)
- Plastic squeeze bottles (for applying dye)
- Plastic cover or garbage bags (to protect your workspace)
- Water and a bucket (for rinsing)
- Measuring tape or ruler
- Iron (to smooth out the fabric)
Step-by-Step Instructions:
1. Choose Your Fabric: Grab your plain cotton fabric. White or light-colored fabric is the best canvas for that dazzling tie-dye effect.
Kids’ art projects have nothing on this masterpiece!
2. Prep Your Space: Lay down a plastic cover or garbage bags to protect your table or floor. Trust me, tie-dye can get messy, so put on those plastic gloves before you get started.
No one wants to explain tie-dye stains to grandma.
3. Fold and Bind: Decide on your tie-dye pattern. You could go for classic spiral, stripes, or even a random blotch look.
Fold the fabric and secure it with rubber bands or string in different sections. The way you bind it determines the design, so get creative!
4. Mix Your Dye: Prepare your fabric dye according to the instructions on the package. Squeeze bottles make it so much easier to apply the dye.
Get your favorite colors ready—think about whether you want bright pops or soft pastels.
5. Start Dying: Apply the dye to the sections of fabric using your squeeze bottles. Be bold with your color choices and layer them for that awesome blend!
It’s like painting, but more fun because you can later sport your adorable creation!
6. Setting the Dye: Once you’ve dyed your fabric, wrap it in plastic (like a burrito), and let it sit according to the dye instructions, generally for several hours or overnight.
This is the suspenseful part while you anxiously wonder if your artistic vision pays off.
7. Rinse and Dry: After the waiting period, rinse the fabric under cold water until the water runs clear. This step is essential to keep the colors from bleeding everywhere.
Then, hang it up to dry—patience is key here!
Optional Add-ons/Variations:
– Get really adventurous and experiment with multiple colors and designs on the same bandana.
Try out different patterns or even stencils for added fun.
– Why not match the bandana with a vibrant collar or leash?
Think about adding some beads or embellishments for extra flair.
Pro Tip:
Before letting your dog wear the bandana, wash it once more on a gentle cycle to remove any excess dye.
This helps prevent color transfer onto your pup’s fur and keeps that tie-dye looking sharp.
Plus, it’s a good reminder for us all—proper prepping can save quite the wardrobe disaster later on.
Happy crafting!
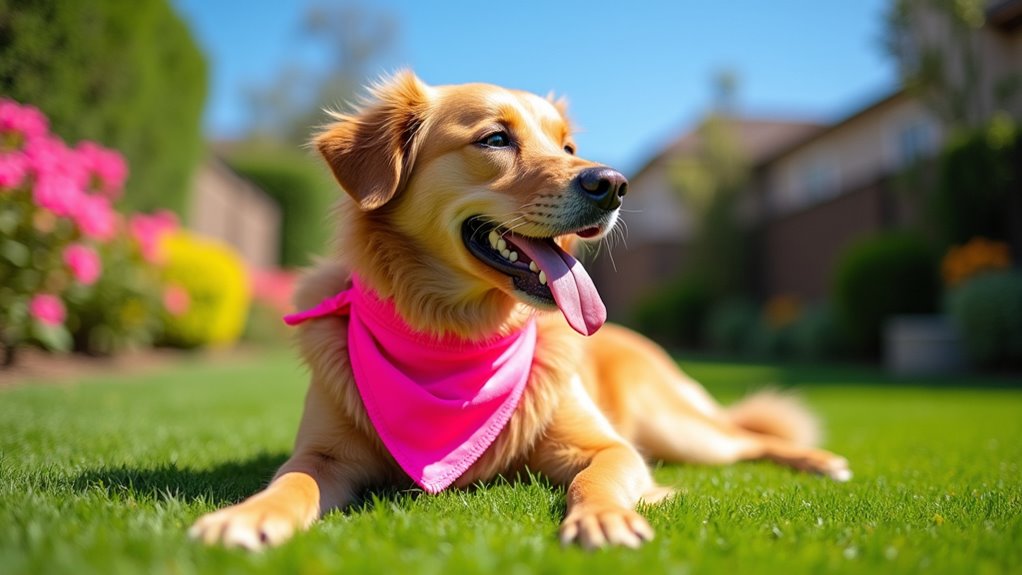
7. Bright Neon Color Bandana

If you want your dog to stand out in a crowd (and let’s be honest, who wouldn’t want their pup to shine bright like a diamond?), then a bright neon color bandana is the way to go. Not only is this DIY project an affordable alternative to pet accessories, but it also brings a fun splash of color to your dog’s style while guaranteeing comfort.
Plus, who could resist that bright pop of color that says, “I’m ready for fun!”?
Materials Needed:
- 1 yard of cotton fabric (in neon colors like pink, green, or yellow)
- Fabric scissors (to cut the fabric)
- Measuring tape or ruler
- Fabric marker (for marking)
- Sewing machine or needle and thread (if you wish to hem the edges, optional)
- Iron (for smoothing down the fabric)
- Pattern (optional: you can print out a bandana template)
Step-by-Step Instructions:
1. Cut the Fabric: Start by cutting your fabric into a square. A good size for most dogs is about 22 inches by 22 inches. If you’re feeling fancy, you can use a pattern or just freehand it—no pressure!
2. Fold for Shape: Take your square and fold it diagonally in half to create a triangle. This will be the basic shape of your bandana—that is a classic look, redefining “fetching” style.
3. Trim the Edges (optional): If you want to give your bandana a more polished look, you can hem the edges. Grab your sewing machine or needle and thread, and do a quick zigzag stitch around the edges.
If you’re short on time, the raw edges can look just fine, too—just embrace the casual vibe.
4. Add Personal Touches (optional): Use fabric markers to doodle or write your dog’s name on the bandana. Or, you could even add some paw prints. Something like “Barky McBarkface” sounds fun, right?
Your pup will love sporting their personalized style.
5. Iron it Out: Give your bandana a quick ironing session to confirm it’s nice and smooth. Just don’t burn a hole in it. That would be… unfortunate.
6. Dress Up Your Pup: Once the bandana is ready, you can tie it comfortably around your dog’s neck. Make sure to leave enough room for them to breathe easily. Fashion is important, but comfort comes first.
Optional Add-ons/Variations:
Want to switch things up? Try using different neon patterns like polka dots or stripes. This can add a quirky layer to your bandana’s look.
You could even switch fabrics based on the season! Why not get festive and use holiday-themed fabric for special occasions?
Pro Tip:
Before you go all out, make sure to wash your fabric to remove any chemicals from production. Plus, washing can help set those vibrant neon colors, confirming your pup remains fashion-forward without any color mishaps.
Just imagine this: a bright green bandana blending into some grass. Not cool.
Now that you’re armed with the know-how, your dog can strut their stuff in style. Happy crafting!
Extra Tips & Ideas
When it comes to DIY dog bandanas, the fun doesn’t stop at just sewing a basic triangle. You can add your personal touch in so many ways.
Consider using fabric paint to create fun designs, or embellish your bandana with patches—because who doesn’t love a bandana with personality? If you’re feeling adventurous, try adding a pocket to hold treats. Just think, a stylish accessory that’s also functional.
Don’t forget about the way you tie it; a bow can instantly elevate the cuteness factor. Also, search through your fabric scraps for unique patterns. You might uncover hidden treasures.
Frequently Asked Questions
What Materials Do I Need for a Dog Bandana DIY Project?
You’ll need fabric (cotton works great), scissors, a sewing machine or needle and thread, measuring tape, and optional embellishments like buttons or fabric paint. Gather these materials, and you’re ready to start your dog bandana project!
How Do I Measure My Dog for the Perfect Fit?
About 70% of dog owners struggle to find the right bandana size. To measure your dog, wrap a tape measure around their neck, leaving room for comfort, then check the size against your desired bandana pattern.
Can I Machine Wash the Bandanas Once Made?
Yes, you can machine wash the bandanas once you’ve made them. Just make sure to use a gentle cycle and cold water. Avoid bleach to maintain their colors and shape, and air dry for best results.
Are There Any Safety Tips for Using Bandanas on Dogs?
When dressing your pup, keep safety in mind. Always supervise them, avoid tight knots, and check for signs of discomfort. Remember, a fashion statement shouldn’t come at the cost of their happiness and well-being.
What if My Dog Dislikes Wearing
If your dog dislikes wearing a bandana, try introducing it gradually. Offer treats or playtime while they wear it for short periods. Choose softer fabrics and make certain it’s a comfortable fit to help them adjust.
Conclusion
So there you have it—your pup’s fashion game just leveled up with these DIY bandana ideas. Who knew mixing floral with plaid could release your inner designer? But seriously, everyone can become a crafting guru, even if your last masterpiece was a lopsided paper mache cat. Just remember, while your dog’s personality might shine through that bright neon, don’t be surprised when they somehow still prefer rolling in mud over wearing it. Good luck, and may the fabric gods be ever in your favor!