Have you ever watched your dog tear apart expensive toys, only to realize you could craft something just as fun at home? It’s easier than you think. Imagine turning an old t-shirt into a tug toy or whipping up a snuffle mat out of mismatched socks. These DIY projects not only save you money but also give your dog something unique and personal. So, are you ready to grab those crafting supplies and get started?
Dog Toy Making Ideas
When you want to keep your furry friend entertained without breaking the bank, making homemade dog toys is the way to go.
Ever thought about turning old t-shirts into a fun rope toy? Just cut them into strips, tie them together, and voila—instant joy.
Or how about stuffing an old tennis ball with treats? Just make a small slit, fill it with goodies, and watch your pup go wild.
These are simple yet effective DIY dog stuff that won’t cost you much. Plus, your dog won’t care if you’re not a pro.
So, roll up your sleeves, channel your crafty side, and create something your dog will love.
Trust me, your pooch will think you’re a genius.
Our Collection
Let’s talk about our collection of fun DIY dog projects you can whip up at home.
You’ve got everything from a recycled t-shirt tug toy to a puzzle treat dispenser that’ll keep your pup engaged for hours.
Whether you’re feeling crafty or just looking to save a few bucks, these projects make sure your furry friend stays entertained while you channel your inner DIY guru.
1. Recycled T-Shirt Tug Toy

Have you ever looked at your old t-shirts and thought, “These would make way better dog toys than rags?” You’re not alone!
Creating a recycled t-shirt tug toy isn’t just fun and satisfying, but it also saves you money and gives your pup something to wag about. Plus, it keeps those old shirts out of the landfill—how’s that for being eco-friendly? Using high-quality materials can ensure the safety of your pet while making toys at home, similar to premium dog food makers.
Materials Needed:
- 2-3 old t-shirts (the more colorful, the better)
- Scissors
- A flat surface for cutting
- Your dog (for testing, of course!)
Step-by-Step Instructions:
- Grab those T-Shirts: Pick out 2 or 3 t-shirts that you don’t wear anymore. The more worn and soft, the better for your pup’s mouth—goodbye chafing!
- Cut into Strips: Lay a t-shirt flat on your surface. Using scissors, cut it into strips about 1 to 2 inches wide. Aim for at least 6 strips per shirt.
- Braid It Up: Take 3 strips (feel free to mix colors for style) and tie a knot at one end. Then, braid them together just like you might with hair. If it helps, channel your inner stylist!
- Tie Off the End: Once you’ve gotten it to your desired length (typically about a foot long works great), tie a knot at the other end. You now have yourself a tug toy!
- Get Testing: Give it to your dog and watch the magic happen. Tug, play, and let them enjoy this new buddy. Don’t be shy—play back!
- Optional Trim: If there are (ahem) any rough edges from your cutting, simply trim any extra fabric to avoid fraying. Dingy edges aren’t cute on dog toys.
Optional Add-ons/Variations:
- Different Fabrics: Try using flannel or an old pair of pajama bottoms! This adds texture and gives the toy a soft feel—perfect for those gentle tugger pups.
- Add a Squeaker: If your dog loves squeaky toys, stick a squeaker inside before you tie the last knot. Just make sure the squeaker is secured and won’t pop out during playtime.
Pro Tip:
Always supervise your dog when playing with any homemade toy, just in case the temptation to chew turns into a full-on fabric buffet.
2. Fleece Ball Toss Toy

Looking for a delightful DIY project that will have your pup bouncing with joy? The fleece ball toss toy is a fantastic way to get your dog moving while keeping them entertained. Not only is it fun to create, but it’s also budget-friendly and adds a colorful touch to your dog’s toy collection. Plus, how great is it that you can customize it to make it uniquely yours?
Materials Needed:
- 1-2 pieces of fleece fabric (in fun colors)
- Scissors
- A bowl (to help form the ball)
- Your dog (for ultimate testing!)
Step-by-Step Instructions:
- Cut the Fleece: Start by cutting your fleece into strips about 1 inch wide. You’ll want strips that are about 12-14 inches long. The more strips, the fluffier the ball will be – so don’t hold back on fabric!
- Create the Ball Shape: Take several strips and place them into a bowl, overlapping them as you go. This will help create a nice rounded shape.
- Twist and Gather: Once you’ve placed enough strips in the bowl, twist them together, then gather all the ends into a single point at the top.
- Tie It Up: Use a strip of fleece from the gathered ends to tie a knot tightly around the top. This will hold everything securely in place.
- Fluff It Up: Fluff out the ball gently. You want it to look fun and inviting for your pup—make sure it’s bouncy and puffy!
- Get Ready to Play: Introduce your new fleece ball to your dog. Toss it, retrieve it, and witness the sheer joy in your dog’s eyes. Bring your best throwing arm because you’re in for a fun time.
Optional Add-ons/Variations:
- Mix Fabrics: Why stop at just fleece? Consider using some soft polar fleece or even old blankets. It’ll add a fun twist and make the ball even cozier for your pup.
- Add a Squeaker: If your dog loves squeaky toys, you can tuck a squeaker inside the ball before you tie it off. Just make sure to secure it properly so it doesn’t pop out during play.
Pro Tip:
Always check the durability of your fleece ball during playtime. If your pup is a particularly enthusiastic chewer, you may need to supervise their play to ascertain the toy stays intact and remains a safe plaything. Alternate your fabric choices for a unique look and added durability! Furthermore, after playtime, consider rewarding your pup with some homemade treats using a premium dog treat dehydrator for a wholesome snack!
Now, ready to give your dog the colorful festivities they deserve? Grab that fleece and start crafting a ball that will keep tails wagging!
3. Tennis Ball Treat Dispenser
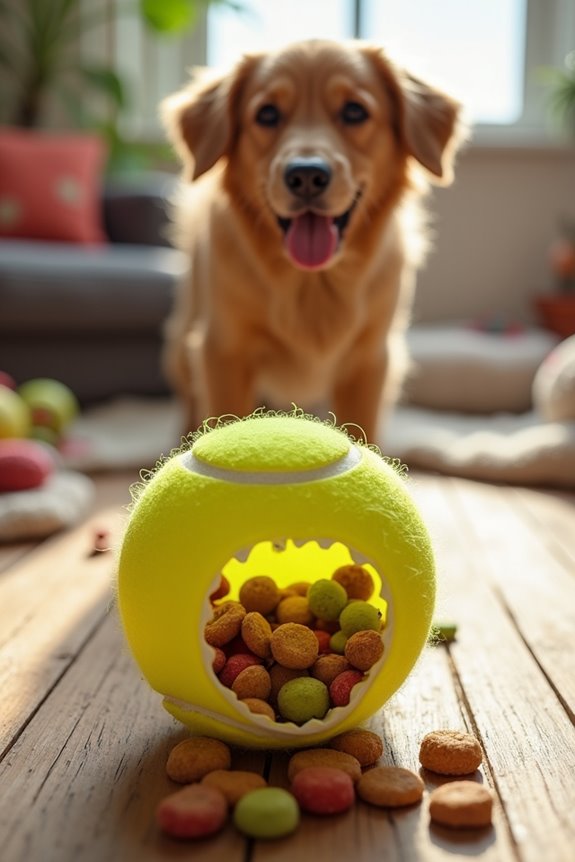
Imagine a toy that keeps your dog actively engaged while rewarding them with tasty treats. Sounds like a dream, right? Enter the Tennis Ball Treat Dispenser. This fun DIY project not only provides your pup with hours of entertainment but also saves you some cash on expensive toys that do the same thing. Plus, it’s an eco-friendly way to repurpose old tennis balls. So, grab those worn-out balls and let’s get to work. Additionally, consider pairing it with some premium dog chew toys for a well-rounded playtime experience.
Materials Needed:
- Old tennis balls (the more, the merrier)
- A sharp knife or scissors
- Dog-safe treats (small treats fit best)
- Marker (optional, for marking the cut)
- A towel or cutting board (to protect your surfaces)
Step-by-Step Instructions:
- Prepare Your Work Area: Set up your cutting board or lay down a towel to catch any little pieces. Safety first—don’t want to mess up your kitchen table!
- Mark and Cut: Use the marker to lightly mark an opening about 1-2 inches long on the side of the tennis ball. This will be where the treats will go. Carefully cut along the mark using a knife or scissors. Be cautious, we don’t want unintentional puppet hands here.
- Create the Treat Pocket: Once you’ve made the incision, gently open the ball to create a pocket inside. If it needs a little persuasion, wiggle it around a bit—it’s kind of like giving a stubborn jar lid a twist.
- Fill with Treats: Grab those dog-safe treats of yours and fill the pocket. You want to make sure there’s enough room for the treats to move around a bit, so they can drop out when rolled.
- Let the Games Begin: Now for the fun part—give the tennis ball to your pup! Toss it around or roll it on the ground. Watch as they go nuts trying to get the treats to tumble out.
- Supervise Playtime: Keep an eye on your pup during playtime. You want to make sure they don’t accidentally chew through the tennis ball. If you’ve got a super chewer on your hands, be ready for a game of interception.
Optional Add-ons/Variations:
- Customize with Colors: Feeling extra crafty? Use non-toxic paint to add fun designs or your pup’s name to the tennis balls. No more fuzzy bouncy balls lost in the chaos of the dog park.
- Curved Cuts: Instead of a straight cut, try making a zigzag opening. It not only looks super cool but can make treats fall out more randomly, increasing the challenge for your curious pup.
Pro Tip:
If you want to extend the life of your dispenser, consider placing the tennis ball inside a sock before filling it with treats. Just tie off the end and let your dog tear through the sock to get to the benefits inside. It adds another layer of durability and can make for even more fun.
And there you have it, your very own Tennis Ball Treat Dispenser. It’s simple, effective, and oh-so-rewarding for both you and your beloved furball.
Now go on, let those tails wag while those treats tumble out in glee.
4. Puzzle Treat Dispenser

Looking for a way to keep your dog mentally stimulated? The Puzzle Treat Dispenser is just the thing! This DIY project offers an engaging way for your pup to work for their snacks, keeping their minds sharp and their boredom at bay. Plus, it’s a budget-friendly alternative to store-bought puzzle toys that can cost a pretty penny. Who knew keeping your dog entertained could be this easy? Additionally, using luxury kitchen appliances can enhance your cooking experience, making treat preparation even more enjoyable.
Materials Needed:
- An empty plastic bottle (think soda or water)
- Dog-safe treats or kibble
- A sharp knife or scissors
- Marker (optional, for marking cuts)
- A towel (to protect surfaces)
Step-by-Step Instructions:
- Gather Your Supplies: Clear a space on your kitchen counter or table. Lay down a towel to catch any bits and pieces while you work.
- Prepare the Bottle: Start by rinsing the plastic bottle to make sure it’s clean. Remove any labels and the cap. If your bottle has a ring on the neck, you can cut through that as it can be a little tricky for your pup.
- Cut Holes: Use your marker to mark a few holes around the bottle. Make them about 1-1.5 inches wide, spaced out evenly. This will allow treats to come tumbling out when the bottle rolls.
- Make the Cuts: With your knife (be careful—no unnecessary injuries here), make cuts along the marked spots. The holes don’t have to be perfect; just big enough for treats to fall out when the bottle is in motion.
- Fill with Treats: Pour in your dog-safe treats or kibble through the top. Don’t fill it too full—just a little will do, as it makes it easier for the treats to escape!
- Playtime!: Time to let your pup in on the fun. Roll the bottle on the floor and watch your curious canine do detective work to figure out how to get those treats out. It’s a show!
- Monitor Your Pup: Keep an eye on your dog. Make sure they don’t chew off any pieces of the bottle. If they turn into a chew monster, it might be time to intervene or find a tougher material.
Optional Add-ons/Variations:
- Decorate the Bottle: Got some old paint or stickers lying around? Jazz up the bottle with non-toxic paint or some fun stickers. It’s sure to make the eating experience a bit more visually appealing for both you and your pup.
- Use Different Bottle Types: Feeling adventurous? Try using different-sized bottles or even combining a couple together. Alternate sizes can make the challenge even more exciting for your furry friend.
Pro Tip:
To increase durability, you could wrap the bottle with thick duct tape, especially around the areas you’ve cut. It not only helps keep your dispenser intact but also adds a little grip for your dog. And hey, if they make it look like a fancy dog toy, bonus points for style.
5. Sock Snuffle Puzzle Mat

If you’ve ever found your furry friend digging through your laundry basket looking for something to play with, then the Sock Snuffle Puzzle Mat is just the DIY project you need. This fun and interactive toy engages your dog’s natural foraging instincts and keeps them entertained while saving you a trip to the pet store to buy overpriced toys. Plus, it’s a great way to recycle old socks that might otherwise go to waste. Who knew a bit of creativity could turn a boring sock into an exciting puzzle? Investing in premium dog supplies can greatly enhance your pup’s quality of life and enjoyment during playtime.
Materials Needed:
- Old socks (clean, dog-safe)
- A sturdy mat or piece of fabric (like fleece or an old towel)
- Scissors
- A sewing kit or fabric glue (optional, for added durability)
- Non-toxic dog treats or kibble
Step-by-Step Instructions:
- Collect Your Socks: Gather a bunch of old socks that your dog won’t mind slobbering all over. Bright colors and fun patterns can make the mat more visually engaging for both you and your pup.
- Cut the Socks: Take a pair of scissors and cut the socks into strips about 1-2 inches wide. You can cut them shorter or longer based on your dog’s size and how challenging you want the mat to be. Just be careful not to cut yourself while you’re at it—scissors can be sneaky tools.
- Prepare the Mat: Lay your sturdy mat or fabric flat on a surface. If you’re using a towel, make sure it’s nice and thick so it can withstand some enthusiastic sniffing and pawing.
- Attach the Sock Strips: Start tying or gluing the cut sock strips onto the mat. You can just tie them on or feel free to sew them in for extra durability. Make sure to leave some space between the strips to create little hiding spots for the treats.
- Add Treats: Now comes the fun part! Tuck small amounts of non-toxic dog treats or kibble between the sock strips, hiding them well to encourage your pups to use their noses and minds to sniff out the goodies.
- Let the Games Begin: Place the Snuffle Mat on the floor and show your dog what to do. They’ll love foraging through the socks for those delicious treats. Just be ready—you might laugh as they look totally determined to find every last morsel.
- Supervise Your Pup: Keep an eye on your furry friend while they explore their new toy. This helps guarantee they don’t chew or swallow any parts of the mat. If they start being too destructive, it might be time to intervene.
Optional Add-ons/Variations:
- Color Coordination: Get creative! Use socks in your dog’s favorite colors or patterns. You can even make a themed mat using holiday socks or seasonal colors to add a personal touch.
- Add Extra Layers: Feeling adventurous? Try layering different fabrics or textures—like strips of soft fleece mixed with denim or cotton—to keep your dog even more interested.
Pro Tip:
Always verify that the materials you use are safe for your dog. If your pup is a serious chewer, you might want to reinforce the mat with strong stitching or choose sturdier fabrics to help prolong the life of your new creation.
And remember, the more challenging the mat, the more mental stimulation for your furry buddy. Happy crafting!
6. Homemade Rope Fetch Toy

If you’ve ever experienced the heart-sinking moment of your dog’s favorite toy tearing apart, the Homemade Rope Fetch Toy is just what you need. It’s a durable, fun, and cost-effective substitute that your dog will enjoy fetching and chewing on for hours.
Plus, you get to express your creativity while saving some cash on expensive store-bought toys. Who says you need to break the bank for a happy pup?
Materials Needed:
- Cotton or hemp rope (about 3-5 yards long)
- Scissors
- Tape (optional, to prevent fraying)
- Dog-safe dye (optional, for added flair)
Step-by-Step Instructions:
- Cut the Rope: Begin by cutting a length of cotton or hemp rope that’s 3-5 yards long. If you’re worried about length, remember—bigger is better for enthusiastic dogs. Just don’t go too crazy; you don’t want a tug-of-war with a dragon.
- Tie the First Knot: Gather the three strands of rope together, about a foot from one end, and tie a secure knot. This will be the top of your toy and keep everything intact as your pup plays. You want it tight; otherwise, it’ll unravel faster than your New Year’s resolutions.
- Braid the Strands: With the loose ends of the rope, simply braid them together. Go over, under, over, and repeat. Make sure to keep the tension in the braid—loose braids tend to fall apart quicker than it takes a dog to snatch a squirrel.
- Secure the End: Once you braid to your desired length (usually around 12-15 inches), tie another knot at the end to hold it all together. If you enjoy a bit of flair, this is where you can dye the knot to match your pup’s personality, or choose colors that look good in your living room… just saying.
- Trim Any Excess: Use scissors to trim any unnecessary frayed edges sticking out of the knots. This not only keeps the toy looking tidy but also prevents any potential choking hazards. You want your dog to have a blast, not an accidental trip to the vet.
- Let the Fun Begin: Toss the rope fetch toy to your dog and watch the excitement unfold. Dogs have a magical way of turning even the simplest toys into sources of endless joy. Just be sure to supervise the fun, especially if your pup is a powerful chewer.
Optional Add-ons/Variations:
- Add Color: If you want to jazz it up a bit more, consider using dog-safe dye to color your rope before braiding it. Bright colors can make your fetch toy more appealing and easily spotted in the backyard chaos.
- Size Variants: Depending on your dog’s size, you can make smaller or larger toys by adjusting the length of the rope or the thickness of the strands. Bigger dogs might need a thicker rope for durability, while smaller pups might prefer something lighter.
Pro Tip:
Before you hand over the rope toy, consider giving it a quick soak in warm water and letting it dry. This process helps soften the rope, making it more comfortable for your dog’s mouth.
It’s like giving them a warm hug in toy form. And remember—always supervise your pup during playtime to guarantee safety and prevent any chew-off antics.
With this Homemade Rope Fetch Toy, your dog won’t only enjoy a great play session, but you’ll also feel satisfied knowing you created something unique just for them.
Happy crafting!
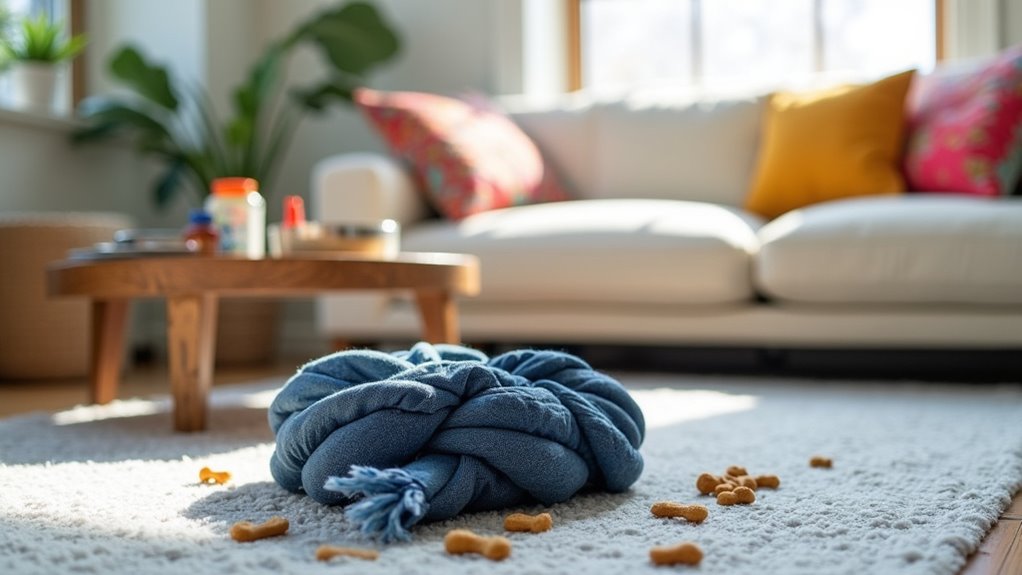
7. No-Sew Jean Dog Toy

Who’d have thought an old pair of jeans could become a fun toy for your pup? The No-Sew Jean Dog Toy is a brilliant DIY project that turns those unworn, frayed jeans into a chewable delight for your furry friend. Not only does it save you some cash on store-bought toys, but it also keeps your dog entertained and gives those jeans a second life. Who knew recycling could feel this good?
Materials Needed:
- Old pair of jeans (the more worn, the better)
- Scissors
- Ruler or measuring tape (optional but handy)
- Dog-safe embellishments (optional, for a personal touch)
Step-by-Step Instructions:
- Prep the Jeans: Start by picking out a pair of jeans that you wouldn’t miss. Cut off the legs from the main part of the jeans. Each leg will make a lovely chew toy.
- Cut the Fabric: Take one of the legs and cut it into 4 equal strips, about 2 inches wide. They don’t have to be perfect—remember, this is DIY, not haute couture.
- Tie the Strips Together: Gather the four strips, line them up, and tie a knot at one end. Make it tight; you don’t want your dog pulling them apart as easy as pie during playtime.
- Braid It Up: With the loose ends, simply braid the strips together. It’s just like braiding your hair, but hey, don’t worry if it’s not perfect. A lopsided braid can be charming in its own way and your dog isn’t judging.
- Secure the Other End: Once you’ve braided to about the same length as your pup’s enthusiasm (usually 10-12 inches), tie a knot at the other end to keep everything snug and secure. Bonus points if you’re feeling extra crafty—make a cute bow with the leftover fabric pieces!
- Let the Fun Emerge: Give it to your pup and watch them go wild. Dogs love pulling and tugging, and your new toy will quickly become a playroom favorite. Just be ready to retrieve it from under the couch every now and then.
Optional Add-ons/Variations:
- Add Some Color: Use fabric paint or tie-dye to brighten up your jean toy. You can create fun patterns or simply add your dog’s name for a personal touch. Who doesn’t love a custom accessory?
- Incorporate Other Fabrics: Mix it up by adding pieces of fleece or an old t-shirt into the braid. This can make the toy softer and even more appealing to your soft-chewing pups.
Pro Tip:
Always supervise your dog with new toys, especially if they’re enthusiastic chewers. And if you notice any tiny pieces coming off the toy, it’s time for a quick clean-up to avoid any choking hazards.
Plus, if you’ve got a dog that loves a good tug-of-war, double-knot that baby. Strong knots equal longer playtime and less mess on your living room floor.
Now go ahead and give your jeans a new purpose; your dog will cherish the creativity released. And don’t worry—those jeans were just lying in the back of your closet, right?
Extra Tips & Ideas
Imagine this: your pup is wagging their tail, eyes bright with excitement, as you reveal a new toy or treat made just for them.
Want to spice things up? Try adding peanut butter to homemade treats; dogs go nuts for it.
Got old T-shirts? Cut ‘em into strips and braid them for a tug toy; it’s eco-friendly and keeps your furry friend active.
Don’t forget to personalize your projects—stitch or paint their name on toys for a special touch.
And hey, include some squeakers if your dog’s into that loud, obnoxious noise. Trust me, it’ll make playtime even better.
Just remember—your attempts mightn’t always be Pinterest-perfect, but your pup won’t care. They’ll just love you more.
Frequently Asked Questions
What Materials Are Safe for Dog DIY Projects?
When creating DIY projects for your dog, use non-toxic materials like untreated wood, cotton fabric, or natural rope. Avoid plastics and harmful chemicals, ensuring your furry friend stays safe while enjoying your creations.
How Can I Ensure My Dog’s Safety While Crafting?
To keep your pup safe while crafting, make certain your workspace is free of hazards. Use pet-friendly materials, supervise closely, and avoid small parts they could swallow. A watchful eye is your best crafting companion!
Can I Use Recycled Materials for Dog Projects?
You can use recycled materials like old t-shirts, cardboard boxes, and plastic bottles for dog projects. Just make sure they’re safe and non-toxic, and your pup will love the unique creations you make together!
What Common Items Should I Avoid Using in DIY Projects?
You should avoid using toxic materials like certain plastics and untreated wood in DIY projects. Studies show over 80% of pet owners unknowingly use harmful items. Prioritize your dog’s safety by choosing non-toxic, pet-friendly materials instead.
How Can I Personalize Dog Projects for My Pet?
You can personalize dog projects by incorporating your pet’s name, favorite colors, or patterns. Consider adding unique features like custom toys or beds shaped like their favorite things, ensuring it reflects their personality and interests.
Conclusion
So, grab those old t-shirts and socks, and let your creativity shine alongside your pup. Each project not only promises a wagging tail and playful barks but also a chance to bond over some good ol’ DIY fun. Remember, every tug and toss is a step closer to a happier, more engaged dog. And hey, if your crafting doesn’t turn out as planned, just blame it on the dog—barks always make for a good excuse, right? Happy crafting!