Ever thought about turning your yard into a safe haven for your pup? It’s like giving them their own little adventure park right at home. Imagine using repurposed pallets or colorful crates—easy on the wallet and the planet. Plus, there’s wire mesh for strength and bamboo for a touch of style. But wait, there’s more! Let’s explore some DIY fence ideas that’ll make your furry friend feel right at home.
Eco-Friendly Fence Options
When you’re looking to keep your furry friend safe without leaving a huge carbon pawprint, you might wonder if eco-friendly fence options are out there.
Great news—there are, and they’re totally customizable for your DIY dog fence.
Think about using recycled materials like reclaimed wood, old pallets, or even bamboo. They’re not just sustainable; they also add a unique touch to your yard.
Want something a bit more whimsical?
Try a living fence—planting tall shrubs or vines can create a natural barrier while looking gorgeous. Plus, it gives your pup a cool hideaway for adventures.
Just remember, whichever design you choose, make sure it’s sturdy enough to keep your escape artist contained. It’s all about safety and style, right?
Our Collection
Now that you’re inspired by eco-friendly options, let’s check out our collection of DIY dog fence ideas.
Whether you’re eyeing repurposed pallets, wire mesh, or even hurdles made from old tires, you’ve got plenty of fun choices.
Which one’ll make your pup’s yard the envy of the neighborhood?
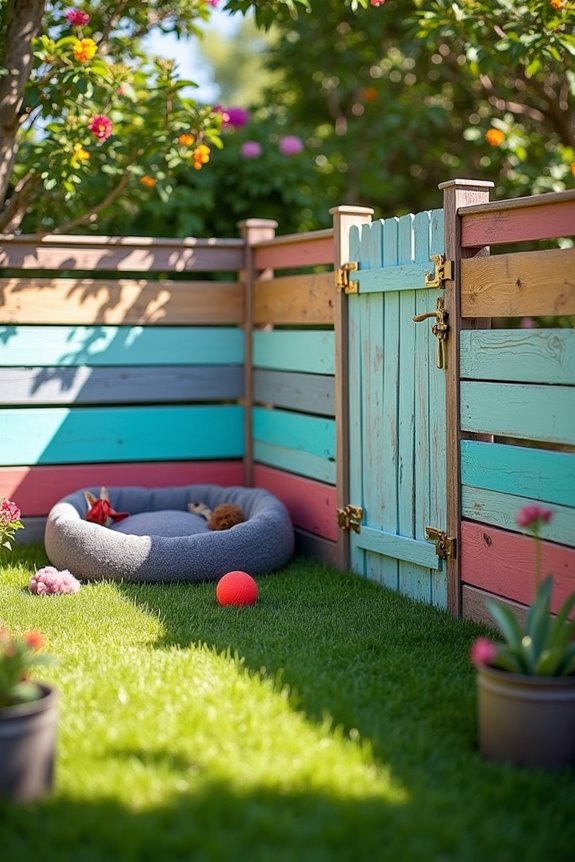
1. Repurposed Pallets as Fencing
Looking to create a secure space for your furry friend without breaking the bank? This DIY project using repurposed pallets isn’t only budget-friendly, but it’s also a creative way to give your yard a rustic charm while keeping your dog happy and safe.
Let’s delve into this fun project that will spark your inner designer…and maybe even a little sweat—don’t worry, it’ll be worth it.
Materials Needed:
- Wooden pallets (check for solid ones with no broken slats)
- Sturdy outdoor wood screws
- Drill with drill bits
- Tape measure
- Level
- Wood stain or outdoor paint (optional)
- Safety gloves and goggles
Step-by-Step Instructions:
1. Gather Your Pallets: Start by collecting as many wooden pallets as you’ll need. You might even make a small adventure out of it—hunt down those free pallets in local retail parks or online marketplaces.
Trust me, it’s like treasure hunting.
2. Measure Your Yard: Use the tape measure to determine how much space you want to fence in. This is where your dog will prance around, so make it spacious enough for their zoomies.
Make a rough outline with stakes or chalk.
3. Prepare the Pallets: Inspect the pallets for any broken pieces or splinters; we don’t want any doggy injuries. Sand down any rough spots, and if you’ve chosen a paint or wood stain, this is the time to do it.
4. Assemble the Pallets: Stand the pallets upright to form your fence. Screw them together at the corners using your drill to secure them.
Make sure to check that each connection is tight as you go. Using a level can help keep things looking nice.
5. Secure the Fence: To guarantee your fence stands strong against the soggiest of storms or the most enthusiastic pooches, drive some wood screws into the ground, anchoring the base of the pallets.
This is the moment you feel like a superhero with all that lumber in place.
6. Finishing Touches: Once your fence is standing tall, take a step back. Look for any gaps where your adventurous pup might escape and fill those in with extra slats or smaller pieces of wood.
7. Enjoy: Sit back, admire your handiwork, and watch your dog explore their new kingdom.
Have a treat ready for those victorious tail wags.
Optional Add-ons/Variations:
- Color it Up: Feel free to give your pallets a pop of color with non-toxic outdoor paint. Imagine your garden with a vibrant blue or cheerful yellow fence—now that’s a view!
- Planter Boxes: Attach a few pallets vertically on one side to create a small planter. Fill it with dog-safe plants to beautify your space and provide your pup with a bit of shade.
Pro Tip:
Before you begin this adventure, consider applying a weatherproof sealant to your finished fence.
It can help protect against rain and sun, making your creation last even longer. Plus, less time repairing means more time watching your dog enjoy their new domain.
It’s all about maximizing joy, right? Plus, having the right tools can help make the dog treat-making experience even more enjoyable—consider investing in some quality dog treat making equipment to reward your furry friend with homemade goodies!
Now get out there and let your DIY skills shine (with just a hint of sweat)!
2. Wire Mesh Dog Fencing
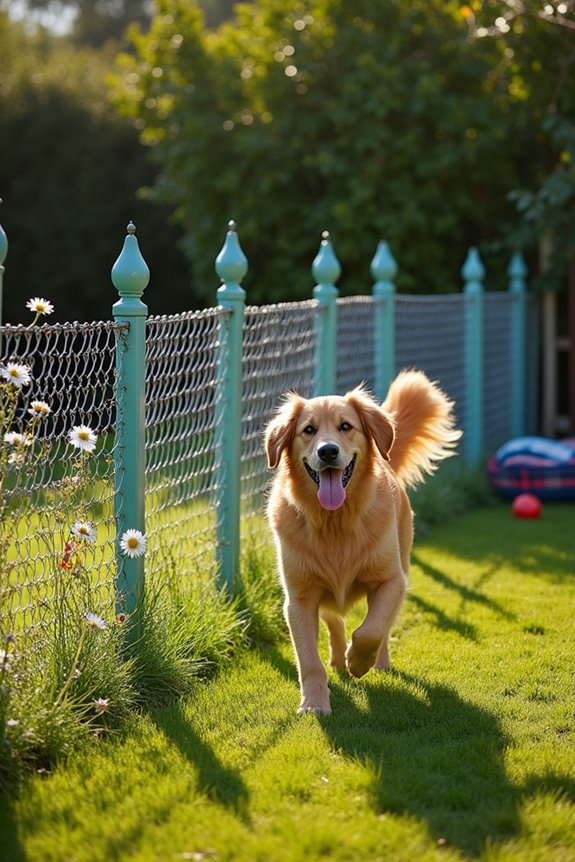
Creating a secure space for your dog can sometimes feel like building a fortress—especially if your pup is an escape artist. But, fear not! Wire mesh fencing is a straightforward and practical solution that’ll keep your dog safe while providing them the freedom to roam. This DIY project isn’t only budget-friendly but also customizable, allowing you to create a space that blends seamlessly into your yard. Plus, it will make your home look a tad more organized. Additionally, pairing your dog’s secure environment with high-quality nutrition from premium dog food brands will help keep them healthy and happy.
Materials Needed:
- Wire mesh fencing (choose a height suitable for your pup)
- Metal stakes or posts (to hold the fencing up)
- Wire cutters
- Hammer or mallet
- Zip ties or fencing clips
- Tape measure
- Level
- Safety gloves and goggles
Step-by-Step Instructions:
- Outline Your Space: Measure out the area you want to fence in using your tape measure. Use stakes to mark where the corners of your fence will be. It’ll help you visualize the layout and guarantee your pup has all the space they need to trot around.
- Install the Posts: Drive your metal stakes or posts into the ground at each corner of your outline. Make sure they’re deep enough so they won’t wobble or fall over. A level is your best friend here; you want those posts standing straight and proud.
- Cut the Wire Mesh: Roll out your wire mesh and cut it to size based on the dimensions of your fenced area. Remember, safety first—use your wire cutters carefully, and wear your safety gloves to avoid any nasty finger pinches.
- Attach the Wire Mesh: Starting at one corner, align the wire mesh with the posts. Secure the mesh to each post using zip ties or fencing clips. Make sure it’s tight and flush against the ground to keep any sneaky pups from trying to dig underneath.
- Complete the Fence: Continue working your way around the fenced area until all the wire mesh is securely attached. Stop for a moment to take a breather and admire the progress. Then, check for any gaps or loose spots—these are the escape routes you definitely want to seal up.
- Finishing Touches: Trim any excess wire mesh at the top if it’s too high for your taste. If you want a polished look, you can also paint the posts or add decorative caps. And voilà—you have yourself a nice little dog oasis!
Optional Add-ons/Variations:
- Decorative Elements: Why not add some color? You could paint the posts a fun color or cover them in vines or flowers to make the fence visually appealing while still doing its job.
- Extensions: For larger dogs or notorious jumpers, consider extending the height of your wire mesh with some additional fencing material or privacy slats on top.
Pro Tip:
If you’re in an area with extreme weather, consider using heavier gauge wire for increased durability. It might cost a bit more initially, but it will definitely save you from repair headaches down the road. And don’t forget to keep checking your fence regularly—keeping an eye out for wear and tear goes a long way in maintaining a safe space for your furry friend.
With just a little effort and some handy materials, you’ll have a secure sanctuary that your pup will love to explore. No more heart-pounding escapes and panicked dog chases. Instead, enjoy peaceful afternoons watching your happy dog frolic in their new playground. Happy building!
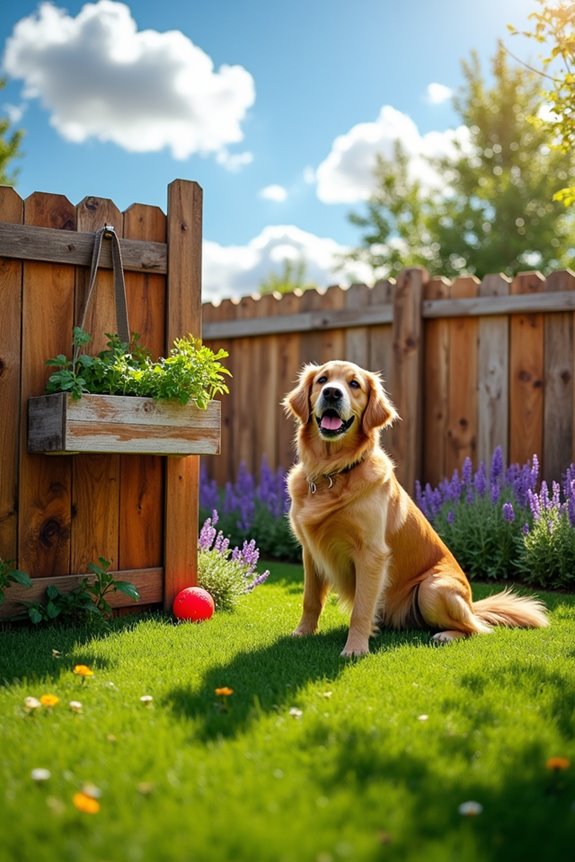
3. Upcycled Wooden Crates Fencing
If you’re looking for a unique and eco-friendly way to create a play space for your furry friend, upcycled wooden crates might just be the charming solution you need. Not only does this project add character to your yard, but it’s also budget-friendly and helps keep your dog safe while allowing them to enjoy the outdoors. Plus, it’s a great way to recycle old materials, making your space feel more personalized and cozy. Additionally, you can enhance your dog’s style with some luxury dog accessories female, making their outdoor experience even more enjoyable!
Materials Needed:
- Old wooden crates (the number will depend on your desired fenced area)
- Sandpaper (for smoothing any rough edges)
- Wood stain or paint (if you want to spruce things up)
- Hinges (for creating a gate if needed)
- Latches (to secure the gate)
- Screws and a screwdriver
- Level (to verify everything looks good)
- Outdoor sealant (to protect your wood from the elements)
Step-by-Step Instructions:
1. Gather Your Crates: Begin by collecting the wooden crates. The beauty of this project is that you can often find them for free or at a low cost from local shops, farmers’ markets, or even online marketplaces.
The more, the merrier—depending on how large you want your fenced area to be.
2. Prepare the Crates: Give the crates a good once-over. Sand down any rough edges to avoid splinters during your pup’s playtime. If you want to jazz them up, this is where you can also apply your wood stain or paint.
Choose a fun color that complements your yard—I went with a bright blue, which has become the talk of the neighborhood.
3. Design Your Fence Layout****: Visualize where you want your fence to go. Using stakes, mark the corners of your designated area. This will help you picture the layout, and it prevents any surprises later on.
4. Assemble the Fence: Start stacking your crates on their sides to form your fence. Align them neatly to keep it looking tidy, and make sure they’re stable.
If it helps, use a level to verify everything is straight. Giving your dog a sturdy structure is essential, especially if they’re a bit rambunctious.
5. Secure the Crates Together: Use screws to fasten the crates to each other. This will guarantee they stay put, even during an enthusiastic play session.
If you’re creating a gate, you should attach two side crates together with hinges and install a latch for easy access.
6. Seal the Wood: Once everything is assembled and you’re satisfied with how it looks, it’s time to protect your beautiful creation. Apply an outdoor sealant to help keep moisture and pests at bay.
This will extend the life of your crates and maintain that lovely appearance you’ve worked so hard to achieve.
7. Finishing Touches: Stand back and admire your handiwork. Make sure there are no gaps that your pup could squeeze through.
You might want to add a little comfort by placing a cozy dog bed inside the fenced area or hanging some toys from the crates. Your furry friend will surely appreciate the extra effort.
Optional Add-ons/Variations:
- Color Me Happy: If you’re feeling adventurous, why not paint each crate a different color for an eye-catching mosaic look? It’s a fun way to let your personality shine and bring some cheer to your yard.
- Add Succulents: For an eco-chic vibe, you can plant some succulents around the base of the crates, creating a natural barrier that’s pleasing to the eye and safe for your dog.
Pro Tip:
Always verify that you choose crates made from untreated wood, as treated wood can have chemicals that aren’t safe for your pets.
Regularly check the condition of your crates, too. If any part starts to splinter or weaken over time, don’t hesitate to make repairs or adjustments. After all, a happy pup is a safe pup.
4. Hurdles Made of Old Tires
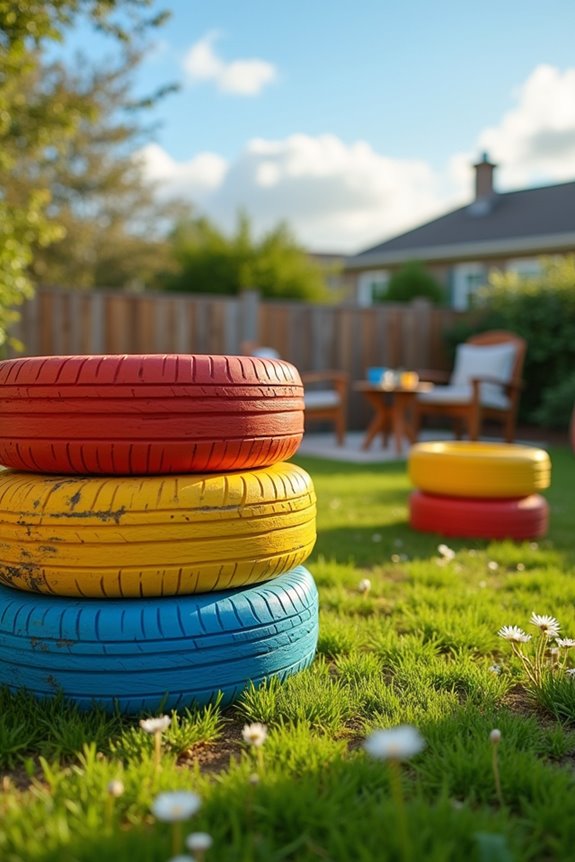
If your dog is full of energy and loves to jump, why not turn those old tires sitting in your garage into fun hurdles? Creating a tire hurdle course isn’t just an entertaining project; it’s also a fantastic way for your pup to exercise, build confidence, and develop agility. Plus, it’s budget-friendly and can add a quirky touch to your backyard. Just imagine the joy on your dog’s face as they leap through their own personalized obstacle course.
Materials Needed:
- Old tires (the more, the merrier)
- A shovel (to dig holes for the tires)
- Soil or gravel (for stability and drainage)
- Outdoor paint or spray paint (optional, for a pop of color)
- Gloves (to keep your hands clean)
- Water (to help settle the soil)
- Ruler or measuring tape (for spacing)
Step-by-Step Instructions:
- Gather Your Tires: First things first, hunt down those old tires. You can often find them at garages, online marketplaces, or even local tire shops. Generally, tires from smaller vehicles like bicycles or cars work well, but feel free to mix it up with some larger ones for variation.
- Decide on Your Layout: Before you start digging, visualize where you want your tire hurdles to go. Think about the spacing and arrangement. A straight line, zigzag, or a circle works wonders. Use a ruler or measuring tape to get consistent distances, unless you like your hurdles a bit wonky (no judgment here).
- Prepare the Ground: Time to dig! Use your shovel to create holes deep enough to set the tires in place, guaranteeing stability. Generally, about a third of the tire should be buried—this makes the hurdle solid for your dog to jump over. If your dog is a LeBron James of jumping, make sure your tires are spaced far enough apart to avoid any mid-air collisions.
- Set the Tires in Place: Drop the tires into the holes you’ve dug, making sure they’re secure and level. You could tap them with a rubber mallet if you need a little extra persuasion, but be careful not to damage the tires. Once in place, step back and admire your handiwork. Pretty neat, huh?
- Add Flair (Optional): Want to jazz things up? Use outdoor paint to give your tires a bright new look. Maybe a bright yellow color to signal “jump zone”? Just make certain they’re fully dry before your dog’s first run—paint fumes aren’t great for our furry friends.
- Test the Course: Bring your dog out and give the hurdles a test run. You might need to encourage them with treats, toys, or your enthusiastic cheerleading skills. Watch how they handle the hurdles and gauge their comfort levels. You might need to adjust their height if your pup looks more like a deer in headlights than an Olympic athlete!
Optional Add-ons/Variations:
- For an added challenge, consider adding different heights by stacking tires upon themselves. Just be sure they’re sturdy enough for a safe jump!
- You could also paint fun patterns on the tires, like polka dots or stripes, for a playful touch. And why not go for funky colors? Your dog deserves a colorful runway!
Pro Tip:
Always check the tires for any sharp edges or protrusions before letting your dog jump on them. Safety first, right? Plus, don’t be afraid to adjust the setup; every dog has their unique jumping style, so feel free to customize the heights and spacing as needed. Happy jumping!
Additionally, incorporating premium dog enrichment toys can also enhance your pup’s playtime experience.
5. Corrugated Metal Sheet Fencing
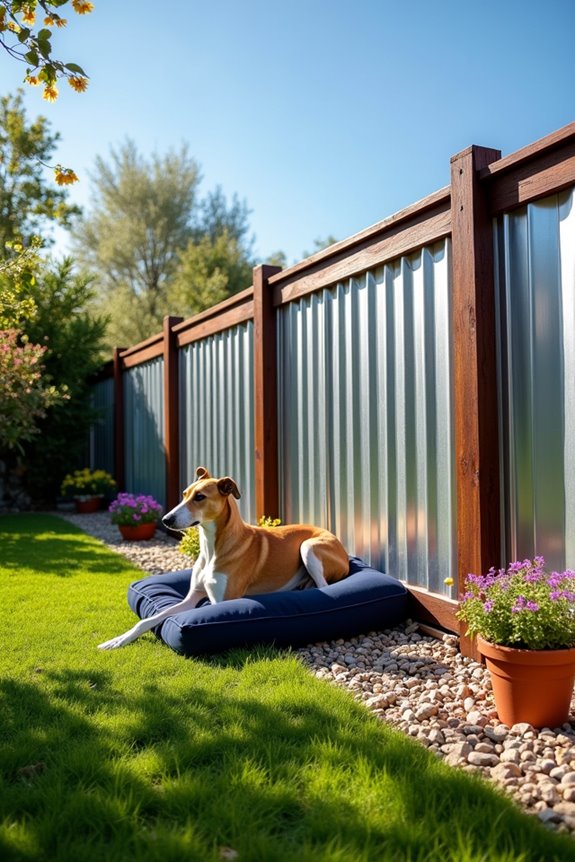
If you’re looking to create a robust and stylish boundary for your furry friend, corrugated metal fencing is your answer. This project isn’t only durable but also adds a modern flair to your yard. Plus, it keeps your dog safe and sound while giving your outdoor space a polished look. Sounds great, right? Additionally, consider providing your greyhound with a cozy place to rest by investing in a greyhound orthopedic dog bed, as it can greatly improve their comfort and well-being.
Materials Needed:
- Corrugated metal sheets
- Wooden fence posts (at least 4×4 inches)
- Concrete mix (for stabilizing posts)
- Screws or bolts (to secure metal sheets)
- Power drill
- Saw (for cutting wooden posts to size)
- Level (to verify posts are straight)
- Tape measure
- Safety gloves and goggles
Step-by-Step Instructions:
- Plan Your Fencing Area: First, determine where you want your fence. Use a tape measure to outline your area, marking points where the posts will go. Think about every corner, bend, and where your dog loves to roam. It’s like mapping out a great adventure.
- Digging Holes for Posts: Using a post hole digger or shovel, dig holes that are about 2 to 3 feet deep. This guarantees your fence will withstand those playful puppy antics. If your dog is more Houdini than Lassie, you might want to make those holes a bit deeper.
- Set Your Posts: Place your wooden posts in the holes, checking each one with a level to make sure they’re upright. Then, fill around the posts with concrete mix and add water according to the package instructions. Let it set for at least 24 hours—it’s tough work, but that sturdy foundation is essential.
- Attach the Metal Sheets: Once the posts are sturdy and stable, it’s time to add the corrugated metal sheets. Use screws or bolts to fasten the sheets to the posts, verifying they’re flush with the top. The sheets should overlap slightly for added security—like a cozy, crinkly blanket for your yard.
- Secure the Bottom: To prevent your pup from digging out or curious critters from sneaking in, consider putting gravel or small stones along the bottom of the fence. This little touch adds extra durability and can help with drainage too.
- Finishing Touches: Step back and admire your work. Give the metal a quick wipe to remove any dirt or smudges, and check for any sharp edges. A little scrub will do wonders.
Optional Add-ons/Variations:
- Custom Colors: While corrugated metal is usually a sleek silver, you can spray paint it in your favorite colors. Pink for playful vibes, or navy blue for a sophisticated touch—whatever fits your personality. Just be sure to use outdoor paint designed for metal.
- Decorative Topper: Consider adding a wooden or decorative metal trim at the top for a more finished look. It can be practical too, providing shade during those sunny days.
Pro Tip:
Always sand down any rough edges after cutting or installing. Safety first, always. And hey, it can save you and your dog from a potential scrape or two. Plus, bonus durability points—smooth edges can help prevent rusting.
With a little time and effort, you’ll have a chic and reliable fence that not only enhances your yard but keeps your canine companion safe and happy. So roll up those sleeves and let’s get to work!
6. Vinyl Privacy Fence Panels
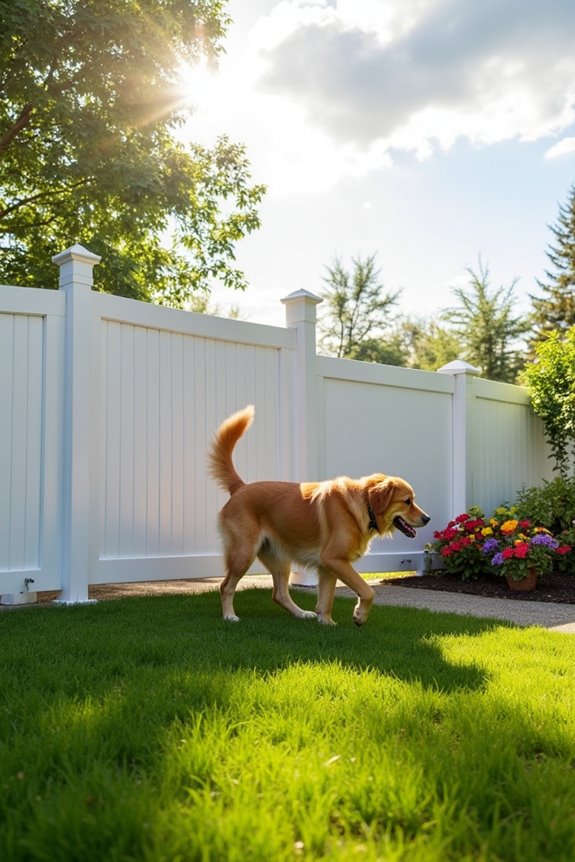
Looking to create a cozy and stylish space for your furry companion? A DIY vinyl privacy fence is a fantastic solution!
Not only does it provide your dog with a safe area to roam, but it also spruces up your yard’s appearance and adds extra value to your home.
Plus, with durable vinyl materials, you’re setting yourself up for a low-maintenance, long-lasting fencing option—because let’s be honest, who’s time for regular upkeep?
Materials Needed:
- Vinyl fence panels (available in various styles)
- Vinyl fence posts
- Post caps (for a finished look)
- Concrete mix (for securing posts)
- Power drill
- Level
- Tape measure
- Saw (for cutting posts, if needed)
- Safety gloves and goggles
Step-by-Step Instructions:
1. Measure Your Space: Start by grabbing your tape measure and figuring out how much space you want to fence in.
Mark the points where your posts will go, confirming you account for any corners or bends.
2. Dig Holes for Posts: It’s time to dig! Use a post hole digger or shovel to create holes about 2 to 3 feet deep—this depth will help guarantee your fence stands tall against any testing from playful paws.
3. Set Up the Posts: Insert the vinyl posts into the freshly dug holes, double-checking with a level to make sure they’re straight as an arrow.
Once aligned, fill the holes with concrete mix and add water per instructions.
Remember, patience is key—let that concrete set for a day.
4. Attach the Vinyl Panels: After your posts are solid and secure, it’s go-time for the vinyl panels.
Slide each panel in between the posts, securing them as you go.
Most vinyl fences have clips or brackets for easy fastening—think of it as getting your fence “dressed” just right.
5. Add Post Caps: Take your project from good to great by adding post caps.
Not only do they look snazzy, but they also help prevent water buildup inside the posts—nobody likes a leaky fence situation.
6. Final Checks: Your new vinyl fence is almost done; take a moment to admire your work.
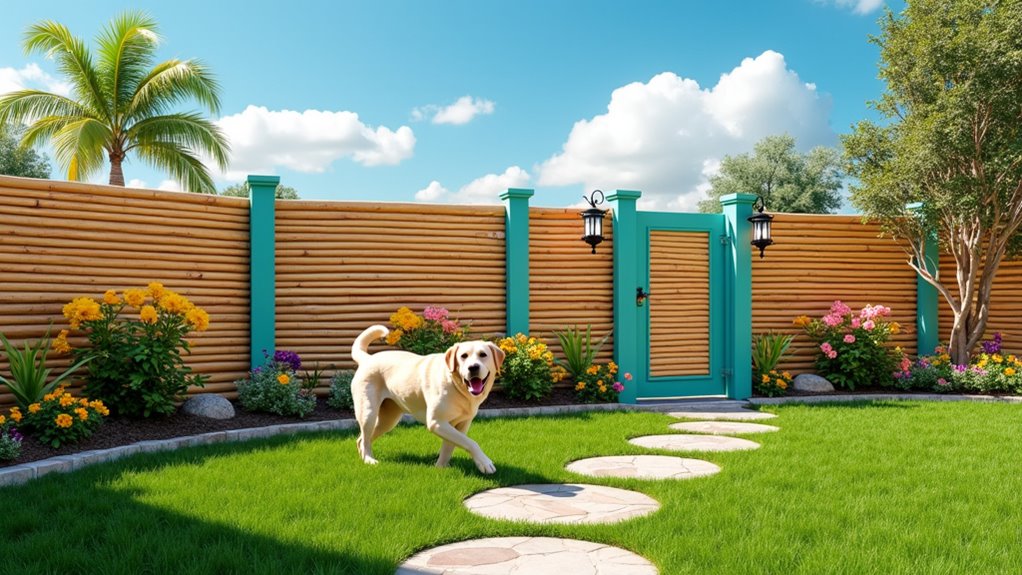
7. Decorative Bamboo Fencing
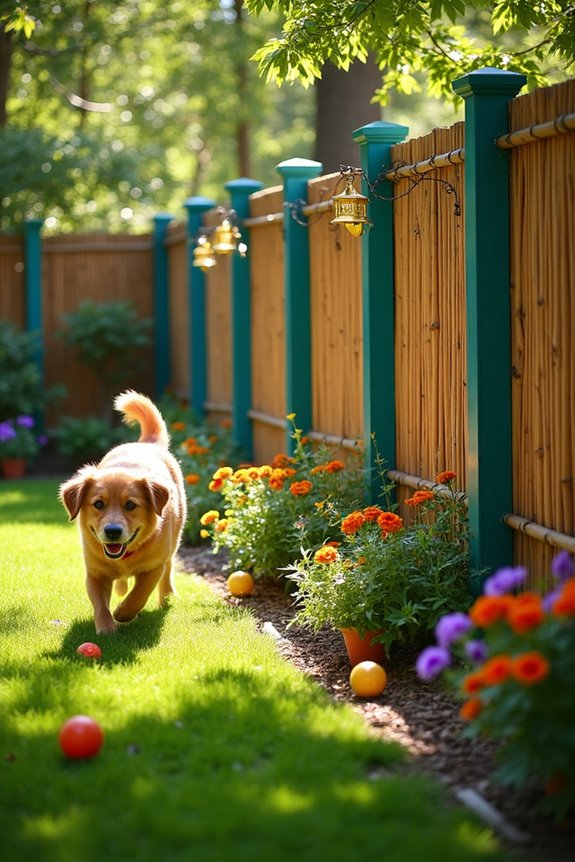
Are you looking to create an inviting and secure space for your furry friend? Decorative bamboo fencing might just be the perfect choice for you.
Not only does it offer a unique, tropical aesthetic that can enhance your yard’s beauty, but it also provides a robust barrier for your dog while keeping a touch of nature close by. Plus, it’s budget-friendly and gives you the chance to show off your DIY skills—all while making your pup feel right at home.
Materials Needed:
- Bamboo fencing rolls (choose your height and thickness)
- Wooden fence posts (treated for outdoor use)
- Zip ties or wire (for securing bamboo to posts)
- Concrete mix (for setting fence posts)
- Power drill
- Level
- Tape measure
- Saw (if cutting posts/stakes is necessary)
- Safety gloves and goggles
Step-by-Step Instructions:
1. Plan Your Area: Start by measuring the perimeter where you want the bamboo fence to go. This is the time to visualize how cute it’s going to look and mark where your posts will stand. You want to create a place your pooch can enjoy, so think about any bends or corners.
2. Dig the Postholes: Grab that post hole digger or a sturdy shovel, and dig holes about 2-3 feet deep, spaced appropriately according to your bamboo roll length (typically 6 feet apart works well). If you hit a rock, don’t worry; that’s just part of the adventure.
3. Set the Posts: Place those wooden posts into the holes, ensuring they’re straight with your trusty level. Fill the holes with concrete mix, and follow the manufacturer’s instructions on adding water.
Let the concrete cure for at least a day—patience is key here, and it’s a good excuse not to do any heavy lifting for a while.
4. Attach the Bamboo: Once your posts are solid in place, it’s time for the fun part! Unroll your bamboo fencing, and starting from one end, use zip ties or wire to secure it to the posts.
Go ahead and channel your inner artist—this is where you can make sure it’s tight enough without making it look too stiff.
5. Finishing Touches: After everything’s secured, step back and see if there are any gaps. If you love a snug fit, you can add additional ties, or even tie off the ends of the bamboo wrap for a cleaner look.
6. Admire Your Work: Look at what you’ve accomplished. Not only does your yard now have a beautiful touch of nature, but your dog also has a lovely new space to explore.
Optional Add-ons/Variations:
Looking to personalize your bamboo project? Consider painting the wooden posts in a fun color to match your house or adding decorative lanterns along the fence.
You could even create a little themed garden area beside it—maybe a tropical paradise for your pup!
Pro Tip:
Extra Tips & Ideas
Wondering how to make your DIY dog fence not just functional but also a little fun? Consider adding some plants! Low, non-toxic shrubs can make your fence feel like a mini-garden. A splash of color brightens any space, right?
You could also paint your fence in vibrant colors or let your kids help with paw prints. Trust me, it’ll give you a good laugh.
Need some privacy? Try hanging fabric, like outdoor curtains—easy to install and gives a cozy vibe.
Finally, don’t forget toys! Putting a few chew toys or a dog house inside can keep your pup entertained. Who wouldn’t love a personal play zone?
Just remember: a happy dog equals a happy home.
Frequently Asked Questions
What Materials Are Safest for Dog-Friendly Fences?
For a dog-friendly fence, use materials like vinyl, wood, or metal without sharp edges. Avoid treated woods with chemicals; instead, choose natural alternatives. Make sure the fence is sturdy and tall enough to contain your pup.
Can I Build a Fence on a Slope?
Yes, you can build a fence on a slope. In fact, about 40% of yards are uneven. Use techniques like racking or stepping to adapt the fence design, ensuring stability while maintaining an attractive look.
How High Should a DIY Dog Fence Be?
A DIY dog fence should be at least four to six feet high. This height helps prevent larger breeds from jumping over and keeps your pup safely contained while allowing them to enjoy their outdoor space.
Will a Fence Keep My Dog From Digging Under?
A sturdy fence acts like a fortress, helping keep your pup safe. While it can deter digging, it won’t completely stop determined dogs. Burying wire mesh at the base might be your best bet.
How Long Does It Take to Build a DIY Dog Fence?
Building a DIY dog fence typically takes one to three days, depending on your design and experience. You’ll want to gather materials first, then plan efficiently to streamline the construction process and minimize delays.
Conclusion
Building a dog-friendly paradise doesn’t have to break the bank or mean endless trips to the store. With a bit of creativity and some scrap materials, you’ve got everything you need to keep your pup safe and happy. Just think of your yard as a blank canvas ready for a splash of dog-loving color. So roll up those sleeves and jump in—your furry friend is waiting for their new playground. After all, who doesn’t want a tail-wagging masterpiece right outside?