Imagine your living room transformed into a cozy dog haven, where function meets flair. Sounds dreamy, right? If you’re tired of those bulky, unattractive crates cluttering your space, you’ve stumbled upon the perfect solution. This guide will take you through seven innovative DIY dog crate ideas that not only keep your pup comfy but also elevate your home’s style. So, are you ready to get creative and finally give Fido the throne he deserves?
Creative Crate Makeover Ideas
When you look at your dog’s crate, don’t you sometimes think it could use a little pizzazz? Sure, it’s a functional space, but why not turn it into a funky focal point?
You can easily transform your plain old crate into a stylish diy dog crate. Start by painting it in a color that matches your decor; maybe even add some stencils.
You might’ve some fabric scraps lying around, so why not sew a cozy blanket or cushion for the inside? If you’re feeling adventurous, you could even attach wheels for easy relocation—because who doesn’t want to roll their dog’s hangout around?
Let your creativity shine; your pup will love the new digs, and you’ll feel like a crafty genius.
Our Collection
If you’re on the hunt for some creative dog crate ideas, you’re in for a treat.
Our collection features everything from a vintage suitcase crate conversion to an airline-style design that’s sure to turn heads.
Trust me, whether you prefer something rustic or a bit chic, there’s a perfect match for your furry friend waiting right here.
1. Vintage Suitcase Crate Conversion
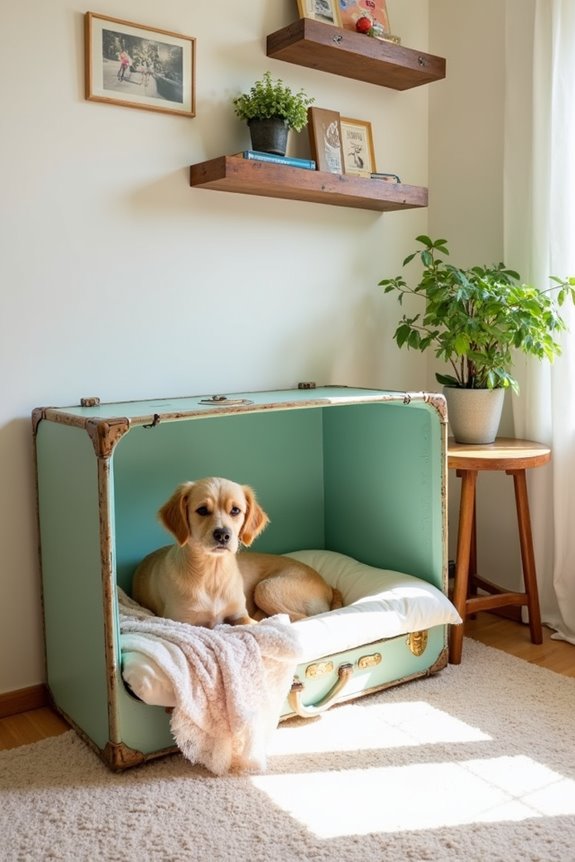
Looking for a chic way to keep your pup comfy and contained? Try converting a vintage suitcase into a stylish dog crate! Not only is this project budget-friendly, but it also adds a unique charm to your home decor. Plus, your furry friend will love having their very own cozy nook. Additionally, consider pairing the crate with dog crate furniture end tables to enhance the overall design of your living space.
Materials Needed:
- A vintage suitcase (preferably hard-sided)
- Soft bedding or blanket
- Small wooden slats (for stability)
- Screws and screwdriver (if needed for slats)
- Sandpaper (if your suitcase has rough edges)
- Non-toxic paint or wood sealer (optional)
- Vintage-style embellishments (optional, for added flair)
Step-by-Step Instructions:
- Choose Your Suitcase: Find a vintage suitcase that’s not too heavy and can comfortably fit your dog. Check flea markets or thrift stores – who knows what treasures await?
- Prep the Suitcase: Clean the inside thoroughly. If it’s been in storage for a while, you might find some unexpected treasures (hello, random old receipts!). Don’t forget to sand down any rough edges to keep your dog safe.
- Stabilize the Structure: If your suitcase is a bit wobbly, you might want to attach a few small wooden slats to the bottom. Just screw them in place to provide extra support — think of it like a solid foundation for a house.
- Add Comfort: Place a soft, cozy blanket or dog bed inside. This is key – your pup deserves a plush retreat. Try to find a color that matches or complements your suitcase for that extra pop that’s totally Instagram-worthy.
- Personalize It: If you love a bit of creativity, feel free to paint the suitcase or add embellishments. Maybe vintage stickers from your travels or a cute nameplate with your pup’s name. It’s their new palace; we just live in it.
- Final Touches: Once everything’s in place, do a final inspection to verify there are no sharp edges or loose screws. You want your dog to feel safe and cozy!
- Introduce Your Pup: Encourage your dog to explore their new space. Treats and toys can make the introduction more exciting. Who knew that a suitcase could be such a welcoming getaway for your furry friend?
Optional Add-ons/Variations:
- Color Contrast: Try painting the suitcase a bold color or adding patterned fabric inside as a lining. Think floral prints or fun polka dots!
- Travel Theme: Decorate with travel stickers or maps to create a whimsical travel-inspired crate. Your pup can feel like a global citizen each time they curl up inside.
Pro Tip:
Always verify that the suitcase is free of anything that might harm your dog. A quick inspection can save an unexpected trip to the vet.
And if your suitcase has a latch, consider leaving it unsecured when your dog is inside so they don’t accidentally shut themselves in—safety first, fur babies!
In the end, this project not only gives your pooch a lovely spot to relax but also keeps those pesky dog crates from ruining the ambiance of your beautifully curated home.
Plus, just think of all the compliments you’ll get from your friends!
2. Wooden Pallet Dog Crate
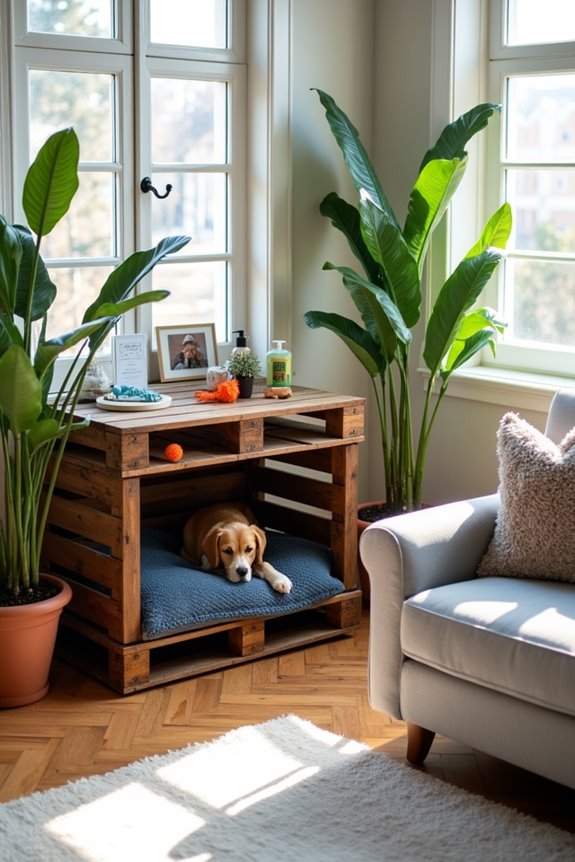
Turning a wooden pallet into a dog crate isn’t only an eco-friendly option, but it also gives you a rustic charm that fits perfectly in any home decor. This DIY project is incredibly useful for dog owners, as it provides a sturdy and spacious area for your pup, and it can be made on a budget. Plus, you’ll feel like a DIY superstar when you see your furry friend enjoying their new space. Also, consider pairing your crate with luxury dog grooming products to really pamper your pup!
Materials Needed:
- 1 or 2 wooden pallets (make certain they’re in good condition)
- Sandpaper or a power sander
- Hammer and nails (or a nail gun if you’re feeling fancy)
- Drill and screws (optional for extra stability)
- Non-toxic wood stain or sealant (optional)
- Soft bedding or blanket for comfort
- Tape measure (for those of us who might think they can eyeball it)
- Safety goggles
Step-by-Step Instructions:
1. Find Your Pallet: First things first, grab a sturdy wooden pallet from a local supplier or even a friendly neighbor. Look for one that’s free of splinters and in decent shape — you don’t want your dog getting any unwanted splinters or surprises.
2. Prep the Pallet: Give the pallet a good sanding. This is one of those steps you’ll thank yourself for later. Trust me, a smoother surface means a happier pup.
Put on your safety goggles, channel your inner DIY warrior, and sand those edges down until they’re nice and soft.
3. Design Your Crate: Think about how you want your crate to look. You could keep it simple and use one pallet as the base and another for the top, or create a full enclosure by securing vertical supports with additional pallets.
If ladder-like furniture isn’t in your style, voila — just secure a side to create an open-top crate.
4. Secure Everything: Use nails or screws to secure any loose parts and guarantee your creation isn’t going to fall apart at the slightest rumble (or when your pup jumps in).
If you’re feeling really crafty, you could add a removable side panel for easy access during cleaning.
5. Add the Finishing Touches: Once your structure is secure, give it a coat of non-toxic stain or sealant, if desired. This won’t only add a nice finish but also protect the wood from any slobber or accidents.
6. Introduce Bedding: Place a soft blanket or dog bed inside for that cozy touch. After all, we want our dogs to think they’re living in the lap of luxury, not a lumberyard.
7. Show it Off: Let your pup explore their new digs and fill it with yummy treats and toys. Don’t be surprised if they transform from a couch potato to a crate enthusiast overnight!
Optional Add-ons/Variations:
- Decorative Stain: Choose a fun color for your wood stain — perhaps a deep navy or warm gray — to match your home aesthetic and make your crate really pop.
- Personal Touches: Consider adding a nameplate with your dog’s name, or even painting designs or paw prints on the side to make it uniquely theirs.
Pro Tip:
Before you start, check the pallets for any chemical treatments. Some pallets are heat-treated (look for a “HT” stamp), while others might’ve harmful chemicals like methyl bromide.
Safety first! And, if you’re unsure, a little extra TLC with paint or stain can seal in any potential issues while giving your crate a polished look. Happy crafting!
3. Repurposed Bookshelf Dog Crate
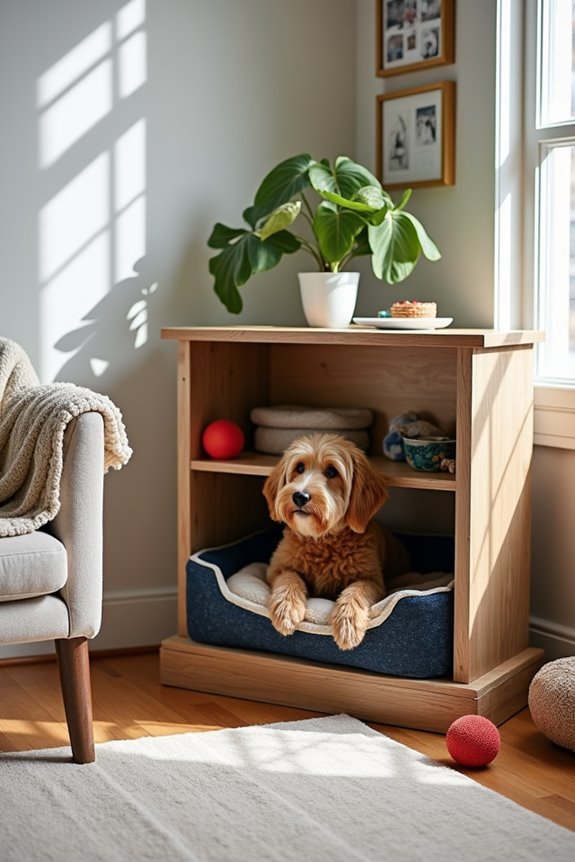
Transforming an old bookshelf into a dog crate is a fantastic way to keep your furry friend cozy while adding a personalized touch to your home decor. Not only does it save you money, but it also gives you a stylish, functional piece that blends seamlessly with any room. It’s a win-win — your pup gets a snug retreat, and you get to flex those creative muscles. Moreover, ensuring your Goldendoodle is well-fed with premium dog food can further enhance their overall comfort and health.
Materials Needed:
- 1 old bookshelf (the sturdier, the better)
- Sandpaper or power sander
- Drill and screws (to guarantee stability)
- Non-toxic paint or wood stain (for style points)
- Soft bedding or blankets for comfort
- Measuring tape
- Safety goggles
Step-by-Step Instructions:
- Choose Your Bookshelf: Start by selecting a bookshelf that’s seen better days or one that you mightn’t use anymore. Make sure it’s sturdy and large enough for your dog to lie down comfortably — no one wants a cramped canine!
- Prep the Surface: Give the whole bookshelf a good sanding. This step is essential because rough edges can lead to a surprised pup (and not the good kind). Get rid of any sharp edges so your dog doesn’t have to worry about splinters.
- Cut the Back Panel (if needed): If the bookshelf has an open back, consider cutting a piece of plywood or thick cardboard to create a solid back. This way, your pup feels more secure and has a cozy nook to settle into.
- Design the Crate Space: Depending on your pup’s size, decide how much of the bookshelf you want to convert. You can remove a shelf to create more headspace or keep everything intact for a height advantage. If it’s going to be an open-front crate, just leave the front side intact.
- Secure Everything: For extra stability, drill screws into all the joints and along any loose parts. You want to make sure this crate can withstand your dog’s enthusiasm, so tighten things up.
- Add a Stylish Finish: If you’ve got some non-toxic paint or stain lying around, this is your cue to shine. Give it a fresh coat with colors that match your home, making it not only functional but also a beautiful addition to your living space.
- Cushion It Up: Finally, pop a soft blanket or dog bed inside to make it inviting. Your pup should feel like they’re lounging on soft clouds instead of hard wooden shelves. Plus, wearing your dog’s favorite blanket is a great way to add some personality.
4. Airline-Style Dog Crate Design
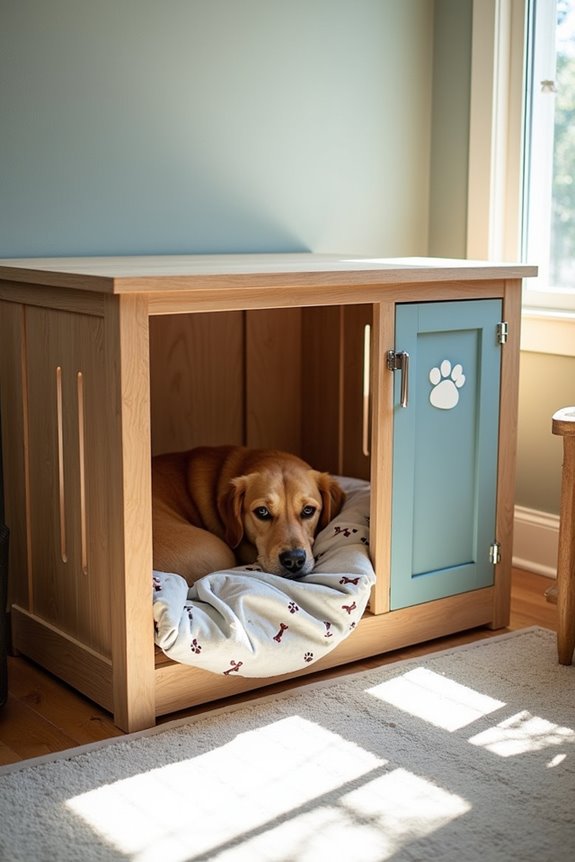
If you’re looking for a stylish way to crate train your furry friend, an airline-style dog crate design is a fantastic DIY project. It’s not only practical, guaranteeing your pup has a safe space to rest during travels or at home, but it also adds a trendy touch to your decor without breaking the bank. Plus, you get to show off your crafting skills—what’s not to love? Additionally, a premium dog kennel enclosure can provide an extra layer of comfort and security for your pet.
Materials Needed:
- Wood boards (plywood works well)
- Wood screws and nails
- Hinges (for a door mechanism)
- Latch (to keep it securely closed)
- Sandpaper
- Non-toxic paint or stain (optional)
- Soft bedding for comfort
- Measuring tape
- Safety goggles
Step-by-Step Instructions:
- Decide the Size: First things first, measure your pup when they’re standing and lying down to guarantee the crate is the right size. You want it snug but not cramped.
- Cut the Wood: Using your measuring tape, mark the dimensions on your wood boards to create the base, sides, and top. Cut accordingly—this is where your dog’s new travel home starts to take shape. Remember, precision is key, unless you want to see an overgrown dog getting stuck.
- Assemble the Frame: Begin by attaching your base to the vertical side walls using wood screws. Then, add the back panel for extra stability. Make sure everything is nailed tight. We want this crate to withstand the excitement of an unexpected squirrel sighting or the delivery person.
- Create the Door: Cut an opening on one of the front panels, making sure it’s large enough for your pooch to come and go. Attach your hinges to one side of the opening, then secure the other side with a latch. This way, your pup can’t escape when they see the mailman. Don’t worry; you can still have your own escape plan.
- Add Ventilation: Drill a few holes on the sides or create a slatted design for airflow. This way, your pup can stay comfortable and cool, even when they’re in their “airplane” mode. Just think—your dog could be the next canine frequent flyer.
- Finish with Style: If you want to jazz it up (and not just your dog), grab that non-toxic paint or stain. You can make it blend with your home decor or go wild with colors—your choice.
- Cushion it Up: Finally, throw in some soft bedding or a cute dog blanket. This makes it cozy for your pup and gives them a nice spot to chill or snooze. Every dog deserves their own lounge chair, don’t you think?
Optional Add-ons/Variations:
- Add a fun design by painting paw prints or bones on the side of your crate. Not only is it cute, but it also personalizes it to your pet’s personality.
- If you’re feeling adventurous, incorporate a removable top to the crate. This can double as a side table when not in use—a two-for-one special!
Pro Tip:
Always sand down your edges and surfaces carefully to avoid any sharp spots that could hurt your furry friend. Nobody wants a cranky pup because of a splinter, right?
Plus, try using screws instead of just nails for added durability; it’s worth it when you see your pup jumping in and out with glee.
5. Glass Cabinet Dog Crate
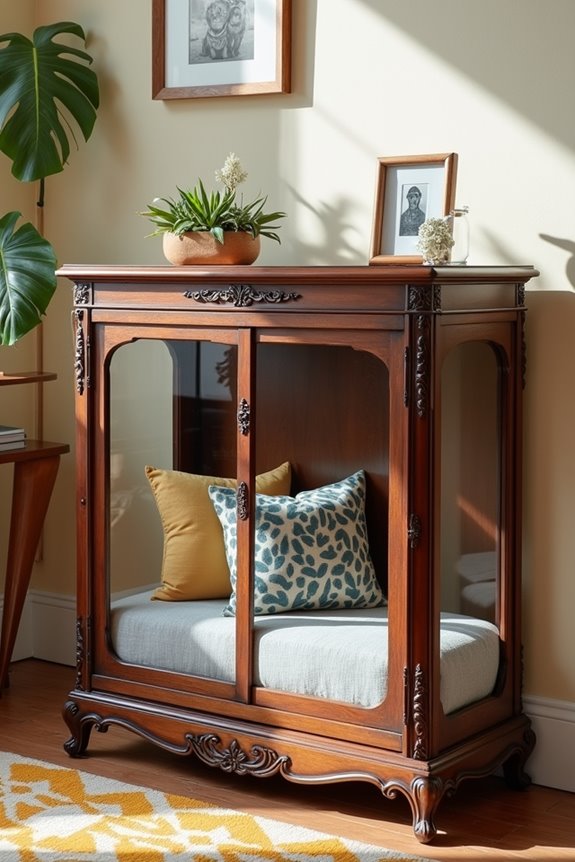
If you’re looking to combine style with functionality, a glass cabinet dog crate is a fabulous DIY project for dog owners. Not only does it give your furry friend a chic space to relax, but it also serves as a beautiful piece of furniture that’s sure to impress your guests. Plus, you save money because you’re creating a unique crate that’s perfect for your decor, all while incorporating premium dog training equipment into your dog’s routine.
Materials Needed:
- Old glass cabinet or hutch
- Sandpaper
- Wood screws (if needed for assembly)
- Non-toxic paint or stain (optional, for touch-ups)
- Soft bedding or a dog bed
- Measuring tape
- Safety goggles
Step-by-Step Instructions:
- Find the Perfect Cabinet: The journey starts with hunting down an old glass cabinet or hutch at a thrift store or garage sale. You want something that’s sturdy and has enough space for your pooch. Bonus points if it has character, like those funky vintage knobs.
- Inspect the Cabinet: Once you’ve found your gem, inspect it for any damage—the glass should be secure, and the wood should be free of rot. Safety first, right? You don’t want Fido to make a dramatic escape.
- Prep the Space: Clear out the inside, removing any old shelves or items. Give the inside a good sanding to guarantee it’s smooth and comfy for your pup. Nobody wants splinters, least of all your delicate darling.
- Personalize It: If your cabinet needs a little sprucing up, now’s the time to paint or stain it. Choose a color that complements your home, or maybe something fun and quirky that reflects your pup’s personality. Just make sure the paint is non-toxic; you don’t want your furry friend tasting the rainbow.
- Cushion the Crate: Once your cabinet is all fancy, throw in some soft bedding or a dog bed to create a cozy haven for your pup. Think of this as their VIP lounge; they deserve it after all that tail-chasing.
- Add Ventilation (if necessary): If your cabinet has limited airflow, consider drilling a few holes on the back or sides for ventilation, especially if your dog is a hot sleeper. We all know how dramatic dogs can be when they get too toasty.
- Seal It Up (optional): For extra security, you can add a latch or magnet on the cabinet door, guaranteeing it stays shut and safe—just in case your pup happens to be a wannabe Houdini.
Optional Add-ons/Variations:
- Fabrics: You can line the bottom of the crate with a cute fabric that matches your decor. Think plaid for a rustic vibe or bold patterns for a modern look.
- Lighting: If you’re feeling adventurous, consider adding some LED strip lights inside the cabinet. It gives off a cozy glow, and who doesn’t love a stylish pup pad that lights up the room?
Pro Tip:
When adding the bedding, choose something machine washable. Accidents happen, and it’s easier to toss it in the wash than to scrub the entire crate. Plus, keeping things clean helps keep your dog happy and healthy.
With this glass cabinet dog crate, you’re not just crafting a kennel—you’re creating a comforting retreat for your furry friend that also elevates your home’s aesthetic.
Happy crafting!
6. Decorative Garden Bench Crate

Looking to give your pup a stylish space while adding a functional piece to your outdoor decor? A decorative garden bench crate is just the ticket.
Not only does it provide a cozy spot for your furry friend to relax outdoors, but it doubles as extra seating for you and your guests. It’s the perfect blend of form and function—plus, it saves you money on both dog furnishings and outdoor seating!
Materials Needed:
- Weather-resistant wood (like cedar or redwood)
- Wood screws
- Measuring tape
- Drill
- Sandpaper
- Non-toxic wood sealant or paint (optional)
- Soft outdoor dog bed or cushion
- Safety goggles
- Wood glue (optional, for extra stability)
Step-by-Step Instructions:
1. Choose Your Wood: Start by selecting sturdy, weather-resistant wood. You’ll want something that can brave the elements just like your pup. Measure out enough wood to create a bench that’s wide and tall enough for your furry friend to lie down comfortably.
2. Cut the Pieces: Use a skilled saw (or have your lumberyard do it) to cut the wood into the following sizes: two long pieces for the top, two shorter pieces for the sides, and four legs. Remember, it doesn’t have to be perfect, but the leg lengths should be even—no wobbly benches, please.
3. Assemble the Frame: Lay out your pieces on a flat surface and start screwing the sides to the top pieces. Then attach the legs to the corners so you have a sturdy frame. If you need a little extra strength, wood glue can help keep everything from wobbling too much during your pup’s epic naptimes.
4. Smooth the Surfaces: Once the frame is secure, grab your sandpaper and smooth out any rough edges. Your dog deserves to lounge without sharp splinters.
Maybe throw in a little meditation for you while you’re sanding—it’s therapeutic, trust me.
5. Seal or Paint the Bench (optional): Now’s your chance to truly personalize the bench. Coat it with non-toxic wood sealant or paint to protect it from rain and sun. Whether you want a natural finish or something vibrant, make sure it suits your outdoor vibe.
6. Add the Cushion: Place a soft outdoor dog bed or cushion on top of the bench for maximum comfort. This is where your pup will claim their throne.
Maybe even consider a fun color or pattern that matches your garden’s style.
7. Final Touches: Verify everything feels secure and ready for doggy lounging. A quick inspection won’t hurt—check for any loose screws or sharp edges before introducing your pup to their new favorite hangout spot.
Optional Add-ons/Variations:
- Personalized Decor: Add an engraved plaque with your dog’s name, or paint fun designs on the bench to make it uniquely yours. A little paw print here and there could really add charm.
- Storage Compartment: Consider making a hinged top to create a storage space for dog toys or even garden tools. Practical and cute? Now that’s a win-win.
Pro Tip:
Always use weather-resistant wood and finish to guarantee your bench can withstand the elements.
Trust me, nothing’s more disappointing than a soggy bench after a rainstorm. Plus, don’t forget to frequently check for any wear and tear; regular maintenance means many comfy naps for your four-legged friend.
Now, go ahead, release that creativity and watch your outdoor space transform into a cozy retreat for you and your pup.
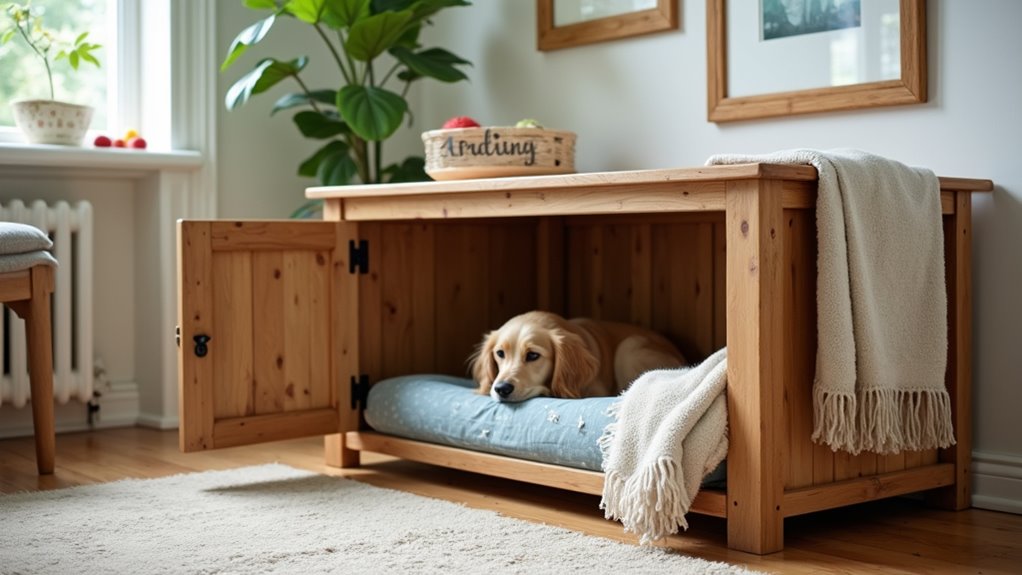
7. Upcycled Coffee Table Crate
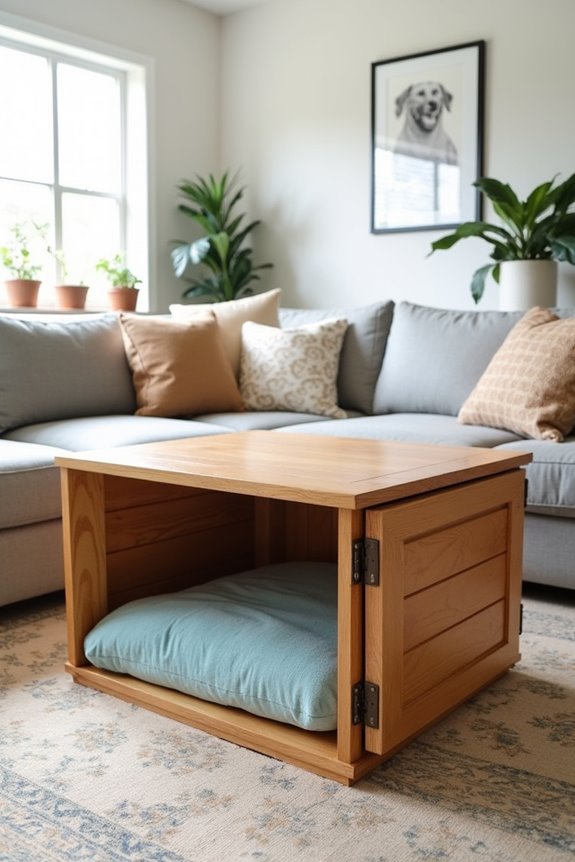
If you have an old coffee table gathering dust in your garage, why not breathe new life into it by transforming it into a chic dog crate? Not only does this DIY project give your pup a stylish and cozy space to hang out, but it also saves you money by repurposing something you already own.
Plus, it turns that drab old table into a trendy accent piece in your home!
Materials Needed:
- Old wooden coffee table (make sure it’s in good shape)
- Measuring tape
- Sandpaper (medium and fine grit)
- Wood glue (for added stability)
- Screws or hinges (if adding a door)
- Non-toxic wood stain or paint (optional)
- Soft dog bed or comfy blanket
- Safety goggles
- Screwdriver or drill
Step-by-Step Instructions:
1. Prepare the Coffee Table: Start by giving your old coffee table a thorough inspection. Make sure there are no loose parts or sharp edges.
If you’re feeling a tad ambitious, you can even give it a good clean and possibly a little sanding to prepare it for a fresh coat of paint or stain.
2. Measure and Cut (if needed): Depending on the original structure of your coffee table, you might need to modify it.
If it’s too tall for your dog to comfortably enter, consider cutting down the legs. Just remember to measure twice—it’s a classic saying for a reason.
3. Create a Cozy Interior: Now it’s time to think comfort. If there’s an inner space that your dog will occupy, make sure it’s clean and smooth.
Line the inside with a soft dog bed or a comfy blanket. Your pup deserves to feel like they’re lounging on a cloud, right?
4. Build a Door: If your coffee table doesn’t already have a way to keep your pup safely tucked in, you might want to add a door.
Remove one of the side panels and attach a piece of wood with hinges, making sure it swings easily. You can also use a latch or latch hook to keep it securely closed when it needs to be.
5. Finishing Touches: Sand down any rough edges to prevent nicks and cuts.
If you opted to paint or stain, now’s the time to apply it. Non-toxic choices are best, making sure your pup can’t accidentally nibble on anything harmful.
6. Add Personality: Once everything’s assembled and dried, consider adding some personal flair.
Maybe you throw on a fun dog-themed sticker, or customize it with your dog’s name—let your creativity flow!
7. Final Inspection: After letting everything cure well, give it a once-over.
Make sure it’s stable and safe, and adjust anything if needed. You want this to be a space your dog loves, not a potential hazard.
Optional Add-ons/Variations:
- Experiment with colorful upholstery if your coffee table has a cushioned top. Use a fun fabric that complements your décor.
- If you’re feeling a little more adventurous, consider adding a cute little awning or canopy above—just think of it as a doggy cabana.
Pro Tip:
Before getting started, it’s a good idea to check for any toxic substances in the original wood finish of the table.
If you notice any peeling or flaking paint, you might want to strip it down completely and apply a new finish.
Your pup will appreciate a safe lounging area, and you’ll feel great about creating an inviting spot in your home. Happy crafting!
Extra Tips & Ideas
While you might think a dog crate’s just a place for your furry friend to chill, adding a few personal touches can really amp up its charm and functionality.
Why not throw in a cozy blanket or a favorite toy? Your pup will feel right at home.
If you’re feeling crafty, painting the crate to match your decor can be a fun project—you’ll feel like an interior designer, ready for the next big show.
You could even add a cute nameplate. Ever thought about using it as an end table? Just make sure it’s sturdy enough. Seriously, who wouldn’t want a dual-purpose piece?
Plus, it’s a great conversation starter. Your dog’s crate can truly be a style statement—who knew?
Frequently Asked Questions
What Materials Are Best for DIY Dog Crates?
You’ll want to use sturdy materials like wood, wire, or PVC for your DIY dog crate. Make sure they’re non-toxic and durable to create a safe and comfortable space for your pup to relax.
How Can I Ensure Safety in a Home-Built Crate?
Think of your crate as a cozy fortress. To guarantee safety, use non-toxic materials, smooth edges, and secure latches. Avoid small gaps where your pup’s paws could get stuck. Regularly check for wear and tear too.
Can I Include Storage in My Dog Crate Design?
Yes, you can definitely include storage in your dog crate design! Consider adding shelves or drawers for toys, leashes, and supplies. It’ll keep everything organized while maximizing space, making life easier for both you and your pup.
What’s the Average Cost of a DIY Dog Crate Project?
A DIY dog crate project typically costs between $50 and $200, depending on materials and size. You’ll save money compared to store-bought options while tailoring it to your pup’s needs and your home decor.
How Do I Train My Dog to Use a Crate?
Training your dog to use a crate is as easy as pie! Start by introducing the crate as a cozy space, using treats and praise to encourage them. Gradually increase time spent inside, fostering comfort and trust.
Conclusion
Now that you’ve got these fun DIY dog crate ideas, it’s time to release your creativity. Imagine your pup lounging in a cozy suitcase or napping inside a stylish bookshelf. These customized crates don’t just keep your dog safe, they make your home look great too. Plus, isn’t it rewarding to see the wagging tail of a happy furry friend? So grab those tools, let your imagination run wild, and create a space that your pup will adore.