So, you want to craft a DIY dog collar? You want to mix style and practicality? Well, you’re in for a fun project. First, you’ll need some fabric, a bit of webbing, and your dog’s neck size (measuring is essential). Trust me, that part isn’t as hard as it sounds, and it’s a great excuse to show off your dog’s personality. Just imagine the compliments at the park… But before we get ahead of ourselves, let’s figure out how to actually put this collar together.
Unique Fabric Patterns
When you think about dressing up your pup, don’t you just love the idea of unique fabric patterns? Imagine your furry friend strutting around in bold patterns that turn heads—a plaid that screams sophistication, or maybe a polka dot that just radiates fun.
Sourcing great fabric can be a treasure hunt! Local fabric stores or online shops are gold mines for discovering quirky prints. Pay attention to textures, too; soft cotton’s comfy, while a smooth nylon can be more durable.
If you’re feeling adventurous, try mixing patterns! Just remember, balance is key. Don’t go overboard—your dog’s not leading a fashion show (though it might feel like it).
Our Collection
Now let’s talk about our collection of dog collars, perfect for your pup’s unique personality.
From vibrant floral prints to trendy geometric designs, there’s something for every fashion-forward furball.
Whether your dog prefers classic plaid, playful stripes, or charming polka dots, you’ll definitely find a collar that’ll make them the talk of the park.
1. Floral Print Dog Collars

Is your furry friend in need of a stylish upgrade? Crafting a floral print dog collar not only saves you some bucks but also gives your pup a unique look that you won’t find at the pet store. Plus, it’s a fun way to express your creativity while making sure your dog is comfortable. Many dog owners also invest in premium dog food storage solutions to keep their pup’s food fresh. Let’s jump in and get those tails wagging!
Materials Needed:
- Fabric (Choose a floral print that makes you smile)
- A sturdy collar buckle (You can find these online or at craft stores)
- Webbing (2 inches longer than the desired collar length)
- Sewing machine (or needle and thread for the hand-sewing aficionados)
- Scissors
- Measuring tape
- Pins or clips
- Optional: Sewing pins, fray check for fabric edges
Step-by-Step Instructions:
- Measure Your Pup: Wrap the measuring tape around your dog’s neck to get an accurate measurement. Add about 2 inches to that number for room to work.
- Cut Your Fabric and Webbing: Using your measurements, cut a piece of fabric and a piece of webbing to the same size. Don’t forget to cut the fabric a little wider and longer if you want it to fold over the webbing nicely.
- Pin It Up: Lay the fabric right side down, and place the webbing on top. Fold the edges of the fabric over the webbing and pin it in place. This will help you keep everything neat while sewing.
- Sew It Together: Use the sewing machine to stitch along the edge, about ¼ inch from the edge. If you’re hand-sewing, just do your best to keep your stitches even. It doesn’t have to be perfect.
- Attach the Buckle: Slide the buckle onto one end of the collar. Make sure it’s secure. You can always test this by gently pulling to avoid a runaway pup situation.
- Finish the Edges: Once everything is sewn together, trim any excess fabric. You can add fray check to prevent unraveling if you’re feeling fancy.
- Try It On: Slip the collar on your pup and adjust it as needed. Snap it into place and watch that tail wag!
Optional Add-ons/Variations:
- Feeling bold? Try mixing and matching floral fabrics for a patchwork effect.
- Or, think about adding a matching leash made from the same fabric.
- Want a splash of color? Instead of a single floral print, you can alternate between two or more patterns for a fresh vibe.
Pro Tip:
When sewing your collar, remember to reinforce the areas around the buckle with extra stitches for added strength.
This little hack will guarantee that your floral collar can withstand all those playful dog park adventures.
Ready to make your dog the envy of the neighborhood? Trust us, they’ll wear it with flair, and you’ll be proud to show off your handiwork.
2. Geometric Design Dog Collars

Looking for a fun way to make your dog stand out while saving a few bucks? Crafting a geometric design dog collar is the perfect weekend project! Not only does it give your pup a modern, stylish look, but it’s also a cozy upgrade that fits just right. Let’s plunge into this project and release your creativity! Moreover, using heavy-duty materials ensures the collar can withstand even the most adventurous dogs.
Materials Needed:
- Fabric (Choose fun geometric patterns to showcase your style)
- Sturdy collar buckle (Find these easily at craft stores or online)
- Webbing (Make it 2 inches longer than your dog’s neck size)
- Sewing machine (Opt for hand-sewing if you prefer a personal touch)
- Scissors
- Measuring tape
- Pins or clips
- Optional: Fray check to prevent fabric from unraveling
Step-by-Step Instructions:
- Measure Your Dog: Wrap the measuring tape snugly around your dog’s neck. Add 2 inches for adjustments and comfort.
- Cut Your Materials: Based on the measurement, cut a piece of fabric and a piece of webbing to match in length. If you want the fabric to look nice when wrapped around the webbing, cut the fabric slightly wider.
- Time to Pin: Lay the fabric down with the right side facing down. Place the webbing on top, then fold the fabric edges over the webbing and pin it in place. This will keep everything tidy while you sew.
- Get Sewing: Using your sewing machine, stitch around the edges about ¼ inch from the edge. If you’re hand-sewing, just focus on keeping your stitches even and neat — it doesn’t have to be perfect (trust me, I’ve had my share of wobbly stitches).
- Attach the Buckle: Slide your collar buckle onto one end of the collar. Give it a little tug to verify it’s secure — no one wants a runaway dog chasing after the mailman.
- Trim and Secure: Once everything looks good, trim any excess fabric. If you like, apply fray check to the edges to keep things tidy.
- Fitting Time: Pop the collar on your pup and make any necessary adjustments. When it snaps into place, look at that happy wagging tail!
Optional Add-ons/Variations:
- Feeling adventurous? Mix and match different geometric designs to create a stunning patchwork collar.
- Want to make it truly bespoke? Use contrasting fabric for the inside lining – it’s a secret way to elevate your design while adding a pop of surprise.
Pro Tip:
When sewing, reinforce the areas around the buckle with extra stitches. This simple hack adds durability, making sure your collar stands up to all that tail-wagging excitement and spontaneous playdates.
3. Plaid Fabric Dog Collars

If you’re a dog owner looking for a fun, budget-friendly project, a plaid fabric dog collar might be just what you need! Not only does it give your furry friend a stylish flair, but it also allows you to customize the comfort and fit perfectly. Plus, you get that rewarding feeling of making something yourself! After creating your collar, consider pairing it with a comfortable bed from our collection of luxury dog beds large. Let’s roll up our sleeves and get crafting.
Materials Needed:
- Plaid fabric (think classic tartans or bold checks)
- Sturdy collar buckle (easily found at craft stores or online)
- Webbing (measure it to be 2 inches longer than your dog’s neck)
- Sewing machine (you can totally hand-sew if that’s your vibe)
- Scissors
- Measuring tape
- Pins or clips
- Optional: Fray check to keep those edges tidy
Step-by-Step Instructions:
- Measure Your Pup: Use your measuring tape to snugly measure around your dog’s neck. Add 2 inches for comfort and adjustments.
- Cut Your Stuff: Cut your plaid fabric and webbing to match your neck measurement, remembering that the fabric should be a bit wider if you want it to wrap nicely around the webbing.
- Pin It Down: Lay your plaid fabric down with the pretty side facing down. Place the webbing on top, then fold the edges of the fabric over the webbing and pin it down. This keeps everything neatly in place while you sew.
- Sew Away: Grab your sewing machine (or thread your needle if you’re hand-sewing) and stitch around the collar about ¼ inch from the edge. Keep it steady—just think of it as an exercise in artistic expression.
- Attach the Buckle: Slide your collar buckle onto one end. Give it a tug to make sure it’s secure. A loose buckle just means your adventurous pup might go exploring (yikes!).
- Finishing Touches: Snip away any extra fabric. If you’ve got fray check on hand, now’s a good time to apply it to those edges to keep everything looking sharp.
- Try It On: Pop the collar on your dog and check the fit. Adjust as necessary and enjoy that tail wagging in approval.
Optional Add-ons/Variations:
- Feeling bold? Choose multiple plaid patterns to create a fun patchwork collar. Who said plaid can’t be eclectic?
- Want to switch things up further? Consider adding a contrasting fabric for the collar lining—this little touch can make a huge difference in style and give it a unique twist.
Pro Tip:
When you’re sewing, take a moment to reinforce the stitching around the buckle area. It might be a small step, but it adds strength and durability. After all, we want to keep that collar intact for all of your dog’s adventures while looking fabulous, too.
4. Striped Fabric Dog Collars

If your pup is ready for a style upgrade that reflects their personality, a striped fabric dog collar could be just the ticket. Not only will it keep your furry friend looking sharp, but it’s also a fun and cost-effective project for dog owners. Plus, you’ll get the added satisfaction of knowing you made something special for your furry companion. Additionally, using premium materials will elevate your pup’s style and ensure the collar lasts for many adventures.
Materials Needed:
- Striped fabric (choose colors that pop!)
- Sturdy collar buckle (available at craft stores or online)
- Webbing (measure it to be 2 inches longer than your dog’s neck)
- Sewing machine or needle and thread (hand sewing is totally fine too)
- Scissors
- Measuring tape
- Pins or clips
- Optional: Fray check for keeping edges neat
Step-by-Step Instructions:
- Measure Your Dog: Grab the measuring tape and measure snugly around your dog’s neck. Don’t forget to add 2 inches for a little extra wiggle room.
- Cut Your Materials: Using your scissors, cut both the striped fabric and webbing to match your neck measurement. Remember, the fabric should be wider—this helps it fit snugly over the webbing.
- Pin Everything Down: Lay the striped fabric down with the patterned side facing down. Place the webbing on top, then fold the edges of the fabric over the webbing, pinning it all in place. It’ll feel a bit like a little fabric burrito for your dog.
- Time to Sew: Whip out your sewing machine (or needle if you’re going the hand-sewing route) and stitch along the edge about ¼ inch in. Take your time; there’s no rush. Just think of it as a creative moment with the fabric.
- Attach the Buckle: Slide the collar buckle onto one end of the collar. Give it a little tug to verify it’s secure. A loose buckle means riskier adventures, and we all know dogs and escapades don’t mix well.
- Final Touches: Trim away any excess fabric and, if you have it, apply the fray check along the edges to keep everything looking clean and tidy.
- Fit Test: Pop the collar on your dog and adjust as necessary. Watch that tail wag—it’s a sure sign that you made a winning design.
Optional Add-ons/Variations:
- Want to make it even more unique? Mix and match different striped fabrics to create a patchwork design. Your pup could be the trendsetter of the dog park.
- Add a contrasting lining fabric on the inside of the collar for an even more personalized touch. It’s a little detail that makes a big difference!
Pro Tip:
Before you start sewing, hit those edges with a quick zig-zag stitch to prevent fraying. It’s like a snug blanket for your collar’s edges, making it super durable for all that playful tugging and pulling during walks.
5. Polka Dot Fabric Dog Collars

If your furry friend needs a little style refresh, why not try making a polka dot fabric dog collar? This fun project isn’t only a terrific way to express your dog’s unique personality, but it also saves you a trip to the store.
Plus, you get the satisfaction of knowing you’ve crafted something special for your canine companion. Additionally, luxury pet ramps and stairs can enhance your dog’s comfort and safety around the house.
Materials Needed:
- Polka dot fabric (choose a color that matches your dog’s personality!)
- Sturdy collar buckle (easy to find at craft stores or online)
- Webbing (measure it to be 2 inches longer than your dog’s neck)
- Sewing machine or a needle and thread (hand sewing works just as well)
- Scissors
- Measuring tape
- Pins or clips
- Optional: Fray check to keep edges neat
Step-by-Step Instructions:
1. Measure Your Dog’s Neck: Grab a measuring tape and wrap it snugly around your dog’s neck. Make sure you add 2 inches for some wiggle room. Trust me, no pup likes a collar that’s too tight.
2. Cut Your Fabric and Webbing: Using your scissors, cut both the fabric and the webbing to match your neck measurement.
Remember, the fabric should be a bit wider to overlap and fully cover the webbing. Think of it as a cozy little jacket for their collar.
3. Pin the Fabric to the Webbing: Lay the polka dot fabric down, patterned side facing down. Place the webbing on top and fold the edges of the fabric over it.
Pin everything in place; it may look like a little fabric burrito at this point, but we’re getting there.
4. Sew It Up: If you’re using a sewing machine or hand sewing, sew along the edge about ¼ inch in.
Take your time; this is a moment to be creative. You might even start singing your favorite song. Just keep your focus; those sewing machines can be sneaky.
5. Attach the Buckle: Slide the collar buckle onto one end of the collar. Give it a little tug to verify it’s secure.
A loose buckle is a no-go, because let’s be honest, dogs and mischief have a strong correlation.
6. Finishing Touches: Trim away any excess fabric, and if you’ve got fray check, now’s the time to apply it along the edges.
Neat collars make neat pups, or at least, they look more polished.
7. Fit Test: Pop the collar onto your dog and adjust it as needed. Watch that tail wagging with excitement—that’s your pooch showing off their new bling.
Optional Add-ons/Variations:
– Want to show off your crafty skills even more? Consider mixing and matching polka dot fabrics to create a unique patchwork design.
Your dog could set trends at the dog park.
– How about adding a contrasting lining fabric on the inside of the collar? It’s a small touch that speaks volumes about your dog’s style.
Pro Tip
If you want to keep your pup extra comfy, verify the collar isn’t too heavy with fabric.
Lightweight materials are best. After all, nobody wants a dog dragging around a heavy collar like it’s a boulder.
6. Animal Print Dog Collars

Looking to give your furry friend a little extra flair? Making an animal print dog collar could be just the project for you. Not only does it save you some cash, but crafting your collar also gives you the freedom to choose patterns and colors that show off your dog’s personality. Plus, who wouldn’t want to see their pooch strutting a stylish new look?
Materials Needed:
- Animal print fabric (leopard, zebra, or whatever wild style your dog would rock)
- Sturdy collar buckle (easy to find at craft stores or online)
- Webbing (measure it to be 2 inches longer than your dog’s neck size)
- Sewing machine or a needle and thread (don’t worry, hand sewing is totally acceptable)
- Scissors
- Measuring tape
- Pins or clips
- Optional: Fray check to keep those edges looking sharp
Step-by-Step Instructions:
- Measure Your Dog’s Neck: Grab your trusty measuring tape and wrap it snugly around your dog’s neck, adding 2 inches for a comfy fit. A collar that’s too tight? Not ideal for our furry friends.
- Cut Your Fabric and Webbing: With your scissors, cut your fabric and webbing to match that neck measurement. Keep in mind the fabric should extend a bit beyond the edges of the webbing, providing a nice little cover for the collar.
- Pin the Fabric to the Webbing: Lay the animal print fabric down, with the stylish side facing down. Place the webbing on top and fold the fabric edges over it. Pin everything down—think of it as tucking your pup in for bed, but much more fashion-forward.
- Sew It Up: Now it’s time to whip out your sewing skills. Whether you’re a sewing machine aficionado or a hand stitching pro, sew along the edge about ¼ inch in. Feel free to hum a little tune while you work—just be mindful of the needle!
- Attach the Buckle: Slide the collar buckle onto one end of the collar and give it a gentle tug to make sure it’s secure. We don’t want any escape artists; dogs have a knack for finding trouble in a blink.
- Finishing Touches: Trim away any excess fabric, and if you’ve got some fray check, apply it along the edges. A tidy collar makes for a tidy-looking pup. Well, at least on the outside…
- Fit Test: Place the collar on your dog and make adjustments as needed. Look at that tail wagging—your pooch can’t wait to show off their new duds!
Optional Add-ons/Variations:
– If you’re feeling a bit adventurous, why not mix different animal prints? A zebra print collar with cheetah accents might just turn your pup into the trendsetter of the dog park. The sky’s the limit—well, the fabric store, anyway.
Pro Tip:
To guarantee durability, make sure to choose a heavy-duty webbing that can withstand your dog’s daily antics. Additionally, always double-check the fit before your dog trots off into adventure mode; comfort is key. A collar should be snug but not too tight, allowing for two fingers to fit between the collar and your dog’s neck.
Now you’re all set to create a paw-sitively fabulous dog collar! Time to channel your inner designer and let your pup strut their stuff in style.
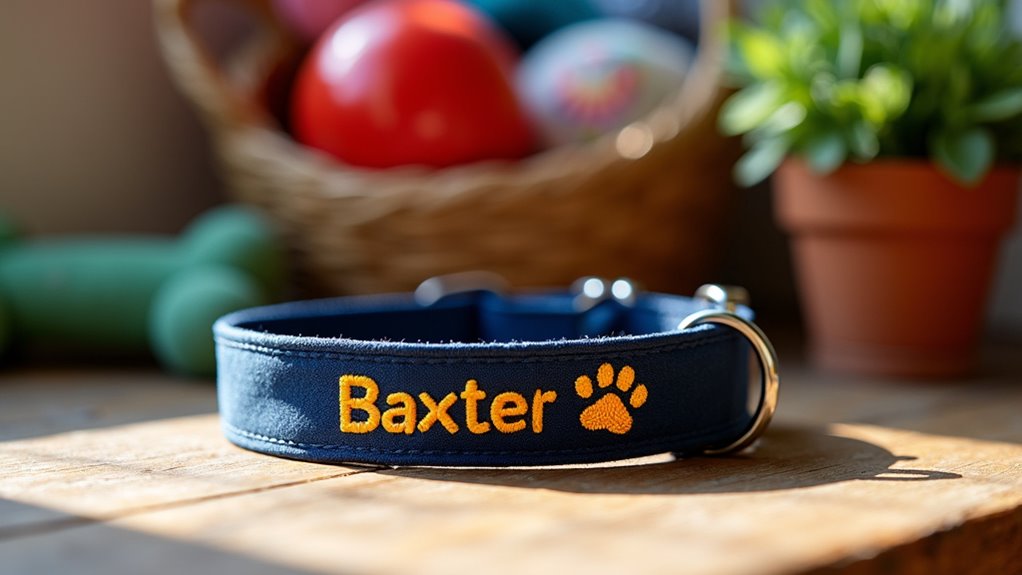
7. Custom Embroidered Dog Collars

Want to add a personal touch to your dog’s ensemble? Creating a custom embroidered dog collar is both fun and practical. Not only can you incorporate your pup’s name or a cute phrase to show off their personality, but it also helps make them more recognizable, especially during those off-leash adventures. Plus, it’s a cost-effective way to get a one-of-a-kind accessory that your furry friend can wear with pride.
Materials Needed:
- Canvas or cotton fabric (in your choice of color)
- Embroidery thread (pick a color that pops)
- Embroidery needle (the larger, the better for thicker fabric)
- Collar buckle (easy to find online or at craft stores)
- Webbing (measured to be 2 inches longer than your dog’s neck size)
- Sewing machine or a needle and thread for final assembly
- Scissors
- Measuring tape
- Embroidery hoop (optional but makes stitching easier)
- Pins or clips
- Optional: Fabric marker for outlining your design
Step-by-Step Instructions:
- Measure Your Dog’s Neck: Start out by measuring around your dog’s neck using the measuring tape. Remember to add 2 extra inches for comfort. Nobody likes a tight collar, right?
- Cut Your Fabric and Webbing: Using your scissors, cut out the fabric and webbing according to your measurement. The fabric should be a bit wider than the webbing. Think of it as giving your pup a stylish blanket that wraps around their collar.
- Choose Your Design: Plan out what you’d like to embroider. This could be your pup’s name, a quirky slogan, or even a cute icon like a paw print. If you’re feeling fancy, sketch it lightly on the fabric with a fabric marker for guidance.
- Embroider the Design: Secure your fabric in the embroidery hoop (if you’re using one) and get to stitching. Take your time, and if you make a mistake, remember that perfection is overrated. Embrace those lovely little quirks that make it unique, much like your pup.
- Sew the Fabric to the Webbing: Once you’re done embroidering, it’s time to marry that fabric with the webbing. Lay the fabric down (design side facing down), place the webbing on top, and fold the edges over. Pin everything in place so it doesn’t wiggle around while you sew.
- Sew It Up: With your sewing machine or a needle and thread, stitch along the edges about ¼ inch in. Enjoy the rhythm of the sewing, and maybe even sing a silly tune—you’ll definitely earn some tail wags for this.
- Attach the Buckle: Slide that collar buckle onto one end of the collar. Give it a tug to verify everything is secure. Your crafty paws deserve a high five for this one—your pup will love it!
- Finishing Touches: Trim any frayed threads or excess fabric. If you like, apply fray check to keep those edges neat and tidy.
- Fit Test: Place it on your dog and adjust as needed. Their tail will be wagging with pride as they parade this masterpiece in style.
Optional Add-ons/Variations:
- How about adding a few decorative patches or embellishments to really make the collar stand out? It spices things up, and your dog will be a trendsetter at the dog park.
- Consider using different colors of embroidery threads, or even a different fabric pattern for the collar’s backing. Release your creativity.
Pro Tip:
Always double-check the buckle’s fit before your dog goes on their big adventure. A collar that’s too loose can easily slip off, and a snug collar mightn’t always be the most comfortable. Keep it snug, but make sure your fingers can slide under the collar too—comfort is key to a happy pup.
Extra Tips & Ideas
While you might think creating a DIY dog collar is all about the basics, there are tons of fun extras you can add to make it truly unique.
Why not consider adding some reflective fabric for collar safety? It’s perfect for evening walks when visibility matters. You could also personalize your collar with charm tags—great conversation starters at the dog park.
Remember, dog comfort is key, so opt for soft materials to prevent irritation. Have you thought about using pretty stitching or fabric paint to showcase your pup’s personality?
If you mess up, no big deal—it’s all part of the process. Embrace the mistakes and say your collar is “vintage.”
Happy crafting, and give your furry friend some extra flair!
Frequently Asked Questions
What Materials Are Best for DIY Dog Collars?
When creating a dog collar, think of it as crafting a lifeline. Leather options offer durability, while vibrant fabric choices provide flair. Choose materials that reflect your pup’s personality, ensuring both style and comfort.
How Do I Determine the Correct Collar Size?
To determine the correct collar size, measure your dog’s neck with a tape measure, leaving a two-finger width for fit adjustments. Check regularly to guarantee it’s comfortable and fits well as your dog grows.
What Tools Do I Need for Making a Collar?
You’ll need fabric, a sewing machine or needle, thread, scissors, and a buckle for collar design. Familiarize yourself with various stitching techniques to guarantee durability and style as you create your unique collar.
Are There Any Safety Guidelines for Homemade Collars?
Yes, there are safety guidelines for homemade collars. Make sure you’re using strong, durable materials to prevent breakage, and avoid anything that could cause choking. Regularly check the collar for wear and replace as needed for safety.
Can I Customize a Collar With My Dog’s Name?
Yes, you can definitely customize a collar with your dog’s name! Consider custom engraving options or use name tag alternatives to make it unique. Your pup will look stylish while staying safe and identified.
Conclusion
So, you’ve just made a DIY dog collar, and chances are your pup’s already strutting around like they own the place. Did you know that having a well-fitted collar can reduce the risk of injury by up to 30% during walks? How cool is that? With unique patterns and your personal touch, you’re not just making a collar; you’re crafting a statement. Now, grab that leash, take your stylish pooch for a spin, and enjoy the compliments coming your way.