So, you’ve got a furry friend who deserves a cozy spot to crash, right? Why not whip up a DIY dog bed frame that’s not just comfy but also a stylish addition to your home? From an elegant wooden frame that’ll make you look like a Pinterest pro to a quirky vintage suitcase bed that sparks joy, there are so many creative options. Stick around, because these ideas will have your pup snoozing in style.
Elegant Wooden Frame Designs
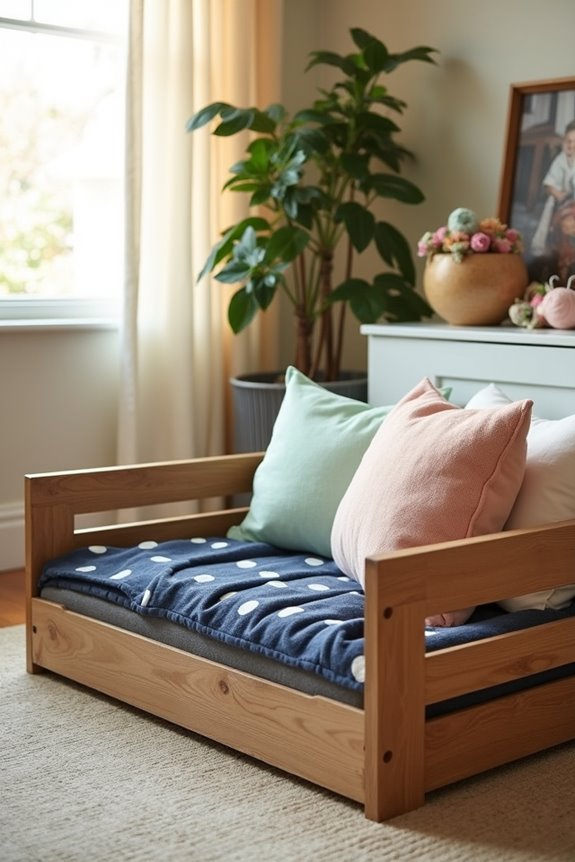
When you think about creating a cozy spot for your furry friend, elegant wooden frame designs can elevate their nap game—and your home décor too.
Picture crafting a DIY dog bed frame that marries style with functionality. You could use reclaimed wood for a rustic look or smooth pine for a modern touch.
Begin by measuring your pup; they need room to stretch out comfortably. Cut the wood into pieces to form the base and legs, then assemble it using screws—easy peasy.
Don’t forget to sand the edges; splinters aren’t dog-friendly, trust me. Add a plush dog bed inside, and voilà! You’ve got a chic and sturdy spot for your best bud.
Plus, you’ll avoid those overpriced pet store prices, which is a win-win.
Our Collection
Now that you’ve seen some elegant wooden frame designs, let’s check out our collection of dog bed frames that’ll make your pup feel right at home.
You’ve got cozy pallet beds, funky repurposed crates, and even upcycled tires—who knew tires could look so stylish?
Whether you’re looking for something outdoor-friendly or want to bring a touch of vintage flair with a suitcase, we’ve got options that’ll make tails wag.
1. Cozy Pallet Dog Bed

Creating a cozy pallet dog bed is a fun and budget-friendly project that any dog owner will appreciate. Not only does it provide your furry friend with a comfortable place to rest, but it also adds a charming rustic touch to your home. Plus, you won’t break the bank—who doesn’t love that? Additionally, consider indulging your chihuahua with luxury dog food options to complement their new cozy space.
Materials Needed
- Pallets (1-2 depending on size)
- Sandpaper (medium and fine grit)
- Wood stain or paint (optional for finishing)
- Paintbrush or roller (if staining/painting)
- Dog bed cushion (to fit inside the frame)
- Screws (for assembly)
- Drill (to screw things together)
- Saw (if resizing pallets)
- Measuring tape
Step-by-Step Instructions
- Choose Your Pallets: Find clean, sturdy pallets. Check for any broken slats and verify they’re free of pests. You want your pup safe, not creating a new “doggy home improvement disaster.”
- Sand Those Edges: Use medium-grit sandpaper to smooth out the rough edges, then switch to fine grit for a silky finish. This is your chance to get rid of splinters; your dog will thank you by not giving you heart palpitations every time they hop in.
- Resize as Needed: If your pallets don’t fit the desired size (or, let’s be honest, you didn’t read the measurements carefully), use a saw to cut them down to size. Measure twice, cut once—remember that timeless wisdom.
- Assemble the Frame: Place your pallets on a flat surface, aligning them to form a bed shape. Use the drill to attach them at the corners with screws. You could create a super sturdy rectangle or even a square, depending on your style and the size of your dog.
- Stain or Paint (Optional): If you want your bed to be a little more stylish, go ahead and apply some wood stain or paint for that personalized touch. Let’s be real; your dog deserves a bed that matches your decor, right?
- Add Some Cushy Comfort: Place the dog bed cushion inside the newly-formed frame. Make sure it fits snugly so that your pooch has a comfy, secure place to snuggle up.
- Set It Up: Find the perfect spot in your home, maybe near a sunny window or your favorite reading chair. Allow your dog to explore their exciting new bed; they might need a gentle push (or a treat) to hop in.
Optional Add-ons/Variations
- Color Customization: Instead of traditional wood stain, choose fun, vibrant paint colors or even patterns that match your style or your pup’s personality.
- Add a Canopy: If you’re feeling ambitious, you can create a cute little canopy using fabric. Attach some lightweight fabric to the top of the bed frame for a cozy hideaway. Your dog will love having a “secret fort” of their very own.
Pro Tip
Before letting your pup take over, give the entire structure a once-over for any splinters or loose screws. You can always give it an extra round with sandpaper or use wood glue for added durability.
Trust me, a little extra effort now will save you “uh-oh” moments in the future. Plus, it just feels good to see your furry friend all snuggled up and comfortable. Isn’t that why we do all of this?
2. Repurposed Crate Dog Bed
If you’re looking for a way to give your pup a stylish and comfortable resting spot while being kind to your wallet, a repurposed crate dog bed is the perfect project. Not only is it a creative way to recycle an old wooden crate, but it also creates a cozy nook for your furry friend that seamlessly blends with your home décor.
Say goodbye to those generic dog beds and hello to a personalized masterpiece.
Materials Needed
- Wooden crate (the larger, the better)
- Sandpaper (medium to fine grit)
- Wood finish or paint (optional for customization)
- Paintbrush or roller (if painting/staining)
- Soft foam or pet mattress (to fit inside the crate)
- Dog blanket or cushions (for added comfort)
- Drill (if needed for assembly)
- Measuring tape
- Wood glue or wood screws (optional for extra sturdiness)
Step-by-Step Instructions
1. Find Your Crate: Look for a sturdy wooden crate at flea markets, thrift shops, or in your attic. Verify it has no sharp edges or loose parts, so your dog stays safe.
2. Sand It Down: Sand the surface of your crate with medium-grit sandpaper, and follow with fine grit for a smooth touch.
You want a pet-friendly surface—trust me, splinters don’t make for happy pups.
3. Clean It Up: After sanding, wipe the crate down to remove dust. A clean surface is crucial for what’s next, especially if you’re planning on painting.
4. Decorate It (Optional): If you want, now’s the time to stain or paint the crate. Choose a color that matches your home décor or a funky shade that reflects your dog’s personality.
Pro tip: let it dry completely before proceeding, unless you’re aiming for the ‘artsy’ look of paint smudges.
5. Choose Comfort: Measure the inside of the crate and cut your soft foam or pet mattress to fit snugly. You can even grab a dog blanket or cushions to create the ultimate cozy zone for your pup.
6. Setup the Bed: Place the foam or mattress inside the crate and fluff with extra cushions or a dog blanket for that extra touch of warmth.
Maybe even throw in a squeaky toy or two for added flair.
7. Find the Perfect Spot: Set the crate in a serene corner of your home, preferably where your dog loves to hang out.
Give them a little nudge (and a treat) if they seem shy about exploring their new cozy sanctuary.
Optional Add-ons/Variations
– Color it Right: Instead of just paint, consider using fabric to cover the interior or adding some stencils for a personalized touch.
Happy patterns can make it feel more like home for your pup.
– Add Wheels: If you want to make it mobile, attach some sturdy caster wheels to the bottom.
This way, you can relocate that adorable bed to follow the sun or hide it in the corner when guests come over.
Pro Tip
For added comfort, consider placing a soft non-slip mat under the dog bed if it’s on a slippery surface.
It keeps the bed in place and adds some cushioning that your pup will love. Plus, it prevents any accidental “surprise slides”—nobody wants to see their dog do a cartoon-like tumble off a moving bed. Plus, consider pairing the crate with our premium dog food packages to ensure your dog stays well-fed and healthy while enjoying their new bed.
3. Upcycled Tire Dog Bed
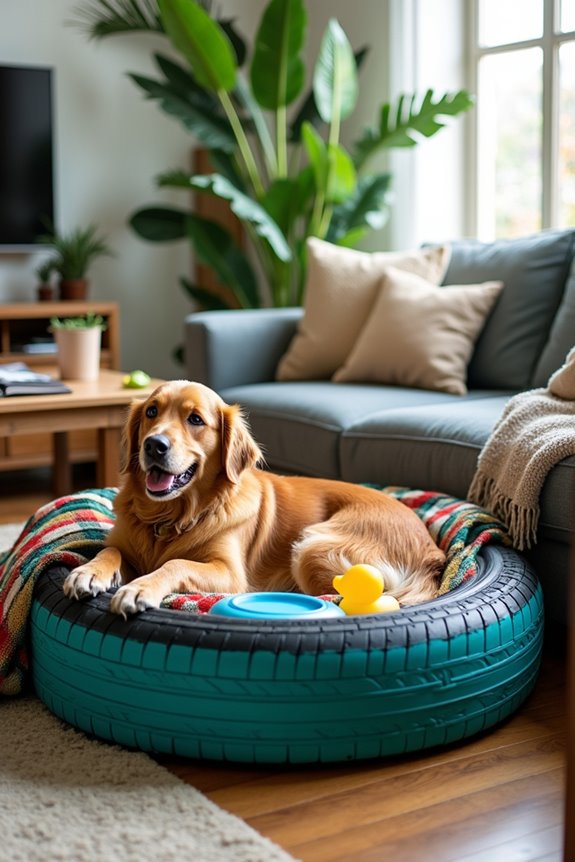
Are you looking for a fun and eco-friendly way to create a unique bed for your furry friend? An upcycled tire dog bed is a fantastic solution! Not only does it save you money compared to buying a fancy dog bed, but it also gives your pup a comfy and stylish haven, while helping the planet too. Plus, who wouldn’t want something quirky in their home? Plus, creating treats with a dog treat dehydrator machine can make your pet feel extra pampered.
Materials Needed
- Old tire (preferably a smaller one for easier handling)
- Soft foam or pet mattress (to fit the tire)
- Outdoor fabric or dog blanket (to cover the mattress)
- Rope or fabric for embellishment (optional)
- Spray paint (optional, if you want to jazz it up)
- Scissors
- Measuring tape
- Hot glue gun (optional, for securing fabrics)
Step-by-Step Instructions
- Gather Your Tire: Hunt down an old tire—maybe from a friend, a local mechanic, or a tire shop. Give it a good inspection to verify that it’s clean and safe for your dog.
- Clean and Prep: Scrub the tire thoroughly to remove any dirt or residue. Use soap and water, rinse it well, and let it dry fully. Your dog’s new bed deserves to be fresh, right?
- Measure for Comfort: Measure the inside of the tire to find out how much foam you’ll need. You can always add a bit of extra here; dogs love to snuggle in!
- Cut the Foam: Trim your soft foam or pet mattress to fit snugly in the tire. You want it just right—too loose and it won’t feel cozy, too tight might be a squeeze. You know what they say, “Goldilocks and the Three Dogs.”
- Cover the Mattress: Take your outdoor fabric or dog blanket and cover the foam snugly. If you’re feeling crafty, secure it with a hot glue gun for neat edges, or just tuck it in if you’re going for a more relaxed look.
- Add Personal Touches: Get creative here. If you’ve chosen to use rope or fabric for embellishment, you can wrap it around the outer edge of the tire to give it a unique flair. Think of it as dog bed fashion—I mean, who wouldn’t want their bed to have runway vibes?
- Find a Comfy Spot: Place the tire bed in your dog’s favorite napping area. Add a few toys for a playful touch, and maybe even entice them with a treat to explore their new throne. Watch out, they might just refuse to come off it for the rest of the day.
Optional Add-ons/Variations
- Color me Happy: Want to add a pop of color? Try spray painting the tire in your dog’s favorite hue or a shade that matches your home. Your imagination is your only limit.
- Fabric Choices: Use patterned fabric like polka dots or stripes instead of plain—it can really brighten up your space and add personality to your dog’s bed.
Pro Tip
While this project is pretty simple, remember to avoid using tires with visible wear and tear or any chemicals. Safety first!
Also, if your pup is a chewer, consider using more durable fabric to withstand their playful antics. Happy crafting!
4. Outdoor Wire Dog Bed
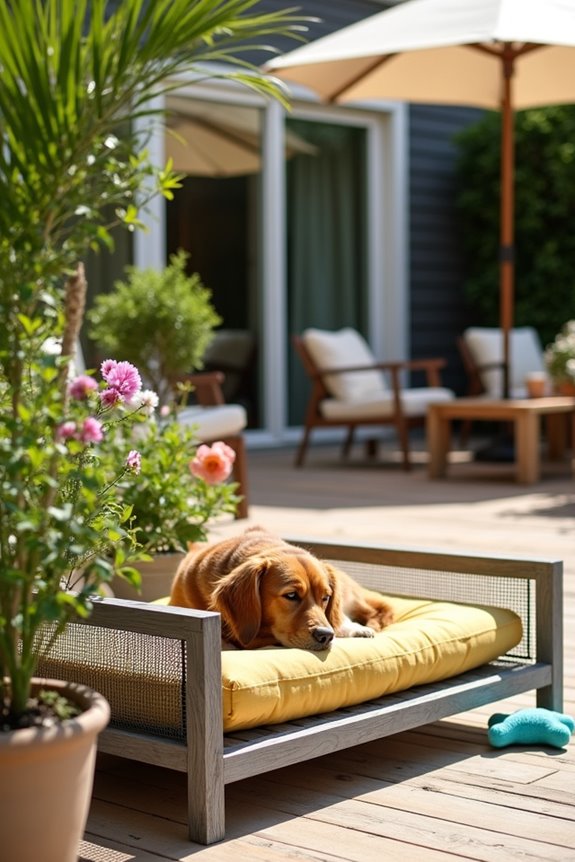
If you’re looking for a durable and stylish dog bed that’s perfect for outdoor lounging, stop your search at an outdoor wire dog bed. Not only is it cost-effective, but it also provides your pup with comfort while being easy to clean. Plus, let’s be honest—who doesn’t want to show off a trendy dog bed that could fit right into a modern patio? Investing in your dog’s comfort can be further enhanced by using luxury dog food for yorkies, ensuring your furry friend feels pampered all around.
Materials Needed
- Wire mesh (sturdy and weather-resistant)
- Wood boards (for the frame, treated for outdoor use)
- Saw (for cutting wood)
- Screws or nails (for assembling)
- Drill or hammer (to secure the frame)
- Sandpaper (to smooth out edges)
- Measuring tape
- Outdoor cushion or foam padding (for comfort)
- Outdoor fabric (to cover the cushion, if desired)
Step-by-Step Instructions
1. Measure and Cut the Wood: First up, decide the size of your dog bed. Use the measuring tape to determine the dimensions (making sure there’s enough space for your pooch).
Cut the wood boards to match these dimensions for the base and sides.
2. Sand the Edges: Give those freshly cut wood pieces a good sanding; you want to avoid any splinters that might poke your pup.
Trust me, a smooth surface is the dogs’ (and your) best friend.
3. Assemble the Frame: Using the screws or nails, put the wooden boards together to form a rectangular frame.
Make sure it’s sturdy – no one wants a wobbly bed. Attach the corners first for a solid foundation.
4. Attach the Wire Mesh****: Cut the wire mesh to fit snugly over the wooden frame. Use your drill to secure it into the wood, making sure there are no sharp edges sticking out (safety first, for both you and your furry buddy).
5. Add a Cushion: Choose an outdoor cushion or get some foam padding to place on top of the wire mesh.
Make sure it’s thick enough to provide comfort, so your pup can enjoy those sunny naps without any discomfort.
6. Cover in Style: If you want to jazz it up a bit, wrap your cushion in some chic outdoor fabric.
It’ll not only enhance the look but also keep the cushion protected from any weather elements.
7. Set It Up Outdoors: Find a cozy spot on your patio or in your yard. Add a few toys or a nice blanket to make it extra inviting.
Watch as your dog kicks back and claims their new throne, which, let’s face it, is probably better than your own seating.
Optional Add-ons/Variations
- Color Pop: Consider using colorful wood stains or outdoor paint to match your patio décor. This simple step adds personality and can help your dog bed blend seamlessly with your backyard oasis.
- Personalized Pillow: For a little extra flair, why not add a personalized dog pillow with your pup’s name on it?
It’s a cute touch that shows off your flair for decor, while also letting everyone know who the real boss is.
Pro Tip
Before you get started, double-check that the wire mesh isn’t too sharp on the edges.
You don’t want your pup getting hurt. If it seems a bit rough, consider using some fabric to cover the edges, or you can even add a soft outdoor carpet underneath for extra padding (and style).
Enjoy your DIY adventure—your dog is going to love their new hangout spot!
5. Vintage Suitcase Dog Bed
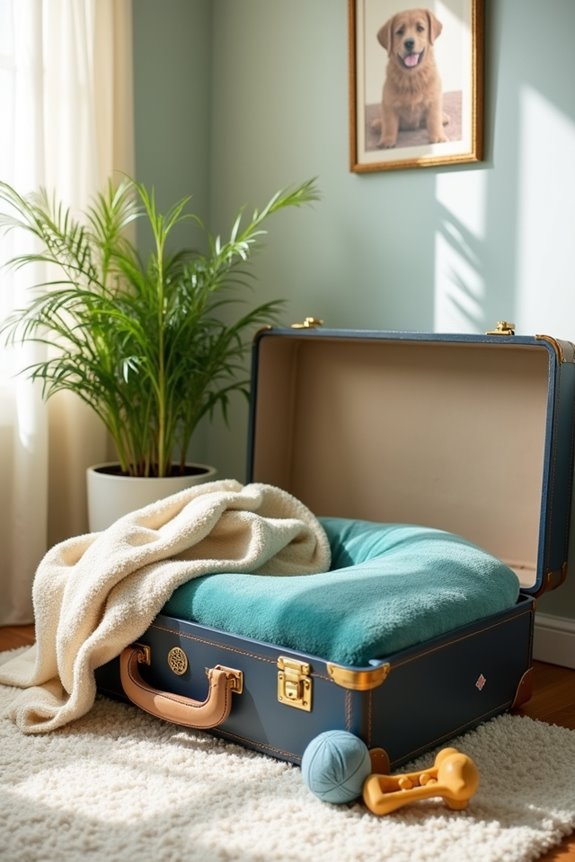
Looking for a unique, stylish dog bed that gives your pup a cozy place to rest? A vintage suitcase dog bed is a charming and functional DIY project that not only saves you money, but also adds a retro flair to your home decor. Plus, it gives new life to an old suitcase, which is kind of like saving a little piece of history. So why not craft a chic spot for your furry friend to lounge in style?
A premium dog food for your Goldendoodle can enhance their comfort and overall well-being while they enjoy their new bed.
Materials Needed
- Vintage suitcase (the bigger, the better)
- Soft foam padding or a thick cushion (for comfort)
- Fabric (optional) (to cover the cushion)
- Sewing machine or fabric glue (if covering) (for a neat finish)
- Heavy-duty fabric scissors (for easy cutting)
- Sandpaper (for any rough edges on the suitcase)
- Measuring tape (to verify the right fit)
- Crafting glue or double-sided tape (to secure fabric, if needed)
Step-by-Step Instructions
1. Find Your Suitcase: Scour your local thrift stores, garage sales, or even your own attic for a vintage suitcase that speaks to you.
Make sure it’s sturdy enough to hold your dog’s weight without giving you an anxiety attack.
2. Clean It Up: Give your suitcase a good wipe-down. If it’s an antique, you may want to be gentle.
After all, you’re dealing with a treasured relic. Don’t forget to check for any sharp edges or loose parts that need smoothing out with sandpaper—your pup’s safety is key.
3. Measure and Cut: Grab your foam padding and cut it to match the interior dimensions of the suitcase.
If you’re a perfectionist, well, you might want to measure twice before cutting once.
4. Optional Fabric Cover: For a pop of color and to match your decor, you can cover the foam with fabric.
Just lay it out, place your foam on top, and fold the edges over securely. Either sew it up or use fabric glue to seal the deal, whichever you feel more comfortable with.
5. Assemble the Bed: Place the cushioned foam inside the suitcase and make any adjustments needed for a snug fit.
You want your dog to feel as if they’ve landed in a plush paradise, not a cramped space pod.
6. Decorate (Optional): Feeling artsy? Add some embellishments, like decorative legs (think wooden dowels) to lift the suitcase off the ground for extra style and comfort.
Just make sure any additions are pet-friendly and stable.
7. Show Off Your Creation: Once it’s all set, find the perfect spot in your home where your pup can curl up.
You’ll likely see them gravitate towards their new cozy nook. And you’ll get to brag a little about your DIY skills when guests come over.
Optional Add-ons/Variations
– Personal Touch: Consider painting the suitcase’s exterior with non-toxic paint to add personality.
You could even decoupage photos of your pup or some fun dog-themed illustrations—it might just become the centerpiece of your living room.
– Liner Love: If you want to keep things even cozier, you can add a dog blanket or throw inside the suitcase, making it your dog’s snuggle zone on colder days.
Pro Tip
To save a few bucks, look for durable, used suitcases at thrift shops or yard sales.
It’s a win-win—you’re recycling, and your dog gets a fabulous bed without straining your wallet. And remember, keeping the suitcase away from direct sunlight helps it maintain its beauty a little longer.
Your dog might thank you, even if they can only bark their approval.
6. Sturdy Metal Bed Frame
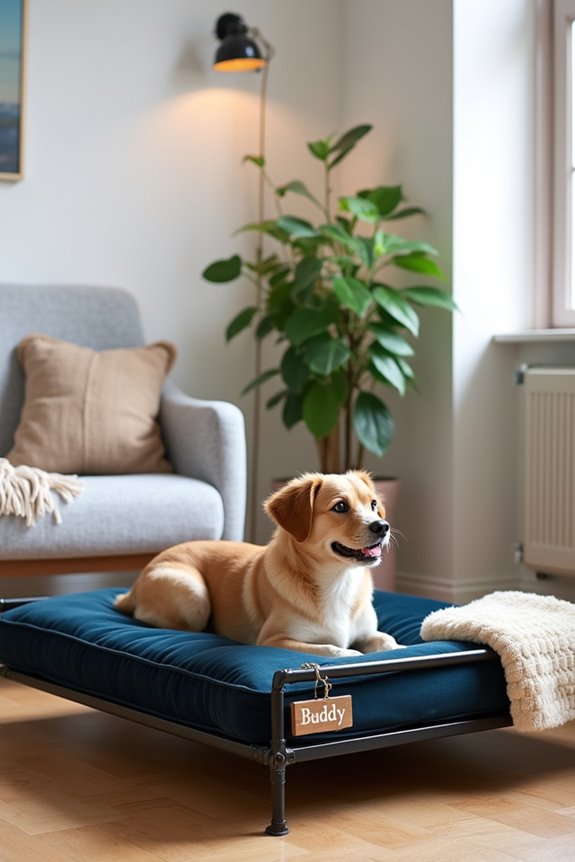
If you’re on the lookout for a solid, stylish, and durable dog bed solution, then crafting a sturdy metal bed frame for your pup might just be the answer you’ve been searching for. This DIY project not only elevates your pet’s sleeping experience by keeping them off cold floors, but it also brings an industrial charm to your home decor.
Plus, building your own frame can save some bucks compared to store-bought options, allowing you to splurge on that organic dog food your furry friend seems to love (or at least their nose does).
Materials Needed
- Metal bed frame kit (check online or local hardware stores for easy-to-assemble options)
- Furry pet mattress or thick cushion (for that cozy comfort)
- Screws and tools (usually included in the bed frame kit)
- Measuring tape (to confirm the right size)
- Drill or screwdriver (for assembly)
- Sandpaper or file (in case of any sharp edges)
Step-by-Step Instructions
- Choose Your Frame: Start by selecting a metal bed frame kit that fits the size of your dog. Consider the weight limit too; you don’t want to end up with a frame that can’t handle your pup’s energetic antics during dreamland.
- Gather Your Tools: Before diving into assembly, gather all your tools and materials. You wouldn’t want to be halfway through and realize your screwdriver is missing, lounging in the couch cushions.
- Assemble the Frame: Follow the instructions provided with the frame kit. Most metal frames will require you to attach the sides and the base. It’s pretty straightforward—just connect the pieces using the screws and a drill or screwdriver.
- Sand Any Rough Edges: Once assembled, check for any sharp edges or rough spots. Use sandpaper or a file to smooth them out so your pup doesn’t end up with tiny scratches while finding their sweet spot.
- Add a Soft Bed: Now the real comfort begins. Place a furry pet mattress or a thick cushion on top of the frame. Make sure it fits snugly so your dog isn’t left teetering on the edge with a “what did I get myself into” look.
- Final Touches: If you’re feeling creative, you can paint or customize the metal frame with non-toxic spray paint to match your home decor or personal flair. Just make sure it’s fully dry before letting your pup make it their throne.
- Position and Enjoy: Find the coziest corner in your home, place the new bed frame somewhere that’s a little away from the hustle and bustle, and watch your dog revel in their new cozy spot.
Optional Add-ons/Variations
- Use different colored cushions or mattress covers to match your style. Stripes, polka dots, or even a fun print — let your imagination run wild.
- For a personalized touch, add your dog’s name to the frame using vinyl lettering or a cute painted sign hanging above their bed.
Pro Tip
Always check the frame periodically for any loose screws or stability issues. Dogs can be surprisingly rough on their beds, and a little maintenance goes a long way in guaranteeing your metal frame stays tickety-boo for a long time.
Conversely, if you’re concerned about slipping, consider adding non-slip pads to the base for better grip, especially on tile or hardwood floors.
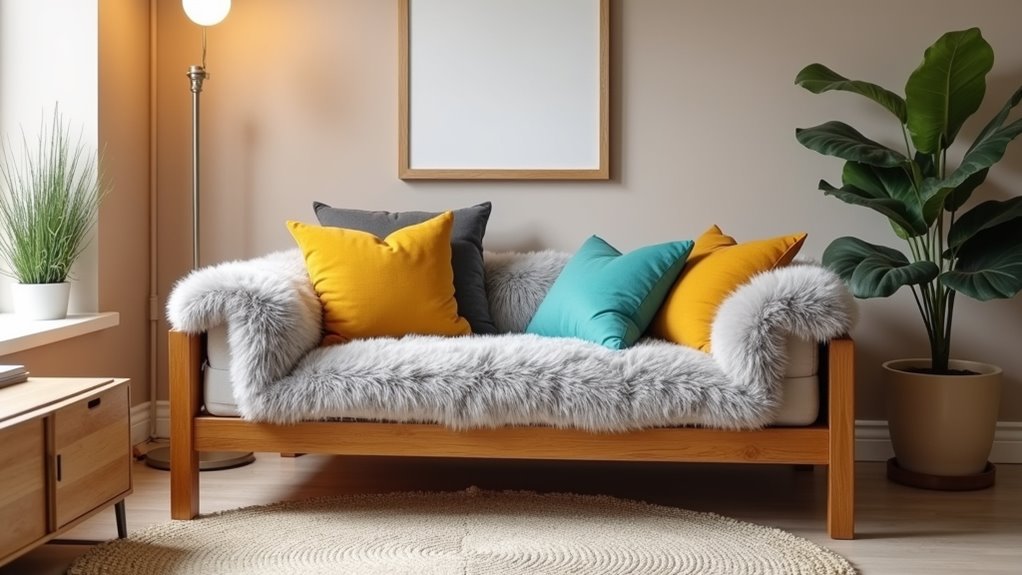
7. Faux Fur Elevated Bed
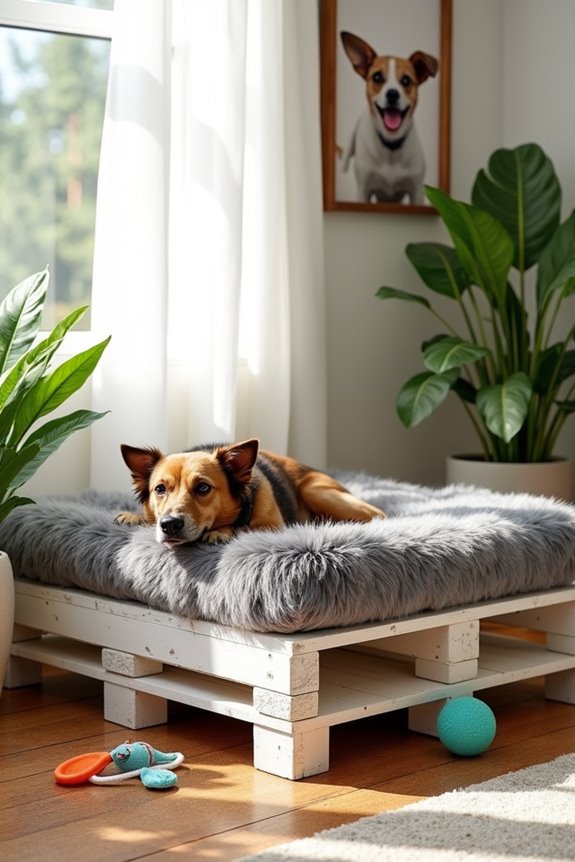
If you’re looking for a chic, cozy, and comfortable bed for your furry friend, why not try making a faux fur elevated bed? Not only does this project give your pup a stylish place to lounge, but it also keeps them off the cold floor, adding a touch of luxury to your home decor that’s certain to impress (both your dog and any visiting guests).
Plus, it’s a budget-friendly way to give your pet the comfort they deserve without breaking the bank.
Materials Needed
- Wooden pallets or wooden boards (for the bed frame)
- Faux fur fabric (the softer, the better)
- Foam padding or thick cushion (like a memory foam dog bed)
- Wood screws and wood glue (to hold everything together)
- Screwdriver or drill (for assembling the frame)
- Measuring tape (to ascertain everything fits just right)
- Saw (if cutting wood is necessary)
- Sandpaper (to smooth any rough wood edges)
Step-by-Step Instructions
1. Measure and Cut the Wood**: Decide how large you want your elevated bed to be based on your dog’s size. Cut your wooden pallets** or boards to length, making sure you have enough pieces for the bed frame.
If you’re unsure about cuts, just remember: measure twice, cut once—unless you enjoy a little wood puzzle!
2. Assemble the Frame: Using wood screws and a drill or screwdriver, connect the cut pieces together to create a rectangular frame. For pups needing extra support, adding cross braces will add stability (and a little “wow factor” to your tripod beauty).
3. Sand Down the Edges: Once your frame is assembled, take some sandpaper and smooth out any rough edges. Trust me, you don’t want your pup getting splinters while they attempt their best fluffball impersonation.
4. Add Foam Padding****: Place the foam padding or thick cushion on top of the frame. Make sure it fits snugly inside so your pup doesn’t feel like they’re on a bouncy castle!
If you’re feeling fancy, you can even custom-cut the foam to match the exact size of the frame.
5. Cover with Faux Fur: Drape the faux fur fabric over the foam, ensuring it’s evenly distributed. Use a staple gun or push pins to secure the fabric to the underside of the frame, molding it like you’re wrapping a gift—just a lot fluffier and without the ribbon.
6. Final Checks: Give everything a good look-over, adjusting the cushion and fur as needed. If you have any loose threads, take the time to trim them for a cleaner finish.
Nobody wants a pup with a fashion faux-paw.
7. Place It Perfectly: Position your new elevated bed in your home, preferably in a cozy corner where your pup can lounge in style.
Sit back and wait for them to claim it like royalty.
Optional Add-ons/Variations
- Colorful Fabrics: Instead of just plain faux fur, pick fabrics with fun patterns or colors to match your home décor. Think polka dots or floral prints—your pup deserves a custom throne.
- Treat Storage Drawers: If you have some spare time, you can make drawers under the bed frame for treats or toys. Your dog can have their own organized corner, and you can finally find that missing squeaky toy.
Pro Tip
Consider using untreated wood for the frame to avoid any harmful chemicals potentially harmful to your dog.
And when it comes to cleaning, a vacuum attachment works wonders to keep that faux fur looking pristine. Trust me, a few minutes of upkeep will give your dog a comfy kingdom that stands the test of time!
Extra Tips & Ideas
While you might think that making a dog bed frame is all about the basic construction, there’s a whole world of fun extras you can add to really make it pop and suit both your and your pup’s style.
Consider painting the frame a quirky color or adding stenciled paw prints; it’s an instant way to show off your flair.
Want to keep your pup extra cozy? You could attach a soft side pillow for lounging.
Don’t forget those cute little touches, like a nameplate or whimsical decorations, to personalize it. Maybe even a hidden treat compartment?
Sure, the fancy dog beds look great, but your DIY creation can be the envy of the dog park.
Trust me, your pup will love it.
Frequently Asked Questions
What Materials Are Safest for Dog Bed Frames?
You’ll want to use non-toxic wood like pine or cedar, and avoid chemicals. For upholstery, choose natural fabrics like cotton or linen, ensuring they’re durable and washable, giving your dog a safe, comfy space.
How Do I Choose the Right Size for My Dog?
To choose the right size for your dog, measure their length from nose to tail and add a few inches for comfort. Confirm the bed width allows them to stretch out and move freely.
Can I Paint or Stain the Frame?
Yes, you can definitely paint or stain the frame! Just make sure to use pet-safe products. It’s a great way to personalize your pup’s bed, and it adds a fun touch to your decor.
What Tools Do I Need for Building the Frame?
You’ll need a saw, drill, measuring tape, level, sandpaper, and wood screws for building the frame. You might also want clamps for stability while assembling. Gather these tools before starting your project for best results!
How Can I Ensure Durability in Outdoor Dog Beds?
You’ll want your dog’s bed to last forever, right? To guarantee durability, use weather-resistant materials, treat the wood with sealant, and reinforce joints. A sturdy design will withstand the elements and keep your pup cozy!
Conclusion
So, there you have it—seven delightful DIY dog bed frame ideas that’ll keep your pup dreaming in style. Whether you’re crafting a plush elevated haven or transforming an old suitcase into a cozy nook, your dog’s comfort is just a project away. And let’s be honest, they don’t care if it’s Pinterest-worthy. They just want a spot to snuggle up. So roll up those sleeves, get a little messy, and create something special for your four-legged friend.