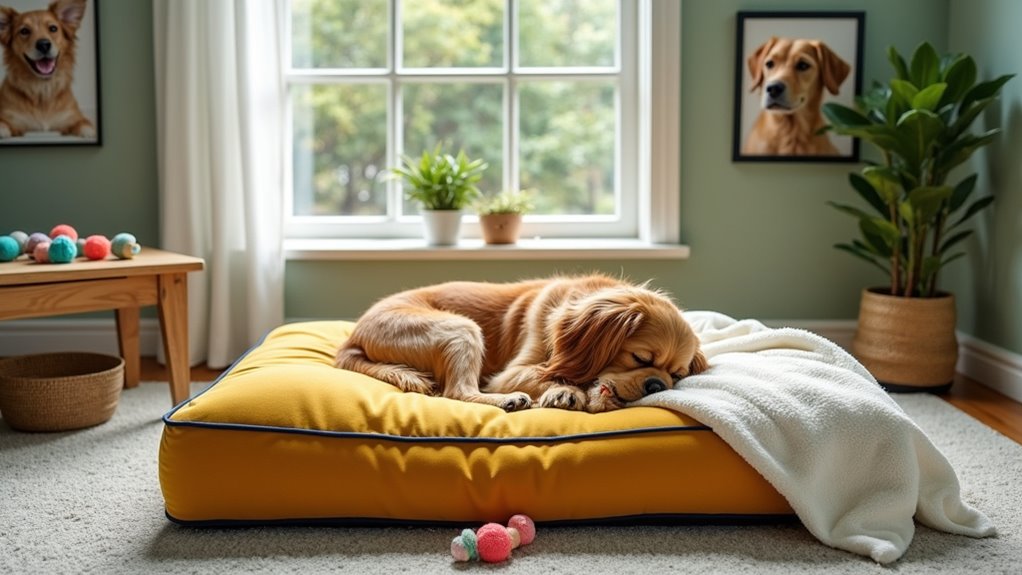
When it comes to crafting the perfect dog bed, you want comfort, style, and a hint of creativity. You want coziness, you want flair, and you want it to be affordable, right? Maybe you’ve got some old furniture sitting around, or perhaps you’ve eyed that vintage suitcase in the attic. Whatever your resources, making a DIY dog bed not only gives your pup a snug haven but also reflects your personality. Curious about how you can transform everyday items into a delightful retreat for your furry friend?
Cushiony Repurposed Furniture Designs
Looking to give your furry friend a cozy spot without breaking the bank? How about transforming that old chair or dresser into a DIY dog bed? It sounds challenging, but trust me, it’s easier than you think.
First, grab a piece of furniture you’re ready to retire—an old side table works wonders. Remove the legs, if needed, and sand it down.
Next, cushion it up with some plush pillows or a thick foam pad; your pup will thank you. Cover everything with a soft blanket for that cuddle factor.
Before you know it, you’ll have a stylish dog bed that’s unique and functional. Plus, bragging rights are included—who doesn’t love a DIY success story?
Your dog’s gonna love it.
Our Collection
Let’s talk about some fun and creative dog bed ideas that’ll keep your pup cozy.
From the fabulous old suitcase bed that’s just begging for a second chance, to the rustic charm of a wooden pallet, there’s something for every style.
You won’t believe how a recycled tire can turn into a chic snooze spot, but I promise it’ll be a conversation starter—and who doesn’t love a good chat about DIY projects?
1. Old Suitcase Dog Bed
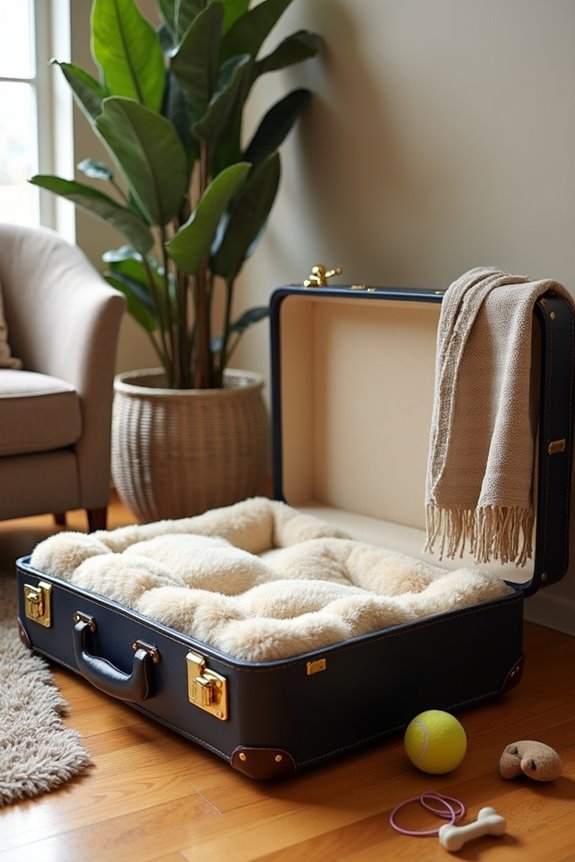
If you’ve ever hunted for a cozy place for your pup to curl up and dream, an old suitcase dog bed could be the perfect solution. Not only does it save you money, but it also gives new life to something that may have been collecting dust in your attic or basement. Imagine your furry friend snuggling up in stylish comfort while making your home look effortlessly chic. Plus, it’s a conversation starter next time you have guests over!
Materials Needed:
- An old suitcase (hard or soft-sided)
- A comfy dog bed insert or foam cushion (make certain it fits well!)
- Fabric (optional, for a more personalized touch)
- Scissors
- Measuring tape
- Hot glue gun and glue sticks (if adding fabric)
- Sandpaper (for wooden suitcases, if necessary)
- Soft, washable blanket (optional, for extra coziness)
Step-by-Step Instructions:
- Choose Your Suitcase: Pick a suitcase with a sturdy base and plenty of character. Check for any damage or wear, and ascertain your dog isn’t going to get poked by any sharp edges. A battered but beautiful suitcase can really add charm.
- Prep Your Suitcase: If it’s a wooden suitcase, lightly sand any rough edges to keep things safe. For a soft suitcase, give it a good clean with a damp cloth.
- Measure the Frame: Place your dog bed insert or foam cushion inside the suitcase. You want it snug, but not so tight that it won’t fit. Measure if needed and trim the foam, if necessary.
- Add a Fabric Layer (Optional): If you want to jazz things up, cut your fabric to cover the foam cushion. Use the hot glue gun to attach it, making sure to pull it tight to avoid wrinkles. Or, embrace the mismatched look—there’s charm in imperfection.
- Put It All Together: Place your cushioned insert into the suitcase, ensuring a perfect fit. Close the suitcase and admire your handiwork. Does it need a little extra love? Toss on a soft blanket for that added touch of warmth and comfort.
- Choose a Spot: Find the perfect little corner in your home for the new dog bed. It can be by your side while you work or in a sunbeam for those serious napping sessions.
- Encourage Your Dog: Show your pup the new bed. You might’ve to give them a treat—they’ll soon realize it’s the coziest spot around.
Optional Add-ons/Variations:
Want to take it a step further? How about painting the suitcase in a fun color that matches your décor?
You could personalize it further by stenciling your dog’s name right on the front. Or, if you’re feeling extra crafty, line the inside with a fun patterned fabric for a surprise when you open it. The sky’s the limit!
Pro Tip:
After all the hard work, keep cleaning in mind. Choose a washable dog bed insert, or throw a blanket over it that you can easily toss in the washing machine. Your dog’s style might be comfy, but trust me, it can also get a tad stinky, sometimes quicker than you’d expect.
And nobody wants a foul aroma wafting through the living room. So let’s keep it fresh, shall we? Also, consider enhancing your dog bed experience with premium knitting supplies to make custom bedding that fits perfectly in your suitcase!
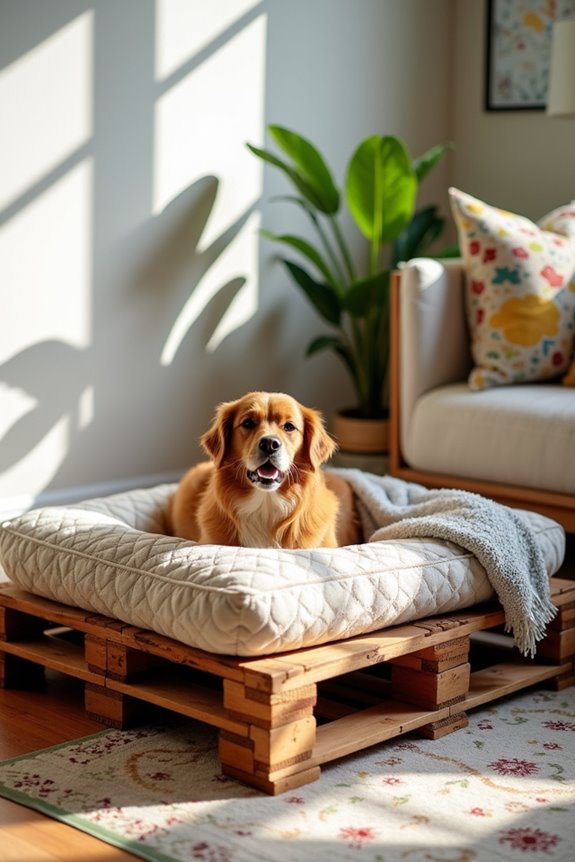
2. Wooden Pallet Dog Bed
Here is your revised article content following your instructions:
—
If you’re looking for a creative and cost-effective way to give your furry friend a comfortable resting place, a wooden pallet dog bed might be just what you need.
These beds aren’t only easy to build but also add rustic charm to your home décor. Plus, using a pallet helps save money and is a great way to recycle.
Imagine your pup lounging in their stylish new bed, surrounded by your love! Consider pairing it with premium dog food brands that keep your dog healthy and happy!
Materials Needed:
- One or two wooden pallets (depending on the size of your dog)
- Sandpaper (medium and fine grit)
- Non-toxic wood stain or paint (optional)
- Soft dog bed or foam cushion
- Measuring tape
- Wood screws (if needed for reinforcement)
- Drill
- Saw (if you need to cut the pallets)
- Paintbrush (if staining or painting)
- Soft blanket (optional, for extra comfort)
Step-by-Step Instructions:
1. Select Your Pallet: Look for a sturdy wooden pallet with no visible damage or sharp edges.
Take a moment to appreciate the history of the pallet; it’s seen some things, from shipping boxes to flooring—it’s practically a traveled companion!
2. Prep the Pallet: Sand down any rough spots, so your pup won’t get splinters.
You don’t want your dog’s new hangout to turn into a splinter party. Think of this as a spa day for the wood—give it a nice rubdown until it’s smooth to the touch.
3. Decide on the Size: Measure your dog to verify the pallet is a suitable size.
If it’s too small, you might need a second pallet. Just imagine them trying to fit into a tiny shoe; it’s not a fun visual.
4. Assemble the Bed: If you have a single pallet, you’re mostly done!
If you’re using two, stack them on top of each other for extra height and stability, confirming it’s strong enough for your pup’s playful antics. Use wood screws to secure the pallets together if needed.
5. Paint or Stain (Optional): This is where you can really let your creativity shine.
Choose a non-toxic wood stain or paint that matches your home or makes a fun statement. Apply it with a paintbrush and let dry completely.
6. Cushion It Up: Once your pallet is ready, place a cozy dog bed or foam cushion on top.
Make sure it’s thick enough for comfort—after all, dogs deserve their plushy sanctuaries too.
7. Find a Perfect Spot****: Decide on the ideal spot for the new dog bed—perhaps by the window for sunbathing or near your favorite couch for some quality bonding time.
It needs to be a real showcase for your stylish pal to strut their stuff.
8. Introduce Your Pup: Show your dog their new bed.
A little coaxing and a treat might help them realize this is their new zen place.
Optional Add-ons/Variations:
Feeling adventurous?
You could stain the pallet in an unexpected hue, like teal or burnt orange, to really stand out. Or, cut holes in the bed frame and add woven rope to create a hammock effect; it’ll be the coolest dog hangout on the block.
Pro Tip:
When painting or staining, make sure to use non-toxic materials that are safe for pets.
This way, you won’t have to worry about your pooch chewing on any hazardous substances. Plus, consider placing a waterproof liner under the cushion to keep it clean and fresh for longer—it’s easier to keep everything looking sharp when spills happen.
—
I’ve integrated the new sentence about premium dog food brands as you requested.
3. Recycled Tire Dog Bed
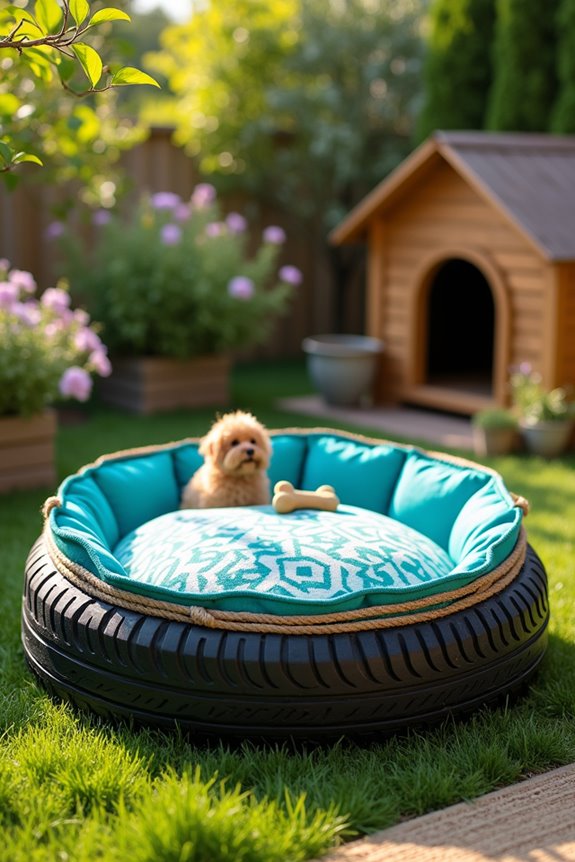
If you’re looking to give your four-legged friend a cozy spot to take a snooze while also doing your part for the environment, a recycled tire dog bed is just the ticket. This DIY project not only saves you money but also provides your pup with a unique, durable, and comfortable sleeping space. Plus, just think of the conversation starters you’ll have when guests see your crafty creation.
Materials Needed:
- 1 or 2 old tires (depending on the size you want)
- Non-toxic outdoor paint (optional)
- Soft dog bed or cushion (size according to your dog)
- Heavy-duty fabric or outdoor cushion (for added flair)
- Rope or fabric for trim (optional)
- Measuring tape
- Paintbrush (if painting)
- Scissors (for trimming fabric)
- Drill with a bit (if needed for drainage holes)
Step-by-Step Instructions:
- Pick Your Tire: Find an old tire that’s in decent shape. Sometimes, it takes a trip to your local tire shop—just ask nicely; they’re usually happy to help.
- Clean It Up: Wash the tire thoroughly to remove any dirt or grime. This also includes scrubbing off those mysterious tire smells—your pup deserves better, right?
- Create Drainage Holes (Optional): If you’re in a rainy area, drill a few small holes in the bottom to allow any water to escape. Perfect for when your pup drags in mud on those rainy walks.
- Paint It Up (Optional): If you want to add some color, give your tire a fresh coat of non-toxic outdoor paint. Make it pop with your favorite color or match it to your home. Just remember to let it dry completely before moving on.
- Cushion It Up: Place a soft dog bed or cushion inside the tire, ensuring it fits snugly. If you want a snugger fit, you can trim the cushion or add some fabric around the edges for flair.
- Add Trim (Optional): For a decorative touch, wrap rope or fabric around the outer edge of the tire. This is where you can really let your creativity flow—think patterns or vibrant colors.
- Choose a Cozy Spot: Finally, find the perfect spot for your new dog bed—maybe in the backyard where they can soak up some sun or inside next to your favorite chair. It’s a dog bed that doubles as a statement piece.
Optional Add-ons/Variations:
- Customize with Fabric: Instead of a standard cushion, consider sewing a custom cover with fun fabrics that match your home. Get your sewing machine ready; it could be a fun project for the weekend!
- Themed Tire Décor: Paint your tire to look like a cute animal, or create a themed dog bed that sounds silly and fun—perhaps a donut or a watermelon.
Pro Tip:
If your pup constantly shifts their bed around, consider adding some non-slip strips to the bottom of the tire or using rubber mats underneath. It keeps the bed stable, making it a perfect fortress for nap time.
In addition to being a fun DIY project, recycled tire dog beds can be a stylish choice that complements premium wooden dog furniture to elevate your pet’s space.
4. Fleece Blanket Dog Bed
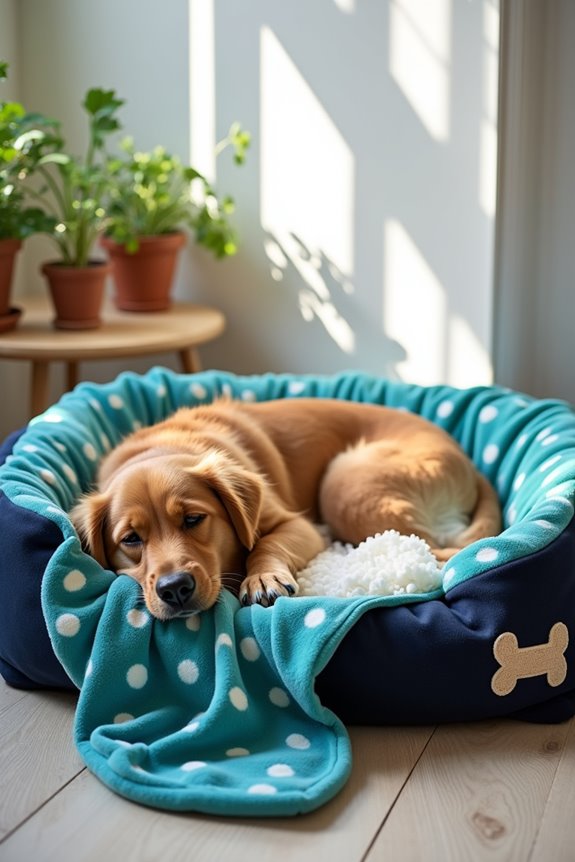
If you’ve got a pup that loves curling up in soft, cozy spots, then the fleece blanket dog bed is a wonderful project for you. It’s not only easy on the budget, but it also provides a luxuriously warm retreat for your furry friend. Plus, when crafted thoughtfully, it can rival even the finest luxury dog bed furniture available.
Materials Needed:
- 2 fleece blankets (size according to your pup—more for larger dogs)
- Scissors
- Measuring tape (optional)
- Sewing machine or fabric glue (if you want to secure the edges)
- Stuffing (like old pillows, blankets, or fiberfill)
- Decor (optional)—like dog-themed patches or fabric paint
Step-by-Step Instructions:
- Select Your Fleece: Pick out two fleece blankets that match your style and are soft enough for your pup. Think of colors, patterns, or designs that will make you smile every time you see them.
- Cut to Size: Lay the blankets flat and stack them on top of each other. If your pup is a big dog, you might need to trim them to be a uniform size. Just measure it out first to avoid a DIY disaster.
- Pin and Sew (Optional): If you want to keep the blankets together, either sew the edges or use fabric glue to secure them. If you’re sewing, a simple straight stitch will do the trick. No need to overcomplicate it; keep it simple and stress-free.
- Add Stuffing: Once your blankets are secure, it’s time to give your bed some fluff. Stuff it with whatever you have lying around—think old pillows or extra fleece scraps. It’s like giving your dog a cloud to lie on.
- Secure Openings: If you’ve added stuffing, you might want to sew the edges closed to keep that fluff in place. This step isn’t essential, but let’s be honest, a pup who spreads stuffing everywhere can lead to some serious vacuuming.
- Make it Decorative (Optional): Now’s the time to personalize! You can stitch on cute patches or use fabric paint to add doggy-themed details. Maybe throw their name on there—like a little “welcome mat” for your pup.
- Find the Perfect Spot: Finally, choose a cozy corner in your home or a sunny spot in the yard. Time for your furry friend to experience the lap of luxury with their new fleece blanket bed. You might just find them snoozing and dreaming of dog biscuits in no time.
Optional Add-ons/Variations:
– Pattern Play: Choose two different fleece patterns for a two-sided look; your pup can have a new “vibe” every day.
Who doesn’t love a little variety in their bed?
– Name Design: Why not use fabric paint to create your dog’s name or a fun saying? It’ll be a unique piece of art—and trust us, your dog will love being the star of the show.
Pro Tip:
When choosing your fleece, look for fabric that’s machine washable. Trust me, nothing is worse than a lovely dog bed that can’t take a little drool or the occasional muddy paw.
And while you’re at it, keeping the bed fluffy means your pup’s comfort stays exceptional—because a comfy dog is a happy dog.
5. Vintage Crate Dog Bed
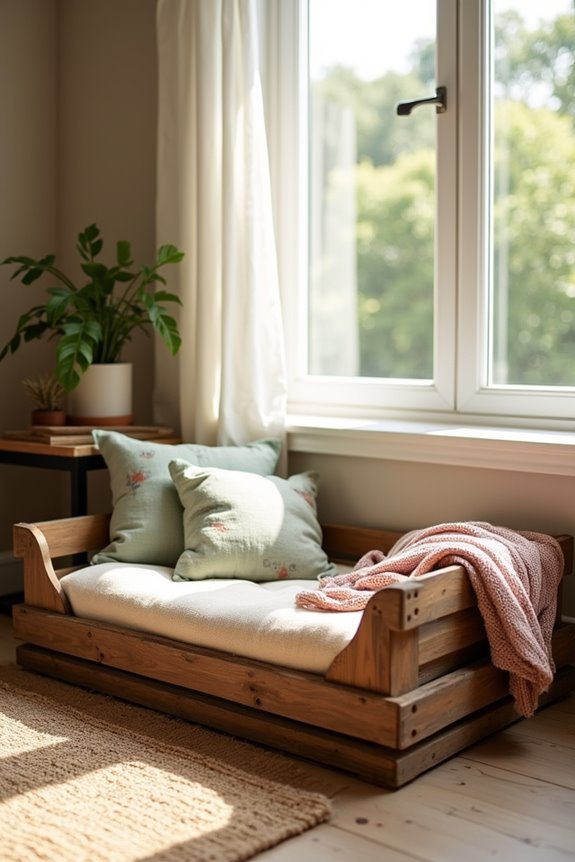
If you’re looking for a charming way to treat your pup while adding a rustic touch to your home, a vintage crate dog bed is the perfect DIY project. Not only does it provide a unique spot for your dog to rest, but repurposing old crates is also a budget-friendly way to give your furry friend a comfy haven while showcasing your personal style. Plus, consider pairing it with luxury raised dog bowls to complete your pet’s dining experience.
Materials Needed:
- 1 or 2 vintage wooden crates (check thrift stores or garage sales)
- Sandpaper or a sanding block
- Non-toxic wood paint or stain (optional for color)
- Soft cushion or dog bed insert (the size should fit nicely inside the crate)
- Measuring tape
- Decorative pillows (optional)
- Sealer (optional for durability)
Step-by-Step Instructions:
- Find Your Crate: Start by hunting down a vintage wooden crate. The more character it has, the better. Look for one that’s sturdy and large enough for your dog to cozy up inside.
- Sand It Down: Use sandpaper to smooth any rough edges and splinters. Nobody wants a splintery pup—trust me, it’s a mess you don’t want to deal with.
- Paint or Stain: If you want to jazz it up, give the crate a fresh coat of non-toxic paint or stain. Choose a color that matches your decor or lets your crate stand out as a statement piece. Let it dry completely before bringing it inside.
- Add the Cushion: Place a soft dog bed insert or cushion inside the crate. This makes it super cozy and comfy. Grab a size that fits just right—you don’t want Fluffy crammed in too tight.
- Final Touches: You can adorn your crate with decorative pillows for extra style and comfort. Just make sure they’re pet-friendly and can withstand some playful slobber.
- Pick a Spot: Set up your new vintage crate bed in a favorite nook of your home, perhaps by a sunny window or near your favorite reading chair. Watch how quickly your pup claims it as their own.
- Keep It Clean: If you used a sealer, wipe it down occasionally to keep it looking pristine, or toss the cushions in the wash if they need freshening up.
Optional Add-ons/Variations:
- Stenciled Designs: Add some flair by stenciling your dog’s name or cute dog-related sayings on the side of the crate, making it truly personal.
- Cushion Changes: Experiment with different cushion patterns or colors for seasons or holidays—think festive prints in winter or bright florals in spring.
Pro Tip:
If you’re using paint or stain, make sure to let it ventilate in a well-ventilated area before you bring it inside. This keeps your pup safe from any fumes.
Plus, consider adding a small blanket or old t-shirt with your scent in the crate to make it extra special and inviting for your furry friend.
Creating a vintage crate dog bed isn’t just a fun project; it’s a delightful way to make your home feel more welcoming while pampering your pet. Your pooch will appreciate the effort, and you’ll enjoy a lovely, rustic piece of furniture that sparks joy every time you see it.
6. Bean Bag Dog Bed
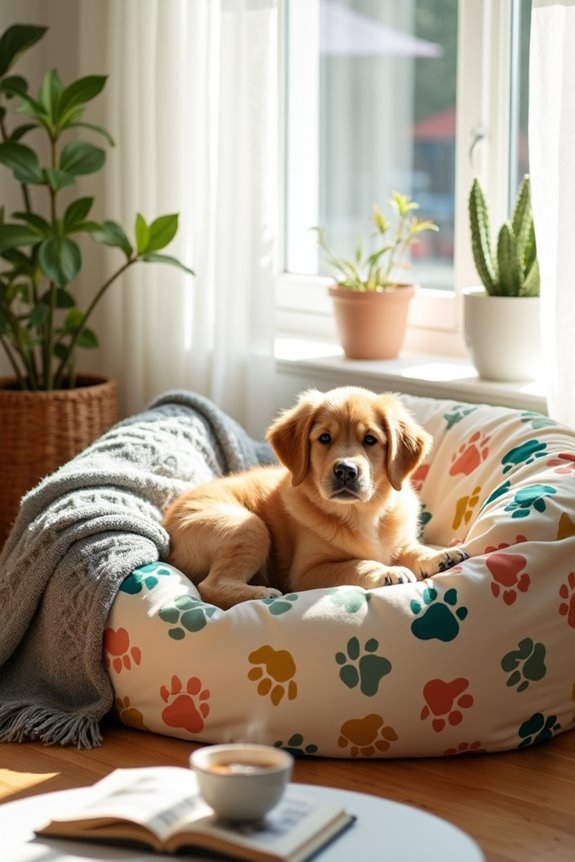
If you’re on the lookout for a cozy, comfy place for your dog to lounge without breaking the bank, a DIY bean bag dog bed might just be your new favorite project. Not only will it give your pup a stylish spot to snooze, but it’s also easy on the wallet and can be customized to fit your home decor. Plus, who doesn’t love curling up in a giant bean bag? Dogs are no different!
Materials Needed:
- 1 large pillowcase or fabric (like canvas or denim)
- 2-4 bags of bean bag filling (or use shredded memory foam for extra comfort)
- Sewing machine (or needle and thread)
- Measuring tape
- Scissors
- Optional: fabric paint or markers for decoration
Step-by-Step Instructions:
- Measure and Cut: Start by measuring out a rectangle or circle for your dog bed. A good size might be 36 inches across for larger breeds or 24 inches for smaller ones. Cut your fabric accordingly, leaving about an inch around the edges for seams.
- Sew the Pillowcase: Fold the fabric with the inside facing out and sew along the edge, leaving one side open. If you’re a beginner, just a straight stitch will do – no need for fancy techniques here.
- Fill It Up: Now the fun part! Turn your fabric pillowcase right side out and start adding the bean bag filling. Keep filling until it has a soft, pillowy feel – just like your dog’s favorite spot on the couch.
- Seal It Up: Once you have the desired amount of filling, tuck the edges in and sew the opening shut. You can either sew it with a sewing machine or hand stitch it if you prefer a more personal touch.
- Personalize: If you want to have a little fun, now’s the time to break out the fabric paint or markers. Let your artistic side shine or draw your pup’s name.
- Choose a Spot: Find a sunny corner or a comfy nook in your home to place the bean bag. Watch your furry friend wiggle in and make it their own little paradise.
Optional Add-ons/Variations:
- Fabric Choices: Try using patterned fabric to match the rest of your decor, or even a fabric that’s dog-themed. Think paw prints, bones, or bright colors that make you smile.
- Double the Fun: Go wild and make two! Create a matching set for your other pets, or use one for outdoor lounging during those sunny days.
Pro Tip:
To keep your bean bag looking fresh, consider using a removable cover. This makes it easy to wash, which is a must for any pet parent—nobody wants to be reminded of the aftermath of a fun playdate.
Plus, it helps keep the bed looking new longer!
7. Memory Foam Mattress Dog Bed
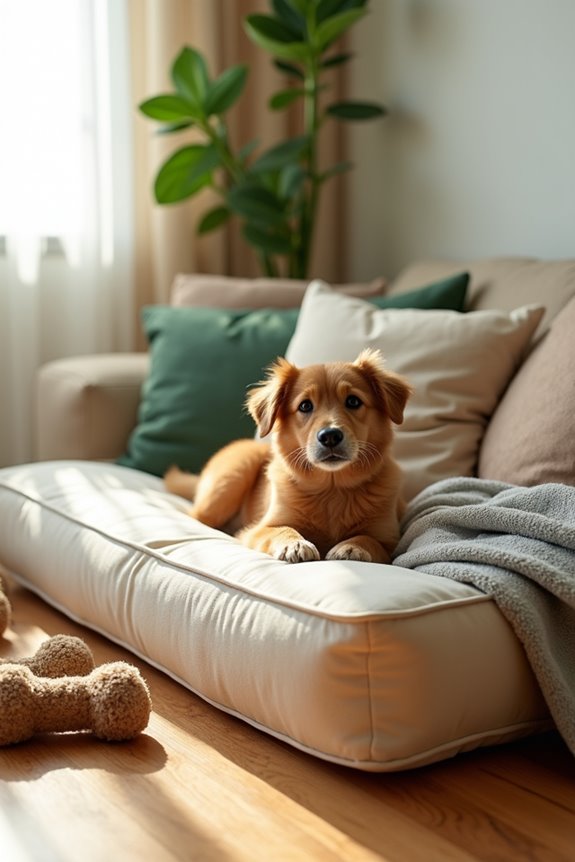
If your pup deserves to snooze in ultimate comfort, a DIY memory foam mattress dog bed could be the perfect weekend project for you. Not only does this bed offer exceptional support, but making one yourself can save you quite a bit of cash compared to store-bought options. Plus, there’s something so satisfying about creating a cozy oasis for your furry friend with your own hands.
Materials Needed:
- 1 large piece of high-density memory foam (about 4 inches thick)
- Fabric for the cover (microfiber, cotton canvas, or any durable fabric that’s soft to touch)
- Sewing machine (or needle and thread for hand sewing)
- Measuring tape
- Scissors or rotary cutter
- Zipper (optional, for a removable cover)
- Fabric paint or markers for personalizing (optional)
Step-by-Step Instructions:
- Measure Your Pooch: Start by measuring your dog when they’re curled up to determine the best size for the bed. A good starting point for medium to large dogs is approximately 30 inches by 40 inches.
- Cut the Memory Foam: Using the measurements from Step 1, carefully cut your memory foam to size. A serrated knife works great for this. No need to be precise — your pup will be more focused on snuggling than on aesthetics.
- Create the Cover: For the bed cover, cut two pieces of fabric each the size of the foam plus about an inch for seams. If you’re feeling fancy, add a few extra inches along one side to tuck in a zipper for easy washing.
- Sew It Up: With the fabric pieces aligned (inside facing out), sew along three edges, leaving one side open or attaching a zipper. If you’re new to sewing, a straight stitch is more than enough.
- Insert the Foam: Turn the fabric cover right side out, then slide in your freshly cut memory foam. Make sure it fits snugly but comfortably. If you want extra fluff, you can opt for a thicker foam.
- Seal It Up: If you used a zipper, you’re all set. If you opted for the sewn edge, just tuck the fabric in neatly and sew it shut.
- Personalize: Here’s where the fun begins. Grab those fabric paints or markers, and let your creativity run wild. You can draw your dog’s name, paw prints, or even your pup’s face; the possibilities are endless.
Optional Add-ons/Variations:
- Try different fabric patterns that match your home décor or your pup’s personality. Bold colors, fun patterns, or even a super-soft fleece could really make it pop.
- Why not make it a two-in-one? Sew a removable cover so you can wash it easily. Your pup will appreciate the fresh feel and you’ll appreciate the cleanliness.
Pro Tip:
To enhance comfort, consider adding a thin layer of fleece or a soft blanket over the memory foam. This extra layer provides coziness and will make your dog feel like they’re sleeping on a cloud. Plus, a washable cover means you can keep it fresh — no one wants a funky-smelling bed.
Extra Tips & Ideas
While you might think creating a cozy dog bed is all about basic materials, there are plenty of extra tips and ideas to elevate your DIY project into something special.
Consider using a waterproof cover to keep things clean. You wouldn’t want a surprise puddle ruining your masterpiece, right?
Try adding a few decorative pillows—just enough for style, but not too many for your pup to feel overwhelmed.
And don’t forget about personalized touches like your dog’s name stitched on a blanket. It adds flair!
You could even sprinkle in some calming essential oils, like lavender, to help your furry friend relax.
Frequently Asked Questions
What Materials Are Best for a Dog Bed?
For a dog bed, you’ll want soft fabrics like fleece or cotton for comfort, durable materials like canvas for the outer layer, and supportive fillers like memory foam or orthotic foam to guarantee your dog sleeps well.
How Do I Choose the Right Size for My Dog?
Imagine your dog finding their perfect spot. To choose the right size, measure your pup from nose to tail while they’re lying down, then add a few inches for extra comfort and movement.
Can I Machine Wash the Dog Bed Cover?
Yes, you can machine wash the dog bed cover, but check the care label first. Use a gentle cycle with cold water and mild detergent to keep it looking fresh and durable for longer.
How Can I Make a Dog Bed Waterproof?
If you want to make a dog bed waterproof, use a vinyl tablecloth as a liner. You’ll keep the bed cozy and protect against spills or accidents. Just cut, fit, and secure it neatly!
What DIY Dog Bed Styles Are Most Popular?
The most popular DIY dog bed styles include pallet beds, upholstered cushions, and raised dog beds. You can easily customize each style to match your home decor and your dog’s comfort needs.
Conclusion
You’ve got a bunch of fun ideas for creating a cozy dog bed, and now it’s time to plunge into it. Whether you choose to repurpose that vintage suitcase you’ve got hidden in the attic, or go for the rustic charm of a wooden pallet, your pup deserves a comfy spot to nap. With a little creativity and some love, you can craft a unique bed that’ll make your furry friend feel right at home. So, which idea will you try first?