If you’ve ever watched a dog fumble around in the water like a clumsy puppy during bath time, you know it can be quite the spectacle. But what if I told you there are clever DIY dog bathing station ideas that can turn that chaotic mess into a smooth operation? From practical washing stations to stylish outdoor showers, the possibilities are endless. Stick around, because you’re about to discover how to make bath time a breeze for both you and your furry friend.
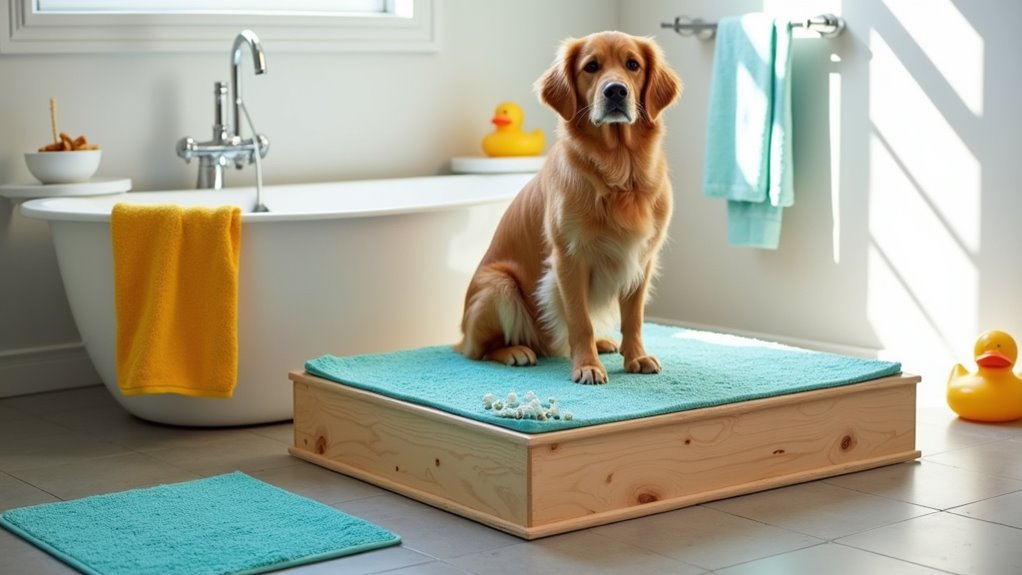
Portable Washing Station Design
When it comes to creating a portable washing station for your pup, think of it as setting up a mini dog spa that’s as easy to pack up as your beach gear. You’ll want a sturdy plastic tub, some shampoo, and a detachable shower nozzle.
Aqua turbulence with a side of tail-wagging joy; it’s practically a recipe for fun. Don’t forget a non-slip mat for your pup’s safety. You can even add a splash guard to keep water from cascading everywhere—trust me, soggy shoes aren’t a fashion statement.
And if you’re feeling crafty, decorate the tub for some extra flair. This DIY dog bathing station isn’t just practical; it’ll make bath time your new favorite adventure. Who knew cleanliness could be this entertaining?
Our Collection
Let’s check out our collection of DIY dog bathing stations that’ll make washing your pup a breeze.
You’ll find everything from a grooming table with a hose attachment to an outdoor shower featuring a grated floor—seriously, it’s like a spa day for your furry friend.
With options like sloped basins for easy water drainage and cozy non-slip bath mats, bathing won’t just be a chore; it might even become your dog’s favorite part of the week.
1. Grooming Table With Hose Attachment

If you’ve ever tried to bathe your dog in a cramped bathroom or kitchen, you know how chaotic it can get. Enter the DIY grooming table with a hose attachment. This project isn’t only easy to put together but also makes bath time a stress-free experience for both you and your furry friend. No more slipping on wet floors or having your pup dart for the door—this setup allows you to wash and groom your dog in comfort while keeping your space neat and tidy. Additionally, using premium dog food for sensitive stomachs can help ensure your pup feels their best, making bath time a breeze.
Materials Needed:
- A sturdy table (old or new; make sure it’s stable)
- A garden hose with a spray nozzle
- PVC pipes (for the frame, if needed)
- Hose clamps (to secure the hose)
- Heavy-duty zip ties or screws (to attach hose permanently)
- Dog grooming arm (optional for extra stability)
- Plastic mat or tarp (for easy cleanup)
- Drill and bits
- Screwdriver
- Measuring tape
Step-by-Step Instructions:
- Find Your Table: Start with a table that’s the right height for you to comfortably wash your dog. An old picnic table or sturdy folding table works great.
- Set Up the Hose: Decide where you want the hose to come from. A garden hose is ideal, but to keep it neat, consider attaching it to the table edge with hose clamps or heavy-duty zip ties.
- Create Hose Holder: If your table needs extra support, use PVC pipes to make a simple frame underneath. This will hold your hose in place and provide additional stability for larger dogs.
- Secure the Hose: Make sure those hose clamps are tight. You don’t want the hose flying around when your pup gets excited. Test it out by turning on the water to check for leaks and adjust as needed.
- Add a Grooming Arm: If you want to invest a little more into your table, add a grooming arm. This little addition will help hold your dog in place while you scrub away. You can buy one or make a simple arm from PVC pipe.
- Lay Down a Mat: Place a plastic mat or tarp underneath the table to catch any splashes. Your floors will thank you later.
- Ergonomic Finishing Touches: Optionally, consider placing rubber mats around the area for grip and comfort. Your dog will appreciate not slipping around.
Optional Add-ons/Variations:
- Color It Up: Get creative with paint. A bright color can make the grooming table pop and look inviting. You can also stencil paw prints or your dog’s name for a personal touch.
- Add Storage: Fit a small shelf under the table to hold grooming supplies, towels, or treats. This way, everything is accessible while you groom, keeping bath time smooth and organized.
Pro Tip:
Before starting the bathing, let your dog get comfortable with the table. A few treats on the table can work wonders.
Also, always check your hose nozzle to make certain it has adjustable settings—some of those intense sprays can scare sensitive pups.
Just remember, a little patience goes a long way in making bath time enjoyable for both of you.
2. Wash Station With Storage Drawer

If you’ve ever found yourself fumbling for shampoo while your dog is happily soaking wet and shaking water everywhere, you know the value of a clean and organized wash station.
A DIY wash station with a storage drawer not only helps streamline the bath time chaos but also keeps everything you need right at your fingertips. Imagine a space where you can wash your pup without the frantic search for supplies—life-changing, right? Plus, it’s a great way to save some money—no trips to the store for forgotten items! To enhance your wash station experience, consider adding high-quality luxury Goldendoodle dog supplies.
Materials Needed:
- A sturdy wooden or plastic storage bin (that can be repurposed)
- A plastic or metal container for the storage drawer
- Waterproof paint or sealant (to protect the wood)
- Dog-friendly shampoo and conditioner (of course)
- A mesh shower tote (for easy organization)
- Screws and screwdriver
- Measuring tape
- Drill
- Optional: Non-slip mat for added grip
Step-by-Step Instructions:
- Choose Your Spot: Find a location in your yard, garage, or laundry room that’s near a water source. It should be spacious enough for you and your dog to move around comfortably.
- Create the Base: Start with a sturdy storage bin or a table that won’t buckle under pressure. If it’s wood, make sure to sand it down to avoid splinters.
- Attach the Storage Drawer: Install the container or drawer to the side of the base. Make sure it’s within easy reach. You can use screws to securely fix it in place. This is where you’ll keep all your grooming products, so think about accessibility.
- Waterproof It: Coat any exposed wood with waterproof paint or sealant. This will protect it from moisture and help it last longer. Because who wants a soggy wash station?
- Organize the Supplies: Place your dog-friendly shampoo and conditioner in the drawer, alongside a mesh shower tote for tools like brushes and towels. The tote makes it easy to grab whatever you need without digging through everything.
- Finishing Touches: Consider adding a non-slip mat inside the wash station area. This helps keep your dog steady while you lather them up. Plus, no slippery shenanigans mean a more relaxed bathing experience for both of you.
Optional Add-ons/Variations:
- Color It Funky: Paint the wash station in a bright, fun color. Maybe a happy yellow or sky blue to make bath time feel cheerful instead of a chore. You can even add cute stencils of your dog’s favorite toys for personalization.
- Storage Upgrades: Add small hooks on the side for hanging collars or leashes, so you have everything you need in one spot. Who doesn’t love efficiency?
Pro Tip:
Always remember to have a non-slip mat or rubber mat beneath your pup’s feet when they hop into the wash station. It makes them feel secure and reduces their chances of slipping, which is a win for everyone involved.
Plus, using a plastic container for the drawer is a cost-effective way to keep everything organized without breaking the bank.
3. Outdoor Shower With Grated Floor

If you’re tired of your dog bringing the outside mud with them after a fun romp in the park, an outdoor shower with a grated floor could be your new best friend. Not only does it help keep your space clean, but it also transforms bath time into a convenient outdoor adventure for your furry buddy. This can be especially helpful if your dog struggles to jump onto the bed, where a dog ramp for bed makes access easier.
Imagine how nice it will feel to rinse your dog off right after they come in from playing, all while bypassing the mess inside. This stylish upgrade doesn’t just keep dirt at bay; it’s a great way to save money on professional grooming and add a touch of charm to your yard.
Materials Needed:
- A wooden or plastic outdoor shower kit
- Grated flooring (can be hardwood or durable plastic)
- PVC piping for drainage
- Showerhead and faucet
- Waterproof sealant
- Shovel
- Leveling tool
- Drill with drill bits
- Screwdriver
- Tape measure
Step-by-Step Instructions:
1. Select Your Location: Choose a sunny spot in your yard that’s close to a water source. Make sure it’s spacious enough for you and your pup. You don’t want to feel cramped while you’re just trying to wash off mud.
2. Dig the Area: Using a shovel, clear out the area where the shower will go. You’ll want to dig slightly deeper than your intended shower floor to accommodate your grate and drainage system.
3. Install the Grated Floor: Place your grated flooring in the dug-out area. This grated surface will let water drain away easily while keeping your dog secure and comfortable while they’re getting clean. Use the leveling tool to verify it’s even.
4. Attach the Shower Structure: Follow the instructions for your outdoor shower kit, setting up the frame and attaching the showerhead and faucet. It should be easy for you to reach even while you’re battling a wiggly dog.
Secure everything tightly with your screws and screwdriver.
5. Connect the Drainage: Use the PVC piping to create a drainage system that leads away from your shower. This step is super important. You don’t want a muddy puddle lingering in your yard. Make sure the water drains away easily to avoid creating a mess.
6. Seal It Up: Apply waterproof sealant around joints and connections to guarantee that everything stays together, especially if you live in a rainy area. Trust me, you don’t want a sudden shower in the middle of bath time.
7. Personalize and Enjoy: If you’d like, add personal touches like some bright paint or custom tiles around the shower area to make it fun. You fully deserve an outdoor space that’s as inviting as it’s functional.
Optional Add-ons/Variations:
- Shower Curtain Upgrade: Consider adding a cheerful shower curtain around the area for a bit of privacy while washing your dog. Choose a waterproof fabric that you can wash easily. It’s like a spa day for your furry pal.
- Decorative Touches: You might want to paint the frame in a color that complements your garden. A happy green or a bright blue can set a playful tone that will delight both you and your dog.
Pro Tip:
Before diving into the project, check local codes or HOA guidelines to see if any regulations apply for outdoor installations. And hey, it’s always smart to enlist a buddy for this DIY project. Two sets of hands make the work lighter, plus the laughter always helps, especially with the inevitable misplacements of tools.
4. Sloped Basin for Water Drainage

If you’ve ever tried to give your dog a bath in a flat tub, you know it can quickly turn into a slippery, water-logged struggle.
Enter the sloped basin! This clever DIY project is a game changer for dog owners. Not only does it keep water flowing towards the drain, ensuring a tidy bathing experience, but it also keeps your pup safe from slipping around. Plus, it adds a chic touch to your yard or bathroom, all while saving you money on groovy grooming spas. Imagine pampering your pup in style without the hefty price tag. Dog bathing stations can be complemented by luxury raised dog beds, enhancing your pet’s overall comfort and relaxation while drying off.
Materials Needed:
- Concrete mix (for the basin)
- Wooden frame or mold (to shape the basin)
- Plastic drop cloth (for protection while pouring)
- Leveling tool
- Trowel or shovel
- Drainage pipe
- Water hose
- Glove to protect your hands
- Optional: waterproof paint or sealer for finishing
Step-by-Step Instructions:
- Choose Your Spot: Find a cozy area with good drainage. Ideally, this should be level yet slightly sloped towards where you’ll install the drainage pipe. Think of it as picking the perfect sunbathing spot for your pup.
- Build Your Frame: Using sturdy wood, create a frame or mold to shape your basin. Make sure to angle it slightly, so it slopes toward the drainage area. This doesn’t have to be perfect; just a gentle incline is all you need to keep the water moving in the right direction.
- Prep the Area: Lay down a plastic drop cloth to protect the surrounding area from concrete spills. Now’s the time to get your gloves on and channel your inner handyman or handywoman.
- Mix the Concrete: Follow the instructions on your concrete mix package. Once mixed to a nice, thick consistency, pour it into your mold. Use the trowel to spread it, ensuring you maintain the slope towards the drainage pipe.
- Install the Drain: Before the concrete fully sets (you don’t want to play tug-of-war with a hardened basin), insert the drainage pipe near the low end of the basin. This will allow the bath water to flow away efficiently.
- Let It Cure: Patience is a virtue. Allow the concrete to cure as per package instructions—usually about 24 to 48 hours. This waiting period is excellent for binge-watching your favorite doggy-themed shows.
- Finishing Touches: Once cured, consider sealing the surface with waterproof paint or sealant to prolong the life of your basin. This can help with maintenance, making it easier to clean up after your furry friend’s adventures in bathing.
Optional Add-ons/Variations:
- Colorful Basin: Want to jazz it up? Use colored concrete or add a splash of waterproof paint to match your yard’s aesthetic.
- Incorporate Fountains: For a fun twist, set up a mini fountain alongside the basin to create a delightful watering hole for your pup. They’ll love splashing in it!
Pro Tip:
Remember to check for sharp edges on the basin once it’s set. If there are any, gently sand them down to keep your pup safe from any unexpected scrapes.
A happy dog means happy bath times.
With just a little effort, your DIY sloped basin will transform bath time from a chore into a bonding experience, turning it into a mini spa day for your furry family member. Happy grooming!
5. Non-slip Bath Mat
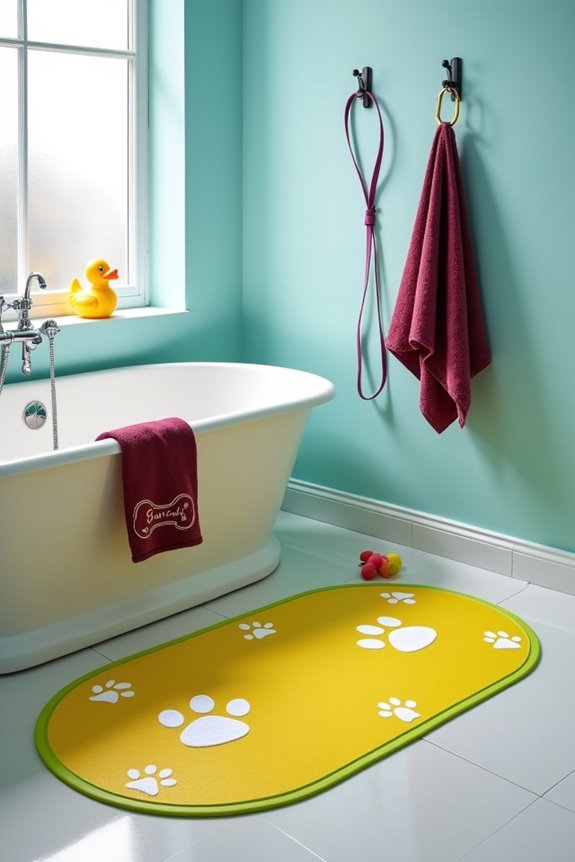
If you’ve ever witnessed your furry friend’s gymnastics routine during bath time, you know a non-slip bath mat is an absolute must-have. This DIY project not only helps prevent those slippery mishaps—saving you and your pup from potential prancing disasters—but it also gives a personal touch to your dog bathing area. Not to mention, it’ll save you some pennies since you won’t be buying overpriced mats that mightn’t even work. Plus, your canine companion will feel much more secure on a comfy non-slip surface, allowing them to relax while you scrub away. And don’t forget, a long training leash can also aid in managing your dog during bath time to keep them in one spot.
Materials Needed:
- Rubber bath mat or sheets of non-slip rubber material
- Velcro strips (adhesive type)
- Scissors
- Measuring tape
- Optional: fabric paint or dog-friendly decorations for added flair
Step-by-Step Instructions:
- Measure Your Space: First things first—grab your measuring tape and check the dimensions where you’ll place the mat. You want a snug fit, but not so snug that it feels like a pair of too-tight shoes.
- Cut the Rubber: Using the scissors, cut your rubber matting to fit the dimensions you measured. This could require a little muscle power; if it feels like you’re wrestling with a giant gummy bear, just take a deep breath.
- Attach Velcro Strips: To keep your mat securely in place, peel off the backing of the adhesive Velcro strips and attach one side to the underside of your mat. Make sure to stick the other side on your bathing area’s floor. This is key for preventing delightful doggy dances.
- Decorate (Optional): If you feel adventurous, release your creativity with some fabric paint or cute dog-themed decorations. Don’t worry if art isn’t your strong suit—our fur babies won’t judge, and their appreciation comes in tail wags, not art critiques.
- Place It Down: Finally, position your newly crafted mat in the bathing area. Give it a little press to verify everything sticks. Now, you’re all set for bath time without the drama of slips and sliding.
Optional Add-ons/Variations:
- Color Variations: Choose rubber mats in different colors or patterns to blend with your home decor. Bright colors can also make bath time more fun and exciting for your pup. Just think of it as creating a spa experience straight out of a doggy magazine.
- Personalized Designs: Try adding paw prints or fun shapes using dog-safe fabric paint to turn a practical mat into a delightful piece of art. Who says pampering ends with grooming?
Pro Tip:
When creating your non-slip mat, make sure the rubber material is thick enough to withstand your enthusiastic pup’s furry antics. Look for rubber that feels sturdy yet soft to keep your dog comfortable while staying steady on their feet.
And hey, if your mat looks like it’s had a bit too much action, just give it a quick rinse, let it dry, and it’s good to go for the next bath. Honestly, it might even become your pup’s new favorite spot outside of bath time.
6. Foldable Dog Bathing Tub

Is your pup in need of a bath but your bathroom isn’t exactly a dog-friendly zone? Introducing the DIY Foldable Dog Bathing Tub! This handy project creates a convenient bathing area that’s not only easy to set up but also saves you money compared to those fancy tubs at the pet store.
Plus, it can be stored away when not in use, making it perfect for small spaces. Let’s plunge into and get your pup splashing without the mess!
Materials Needed:
- Large plastic tub or kiddie pool (make sure it’s foldable)
- Non-slip rubber mat (one you’ve already made, perhaps?)
- Hose or portable water source
- Dog-friendly shampoo
- Towels (for post-bath drying)
- Optional: waterproof fabric or tarp for extra protection
Step-by-Step Instructions:
1. Choose Your Location: Find a suitable space—whether it’s in your backyard or a garage. Make sure it’s easy to clean afterward, especially if you and your furry friend are prone to creating mini tidal waves during bath time.
2. Prepare the Tub: If you’re using a foldable tub, put it together according to the manufacturer’s directions. If it’s a kiddie pool, give it a good rinse to verify it’s clean. Trust me; no one wants to bathe in last summer’s muck.
3. Bring in the Mat: Lay down your non-slip mat in the bottom of the tub or pool. This comfy layer will keep your pup from slipping and sliding, making bath time a much more enjoyable experience for the both of you.
4. Fill It Up: Using your hose or water source, fill the tub with lukewarm water. Make it deep enough for your pup to enjoy without drowning, but not so deep that they feel like they’re taking a dip in the ocean.
5. Introduce Your Pup: After you’ve set the stage, it’s the moment of truth—gently guide your pup into the tub. Use treats to coax them if they seem hesitant. Just think of it as a celebratory swim instead of a dreaded wash.
6. Lather and Rinse: Apply the dog-friendly shampoo and give your pup a good scrub. Rinse thoroughly with water to get rid of any suds.
Keep it light, and don’t forget to talk soothingly to them—encouragement goes a long way!
7. Dry Off: Once the bath is complete, help your pup out of the tub and wrap them in a towel for drying. Make it a fun event with lots of pets and compliments!
Optional Add-ons/Variations:
- Personalized Designs: Decorate your tub with some waterproof paint or stickers. Maybe go for a trendy “doggie spa” look; think bamboo patterns, beach themes, or even a tribute to their favorite cartoon character—it’s all about giving a personal touch!
- Portable Solutions: Need a more mobile option? Use a pop-up pet bath that you can easily store in your car for the dog park visits. Just imagine how impressed your pals will be when they see you set up an impromptu bath station on the go.
Pro Tip:
Don’t forget to secure your tub or pool in place while it’s being used. A running-away bath tub could lead to a whirlwind of suds and, yes, a very soggy dog (and maybe a sobbing human).
Also, keep a few extra towels handy; you’ll thank yourself when your excited pup shakes off all that water like an explosive wet noodle.
7. Raised Bathing Platform

Every dog owner knows the struggle of bending down to wash their pup, especially if they’re a larger breed. Enter the DIY Raised Bathing Platform—a game changer for furry bath time! This platform elevates your dog to a more manageable height, making the whole experience easier on your back while turning bath time into a leisurely spa session for your pup.
Plus, it’s a money-saver compared to pre-fabricated options. Let’s get started on this fun and practical project!
Materials Needed:
- Wooden planks (2x4s are a good choice)
- Screws
- Wood glue (optional for extra strength)
- Sandpaper
- Waterproof paint or sealant (to protect from water damage)
- Non-slip mats or rubber pads
- Drill or screwdriver
- Measuring tape
- Saw (hand saw or power saw)
- Safety goggles (always good to have)
Step-by-Step Instructions:
- Measure and Cut the Wood: Start by measuring the desired height for your platform—around 12 to 18 inches is often just right. Cut your wooden planks to create a rectangular frame that fits your pup comfortably. Remember, safety first—wear your safety goggles while cutting.
- Assemble the Frame: Lay out the pieces to form a rectangle, and use the screws to secure the corners. Feel free to reinforce the joints with wood glue for added strength. If this thing can hold up against your rambunctious furball’s wiggling, you’re golden.
- Add the Legs: Cut four additional planks for the legs. Attach these securely to each corner of the frame, ensuring they’re straight and even. You want the height consistent, so measure twice and screw once.
- Sand it Down: This step is crucial! Use sandpaper to smooth out any rough edges, averting future splinters for both you and your furry friend. No one wants a trip to the vet because of a miscalculated DIY project.
- Seal the Deal: Now, it’s time to protect your hard work. Apply waterproof paint or sealant on all surfaces. This will keep the wood safe from all the splashes and suds. Plus, it gives it a snazzy finish!
- Add Non-Slip Features: To prevent any slipping, attach non-slip mats or rubber pads to the top surface of the platform. You want to keep your pup from impersonating a greased pig during their bath.
- Introduce It to Your Pup: Once it’s dry, place the platform in your preferred bathing area and let your furry friend have a look. Maybe toss some treats or toys up there to get them excited about their new bathing station. Make it a welcoming space!
Optional Add-ons/Variations:
- Decorative Touches: Consider painting your raised platform in vibrant colors that match your decor or adding cute stencils for that personal flair. Maybe a paw print design or their name? It’s all about making it feel special for your pup.
- Adjustable Height: For those of you who get a little fancy with your woodworking skills, consider adding adjustable legs that can be raised or lowered according to your needs. This could be a fantastic option if you have multiple pets of different sizes.
Pro Tip:
To stretch your budget, check local classifieds or community groups for reclaimed wood. Not only is this eco-friendly, but it also gives your platform a unique, rustic look. Just remember to sand it down well to avoid any hidden splinters.
Extra Tips & Ideas
While setting up your DIY dog bathing station, you may want to add some extra personal touches that make the experience a whole lot more enjoyable—for both you and your furry friend.
Consider adding a shelf for all those dog shampoos and conditioners you can never find when you need them. You know, the ones that seemed like a great idea until you realized you’d twelve?
A non-slip mat can also work wonders to keep your pup steady during bath time—because no one wants to go chasing a wet, slippery dog around the yard.
And hey, throw in some dog treats nearby as a reward. Trust me, it’ll make for a much smoother bath experience—and who doesn’t want a clean pup who’s motivated by snacks?
Frequently Asked Questions
What Materials Are Best for Building a Dog Bathing Station?
You’ll want to use waterproof materials like stainless steel, plastic, or treated wood for building a dog bathing station. Non-slip surfaces and drainage systems guarantee safety and efficiency during bath time, making the process easier for you both.
How Do I Keep My Dog Calm During Bath Time?
To keep your dog calm, try pretending the bath is a thrilling adventure. You can use treats, soothing voices, and toys while ensuring the bath is an enjoyable experience—like a spa day, not a shower!
Can I Install a Dog Bath Station Indoors?
Yes, you can install a dog bath station indoors. Choose a suitable location, like your laundry room or bathroom, and guarantee proper drainage. Add non-slip mats and easy-access supplies to make bath time smoother for both of you.
What Are the Best Cleaning Products for Dog Bathing?
For dog bathing, use gentle shampoos without harsh chemicals, like oatmeal or coconut-based formulas. You’ll also want non-toxic conditioners and brushes designed for dogs to make the process smoother and more enjoyable for your pup.
How Often Should I Bathe My Dog?
Like Shakespeare’s Hamlet, you’ll ponder, “To wash or not to wash?” Generally, bath your dog every 4 to 6 weeks, but adjust based on their activity level, coat type, and skin conditions for ideal cleanliness.
Conclusion
Creating a DIY dog bathing station can make bath time feel like a day at the spa for your pup. With options ranging from portable washing stations to raised platforms, you’ll find something that fits your space and style. So, why not transform bath day into fun day? Your furry friend will thank you with wagging tails and happy barks. Immerse yourself in these ideas and embrace the joy of a squeaky clean companion. Who knew bath time could feel this good?