Have you ever thought about how much your pup would love homemade treats? Dehydrated snacks are not just tasty; they lock in all those fresh flavors. I mean, who doesn’t want their dog to munch on some chicken and carrot bites while you sip your coffee in peace? If you’re like me and can’t keep store-bought goodies around without soon discovering them in your dog’s mouth, let’s explore some fun and easy recipes. Trust me, your furry friend will thank you.
Why Homemade?
When it comes to dog treats, why not go homemade? Making dehydrated dog treats at home means you know exactly what goes into them. Forget those long ingredient lists that sound like science experiments. You can whip up simple ingredients your pup loves, like sweet potatoes or chicken. Just slice them, dehydrate them, and voilà—treats that are both yummy and healthy.
Using a dehydrator not only preserves flavors but also enhances nutritional value of the ingredients. Homemade dog chew treats can be easily customized to meet the specific dietary needs of your pet. Plus, adding homemade probiotics to your treats can boost your dog’s gut health and overall well-being. Think about it. How can you resist the joy of seeing your dog wag his tail in excitement for a treat you made? Plus, creating your own dehydrated treats allows for tailored flavors and textures that will suit your dog’s specific taste preferences.
You might even surprise yourself with how easy it is. Sure, the first time you mess up a batch might lead to a doggie taste test that resembles something from a horror movie, but practice makes perfect.
In no time, you’ll be a treat-making pro, and your furry friend will thank you for those crunchy, flavorful bites.
Flavorful Treats Collection
When it comes to treating your pup, flavor matters, right?
Imagine those Chicken and Carrot Bites for their mealtime excitement or those Peanut Butter Banana Chews that make tails wag uncontrollably. You can also create some homemade cheese dog biscuits that will be a hit during snack time. You’ll want to discover a whole collection of tasty goodies, like Sweet Potato and Spinach Bites or Pumpkin and Cinnamon Delights—trust me, your dog will think they’ve hit the jackpot. Plus, your dog will love the wholesome benefits of pumpkin and oat dog treats that provide essential nutrients while satisfying their taste buds. In addition, sweet potato dog treats are a nutritious option packed with vitamins and fiber. Cold treats like frozen dog treats are also a refreshing option, especially during hot summer days, ensuring your furry friend stays cool and happy.
1. Chicken and Carrot Bites
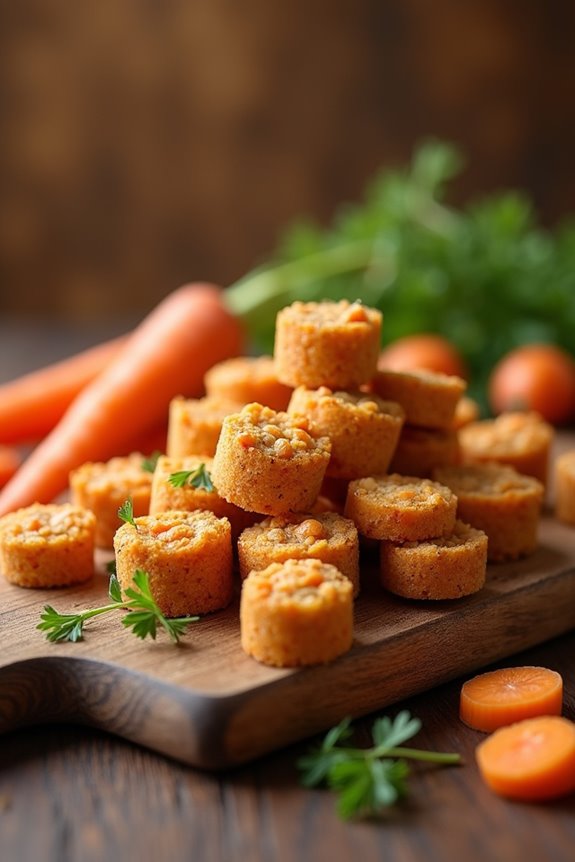
Making Chicken and Carrot Bites for your pup’s treat stash is super simple and a great way to sneak in some veggies. You’ll love how easy it’s to whip these up, especially with just a few tasty ingredients and a couple of optional add-ons to kick up the flavor. Additionally, these bites are part of a growing trend of dehydrated dog treats that helps preserve fresh flavors. Incorporating simple ingredients can help meet your dog’s nutritional needs while being mindful of homemade dog food for diabetic dogs. So, are you ready to turn your kitchen into a dog treat factory?
Ingredients
When it comes to making your pup some tasty treats, it’s all about choosing the right ingredients. You want to avoid anything that might upset their belly or be harmful, right?
So, let’s keep this simple and wholesome with our flavor-packed Chicken and Carrot Bites that your furry friend will love.
- 1 cup of cooked chicken, shredded (make sure it’s plain and unseasoned)
- 1/2 cup of finely grated carrots (a great way to sneak in some veggies, don’t you think?)
- 1/4 cup of rolled oats (a perfect binding agent, and that crunch your dog will adore)
- 1/4 cup of chicken broth (not the salty kind; you want low-sodium or homemade if possible)
- 1 tablespoon of coconut oil (for a little healthy fat that’s good for the coat)
- 1 large egg (helps hold everything together, like a tiny glue stick for treats)
Trust me, watching your dog enjoy these bites will put a smile on your face. Just imagine those wagging tails and happy puppy eyes – it’s adorable, right?
Plus, these treats are super easy to make, and you might even impress yourself in the kitchen. Who knew you could whip up a puppy delicacy?
Give it a go, and let your dog be your taste tester. They always have honest opinions, after all.
Step by Step Instructions
To whip up some tasty chicken and carrot bites for your furry friend, let’s get started with some simple steps. Trust me, your dog will be wagging its tail in delight. Here’s how you can make those dehydrated treats.
- Preheat your dehydrator to 160°F (71°C). If you’re using an oven, preheat it to the lowest setting, usually around 150°F (65°C). (Make sure it’s not too hot or you might end up with doggie jerky.)
- Gather your ingredients: 2 cups of cooked chicken, 1 cup of grated carrots, and 1 cup of oats. (Cutting up the chicken can be messy—don’t wear your best shirt.)
- In a mixing bowl, combine the cooked chicken and grated carrots. Use a fork to mash them together until they’re well mixed but still slightly chunky. (A good mash is key—sort of like making guacamole but less tasty for humans.)
- Stir in the oats until the mixture holds together. (If it’s too dry, splash in a little chicken broth. Just a little.)
- Shape the mixture into small bite-sized balls or pat it into a thin layer on a parchment-lined baking sheet. (Scoop ‘em out with your hands or a melon baller; no need for perfection—your dog won’t judge.)
- Place the shaped treats in the dehydrator or the oven. Dehydrate for 4–6 hours, checking for doneness. The treats should be firm and have no moisture left. (Check them every so often—you’ll know they’re ready when they’re hard and smell amazing.)
- Once done, remove the treats from the dehydrator or oven and let them cool on a wire rack. (Try not to sneak a taste; I mean, it’s for your dog, right?)
- Store the cooled treats in an airtight container at room temperature for up to two weeks. (If they last that long—good luck resisting those puppy dog eyes.)
Cool completely before serving to your dog. Happy treat time!
Optional Add-ons
Your furry friend deserves a little variety in their treat collection, right?
Consider adding Chicken and Carrot Bites to keep them interested. Just combine cooked chicken and finely chopped carrots, then dehydrate until crispy. It’s as simple as that.
Your pup will thank you with tail wags and slobbery kisses. Plus, you’ll feel like a gourmet chef, even if you burned toast last week.
2. Peanut Butter Banana Chews

When it comes to making Peanut Butter Banana Chews, you’ll love how simple the ingredients are—just a few staples you probably already have.
I’ll walk you through each step so you won’t feel overwhelmed, plus we’ll throw in some optional add-ons for an extra tasty twist.
Ready to treat your pup to something special?
Ingredients
If you’re looking to whip up some delightful treats for your furry friend, these Peanut Butter Banana Chews are a great choice. Not only do they taste amazing, but they also have ingredients that you probably already have in your pantry.
So, let’s get started on ensuring your pup gets a yummy snack that’s also healthy.
- 1 ripe banana, mashed (the riper, the better for flavor)
- ½ cup natural peanut butter (make sure it’s free from xylitol, that stuff is deadly)
- 1 cup rolled oats (the plain kind, no added sugar or flavors)
- ½ cup whole wheat flour (or oat flour if you want to be fancy)
- 1 tablespoon honey (optional, but it adds a nice touch)
- 1 egg (this helps bind everything together)
Mix these ingredients together, and you might just want to sneak in a taste yourself.
You know, testing for quality control for your dog… right? They’ll be wagging their tails in no time, and you’ll either earn major treat-making cred or get a suspicious look for your strange nibbling during the process.
Either way, let’s keep that kitchen filled with the sweet scent of banana and peanut butter!
Step by Step Instructions
1. Preheat your dehydrator to 145°F (or set your oven to the lowest temperature if you’re using that method). This guarantees the treats dry out properly without cooking them too much.
2. Grab a ripe banana and a cup of peanut butter. Seriously, the riper the banana, the better—the mushier, the more flavor. Slice the banana into thin rounds.
3. In a mixing bowl, combine the sliced banana with the peanut butter. Stir until the banana slices are nicely coated. You might want to use a spatula to make certain you get every bit of that delicious peanut butter goodness.
4. Spread the banana and peanut butter mixture evenly on a parchment-lined baking sheet or your dehydrator trays. Be certain the slices aren’t touching—they need some space to breathe (and dry out, of course).
5. If you’re using an oven, bake the treats for about 2–3 hours, checking them occasionally. They’re ready when they’re hard and fully dry, but not crunchy—think of a chewy texture, not like a potato chip.
If you’re using a dehydrator, let it run for about 6-8 hours.
6. Once done, remove the treats and let them cool completely on a wire rack. This step is essential because you don’t want your dog getting hot treats.
7. Store the treats in an airtight container at room temperature. They should last for a couple of weeks, though I doubt they’ll last that long with your pup around.
Cool completely before serving to your dog. They’ll thank you (with puppy dog eyes and lots of tail wagging).
Optional Add-ons
Looking to spice things up with some optional add-ons for those Peanut Butter Banana Chews?
You can mix in some shredded coconut, or drizzle a bit of honey for extra sweetness.
Maybe even toss in a dash of cinnamon—who says dogs don’t enjoy a little gourmet flair?
Experimenting not only makes treats fun, but it might just impress your furry friend, too.
3. Sweet Potato and Spinach Bites

Ready to whip up some tasty Sweet Potato and Spinach Bites for your pup? You’ll love how simple the ingredients are, and I promise, it’s worth the effort to see those happy tail wags. Let’s get into the step-by-step guide, plus a few optional add-ons that could take these treats to the next level.
Ingredients
When you’re making dog treats, it’s all about using wholesome ingredients that not only taste great but are also good for your furry friend.
Sweet potatoes and spinach aren’t just nutritious, they’re also beloved flavors that dogs can’t resist. So let’s dive right into the simple ingredients you’ll need for these tasty Sweet Potato and Spinach Bites.
- 1 cup cooked and mashed sweet potato (about one medium sweet potato, peeled and diced)
- 1 cup fresh spinach, chopped
- 1 cup whole wheat flour (or oat flour for a gluten-free option)
- 1 large egg
- 2 tablespoons peanut butter (make sure it’s xylitol-free)
- 1 tablespoon water (may need a bit more for consistency)
Now, how easy is that? With just a handful of simple ingredients, you’re well on your way to creating something truly delicious for your pup.
Trust me, they’ll wag their tail with glee, and you’ll feel like the best dog parent ever. Just remember to keep an eye on the oven; it can get a little toasty in there.
Happy baking!
Step by Step Instructions
- Preheat your oven to 350°F (175°C). We want it nice and toasty for our pup’s treats.
- Wash and peel 1 large sweet potato. Make sure to get all that dirt off—dogs don’t appreciate gritty bites.
- Cut the sweet potato into small, even cubes to make cooking easier. Think bite-sized nuggets!
- Boil the sweet potato cubes in a pot of water for about 10–15 minutes, until they’re fork-tender. You know they’re ready when they break apart easily.
- While the sweet potatoes are boiling, rinse and chop 1 cup of fresh spinach. Aim for finely chopped pieces—little morsels for little mouths.
- Drain the sweet potatoes and let them cool slightly. You don’t want to burn your hands while mixing.
- In a mixing bowl, combine the cooled sweet potatoes and chopped spinach. Use a fork to mash the sweet potatoes until smooth, with just a few lumps here and there.
- Stir in 1/2 cup of whole wheat flour and mix until just combined. Remember: don’t overmix; you want those flavorful bites to stay tender.
- Scoop tablespoon-sized portions of the mixture and shape them into small balls, then flatten them slightly for even baking.
- Place the flattened bites on a greased baking sheet, giving them a little room to breathe.
- Bake in your preheated oven for 25–30 minutes, until they’re firm and lightly golden. Keep an eye on them—you want them crisp, but not rocks.
- Remove the treats from the oven and let them cool completely before serving to your dog. Trust me, they’ll thank you for the deliciousness!
Optional Add-ons
Adding optional ingredients to your Sweet Potato and Spinach Bites can elevate them from simply tasty to downright irresistible, and who wouldn’t want that for their furry friend?
Consider tossing in a pinch of turmeric for an antioxidant boost, or a sprinkle of bacon-flavored seasoning to tempt even the pickiest eater. Trust me, your pup will appreciate the extra effort.
4. Pumpkin and Cinnamon Delights
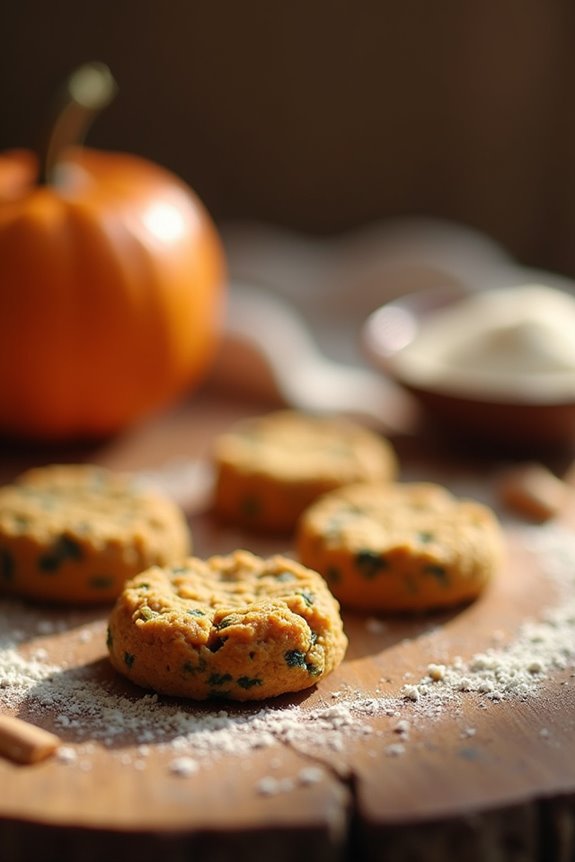
When it comes to making those Pumpkin and Cinnamon Delights, you’ll want to gather some simple but tasty ingredients—trust me, your pup will thank you.
I’ll walk you through each step, so you won’t feel lost, and we’ll even toss in a few optional add-ons to keep things interesting.
Ready to whip up a batch of flavor-packed treats?
Ingredients
Alright, let’s whip up some delightful treats for your furry friend. These Pumpkin and Cinnamon Delights aren’t just tasty; they’re actually good for pup’s tummy too. Your dog will be drooling for more, and who can blame them?
It all starts with some simple, wholesome ingredients.
- 1 cup pure pumpkin puree (not the spiced kind; save that for your latte)
- 2 cups whole wheat flour (make sure it’s dog-friendly)
- 1 tablespoon cinnamon (just the spice, no sugar added)
- 1 egg (medium-sized will do)
- 1/4 cup water (or a little more if your dough is too crumbly)
- 1 tablespoon honey (optional, for that extra touch of sweetness)
Just imagine your pup’s excitement as these treats bake; I mean, if only they could understand how much love goes into making their snacks.
It’s not a complicated recipe at all, so let’s get to it and give our furry friends a well-deserved snack break!
Step by Step Instructions
1. Preheat your dehydrator or oven to 160°F (70°C). This is the perfect temperature for drying out those precious treats.
2. Gather your ingredients: 1 cup of pumpkin puree, 1 tablespoon of cinnamon, and 1 ½ cups of whole wheat flour. Make sure the pumpkin is pure and not spiced—your dog doesn’t need a sugar rush.
3. In a mixing bowl, combine the pumpkin puree and cinnamon. Mix until well combined; it should smell heavenly—your dog might even perk up at the delicious aroma.
4. Gradually whisk in the whole wheat flour. Stir until the dough starts to form. It’s okay if it feels a tad sticky; that just means it’s going to be delightfully chewy.
(Tip: If it’s way too sticky, add a little extra flour.)
5. Transfer the dough onto a lightly floured surface. Knead it gently for about 2–3 minutes until it’s smooth. Think of it as a mini workout for your arms—it counts, right?
6. Roll out the dough to about ¼ inch thick. Grab your favorite cookie cutters, and cut out fun shapes! Your pup deserves some flair with their treats.
7. Place the shapes on a parchment-lined baking sheet. They should be spaced out a bit; we wouldn’t want them to stick together in the dehydrating process.
8. If using a dehydrator, arrange your treats in the trays and dry them for about 4–6 hours. Check them occasionally, and they’re done when they’re firm and break easily—not crumbling into a million pieces.
9. If using an oven, bake the treats for 25–30 minutes, flipping them halfway through for even drying. Let them cool until firm and slightly crisp.
10. Cool completely before serving to your dog. You don’t want to risk anyone’s taste buds getting burnt—not fun!
Now, pack them in an airtight container, and your pup is in for a real treat that’s made with love (and pumpkin).
Optional Add-ons
Now that you’ve whipped up those wonderful pumpkin and cinnamon dog treats, why not take it up a notch?
Consider adding some peanut butter or carob for extra flavor. Mix in a pinch of turmeric for health benefits and allure.
Your pup’s taste buds will thank you, and you might just wonder why you didn’t try this sooner.
Trust me, they’ll go crazy for it.
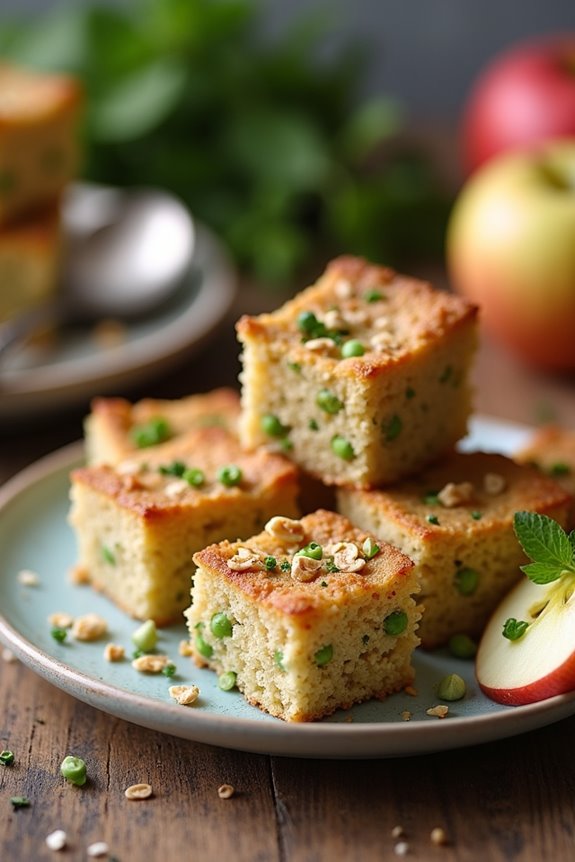
5. Apple and Oat Squares
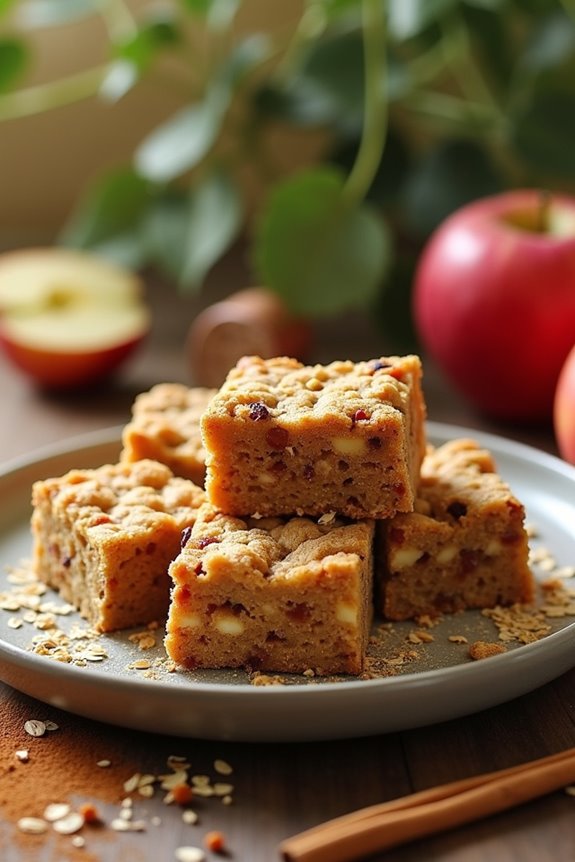
Let’s get into those tasty Apple and Oat Squares that your dog will absolutely love.
You might be wondering what goes into these treats, and how easy they’re to whip up.
I’ll walk you through the ingredients and step-by-step instructions, plus share some fun optional add-ons to make them even better.
Ingredients
When it comes to making delicious treats for our furry friends, keeping it simple is the way to go. These Apple and Oat Squares are packed with wholesome goodness that your dog will love.
You might be wondering, “What’s in them?” Well, I’m glad you asked. Here’s a list of everything you’ll need to whip up these tasty bites.
- 1 cup of rolled oats
- 1 cup of unsweetened applesauce
- ½ cup of whole wheat flour
- 1 tablespoon of honey (optional, but makes them a bit sweeter)
- 1 teaspoon of cinnamon (just a hint to bring out that apple flavor)
- 1 egg (for binding everything together)
See? Easy peasy! Just grab these pantry staples, maybe a cute apron if you’re feeling fancy, and let’s get those tails wagging with some homemade goodness.
Trust me, your pup will be begging for more, and you’ll feel like the superhero you’re for making such wholesome treats.
Step by Step Instructions
1. Preheat your oven to 350°F (175°C) to get it nice and warm for baking. A warm oven is a happy oven.
2. In a mixing bowl, combine 1 cup of rolled oats and 1 cup of unsweetened applesauce. Use a spoon to mix them together until they’re well-blended.
3. Add 1/2 cup of whole wheat flour to the mixture. Gently fold it in until you see no dry flour hiding in the bottom of the bowl (but don’t overmix—lumps are okay).
4. Incorporate 1/4 cup of finely chopped apple. Make sure to toss it evenly so every bite has a hint of apple’s sweetness.
5. Pour in 1 tablespoon of honey (optional) to add some extra flavor. Stir it in until it’s combined well.
6. Line a baking dish with parchment paper for easy cleanup. You can use an 8×8-inch dish if you have one.
7. Spoon the mixture into the prepared baking dish, spreading it out evenly. You want a nice, smooth surface for baking.
8. Bake for 25-30 minutes, or until the edges start to turn golden brown and the center is set. Your kitchen should smell amazing by now.
9. Once baked, remove the dish from the oven and let it cool for about 10 minutes.
Then, transfer it to a wire rack to cool completely, so it won’t burn those precious pup tongues.
10. Cut into squares and serve after they’ve cooled completely to room temperature. Your dog deserves the best, after all.
Optional Add-ons
Elevate your dog’s snacking experience with a splash of creativity.
Try making Apple and Oat Squares. Just blend oats, mashed apples, and a hint of cinnamon. Trust me, your pup will love these.
Shape them into squares, bake, and voilà—snack time! What could be better than watching your furry friend go wild over these treats? They’ll think you’re a kitchen genius.
6. Tuna and Sweet Pea Bites
Let’s get into those Tuna and Sweet Pea Bites, shall we?
You’ll love how simple the ingredients are, and I promise your pup will wag their tail at the first taste.
With step-by-step instructions and some optional add-ons to mix things up, you’re all set to whip up a treat that’s just as special as your furry friend.
Ingredients
When it comes to making tasty treats for our furry friends, keeping things simple and healthy is key.
These Tuna and Sweet Pea Bites are just the ticket! Not only are they super easy to whip up, but your dog will absolutely wag their tail in delight. Just a little prep and you’ll be well on your way to baking something special in no time.
Let’s gather the easy-to-find ingredients, shall we?
- 1 can of tuna in water, drained (about 120 grams)
- 1 cup of frozen sweet peas, thawed
- 1 cup of whole wheat flour (or gluten-free flour, if needed)
- 1 large egg
- 2 tablespoons of olive oil
- 1 teaspoon of dried parsley (optional, for a fresh kick)
Now, you know how I like to keep things on the lighter side—like, you know, not using ingredients that aren’t great for our pups.
So, it’s just the right mix of goodness. Plus, who doesn’t love a recipe that’s dog-approved? Trust me, your pooch will look at you with those big, puppy dog eyes, and you might melt right there.
Enjoy whipping these up!
Step by Step Instructions
- Preheat your dehydrator to 155°F (68°C) or your oven to the lowest setting. Just think of it as warming up the stage for these tasty treats.
- Open a can of tuna—preferably in water, not oil. Drain it well and put the tuna in a mixing bowl. (Try not to get too lost in daydreams about sushi; this is for your dog, after all.)
- Add 1 cup of cooked sweet peas to the tuna bowl. If you’re achieving a colorful explosion, you’re on the right track.
- Use a fork to mash the tuna and peas together until they’re evenly mixed. You want it to be somewhat chunky, not a smooth paste. (Texture makes it interesting, right?)
- Gradually add 1 cup of whole wheat flour to the mixture. Stir gently as you go. (It’s like folding in the good vibes—don’t rush it.)
- Once combined, scoop out spoonfuls of the mixture and form them into small, bite-sized balls, about 1 inch in diameter. Channel your inner chef, but remember, they don’t have to be perfect. They’re for dogs, not Michelin stars.
- Place the balls on dehydrator trays or a lined baking sheet, spacing them an inch apart. They need room to breathe as they transform into crunchy goodness.
- If you’re using an oven, bake for 25–30 minutes or until they’re golden brown and firm to the touch. If you’re dehydrating, let them dry for about 4-6 hours, checking for that satisfying crunch.
- Allow the treats to cool completely before serving to your dog. (Trust me, warm treats are great for your heart but can be tough on your pup’s tummy.)
Optional Add-ons
Adding a splash of creativity can elevate your Tuna and Sweet Pea Bites into an even more delectable treat for your furry friend.
Consider tossing in a pinch of dried kelp for an oceanic twist, or some blended pumpkin for a touch of sweetness. Your pup won’t just enjoy these treats—they’ll beg for more, making your kitchen the new snack hotspot.
Simple and fun, right?
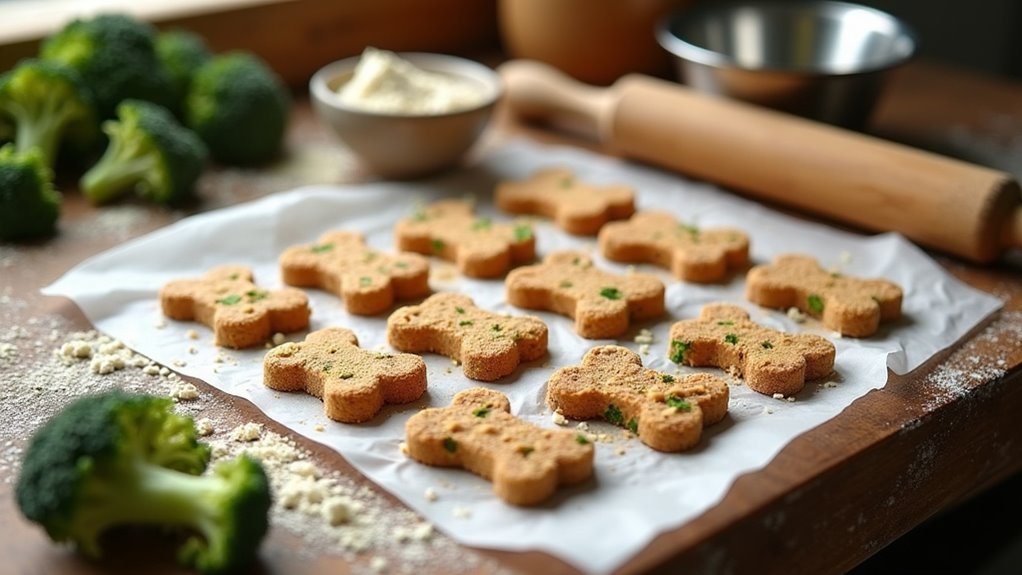
7. Beef and Broccoli Nibbles
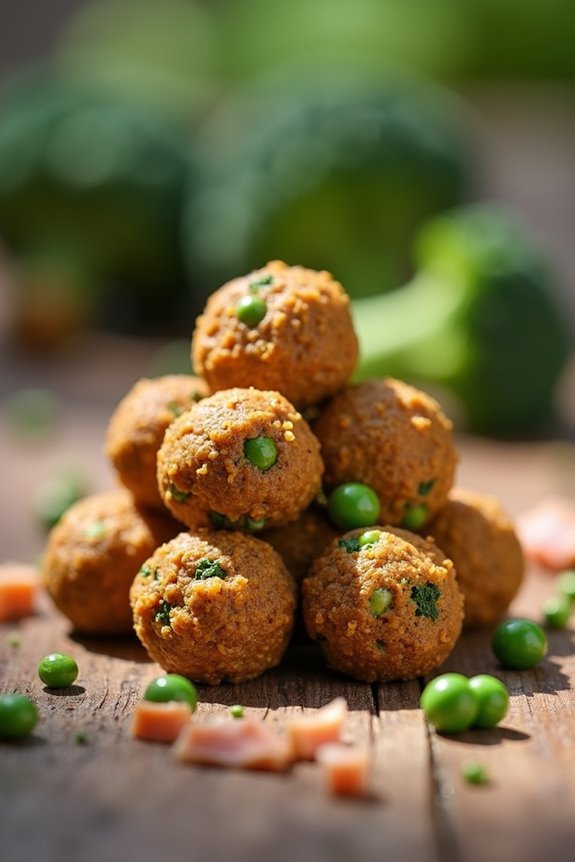
Ready to whip up some Beef and Broccoli Nibbles? You’ll love how simple the ingredients are—just fresh beef, nutritious broccoli, and a few spices, though you can definitely throw in some optional add-ons if you’re feeling adventurous. Let’s get to it, because your pup deserves the tastiest treats around, right?
Ingredients
When it comes to making treats that your furry friend will adore, keeping it simple is key. You want their tails wagging, and trust me—these Beef and Broccoli Nibbles are sure to do the trick. Packed with flavors and nutrients, they’re a great way to spoil your pup without going overboard on the ingredients.
Plus, it’s a fun little project you can tackle right in your kitchen. So, let’s gather our goodies, and see what we need to whip up these delightful nibbles.
- 1 cup lean ground beef
- 1 cup fresh broccoli, chopped finely
- 1/2 cup oat flour (you can make this by blending oats until fine)
- 1/4 cup low-sodium beef broth
- 1 large egg
- 1 tablespoon olive oil
This list is pretty easy to work with, right? Just a few things, and you’re on your way to treating your pup to something special. I mean, who wouldn’t want to reward their best buddy with a homemade snack?
They’ll think they’re getting a gourmet experience while you enjoy the little victory of having made their tail wag with just a few simple ingredients. Happy treating!
Step by Step Instructions
1. Preheat your oven to 350°F (175°C). Make sure it’s nice and hot for those tasty treats.
2. Wash and chop about 1 cup of fresh broccoli into small pieces. Your pup will thank you for those vibrant green bits.
3. In a medium pot, bring 2 cups of water to a boil. Just keep an eye on it so you don’t end up with a boisterous pot of water over the edge.
4. Once the water is boiling, add the chopped broccoli. Cook for about 3 minutes until bright green and tender, but not mushy. We’re aiming for a happy crunch here.
5. Drain the broccoli and set it aside to cool completely. No one likes a steaming hot treat—and neither does your dog.
6. In a large bowl, mix together 1 ½ cups of whole wheat flour with 1 cup of cooked ground beef.
Get in there and use your hands if you need to—just don’t be afraid of a little mess.
7. Fold in the cooled broccoli until it’s evenly mixed throughout. Make sure all the pieces are happy to see each other.
8. Gradually add in 1 egg and 1/4 cup of low-sodium chicken broth.
Mix until everything is combined. It should form a somewhat thick dough.
9. Lightly flour your countertop and roll the dough out to about 1/4 inch thick.
If it sticks, don’t sweat it—just keep adding a pinch of flour as needed.
10. Use cookie cutters or a knife to cut the dough into fun shapes. The more creative, the better—your dog loves a bit of flair.
11. Place the treats on a baking sheet lined with parchment paper. Make sure they aren’t too close together—nobody likes a team-up situation in the oven.
12. Bake in the preheated oven for 25–30 minutes until golden brown.
You’ll know they’re done when the kitchen smells like a delicious feast.
13. Remove from the oven and let the treats cool completely on a wire rack.
Trust me, your dog can wait just a bit longer for the ultimate flavor.
14. Once cool, store the treats in an airtight container.
They’ll last about a week if you can resist their adorably pleading eyes.
Now you’re all set for treat time. Enjoy the happy tail wags!
Optional Add-ons
If you want to kick your dog’s treat game up a notch, adding a few flavorful ingredients might just do the trick.
Think beef and broccoli nibbles. It’s simple! Mix dehydrated beef with crunchy bits of broccoli for a tasty combo.
Your pup will feel like royalty. Besides, who wouldn’t want to spoil their best friend a little? Go ahead, give it a try.
Use Quality, Fresh Ingredients
Using quality, fresh ingredients is the secret sauce to making amazing dehydrated dog treats. Imagine your dog’s tail wagging like a metronome as they devour something packed with wholesome goodness.
You wouldn’t eat leftover takeout every day, right? Treat your pup to the same standards. Choose vibrant veggies, lean meats, and fruits that actually smell like they’re supposed to.
Don’t just grab anything off the store shelf; check for wrinkles or bruises. Your dog can spot a subpar treat from a mile away. Plus, fresh ingredients mean more nutrients. It’s like giving your dog a mini-boost of energy in every bite.
You might even find joy mixing these goodies together—watch out for the flour explosion when you open that pack.
If I can bake without setting off smoke alarms, so can you. With quality ingredients, your treats won’t just be tasty; they’ll be an experience your furry friend won’t forget.
Frequently Asked Questions
How Long Do Dehydrated Dog Treats Last When Stored Properly?
When stored properly, dehydrated dog treats can last anywhere from six months to a year. Make sure to keep them in a cool, dry place, and always check for any signs of spoilage before giving them.
Can I Dehydrate Fruits and Vegetables for My Dog?
Yes, you can dehydrate fruits and vegetables for your dog! Just make certain they’re safe options like carrots or apples. It’s a great way to provide healthy, crunchy snacks that your pup will enjoy.
Are Dehydrated Treats Suitable for All Dog Breeds?
Yes, dehydrated treats are generally suitable for all dog breeds. However, you should consider your dog’s size, age, and health. Always consult your vet if you’re unsure about the best options for your furry friend.
How Can I Tell if My Dog Likes a New Treat?
You can tell your dog likes a new treat if they enthusiastically sniff it, wag their tail, and quickly chew it. Positive body language and excitement during feeding are great signs of approval.
Do I Need Any Special Equipment to Dehydrate Treats?
You don’t need special equipment to dehydrate treats. Your oven or a food dehydrator works perfectly. Just slice the ingredients thinly, set the right temperature, and let them dry until they’re crunchy and ready!