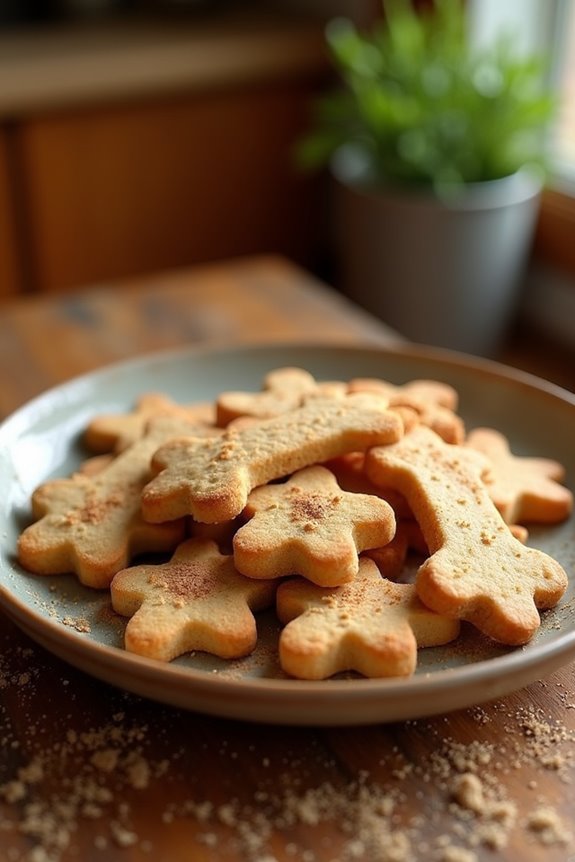
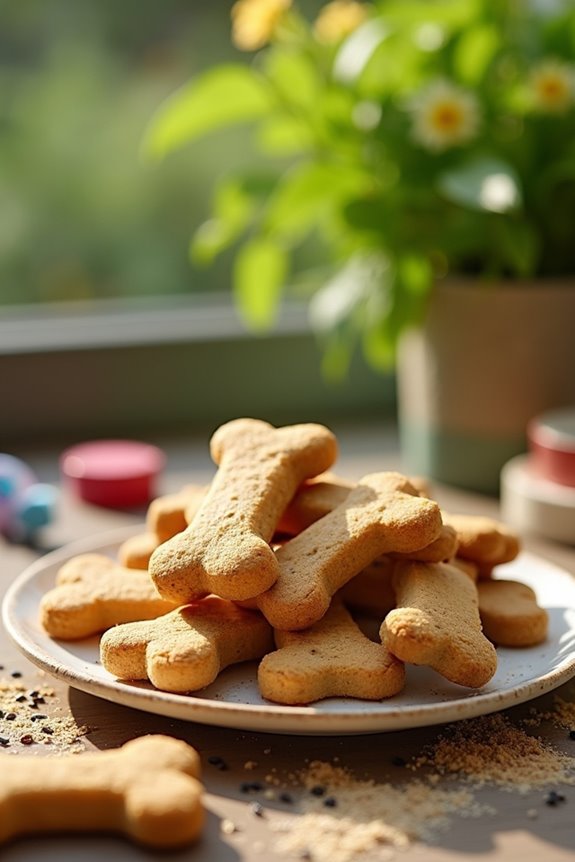
If you’ve ever thought about whipping up something special for your furry friend, you’re in for a treat—literally. From Peanut Butter Pumpkin Cookies to Carrot and Ginger Treats, there’s a world of homemade doggy delights waiting for you. Trust me, they’re healthier than those mystery store-bought ones, and your pup will appreciate the effort. So, why not roll up your sleeves and try your hand at these? Your kitchen could use a dash of canine love. Curious about the recipes?
Why Homemade?
When it comes to spoiling your dog, why not go the homemade route? You’ll feel like a culinary genius when you whip up some baked dog treats recipes tailored just for your pup. Plus, think about it: you know exactly what goes into each treat. No mystery ingredients, no weird fillers—just love and wholesome goodness. Making your own dog treats can be a great option if you’re looking for no-bake dog treats that are quick and easy to prepare. Additionally, you can explore various wholesome ingredients that provide a nutritional boost for your furry friend and help promote better overall health and well-being for your dog.
And let’s be real. Your dog’s face when they sniff those fresh-baked goodies? Priceless. You can experiment with flavors like peanut butter or pumpkin, making it a fun baking adventure. Got a picky eater? You can customize the recipes to suit your dog’s taste preferences. Just remember, it’s all about trial and error—you might end up with a few baking flops (I’ve burned my fair share). But it’s worth it just to see that wagging tail and happy dance when they get a taste of your homemade creations. Additionally, making treats from scratch allows you to avoid mystery ingredients that may not be suitable for your dog’s diet.
Delicious Treats for Your Pup
Before you whip up those tasty treats, think about how much your pup loves flavors like peanut butter and pumpkin. Dogs also enjoy the sweet taste of homemade banana treats, which can add variety to their diet. With recipes for Peanut Butter Pumpkin Cookies and Apple Cinnamon Dog Biscuits, you’ll be their hero—who knew being a dog chef could be this fun? Homemade peanut dog treats are not only delicious but also a great way to ensure your pet enjoys wholesome ingredients. You’ll find that adding peanut butter apple sauce gives a unique flavor that most dogs find irresistible.
Including wholesome ingredients like pumpkin and oats can also lead to healthier pups, boosting their overall well-being.
Ready to spoil your furry friend? Let’s get baking.
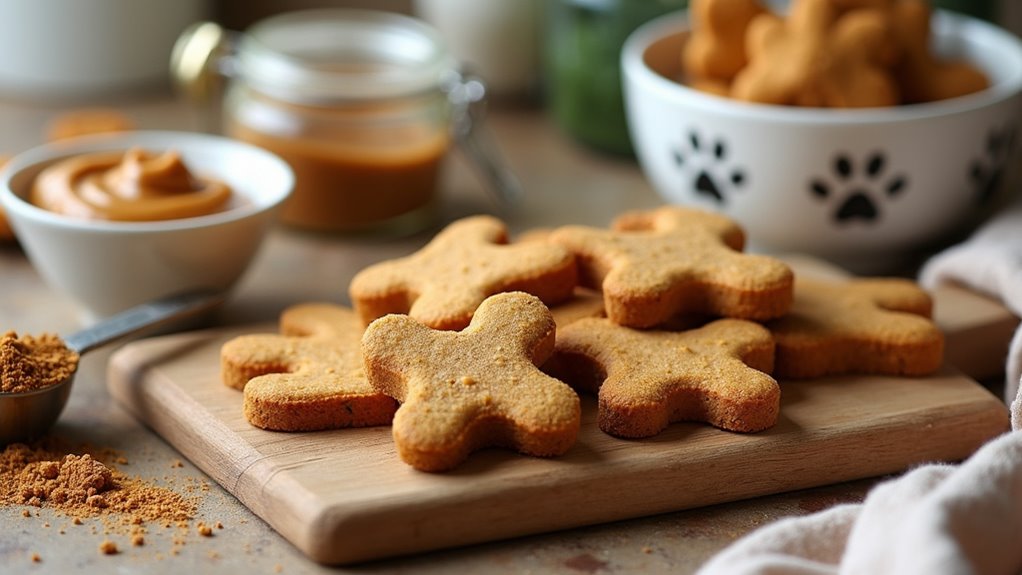
1. Peanut Butter Pumpkin Cookies

Ready to whip up some delicious peanut butter pumpkin cookies for your furry friend? You’ll need a few simple ingredients and some step-by-step instructions that even a newbie baker can follow. These homemade treats are not only fun to make, but they also provide nutritious ingredients that can benefit your dog’s health. And if you’re feeling a bit adventurous, I’ll share some optional add-ons to make those treats extra special. Additionally, these cookies can also incorporate homemade peanut butter and banana for an even tastier treat your dog will love.
Ingredients
Who doesn’t love a good treat, especially when it comes to our furry friends?
These Peanut Butter Pumpkin Cookies aren’t just easy to whip up but are also packed with flavors that pups adore.
With just a few simple ingredients, your kitchen will be transformed into a doggy bakery in no time.
Get ready to see those tails wagging!
- 1 cup of pumpkin puree (not the spiced pie filling)
- 1/2 cup of creamy peanut butter (make sure it’s xylitol-free)
- 2 cups of whole wheat flour (or a gluten-free blend if your pup needs it)
- 1/4 cup of rolled oats
- 1/2 teaspoon of cinnamon (optional, but some dogs enjoy it)
- 1/4 cup of chicken or beef broth (low-sodium is best)
And there you have it!
These ingredients are simple to find, and trust me, your pup will be begging for more once they get a whiff of these baking goodies.
Who knew being a dog chef could be this rewarding?
Step by Step Instructions
- Preheat your oven to 350°F (175°C) to get things nice and toasty for your pup’s treats.
- In a medium bowl, combine 1 cup of pumpkin puree and 1/2 cup of peanut butter. Mix until well blended—this part should smell divine.
- In another bowl, whisk together 2 1/2 cups of whole wheat flour and a pinch of cinnamon. This gives your treats a hint of warmth.
- Slowly fold the dry ingredients into the pumpkin mixture. Don’t overmix; just blend until everything is moistened, and your dough looks a bit shaggy.
- Turn the dough out onto a floured surface. Roll it out to about 1/4 inch thick—this is where your rolling pin really comes in handy (or just use a bottle if you’re feeling crafty).
- Use a cookie cutter (or a fun dog bone shape if you have one) to cut out your treats. Place them on a baking sheet lined with parchment paper, leaving a little space between each one.
- Bake for 25–30 minutes, or until the edges are golden brown. Your kitchen will start to smell magical about halfway through.
- Remove the treats from the oven and let them cool on a rack. This is essential—don’t serve them hot.
Cool completely before serving to your dog, and watch those tails wag.
Optional Add-ons
After baking those scrumptious pumpkin treats, you might be scratching your head, wondering how to take your pup’s snacking game to the next level.
Why not mix in some peanut butter? Just a spoonful will release tail-wagging excitement.
You could also add oats for crunch or even a dash of cinnamon.
Experiment, have fun, and watch your fur baby savor every bite like it’s a gourmet meal.
2. Apple Cinnamon Dog Biscuits
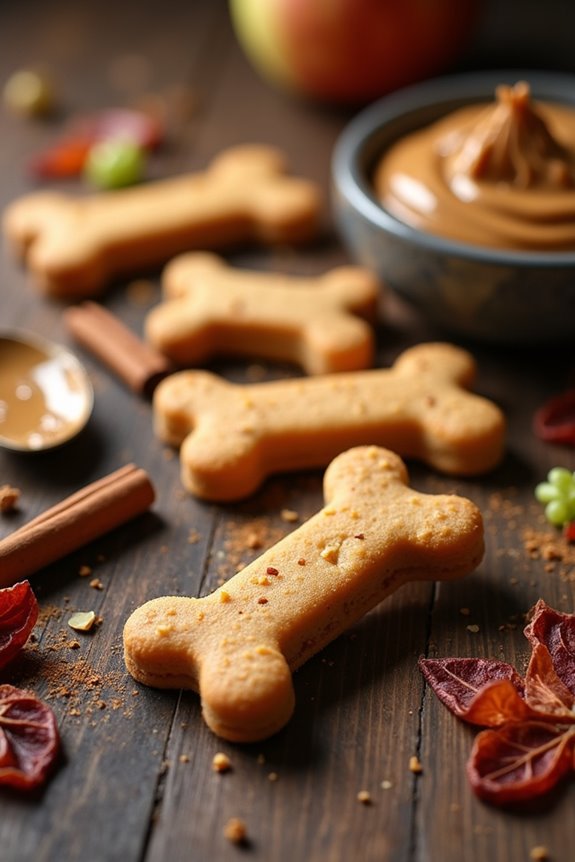
If you’re looking to whip up something tasty for your furry friend, these Apple Cinnamon Dog Biscuits might just be the perfect treat. You’ll love the simple ingredients, easy step-by-step instructions, and even a few optional add-ons that can take these biscuits to the next level. So, grab your apron and let’s get baking—I promise your pup will thank you with those adorable puppy eyes.
Ingredients
Making homemade treats for your pup isn’t just fun; it’s downright rewarding. Just think about it — you’ll know exactly what goes into each bite, and your furry friend will be over the moon.
Now, let’s gather some simple, dog-friendly ingredients to whip up those scrumptious apple cinnamon dog biscuits. You’ll be amazed at how easy this can be.
- 2 cups whole wheat flour
- 1 cup apple sauce (unsweetened)
- 1 teaspoon ground cinnamon
- 1/4 cup peanut butter (make sure it’s xylitol-free!)
- 1/2 cup water (or more, depending on dough consistency)
Now, I can already feel those tails wagging when they catch a whiff of these delicious treats.
Oh, and a little tip — don’t be surprised if you end up giving your pup more than one. They might be asking for a second, third, or even fourth, and who could blame them?
Just think of it as a way to sneak in more love.
Step by Step Instructions
To whip up some tasty Apple Cinnamon Dog Biscuits for your furry friend, follow these straightforward steps. Your pup will be wagging their tail in no time!
- Preheat your oven to 350°F (175°C) to get ready for some baking magic.
- In a bowl, combine 2 cups of whole wheat flour and 1 teaspoon of cinnamon. Mix them well until blended.
- In another bowl, mash 1 ripe banana, then add 1 cup of unsweetened applesauce, and 1 egg. Whisk until everything is smooth and combined.
- Gradually fold the wet ingredients into the dry ingredients. Mix until a dough forms (don’t stress if it’s a bit crumbly).
- Lightly flour your surface and roll out the dough to about 1/4 inch thick. Kids, pets, or playful spirits might want to join this part.
- Use cookie cutters to cut out the biscuit shapes. Place them on a baking sheet lined with parchment paper, allowing a little space between each one.
- Bake in your preheated oven for 25-30 minutes, or until the biscuits turn golden brown and smell delicious.
- Remove the biscuits from the oven and let them cool on a wire rack.
(Note: You should probably keep your dog at bay during this cooling phase—those noses can be tempting.)
Cool completely before serving to your dog, and get ready for some serious tail-wagging action!
Optional Add-ons
While you might think those Apple Cinnamon Dog Biscuits are perfect just as they are, adding a few optional ingredients can elevate them from simply delightful to tail-waggingly irresistible.
Consider mixing in some peanut butter for extra creaminess or maybe a dash of pumpkin for that autumn flavor. Your pup won’t know what hit ‘em, and trust me, you’ll want to keep the snacks coming.
3. Sweet Potato Oatmeal Chews
Ready to whip up some tasty Sweet Potato Oatmeal Chews for your pup? You’ll need just a handful of simple ingredients, and I promise, it’s easier than it sounds. Let’s break it down step by step, and maybe even throw in some fun add-ons to make your dog’s tail wag a little more.
Ingredients
When it comes to treating your furry friend, sweet potato oatmeal chews aren’t only a delicious option but also a healthy one. Your dog will thank you, and you’ll feel pretty great about it too.
Grab a few simple ingredients, and let’s whip up something special for that tail-wagging companion of yours.
- 1 cup cooked sweet potato, mashed (about 1 medium sweet potato)
- 1 cup rolled oats
- 1/2 cup whole wheat flour (or oat flour for a gluten-free option)
- 1/4 cup peanut butter (make sure it’s xylitol-free, of course)
- 1/4 cup water (you might need a bit more, depending on the dough)
- 1 large egg
Now, you’re ready to make some chewy delights that will have your dog doing the happy dance.
Seriously, if you’re looking for tail wags galore, this is it. Just think about it; what pup wouldn’t love these?
Step by Step Instructions
1. Preheat your oven to 350°F (175°C) so it’s nice and toasty when you’re ready to bake.
2. Peel and chop 1 large sweet potato into chunks. Boil the chunks in a pot of water for about 15 minutes, or until they’re fork-tender.
It’s like giving the sweet potato a relaxing spa treatment; it deserves it.
3. Drain the sweet potato and mash it in a bowl until smooth. No lumps allowed—this is where the magic happens.
You want it creamy, not chunky.
4. In a separate bowl, mix together 2 cups of rolled oats and 1/2 cup of whole wheat flour. Whisk them until they’re well combined.
5. Add the mashed sweet potato to the oat mixture. Stir until fully incorporated.
It should look like a thick, sweet mixture—like the world’s greatest doggy mash-up.
6. Pour in 1 egg and mix again until everything is combined.
This will help everything stick together nicely, just like your pup to their favorite toy.
7. Roll the dough into small balls, then flatten each ball into a treat shape about 1/2 inch thick.
Think of them as mini doggy pancakes; they’ll fluff up a bit while baking.
8. Place the treats on a parchment-lined baking sheet.
Make sure they’re spaced out; they need their freedom to grow.
9. Bake for 25–30 minutes, or until the treats are golden brown and firm to the touch.
You want that nice, crunchy texture your pup will love.
10. Cool completely before serving to your dog.
Trust me, your pup will appreciate the patience—it’s worth the wait!
Optional Add-ons
Adding some optional ingredients to your sweet potato oatmeal chews can take these treats from good to absolutely drool-worthy.
How about mixing in some peanut butter for extra flavor that’ll make your pup’s tail wag? You could also consider a sprinkle of cinnamon for a cozy touch or even some finely chopped apples.
Trust me, your furry friend won’t be able to resist these yummy additions.
4. Peanut Butter Banana Bites
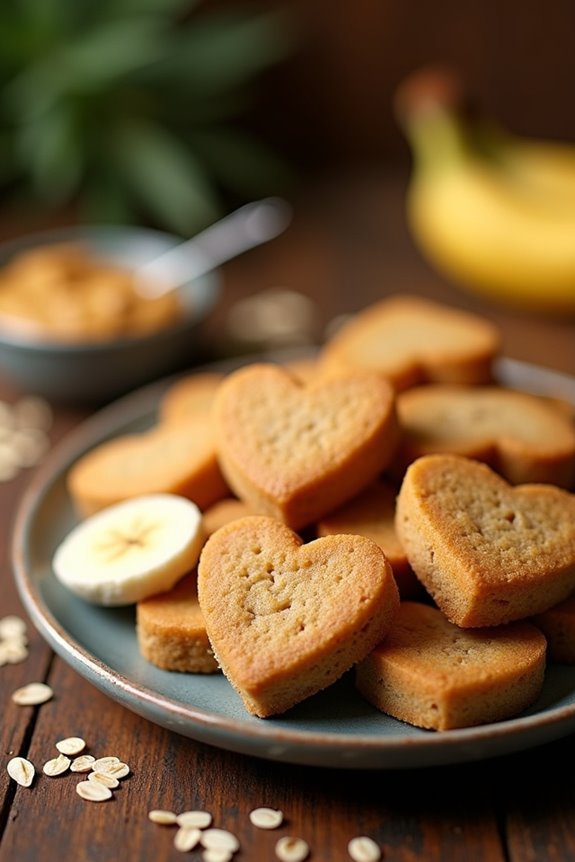
Ready to whip up some Peanut Butter Banana Bites for your pup? You’ll love how easy these treats are with just a few simple ingredients and step-by-step instructions. And hey, if you’re feeling adventurous, there are some optional add-ons to really jazz things up.
Ingredients
When it comes to whipping up some tasty treats for your pup, nothing beats the scrumptious combo of peanut butter and banana. Seriously, these Peanut Butter Banana Bites are so easy to make, and your furry friend is going to gobble them up faster than you can say “good boy.”
Plus, who doesn’t love a treat made with ingredients you can actually pronounce? So, roll up your sleeves and grab these simple ingredients, and let’s get baking!
- 1 ripe banana, mashed
- ½ cup natural peanut butter (make sure it’s xylitol-free)
- 1 cup whole wheat flour
- ¼ cup oats
- 1 egg
That’s it! Just a handful of wholesome ingredients, and you’ll have a batch of snacks that will have your dog wagging their tail in delight.
Trust me, when you’re plopping those bites into the oven, you’ll feel like a dog treat superstar. Happy baking, and may your pup appreciate your culinary efforts!
Step by Step Instructions
1. Preheat your oven to 350°F (175°C). This will make sure it’s nice and toasty for your pup’s treats.
2. In a mixing bowl, mash 2 ripe bananas. You want them squishy and mushy—think toddler food.
3. Add 1 cup of peanut butter to the mashed bananas. Make sure it’s unsweetened and unsalted, because we’re looking out for our furry friends.
4. Mix in 1 cup of whole wheat flour gradually. Stir until combined; don’t worry if it’s a bit thick.
(Remember, this is a dog treat, not a soufflé.)
5. Optional: If your dog is a fan of crunch, you can fold in some oats or bits of apple—just a half a cup or so will do.
6. Scoop the dough onto a baking sheet lined with parchment paper. Use your hands or a spoon, and make them about 1 inch in size; they don’t need to be perfect, but who doesn’t love a little symmetry?
7. Bake in the preheated oven for 20–25 minutes, or until they’re golden brown because treats that look good are always more appetizing.
8. Once baked, take them out and let them cool completely on a wire rack.
(Trust me, you don’t want to serve your dog a hot treat—it’s like trying to enjoy a scalding slice of pizza.)
9. Store in an airtight container for up to a week, or freeze them for those special days when your pup deserves a bonus snack.
Cool completely before serving to your dog.
Optional Add-ons
If you’ve ever seen your dog’s eyes light up at the mere sight of peanut butter and bananas, you know exactly what I mean when I say these add-ons can take your homemade treats to the next level.
Just mash ripe bananas, mix with peanut butter, and fold it into your dough.
Trust me, your pup will think you’ve become a baking wizard.
Who knew simplicity could be this magical?
5. Carrot and Ginger Treats
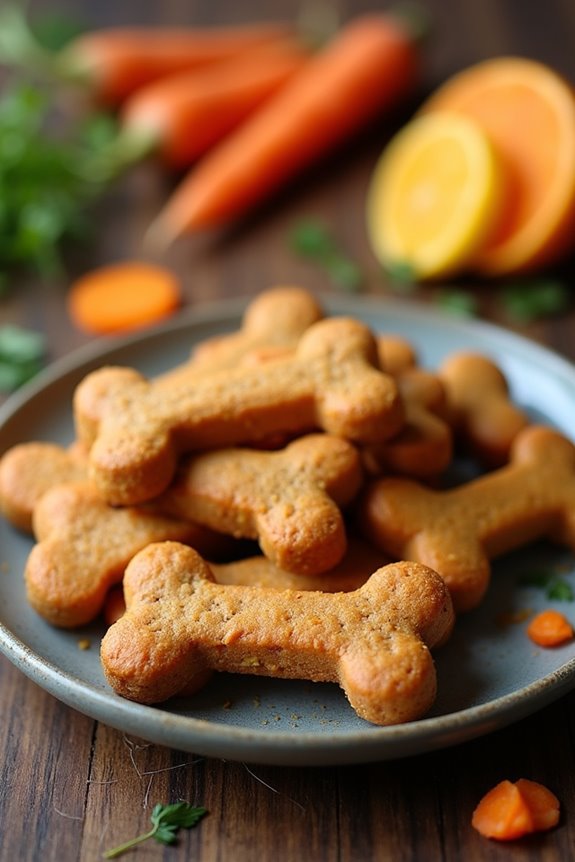
Let’s get into some tasty Carrot and Ginger Treats that your pup will absolutely love. You’ll need a few simple ingredients, and I promise these step-by-step instructions are so easy that even your kitchen novice can whip them up. Want to jazz them up a bit? I’ve got some optional add-ons that’ll make these treats even more special.
Ingredients
Making your own dog treats at home can be a fun and rewarding experience, especially when you know just how much your pup will love them.
These Carrot and Ginger Treats aren’t only easy to make, but they’re also packed with flavors that will have your furry friend wagging their tail in delight.
Let’s keep it simple and get all the ingredients ready—here’s what you’ll need:
- 1 cup finely grated carrots
- 1 tablespoon fresh ginger, grated (or 1 teaspoon ground ginger if you have it on hand)
- 2 cups whole wheat flour (make sure your pup isn’t gluten-sensitive)
- 1/4 cup unsweetened applesauce
- 1/4 cup chicken or vegetable broth (low sodium is best)
- 1 egg
That’s it! Not too shabby, right?
Just grab these ingredients from your kitchen or the local grocery store, and you’ll be all set to whip up some tail-wagging goodness.
Who knew being a dog chef could be this easy? Let’s get baking!
Step by Step Instructions
- Preheat your oven to 350°F (175°C). This is the first step in our dog treat adventure.
- In a large mixing bowl, combine 1 cup of whole wheat flour and 1 cup of oats. Mix these dry ingredients until they’re evenly distributed—no dry clumps allowed.
- Grate 1 medium-sized carrot and add it to the bowl. Give it a good stir, so the carrot gets to know its flour and oat buddies.
- Next, grate about 1 tablespoon of fresh ginger and mix it in! Don’t worry if it’s a bit sticky—this means flavor!
- In a separate bowl, whisk together 1 large egg and 1/4 cup of unsweetened applesauce until well blended. Trust me, this is going to help bind everything together nicely.
- Pour the wet mixture into the bowl with the dry ingredients. Fold everything together until just combined—be careful not to overmix (a few lumps are totally fine).
- Lightly flour a clean surface and roll out the dough to about 1/4 inch thick. Grab cutter shapes that tickle your fancy—paw prints, bones, or whatever makes you smile.
- Place the cutout treats on a parchment-lined baking sheet, leaving a little space between each one. They need room to breathe!
- Bake the treats in the preheated oven for 25–30 minutes, or until they’re golden brown and your kitchen smells like a ginger-spiced puppy wonderland.
- Remove the treats from the oven and let them cool on a wire rack for a bit.
Cool completely before serving to your dog.
And once done, get ready to be the hero of treat time; your pup is going to love you for this!
Optional Add-ons
While your homemade carrot and ginger dog treats are already a hit, why not elevate them with some optional add-ons that’ll have your pup wagging their tail in delight?
Consider mixing in a bit of peanut butter for added richness, or perhaps some flaxseed for a healthy boost.
Trust me, one sniff and your dog will think you’re a culinary genius.
6. Pumpkin Chia Seed Bites
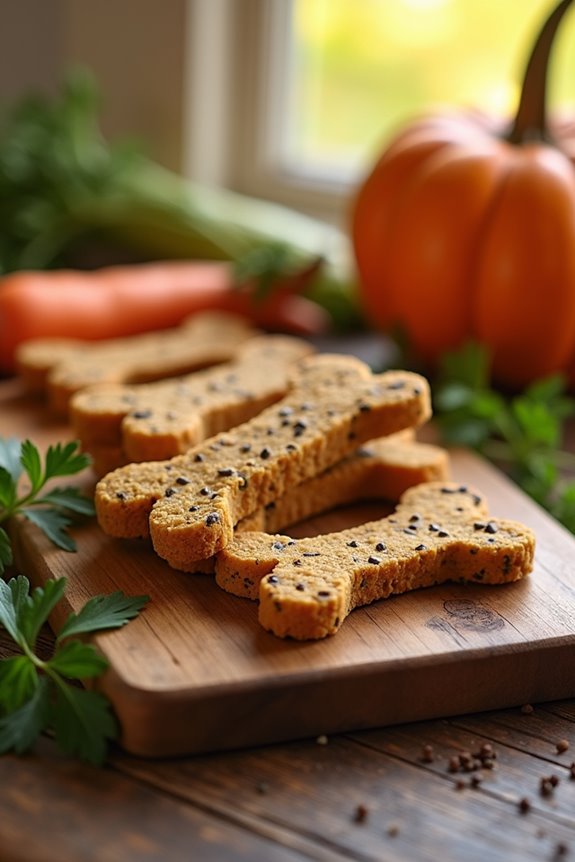
If you’re looking to whip up some tasty, healthy bites for your pup, pumpkin chia seed treats are the way to go. You’ll need just a handful of simple ingredients, and trust me, the process is a breeze. Plus, I’ll share some fun optional add-ons to make them even more special for your furry friend.
Ingredients
Are you ready to whip up some delicious treats for your furry friend? These Pumpkin Chia Seed Bites are super easy to make, and the best part? Your pup is going to go absolutely wild for them.
Trust me, I’ve seen my dog do the happy dance when I pull out these treats. So, gather your ingredients, and let’s treat your pup to something special—because they totally deserve it, right?
- 1 cup canned pumpkin (make sure it’s pure pumpkin, not the spiced pie filling)
- 1 cup whole wheat flour (or oat flour if you want to go gluten-free)
- 2 tablespoons chia seeds
- 1/4 cup peanut butter (just check it’s xylitol-free)
- 1/2 teaspoon cinnamon (not harmful, but dogs love the aroma)
- 1 egg (large, preferably from a local farm if you can swing it)
That’s it! Simple, right?
Now let’s get baking and make those tails wag!
Step by Step Instructions
Start by prepping your kitchen and the ingredients. This is where the magic begins.
- Preheat your oven to 350°F (175°C). This guarantees that your treats bake evenly.
- In a large mixing bowl, add 1 cup of pumpkin puree and 2 eggs. Mix well until fully combined.
- Sprinkle in 1/4 cup of chia seeds and stir them into the pumpkin mixture until evenly distributed.
- Gradually add 2 1/2 cups of whole wheat flour to the mixture. Mix until a dough forms (Don’t worry if it’s a bit sticky).
- Lightly flour your work surface and turn the dough out. Knead it gently for about 1 minute (Just enough to bring it together).
- Roll the dough out to about 1/4 inch thick. If it’s too sticky, dust with a bit more flour.
- Use cookie cutters to cut out fun shapes, or just go for simple squares if you’re feeling lazy (We’ve all been there).
- Place the treats on a baking sheet lined with parchment paper, giving them a little space in between (They don’t need to be best friends just yet).
- Bake in the preheated oven for 25–30 minutes, or until they’re lightly golden brown.
- Remove from the oven and let them cool on a wire rack.
Cool completely before serving to your dog. They’ll be drooling in no time!
Optional Add-ons
When it comes to spoiling your pup, why not think outside the box—or in this case, the treat?
Pumpkin chia seed bites are a fantastic optional add-on. Blend together canned pumpkin, chia seeds, and oats, then shape into bite-sized goodies. Your furry friend will go wild for them.
It’s a simple twist that makes your homemade treats even more special—not to mention healthy!
7. Peanut Butter and Carob Treats
Ready to whip up some yummy peanut butter and carob treats for your pup? First, let’s gather those simple ingredients and get into the swing of things with easy step-by-step instructions. Want to spice things up a bit? I’ll share some optional add-ons that’ll make your dog’s tail wag just a little faster.
Ingredients
When it comes to whipping up some tasty baked treats for your furry friend, the ingredient list can be simple yet satisfying.
These peanut butter and carob bites will have your pup wagging their tail with delight! So, grab your measuring cups and let’s get started on making these delicious goodies.
- 1 cup of whole wheat flour
- ½ cup of peanut butter (make sure it’s unsweetened, no xylitol)
- ¼ cup of carob powder
- ¼ cup of oats
- 1 large egg
- ½ cup of water (as needed)
And there you go! Just a few wholesome ingredients that you probably already have in your pantry.
A little bit of love, a dash of patience, and your four-legged friend is in for a treat they’ll absolutely adore.
Trust me, they’ll think you’re a culinary genius—who knew we could be treated like chefs in the kitchen, right?
Step by Step Instructions
1. Preheat your oven to 350°F (175°C). This gets the kitchen cozy and ready for some doggy goodness.
2. In a large mixing bowl, add 1 cup of whole wheat flour and 1/4 cup of carob powder. Whisk them together until they’re combined. You want to make sure your pup’s treats have a solid base.
3. In another bowl, mix together 1/2 cup of peanut butter and 1/4 cup of unsweetened applesauce. Use a spatula or wooden spoon to blend until smooth. You’re creating that mouth-watering, tasty goodness your dog will love.
4. Pour the peanut butter mixture into the flour mixture. Stir until fully combined. Don’t be shy, get in there. It should form a nice dough that’s not too sticky.
5. If the dough feels dry, add a splash (about 1-2 tablespoons) of water. Mix until you reach a playable dough consistency. Trust your instincts here—if it’s dry, hydration is key.
6. Lightly flour your countertop and turn the dough out. Roll it out to about 1/4 inch thick. If you’re feeling fancy, grab some cookie cutters and cut out fun shapes.
Remember, the more adorable the shape, the happier your pup will be!
7. Place the treats on a parchment-lined baking sheet, giving them a little space to breathe. Bake for 25–30 minutes, or until they’re firm and slightly golden brown.
Don’t wander too far during this time; your nose will thank you later!
8. Once baked, remove from the oven and let them cool on the pan for a few minutes before transferring them to a wire rack.
9. Cool completely before serving to your dog. This wait can feel like a lifetime for both you and your pup, but trust me, it’s worth it for those perfect, crunchy bites.
Optional Add-ons
After you’ve whipped up those delicious peanut butter and carob treats, why not take them to the next level?
Try mixing in some mashed banana or a dash of cinnamon for extra flavor. A sprinkle of crunchy oats can add a fun texture, too.
Your pup’s taste buds will dance with delight. Who knew dog treats could be this fancy, right?
Use Fresh Ingredients Always
Using fresh ingredients makes all the difference in your homemade dog treats. You wouldn’t want to snack on stale bread or wilted veggies, right?
Your pup deserves better. Fresh ingredients not only boost the flavor but also pack in nutrients, keeping your furry friend healthy and happy. Think ripe bananas, crunchy carrots, and smooth peanut butter—yummier, right?
Now, when you’re shopping, skip the processed stuff. Look for organic or locally sourced goodies if you can.
Trust me, your dog can tell. I’ve had a few “taste tests” where my dog turned up her nose at old flour. You’ll want those excited tail wags, not a curious sniff and a walk away.
Frequently Asked Questions
How Long Do These Homemade Treats Last?
Homemade dog treats typically last about one to two weeks at room temperature. If you refrigerate them, they can last up to three weeks. For longer storage, freeze them, and they’ll stay good for months!
Can I Substitute Ingredients in These Recipes?
Yes, you can substitute ingredients in these recipes! Just guarantee the alternatives are dog-safe and maintain similar textures and flavors. Experimenting can lead to exciting new treats your furry friend will love even more!
Are These Treats Safe for All Dog Breeds?
Not all treats are safe for every dog breed. You should consider your dog’s size, allergies, and dietary restrictions. Always consult your vet before introducing new treats to guarantee they’re safe for your furry friend.
How Can I Store the Baked Treats?
You can store the baked treats in an airtight container at room temperature for up to a week. For longer storage, freeze them in a zip-top bag, and they’ll stay fresh for a couple of months.
What Is the Best Way to Introduce New Treats to My Dog?
Start by offering a small piece of the new treat, observing your dog’s reaction. Gradually increase the quantity, mixing it with familiar favorites. Always praise and reward positive responses to create a positive association with the new treat.