Have you ever thought about whipping up some homemade treats for your pup? It’s a lot easier than you might think, and your dog will be over the moon. Imagine this: crunchy Peanut Butter Delights or chewy Sweet Potato Chews. Just think about the tail wags and happy barks. You can control the ingredients, and let’s face it, isn’t that a bonus? Let’s explore some recipes that will turn snack time into something truly special. Curious yet?
Why Homemade?
Why go homemade with your dog treats? Well, it’s all about knowing what’s going into those tasty bites. Using DIY dog treats means you control the ingredients, so there are no mystery additives or preservatives your pup mightn’t handle well.
Imagine whipping up a batch of peanut butter biscuits that you know are safe and healthy; it just feels good, right? Plus, you’ll save money instead of splurging on overpriced store brands that often don’t taste great either. And let’s be real—your dog deserves the best.
Making these treats can also be a fun bonding experience for you and your furry friend. Just picture your pup watching you intently as you mix, roll, and cut the dough. You might mess up a bit, but hey, it’s the thought that counts.
Treat Variations to Try
Now that you’re all in on the why behind homemade dog treats, let’s talk about some tail-wagging variations to try.
Ever thought about whipping up some Peanut Butter Delight or Carrot-Cinnamon Chews?
With flavors like Pumpkin-Peanut Butter Bites and Cheesy Bacon Biscuits on the list, your pup’s taste buds are in for a real treat.
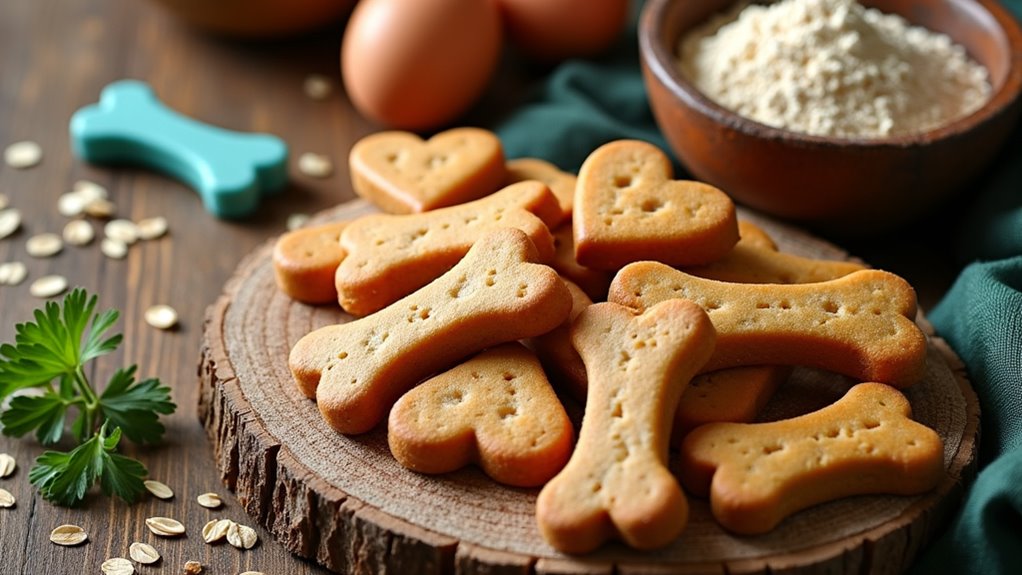
1. Peanut Butter Delight
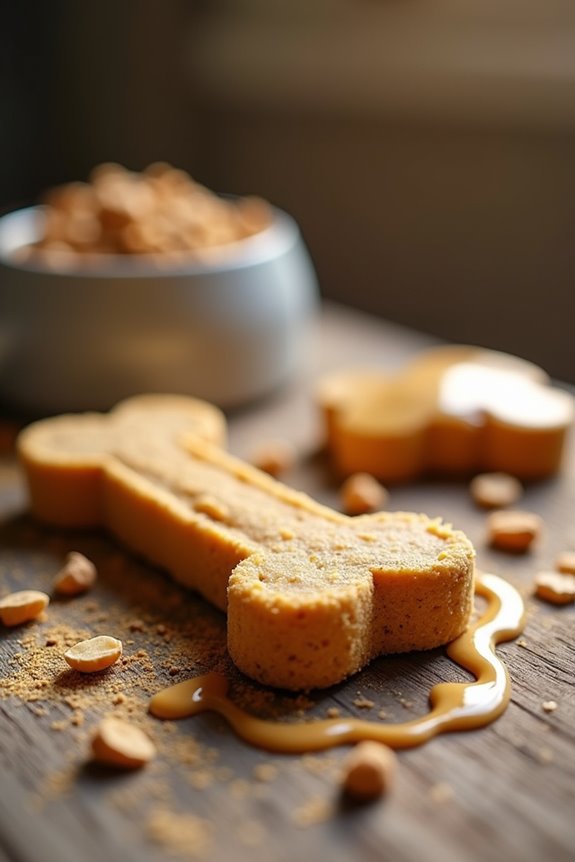
Let’s get into making some Peanut Butter Delight dog treats that’ll have your pup wagging their tail for sure. To whip these up, you’ll need a few simple ingredients, and I promise it’s easier than counting to three. Plus, I’ll share some fun optional add-ons to really make each batch special, because who doesn’t love a little variety? Proper dog food storage is essential to keep your pup’s treats fresh and tasty!
Ingredients
Creating homemade dog treats is like starting on an adventure with your furry friend. You get to choose every ingredient, ensuring it’s safe and healthy. Plus, nothing beats the wag of a tail when you’ve whipped up something delicious.
So, let’s delve into the ingredients for these Peanut Butter Delights, guaranteed to make your pup’s taste buds dance with joy.
- 1 cup natural peanut butter (make sure it’s xylitol-free; that stuff is a no-go)
- 1 cup whole wheat flour (or oat flour for a gluten-free twist)
- 1/2 cup rolled oats (not just for breakfast anymore)
- 1/4 cup unsweetened apple sauce (hello, healthy sweetness)
- 1 egg (because eggs make everything better)
- 1 tablespoon honey (optional, but who can resist a little sweetness)
- 1/4 cup water (enough to bring it all together)
With these simple yet wholesome ingredients, you’ll be well on your way to creating a treat that’ll have your dog begging for more.
Just imagine their little paws dancing with anticipation, or their adorable puppy eyes as they watch you whip up these delicious bites.
And hey, if you happen to munch on a crumb or two while preparing, don’t worry. This recipe is so tasty, you might find yourself sneaking a nibble (not that I’ve ever done that… maybe).
Happy baking!
Step by Step Instructions
- Preheat your oven to 350°F (175°C) so it’s nice and toasty when your treats are ready to go in.
- In a large mixing bowl, combine 1 cup of natural peanut butter (make sure it’s free of xylitol, as that’s toxic to dogs) and 1 cup of pumpkin puree. This will make a sticky, scrumptious base.
- Add in 2 ½ cups of whole wheat flour, making sure to sprinkle it in for minimal mess. You might need to use your hands soon, so don’t get too attached to neatness here.
- Slowly pour in 1 cup of low-sodium chicken broth. Mix it all together until a dough forms (get in there—your hands might be the best tool for this).
- If the dough is too crumbly, add a little extra broth, just a tablespoon at a time, until it holds together nicely. Remember, you want it firm but workable.
- Lightly flour your countertop and roll out the dough to about ¼ inch thick. This is where it starts to look like actual treats.
- Use cookie cutters to cut out fun shapes for your dog. Just think about how happy they’ll be; remember, your dog doesn’t care if the shapes resemble anything specific, as long as they’re tasty!
- Place the shaped treats on a baking sheet lined with parchment paper. Leave a little space between each treat; they need room to spread their paws (figuratively speaking).
- Bake in the preheated oven for 25-30 minutes, or until the edges are golden brown. As they bake, prepare for your kitchen to start smelling like an absolute dream.
- Remove from the oven and let the treats cool on a wire rack.
Cool completely before serving to your dog, unless you want to end up with one overly enthusiastic pup trying to steal a scalding treat out of your hands.
Optional Add-ons
If you’ve ever seen your dog’s eyes light up at the sight of peanut butter, you know it’s time to explore a delightful twist on your DIY treats.
Mix peanut butter into your dough; can you imagine the tail wags?
For a fun variation, toss in some mashed bananas or pumpkin puree.
Your pup won’t just taste the love; they’ll feel it!
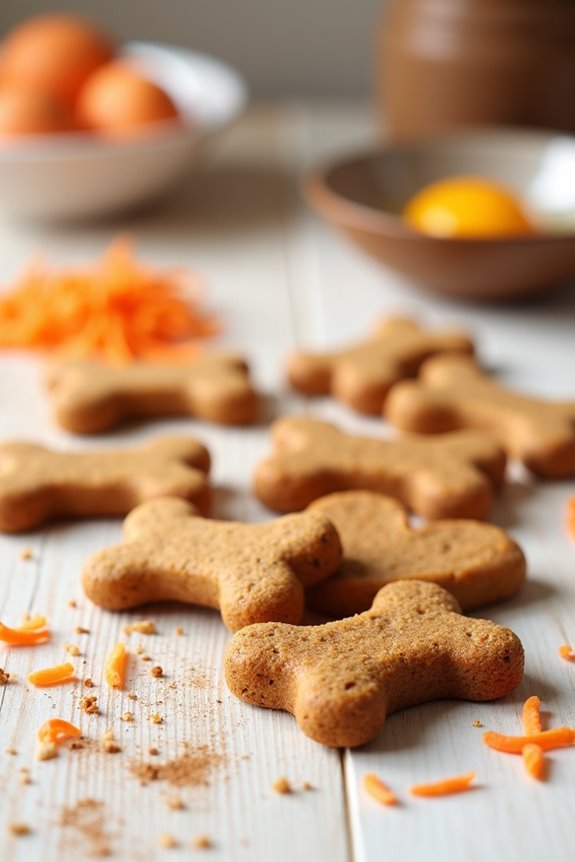
2. Carrot-Cinnamon Chews
Ready to whip up some tasty Carrot-Cinnamon Chews for your pup? You’ll want to gather a few fun ingredients and follow some easy steps to create these flavorful treats. Plus, we can chat about optional add-ons to really make your dog’s tail wag – who knew baking for a dog could be this much fun? Don’t forget to check out some premium dog baking equipment to elevate your homemade treat game!
Ingredients
Let’s plunge into the world of homemade dog treats with this delightful recipe for Carrot-Cinnamon Chews.
Trust me, your furry friend will thank you for these tasty, healthy bites. Plus, whipping them up is super simple and way better than anything you’ll find in a store.
So, gather your ingredients and let’s make your pup’s tail wag even more.
- 1 cup whole wheat flour
- 1/2 cup grated carrots (freshly shredded, not the canned stuff)
- 1/4 cup pure pumpkin puree (make sure it’s not the spiced pie filling, we’re not trying to win a baking competition here)
- 1/4 cup rolled oats
- 1/2 teaspoon ground cinnamon
- 1/3 cup water (or more, as needed for dough consistency)
See? Nothing too fancy, just some good old wholesome ingredients that are safe and nutritious for your dog.
Your kitchen will smell amazing while you mix it all together, and you might even find yourself sampling a bit of the dough — just be careful it doesn’t taste like anything too sweet.
Dogs have different taste buds after all.
Now, let’s get to baking those treats that will have your pooch begging for more!
Step by Step Instructions
1. Preheat your oven to 350°F (175°C) so it’s nice and hot when you’re ready to bake.
2. In a mixing bowl, combine 1 cup of whole wheat flour with ½ cup of finely grated carrots.
(Make sure those carrots are fresh; your pup will know the difference.)
3. In a separate bowl, blend ½ teaspoon of cinnamon with 1 egg.
Whisk it until well combined; your arm workout is just getting started.
4. Pour the wet mixture into the dry ingredients and mix until it forms a dough.
(Don’t be afraid to use your hands if it gets messy).
5. If the dough feels too crumbly, add a splash of water or broth until it holds together.
(Think of it as helping your dough find its purpose.)
6. Roll out the dough on a floured surface to about ¼ inch thick.
(Channel your inner pastry chef; it doesn’t have to be perfect but aim for even.)
7. Cut the dough into shapes using cookie cutters or a knife.
(Get creative, or just go for classic bone shapes—it’s all good.)
8. Place the treats on a greased or lined baking sheet, spacing them out a bit.
(They like their personal space, just like we do sometimes.)
9. Bake in the preheated oven for 25–30 minutes, or until the treats are golden brown.
(Keep an eye on them; burnt treats aren’t a happy ending.)
10. Once baked, remove them from the oven and let them cool completely.
(Trust me, your dog will be anxiously waiting; everyone loves a good surprise treat.)
Optional Add-ons
While you might think that dog treats can only be plain and boring, the truth is that with just a few optional add-ons, you can spice things up in the kitchen and make your pup’s taste buds dance.
Try adding grated carrots and a sprinkle of cinnamon for a twist.
Seriously, your dog will think they’re getting gourmet treats, and you’ll love the smiles!
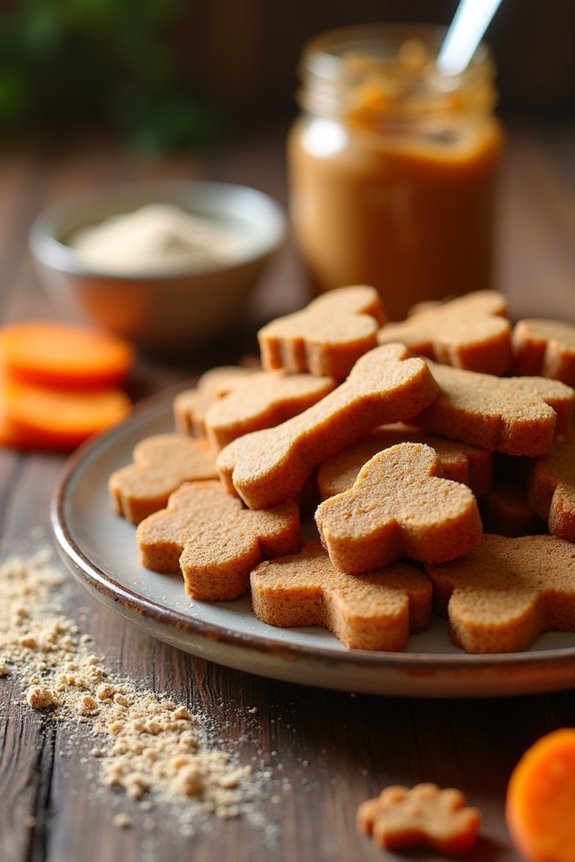
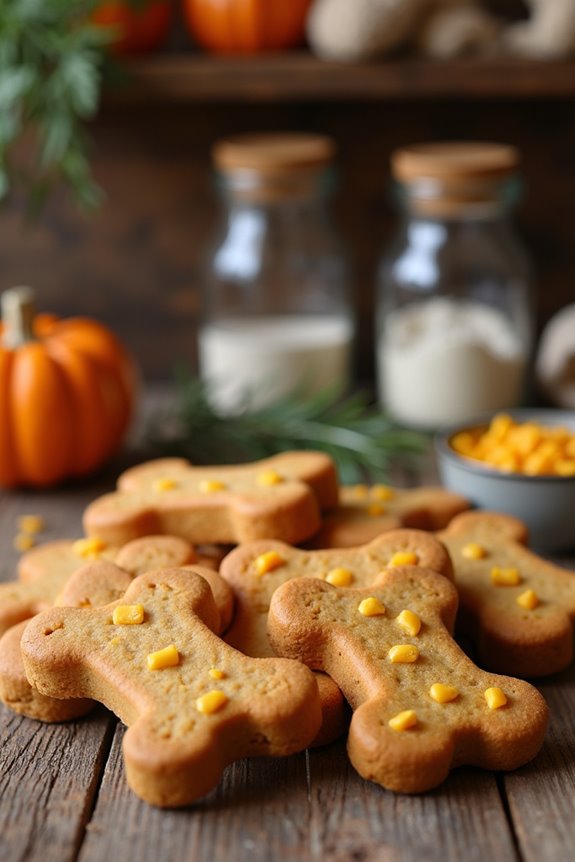
3. Pumpkin-Peanut Butter Bites
Ready to whip up some Pumpkin-Peanut Butter Bites for your pup? Let’s break down the essential ingredients you’ll need, so you’re not scrambling at the last minute. Plus, I’ll throw in a few optional add-ons that could take these treats to a whole new level—who knew we could make dog treats sound so exciting? Making your own treats with a premium dog treat maker is a fantastic way to ensure you know exactly what goes into your dog’s snacks.
Ingredients
When it comes to spoiling our furry friends, making treats at home can be a fun and fulfilling way to show that love.
Trust me, there’s nothing better than seeing a wagging tail in excitement.
For this delightful recipe, we’re keeping it simple with ingredients that you probably have in your pantry or can easily grab from the store.
So let’s whip up some pumpkin-peanut butter bites that aren’t just tasty, but also healthy for your pup.
- 1 cup of canned pumpkin (not the spiced pie filling)
- 1/2 cup of unsweetened peanut butter (make sure it doesn’t have xylitol)
- 1/2 cup of rolled oats
- 2 tablespoons of honey
- 1/2 cup of whole wheat flour (or oat flour for a gluten-free option)
- 1/4 cup of water (you might need a little more depending on the consistency)
These ingredients are all dog-friendly and make for a paw-sitively tasty treat.
Plus, I guarantee your kitchen will smell great—at least until your dog tries to take over the counter.
Who knew baking could turn into such a competitive sport?
Step by Step Instructions
- Preheat your oven to 350°F (175°C). Get that heat cranking while you gather your ingredients.
- In a mixing bowl, combine 1 cup of pumpkin puree, 1/2 cup of peanut butter, and 1 egg. Mix until everything is well blended and creamy (yes, feel free to channel your inner foodie).
- Add 1 1/2 cups of whole wheat flour to the mixture. Stir gently until just combined (Don’t overmix the dough—it should be slightly sticky).
- If the dough is too thick, you can add a tablespoon of water to loosen it up a bit. Just remember, we’re not making soup here.
- Lightly flour your countertop and roll out the dough to about 1/4 inch thick. You want it thick enough for shape but not so thick it could double as a doorstop.
- Use cookie cutters to cut out fun shapes, like bones or hearts (because your pup deserves fancy treats, right?). Be sure to place the shapes on a parchment-lined baking sheet.
- Bake in the preheated oven for 25–30 minutes, or until the treats are golden brown and have a delicious aroma wafting through your kitchen.
- Once they’re out of the oven, allow the treats to cool on a wire rack. This step is key; you don’t want to burn your furry friend’s tongue.
- Cool completely before serving to your dog. Watching their tail wag in excitement will make all of this baking worth it.
Optional Add-ons
If you’re looking to jazz up those basic pumpkin-peanut butter treats, you’re in for a delightful culinary adventure that’ll have your dog grinning from ear to ear.
Try adding a dash of cinnamon or a spoonful of honey for extra flavor. Even consider tossing in some shredded carrots or oat flakes.
Your furry friend won’t know what hit them.
Happy baking, you culinary wizard!
4. Cheesy Bacon Biscuits
Ready to whip up some Cheesy Bacon Biscuits for your pup? You’ll want to gather some tasty ingredients and follow a few straightforward steps—trust me, your furry friend will be wagging their tail in no time. Don’t forget, you can even throw in some optional add-ons to really make these treats shine. Using a dog treat maker machine can simplify the process and ensure your biscuits come out perfectly every time.
Ingredients
When it comes to making your pup’s taste buds dance, nothing beats the cheesy goodness and savory bacon in these treats. Seriously, your dog is going to think they’re winning the snack lottery.
Just imagine their wagging tails and those cute, drooly faces as they anticipate the goodness. So let’s gather what you need for these cheesy bacon biscuits—shopping for these ingredients will be a piece of cake. Or, you know, biscuits, in this case.
- 1 cup whole wheat flour
- 1/2 cup shredded cheddar cheese
- 1/4 cup cooked and crumbled bacon
- 1/4 cup unsweetened applesauce
- 1/4 cup chicken broth (low-sodium)
- 1 large egg
See? A simple list that won’t break the bank. Plus, most of these items you probably have in your pantry already.
And if you don’t have bacon, well, that’s just going to be a sad day for both you and your furry friend. Happy baking!
Step by Step Instructions
1. Preheat your oven to 350°F (175°C) and grab a baking sheet lined with parchment paper.
It’s time to get the whole house smelling like bacon paradise.
2. In a large mixing bowl, combine 2 cups of whole wheat flour and 1 cup of shredded cheese.
Go ahead, let your dog drool a little.
3. Crumble 1/2 cup of cooked bacon into the cheese and flour mixture.
Confirm those bits are nice and small—your pup deserves all the flavor.
4. In a separate bowl, whisk 1/2 cup of chicken broth and 1 beaten egg together.
Just think of this as your secret sauce that ties all the deliciousness.
5. Pour the broth mixture into the dry ingredients.
Mix until combined, but don’t overmix—it should be slightly sticky and come together like a slightly rebellious dough.
6. Turn the dough out onto a lightly floured surface.
Roll it out to about 1/4 inch thickness. If it gets a bit too sticky, add a sprinkle more flour. You want it smooth but not fighting you.
7. Use cookie cutters to cut out shapes—bone shapes, stars, or whatever you fancy.
Your dog’s not picky; they just want treats.
8. Place the cut-out shapes on your lined baking sheet, making sure to give them a little space.
They aren’t having a training session, after all.
9. Bake for 25–30 minutes, keeping an eye on them until they turn a lovely golden brown.
The aroma should be heavenly, but don’t let the nose control you; they’ve to actually bake.
10. Remove them from the oven and let the treats cool on a wire rack.
Trust me, your patience will pay off.
Cool completely before serving to your dog.
You might want to make a batch for yourself too (just kidding, but the smell really gets to you).
Enjoy!
Optional Add-ons
If your pup’s been giving you those big, pleading eyes every time you crack open the treat jar, why not mix things up a bit?
Try making cheesy bacon biscuits. Just combine whole wheat flour with shredded cheese, crumbled bacon, and a bit of water. Roll them out, cut into shapes, and bake.
Trust me, your dog won’t be able to resist!
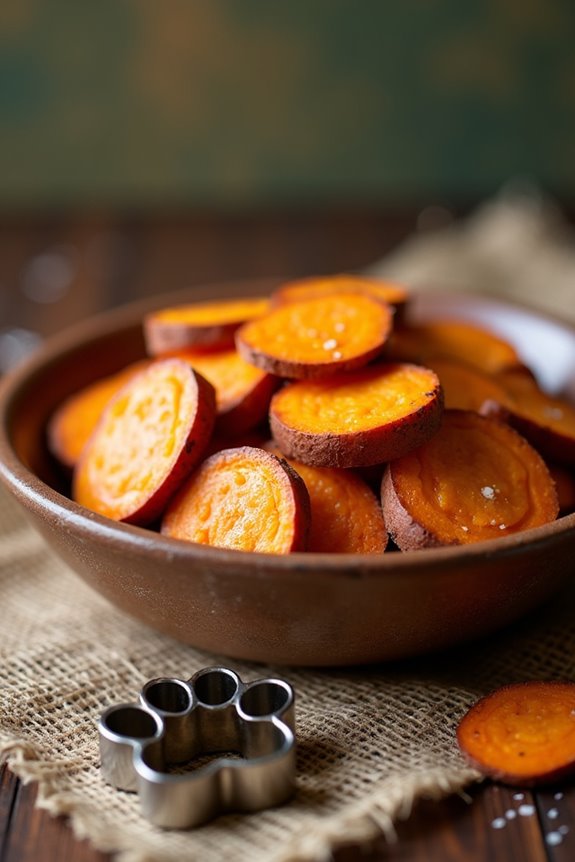
5. Sweet Potato Chews

Sweet potato chews are a fantastic way to spoil your pup while sneaking in some nutrition.
You might be surprised by how easy they’re to whip up—just a few ingredients and a bit of time, and you’ll have a tasty treat ready for your furry friend.
Plus, you can get creative with add-ons to make these chews even more special; who wouldn’t love a little twist on a classic?
Ingredients
When you think about spoiling your pup, nothing beats a homemade treat. Sweet potato chews aren’t just tasty; they’re packed with vitamins and nutrients that are great for your furry friend.
Plus, they’re so easy to make. Grab a few simple ingredients, and you’re on your way to creating something that will have your dog doing a happy dance – or at least a wagging tail.
Let’s gather what you need:
- 1 large sweet potato (about 200 grams, give or take)
- 1 tablespoon olive oil (for a little extra flavor)
- 1 teaspoon cinnamon (just a hint of spice, but totally optional)
- 1/4 cup rolled oats (to give them a nice texture)
- 1/2 cup whole wheat flour (makes them easy to shape)
Before you start, make sure you’ve got everything ready. It’s a fun process, and your kitchen will smell heavenly – just don’t eat all the treats before your pup gets a chance.
Balance is key, right? Now, let’s whip these up and make our best friends happy!
Step by Step Instructions
- Preheat your oven to 250°F (120°C). Yes, that’s low and slow—trust me, your dog will thank you.
- Wash and peel 2 large sweet potatoes. Give them a gentle scrub; you want them clean but no need to get too obsessive.
- Cut the sweet potatoes into thin slices (about 1/4 inch thick). Try to make them as uniform as possible so they cook evenly—don’t worry if they’re not perfect, your dog won’t judge you.
- Arrange the sweet potato slices on a baking sheet lined with parchment paper. Keep them spaced out for best results; nobody likes a potato stuck together.
- Bake for 2–3 hours, flipping the slices halfway through. You’re looking for them to be dried out but still chewy—check around the 1.5-hour mark.
- Once they’re ready, remove them from the oven and let them cool. They’ll crisp up a bit as they cool—just wait until you see your pup’s face light up.
- Serve only after they’ve cooled completely to avoid any puppy surprises. Enjoy the tail wags and happy dances!
Optional Add-ons
While you might think sweet potatoes are already perfect on their own, there’s always room to mix things up and create even more delicious variations your pup will adore.
How about adding a bit of peanut butter or even some cinnamon for extra flavor?
Just bake those sweet potato slices a little longer, and watch your dog go wild over these irresistible treats. It’s a game changer.
6. Savory Chicken and Rice Treats
If you’re looking to impress your pup with something tasty, savory chicken and rice treats are a fantastic choice. To whip these up, you’ll need a few simple ingredients and follow some easy steps that’ll have your kitchen smelling like a gourmet dog treat factory. Plus, we’ll explore some optional add-ons that can give these snacks an extra zing, making your furry friend wag their tail in delight.
Ingredients
Making homemade treats for your pup isn’t only fun, but it’s also a great way to show your furry friend just how much you care.
Plus, you can control exactly what goes into these tasty snacks. The savory chicken and rice treats are a fantastic option, bursting with flavor and easy on your dog’s tummy.
Ready to whip up some yummy goodness? Here’s what you’ll need:
- 1 cup cooked, shredded chicken (no seasoning, please)
- 1 cup cooked brown rice
- 1/2 cup unsweetened applesauce
- 1/4 cup peanut butter (make sure it’s xylitol-free)
- 1 egg, beaten
- 1 cup oat flour (you can easily make this by blending oats)
- 1/2 cup chicken broth (low-sodium is best)
Gather these ingredients, and let’s get cooking.
Your dog is going to think you’re the best chef in the world—sorry, Gordon Ramsay!
Step by Step Instructions
1. Preheat your oven to 350°F (175°C) so it’s nice and warm when your treats are ready to bake.
2. In a medium pot, boil about 1 cup of water.
3. Once boiling, add 1 cup of rice. Stir it once so it doesn’t clump, then cover and let it simmer for about 15 minutes.
(Set a timer—you don’t want to forget about it and end up with rice goo!)
4. While the rice is cooking, chop up 1 cup of cooked chicken into small pieces. You can use leftovers or store-bought rotisserie chicken (We all love a good shortcut, right?).
5. In a large mixing bowl, combine the cooked rice, chopped chicken, 1 beaten egg, 2 cups of whole wheat flour, and 1 tablespoon of chicken broth.
6. Mix everything together until well combined (It should be sticky, but not soupy).
If it’s too dry, add a little more chicken broth, a spoonful at a time.
7. Once mixed, roll the dough out on a floured surface to about ½ inch thick (Remember, they don’t have to be perfect, they’re for your pup, not a doggy gourmet competition!).
8. Use cookie cutters to cut out shapes. If you don’t have cutters, just cut them into squares or rectangles with a knife.
9. Place the cut treats on a baking sheet lined with parchment paper, making sure they’re not touching each other.
10. Bake in the preheated oven for 25-30 minutes, or until they’re golden brown (Your kitchen might smell amazing; your dog will be very curious!).
11. Remove the treats from the oven and let them cool on a wire rack.
12. Cool completely before serving to your dog.
(Trust me, they’ll have to be completely cool or you might end up with some disappointed panting pups and your fingers too).
Optional Add-ons
While the basic chicken and rice treats are sure to win your pup’s heart, why not take it up a notch with some optional add-ins?
You could mix in a spoonful of peanut butter for extra flavor or a sprinkle of diced veggies for crunch.
Imagine their surprise when they taste those savory surprises — they’ll think they’re in doggy heaven.
Trust me, it’s worth it!
7. Liver and Parsley Biscuits
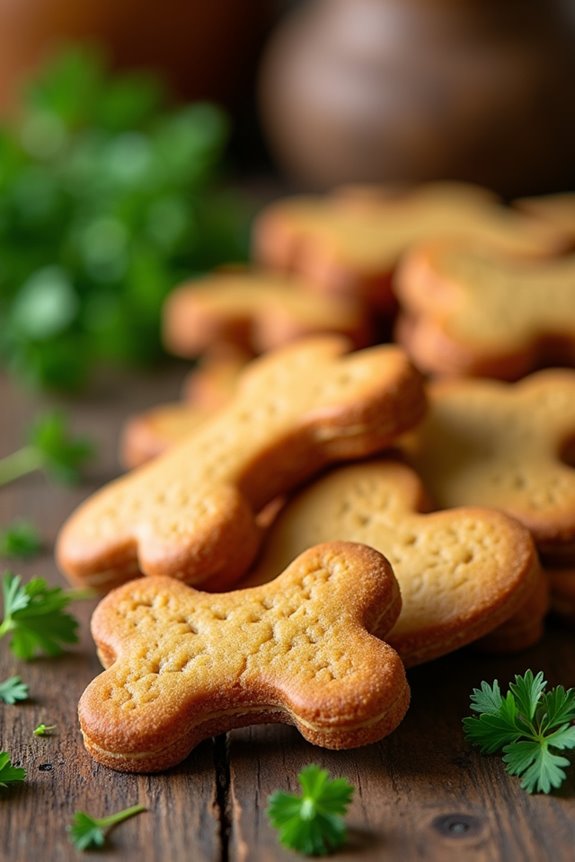
Let’s whip up some liver and parsley biscuits for your pup. You’ll love how simple the ingredients are, and I’m sure your dog will agree—they’ll be wagging their tail with excitement. Plus, making treats at home can be a fun way to bond with your pet using a pet treat maker machine. So, grab your apron and let’s get into those step-by-step instructions, shall we?
Ingredients
When it comes to whipping up some tasty treats for your four-legged friend, you want to make sure you’re using dog-safe ingredients they’ll love.
Let’s get right into it with a simple list of what you’ll need for those delightful Liver and Parsley Biscuits. Your pup will think you’ve turned into a gourmet chef, and honestly, who knew a little liver could make such magic happen?
Alright, grab your apron and let’s gather these goodies!
- 1 cup liver (cooked and pureed, make sure it’s plain without any seasoning)
- 1/2 cup fresh parsley (chopped, this not only adds flavor but is good for their breath)
- 1 cup whole wheat flour (or oat flour if your pup is gluten-sensitive)
- 1/4 cup rolled oats (these add a nice texture for those busy chew sessions)
- 1/4 cup low-sodium chicken broth (to keep it flavorful and moist, just paw-some!)
- 1 egg (a little binder magic to hold it all together)
- Optional: a pinch of turmeric (for its anti-inflammatory benefits; you can skip this if you’d like, but why not sprinkle in some health?)
If only cooking for ourselves were this simple, right? These ingredients are pretty straightforward, and you can find them all at your local grocery store.
Just remember to keep an eye on the liver—there’s a reason it’s a dog delicacy, and you may even find yourself giving into the temptation of a little snack along the way.
Just be careful not to let your pup catch you licking the spoon; trust me, the look they give you can be quite fierce.
Step by Step Instructions
- Preheat your oven to 350°F (175°C) while you get everything else ready.
- Gather your ingredients: 1 cup of liver (chopped), 1 cup of whole wheat flour, 1/4 cup of rolled oats, 1/4 cup of fresh parsley (finely chopped), 1 egg, and 1/2 cup of water.
- In a blender, blend the liver until it reaches a smooth, creamy consistency. This will be your flavor powerhouse (and it might be a little stinky, but your pup will love it).
- In a large mixing bowl, combine the blended liver, whole wheat flour, rolled oats, chopped parsley, and the egg.
- Slowly add water, mixing until a dough forms (don’t be afraid to get your hands in there—it’s messy, but that’s half the fun).
- If the dough is too sticky, sprinkle a bit more flour until it’s manageable (you want it to hold its shape when you roll it out).
- Roll out the dough on a floured surface to about 1/4 inch thick.
- Use cookie cutters to create fun shapes or just slice into squares with a knife (simple is sometimes better, right?).
- Place the shapes on a baking sheet lined with parchment paper, making sure they’ve some space between them.
- Bake in the oven for 25-30 minutes, or until they’re golden brown and firm to the touch.
- Remove from the oven and let the treats cool on the baking sheet for a few minutes before transferring them to a wire rack.
- Cool completely before serving to your dog – they’ll appreciate the wait (and you might need to resist the urge to taste-test yourself).
Enjoy treating your furry friend with these delightful homemade biscuits!
Optional Add-ons
Once those delicious liver and parsley biscuits are baking away, why not experiment a little?
You could mix in some sweet potato for extra flavor or sprinkle in a pinch of cinnamon—just a pinch, promise. Your pup won’t know what hit them.
Try adding some grated cheese, too. Who wouldn’t want cheesy liver goodness?
Experiment and watch your furry friend go wild!
Use Fresh, High-Quality Ingredients
Using fresh, high-quality ingredients can make all the difference in your DIY dog treats. Imagine your pup’s tail wagging faster than a speeding car when they catch a whiff of those treats. You wouldn’t want to eat stale cookies, right? So why serve your furry friend anything less? Grab whole grains, fresh fruits, and natural peanut butter—nothing funky or artificial hanging out in your pantry.
When you mix in fresh carrots or sweet potatoes, your dog’s eyes light up like a holiday tree. And let’s be honest, they’ll feel so pampered you might regret not making these treats sooner.
Remember to check labels for hidden sugars or additives; sometimes you think it’s wholesome, but it’s really a sneaky imposter.
Frequently Asked Questions
How Long Do Homemade Dog Treats Last?
Homemade dog treats generally last about one week at room temperature, but they can last up to two weeks in the fridge. For longer storage, consider freezing them for up to three months.
Can I Use Substitute Ingredients for Allergies?
Yes, you can definitely use substitute ingredients for allergies. Just make sure to choose safe alternatives that won’t trigger your dog’s sensitivities. Always test a small batch first to guarantee your pup’s tummy handles it well.
What Common Ingredients Should I Avoid for Dogs?
You should avoid common ingredients like chocolate, grapes, onions, garlic, and avocados. These can be toxic to dogs. Always check for allergens and consult your vet before introducing new foods into your pup’s diet.
How Do I Store Homemade Dog Treats?
You should store homemade dog treats in an airtight container, either in the fridge for up to a week or freeze them for longer shelf life. That way, your pup’ll always enjoy fresh snacks!
Are These Treats Suitable for All Dog Breeds?
Yes, these treats can be suitable for all dog breeds, but it’s important to evaluate any specific dietary needs or restrictions your dog may have. Always consult your vet if you’re unsure about ingredients.