So, your dog’s birthday is coming up, huh? That’s the perfect excuse for a fun photoshoot. With a few creative ideas, you can capture all those wagging tails and goofy grins. Ever thought about using colorful DIY decorations or maybe some playful props? It’s all about showcasing your pup’s personality while making those memories last. Ready to get your pup’s celebration started? Let’s check out some pawsitively delightful ideas that’ll have you snapping away in no time.
Why Homemade?
When it comes to celebrating your pup’s special day, homemade touches can really make a big difference. Imagine this: a dog birthday photoshoot that captures your furry friend in the cutest party hats and props you made yourself. You can set the scene in your backyard or living room, adding homemade decorations like paw print banners or colorful balloons.
Every little detail adds character and warmth. You might think, “Can I really do this?” Absolutely! Just grab some craft supplies, and let your creativity run wild. A great addition to the celebration is a delicious dog-friendly cake, which is not only a sweet treat but also provides essential nutrients if made with specific dog-friendly ingredients. Many recipes include wholesome options like oat flour that are great for canines. Additionally, creating a festive atmosphere with themed decorations can elevate the joy of the occasion. Trust me, your pup won’t care if the birthday hat looks a little lopsided—those charming flaws are what make it special. Plus, when your dog poses for those photos, you’ll cherish the memories for years.
Treat Preparation Guide
When it comes to your pup’s birthday, the treats can really make the day special.
Imagine whipping up some Peanut Butter Dog Biscuits or those delightful Pumpkin Carrot Dog Treats — your furry friend will think you’re a culinary genius. Not only do pumpkin and oats provide a nutritious boost, but they also help create wholesome and tasty treats your dog will love. Additionally, don’t forget to include some tasty homemade banana dog treats made with love, as they are a great source of natural sweetness for your dog. You can also surprise your pup with some homemade cheese dog biscuits that are not only easy to make but also incredibly delicious. For a special twist, consider adding some delicious sweet potato dog treats to the mix, as they are packed with nutrients and flavor that dogs adore.
1. Peanut Butter Dog Biscuits
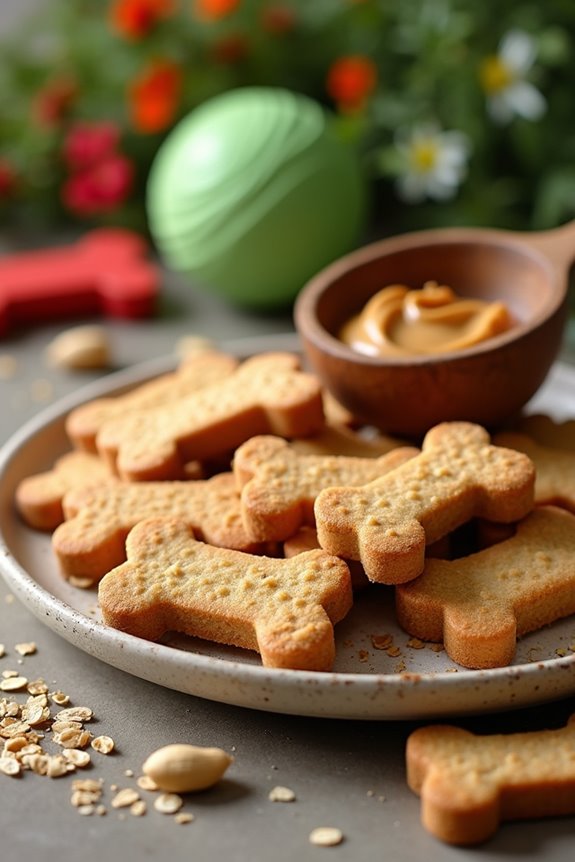
Ready to whip up some tail-wagging peanut butter dog biscuits? You’ll need just a few simple ingredients to get started, and I promise, the process is easier than it sounds. Plus, if you want to jazz things up, I’ll share some fun optional add-ons that’ll make your pup’s birthday extra special. Peanut butter apple sauce treats are also a delightful option that your furry friend will love! You can even get creative with homemade peanut butter and banana dog treats that your furry friend will love!
Ingredients
When it comes to making special treats for your pup, peanut butter dog biscuits are a total crowd-pleaser. I mean, who doesn’t love the smell of fresh-baked goodies wafting through the house?
You’ll be amazed at how easy these biscuits are to whip up, and they’ll definitely make your dog’s birthday extra special. Plus, you probably have most of these ingredients hanging around in your pantry already. So, roll up your sleeves and let’s get started.
- 1 cup whole wheat flour (or oat flour if your pup has a gluten sensitivity)
- 1/2 cup peanut butter (make sure it’s dog-safe, without xylitol)
- 1/4 cup chicken or beef broth (low sodium is best)
- 1 egg (large and fluffy, just like your dog when they’re excited)
- 1 tablespoon honey (it’s okay to share a little sweetness)
- 1/2 teaspoon baking powder (this helps them rise; we all love a good rise, right?)
And there you have it! Six simple ingredients that will have your adventure buddy wagging their tail with delight.
Just think about it, each time they crunch into one of these biscuits, you’ll be the hero of doggy birthday treats.
And if they go a little wild for the treats, just remember, it’s all part of the celebration. Voilà! Happy baking!
Step by Step Instructions
- Preheat your oven to 350°F (175°C). It’s time to get that kitchen warm and inviting for some doggie treats.
- In a mixing bowl, combine 1 cup of peanut butter and 2 cups of whole wheat flour. Get ready to mix, mix, mix until well combined.
- Pour in 1/2 cup of water. It should start looking like a dough—kind of sticky but manageable.
- Knead the dough on a floured surface for about 5 minutes. Yes, you can totally pretend you’re a professional baker while doing this.
- Roll out the dough until it’s about 1/4 inch thick. If it gets a little too sticky, don’t panic; just sprinkle a little more flour.
- Use cookie cutters to cut out fun shapes (like bones or paw prints). Remember, it’s all about making your pup’s day special.
- Place the cutouts on a parchment-lined baking sheet. Try not to eat any of the dough—though, I can’t blame you for being tempted.
- Bake the biscuits for 25–30 minutes, or until they’re golden brown. Keep an eye on them; no one likes a burnt treat.
- Remove the biscuits from the oven and let them cool on a wire rack. The smell in your kitchen will be amazing, but be patient.
- Cool completely before serving to your dog. Trust me, a happy, tail-wagging pup is the best reward.
Optional Add-ons
If you’re looking to spice up those peanut butter dog biscuits, there are plenty of optional add-ons that can elevate your treats from ordinary to extraordinary.
Think crushed oats for texture, banana puree for sweetness, or even bacon bits for that gourmet flair.
Your pup’s taste buds will thank you, and you might just find yourself sneaking a nibble too—no judgment here, right?
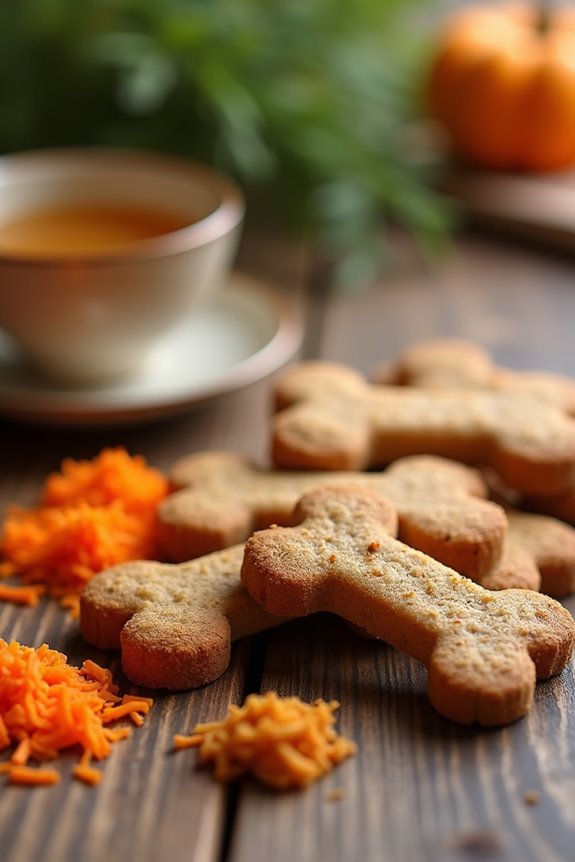
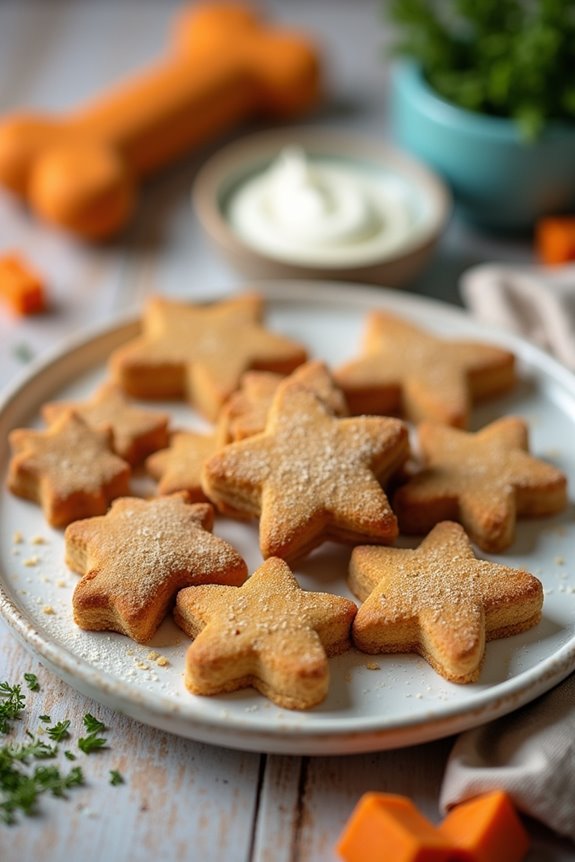
2. Pumpkin Carrot Dog Treats
Let’s whip up some Pumpkin Carrot Dog Treats that’ll have your pup wagging their tail in delight. You’ll need a few key ingredients, and I’ll walk you through step-by-step instructions to make it as easy as pie—or should I say, easy as pumpkin spice? Plus, if you’re feeling adventurous, I’ve got some optional add-ons to really elevate those treats.
Ingredients
Making some delicious pumpkin carrot dog treats couldn’t be easier. Your furry friend will drool with anticipation as the heavenly aroma fills your kitchen.
Here’s what you’ll need to whip up these tasty delights that are perfect for your dog’s birthday photoshoot or just for spoiling them a little extra.
- 1 cup of pure pumpkin puree (make sure it’s not the spiced pie mix)
- 1 cup of finely grated carrots (about 2 medium carrots)
- 1 and 1/2 cups of whole wheat flour (or oat flour for a gluten-free option)
- 1/4 cup of rolled oats (the kind you use for breakfast, not those fancy Insta smoothies)
- 1/4 cup of unsweetened applesauce (it’s like a sweet hug from an apple)
- 1 large egg (the stick-together superstar)
These simple ingredients are easy to find at your local grocery store, so don’t panic.
And your dog? They’ll be thrilled with these all-natural goodies—just remember to snap a few pics of them licking their chops.
Step by Step Instructions
1. Preheat your oven to 350°F (175°C) so it’s nice and toasty when your treats are ready to bake.
2. In a large mixing bowl, combine 1 cup of pure pumpkin puree and 1 cup of grated carrots. This is where the magic begins—smells like autumn already, right?
3. Add 2 cups of whole wheat flour to the mixture. (You might want to wear an apron unless you enjoy a little flour explosion.)
4. Sprinkle in 1/4 cup of rolled oats and 1/4 teaspoon of cinnamon. The oats give a nice crunch, and the cinnamon? Well, it makes everything smell divine.
5. Pour in 1 egg and 1/4 cup of chicken or vegetable broth. This will help bind it all together—don’t skimp on the broth; we want those doggie taste buds dancing.
6. Mix everything together with a spoon or your hands until it forms a dough. (If you opt for the hands method, prepare for some seriously sticky fingers!)
7. Roll out the dough on a lightly floured surface to about 1/4 inch thick. It’s time to get those rolling pin skills in action.
8. Use cookie cutters in fun shapes to cut out the treats. Bone shapes? Hearts? Go crazy—your pup won’t care, they’ll just be excited about what’s coming.
9. Place the cut-out treats on a baking sheet lined with parchment paper. Give them a little space because they’ll spread slightly while baking.
10. Bake for 25–30 minutes, or until the edges turn golden brown. Keep an eye on them; we don’t want burnt treats—yikes!
11. Remove the treats from the oven and let them cool completely on a wire rack.
(This is the hardest part—watching your pup give you those sad, puppy-dog eyes while they wait.)
12. Once cooled, store the treats in an airtight container or share them with your furry friend.
Cool completely before serving to your dog. They’ll think you’re a baking genius.
Optional Add-ons
Looking to take those pumpkin carrot dog treats up a notch? Try adding peanut butter or a sprinkle of cinnamon for extra flavor.
Mixing in some mashed banana can also make them pup-approved. Just remember, while you’re stirring away, your dog’s probably giving you that “How much longer?” face.
Keep it simple, and enjoy those delightful moments together. Your dog deserves it.
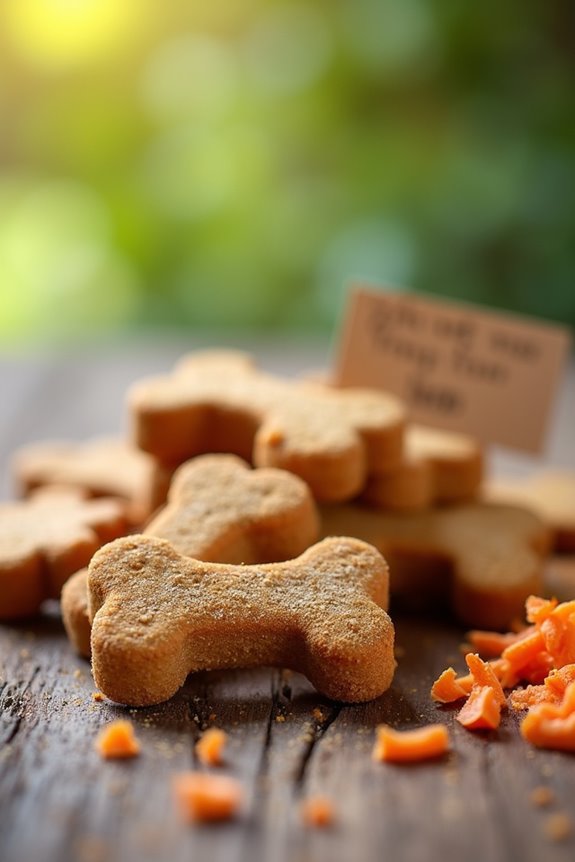
3. Chicken and Sweet Potato Treats
Get ready to whip up some tasty Chicken and Sweet Potato Treats that’ll have your pup wagging their tail like crazy. You’ll only need a few simple ingredients, and I promise you, it’s just as easy as it sounds. Plus, I’ll share step by step instructions and even some fun add-ons to make the treats extra special—because who doesn’t want a happy pup on their birthday?
Ingredients
Making homemade treats for your pup can be a fun way to celebrate their special day. Plus, there’s nothing quite like the look on their face when you whip up something tasty just for them.
So, let’s explore the ingredients you’ll need for these yummy Chicken and Sweet Potato treats. They’ll have tails wagging and tongues drooling in no time.
- 1 cup of cooked, shredded chicken (remove any skin or bones)
- 1 cup of mashed sweet potatoes (cooked and cooled, please)
- 1/2 cup of oat flour (or you can blend rolled oats until fine)
- 1/4 cup of chicken broth (low-sodium is best)
- 1 tablespoon of coconut oil (melted, for that nice, tasty touch)
And there you have it! These simple ingredients aren’t only safe but also delicious, making them perfect for your dog’s birthday photoshoot—and trust me, nothing beats a happy pup in their party hat munching away on homemade goodies.
What could be better? Just imagine those puppy eyes looking up at you, full of love and gratitude. How cute is that?
Step by Step Instructions
- Preheat your oven to 350°F (175°C) to get it nice and toasty.
- Gather two chicken breasts and one medium sweet potato.
- Boil a pot of water and add the chicken breasts. Let them cook for about 15-20 minutes, or until they’re no longer pink inside. (You can peek if you like.)
- While the chicken is cooking, wash and peel the sweet potato. Chop it into small cubes.
- In a separate pot, add the sweet potato cubes and boil them for about 10-15 minutes, until they’re tender. You can test by poking one with a fork.
- Once cooked, drain the sweet potato and mash it with a fork.
- When the chicken is cooked, remove it from the pot and let it cool for a few minutes before shredding it into small pieces (this is the part where you can pretend you’re a chef mastering your shredding skills).
- In a mixing bowl, combine the shredded chicken and mashed sweet potato.
- Mix in one cup of whole wheat flour and one beaten egg, then stir until the dough forms. (It’ll be a bit sticky, don’t worry.)
- Dust a clean surface with some extra flour, then roll out the dough to about ½ inch thick.
- Use cookie cutters to create fun shapes. Any shape will do—because let’s face it, it’s all about the doggie cuteness factor.
- Arrange the treats on a parchment-lined baking sheet, spacing them out a bit.
- Bake for 25–30 minutes, or until they turn golden brown (time for some happy dance moves).
- Allow the treats to cool completely before serving them to your dog. (Trust me, they’ll be in doggy heaven.)
Optional Add-ons
While you’ve got those chicken and sweet potato treats baking, why not consider some optional add-ons that can take things up a notch?
Maybe sprinkle some parsley on top for a touch of color—or even mix in peanut butter for extra flavor.
Your pup deserves the best, right? Trust me, they won’t complain.
Plus, those treats will look adorable in your photos.
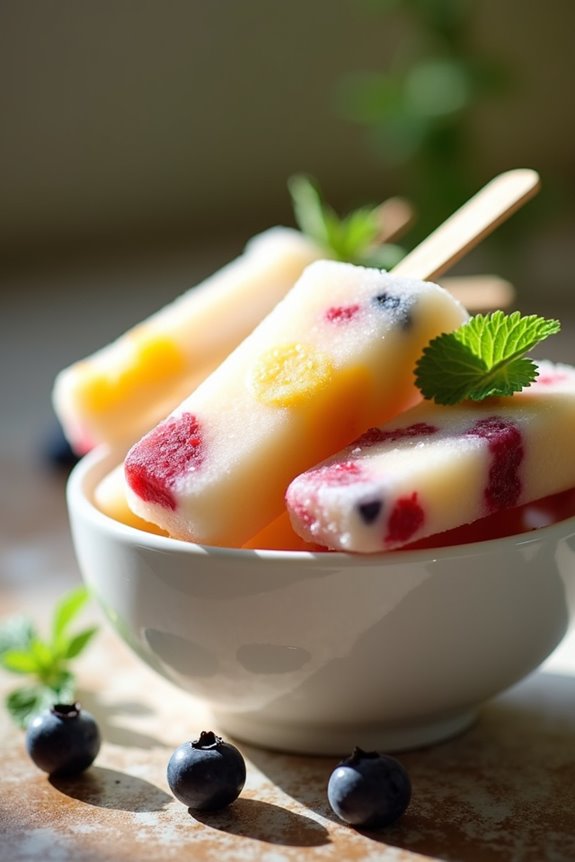
4. Fruity Yogurt Dog Popsicles
Ready to whip up some tasty Fruity Yogurt Dog Popsicles? You’ll need just a few simple ingredients, and I’ll guide you through the process step by step, making it easy and fun.
Plus, we’ll chat about some optional add-ons that’ll make your pup’s birthday treat even more special, because who doesn’t love a little extra flair?
Ingredients
Getting ready to spoil your pup with some fruity yogurt pops? It’s a super fun and easy way to celebrate your dog’s big day. Plus, popsicles are invigorating and perfect for those tail-wagging summer afternoons.
So, gather up these simple ingredients, and let’s whip up something special for your furry friend.
- 2 cups plain yogurt (make sure it’s unsweetened and doesn’t have any artificial sweeteners)
- 1 ripe banana, mashed (makes it creamy and delicious)
- 1 cup fresh strawberries, chopped (or blueberries, if your dog loves those more)
- 1 tablespoon honey (this is optional, but it adds a touch of sweetness)
- 1/2 cup water (to blend everything smoothly)
Just think about how happy those little taste buds will be!
Step by Step Instructions
- Gather all your ingredients: plain yogurt, fresh fruit (like bananas, strawberries, or blueberries), and water. Make sure everything is dog-friendly and safe for your furry friend.
- Cut the fruit into small, bite-sized pieces. Think of it like prepping a salad, but for your pup.
- In a mixing bowl, combine the yogurt and water. Use about a cup of yogurt and a splash of water to make it easier to pour.
- Whisk the mixture until smooth, ensuring there are no lumps. This is where your arm gets a workout, so use those biceps.
- Fold in the chopped fruit gently. You want it mixed well, but don’t go ninja on it—too much mixing can mush the fruit up completely.
- Pour the mixture into silicone molds or ice cube trays. Fill them about three-quarters full to allow for expansion as they freeze.
- Place the molds in the freezer and let them chill for at least 4-6 hours, or until they’re solid. This is a great time to binge-watch that show you’ve been meaning to catch up on.
- Once frozen, carefully remove the popsicles from the molds. A little warm water on the outside of the mold can help them slip out easier.
- Serve the popsicles to your dog in a shady spot. You might want to have a towel handy—it can get a bit messy.
Cool completely before serving to your dog. Enjoy watching your pup’s tail wag in delight.
Optional Add-ons
While your fruity yogurt dog popsicles are already a delightful treat, you can easily jazz them up with some optional add-ons that’ll make your pup’s tail wag even harder.
Think about tossing in a few bits of fresh fruit or a drizzle of honey.
You could even sprinkle some dog-safe peanut butter on top.
Your pup deserves the best, right?
5. Peanut Butter Banana Delights
Ready to whip up some Peanut Butter Banana Delights that your pup will go nuts for? You’ll just need a few simple ingredients and some easy step-by-step instructions to create these yummy treats. And hey, if you’re feeling adventurous, I’ll share some optional add-ons to make them even more special!
Ingredients
When it comes to treating your furry friend, nothing beats the joy of whipping up some homemade Peanut Butter Banana Delights.
Trust me, your dog will appreciate the effort—and those wagging tails are hard to resist. Plus, the best part? Most of these ingredients are already in your pantry.
So let’s dive right in and gather what you need to create these simple yet delicious treats.
- 1 ripe banana, mashed
- ½ cup peanut butter (make sure it’s xylitol-free)
- 1 cup whole wheat flour (or oat flour for a gluten-free option)
- 1 egg
- ¼ cup rolled oats
- A splash of water (just enough to moisten the mixture)
There you have it—the essentials for whipping up those delightful treats.
You might be wondering, can I substitute this or that? Well, you can get creative, but the basic recipe works wonders on its own.
Dogs, as we understand, have their own set of tastes, and sometimes, they’re just as picky as we are.
Step by Step Instructions
- Preheat your oven to 350°F (175°C), giving it a few minutes to get nice and toasty, which is what every good treat deserves.
- In a mixing bowl, mash 2 ripe bananas until smooth; it’s okay if a few lumps remain—your dog won’t judge the presentation.
- Add 1 cup of natural peanut butter (make sure it’s dog-safe, no xylitol) and 1 tablespoon of honey to the bananas.
- Stir the mixture well until combined—it should be thick and creamy, not running away from you.
- Gradually add 1 ½ cups of whole wheat flour, mixing until just incorporated (don’t overmix; we’re not trying to make a cake here).
- If the dough feels too sticky, sprinkle in a bit more flour, until it holds together nicely.
- Line a baking sheet with parchment paper for easy cleanup—trust me, your future self will be grateful.
- Scoop small spoonfuls of dough and place them on the baking sheet, giving them a little space to spread out as they bake.
- Flatten each treat slightly with the back of a fork for a cute design—your dog mightn’t care, but it’s all about the Instagram-worthy aesthetics, right?
- Bake in the preheated oven for 15–20 minutes until golden brown. You want them to look crunchy but not overdone—like your favorite snack from the store.
- Remove from the oven and let them cool completely on a wire rack.
- Cool completely before serving to your dog—those little pups will be enthusiastic waiting, tails wagging, but hot treats are a no-go.
Optional Add-ons
After whipping up those Peanut Butter Banana Delights, you might be wondering, what else can I sprinkle on top of this doggy goodness?
Try adding a drizzle of yogurt or a sprinkle of crushed dog-safe treats for a fancy twist. Your pup will love it!
Just remember, they won’t judge your efforts—trust me, mine certainly don’t when I’m baking.
Happy treat-making!
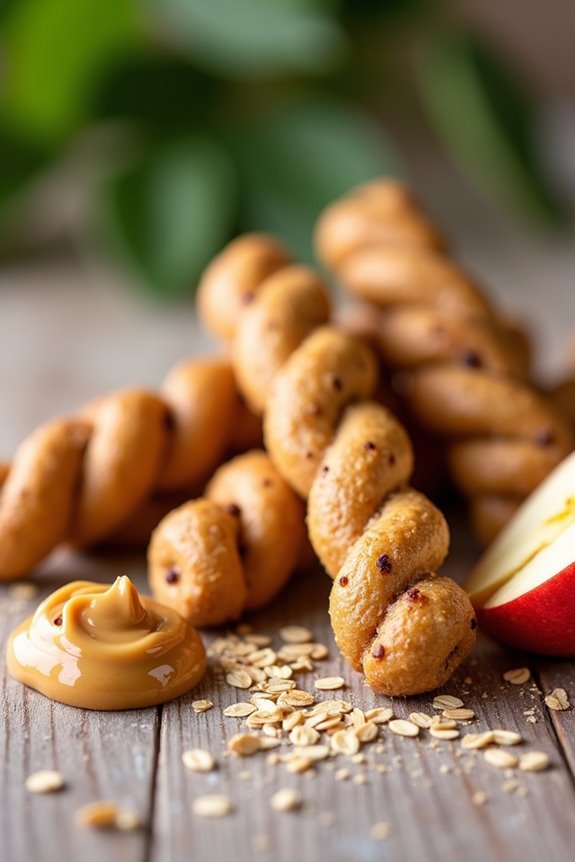
6. Peanut Butter Apple Twists
Ready to whip up some Peanut Butter Apple Twists for your pup’s special day? You’ll need just a few simple ingredients and some easy-to-follow steps—don’t worry, you’ve got this. And if you’re feeling adventurous, I’ll throw in a couple of tasty add-ons to really wow your furry friend.
Ingredients
If you’re looking to whip up a tasty treat for your pup’s birthday, these Peanut Butter Apple Twists are a perfect choice. They’re not only fun to make, but your dog will go bananas for them. Plus, they’re crafted from safe and healthy ingredients, so you can feel good about your furry friend’s birthday snack.
So, let’s gather what you need for these delightful treats.
- 1 cup whole wheat flour
- 1/2 cup creamy peanut butter (make sure it’s xylitol-free)
- 1/2 cup unsweetened applesauce
- 1/4 cup shredded carrot (for a little crunch and color)
- 1/2 teaspoon cinnamon (dogs love the smell)
And that’s it! Just these simple ingredients come together to create something your dog will absolutely flip over.
So simple, right? Now, if only I could figure out a way to make it a little simpler for myself when it comes to wrapping those silly gift bags for the party—why are they always so tricky?
But I digress. Let’s get to baking!
Step by Step Instructions
- Preheat your oven to 350°F (175°C) while you gather your ingredients. This makes sure everything’s nice and warm when it’s time to bake.
- In a large mixing bowl, combine 1 cup of whole wheat flour and 1 cup of rolled oats. Give it a good stir with a spoon so the dry ingredients mix well. No one likes a flour explosion.
- In another bowl, mash 1 medium apple (cored and peeled) with a fork until it’s mostly smooth, but don’t shy away from some chunky bits. Your dog’s taste buds will thank you for the texture!
- Add 1/2 cup of peanut butter to the mashed apple and mix until completely blended. Channel your inner dog chef here; think of all the drooling faces waiting for a taste.
- Pour the apple-peanut butter mix into the flour and oats. Stir until a dough forms. Don’t worry if it feels a little sticky; it’s meant to be a bit messy.
- Dust a clean surface with a little extra flour, then roll out the dough to about 1/4-inch thick. If it sticks, just sprinkle a little more flour on top. It’ll save you some trouble (and possibly some frustration).
- Use cookie cutters to cut out shapes. Dogs love fun shapes, so go wild—bones, stars, or even hearts if you’re feeling fancy. Just remember to keep some space between the shapes on the baking sheet.
- Place the cutouts on a baking sheet lined with parchment paper. You can fit quite a few, but don’t overcrowd them. They need room to spread (not that we’re judging what happens after snack time).
- Bake in your preheated oven for 20–25 minutes, or until they’re golden brown. Keep an eye on them; nobody likes burnt treats, especially not your canine friend.
- Remove from the oven and let the treats cool on a wire rack. Trust me, you want them cool before letting your dog indulge; this avoids a biscuit-turned-football moment.
Cool completely before serving to your dog.
They’ll go bonkers for these delicious goodies, and you’ll feel like the star baker of the dog world. Happy baking!
Optional Add-ons
While baking your dog’s treats, why not kick it up a notch with some Peanut Butter Apple Twists?
Grab that peanut butter and diced apples, mix them in some whole wheat flour, and roll into twisty shapes. Your pup will love ’em.
I mean, who doesn’t want treats that look almost as good as your dog does?
It’s a win-win, trust me.
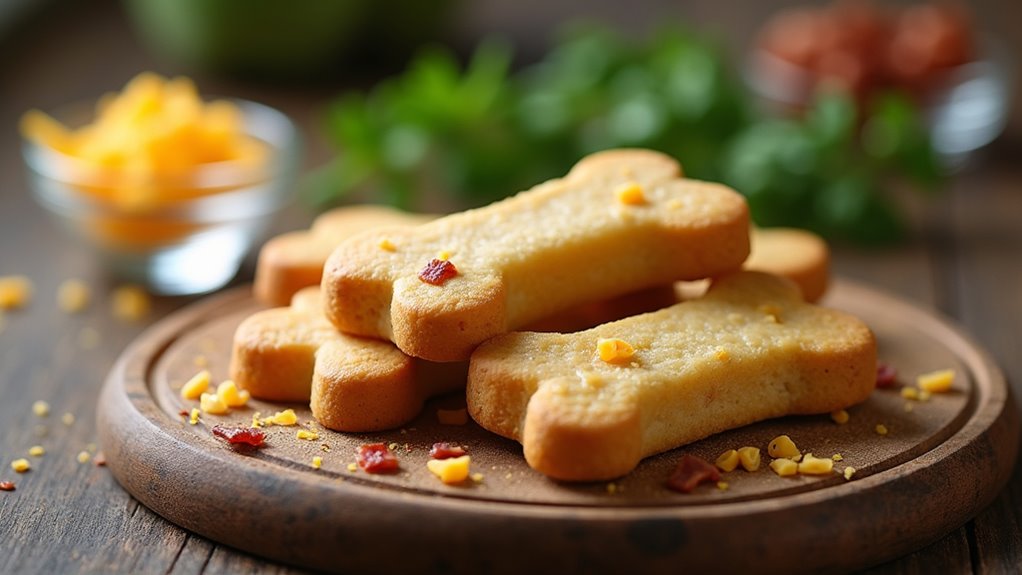
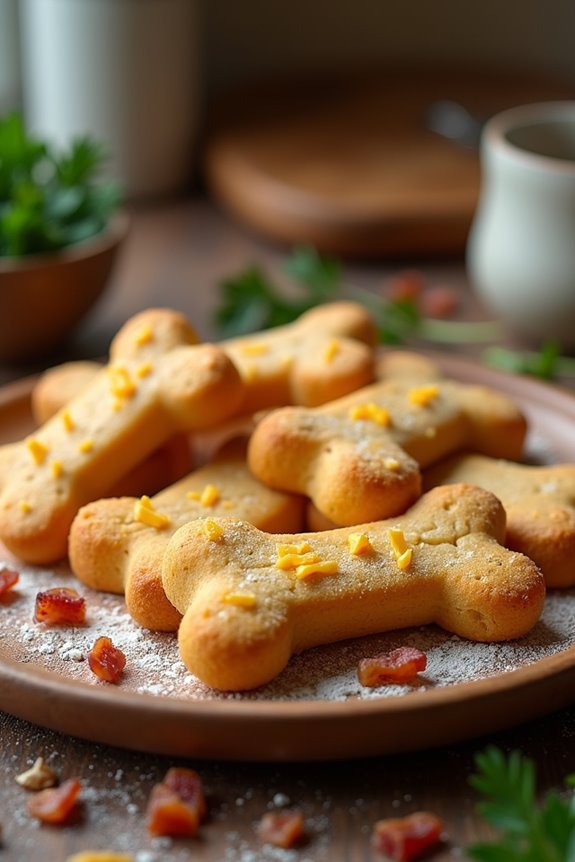
7. Savory Bacon Cheddar Bites
Let’s get your pup’s taste buds tingling with some Savory Bacon Cheddar Bites. You’ll need just a few simple ingredients, a clear step-by-step guide, and maybe some optional add-ons to really impress your furry friend. Are you ready to whip up these delicious treats and make your dog’s birthday extra special?
Ingredients
When it’s time to whip up some tasty treats for your furry friend, nothing beats the smell of bacon and cheese wafting through the kitchen.
These Savory Bacon Cheddar Bites aren’t only scrumptious but super easy to make. Your pup will wag their tail in delight, and you might just want to sneak a nibble yourself (though, maybe not the best idea).
Let’s gather up the essentials.
- 1 cup of whole wheat flour
- 1/2 cup of shredded cheddar cheese
- 1/4 cup of cooked, crumbled bacon (make sure it’s plain and unsalted)
- 1/4 cup of unsalted peanut butter
- 1/4 cup of chicken broth (low sodium works best)
- 1 large egg
Just a few simple ingredients and you’ll have delicious bites that your dog will love.
And let’s be honest, who doesn’t like a little bacon now and then? Just remember, these treats are for your pup, but I won’t judge if you sneak a taste of that peanut butter while you’re at it.
Cooking with your pet in mind is all about having fun and keeping it safe, right?
Step by Step Instructions
- Preheat your oven to 350°F (175°C). That’s the magic number where the bacon and cheese will transform into bites of goodness.
- In a large mixing bowl, combine 1 cup of shredded cheddar cheese, 1 cup of cooked, crumbled bacon, and 1 cup of whole wheat flour. This is where the party starts—just imagine that aroma.
- In a separate bowl, whisk together 1 egg and 1/4 cup of chicken broth. Don’t worry if it looks a little fancy; it’s just being shy.
- Pour the egg mixture into the dry ingredients. Mix everything until it just comes together into a dough (Don’t overmix; nobody likes tough treats).
- Lightly flour your countertop, and roll out the dough to about 1/4 inch thick. You can use a rolling pin or your hands, whatever feels right.
- Grab a cookie cutter (or a glass if you’re feeling resourceful) and cut out shapes from the dough. Think of it as crafting tiny masterpieces—each one a tasty gift for your pup.
- Place the shapes onto a baking sheet lined with parchment paper. Give each little bite some space, as they’ll spread a little while baking—I mean, who doesn’t love personal space?
- Bake in the oven for 20 to 25 minutes or until the edges are golden brown. Keep an eye on them and try not to drool—it’s a tough task, I know.
- Remove the baking sheet from the oven and let it cool for a few minutes. Seriously, try not to burn your fingers here.
- Cool completely before serving to your dog, unless you want a very enthusiastic pup trying to plunge into the hot treats. Just think of it as a mini cooking show—“Can You Handle the Heat: Dog Edition.”
Optional Add-ons
Ready to amp up those Savory Bacon Cheddar Bites? Mix together crispy bacon, sharp cheddar, and a bit of flour for pawesome treats.
Shape little balls and bake them until golden. Your dog’s tail will wag like crazy. You might lose a few to the taste test—don’t worry, it’s just for quality control, right?
Grab a camera; these bites deserve the spotlight.
“Capture Candid Moments
Capturing candid moments during your dog’s birthday photoshoot can be one of the most joyful parts of the day. Those spontaneous smiles and goofy poses? Pure gold.
Candid shots of your pup’s birthday antics? Priceless! Those joyful smiles and silly poses are memories to cherish forever.
So, how do you snag those adorable shots? Start by keeping your camera handy, ready for action. You never know when your pup will do something hilarious, like chase their tail or try to steal a cupcake.
Encourage your furry friend to play; let them interact with their favorite toys or guests. Get down to their level—trust me, that’s the secret sauce.
Also, don’t forget to follow the treats. A well-placed snack can coax out the cutest expressions.
And hey, if you accidentally catch yourself in the background looking like a hot mess, embrace it! Those moments bring character.
Just remember, it’s all about having fun and making memories—and trust me, you’ll treasure those awkward, beautiful shots for years to come.
Frequently Asked Questions
What Props Should I Include for My Dog’s Birthday Photoshoot?
Include colorful balloons, a festive birthday hat, a cake (real or fake), and toys your dog loves. Don’t forget a fun backdrop, like streamers or a banner, to make the photos pop!
How Can I Calm My Dog During the Photoshoot?
To calm your dog during the photoshoot, create a relaxed environment with familiar toys, treats, and soothing music. Take breaks often, use gentle praise, and capture moments when your pup feels at ease to guarantee great shots.
What Time of Day Is Best for Outdoor Dog Photos?
The best time for outdoor dog photos is either early morning or late afternoon. The soft, golden light during these hours creates stunning images and helps your dog feel more relaxed and comfortable in the environment.
How Do I Choose a Location for the Shoot?
Choose a location that reflects your dog’s personality. Look for familiar spots like parks or your backyard. Make certain it’s safe, has good lighting, and offers interesting backgrounds to capture those memorable moments during the shoot.
Should I Hire a Professional Photographer for My Dog’s Birthday?
You could hire a professional photographer if you want stunning, high-quality images. They’ve got the expertise to capture your dog’s personality perfectly, making it a worthwhile investment for those unforgettable moments.