So your golden is sitting there giving you the eyes while you’re eating, and you cave — obviously — and toss him one of those sad little store-bought biscuits. And then you flip the bag over and actually read the ingredients. Corn syrup. Artificial flavoring. Things you can’t even pronounce.
Yeah, that happened to me too. I felt so guilty I basically stress-baked for a week straight.
Here’s the thing — dog biscuits homemade are so much easier than people think, and your kitchen is about to smell incredible. Like, warm peanut butter and oats incredible.
These 7 recipes give your pup that satisfying crunch he goes crazy for, but with ingredients you actually recognize. And honestly? He’ll lose his mind over them in the best way.
Keep this in mind: if you want to go deeper, these homemade dog treats with budget-friendly recipes are worth bookmarking too.
#1: Personalized “Bella” Dog Bone Biscuits — Because Your Pup Deserves a Treat With Their Name On It
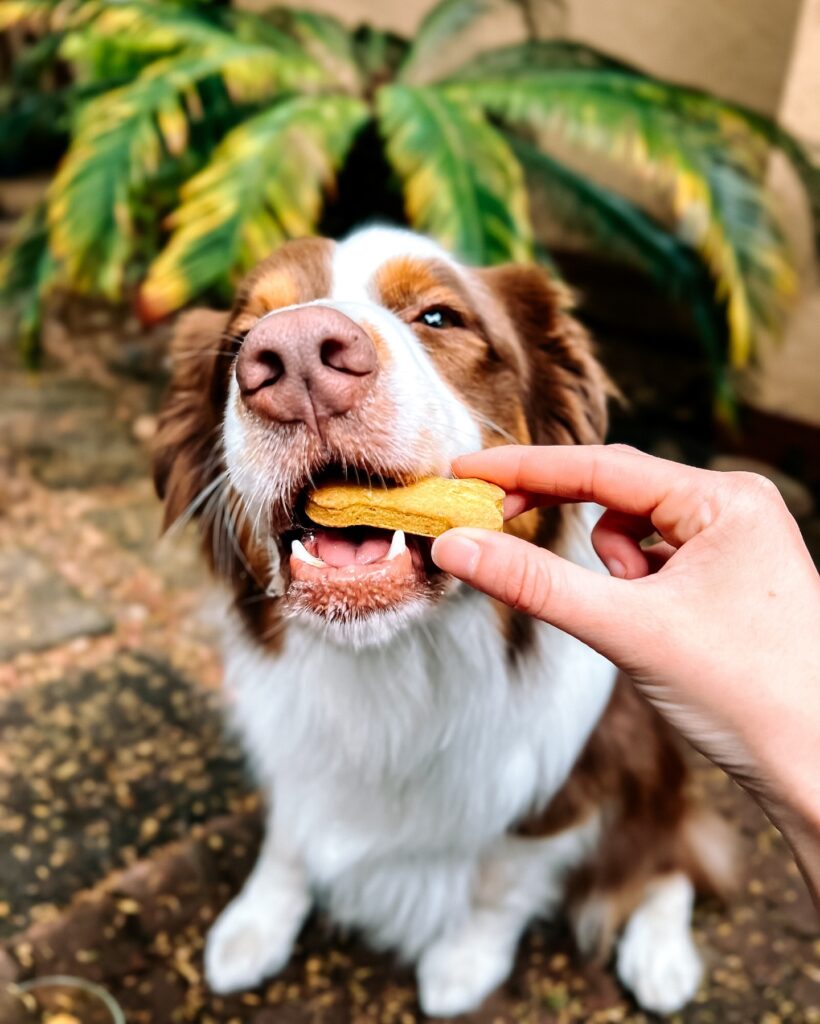
You know that look. That wide-eyed, nose-twitching, please-just-give-it-to-me stare your golden gives you the second she smells something good in the kitchen. My dog does the exact same thing, and honestly? It melts me every single time.
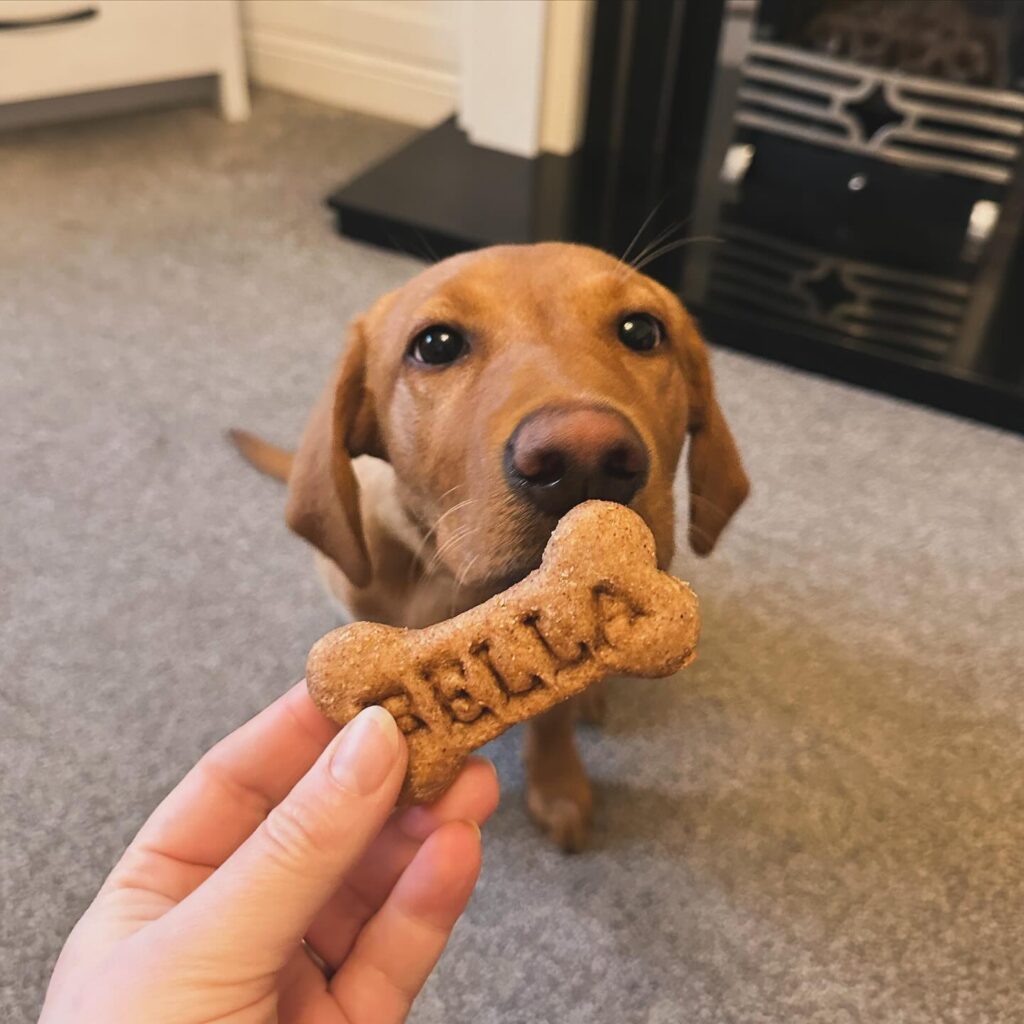
These stamped bone biscuits are exactly what I made last Sunday — warm, golden-brown, and pressed with your pup’s name right into the dough. The ones in the photo use a bone-shaped cookie cutter and a letter stamp set to press the name “Bella” into the surface before baking. The result is crispy on the outside, slightly tender in the middle, and smells like a peanut butter dream throughout your whole house.
Ingredients:
1. 2 cups whole wheat flour
2. 1/2 cup rolled oats
3. 1/3 cup natural peanut butter (unsalted, xylitol-free)
4. 2 eggs
5. 1/3 cup low-sodium chicken broth
6. 1 tablespoon honey
Instructions
Preheat your oven to 350°F and line a baking sheet with parchment paper. Mix your dry ingredients — the whole wheat flour and rolled oats — together in a large bowl first. This matters because distributing the oats evenly keeps the texture consistent in every bite.
Add the peanut butter, eggs, honey, and chicken broth into the dry mix. Stir until a firm dough forms. If it feels sticky, add flour one tablespoon at a time — you want it rollable, not crumbly.
Roll the dough out to about 1/4 inch thickness on a lightly floured surface. Use your bone-shaped cutter to press out each piece, then immediately press your letter stamps into the surface of each unbaked biscuit. The dough holds the impression cleanly before baking, so don’t skip this step.
Place them on your lined sheet and bake for 25-30 minutes until the edges turn deep golden brown. The longer you bake them (closer to 30 minutes), the crunchier they get — which is great for heavy chewers like most goldens.
Cool them on a wire rack for at least 15 minutes before giving one to your dog. Rushing this step makes them crumble in your hand, and nobody wants that.
Whole wheat flour adds fiber that supports digestion, peanut butter delivers protein to keep energy steady, and the personalized stamp makes the whole thing so Pinterest-worthy your friends will think you ordered them. If you love making gut-friendly treats, Homemade Probiotics for Dogs — The Ultimate Guide pairs really well with this kind of from-scratch routine.
Store the finished biscuits in an airtight glass jar at room temperature for up to 2 weeks, or freeze them in a zip-lock bag for up to 3 months.
Prep Time: 15 minutes | Cooking Time: 25–30 minutes | Serving Size: Approximately 20–24 biscuits
Swap the chicken broth for pumpkin puree if your golden has a sensitive stomach — it adds moisture and a flavor dogs genuinely go crazy for.
📸 Photo credit: Instagram @bella_fox_red_lab
#2: Fluffy Bone-Shaped Yogurt & Cheese Dog Biscuits
You know that moment when you’re baking something for yourself and your golden just parks himself right at your feet, staring up at you with those eyes? Yeah. That’s exactly why I started making these.
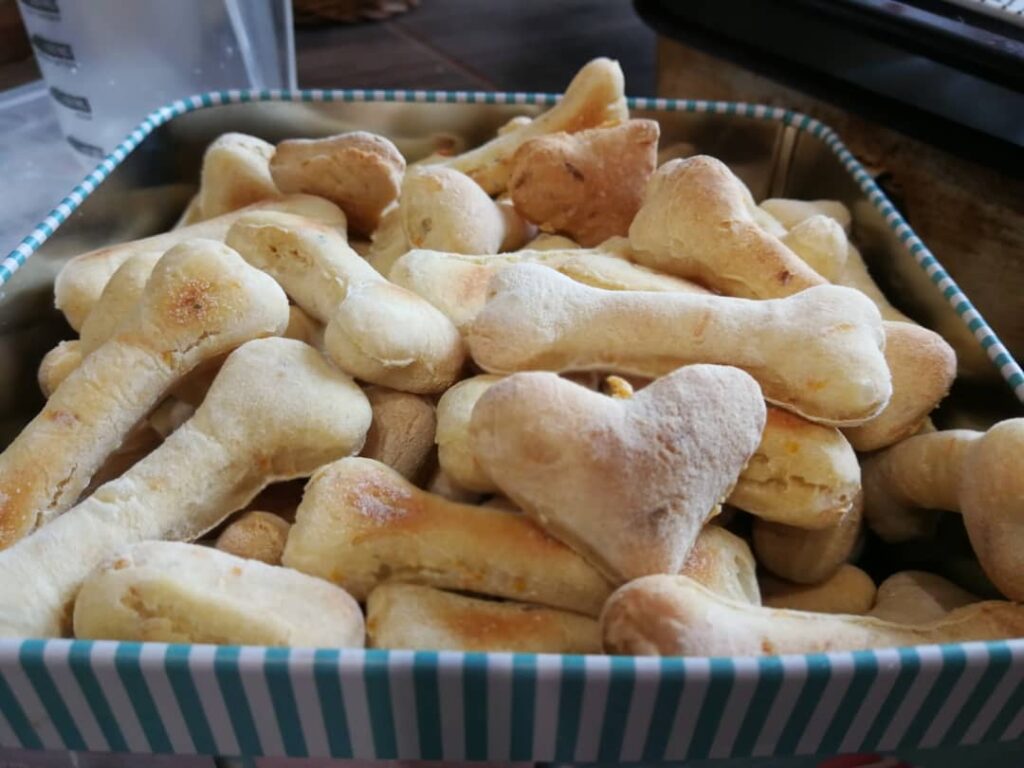
These pale, pillowy bone-shaped biscuits are everything. Look at them — they’re golden at the edges, soft white in the center, and shaped like the cutest little cartoon bones you’ve ever seen. Mine came out of the oven and my friend literally thought they were people cookies.
Ingredients:
1. 2 cups whole wheat flour
2. ½ cup plain Greek yogurt
3. ½ cup shredded cheddar cheese
4. 1 egg
5. 2 tablespoons chicken broth (low sodium)
6. 1 teaspoon baking powder
Prep Time: 15 minutes | Cooking Time: 25 minutes | Serving Size: Approximately 20–24 bone-shaped biscuits
Instructions
Preheat your oven to 350°F. Mix the flour and baking powder together first — this distributes the rise so your biscuits puff up evenly without dense spots in the center.
Add the yogurt, egg, and broth. Work the dough with your hands until it pulls together into a firm ball. It should feel like soft Play-Doh. If it sticks, add flour one tablespoon at a time.
Roll it out to ¼ inch thickness on a lightly floured surface. Use a bone-shaped cookie cutter — that classic shape isn’t just adorable, it gives smaller dogs an easy grip point while chewing, which helps slow them down naturally.
Cut your shapes and place them on a parchment-lined baking sheet. Bake for 22–25 minutes until the edges turn that warm golden color you see in the photo. The centers stay slightly soft — that’s normal. They firm up as they cool.
Cool completely on a wire rack before storing. Yogurt-based treats have more moisture than standard biscuits, so store them in an airtight glass container in the fridge for up to 2 weeks.
The yogurt adds natural probiotics, which supports your dog’s gut health — so every crunchy treat becomes a tiny wellness moment. If your golden loves peanut butter, Homemade Peanut Dog Treats: Healthy & Delicious Meals for Your Pup are worth trying next batch.
Dust the tops with a tiny pinch of flour before baking — it gives them that beautiful matte finish you see in the photo instead of a shiny, hard crust.
📸 Photo credit: Instagram @daisy.the.bcollie
#3: Homemade Bone-Shaped Dog Biscuits (The Batch Your Pup Will Lose Their Mind Over)

You know that look your golden gives you when you’re eating something and she just stares? Yeah. That’s exactly the look that made me start making these.
Prep Time: 15 minutes | Cook Time: 25 minutes | Serving Size: 30–35 small bone-shaped biscuits
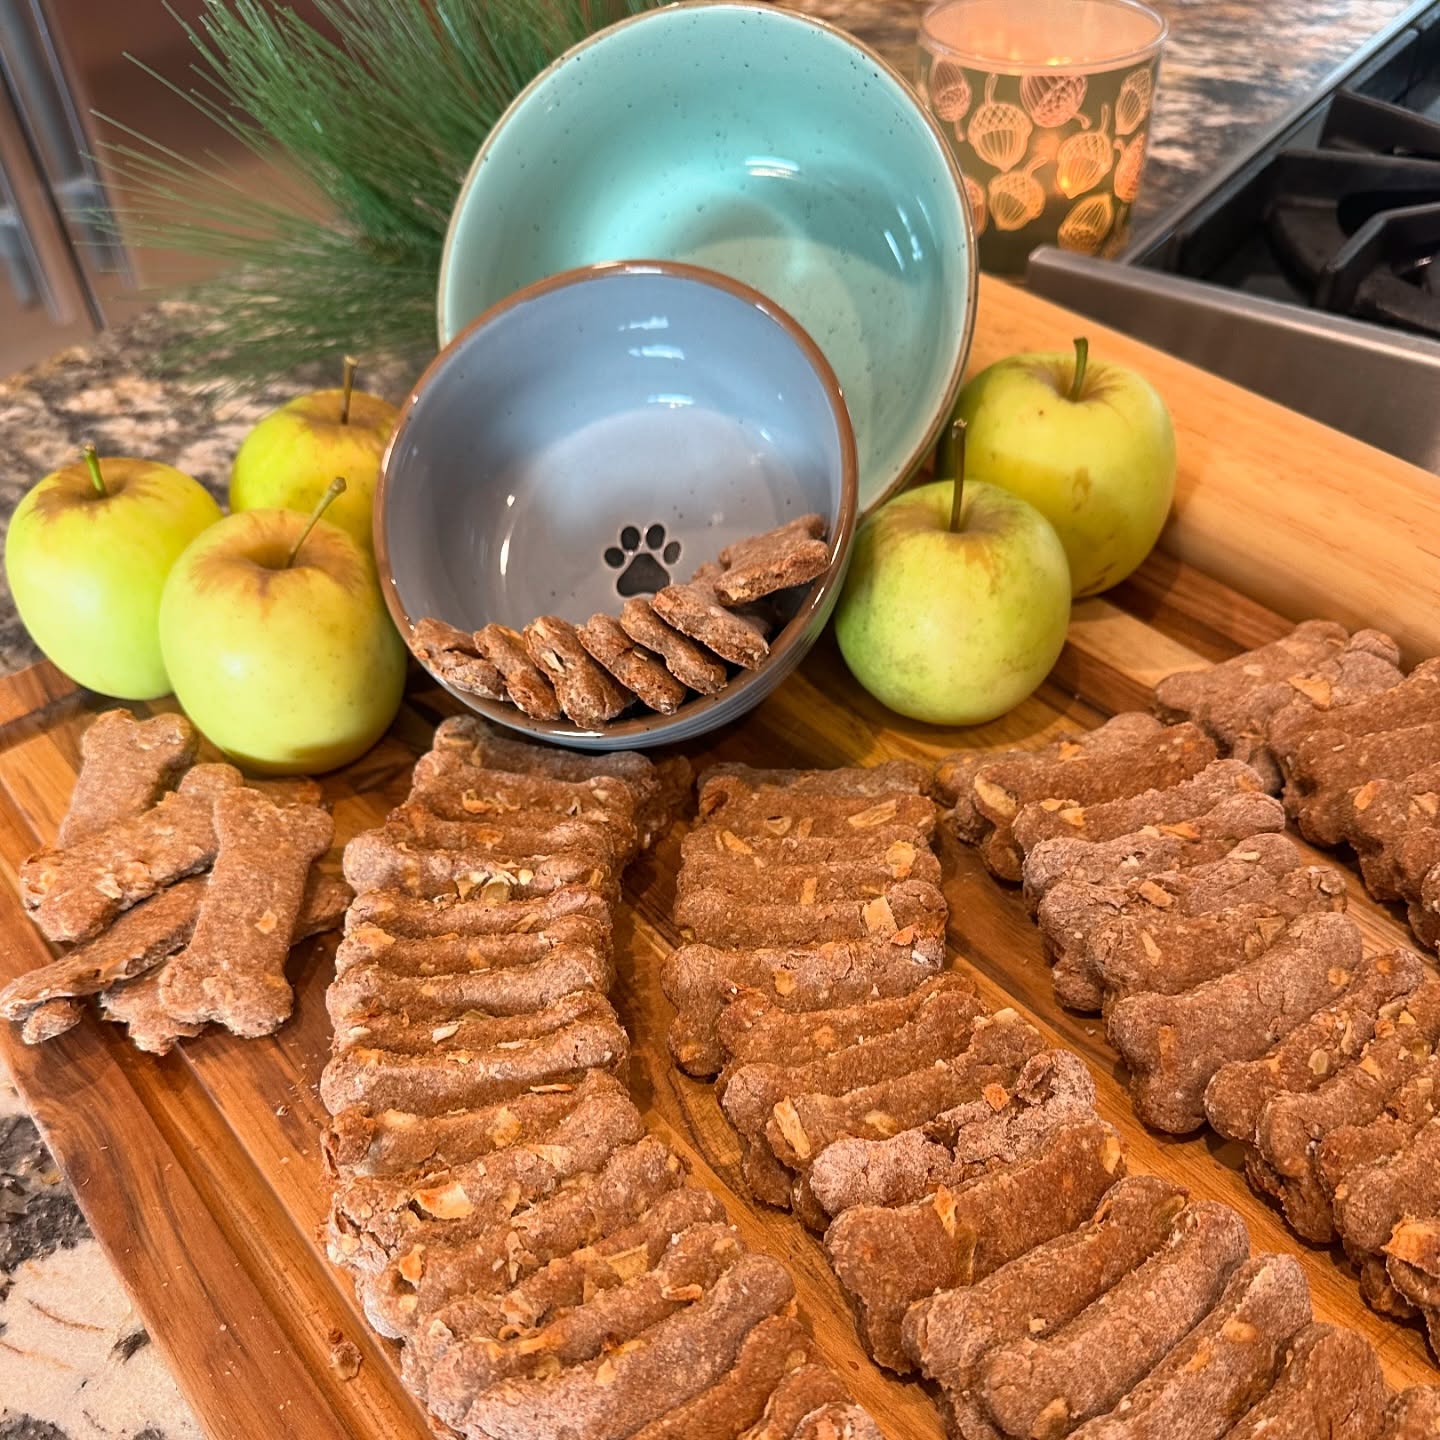
These little golden biscuits are shaped like classic bones using a bone-shaped cookie cutter, baked on a wooden cutting board, and they come out crispy with this warm, golden-brown color that honestly looks Pinterest-ready.
Ingredients:
1. 2 cups whole wheat flour (plus extra for dusting your surface)
2. 1 egg
3. ½ cup natural peanut butter (xylitol-free, always check the label)
4. ⅓ cup water or low-sodium chicken broth
5. 1 tablespoon olive oil
Instructions
Roll your dough out on a lightly floured surface to about ¼ inch thick — not too thin or they’ll snap before your dog even gets to enjoy them. Press your bone-shaped cutter firm and clean through the dough. Re-roll the scraps.
Line them on a parchment-lined baking sheet and bake at 350°F for 22–25 minutes until the edges go deep golden.
Whole wheat flour adds fiber and keeps digestion steady — that means fewer of those 6am “urgent” bathroom wake-ups.
Let them cool completely on the board before serving. Warm biscuits stay soft inside and can crumble apart before your pup even settles in.
Store in an airtight glass jar for up to two weeks, or freeze a batch for up to three months. My dog literally circles the kitchen the second I open that jar.
📸 Photo credit: Instagram @stellaandchewys
#4: Homemade Multi-Shape Dog Biscuits (Bones, Hearts & Stars)

Your golden is sitting at your feet, doing that thing — the slow head tilt, the big eyes, the paw tap on your leg. And you’re just trying to drink your coffee in peace.
That is exactly why I started making these at home.
Looking at Ellie’s plate here, I’m obsessed with how gorgeous a big pile of mixed-shape biscuits looks. Bones, hearts, little stars — all baked golden-brown and piled on a simple white ceramic plate with a navy rim. Honestly it’s giving Pinterest board energy and your retriever deserves that.
Here’s what you need:
1. 2 cups whole wheat flour
2. 1/2 cup rolled oats
3. 1/3 cup pumpkin puree (plain, not pie filling)
4. 2 tablespoons peanut butter (xylitol-free)
5. 2 eggs
6. 1/3 cup water
Instructions
Preheat your oven to 350°F. Mix your dry ingredients first — flour and oats together in a big bowl. Add peanut butter, pumpkin, and eggs, then slowly pour in water until the dough pulls together. It should feel like stiff cookie dough, not sticky.
Roll it out to about 1/4 inch thickness on a floured surface. Press your cutters — bones, hearts, stars, whatever you have — and lay them on a parchment-lined baking sheet. The whole wheat flour gives these biscuits that satisfying crunch your dog goes crazy for, which means longer chew time, which means a few minutes of actual quiet for you.
Bake 25-30 minutes until deep golden. Let them cool completely before piling them up. They firm up even more as they cool — don’t skip that part.
Real talk: if your dog has a sensitive stomach, swapping pumpkin for mashed banana works beautifully too. I’ve got a whole thing on Homemade Banana Dog Treats: Easy Recipes Your Pup Will Love if you want to go that route.
Store in an airtight container for up to two weeks — or freeze them for up to 3 months.
Prep Time: 15 min | Cook Time: 28 min | Serving Size: About 40-50 biscuits depending on cutter size
📸 Photo credit: Instagram @ellie.the.mini.mutt
#5: Cheesy Pumpkin Dog Biscuits (The Ones That Disappear in Seconds)
You know that moment when your golden is sitting right at your feet, doing that whole “I’m starving and you’re my only hope” eyes thing? Yeah. These biscuits were made for that moment.
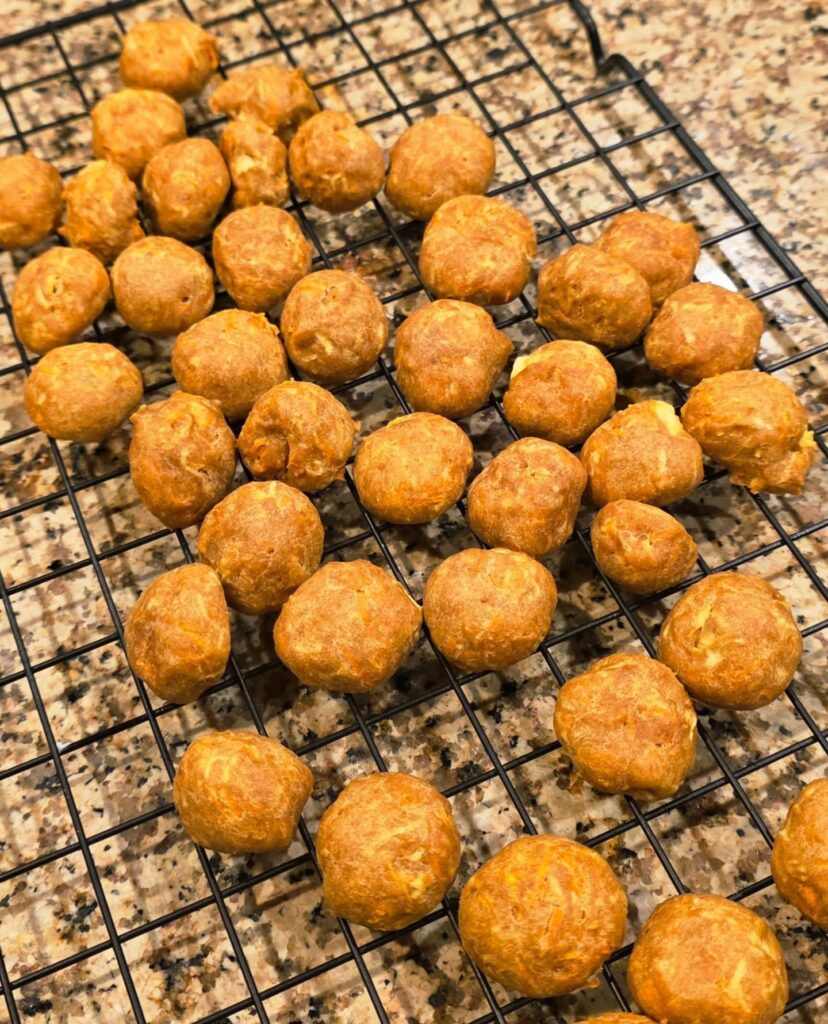
I made these on a Sunday afternoon and had 40+ round biscuits cooling on my wire rack within an hour. They’ve got this warm, golden-orange color from the pumpkin and cheddar combo, and honestly? They smell like something I’d eat myself.
Ingredients:
1. 2 cups whole wheat flour
2. ½ cup pumpkin puree (plain, not pie filling)
3. ½ cup shredded sharp cheddar cheese
4. 2 eggs
5. ¼ cup low-sodium chicken broth
Instructions
Preheat your oven to 350°F. Mix the pumpkin puree, eggs, and broth in a bowl first — wet ingredients combine easier this way. Add the flour and cheddar, then stir until a firm dough forms. Roll it into 1-inch balls by hand and place them on a lined baking sheet. Bake for 25-30 minutes until golden and firm. Transfer to a wire rack to cool completely before serving. The longer they cool, the crunchier they get — and that crunch helps clean your dog’s teeth naturally, which means fewer vet visits and a healthier pup overall.
Store in an airtight container for up to two weeks, or freeze for 3 months.
Prep Time: 15 min | Cook Time: 30 min | Serving Size: ~40 biscuits
📸 Photo credit: Instagram @whennonnocooks
#6: Bone-Shaped Peanut Butter Dog Biscuits (The Classic Your Pup Will Lose Their Mind Over)
You know that look. Your golden sits right at your feet, nose twitching, eyes locked on your hand like you’re holding actual gold. That’s exactly the moment these biscuits were made for.
My neighbor’s border collie, Kai, literally trembles when she hears the treat bag crinkle. So she started making these at home — whole wheat flour, natural peanut butter, and oats — and honestly? The ingredients list is shorter than my grocery receipt.
Ingredients:
1. 2 cups whole wheat flour
2. 1 cup rolled oats
3. ½ cup natural peanut butter (no xylitol — check the label)
4. 2 large eggs
5. ¼ cup water (add more if dough feels dry)
Instructions
Preheat your oven to 350°F. Mix the dry ingredients first — flour and oats together in a big bowl. Add the peanut butter and eggs, then work the dough with your hands until it pulls together. The dough should feel firm, not sticky. Roll it out to about ¼ inch thick on a floured surface and press your bone-shaped cookie cutter right through.
Bake on a parchment-lined sheet for 25-30 minutes until the edges turn deep golden-brown. The crunch is what makes these worth it — a crunchy biscuit supports dental health while giving your dog something satisfying to chew, which means fewer shoe casualties.
Let them cool completely before handing one over. Warm biscuits crumble. And if you want more baked treat ideas, the Ultimate Guide to Oven Dog Treats: Healthy, Homemade Recipes for Your Pup covers so many variations.
Store extras in an airtight glass jar on your counter — they stay fresh for up to two weeks.
Prep Time: 15 min | Cook Time: 28 min | Serving Size: About 24 biscuits
📸 Photo credit: Instagram @kai.the.aussie
#7: Homemade Veggie-Packed Dog Bone Biscuits (The Batch That Disappears Fast)
Okay, so you know that moment when your golden gives you the look — tail going crazy, nose pressed against the treat cabinet? Yeah, my dog does that too, and honestly it’s why I started making these at home.
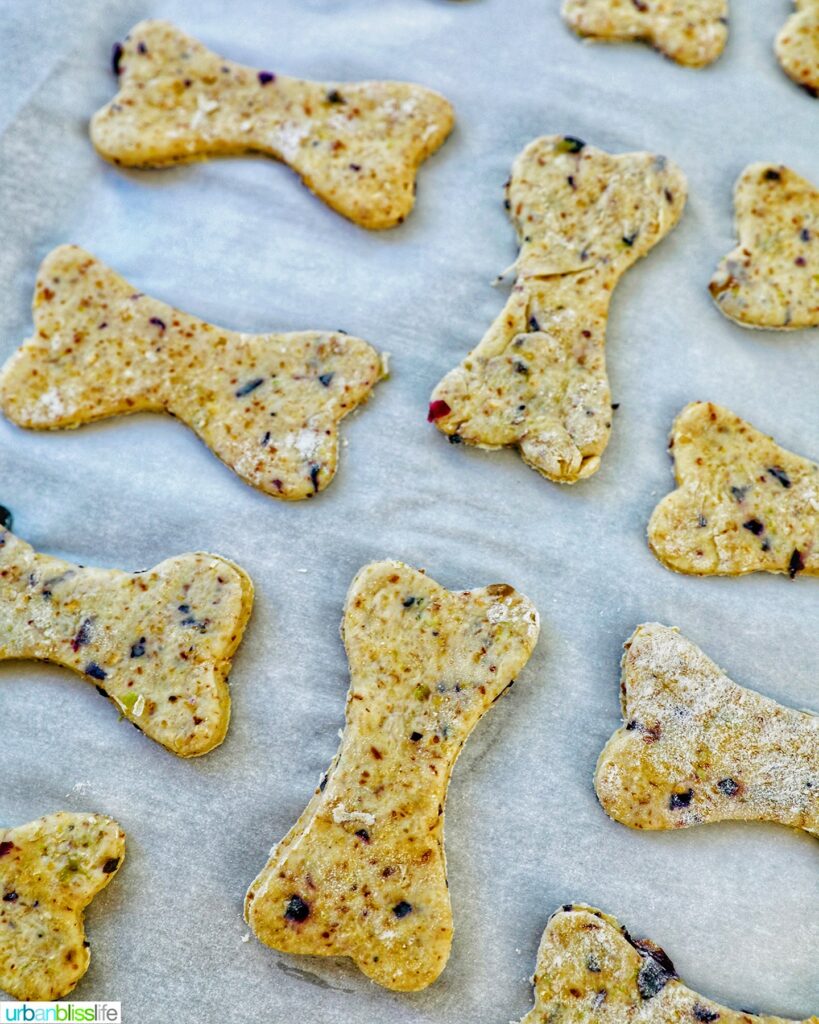
These bone-shaped biscuits are exactly what I was hoping for when I first tried homemade dog treats. Look at them — golden, rustic, speckled with bits of real veggies like red bell pepper, zucchini, and black olives baked right into the dough. They’re laid out on parchment paper before baking, and you can see every little fleck of color peeking through.
Ingredients:
1. 2 cups whole wheat flour
2. 1/2 cup rolled oats
3. 1/4 cup finely diced red bell pepper
4. 1/4 cup chopped zucchini
5. 2 tablespoons sliced black olives
6. 1 egg
7. 1/3 cup low-sodium chicken broth
8. 2 tablespoons olive oil
Prep Time: 15 minutes | Cooking Time: 25 minutes | Serving Size: About 20 bone-shaped biscuits
Instructions
Preheat your oven to 350°F and line a baking sheet with parchment paper — that’s the exact setup you’re seeing in the photo, and it prevents sticking without any fuss.
Mix your dry ingredients first. Whole wheat flour and oats together in a big bowl. Add your veggies next, tossing them through the flour so they distribute through every single biscuit.
Beat the egg with the broth and olive oil, then pour it into your dry mix. The dough should feel firm but pliable — not sticky. Good news: if it’s crumbling, just add broth one teaspoon at a time.
Roll the dough out to 1/4 inch thickness on a lightly floured surface. Use a bone-shaped cookie cutter — any size works, but the ones in the photo look about 3 inches long, which is perfect for a golden retriever.
Place them on your prepared sheet with a little space between each one. Bake for 22-25 minutes until the edges turn golden and the centers feel firm when you press them gently. They crisp up more as they cool, so pull them right at that golden color stage.
These whole-food ingredients mean your dog gets real nutrition — no mystery fillers — and you get total peace of mind knowing exactly what went into every bite. If your pup already loves fruit-based snacks, Apple Dog Treats: Easy & Healthy Homemade Recipes for Your Pup are worth bookmarking for your next baking day.
Let them cool completely on the parchment before storing. Store in an airtight container for up to one week at room temp, or freeze them in a zip bag for up to three months. I always make a double batch and freeze half — future you will be so grateful on a busy Tuesday.
📸 Photo credit: Instagram @urbanblisslife
The One Baking Mistake That Ruins Homemade Dog Biscuits (And Nobody Talks About It)
Okay, so here’s the thing nobody tells you — and I learned this the hard way after a whole batch went soft and gross within two days.
You have to double-bake your dog biscuits.
Pull them out at the normal time, let them cool for ten minutes, then slide them back in at a lower temp (around 200°F) for another 20-25 minutes. That second round pulls out all the hidden moisture. That moisture is what turns your beautiful biscuits into a crumbly, moldy mess before your golden retriever even gets halfway through the batch.
Also? The thickness matters more than people think. Roll your dough to exactly ¼ inch. Thicker than that and the center stays soft no matter how long you bake. Thinner and they burn before the outside even sets.
One more pro secret — swap half the flour for oat flour. Your pup’s digestion will thank you, and the texture gets this perfect snap.
If you want to branch out from crunchy biscuits, 10 Irresistible Homemade Soft Dog Treats Your Pup Will Love gives you a whole different direction to try.
Your Golden Deserves a Collar That Actually Works
Okay, so here’s the thing — you don’t have to keep replacing cheap collars every few months. Pick one that fits your dog’s life and your aesthetic, and you’re done.
Start with what matters most to you. Safety, style, or both? Honestly, you can have all three.
Your golden is already the best part of your home — the collar should match that energy. Grab one this week, slap it on that fluffy baby, and send me a pic because I know she’s gonna look adorable.
So tell me — what’s the one thing you wish your dog’s current collar actually did?