If your dog’s tummy is a bit sensitive, you might want to whip up some homemade grain-free treats. It’s surprisingly easy and way healthier than store-bought options, which can be loaded with ingredients neither you nor your pup can pronounce. Imagine your furry friend’s tail wagging with joy as they munch on sweet potato chews or pumpkin oat biscuits. Curious about how to get started? Let’s explore these delicious recipes together.
Why Homemade?
When you think about it, who wouldn’t want to whip up some homemade dog treats? Seriously, it’s a wonderful way to show your furry friend you care. You get to control the ingredients, so you can create grain-free dog treat recipes tailored to their specific needs. No weird fillers or preservatives lurking around. Just pure, tasty love. Not to mention, homemade treats can be more nutrient-dense than many store-bought options. Additionally, using fresh ingredients allows you to enhance the flavor and nutrition profile of the treats.
Imagine your pup wagging their tail in excitement as the aroma fills your kitchen. It’s almost like a magic trick, bringing joy and trust. Plus, you save some money while making exceptional snacks. Additionally, making your own treats ensures they are made with high-quality ingredients, which is essential for your dog’s overall well-being.
And hey, who can resist those happy puppy eyes?
Let’s face it; store-bought treats can be hit or miss. With your homemade goodies, you’re assured that they’re healthy and made with love. Additionally, making your own food allows you to ensure that it meets the nutritional needs of your dog, as ensuring a balanced diet is crucial for Cockapoo health. So, grab those ingredients, and let’s get mixing. Your dog won’t just be a fan; they’ll be your biggest cheerleader.
Homemade Treat Instructions
Ready to whip up some homemade treats that’ll have your pup wagging their tail in delight? Let’s get started with easy recipes like Peanut Butter Pup Cookies and Sweet Potato Chews. You’ll see, once you start, it’ll be hard to stop; your kitchen will smell amazing, and trust me, your dog won’t mind being your biggest fan. Additionally, homemade treats are a great way to customize flavors based on your dog’s preferences, allowing you to create tailored dog snacks that your pup will love. Plus, using top dog treats during training can enhance your sessions even further! To ensure your furry friend enjoys the best, consider incorporating quality ingredients like pumpkin or oats, which are both gluten-free and nutritious. Additionally, these no-bake treats can save you time and hassle while keeping your pup’s diet healthy and safe.
1. Peanut Butter Pup Cookies
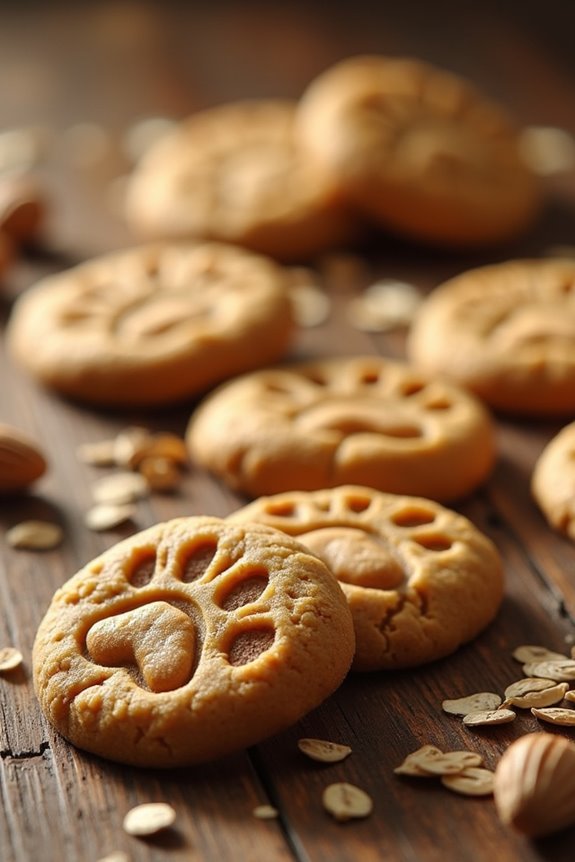
Ready to whip up some delicious Peanut Butter Pup Cookies? You’ll need just a few simple ingredients, and I promise, your furry friend will wag their tail with joy. These treats can be tailored with peanut butter and apple sauce to make them even more delightful for your pup. Did you know that peanut butter is a safe treat for most dogs when given in moderation? We’ll cover step-by-step instructions, along with some fun optional add-ons to make those treats extra special.
Ingredients
When it comes to whipping up these delightful Peanut Butter Pup Cookies, you’ll find that the ingredients aren’t only simple but also things you probably already have in your kitchen.
Dogs love these treats, plus they’re grain-free – a win-win! Grab your apron (or not, I mean, dogs don’t care about your cooking outfit), and let’s gather what you need.
- 1 cup natural peanut butter (make sure it’s xylitol-free; that stuff is a no-go for pups)
- 1 cup pumpkin puree (not the spiced pie mix, just the puree that’s super good for their tummies)
- 2 eggs (for binding and making those treats nice and chewy)
- 2 ½ cups oat flour (you can make this at home by blending rolled oats until they’re fine)
- 1 tablespoon honey (optional, but adds a little sweetness for the taste buds)
Feeling prepared? I hope so, because your pup is going to go wild for these.
Don’t be surprised if they start doing tricks for you while you’re baking, as if they know something delicious is coming.
Trust me, the wagging tails are worth every minute in the kitchen.
Step by Step Instructions
- Preheat your oven to 350°F (175°C) while you gather your ingredients. Nothing like the smell of baking cookies to get everyone excited, right?
- In a mixing bowl, combine 1 cup of natural peanut butter and 1 egg. Resist the urge to eat the peanut butter by the spoonful—trust me, it’ll be worth the wait.
- Add in 1 cup of pumpkin puree (not pie filling) and mix until smooth.
- (If it’s a bit chunky, it’s okay—your pup won’t mind.)
- Gradually add in 2 cups of almond flour. Stir until fully incorporated, but don’t overmix—the dough should be thick and slightly sticky.
- Turn the dough out onto a lightly floured surface. Roll it out to about ½ inch thickness.
- (Don’t stress if it’s not perfect; pups appreciate love over perfection.)
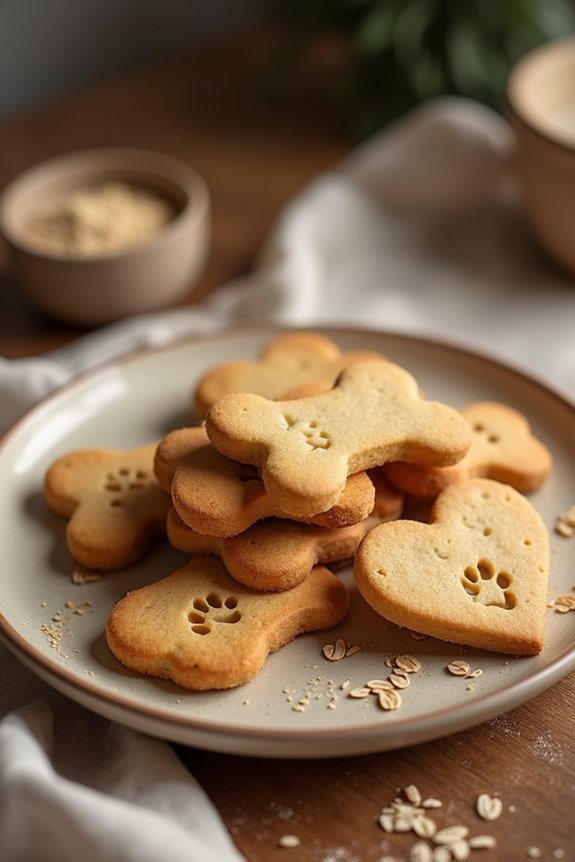
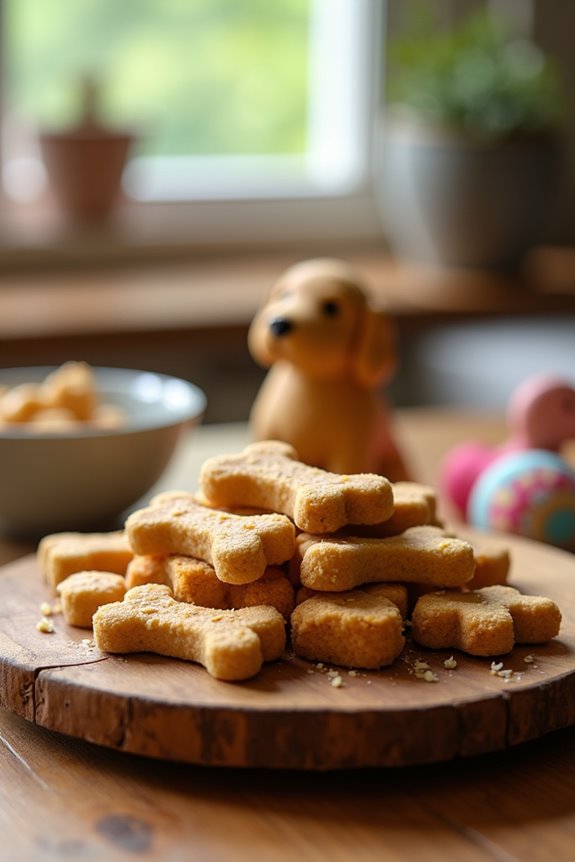
- Use cookie cutters to cut out shapes (bone shapes are always a hit). Place the treats onto a parchment-lined baking sheet.
- Bake in the preheated oven for 25-30 minutes, or until the edges are golden brown.
- Keep an eye on them—nobody wants burnt pup cookies.
- Allow the treats to cool on the baking sheet for about 10 minutes, then transfer them to a wire rack to cool completely.
Cool completely before serving to your dog. Your furry friend will thank you with tail wags and puppy eyes.
Optional Add-ons
Now that you’ve mastered the basic Peanut Butter Pup Cookie recipe, let’s talk about ways to kick it up a notch.
How about tossing in some mashed banana for natural sweetness?
Or maybe a dash of cinnamon for flavor?
You could even mix in some shredded carrots—because who doesn’t want their pup to have a veggie boost?
Trust me, they’ll love you more!
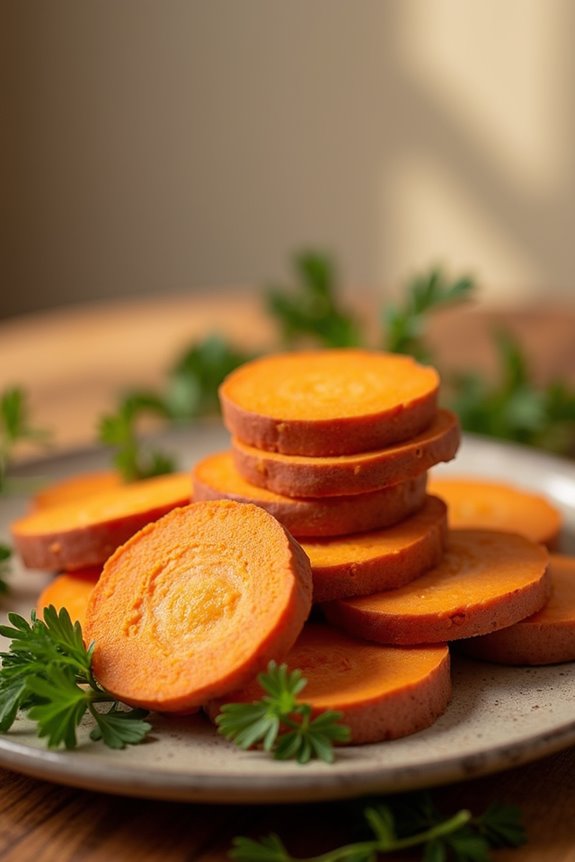
2. Sweet Potato Chews
When you’re ready to whip up some tasty sweet potato chews for your furry friend, you’ve got to start with the right ingredients.
Imagine a mix of wholesome sweet potatoes and maybe a sprinkle of something special—like cinnamon.
Let’s break down the step-by-step instructions and even consider some fun add-ons that could make your dog’s tail wag even harder.
Ingredients
Making homemade treats for your furry friend can be such a rewarding experience. And your dog will love the taste of these sweet potato chews. So grab your apron, and let’s get to it.
Here’s what you’ll need to whip up these simple and nutritious delights.
- 1 large sweet potato (about 1 cup when mashed)
- 1 tablespoon coconut oil (melted)
- 1/4 teaspoon cinnamon (a little spice goes a long way)
- 1 egg (to help bind everything together)
- 1/2 cup oat flour (you can make this by blending rolled oats)
- 1 tablespoon honey (optional, for a touch of sweetness)
With just these few ingredients, you’re all set to create something special for your dog.
It’s as easy as pie – well, easier, really, considering you don’t have to worry about complex pie crusts or temperamental baking times. Your pup will be happily wagging their tail before you know it!
Step by Step Instructions
- Preheat your oven to 250°F (120°C). You want it nice and low for those chewy treats.
- Wash and peel 2 large sweet potatoes. They’re the star of this show, and no one likes a dirty star.
- Slice the sweet potatoes into 1/4-inch thick rounds. Try to keep them even—your dog doesn’t want a lumpy treat (but don’t worry, they won’t judge you too harshly).
- Line a baking sheet with parchment paper. This will prevent sticking and make cleanup a breeze. Because who likes scrubbing pans?
- Arrange the sweet potato slices in a single layer on the baking sheet. Give them some space, like they’re at a cozy dog park.
- Bake the sweet potatoes in the preheated oven for about 3 hours. Yes, 3 hours. Go find something else to do, like binge-watch a show or take a nap.
- Check the sweet potatoes around the 2-hour mark. They should be dry and slightly crunchy on the edges but still chewy in the middle. If they’re not there yet, keep baking. Patience is a virtue, even for treats.
- Once they’re done, take them out and let them cool on a wire rack. This is where the magic happens—they transform into homemade goodness.
- Cool completely before serving to your dog. Trust me, burned paws aren’t a good look.
And there you have it—easy peasy sweet potato chews that your pup will absolutely love!
Optional Add-ons
Adding some optional extras to your sweet potato chews can take them from delightful to absolutely drool-worthy.
Think peanut butter or coconut oil for an added flavor punch. You could even sprinkle in some cinnamon for a cozy twist. Your pup won’t know what hit ’em!
3. Pumpkin Oatmeal Biscuit Recipe
Ready to whip up some delicious pumpkin oatmeal biscuits for your pup?
You’ll love how simple it is, with just a few basic ingredients and easy steps to follow. Plus, I’ll share some fun optional add-ons if you’re feeling adventurous—who knew baking for your dog could be this much fun?
Ingredients
If you’re looking to whip up some tasty treats for your pup, this Pumpkin Oatmeal Biscuit recipe is as simple as it gets. You probably already have some of these ingredients in your pantry, which makes it super easy to get started.
Let’s spoil our furry friends a little, shall we?
- 1 cup canned pumpkin (not the spiced pie filling, just plain pumpkin)
- 2 cups rolled oats (make sure they’re plain)
- 1/2 teaspoon cinnamon (a nice touch, but optional)
- 1/4 cup water (add more if the dough feels too dry)
- 1/4 cup coconut oil (melted and slightly cooled)
- 1 egg (for binding and extra protein)
And there you go! Just a handful of ingredients, all safe for your pup and guaranteed to get that tail wagging.
It’s a pretty straightforward recipe, but feel free to get a little creative. Your dog won’t mind a personal twist here or there.
Plus, making these treats at home will leave your kitchen smelling like a cozy bakery—unless you accidentally knock over the flour, which I may or may not have done myself.
Happy baking!
Step by Step Instructions
- Preheat your oven to 350°F (175°C) to get it nice and toasty while you prepare the dough.
- In a large mixing bowl, combine 1 cup of pumpkin puree, 2 cups of oat flour, and 1/2 cup of rolled oats. Don’t worry if you spill a bit—that’s a sign you’re having fun!
- Pour in 2 eggs and an optional splash of water if the mixture feels too dry. Remember, we want a kneadable dough, not a runny mess.
- Mix everything together until well combined. Use your hands if you need to get in there and show it who’s boss (just maybe don’t call it names).
- Place the dough on a lightly floured surface. Pat it down into a 1/2-inch thick rectangle. If it sticks, just sprinkle a bit more flour like you’re adding “magic dust”.
- Use cookie cutters to shape your biscuits as desired. This is where you can really get creative. Bones, hearts, stars—your dog doesn’t care, as long as it’s tasty!
- Transfer the shaped treats onto a parchment-lined baking sheet. Give them a little wiggle room because they do expand slightly while baking.
- Bake in the preheated oven for 25–30 minutes, or until they’re golden brown and fragrant. Keep an eye on them, but don’t hover—enjoy the delicious smells wafting through your kitchen.
- Remove from the oven and let them cool on a wire rack (or, let’s be honest, just on your countertop because it’s quicker).
- Cool completely before serving to your dog, and watch their tail wag with delight!
Optional Add-ons
When it comes to homemade dog treats, adding a few optional ingredients can elevate your pumpkin oatmeal biscuits from good to tail-wagging great.
Consider tossing in some peanut butter for a nutty punch or a sprinkle of cinnamon for extra flavor. Your pup will think you’re a culinary genius.
After all, who wouldn’t enjoy a treat that’s just a bit more special?
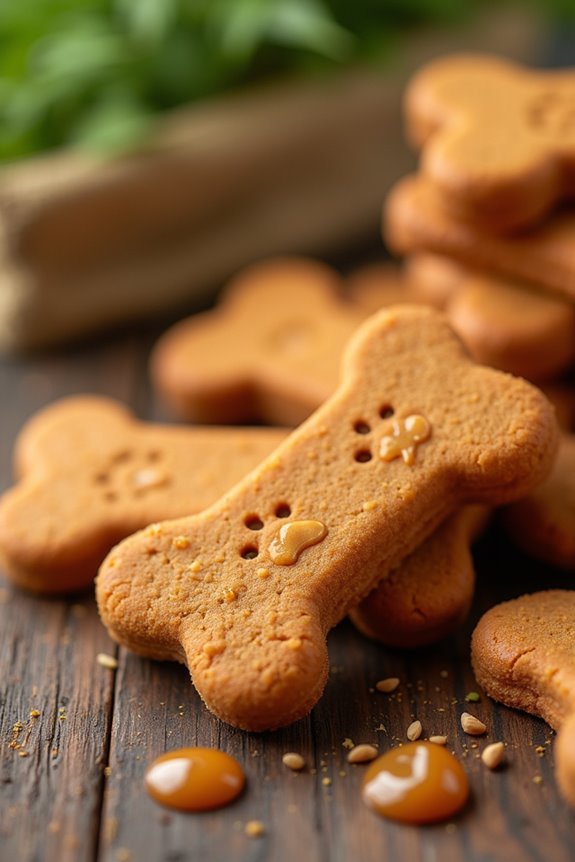
4. Coconut Flour Biscuits
Ready to whip up some delicious coconut flour biscuits for your furry friend? You’ll want to gather a few simple ingredients, and I promise, making these treats is a breeze. Let’s break it down step by step, and I’ll even throw in some fun optional add-ons to keep your pup guessing.
Ingredients
If you’re ready to whip up some tasty bites for your furry friend, you’re in for a treat—literally.
These coconut flour biscuits aren’t just easy to make; they’re also a hit with dogs. Just imagine your pup’s tail wagging in approval as they munch away.
Here’s what you need to get started:
- 1 cup coconut flour
- 1/2 cup peanut butter (make sure it’s xylitol-free)
- 1/2 cup unsweetened applesauce
- 1/4 cup chicken or beef broth (low sodium is best)
- 2 large eggs
These simple ingredients come together to create delightful biscuits that your dog will love.
And the best part? You probably have most of them on hand already. So, let’s jump in and get those tails wagging.
Step by Step Instructions
- Preheat your oven to 350°F (175°C). You want it nice and warm, almost like a cozy hug for your dog’s future treats.
- Gather your ingredients: coconut flour, eggs, peanut butter (make sure it’s dog-safe), and any water if the dough is too dry. That’s right, nothing fancy here—just good old simple stuff.
- In a mixing bowl, whisk together 1 cup of coconut flour and 1 egg until combined. It’ll be a little clumpy, and that’s perfectly okay—no need to make it smooth.
- Add in 1/2 cup of peanut butter and mix. It might feel like a workout at this point—use some muscle! Keep stirring until it’s all blended together.
- If your dough seems too dry, slowly add a tablespoon of water at a time until it reaches a nice doughy consistency (just enough to hold together, not sticky). You want to be able to roll it out without losing half of it to the counter.
- Once you have your dough, sprinkle some coconut flour on a clean surface. Roll out the dough to about 1/4 inch thick. You can think of it as rolling out pizza dough, but a lot more delightful for your furry friend.
- Using a cute cookie cutter (or just a knife if you’re feeling adventurous), cut out your treats into fun shapes. A bone shape always gets a wag of approval!
- Place the cut-out treats on a baking sheet lined with parchment paper. Give them a little space—they need their room to breathe.
- Bake in the preheated oven for 25–30 minutes. Just watch for that golden brown color; that means they’re ready and oh-so-tasty!
- Remove from the oven and let cool on a wire rack. This part is important; nobody wants hot treats to burn their pup’s tongue.
- Cool completely before serving to your dog. Trust me, the wait is worth it when you see that happy tail wagging at treat time.
And there you have it! Homemade coconut flour dog biscuits that your furry friend will love. Get ready for the appreciative slobber and tail wags.
Optional Add-ons
Adding a few optional ingredients can take your homemade coconut flour biscuits from delicious to downright irresistible.
Consider mixing in a spoonful of peanut butter or some pureed pumpkin for a tasty twist. Ever thought about adding shredded carrots? It’s like giving your pup a surprise inside!
Plus, a sprinkle of cinnamon can make them smell heavenly. Your furry friend will love you even more.
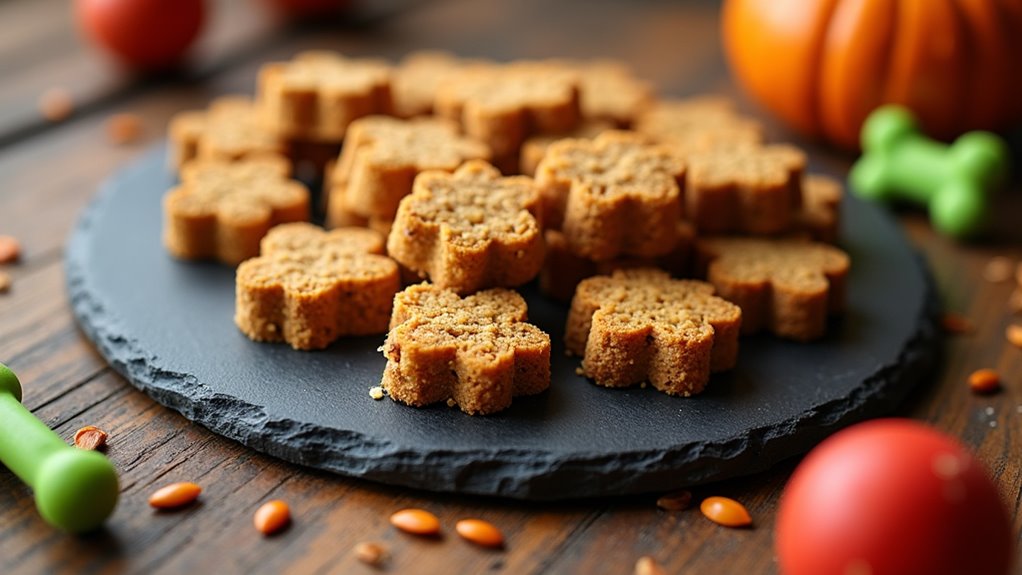
5. Chicken and Pumpkin Bites
Ready to treat your pup to something special? These Chicken and Pumpkin Bites are packed with flavor and so easy to whip up. Let’s get into the ingredients, step-by-step instructions, and a few fun add-ons to take these treats to the next level.
Ingredients
Making homemade treats for your furry friend isn’t just fun, it’s also a great way to show you care. Who wouldn’t want to whip up a batch of Chicken and Pumpkin Bites?
They’re perfect for snacking or rewarding good behavior, and the best part is you know exactly what’s going into them. Let’s get to the ingredients, so you can get started on this tail-wagging adventure.
- 1 cup cooked, shredded chicken (make sure it’s plain and unseasoned)
- 1 cup pumpkin puree (not the spiced pie filling, just pure pumpkin)
- 1 cup coconut flour (great for that grain-free goodness)
- 1 egg (to help hold everything together)
- 2 tablespoons of peanut butter (make sure it doesn’t contain xylitol)
- Optional: a pinch of cinnamon (just a tiny bit for a wee bit of flavor)
Just gather these items, and you’ll be well on your way to baking something your dog may just declare the best treat ever.
I mean, they can’t talk, but those wagging tails don’t lie, right? Happy baking!
Step by Step Instructions
- Preheat your oven to 350°F (180°C) and grab a baking sheet, lining it with parchment paper. This will save you some serious scrubbing later—trust me, it’s worth it.
- In a mixing bowl, add 1 cup of pureed pumpkin and 1 cup of cooked, shredded chicken. If you’ve got leftover chicken, this is your chance to be a hero.
- Sprinkle in 1 cup of almond flour and 1 egg. The egg will help bind everything together, so don’t skip it.
- Mix all the ingredients together until you achieve a consistent and sticky dough. Get in there with a fork or your hands—don’t be shy, it’s just you and the ingredients.
- Roll the dough into small balls, about the size of a tablespoon. Don’t worry about perfect shapes; your pup isn’t judging your artistry.
- Place the balls onto the prepared baking sheet. Give them a little space to spread out—because nobody likes crowded cookies.
- Press each ball down slightly with a fork to flatten them out. This gives them that cookie-like look and makes them easy for your dog to munch.
- Bake in the preheated oven for 25–30 minutes, or until they’re golden brown and firm to the touch. The aroma is going to make your kitchen smell like heaven—seriously, you might find yourself tempted to take a bite.
- Once baked, remove the treats from the oven and let them cool on the baking sheet for a few minutes before transferring to a wire rack.
- Cool completely before serving to your dog. You definitely don’t want to burn their little tongue—your pooch deserves the best!
Optional Add-ons
After your delicious chicken and pumpkin treats come out of the oven, why not take it up a notch?
You could sprinkle a bit of cinnamon on top for extra flavor, or mix in some cooked, mashed sweet potato for a little twist.
These add-ons not only enhance taste but also pack a nutritional punch.
Your pup will think you’re a gourmet chef in no time.
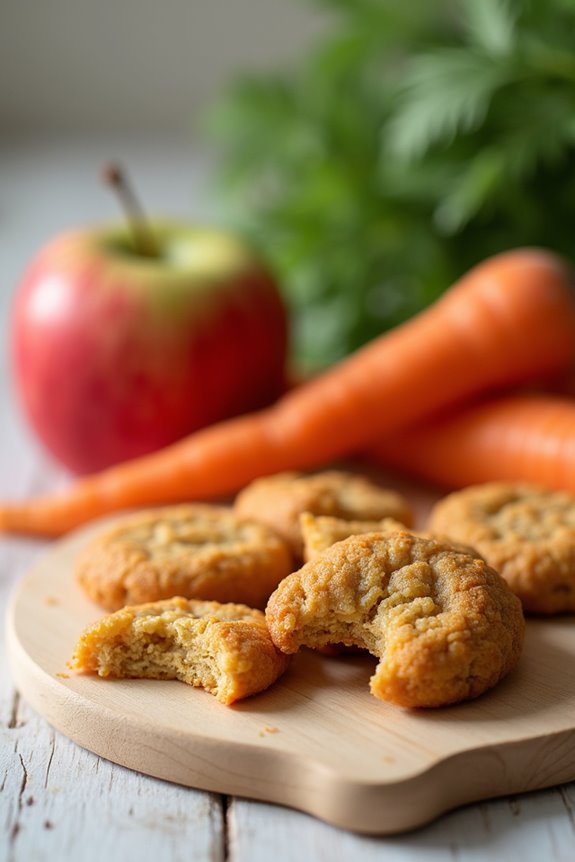
6. Apple and Carrot Crunchies
Ready to make some crunchy dog treats your pup will love? You’ll need just a few simple ingredients and some easy-to-follow steps. Plus, I’ll share a couple of fun optional add-ons that can make these treats even more irresistible.
Ingredients
If you’re looking to whip up something special for your furry friend, these Apple and Carrot Crunchies are the perfect treat. They’re super simple, and the ingredients can be easily found at your local grocery store. Plus, your pup will love you for it, and let’s be honest, who doesn’t want a dog that thinks they’re a culinary genius?
- 1 cup of finely grated carrots
- 1 cup of finely chopped apple (make sure to remove the seeds and core)
- 1 cup of oat flour (you can make this by blending rolled oats until fine)
- 1/2 cup of unsweetened applesauce
- 1 egg (large)
- 1 tablespoon of coconut oil (melted)
- 1/2 teaspoon of cinnamon (just a pinch for flavor, not too much)
These ingredients are all dog-friendly and pretty easy to grab, right? Making treats shouldn’t be more complicated than a lot of dog parents’ lives already are. You’ve got this!
Step by Step Instructions
- Preheat your oven to 350°F (175°C). Yearning for those delicious treats? Let’s get started.
- Gather your ingredients: 1 cup of grated carrots, 1 cup of finely chopped apple (remove seeds), 1 egg, and 2 cups of almond flour. Are you feeling organized yet?
- In a large bowl, mix the grated carrots and chopped apple together. You want to enjoy that bright orange and crisp green combo. Looks good, right?
- Crack the egg into the bowl and stir it in with the veggies and fruit. Don’t worry if it looks a bit messy—just embrace the chaos.
- Gradually add the almond flour to the mixture. Use a spatula to fold it in until everything is well combined. Remember, no need to overmix—lumps are welcome in this treat world.
- Line a baking sheet with parchment paper. This will save you from a sticky cleanup later. You’ll thank yourself later, trust me.
- Scoop tablespoon-sized amounts of the mixture and place them on the parchment. Flatten them slightly for even baking. They might look a bit like mini pancakes. I mean, who says treats can’t be cute?
- Bake in the oven for 25–30 minutes, or until the edges are golden brown. Take a little peek around the 20-minute mark—it’s really important to watch these little guys.
- Remove the treats from the oven and let them cool on the baking sheet for a few minutes, then transfer them to a wire rack. The aroma is heavenly, isn’t it?
- Cool completely before serving to your dog. Patience, my friend—it’ll be worth the wait when they go wild for these delicious crunchies.
Optional Add-ons
Adding some optional ingredients to your apple and carrot crunchies can take them from tasty to absolutely irresistible.
Think about tossing in a bit of peanut butter or some pumpkin puree—your pup will love it.
Feeling adventurous? Try adding cinnamon for a hint of spice.
Just remember, less is more. It’s all about experimenting and discovering what tickles your furry friend’s taste buds.
7. Savory Beef and Pumpkin Treats

Ready to whip up some irresistible treats for your pup? You’ll need just a few key ingredients like beef and pumpkin, plus I’ll guide you through simple, step-by-step instructions that make the process smooth and fun. There are also some optional add-ons that can take these treats to the next level, because who wouldn’t want to spoil their furry friend a little more?
Ingredients
When it comes to whipping up tasty treats for your pup, simplicity is key. These Savory Beef and Pumpkin Treats aren’t only delicious but also use ingredients that you might already have in your pantry. Plus, your dog is sure to love them. Let’s gather what we need.
- 1 cup ground beef (cooked and drained)
- 1 cup canned pumpkin (not pumpkin pie filling, please)
- 2 cups oat flour (you can make this by blending rolled oats in a food processor)
- 1 egg (it’s a great binder)
- 1 tablespoon honey (a little sweetness goes a long way)
- 1 teaspoon dried parsley (for freshness)
- Optional: ½ cup low-sodium beef broth (to moisten the dough, if needed)
Step by Step Instructions
- Preheat your oven to 350°F (175°C). Let’s warm things up; nobody likes a cold treat.
- Gather all your ingredients: 1 cup of cooked, shredded beef, 1 cup of canned pumpkin, 2 cups of almond flour, and 1 egg. Check you have everything—maybe give a little nod of approval after each item.
- In a large mixing bowl, combine the shredded beef and canned pumpkin. Mix well until the ingredients are fully combined (you want to see a nice, even blend).
- Crack the egg into the bowl and whisk until everything is blended together. A good whisk is your best friend here; think of it like a mini workout for your arm.
- Gradually fold in the almond flour. Start with half, mix, then add the rest. Don’t overmix; it should be slightly sticky but not a complete disaster (we’re going for treat, not concrete).
- Prepare a baking sheet by lining it with parchment paper. This is the best way to avoid a sticky situation when you try to take the treats off later.
- Scoop tablespoon-sized amounts of the dough and roll them into balls, placing them on the lined baking sheet. Give them some space, about an inch apart—they need a little room to spread out while baking.
- Press each ball down gently with a fork to create a flat disc. Make it a funky shape, if you like; just remember, your pup isn’t judging aesthetics.
- Bake in the preheated oven for 20–25 minutes, or until the edges are lightly golden brown. The smell will have you drooling in no time—seriously, it’s hard not to taste them yourself.
- Remove the baking sheet from the oven and let the treats cool for about 10 minutes. Resist the urge to devour them; they need a little more time.
- Once cooled, transfer the treats to a wire rack to cool completely before serving to your dog. It’s like giving them a little message of love while you wait.
Optional Add-ons
After those savory beef and pumpkin treats come out of the oven smelling heavenly, why not kick things up a notch?
Try adding a spoonful of peanut butter for extra flavor, or toss in some finely chopped carrots for a crunchy surprise. Your pup won’t be able to resist.
Monitor Ingredient Freshness
Fresh ingredients are the secret sauce to making delicious grain-free dog treats that your pup will go crazy for.
So, how do you make sure your ingredients are fresh? First, check the expiration dates on everything. Seriously, you don’t want to find out that the peanut butter you just opened is older than your dog. Yikes.
Next, always inspect your fruits and veggies. If they look like they’ve seen better days, maybe skip using them.
As you’re preparing your treats, store anything you don’t use in the fridge or freezer. That’ll help keep them fresh for a longer time.
And here’s a trick: when you buy in bulk, label everything with the date you purchased it. That way, you mix the older stuff first.
Fresh, tasty ingredients help your furry friend enjoy their treats—and isn’t that the goal?
Plus, you’ll feel like a superstar dog chef. Who knew?
Frequently Asked Questions
Can I Use Other Protein Sources Besides the Ones Suggested?
Yes, you can definitely use other protein sources! Just make sure they’re suitable for your dog’s dietary needs. Experimenting with options like fish, lamb, or even plant-based proteins could be beneficial for your pup.
How Can I Store These Homemade Treats for Freshness?
You can store homemade treats in an airtight container in a cool, dry place. If you want to keep them fresher longer, consider refrigerating or freezing them for added longevity and to maintain their flavor.
Are These Recipes Suitable for Puppies?
Yes, these recipes can be suitable for puppies, but you should check ingredient safety first. Ascertain they’re age-appropriate, as puppies have different nutritional needs. Consulting your vet before introducing new treats is always a smart idea.
What Are Signs My Dog Is Allergic to an Ingredient?
If your dog is allergic to an ingredient, you might notice itching, swelling, gastrointestinal upset, or skin rashes. Pay attention to any unusual behavior or reactions after eating, and consult your vet for guidance.
Can I Substitute Ingredients if My Dog Dislikes Certain Flavors?
Absolutely, you can substitute ingredients! If your dog dislikes certain flavors, try using alternatives they prefer. Just make certain the replacements are safe and nutritious for them while still adhering to any dietary restrictions they might have.