
Remember when your mom wouldn’t let you dye your hair that wild neon green? Well, now it’s your chance to release your creativity on your dog’s fur instead. If you’ve got a pup with a personality that just begs for some flair, you might be wondering what dog dye ideas you can try. From rainbow swirls to chic geometric shapes, there’s a whole world of colorful possibilities waiting for you and your furry friend. Stick around, ’cause you won’t want to miss these fun designs.
Color Patterns for Fur
When it comes to color patterns for your dog’s fur, the options are endless and super fun.
Imagine a rainbow swirl that practically makes your pup a walking piece of art, or geometric shapes that would impress even the pickiest of critics.
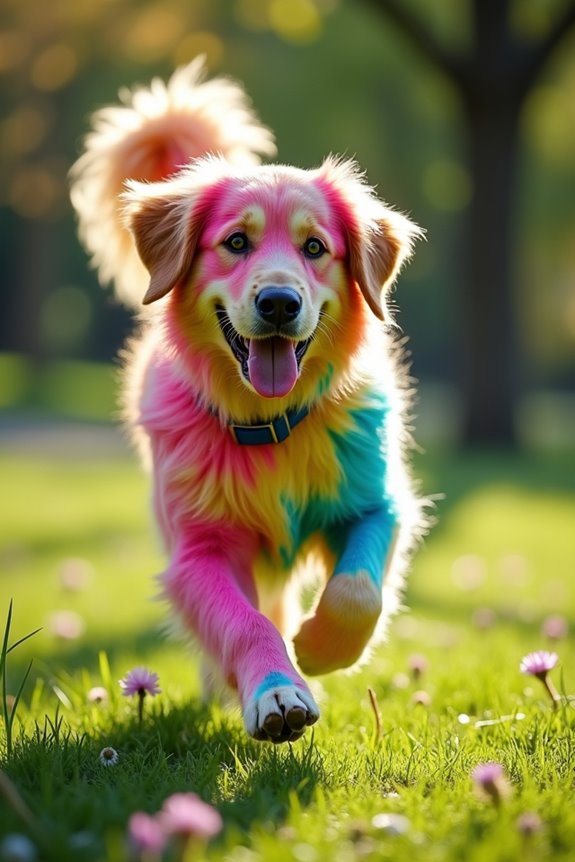
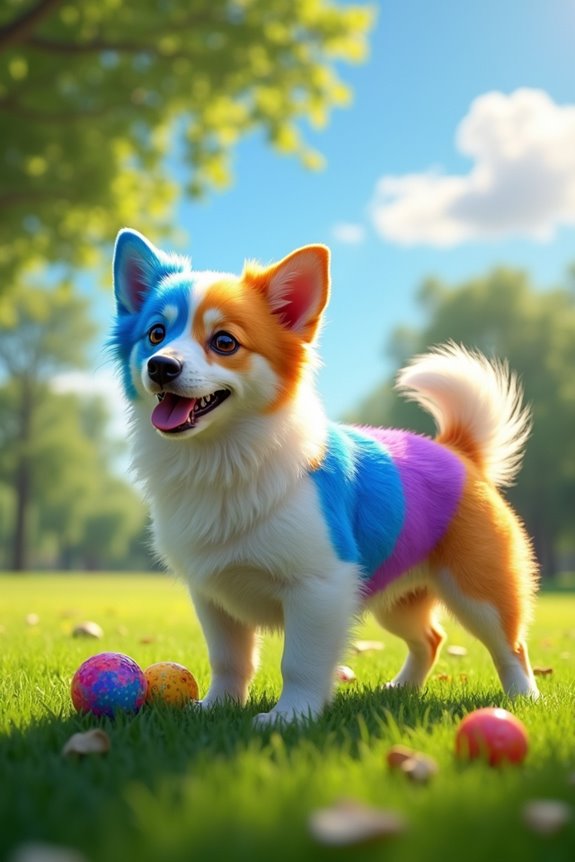
1. Rainbow Swirl Pattern
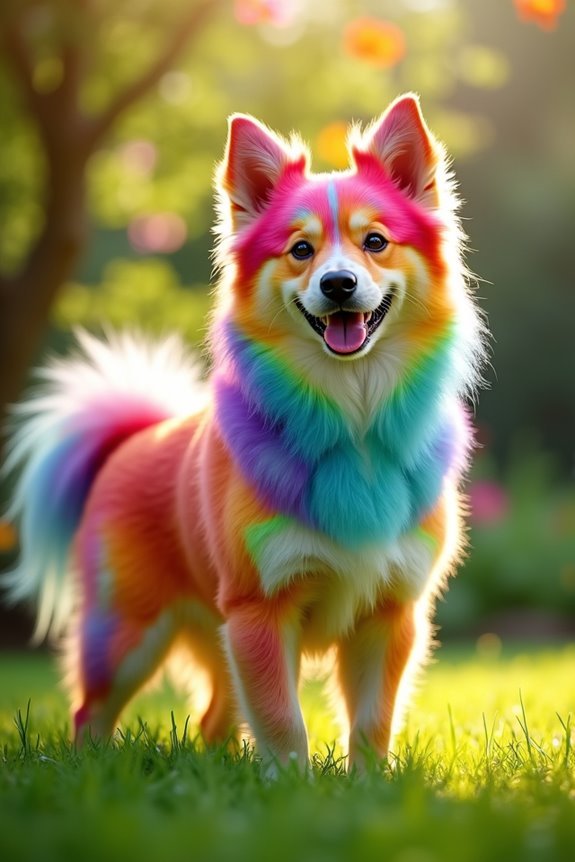
When it comes to dyeing your dog’s fur, nothing beats the vibrant charm of a rainbow swirl pattern. It’s not just a visual delight; it brings an upbeat and playful vibe to your furry friend, making every outing feel like a mini celebration. Plus, who wouldn’t want their pup to stand out at the dog park? Let’s explore how you can create this lively look with just a bit of time and creativity.
To start off, gather all your supplies. You’ll need dog-safe dyes—look for ones that are easy to wash out, just in case your masterpiece doesn’t quite turn out how you imagined. I once ended up with my dog looking a bit like a tye-dye disaster, but hey, we laugh about it now!
Also, grab some cotton balls or sponge brushes for application, and of course, gloves. You’ll want to keep your hands from looking like a rainbow explosion post-session.
Now, let’s talk about the fun part: the actual dyeing! Choose a spot where you can let your creativity run wild without worrying about getting dye everywhere—trust me, your clean kitchen floor doesn’t deserve those colorful splatters.
Begin with the lightest color first; it’s a great way to build your layers. Think of it like painting, only your canvas is a fluffy dog instead of a boring old piece of paper. Apply the dye in sections, swirling from root to tip, mixing colors as you go for that beautiful, blended look.
One important tip: make sure your pup is comfortable throughout the process. A few gentle treats can work wonders to keep their spirits high. Ah, the classic bribe method—it’s not just for kids!
After you’ve applied the colors, give your dog some time to let the dye set. Maybe a quick game of fetch to shake off the wiggles?
Finally, after what seems like an eternity of waiting (or just 20 minutes), it’s rinse time. Use lukewarm water and shampoo lightly to help wash out any excess dye. I recommend doing this outside if you can. Your shower probably didn’t sign up for an art project, right?
Once you’re done, dry your dog off with a towel, and prepare for the spectacular reveal. Seriously, it’s like exposing a colorful masterpiece. Don’t forget to snap a million pictures because who wouldn’t want to share their rainbow dog’s debut on social media?
And remember, a dog with a swirl of colors is a conversation starter, so be ready to bask in all that attention (and maybe even some playful jeers about your epic dyeing skills).
2. Geometric Shapes Pattern
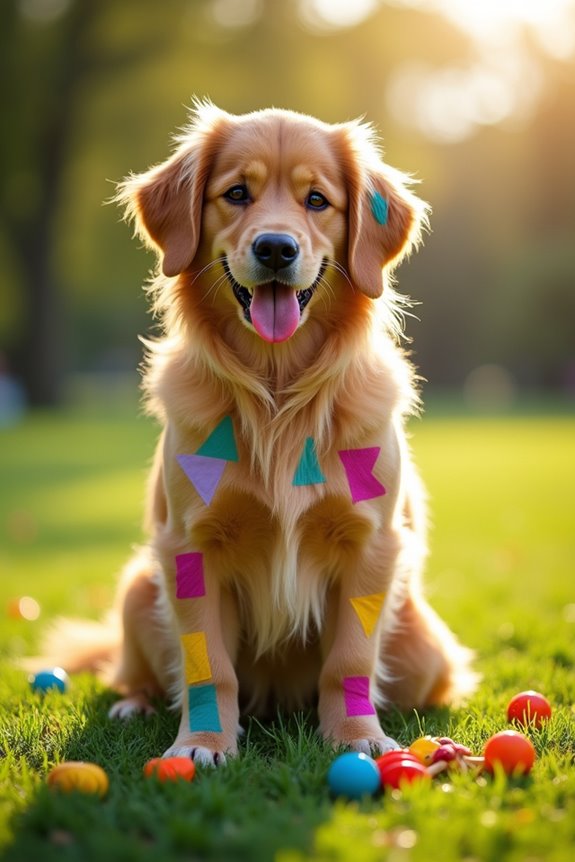
When it comes to adding a touch of flair to your dog’s appearance, geometric shape patterns are a fantastic choice. Not only do these designs create a trendy, modern look, but they also bring a sense of structure and fun to your fluffy friend’s fur. Plus, who doesn’t love a little bit of chic style in the dog park?
To kick things off, gather your supplies—yes, another shopping list! You’ll need your trusty dog-safe dyes, sponge brushes, and some patience. Trust me, this isn’t just straightforward painting; it’s like crafting a masterpiece on a wriggly canvas! Select colors that complement each other—maybe some bold blacks and bright yellows or soft blues and rosy pinks.
Now comes the fun part: creating the shapes! Think triangles, squares, or even funky zigzags. Start with your base color, using a sponge brush to apply it in large sections where you want your shapes to go. Imagine you’re giving your dog a stylish haircut, but with color instead of scissors.
Then, carefully outline your geometric patterns with a contrasting color. This is where steady hands come in handy. I’ve learned that steady hands and a focused mind are key, or else you might end up with more of a Jackson Pollock style than neat shapes.
Don’t forget to keep your dog entertained! A few treats can easily distract from the dyeing process, and maybe throw in some fun toys to help them relax. I usually play some goofy music in the background to lighten the mood – who knew dogs could dance while getting a makeover?
Once your shapes are in place and you feel like a proud artist, it’s rinse time! Use lukewarm water and gentle shampoo to wash out the excess dye. I prefer to do this outside because one time I accidentally made my bathroom look like a color bomb went off. Trust me, your tiles will thank you later!
After rinsing, dry your pup with a towel and get ready for the reveal. The best part? Watching your dog strut their stuff in their new, stylish fur! Remember, dogs require premium dog food for optimal health, ensuring their coat remains vibrant and glossy, which complements your artistic efforts.
Don’t forget to snap some adorable photos to share with friends and family or maybe even start that Instagram account you’ve been thinking about. Geometric shapes aren’t only visually delightful; they turn everyday walks into runway moments, and who wouldn’t want that?
3. Floral Motifs Design
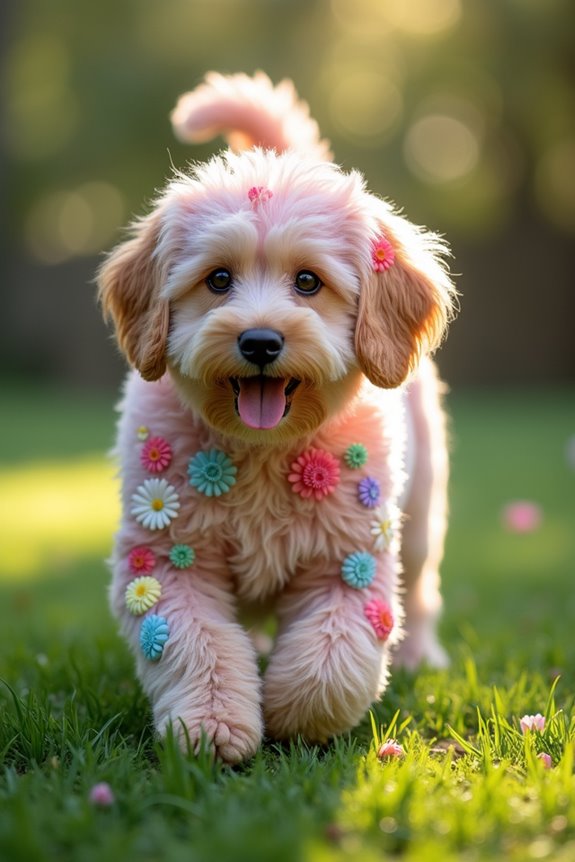
If you’re looking for a burst of beauty to brighten up your dog’s look, floral motifs are the way to go. These vibrant designs not only add a touch of whimsy, but they also exude a friendly, inviting vibe. Imagine your pup drawing compliments on strolls like they’re the A-list star of the pet world. Plus, who wouldn’t want their fur-friend to resemble a living flower garden?
First things first, gather your materials. You’ll need the same dog-safe dyes, a selection of sponges (or even paintbrushes if you’re feeling fancy), and a steady hand. Keep a paper towel handy, too – spills happen, and I’ve learned that lesson the hard way more times than I care to admit. Also, it’s a good idea to have some premium dog treat dispensers on hand to keep your dog occupied while you get creative.
Choose colors that resonate with each other, maybe think of soft pastels that remind you of spring or bold and vivid hues for a splash of summer fun. It’s also recommended to provide your dog with high-quality nutrition from premium dog food brands to ensure they have the energy during the creative process.
Now, let’s get our flower power on! Start by applying your base color on your dog’s fur. This could be a lovely light hue as a background that lets your floral patterns really pop. Once you have the base laid down and dried a bit, it’s time to create your flowers! You can paint simple flower shapes like daisies or something fancier like roses. Make small blobs for petals and don’t stress if they don’t look perfect—dogs are too cute to care about floral realism anyway. It’s all about bomb vibes, right?
And while you’re bringing spring into winter, don’t forget to keep your pup entertained. Treats and snuggles go a long way during the dyeing process. Maybe keep a favorite squeaky toy nearby to distract them if they start to wiggle too much.
Trust me, if my dog had the ability to laugh at my chaotic attempts, I’d be in trouble.
Once you’re content with your floral beauty masterpiece, it’s rinse time again! Grab some lukewarm water and a gentle dog shampoo to wash away any excess dye. I’ve made the mistake of doing this inside once—let’s just say my dog wasn’t the only one left with a colorful surprise.
Dry them with a towel, step back, and take in your work. The final reveal is always the best part. Snapping some pictures to share on social media is a must. Those floral designs will definitely turn heads and hearts!
4. Custom Stencil Designs
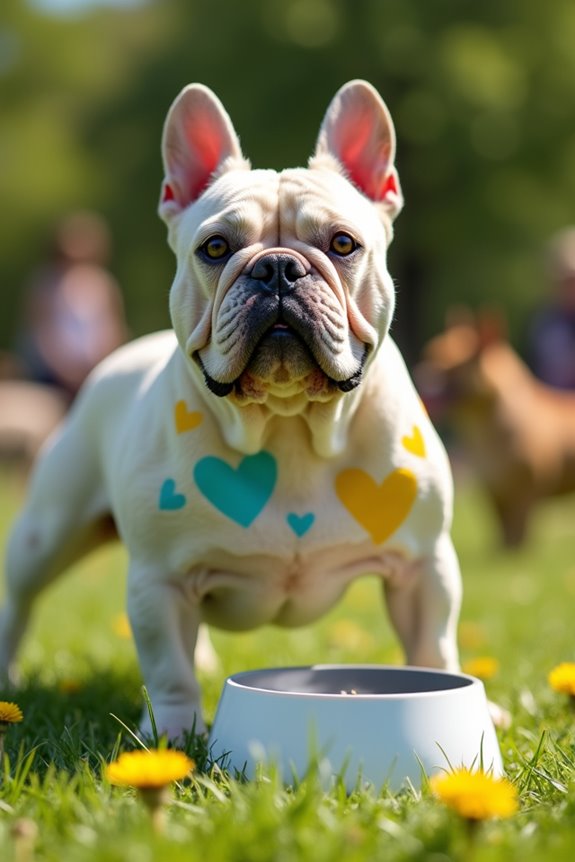
Ready to take your dog’s look to the next level? Custom stencil designs can be a game-changer. Not only do they offer endless opportunities for creativity, but they also create a sleek, artistic vibe that’s hard to beat. If you want your bulldog to thrive as they rock their new look, invest in premium dog food for bulldogs to keep them healthy.
Think about it—your pup strutting down the street with a stylish patterned coat is bound to catch everyone’s eye and make you the talk of the town, or at least the dog park.
First, you’ll want to pick a stencil that suits your dog’s personality. Maybe they’re playful and fun, which calls for stars or hearts, or perhaps they’re a bit of a wild spirit that would rock some lightning bolts. You can easily create your own stencils from sturdy cardboard or purchase some pre-made ones online. Cut out your shapes carefully—just like I wish I’d have when I tried to make a star stencil last time. Let’s just say my star ended up looking like a sad blob.
Next, grab your dog-safe hair dye in your chosen colors and a sponge or brush for applying. Start with a base color—maybe a nice white or light shade for a great backdrop.
After the base layer has dried, it’s time to lay down that stencil. Make sure it’s held firmly against the fur so it doesn’t shift while applying the dye. I learned this the hard way after my craft night morphed into a messy abstract art session.
When you’re ready to apply the color, carefully dab the sponge over the stencil. Go for thin, even layers. Too much dye could cause drips, and, let’s face it, no one wants to explain how their dog ended up with polka dots in all the wrong places.
Remember, patience is key here. You can always add more later, but it’s tough to fix if it’s too dark right off the bat.
Once you’ve got your design set, peel away the stencil slowly so as not to mess up your hard work, and rinse your pup with lukewarm water. A gentle dog shampoo should do the trick, so you can keep their fur clean and soft.
And if you’re looking to streamline feeding time for your stylish canine, consider investing in an automatic smart pet feeder, which can help take care of mealtime while you focus on your dog’s fabulous new look.
Look back at your stunning creation and admire—don’t forget to grab your phone for some Instagram-worthy photos. With the right stencil design, your dog could snag a little runway time in the park, and who wouldn’t want that?
5. Tie-Dye Techniques
Ready to make your pup the talk of the dog park? Tie-dye techniques can transform your furry friend into a walking canvas of color. Not only does this style scream fun and individuality, but it also gives your dog an invigorating, kaleidoscopic vibe that’s sure to turn heads. Just picture it—a splashed, swirling masterpiece trotting around the neighborhood. How could that not brighten up your day?
Now, let’s talk tie-dye basics. It starts with selecting a few vibrant dog-safe dye colors, and trust me, you won’t need the whole rainbow (though I’ve been known to go a bit overboard sometimes). Pick 3 to 5 shades that work well together, like bright pink and sunny yellow or electric blue with vivid green. It’s all about creating that perfect funky swirl of colors. To keep your dog’s fur and skin safe, ensure you use dog-safe dyes for this process.
Next, gather your supplies. You’ll need a spray bottle for your dye, rubber bands, and some water. You can even use a spray bottle for more control, especially if you’re anything like me—you know, the type who’s had a run-in with a rogue squirt bottle and a white shirt. (Spoiler alert: the shirt didn’t survive.)
When you’re ready to get started, wet your dog’s fur. This helps the dye stick better and creates those beautiful blending effects. Now, take sections of the fur and twist them into little buns, securing each with a rubber band. You can create spirals, waves, or just go free-form. The beauty of tie-dye is that there are no rules—except perhaps that you shouldn’t put the dye on your dog’s face. That can get messy, and let’s avoid an accidental ‘clown dog’ situation.
Now, with your dog sitting patiently—hopefully with a treat or two as motivation—spray on your dyes in a random, patchy manner. The key is to overlap a bit to get that gorgeous blending look. It’s like making a smoothie, right? You want all those flavors to mix together, but some chunks are totally fine. Just keep spraying until you’re satisfied with the color explosion.
Once you’re done dyeing, let your pup hang out for about 30 minutes to an hour. This allows the colors to absorb well. And yes, this is the part where they may look totally ridiculous, but trust the process.
After the waiting period, rinse your dog in lukewarm water until the water runs clear, and gently shampoo to keep that fur soft and fluffy. Additionally, make sure to provide a comfortable space for your dog to relax while the dye sets, such as a premium outdoor dog kennel, to keep them calm and happy during the process.
Once your tie-dye masterpiece is revealed, brace yourself for the adorableness. You’ll be tempted to take a million pictures—just remember the treats were a bribe for good behavior during the dye process.
And while I can’t say I’ve been invited to any art shows yet, I can safely say my dog will always be a standout with their fabulous, swirling fur. So, give tie-dye a go; it’s colorful fun, and your pup will love being the coolest dog on the block.
6. Sparkly Glitter Accents
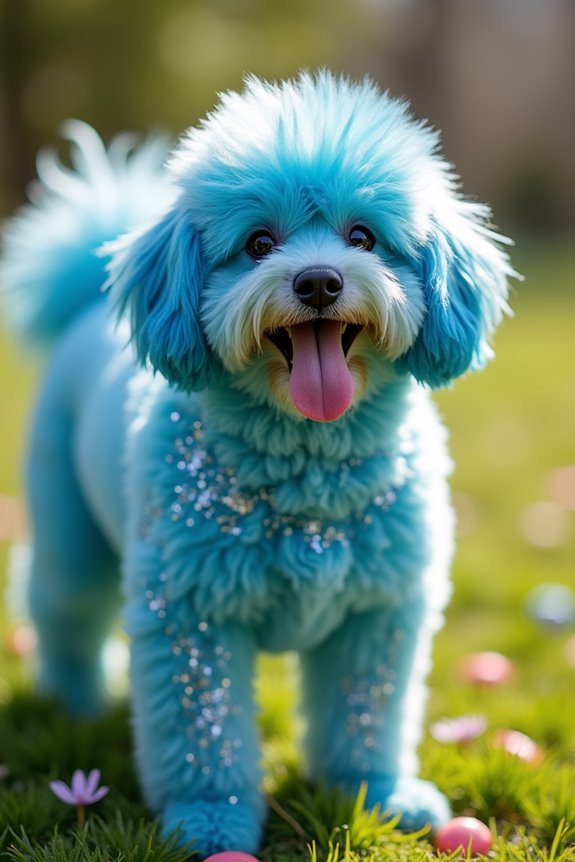
Let’s plunge into the glittery goodness, shall we? First, you’ll need some dog-safe glitter (yes, that exists, and thank goodness for that), along with the color-safe dye you used before. Pick a couple of colors—maybe a vibrant blue for the base and some whimsical silver or gold glitter to add that extra flair. You want to make sure the colors complement each other and resonate with your dog’s personality. If your pup is more of a calm, gentle soul, stick to softer colors. But if they’re the life of the party, go bold and bright! To make the most of your creative grooming session, consider investing in a luxury dog grooming kit, which often includes high-quality tools that can make the process easier and more enjoyable.
Before you start, it helps to have your space prepped because trust me, glitter gets everywhere. Lay down some old towels or a craft mat to catch any rogue sparkles.
Now, after your tie-dye adventure, let’s sprinkle in the magic. Once the dye has taken and is all rinsed out, it’s time for the glitz. Lightly dampen your dog’s fur again. This will help the glitter stick like a charm, and your pup won’t end up looking like they just got out of a confetti cannon.
Grab a handful of glitter, and carefully sprinkle it on their coat, focusing on strategic areas like the back or tail for maximum effect. While you do this, keep a few treats handy. A little encouragement goes a long way. “You’re doing great, buddy. Just a little more sparkle, and you’ll look like the star you are!” Because who can resist those puppy dog eyes?
Make sure to rub it in gently, but not too much—motorboat fur isn’t the goal here. Once you’ve achieved that perfect sparkle and bling, gently brush through your dog’s fur to distribute the glitter evenly. Remember, a little goes a long way, and we want to avoid a walking glitter bomb.
After your pup is adorned in all that shine, let them strut their stuff, but do be cautious. While glitter is safe, be mindful about it getting into their eyes or mouth. If your dog is more like a curious cat, keep an eye out for that playful tongue. Using premium dog training equipment can also help ensure that they stay calm and well-behaved during the whole process.
Once it’s all done, your pup won’t only look fantastic but will also bring smiles and laughter wherever they roam. Just don’t forget to snag some pictures—those sparkling moments are ones you’ll want to treasure forever.
7. Pastel Ombre Effect
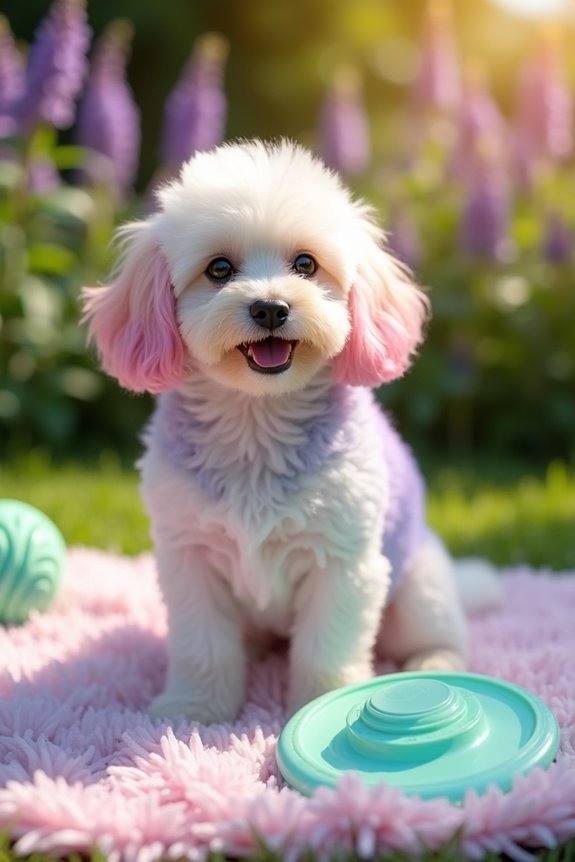
Let’s chat about the ever-so-charming pastel ombre effect for your furry friend’s fabulous new look. This technique isn’t just pretty; it creates a gentle shift of colors that looks sophisticated while still being playful. Plus, who doesn’t want their pup to strut around like they just stepped off a fashion runway? The faded, soft colors blend beautifully, giving off a laid-back vibe perfect for any occasion—be it a romp in the park or a cozy night in.
To get started, gather your pastel dyes—think soft pinks, baby blues, mint greens, and lavender. These colors are great for conveying that sweet, whimsical personality of your pup. Avoid the super bright colors for this look; we want to keep it on the pastel side. Oh, and don’t forget your gloves—unless you want a surprise tie-dye job on your hands to match your dog’s new style. Additionally, it’s important to note that dog incontinence management may require special attention when dyeing your pup’s coat, especially if they have existing sensitivities.
First, decide on the color order for the ombre effect. A classic shift could be going from lavender at the tips, blending into a soft pink, and fading into white. It’s like a sunset… but for your dog! Apply the lightest shade at the roots and gradually add the darker colors toward the tips. Use a squeeze bottle or sponge for controlled application. Trust me, nobody wants messy fur—or their carpet might just get a new color scheme, too.
As you’re applying the dye, use a comb to help blend the colors together. This is where things can get a bit messy, so if you have a slightly less-than-cooperative dog, maybe consider a few extra treats or a favorite toy close by. Engage with them, e.g., “Look at you, getting all dolled up!” It makes the whole experience more enjoyable for both of you.
Once you’re satisfied with the blend, let it sit for about 15 to 20 minutes—just enough time to sip some coffee and ponder life’s mysteries, like why dogs insist on digging in the dirt right after a bath. An insulated dog house ensures that your dog has a cozy space to stay warm after their stylish makeover. After rinsing, pat your pup dry and get ready for the big reveal. The subtle color shifts will be eye-catching, and you’ll likely be proud of your creative handiwork.
Finally, take a moment to capture those sparkling moments. Snap some photos and share them with friends; after all, every dog deserves to be a social media star. Plus, who knows? This ombre journey might just motivate you to take your dyeing skills to the next level. It’s a win-win. Now, let your colorful companion prance around and enjoy all the compliments.
8. Animal Prints Technique
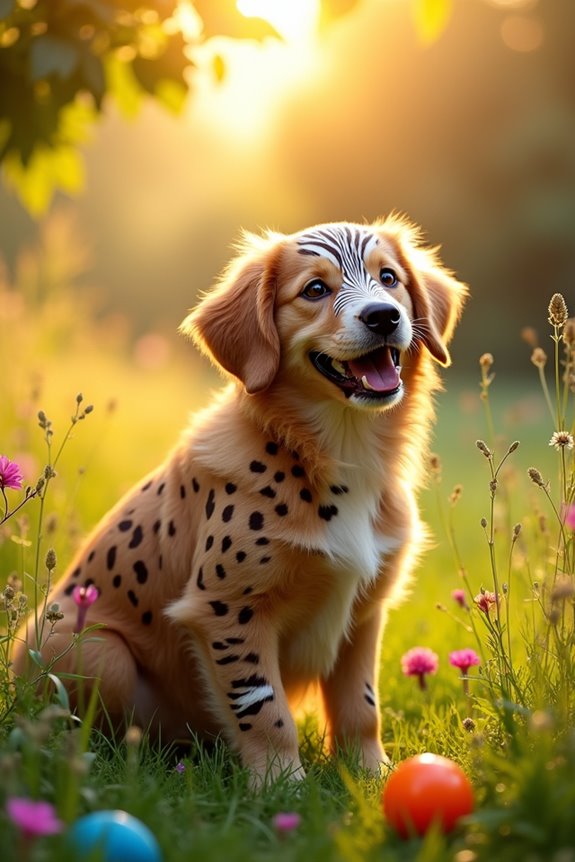
When it comes to doggy style, nothing makes a bolder statement than the animal prints technique for fur dyeing. It’s not just a look; it’s an attitude. Imagine your pup strutting around in fierce leopard spots or adorable zebra stripes. This technique adds a playful jungle vibe, transforming your dog into a walking piece of art. They’re sure to be the talk of the dog park.
To begin, pick some fabulous dye colors. Think rich browns for a classic leopard print or vivid blacks and whites for a signature zebra. Gather your supplies: gloves, a couple of brushes, and maybe even a stencil for those intricate shapes. Trust me, this is where you’ll want your creative juices to flow. No one wants a “spot” that looks more like a splatter, right?
Start by preparing your dog’s coat – give them a thorough wash and dry, then brush them out to guarantee their fur is tangle-free. Once your pup is all set, begin with a base coat. If you’re going with a leopard print, use a golden-brown shade as your background. Apply this over their entire body, but keep it light. You want the elegant spots to pop against the base, not drown in it.
Now, it’s time to create those eye-catching patterns. Using your brush, dab on the darker color in random spots, mimicking the natural design of a leopard. If you’re feeling adventurous, let loose and get a little abstract with those spots. Who cares if they’re not perfectly round? Dogs are meant to be fun, not flawless.
For zebra stripes, you’ll want to use long, flowing strokes, curving them gently along their body. Remember, it’s art—embrace the wobbly lines.
Once you’ve got your patterns in place, let the dye sit for about 20 minutes. This is the moment for you to channel your inner art critic and contemplate your masterpiece. Should you have gone for a neon giraffe look instead? Nah, let’s stick with fierce, not fluorescent.
After the wait, rinse your dog with cool water. Gently pat them dry, and watch your wild creation come to life.
Before letting your stylish pup run free, grab that camera. You’ll want to capture the adorable chaos of them prancing around, showing off their newfound fashion. Who knows? Those Instagram likes might just pour in as you showcase your dog’s wild side.
Now, sit back and enjoy all those compliments, knowing you sculpted this fabulous look from scratch. Happy dyeing!
9. Color Block Variation
Color blocking is one of those fabulous trends that’s not just reserved for fashion—it’s perfect for your pup’s fur too. This technique involves contrasting solid blocks of color, which add a fun, modern edge to your dog’s look. Imagine your furry friend sporting bright purple mixed with a touch of electric blue, turning heads on every walk. It’s playful yet manageable, creating a striking visual impact that stands out anywhere—especially at the doggy daycare.
So, how do you achieve this chic style? First, gather some vibrant dye options. Think bold, think bright. Grab colors that complement each other, but don’t shy away from going a little wild. You want your dog to be the trendsetter, not a wallflower.
Make sure you have all your supplies handy: gloves, brushes, and sectioning clips are essential. Get ready to channel your inner artist, because this is where the magic happens.
Start by giving your dog a good bath. A clean canvas is key. Once they’re squeaky clean and dry, brush their fur so it’s all nice and smooth. Now, decide where you want your blocks of color. The method’s all about separating sections to create those bold contrasts. Use the clips to keep areas apart, so you don’t accidentally get a splash of orange in your blue section.
Mistakes happen (trust me, I’ve been there), but we want to keep things stylish.
Now it’s time to apply the base coat. If you’re starting with a lighter shade, it can help pop the bolder colors you’ve chosen. Think of it as the foundation of a colorful masterpiece. After the base, carefully apply the first color in the first section using your brush. Be sure to cover the fur evenly. Work from the roots to the tips to avoid splotches.
Repeat this for each color and section, adding layers until you achieve a vibrant look.
Let it sit for about 20 minutes. This is the moment to pat yourself on the back. You’re really doing this. After the wait, rinse them out with cool water, and don’t forget to gently pat them dry. The reveal is always the best part. Watching that colorful beauty shake off the extra water and strut their stuff is a joy that can’t be beaten.
And don’t forget about photos! Snap a few shots before they plunge into the mud or roll around in the grass. You’ll want to capture their fabulous new look before they return to their natural state of charming chaos.
With this fun color blocking technique, your pup will turn into a walking color palette, and they’ll be sure to steal the show wherever they go. Happy dyeing!
10. Camo Pattern Method
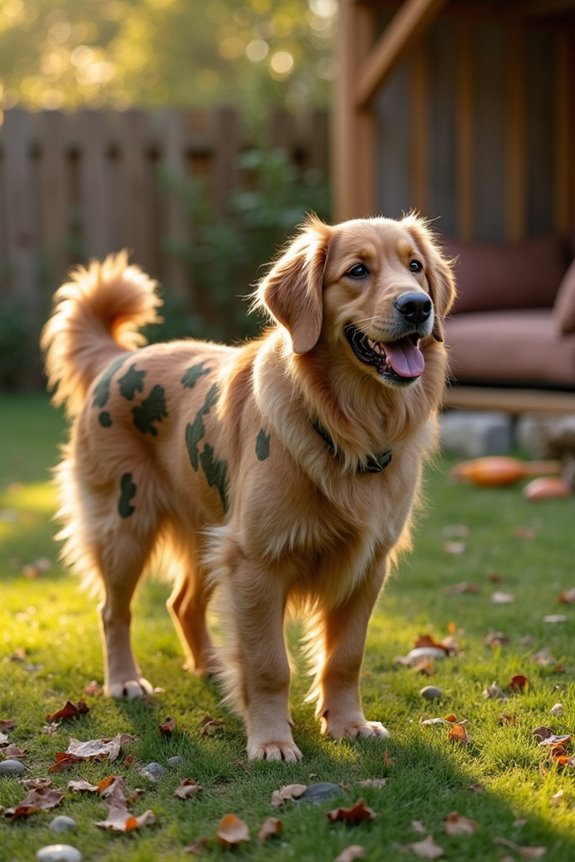
If you’re looking to combine style and function, the camo pattern method might just be the answer. This look isn’t just about color; it’s about creating a cool, rugged vibe for your furry friend while cleverly blending in with their surroundings—like the outdoors or your backyard.
Plus, let’s be honest, who doesn’t want their pup to look like the coolest dog on the block, ready for any adventure? Consider also how this aesthetic can be complemented with luxury designer dog beds that offer both comfort and elegance.
To start with this exciting camo style, you’ll want to pick a color palette that reflects the great outdoors. Think earthy tones like olive green, sandy beige, and deep browns—colors that mimic nature. The idea is to create splashes of these shades to form a pattern that resembles classic camouflage.
It’s like giving your dog a fashion makeover that also lets them embrace their inner wild side.
Before you embark on this creative journey, gather your supplies: dog-safe dye, brushes, gloves, sectioning clips, and a couple of trusty towels (trust me, you’ll need them).
Bath time is up next! A clean pup is essential for an even dye job. Once your pooch is washed, brushed, and ready to go, it’s time to get creative.
Divide your dog’s fur into sections with those handy clips. Think of it as making sections for a complicated recipe—you don’t want the flavors mixing yet.
Apply your lightest color first in random patches, like a playful splash here and there. Then, using your darker shades, add more spots, overlapping in a way that could fool an unsuspecting squirrel.
Work carefully, and feel free to channel your inner artist as you create those intricate patches.
Give the dye about 20-30 minutes to soak in while you sip some water and pat yourself on the back for your crafting skills.
Rinse with cool water and, depending on how much muddy fun they’re likely to get into, you might want to take a photo or two right away.
But don’t stress too much—if your dog ends up looking a bit more like a mixed-up puzzle than a camo champ, it’s all part of the charm.
Just think of it as your pup’s unique style statement! Remember, it’s not just about looking great; it’s about bonding with your furry friend through a fun, creative experience.
And who knows, maybe they’ll be instigating a new trend at the dog park before you know it. Additionally, while you’re at it, consider pairing this stylish look with luxurious dog products that can enhance your pup’s comfort and style!
Safe Dye Selection Techniques
Choosing the right dye for your dog can feel a bit like maneuvering through a minefield, especially with so many options out there.
You’ve got to think about safety first. Look for dyes labeled “pet-safe” or “natural.” Sure, those vibrant neon colors might look fun, but they could contain harmful chemicals. Additionally, using giant dog beds orthopedic can provide your pet comfort while they undergo the dyeing process.
Have you considered vegetable-based dyes? They’re gentler and can lead to some fabulous dog dye ideas.
Before you immerse yourself, test a small patch on your pup. If they react poorly, you might end up with a furry canvas that’s less masterpiece and more disaster. Additionally, using pet-safe dye options can greatly reduce the risk of allergic reactions in your dog.