Okay, so you know how your golden just looks at you with those big eyes and you’d literally do anything for him?
Yeah. That’s how I ended up at my kitchen table at 11pm with a hot glue gun and zero regrets.
I’d been scrolling Pinterest forever trying to find something cute for my pup Maple — something that actually fit right and didn’t cost $40 for like, two wears. Store-bought dog clothes always looked sad on her. So I started making my own, and girl, I never looked back.
Here’s the thing though — diy dog clothes don’t have to be complicated or messy. My first attempt was a disaster (RIP that flannel shirt), but I figured it out.
These 7 ideas are the ones I keep coming back to. Easy, adorable, and your golden is going to look so good.
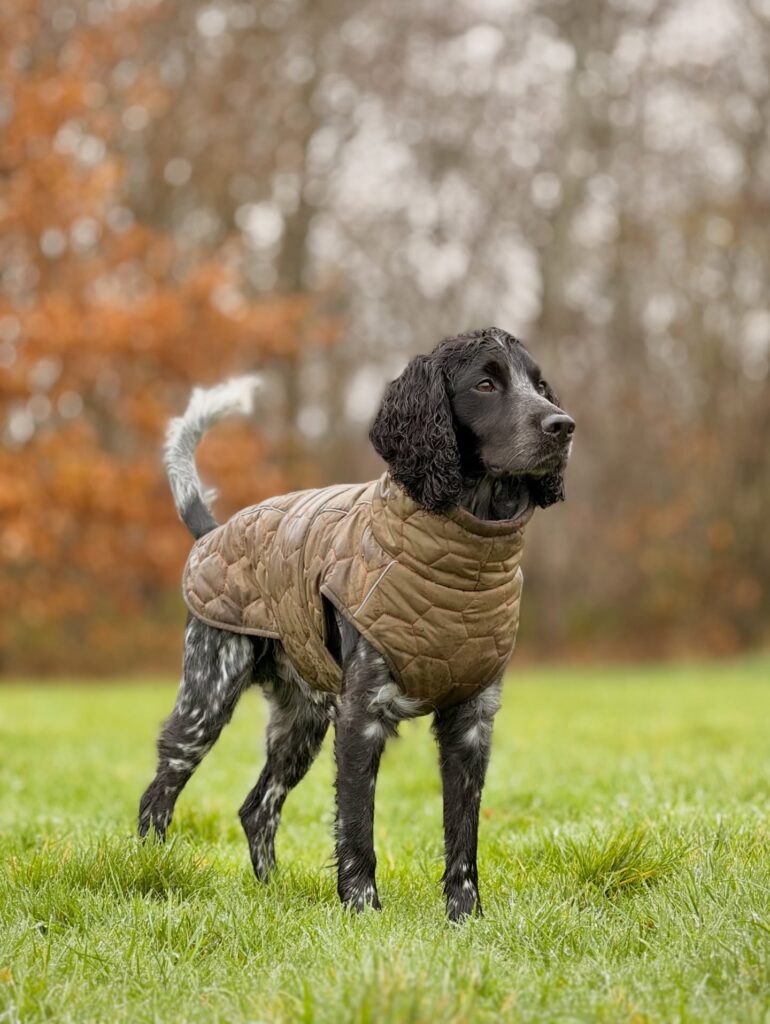
#1: DIY Quilted Dog Coat (No-Sew Version That Actually Looks Good)
You know that moment when your golden comes in from the backyard soaking wet, shaking rain all over your just-mopped floors, and you think — why don’t I have something to keep her warmer so she actually wants to stay outside longer? Yeah. That moment hit me hard last fall.
This quilted dog coat is giving me all the cozy autumn vibes, and honestly? It looks like something you’d find at a boutique pet shop.
Prep Time: 20 min | Active Project Time: 1.5 hours | Difficulty Level: Intermediate
Materials & Tools:
– ½ yard quilted cotton fabric (tan/khaki — that warm latte color in the photo)
– ½ yard fleece lining fabric in charcoal or black
– Fabric scissors or rotary cutter
– Tailor’s chalk or washable fabric marker
– 1-inch velcro strips (two sets)
– Sewing machine or heavy-duty fabric glue
– Your dog’s measurements (neck, chest, back length)
Instructions
Start by measuring your dog’s back from collar to tail base, then wrap the tape around the widest chest point. Add 2 inches to each measurement for seam allowance — this gives the coat that fitted-but-not-restrictive look you see here.
Cut your quilted fabric into a saddle shape: wider at the chest, narrowing at the belly. The high mock-neck collar? Cut a separate 4-inch strip, fold it in half, and attach it at the neckline. That structured collar keeps cold wind off their throat — warm neck means a warmer dog overall, so they stay comfortable longer on those rainy walks.
Layer your fleece lining underneath, wrong sides together. Stitch or glue around all edges. Attach velcro tabs under the belly — two points keep it secure without restricting movement.
And here’s where most people rush: let the glue cure a full 24 hours before your pup wears it. But if you sew instead, run a double stitch along stress points like the chest opening.
The diamond quilting pattern isn’t just pretty. It traps air between layers, which means real insulation — exactly what a wet dog needs. Pair this project with ideas from 13 Genius DIY Dog Stuff Every Pet Parent Needs to Try Today! for a full cozy dog setup.
Cut the belly strap slightly shorter than you think — dogs move more than you’d expect, and a snug (not tight) fit prevents the coat from sliding sideways mid-walk.
📸 Photo credit: Instagram @button.boops
#2: DIY Full-Body Rainsuit for Dogs (The “No Muddy Mess” Outdoor Jacket Set)
Okay, so picture this. Your golden comes bounding back from the trail, soaking wet, and before you can even grab a towel, she’s already shaking all over your couch cushions.
That moment is exactly why I fell down a rabbit hole making this full-body rainsuit — and honestly? It changed rainy hike days for me completely.
Materials & Tools You’ll Need:
– 2 yards of ripstop nylon fabric (one in olive/sage green, one in magenta/fuchsia)
– 0.5 yard of charcoal gray nylon for the leg panels
– Reflective tape strips (¾ inch wide) for leg accents
– #5 waterproof zipper, 18 inches long
– Adjustable side-release buckles (x2)
– Velcro strips (1-inch wide, 6 inches long)
– Sewing machine with a denim/heavy-duty needle
– Waterproof seam sealer
– Dog body measurements: neck, chest girth, back length, leg circumference
Prep Time: 30 minutes | Active Project Time: 3–4 hours | Difficulty Level: Intermediate
Instructions
Start by measuring your dog’s back length from collar to tail base, then her chest girth at the widest point. These two numbers drive every pattern piece, so don’t rush this part.
Cut your main body panel from the sage ripstop — this becomes the jacket top. Then cut four separate leg tubes from the charcoal gray nylon, sized to your dog’s leg circumference plus ½ inch seam allowance on each side.
Sew each leg tube into a cylinder first, right sides together, using a ½ inch seam. Run waterproof seam sealer along every interior seam while the fabric is still flat — this step is what keeps the water out instead of wicking through.
Attach the leg tubes to the body panel at the shoulder and hip openings, easing the fabric around each curve so there’s no bunching. My first attempt I skipped pinning and the front legs ended up lopsided — trust me, pin everything.
Fold and stitch the back neckline into a 1-inch collar stand, then set in your 18-inch zipper along the dorsal spine opening. A waterproof zipper here means your dog’s back stays dry even in downpours — which is the whole payoff when you’re 3 miles into a foggy trail and it starts raining sideways.
Add the reflective tape strips horizontally along the lower leg panels, heat-bonding them first then top-stitching the edges. And the buckle straps? Position one across the chest and one at the belly — these keep the suit snug without restricting her stride.
Topstitch the entire perimeter of the body panel with a ⅜ inch seam for a clean, structured finish that holds its shape wash after wash.
Keep this in mind: ripstop nylon frays at cut edges, so run a lighter flame very quickly along any raw edges before sewing, or use a serger if you have one.
If you love making gear for your dog, 12 Heartfelt Designs for DIY Dog Accessories has some seriously good inspiration to keep the momentum going.
Wash this suit on cold, hang dry only, and reapply seam sealer after every 5–6 washes to maintain the waterproof barrier.
📸 Photo credit: Instagram @gonegoldens
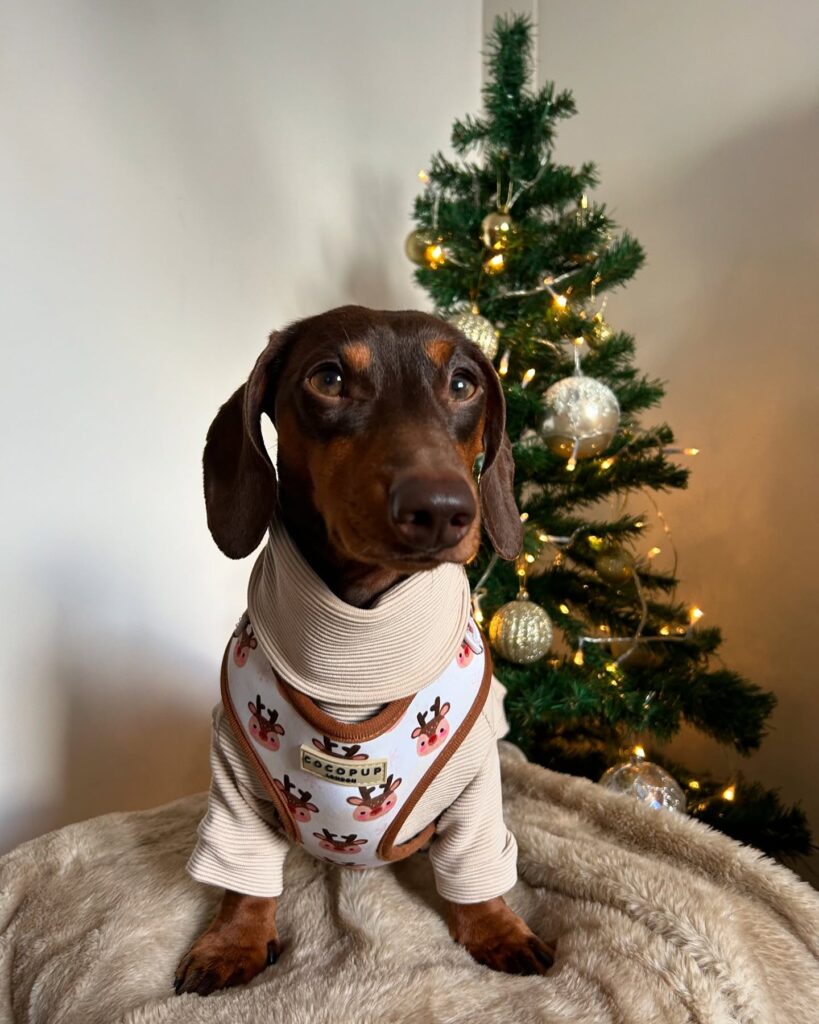
#3: DIY Reindeer Harness Vest With Turtleneck Sweater
Your golden probably does the same thing mine does — sits right in the middle of the living room like she’s posing for a holiday card, except she’s got mud on her paws and zero awareness of your Pinterest mood board.
This is the look that fixes that.
Materials & Tools You’ll Need:
– ¼ yard white cotton canvas or thick felt (for the harness bib)
– ¼ yard beige ribbed knit fabric (for the turtleneck sweater body)
– Brown faux leather trim — about 1 yard total
– Reindeer face fabric stamps OR iron-on reindeer printed fabric patch
– Acrylic paint in blush pink, brown, and black (for hand-painting reindeer faces)
– Small gold rectangular label (label maker or metal charm works)
– 1-inch brown D-ring and adjustable slide buckle
– Fabric scissors, sewing machine or fabric glue, measuring tape, chalk
Instructions
Measure your dog’s chest girth and neck circumference first — everything depends on these two numbers fitting right.
Cut the ribbed knit into a tube shape matching the neck-to-chest length, leaving extra at the top to fold over into that chunky turtleneck roll. Hand-stitch or machine-sew the seam along the back. The ribbed texture hugs the body without restricting movement, which means your dog stays warm without fighting the fabric all day.
Cut the white canvas into a bib shape — wider at the chest, narrower at the neck. Paint or press your reindeer faces across the front using the acrylic paints. Let each color dry before layering the next. Pink base, brown antlers, tiny black dot nose.
Edge the entire bib with your brown faux leather trim, gluing or stitching it around the perimeter. Attach the D-ring at the center chest and thread the adjustable strap through the slide buckle so it fits snug but not tight. Add your gold label charm right at the center — that small detail makes it look so polished.
Layer the sweater tube under the harness bib and attach both pieces at the back with a few hidden stitches to keep everything from shifting around.
Prep Time: 20 min | Active Project Time: 2–3 hours | Difficulty Level: Intermediate
The faux leather edging does double work here — it reinforces the harness structure AND gives it that boutique look you’d pay $45+ for at a pet store. And the ribbed knit regulates body heat, so your dog stays comfortable through the whole holiday visit without overheating.
If your knit fabric keeps curling at the edges while you’re cutting, stick it in the freezer for 10 minutes flat. It firms up just enough to cut a clean line.
📸 Photo credit: Instagram @otissausagee
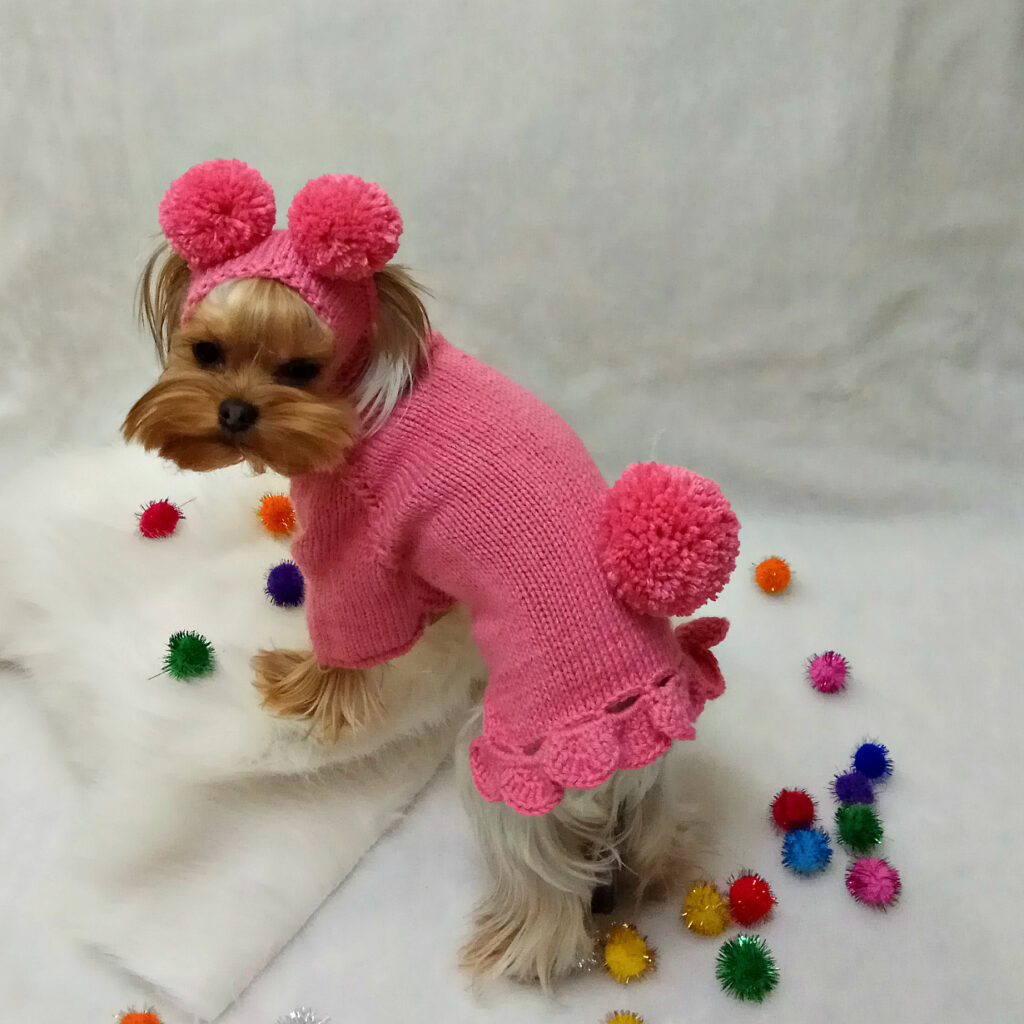
#4: DIY Pink Pom-Pom Hoodie Dress for Small Dogs
My cousin called me last winter panicking because her Yorkie was shivering on the couch and she had nothing that fit. Every store-bought sweater swallowed the poor baby whole. Sound familiar? Your golden might not have that problem, but if you’ve ever dressed up a friend’s tiny dog — you know the struggle is real.
This knitted pink hoodie dress is everything. Two giant pom-poms on the hood, one on the back, a scalloped hem, and built-in leg coverage. It looks like something straight off a Pinterest board.
Materials & Tools:
– Bulky weight yarn in hot pink (approximately 200g)
– Size 5mm knitting needles
– Cardboard (for pom-pom making)
– Scissors, yarn needle, measuring tape
– Stitch markers
Instructions
Start by measuring your dog’s neck, chest, and back length — exact measurements save you from frogging the whole thing later. Cast on enough stitches for the neck opening, working in 1×1 ribbing for the hood band first.
Knit the hood in stockinette stitch, shaping gently at the top with decreases every other row. Join the body section at the collar and work downward, increasing slightly around the chest for comfort. Your dog breathes easier with a fitted-but-not-tight chest — that’s the feature, the benefit is zero restriction during movement, and the payoff is a happy pup who actually keeps it on.
Work the sleeves separately using double-pointed needles, then attach them with a three-needle bind-off. Knit the skirt section with scallop edging: cast on extra stitches, work shell clusters, then bind off.
For the pom-poms, wrap yarn 100 times around a 3-inch cardboard circle, tie the center tight, and trim into a round shape. You need three total — two smaller ones for the hood and one bigger one for the back.
Sew everything together with a yarn needle, weaving in all ends.
One time I made pom-poms too loose and they just… unraveled mid-photoshoot. Tie that center knot twice.
Prep Time: 30 minutes | Active Project Time: 6-8 hours | Difficulty Level: Intermediate
📸 Photo credit: Instagram @dog.moda
#5: DIY Chanel-Inspired Tweed Dog Dress With Faux Fur Collar
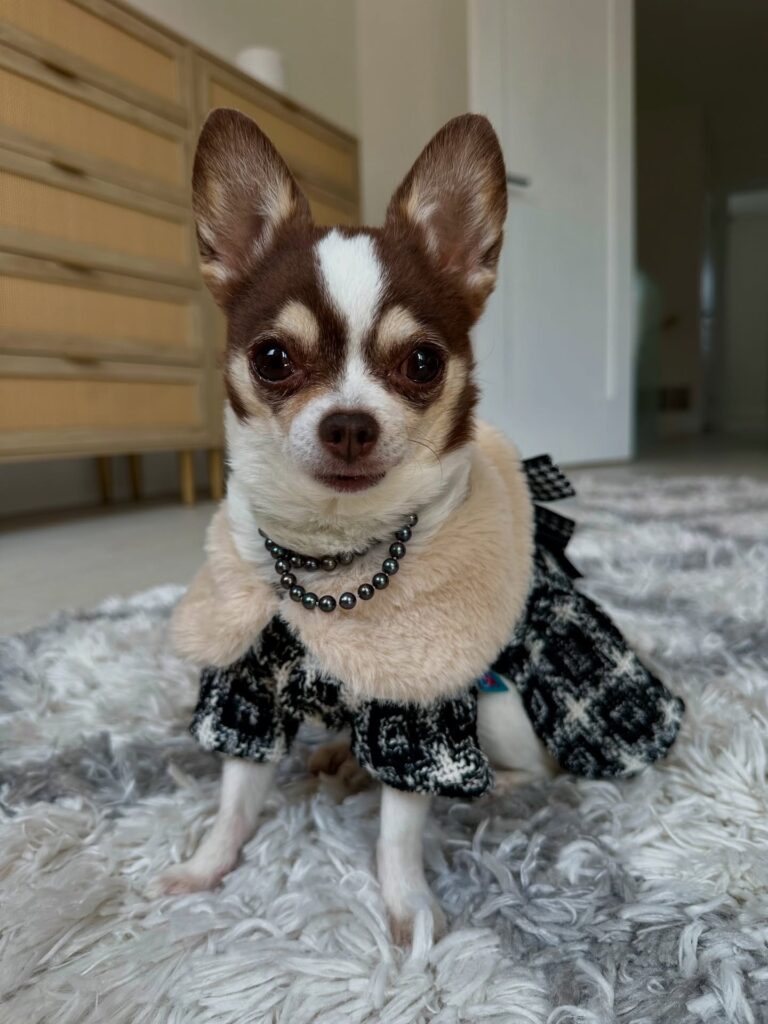
Okay so you know that moment when your golden comes trotting in from the backyard, shakes mud everywhere, and you’re just standing there holding a Pinterest board full of aesthetic dreams? Yeah. This one’s for the dog who deserves the main character moment.
This little dress in the photo? I made something almost identical for my cousin’s chihuahua and people lost their minds over it.
Materials & Tools:
– ¼ yard black-and-white bouclé tweed fabric
– ⅛ yard cream faux fur fabric (for the collar)
– Dark gray or black pearl beading string (8–10 inches)
– Black grosgrain ribbon (½ inch wide) for the back bow
– Fabric scissors, sewing pins, needle & thread (or sewing machine)
– Measuring tape
– Snap fasteners or velcro (1-inch strips)
– Fabric glue (optional, for beading)
Prep Time: 20 min | Active Project Time: 2–3 hours | Difficulty Level: Intermediate
Instructions
Start by measuring your dog’s neck, chest, and back length — these three numbers are everything. Cut your tweed into a simple A-line shape, wider at the bottom hem, with two small armhole openings on each side. The flared cut gives the dress that bouclé runway look while keeping your dog’s legs free, which means zero restricted movement and a happier, more comfortable pup.
Next, cut a curved rectangle from the faux fur for the collar — roughly 4 inches wide by your dog’s neck circumference. Sew it along the neckline, folding the raw edge under before stitching so it sits clean and full. That plush collar sits against the skin, acting like a soft buffer between the tweed’s texture and your dog’s neck.
And here’s where it gets fun. Fold your grosgrain ribbon into a small looped bow and hand-stitch it to the upper back — it adds that Chanel-coded finishing touch without any extra bulk.
For the pearl necklace, thread your beads onto elastic string and knot it to fit loosely around the neck. Faux fur collar underneath plus pearls on top — that layered texture is what makes this look so editorial. You’re basically giving your dog a Pinterest board in physical form.
Attach your snap fasteners or velcro along the belly for easy on-and-off. Trust me, dogs tolerate this so much better when you’re not wrestling them into something.
When your pup wears something that fits well and moves with them, they stay calmer — and you actually get the photos you want instead of a blur of fur and chaos.
If you’re already sewing for your dog, 7 Creative DIY Dog Bandanas Your Pup Will Love are a great starter project to build your confidence before tackling a full dress.
Bouclé fabric frays like crazy, so always run a zigzag stitch along every raw edge before you assemble anything. It saves the whole project.
📸 Photo credit: Instagram @pawfectchai
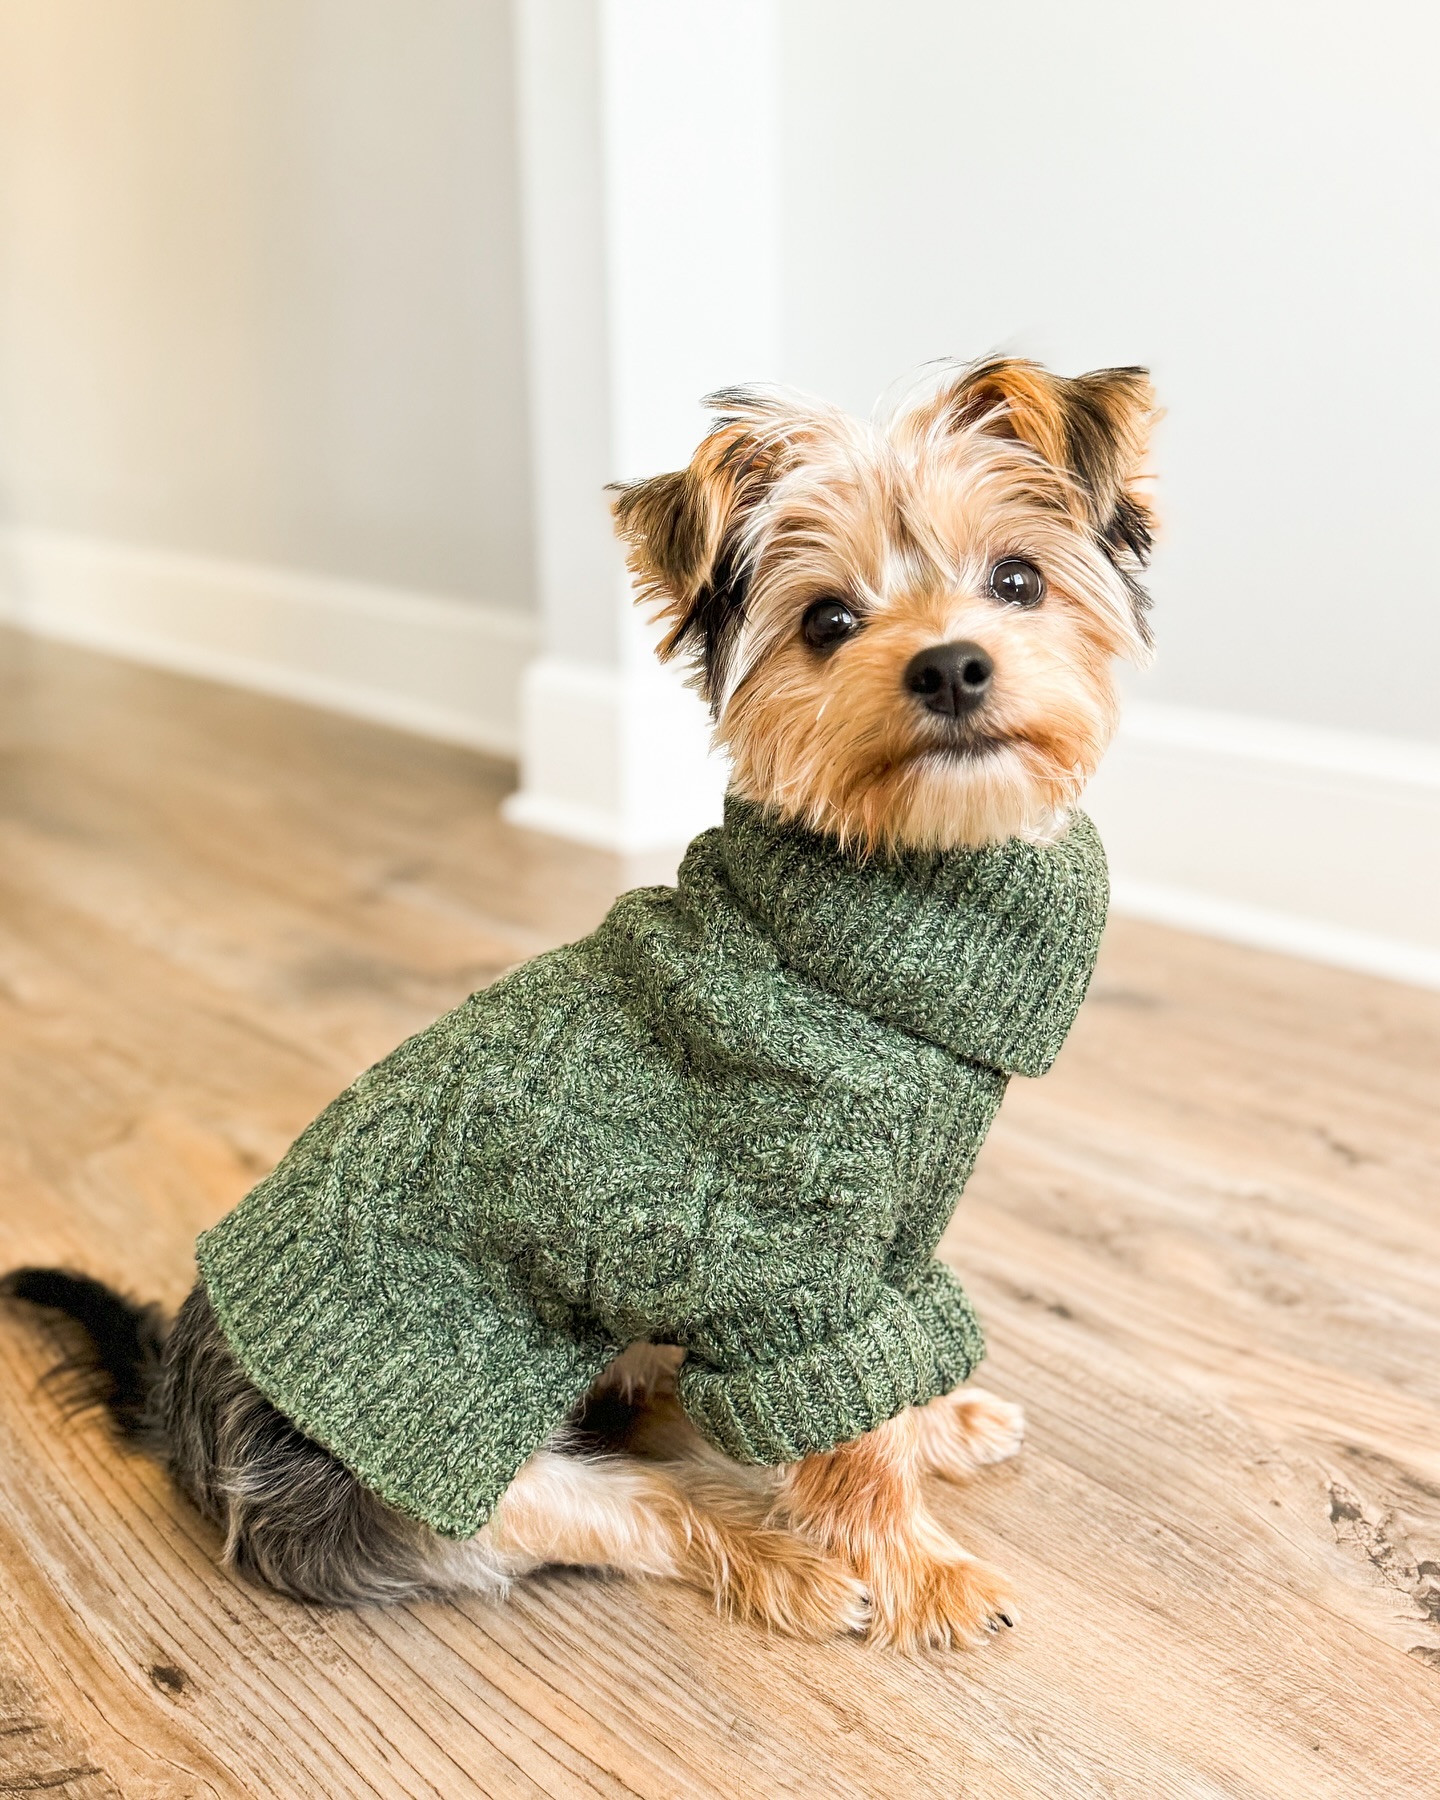
#6: Cozy Cable-Knit Dog Sweater (The One That’ll Make Everyone Stop You on the Walk)
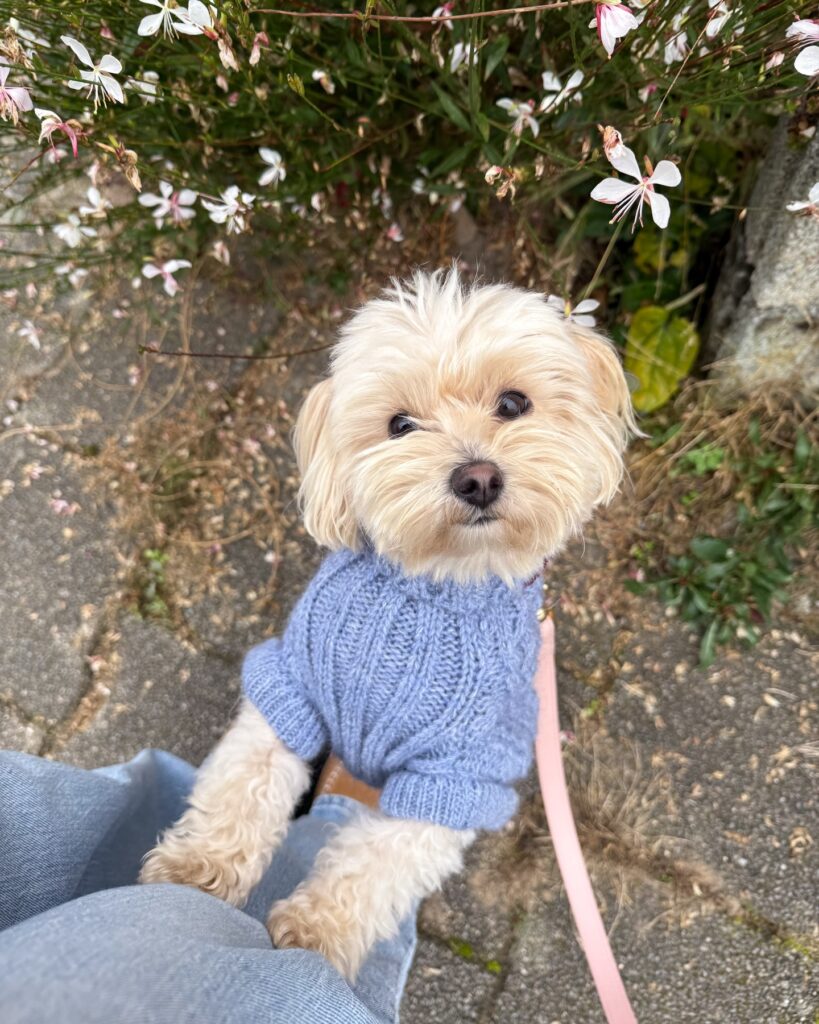
Okay, you know that moment when the temperature drops and your golden is shivering by the back door, giving you those eyes? I had that exact moment with my friend’s little Maltipoo last fall — and honestly, a store-bought sweater just never fits right on small dogs.
This hand-knit pale blue cable-knit sweater is exactly what changes that.
Materials & Tools:
– 100% merino wool yarn in dusty blue (soft enough for sensitive skin)
– Size 4mm knitting needles
– Stitch markers (at least 4)
– Tapestry needle for seaming
– Measuring tape
– Scissors
– Row counter (optional but lifesaving)
Prep Time: 20 min | Active Project Time: 6–8 hours | Difficulty Level: Intermediate
Instructions
Start by measuring your dog’s neck circumference, chest width, and back length — these three numbers are everything. Cast on stitches proportional to the neck measurement using a 2×2 ribbed cast-on, which gives that snug turtleneck-style collar you can see in the photo.
Work 4 rows of rib stitch for the collar, then transition into a classic cable pattern (a simple 6-stitch cable cross every 6th row works perfectly here). The cable stitch pulls the fabric inward slightly, which creates that cozy fitted look without restricting movement — merino wool stretches with your dog’s body, keeps warmth locked in, and means zero stiffness on a morning walk.
And this is where most people go wrong: they skip the armhole shaping. Bind off 6–8 stitches on each side at the chest section, then pick them back up on separate needles to knit the sleeves downward. This creates those little open leg holes you see, letting the sweater sit naturally without pulling.
Seam the underside using a mattress stitch — it’s invisible and keeps the seam from rubbing your dog’s belly.
Small change, big win: blocking the finished sweater over a damp towel for 30 minutes before the first wear softens the cables and gives it that polished, structured shape.
Weave in all ends, give it a gentle hand wash in cool water, and it’s ready.
Because merino regulates temperature naturally, your pup stays warm on cool mornings without overheating mid-walk — which means fewer “I need to stop and pant” moments and more actual walking together.
Sizing tip: always knit a gauge swatch first. Even one stitch off per inch throws the whole fit, and a too-tight chest is uncomfortable for your dog to wear for more than a few minutes.
📸 Photo credit: Instagram @melle.the.maltipoo
#7: Pink Knit Dog Sweater and Bandana DIY Set (The Matching Bestie Look)

You know that moment when your golden is sitting in the yard looking so cute, but also kind of… plain? Like she deserves more than just her collar? Yeah. That’s exactly how this started for me.
Prep Time: 30 minutes | Active Project Time: 3–4 hours | Difficulty Level: Intermediate
Materials & Tools:
– 100% soft pink merino wool yarn (approx. 200g for the sweater, 50g for the bandana)
– 4mm knitting needles (straight or circular)
– Stitch markers and yarn needle
– Small white daisy appliqués (for the bandana detail)
– Fabric scissors
– Measuring tape
– Pink satin ribbon (1/4 inch wide) for the sweater bow accent
– Pins for blocking
Instructions
Start by measuring your dog’s neck, chest girth, and back length — these three numbers are everything. For a small dog like a Cavalier King Charles (roughly 8–12 lbs), cast on 48 stitches for the sweater body using a 2×2 rib stitch for the collar section. Work about 2 inches of ribbing so it sits snug but doesn’t restrict breathing — a comfortable fit means your dog actually keeps it on instead of army-crawling out of it the second you look away.
After the collar ribbing, switch to stockinette stitch and begin increasing on every fourth row to shape the chest panel. The chest panel is the part that shows when your dog sits up and begs, so this is where you want clean, even tension. Work the body for 5–6 inches depending on your dog’s back length, then divide for the leg openings by placing 10 stitches on hold on each side.
And this is where it gets really satisfying — once you reconnect the back panel and finish the body, the sweater starts looking like an actual garment. Bind off loosely, weave in all ends, then block the piece flat on a towel to set the shape.
For the bandana, cast on 30 stitches and work in garter stitch on a diagonal by increasing one stitch at the end of every row until you hit your widest point (around 8 inches), then decrease back down to form the triangle. Sew the daisy appliqués across the bottom edge — three evenly spaced looks exactly like the photo.
The merino wool holds its shape after washing, which means one sweater set survives the whole winter without going lumpy — that’s the payoff for spending a little extra on quality yarn.
Weave the pink satin ribbon along the neckline of the sweater and tie it into a small bow at the center front. Hand wash in cool water and lay flat to dry.
Blocking both pieces together overnight gives you that polished, boutique look without the boutique price tag. And if your dog is a wiggly one during fitting sessions, treat breaks every few minutes genuinely help — I learned that one the hard way with my cousin’s cockapoo who staged a full protest at step one.
📸 Photo credit: Instagram @kiriandhertails
The One Measurement Mistake That Ruins Every DIY Dog Outfit
Okay, real talk — most people measure their dog’s back length and call it a day. That’s exactly where it goes wrong.
The secret? You need your dog standing naturally, not sitting. I learned this the hard way after sewing the cutest little flannel jacket for my cousin’s lab mix. Sat perfectly on him during fitting. The second he stood up and started walking? Fabric bunched right at the shoulders, basically strangling his front legs. Three hours of work, unwearable.
For golden retrievers, you also need that chest girth measurement taken behind the front legs, not across them. That deep-chested build means standard patterns will gap weird at the belly every single time.
Here’s the pro tip nobody talks about: always cut your pattern in cheap muslin fabric first. Test it on your pup before you touch your good material. Takes maybe 20 extra minutes and saves you so much heartache.
One thing to remember: stretch fabric like jersey knit forgives measurement errors way better than woven cotton — perfect for a wiggly golden who can’t stay still for two seconds.
Your Floors Deserve a Break — So Does Your Sanity
Look, your golden is not slowing down. The muddy paws, the post-bath shakes, the enthusiastic water bowl situation — that’s just life now, and honestly? I love that for us.
But your floors and rugs don’t have to suffer for it.
Pick one mat that fits your messiest spot first. The entryway, the food station, wherever your girl makes her biggest chaos. Once you see how much easier cleanup gets, you’ll wonder why you waited.
Your home can still look Pinterest-worthy and survive a 70-pound retriever — I promise those two things can coexist.
So tell me — which spot in your home does your dog destroy the most?