Think your furry friend deserves a cozy retreat? Imagine turning their indoor dog cage into a luxurious haven. Picture plush memory foam beds, fun toys, and even climate control to keep them comfy. You’re probably wondering how to pull it all off without going broke or feeling like a DIY disaster. Don’t worry, you’re not alone. Let’s explore 10 inspiring designs that’ll make your pet’s space both stylish and inviting, while keeping their tail wagging.
Cozy Retreat Dog Cages
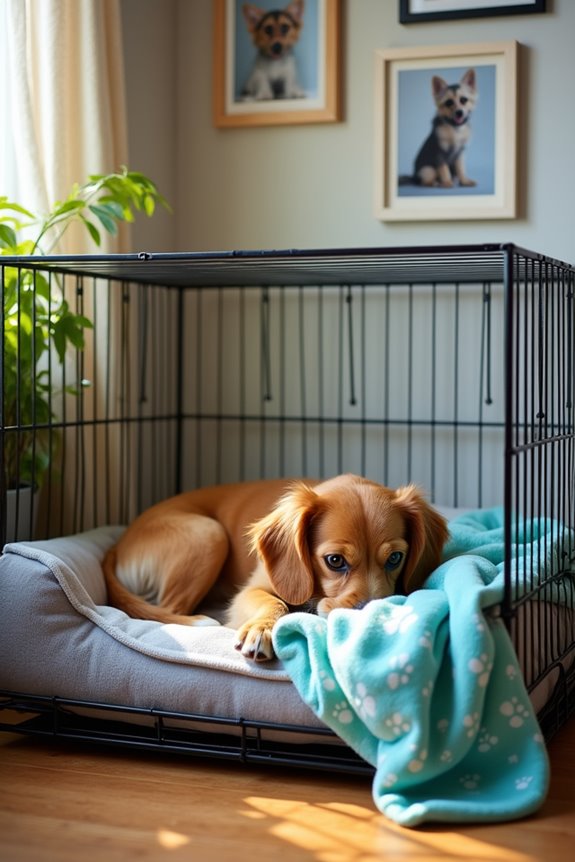
When it comes to finding a cozy retreat for your furry friend, you might discover that not all dog cages are created equal.
Sure, you’ve seen the standard wire crates, but let’s get creative with some dog cage ideas indoor that can truly feel like a little haven. Think about cushy bedding and a soft blanket; your pup deserves that extra comfort.
You could even attach a few toys or photos on the side.
What about adding a little flair with a fun cover? It totally elevates the vibe. Seriously, who wouldn’t want to curl up in a space like that? Consider exploring luxury dog crates furniture options that blend seamlessly with your home decor.
Our Collection
Check out our collection of indoor dog cages, where comfort meets style.
You’ll find everything from luxury memory foam bedding to ventilated mesh panels—perfect for your pup’s ultimate relaxation. Our premium selection even includes stunning luxury wooden dog furniture designed to elevate your pet’s space. Each of our cages is built with quality materials to ensure durability and comfort for your furry friend.
Need options for easy access or a cute decorative cover? We’ve got that too, plus an automatic feeding system that’ll make you feel like a doggie parent of the year. To complete your pet’s space, consider our stylish options for dog crate furniture end table that blend seamlessly with your home decor.
1. Luxury Memory Foam Bedding
Let’s face it, our furry friends deserve the best of the best, don’t you think? Creating a cozy memory foam bed for your dog in their cage not only saves you money but also guarantees they experience maximum comfort.
Imagine how happy your pup will be sinking into their very own cushy cloud while they snooze away. Plus, you’ll get to add your personal touch to their bedding, making their space feel a bit more special.
Materials Needed
- High-density memory foam (enough to fit the cage size)
- Soft, durable fabric (like fleece or cotton)
- Heavy-duty sewing machine or needle and thread
- Measuring tape
- Scissors
- Fabric pins or clips
- Optional: zipper for easy cover removal
Step-by-Step Instructions
1. Measure Your Cage: Grab your measuring tape and take note of the dimensions of your dog’s cage tray. Write down the length and width so you know how much foam to buy.
2. Cut the Foam: Using your scissors, cut the memory foam into the same size as the cage tray. It should fit snugly, but you don’t want a lot of wiggle room.
3. Prepare the Fabric: Lay your fabric out flat and place the foam on top. Cut the fabric, leaving an extra inch around the edges for seams – this helps avoid the dreaded “oops, I cut it too small” issue.
4. Sew the Cover: Fold the fabric over the foam and pin it in place. Sew along the edges, leaving one end open if you plan on using a zipper or a simple flap to cover your foam.
If you want to skip the sewing, you can just use fabric glue, but it mightn’t last as long.
5. Insert the Foam: Once your cover is sewn, flip it right side out and Insert the Foam. If you used a zipper, zip it up! If you went for a flap, just tuck it in securely.
6. Final Touch: Place the new memory foam bed into the cage. Watch your pup’s excitement as they jump in, wriggle around, and settle in for a cozy nap!
Optional Add-ons/Variations
Want to add some flair? Choose fabric in fun patterns or colors that match your home décor, creating a stylish contrast against your dog’s cage.
You can also personalize the bed with your dog’s name by using fabric paint or iron-on letters—think “Fido’s Dream Oasis” or simply “Cuddles”.
Pro Tip
Make sure to opt for washable fabrics! Drool, hair, love, and occasional “mishaps” (hey, it happens!) can all lead to your DIY project needing a refresh.
A removable cover makes laundry day not so intimidating, so go ahead and embrace the messiness that comes with being a dog parent. You’ll thank yourself later.
2. Ventilated Mesh Panels
Is there anything better than giving your pup a cozy home? How about making it even cozier while keeping them cool and comfortable? Investing in premium dog supplies can enhance your dog’s living experience in many ways.
Installing ventilated mesh panels in your dog’s cage is a brilliant way to improve airflow, making those warm summer days much more bearable for your furry buddy. Plus, by doing this DIY project, you’re saving money on fancy cages and creating a custom space just for them. It’s a win-win!
Setting up a dog grooming station within the same area can also streamline your routine, making care time enjoyable for both you and your dog.
Materials Needed
- Mesh fabric (dog-safe and breathable)
- Scissors
- Measuring tape
- Heavy-duty adhesive or Velcro strips
- Optional: Fabric frame or wood for better support
- Optional: Decorative fabric (if you want to jazz it up)
Step-by-Step Instructions
- Measure the Space: Get your tape measure and jot down the width and height of the areas where you’ll be adding mesh panels. Remember to calculate for each side if you want a 360-degree airflow.
- Cut the Mesh: Once you have your measurements, cut the mesh fabric to fit each area. You want the mesh to be just slightly bigger than the openings to guarantee a snug fit.
- Prepare the Frame: If you’re using a fabric frame or wooden support, trim it to match the dimensions of your mesh cutouts. This will help secure the mesh, so it doesn’t flop around or come loose.
- Attach the Mesh: Use heavy-duty adhesive or Velcro strips to attach the mesh panels securely to the cage. If you’re particularly crafty, you can sew the mesh into your frame. If all else fails and you run into sticky situations (it happens), just channel your inner MacGyver.
- Final Inspection: Give everything a once-over to guarantee there are no sharp edges or gaps where your pup could get snagged. Safety first, right?
- Make It Yours: If you opted for decorative fabric around the mesh, glue or staple it into place now. This is your moment to get artsy and put your personal touch on your dog’s cave of wonder.
- Introduce Your Dog: Finally, place your newly decorated and ventilated cage in a comfy spot, and invite your dog in. Watch that happy wag as they explore and sniff their new setup.
Optional Add-ons/Variations
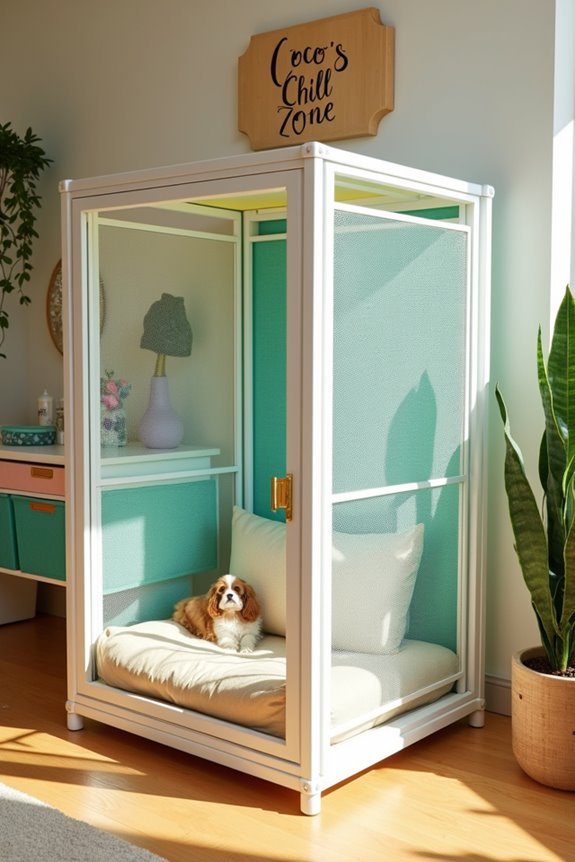
Want to take your cage décor to the next level?
Choose mesh in vibrant or fun colors that complement your home’s aesthetic—or maybe even your dog’s personality. You could also print their name in fabric paint on the frame for a delightful personal touch. Because who wouldn’t want their own little “Coco’s Chill Zone”?
Pro Tip
Before you start, double-check that your chosen mesh is machine washable.
Believe me, those little accidents happen—and after a muddy day at the park, your dog’s cage needs a quick refresh. A removable and washable panel can help keep things clean without a hassle, so you and your pup can enjoy each other’s company without distractions.
3. Adjustable Entrance Door Options
Thinking about upgrading your dog’s cage for easier access? DIY adjustable entrance doors might just be the perfect fit for you and your furry friend. Not only does this project improve accessibility for your pup, but it also adds an element of style to their home—plus, it can save you some cash against buying an expensive new cage. Additionally, these designs can be paired with luxury dog products to create a truly opulent space for your canine companion, such as luxury dog bed furniture that enhances both comfort and aesthetics. Opting for the best nutrition with a premium dog food subscription can complement this upgraded living space by ensuring your pup stays healthy and happy.
Materials Needed
- Wood planks or sturdy foam board
- Hinges (with screws)
- Sliding latch or hook and eye latch
- Drill with bits
- Screwdriver
- Measuring tape
- Sandpaper
- Paint or wood finish (optional for aesthetics)
Step-by-Step Instructions
- Measure the Opening: Use your measuring tape to find out the size of the cage door opening. This step guarantees the new door fits snugly without any gaps for little paws to slip through.
- Cut the Wood: Depending on your measurements, cut your wooden planks or foam board to size. If you’re feeling adventurous and want a bit of flair, consider rounding the corners—because sharp edges are just not dog-friendly.
- Smooth the Edges: Take some sandpaper and carefully smooth out any rough edges of the cut pieces. Your pup deserves a comfortable entrance, and you don’t want them to get snagged!
- Attach the Hinges: Position the hinges on one side of the door and attach them securely with screws. Make sure to double-check that they allow smooth opening. This isn’t a game of tug-of-war, after all.
- Install the Latch: On the opposite side of the hinges, attach your sliding latch or hook and eye latch. This step is vital for keeping your dog safe inside when needed, so make sure it’s solid and provides easy access for you.
- Paint or Finish (Optional): If you want to jazz up your dog’s new entrance, go ahead and paint the wood or add a wood finish. Use colors that match your home decor or your dog’s vibrant personality.
- Final Check and Installation: Before you set it up in the cage, give everything a once-over. Verify that there are no sharp areas, and all components are secure. Once satisfied, attach your new door to the cage frame, step back, and admire your handiwork while your pup gives you those puppy-dog eyes.
Optional Add-ons/Variations
Want to add some flair? Consider painting paw prints across the new door or using fun, non-toxic wrapping paper to cover the wood. You could also opt for a removable screen door insert to keep air flowing while still keeping your pup contained.
Personal touches make this project special, don’t you think?
Pro Tip
Confirm that the latch you choose is easy for you to operate but secure enough that your clever doggo can’t figure it out.
Also, treat yourself to extra hinges—they can help the door swing open smoothly and stand the test of time, especially if your pup enjoys a dramatic entrance.
With these simple steps, you’ll have an adjustable entrance that gives your dog the flexibility they need while keeping their home stylish.
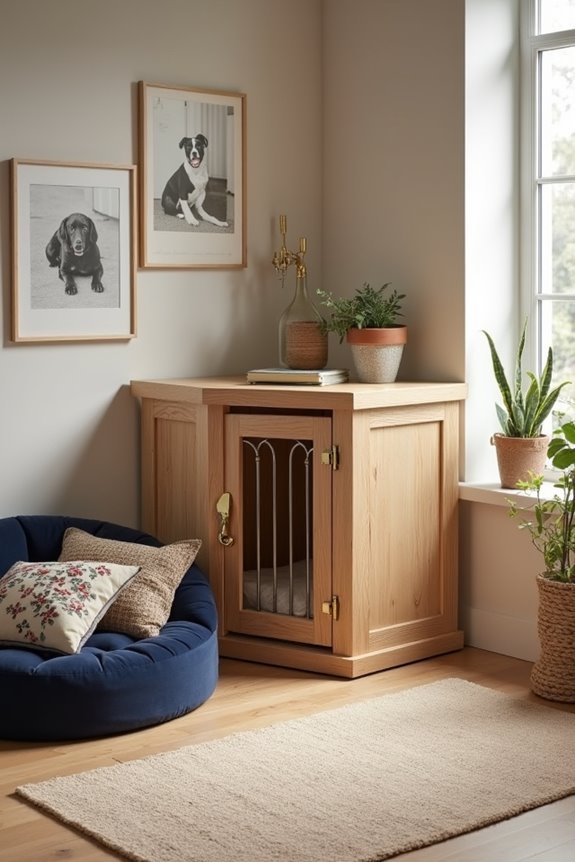
4. Decorative Cage Cover Options
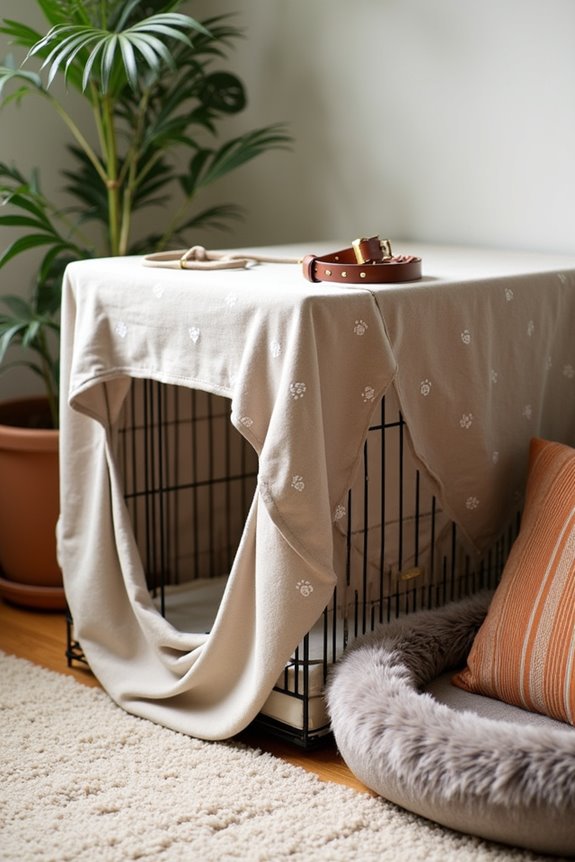
Is your dog’s cage feeling a bit too… well, cage-like? A decorative cage cover can do wonders for transforming that metal fortress into a cozy retreat. Not only does it provide your pup with a sense of security and comfort, but it also enhances your home’s aesthetics and keeps distractions at bay. Plus, it’s a fun DIY project that’s easy on the wallet—who doesn’t love saving money while making their furry friend feel a little special? With the addition of luxury dog accessories, you can elevate both your pup’s comfort and style. A luxury dog collar kit can truly enhance your dog’s look.
In fact, choosing a luxury dog kennel experience helps create a haven for your furry friend that goes beyond simple aesthetics.
Materials Needed
- Measuring tape
- Fabric of your choice (cotton, fleece, etc.)
- Scissors
- Sewing machine or needle and thread (if you’re feeling adventurous)
- Pins or fabric clips
- Fabric glue (optional for non-sewing method)
- Ribbon or Velcro (for closures)
- Iron and ironing board (optional, for creating crisp edges)
Step-by-Step Instructions
- Measure Your Cage: Get your measuring tape and carefully measure the height, width, and depth of your dog’s cage. Remember, precise measurements lead to a perfect fit—nobody wants a draped cover that’s too tight or too loose.
- Choose Your Fabric: Head to the fabric store or raid your attic for something that speaks to your style. Think fun patterns or soothing colors that match your decor. If your dog tends to shed, opt for a fabric that’s easy to clean.
- Cut Your Fabric: Based on the measurements you took, cut your fabric to size. For a full cover, you’ll generally want two pieces for the sides and a longer piece for the top, allowing for a nice drape. Don’t stress about cutting it perfectly—there’s always the “artistic” look.
- Sew or Glue Edges: For a neat finish, fold the edges of your fabric over and either sew them down or use fabric glue. This prevents fraying and keeps your work looking polished. If you’re sewing, a straight stitch will do the trick!
- Add Closures: Attach ribbon or Velcro to the edges of your fabric cover to secure it to the cage. This way, you can open and close it easily while providing a snug fit that keeps your pup feeling safe.
- Final Touches: After assembling your cover, take a moment to iron any creases (if you want that professional look). Fold it neatly and drape it over your dog’s cage. Voila! It’s a cozy hideaway that looks stylish too.
Optional Add-ons/Variations
Want to give your project a personal touch? Consider using fabric paint to add your dog’s name or paw prints to the cover. Alternatively, you could create a reversible cover with two different patterns—talk about double duty!
Pro Tip
When choosing your fabric, remember to go for something washable—because let’s face it, every pup has their messy moments.
A little pre-wash can also help prevent shrinking, ensuring your cover fits perfectly even after a spin in the washer.
5. Automatic Feeding System
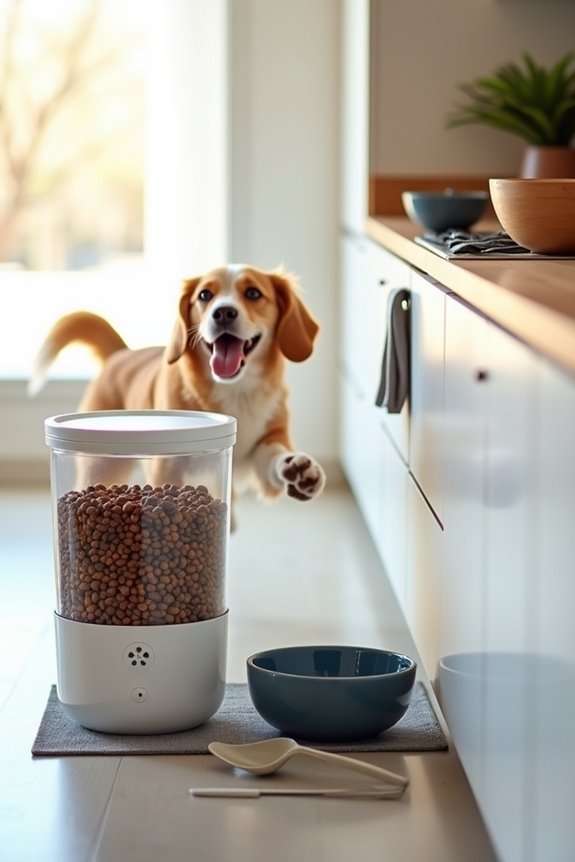
Do you ever find yourself scrambling for the dog food right before you head out the door? Or maybe your pooch has perfected the sad puppy eyes routine when it’s their mealtime?
An automatic feeding system can save the day—it’s a handy solution for dog owners who want to keep their furry friends well-fed, even when life gets busy. A premium dog treat maker can complement this by providing homemade goodies for your pup between meals. It’s worth noting that many of these devices are equipped with advanced programming features, allowing you to customize feeding times and portions.
Let’s plunge into a fun DIY project that won’t only make feeding time a breeze but also save you some cash in the long run. Your pup will thank you (and maybe even give you a tail wag of approval).
Materials Needed
- Plastic container with a lid (like an empty cereal container or a large water bottle)
- Pet food (any kind your dog loves)
- Scoop for portioning
- Timer or programmable feeding unit (available online or at pet stores)
- Drill and drill bit (for making holes)
- Cutting tool (like a utility knife)
- Sandpaper (to smooth out any rough edges)
- Optional: Non-slip mat (to keep the feeder steady)
Step-by-Step Instructions
1. Choose Your Container: Start with a sturdy plastic container that holds enough food for a few days.
Just remember—your pup’s gonna need room for their meals and snacks, so go big or go home.
2. Prepare the Lid: If your container has a snap-on lid, that’s fantastic. If it doesn’t, grab your drill and make a hole about the size of a golf ball in the lid.
This is where the food will flow from. Be careful—not all containers are created equal. You want to avoid drilling a hole that’s too large because we want precision feeding here, not a food avalanche.
3. Smooth Rough Edges: Grab some sandpaper and gently sand around the hole you just drilled.
This is key to preventing any sharp edges from scratching your pup’s nose. Safety first, right?
4. Add the Timer: If you’re using a programmable feeding unit, follow the manufacturer’s instructions to attach it to your container.
If you’re going the DIY way, just set a timer for the feeding schedule you want (like every 8 hours). You’ll be a mealtime hero without even being home.
5. Fill It Up: Use the scoop to fill your container with the dog food.
Now, this is where you can get a bit creative—consider how much food your pup gets for each meal and adjust accordingly. No one likes an overeater.
6. Set It Up: Place the automatic feeder in a dedicated feeding area.
If you’re using a non-slip mat, position it under the feeder to prevent it from sliding around as your excited dog digs in.
7. Test It Out: Set your timer or feeding unit to dispense the food and watch in awe as it works its magic.
Is your dog staring in disbelief? That’s a win!
Optional Add-ons/Variations
Want to take your automatic feeding system to the next level?
Consider painting or decorating your container with non-toxic paint, so it matches your home decor.
You could also switch it up and use a larger container for multiple pets—just adjust the feeding times accordingly.
After all, why not make it a stylish feeding station?
Pro Tip
If you’re worried about your pup becoming a chow hound and devouring their food too quickly, consider getting a slow feeder bowl.
This can help encourage slower eating and reduce the risk of bloating. Plus, it adds a little extra fun to mealtime!
Now, with this nifty auto-feeding system, you can strut out the door without worrying if your pup is stuck in a hunger crisis. Additionally, investing in an automatic dog food dispenser ensures that your pet receives the right amount of food at regular intervals.
After all, a well-fed dog is a happy dog.
6. Built-in Climate Control System

Ever wish your dog’s space felt just as comfortable as the rest of your home? A built-in climate control system is a fantastic DIY project that can help regulate your pup’s environment, keeping it cozy and safe throughout the year. This handy addition isn’t only great for your dog’s comfort but also adds value to your home in the long run. Let’s explore how you can create this comfortable haven for your furry friend.
Materials Needed
- Energy-efficient heater or air conditioning unit (small size appropriate for the dog space)
- Thermostat (digital or programmable)
- Insulation material (foam boards or reflective insulation)
- Weatherproofing sealant (to seal any gaps)
- Basic tools (screwdriver, drill, tape measure)
- Vent covers (if you’re incorporating air circulation)
- Optional: Weatherproof indoor/outdoor rug or pet bed
Step-by-Step Instructions
- Determine Your Space: Measure the area where your dog spends most of their time. This could be a dog house, an indoor corner, or even a cozy nook. Knowing the space dimensions helps in selecting the right heating or cooling unit.
- Select Your Climate Control Unit: Choose an energy-efficient heating or cooling system that suits the size of your dog’s area—better for both the environment and your wallet. Look for units that are safe and specifically designed for small spaces.
- Insulate the Area: Insulation is key. Use foam boards or reflective insulation to line the walls of your dog’s space. This will help maintain the desired temperature, keeping it warmer in winter and cooler in summer. Plus, it’s a simple task that can save you energy costs down the line.
- Install the Thermostat: Follow the manufacturer’s instructions to install the thermostat in a place that’s easily accessible. A programmable thermostat can help you control the climate automatically. No more guessing when to heat things up or cool things down.
- Seal Any Gaps: Use weatherproofing sealant around windows, doors, or any gaps in the walls or ceiling. This will keep the elements out and maintain a comfortable environment. Not all heroes wear capes, some wield caulk guns.
- Set Up Ventilation: If you’re using a cooling unit, make sure it has proper ventilation. Install vent covers to help circulate air effectively, ensuring your pup is always comfortable regardless of the weather outside.
- Add Comfort: Finally, throw in a weatherproof rug or a plush pet bed to complete the space. This not only makes it inviting but also adds an extra layer of comfort for your furry friend.
Optional Add-ons/Variations
How about a bit of style? Consider painting the walls or adding some pet-friendly wallpaper to create a cozy atmosphere. Or if you’re feeling extra crafty, you could make a cute custom sign for their space, like “Fido’s Retreat.” Don’t forget to incorporate your pup’s personality!
Pro Tip
Always keep safety in mind—be sure that any heating or cooling unit is pet-safe, and make sure cords are out of reach. For extra peace of mind, consider adding a pet-proof guard over vents or heaters to avoid any curious pup incidents. Who knew creating a cozy space could be both rewarding and heartwarming? Happy building! Additionally, having a dedicated dog grass potty station can ensure your pup has designated areas for their bathroom needs, helping maintain cleanliness in their space.
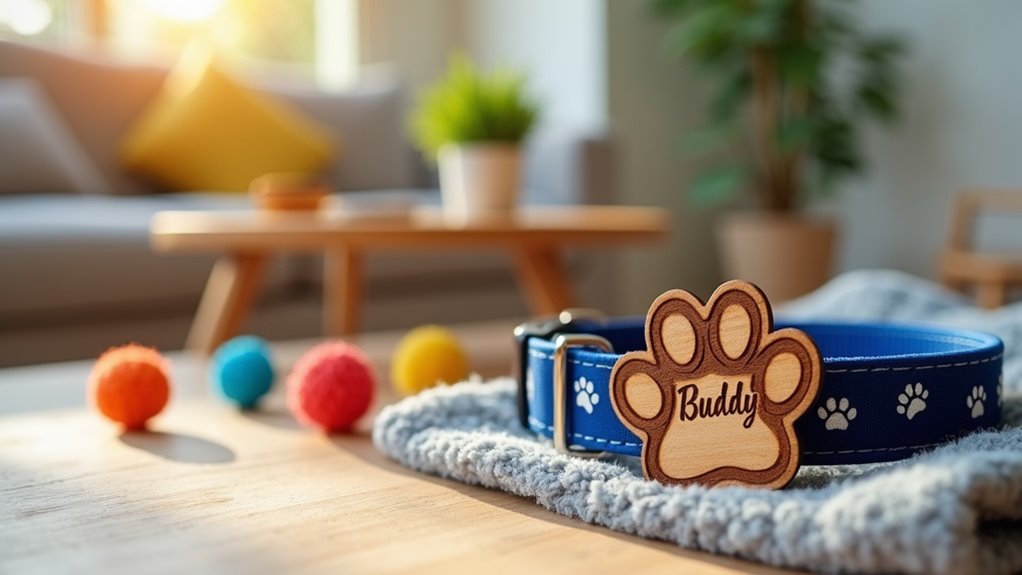
7. Personalized Name Tag Options

Wouldn’t it be nice to have a special something that makes your furry friend feel a little more like royalty? Creating personalized name tags for your dog can’t only help bring out their personality but can also guarantee that they’re easily identifiable during walks or playdates. Consider adding a personalized engraved collar to complement your name tag for an even more unique look.
This DIY project is a great way to combine creativity and practicality, and it adds a fun touch to your pup’s daily adventures.
Materials Needed
- Blank metal, wood, or plastic tags (variety available at craft stores)
- Permanent markers, paint pens, or engraving tools
- Keyrings or chains (according to your tag style)
- Stencils (optional for design or lettering)
- Clear sealant spray (to protect the design)
Step-by-Step Instructions
1. Choose the Tag: Start by choosing the material of your name tag. Metal might be sturdy, while wooden tags can give that cozy, rustic vibe. Grab a few options if you’re feeling adventurous!
2. Design it Up: Time to get creative! Use permanent markers or paint pens to write your dog’s name boldly on the tag. If you’re not the best at freehand, stencils can be your best friend.
You can even add cute doodles or paw prints around the name.
3. Optional Personal Touch: Reflect on adding your phone number or a fun little quote about dogs. Something like “Best Buddy” or “Forever Loved” can add that extra flair, just tag it on the back or around the edges.
4. Seal the Deal: Once your masterpiece is dry, give it a coat of clear sealant spray. This will protect the design from wear and tear while adding some shine!
Verify it’s completely dry before moving to the next step.
5. Attach the Tag: Now it’s time to put that tag on your dog’s collar using a keyring or chain. Make sure it’s secured well enough to withstand your pup’s enthusiastic antics during playtime.
6. Show It Off: Strut around the neighborhood with your stylishly tagged pooch. You’ll be amazed at how many compliments you’ll get, and your dog will certainly feel a little more special.
Optional Add-ons/Variations
Want to switch things up? Think about using different colors for the tag or even a shimmering glitter finish for an extra pop.
You could also experiment with various designs and shapes—like a bone or a heart—as unique silhouettes can add tons of personality.
Pro Tip
When choosing materials, remember to reflect on your dog’s lifestyle. If your dog loves to romp around in the bush or swim at the dog park, look for something durable and water-resistant.
That way, your beautiful creation will last through all their adventures while keeping them safe and stylish. And who knows, you might end up wanting a matching tag for yourself—not that I’d judge.
Extra Tips & Ideas
While creating the perfect indoor dog cage for your furry friend might seem straightforward, a few extra tips can turn a simple space into a cozy retreat.
First, think about layering—add a soft bed, warm blanket, and maybe a few plush toys. Dogs love to snuggle, right? Creating a more inviting space can also include interactive play options, as engaging toys will keep them entertained for hours. Consider adding premium dog fashion accessories that could enhance their comfort while lounging.
You can also position the cage near a window for some natural light, so your pup feels part of the family bustle.
And don’t forget some personal touches. Consider hanging a small plant nearby or even a framed photo of you two. It’s like doggie décor!
Finally, keep it fresh by rotating bedding and toys; dogs get bored, too. Investing in designer dog crate furniture can elevate the aesthetic while providing comfort.
Trust me, a happy pup equals a happy home.
Frequently Asked Questions
What Materials Are Best for Comfortable Dog Cages?
For comfortable dog cages, you’ll want materials like soft bedding, durable yet breathable fabrics, and sturdy metal frames. Avoid plastics that might trap heat. Choosing the right materials will enhance your dog’s comfort considerably.
How Can I Prevent My Dog From Chewing the Cage?
To keep your pup from nibbling on the cage, offer plenty of chew toys and distractions. Consider positive reinforcement training to discourage the habit, ensuring your furry friend feels secure and entertained in their space.
Are There Specific Sizes for Different Dog Breeds?
Yes, there are specific sizes for different dog breeds. A small breed needs less space, while larger breeds require bigger cages. Always measure your dog to guarantee the cage fits comfortably and provides enough room to move.
How Do I Clean and Maintain a Dog Cage?
To clean and maintain a dog cage, remove your dog and all items, scrub with mild soap and water, rinse thoroughly, dry completely, and regularly inspect for any damage or wear to guarantee safety.
Can I Customize a Dog Cage for My Pet’s Needs?
Think of your dog’s cage as a canvas waiting for your brush. You can absolutely customize it for your pet’s needs, adding features like comfy bedding, toys, or relaxation areas to create their own cozy haven.
Conclusion
Creating a cozy retreat for your pup is like building a warm hug. Just picture your furry friend snuggled up on that plush memory foam bed, tail wagging with pure joy. It’s more than just a cage; it’s their personal palace! So, why not blend comfort and style effortlessly? With fun touches like name tags and interactive toys, you’ll turn their space into a haven they’ll love. After all, happy pup, happy life, right?