Building a DIY dog ramp might seem intimidating, but trust me, it’s easier than figuring out how to assemble IKEA furniture—without the missing screws. Imagine this: your furry friend confidently trotting up and down like it’s no big deal. Doesn’t that sound great? Plus, you can get all fancy with colors and designs that match your home. Curious about how to get started and make it safe and stylish? Let’s explore the details together.
Elevate Your Dog’s Independence
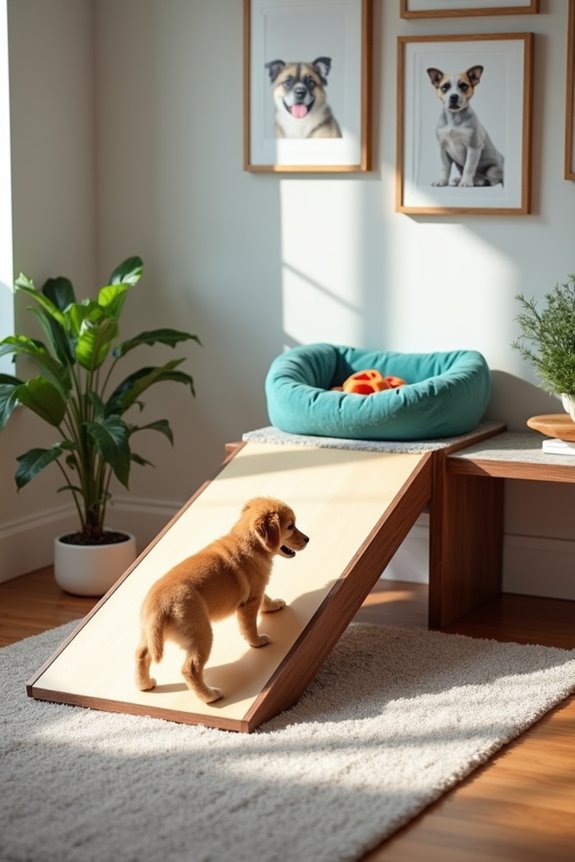
When you’re looking to boost your furry friend’s independence, a DIY dog ramp can work wonders.
Envision this: your pup, once hesitant, now strutting up and down with newfound dog mobility. It’s like giving them a golden ticket to their own little kingdom.
With a simple ramp, you’re not just creating a piece of furniture; you’re building canine confidence. You’ll save your poor back, too, by letting them hop into the car or onto the couch themselves.
Plus, they’ll feel like a superhero. Don’t worry if you’re not a woodworking wizard—just grab some wood, screws, and a bit of sandpaper.
It’s not rocket science, and trust me, your pup’s grateful face will make it all worthwhile.
Our Collection
When you’re choosing a ramp for your furry friend, it’s crucial to check out our collection.
You’ll find everything from a durable wooden design to a non-slip surface that keeps those paws secure.
Plus, with adjustable heights and a weather-resistant finish, you’ll have a ramp that’s as versatile as your pup’s personality.
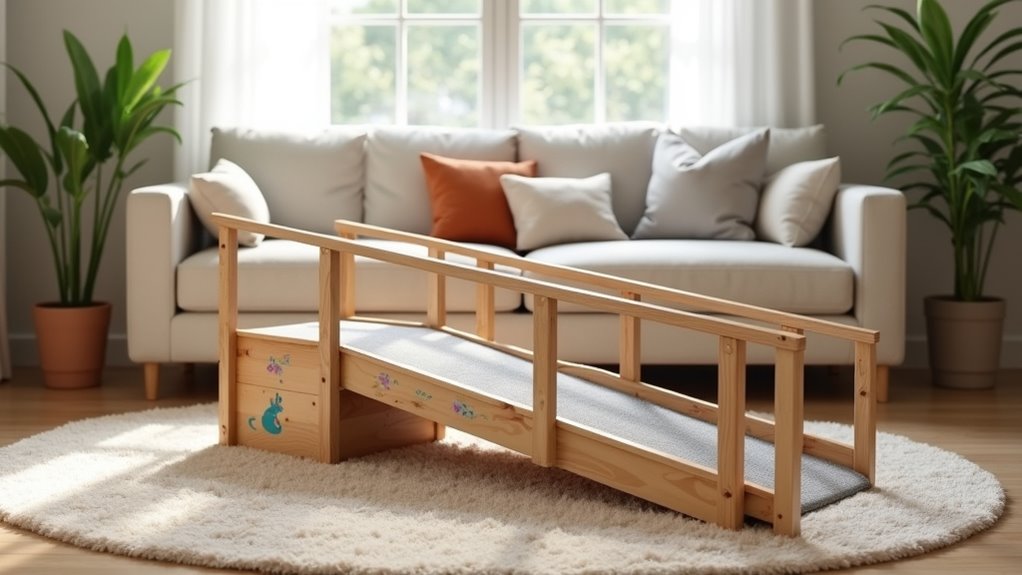
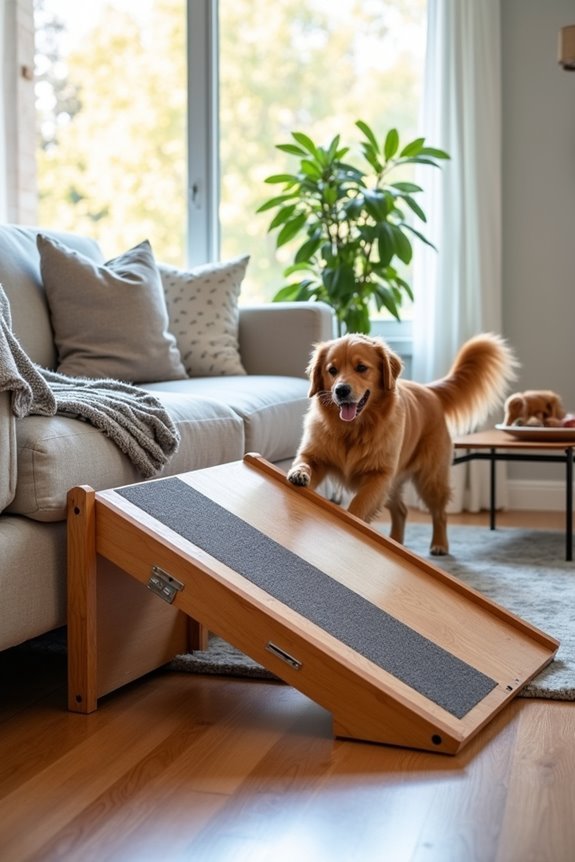
1. Durable Wooden Ramp Design
Building a dog ramp can be one of the best things you do for your furry friend. Not only does it provide your pup with easier access to hard-to-reach spots, but it also helps prevent injuries, especially for older dogs or those with mobility issues. Plus, making your own means you can customize it to fit your home’s style while saving a bit of cash. Who doesn’t like that? Additionally, providing your dog with premium digestive supplements can further enhance their overall health and well-being.
Materials Needed:
- 1 sheet of plywood (3/4 inch thick)
- 2 wooden boards for the sides (2×4 inches)
- Wood screws
- Wood glue
- Sandpaper (medium and fine grit)
- Paint or wood stain (optional)
- Non-slip carpet or adhesive grip strip
- Drill
- Saw (a circular saw is great, but a hand saw works too)
- Measuring tape
- Paintbrush (if staining/painting)
Step-by-Step Instructions:
- Measure the Height: Determine how high the ramp needs to be. This will depend on where your dog needs access (like a couch or a bed). Measure the height with a reliable measuring tape.
- Cut the Plywood: Using your saw, cut the plywood sheet into a rectangle. This will be the main ramp section. Make sure it’s long enough—ideally a 2:1 ratio for the incline so it’s gentle on those puppy paws.
- Create the Side Supports: Cut the 2×4 wooden boards to the same length as your ramp’s length. These will serve as the side rails to keep the ramp sturdy. You’ll want one on each side of the ramp.
- Screw the Ramp Together: Use wood screws to attach the plywood ramp to the two support boards. Confirm the screws are securely fastened. You want this ramp to hold up, especially when your fur baby is racing up and down.
- Smooth the Edges: Grab your sandpaper and smooth out any rough edges on the ramp. Remember, you want it comfortable for those little paws—and we all know how much dogs love to zoom around.
- Add a Non-slip Surface: This is key. Make sure your dog won’t take a spill. Survey your local hardware store for non-slip carpet or grip strips and adhere them to the ramp surface.
- Finish with Paint or Stain: If you’d like to spruce up your new ramp, now’s the time to paint or stain. Choose a color that complements your home decor, making this ramp not just functional, but also a stylish addition.
Optional Add-ons/Variations:
- Personalized Colors: Consider painting the ramp in your dog’s favorite color or adding fun designs using stencils. Imagine a ramp decked out in paw prints!
- Decorative Features: Attach a shelf or box at the end of the ramp for toys. You can even add a little plaque with your dog’s name for that extra personal touch.
Pro Tip:
To keep it safe and sturdy, give the ramp a test run yourself—no need for any pride here. If you feel stable walking on it, your pup is certainly safe to use it too.
And consider weatherproofing it if it’s going to be outdoors; a nice coat of sealant can do wonders.
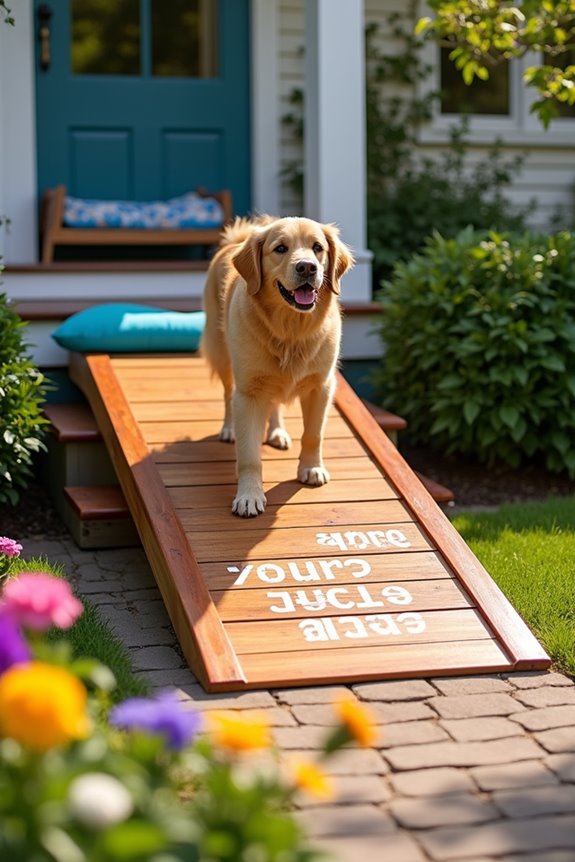
2. Non-Slip Surface Material
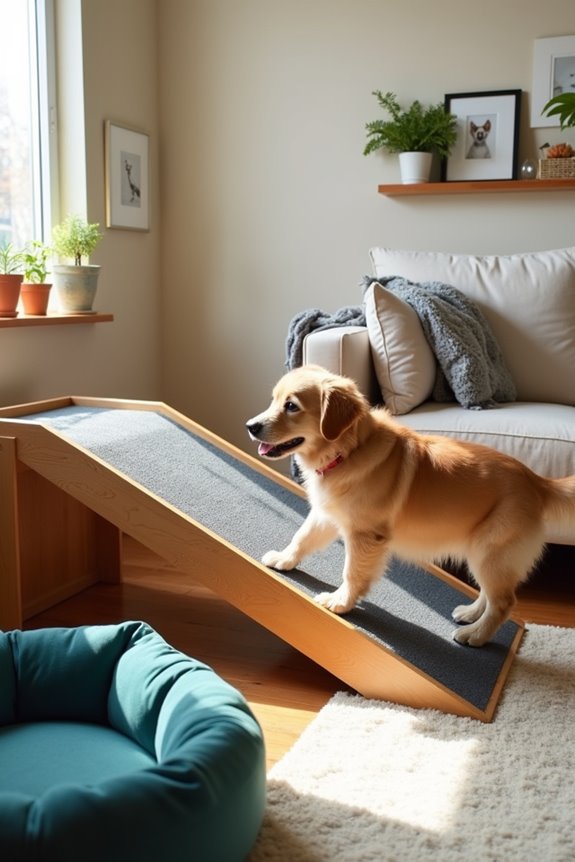
Building a dog ramp isn’t just a fun weekend project; it’s a heartfelt way to enhance your pup’s life while keeping your home looking great.
Whether your furry friend needs a little extra help getting up to the couch or benefits from safe access to a car, this DIY dog ramp can make life easier and more comfortable for both of you.
Plus, creating it yourself saves you money and gives you the joy of crafting something specially designed for your beloved companion. Premium dog gadgets can also provide additional enhancements for your dog’s comfort and safety.
Materials Needed:
- 1 sheet of plywood (3/4 inch thick)
- 2 wooden boards for the sides (2×4 inches)
- Wood screws
- Wood glue
- Sandpaper (medium and fine grit)
- Non-slip carpet or adhesive grip strip
- Drill
- Saw (circular saw or hand saw)
- Measuring tape
- Paintbrush (if coloring or staining)
Step-by-Step Instructions:
1. Measure the Height: First, grab your measuring tape to find out how high your ramp needs to be.
Is your dog aiming for the couch? Measure from the ground up to the seat. The height will determine how long to make your ramp.
2. Cut the Plywood: Next, take your saw and Cut the Plywood into a rectangle.
Ideally, the ramp should follow a 2:1 incline (every two units in length for every one unit in height) to make it easy for your pup to use, while also reducing strain on their little legs.
3. Create the Side Supports: Now, you’ll cut the 2x4s to match the length of your ramp.
These will act as the side rails. So, if your ramp is 4 feet long, cut two 4-foot pieces. It’s always better to measure twice—trust me, no one wants to waste wood!
4. Screw the Ramp Together: With your side supports and plywood cut, it’s time to bring it all together.
Use wood screws to attach the plywood ramp to the two side supports. Make sure it’s all tight, as a loose ramp during pup traffic can be—let’s just say—an adventure best avoided.
5. Smooth the Edges: Grab your sandpaper and smooth out any rough edges or splinters along the ramp.
Dogs have delicate paws, and we want them to be happy as they trot up and down.
6. Add a Non-slip Surface**: Safety first**! Find some non-slip carpet or adhesive grip strips and apply them to the surface of the ramp.
This guarantees your furry friend won’t slip and slide on the way up or down. It’s like giving them their own little doggy runway.
7. Finish with Paint or Stain****: If you want to give your ramp a personal touch, now is the time to get creative.
Paint or stain your ramp in a color that matches your décor, or maybe even your dog’s bed!
Optional Add-ons/Variations:
– Personalized Designs: Have some fun and add a splash of personality.
You can use stencils to paint paw prints or your dog’s name down the side of the ramp. Imagine how adorable it will look, and your pup will feel like royalty!
– Fabric Cushions: For added comfort, consider wrapping the ramp in soft fabric along the sides.
Not only will this look cozy, but it will also make it safer if your pup decides to hop off the side.
Pro Tip:
Before you let your dog use this fabulous new ramp, do a safety check.
Verify it’s stable and can support your dog’s weight. And maybe even train them gently at first—no need for a full-speed run right out of the gate.
A little patience and practice will guarantee they use their new ramp with confidence and ease.
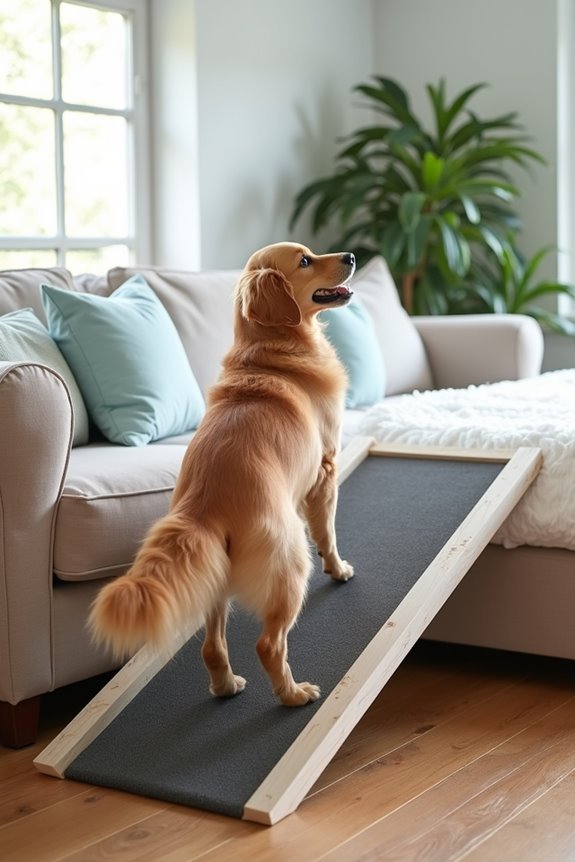
3. Adjustable Height Mechanism
Building a dog ramp isn’t just about making life easier for your furry friend; it’s about creating a versatile piece of furniture that adapts to your home’s needs. An adjustable height mechanism gives you the flexibility to modify the ramp as needed, ensuring maximum comfort for your dog while also collecting “Ooohs” and “Aaahs” from your guests. Plus, who doesn’t love a good DIY project that just screams “I care about my pup”?
Did you know that an automatic dog food dispenser can also help streamline your pet care routine? Let’s explore and make your canine companion’s world a more accessible place.
Materials Needed:
- 1 sheet of plywood (3/4 inch thick)
- 2 wooden boards for the sides (2×4 inches)
- 2 wooden dowels (1-inch diameter)
- 4 metal L-brackets
- Wood screws
- Wood glue
- Sandpaper (medium and fine grit)
- Non-slip carpet or adhesive grip strip
- Drill
- Saw (circular saw or hand saw)
- Measuring tape
- Paintbrush (if coloring or staining)
Step-by-Step Instructions:
1. Measure the Height: Grab your measuring tape and Measure the Height you need your ramp to reach. This could be the height of your couch, bed, or car trunk.
Remember, the goal is to provide easy access for your furball.
2. Cut the Plywood: Using your saw, Cut the Plywood into a rectangle. Keep that 2:1 incline in mind—every two feet in length should equal one foot in height.
This way, your dog won’t have to do an Olympic gymnastics routine just to get up.
3. Create Side Supports: Now that you have a ramp, cut your two 2x4s to match the length of the ramp.
For an adjustable design, modify these supports with holes for the dowels to pass through. Each hole should be evenly spaced, allowing you to adjust the height simply by moving the dowels.
4. Attach the Plywood to the Side Supports: Use wood screws to secure the plywood ramp to the two side supports.
Make sure everything is sturdy and tight—an unexpected wobble could turn into a surprise skirmish for your pup.
5. Install the Adjustable Mechanism: Insert the wooden dowels through the side supports at your desired height, and add the metal L-brackets for added stability.
This step allows you to easily adjust the height of your ramp later on, depending on its new location or your dog’s needs.
6. Smooth the Edges: It’s time for some pampering. Take your sandpaper and smooth out any rough edges or splinters.
Nobody wants a splintered paw, right?
7. Add Non-slip Surface****: Now for safety—find some non-slip carpet or adhesive grip strips and apply them to the ramp’s surface.
This is essential for preventing any canine wipeouts. Think of it as a safety net for your furry acrobat.
8. Personalize: If you want to add a splash of creativity, now’s the time to paint or stain the ramp to match your home décor.
Maybe add your dog’s name or a cute paw print design.
Optional Add-ons/Variations:
– Color and Pattern: Choose bright paint colors or fun patterns for a unique look.
What about a camouflage for the adventurous pup or a pastel palette for your sweet little princess?
– Height Markings: You can mark different height options on the side supports with numbers or colors so you can easily reference the best setting for your pup.
Pro Tip:
Always check the ramp once a month to make sure everything is tight and secure.
Re-tighten screws or dowels if you notice any movement, because the last thing you want is your pup going on a wobbly escapade.
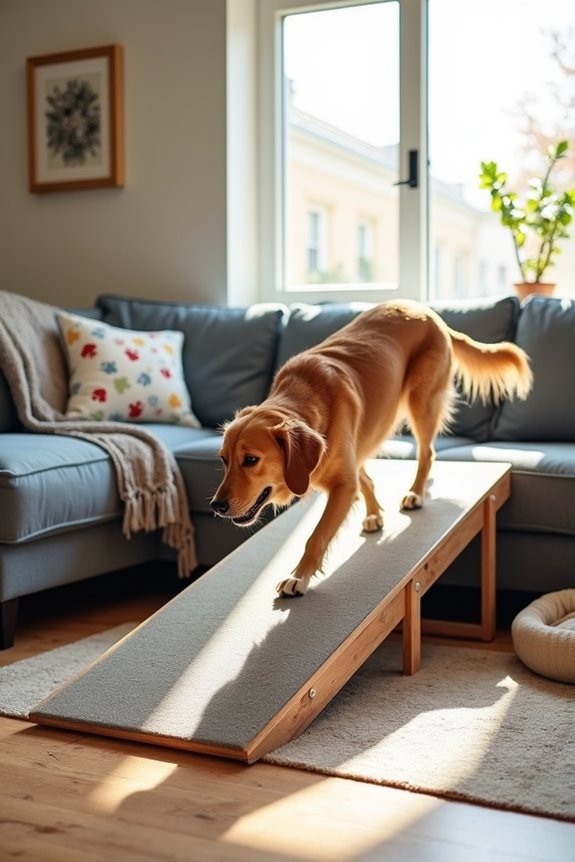
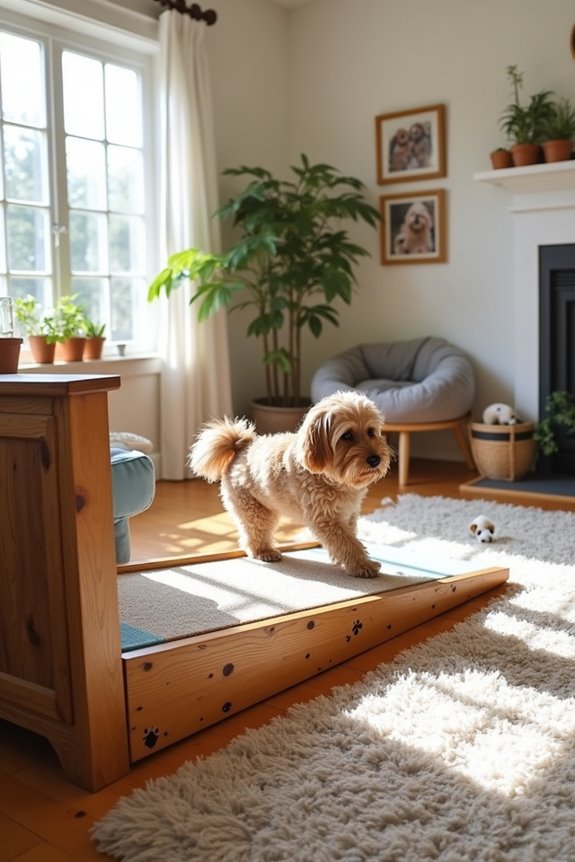
4. Portable for Easy Transport
If you’re a dog owner who loves adventures, having a portable dog ramp can be a game-changer. Whether you’re heading to the vet, going on a weekend getaway, or just relaxing at a friend’s house, a portable ramp makes accessing cars, couches, and more a breeze for your furry friend. Not only does it save money by eliminating the need for costly dog safety harnesses or seat covers, but it also enhances your dog’s comfort while adding a touch of style to your home. Additionally, selecting a premium dog kennel outdoor ensures a safe and comfortable environment for your pet when you’re not around.
Materials Needed:
- 1 sheet of plywood (3/4 inch thick)
- 2 wooden boards for the sides (2×4 inches)
- 2 wooden dowels (1-inch diameter)
- 4 metal L-brackets
- Wood screws
- Wood glue
- Sandpaper (medium and fine grit)
- Non-slip carpet or adhesive grip strip
- Portable handle (can be a sturdy rope or strap)
- Drill
- Saw (circular saw or hand saw)
- Measuring tape
- Paintbrush (for coloring or staining, if desired)
Step-by-Step Instructions:
- Measure for Portability: First, assess what makes your ramp truly portable. Aim for a length that’s easy to handle but still gives your pup a manageable incline. About 3 to 4 feet is generally a good length for portability.
- Cut the Plywood: Use your saw to cut the plywood into a rectangle that follows your portability dimensions. A gentle 2:1 incline is key to guaranteeing your dog feels safe and comfortable using it.
- Prepare Side Supports: Cut your 2x4s to match the length of the ramp and consider adding holes for the dowels, which allows for height adjustments. This way, you have a ramp that can fit different situations and vehicles.
- Secure the Plywood: Attach the plywood to the side supports using wood screws. Make sure everything is tight and stable. A great ramp is one that won’t wobble or creak under your pup’s weight.
- Add the Portable Feature: Install the wooden dowels for adjustable height and attach the metal L-brackets for added sturdiness. For portability, now would be a great time to drill a small hole at the top or bottom of the ramp and attach a handle. This could be a simple rope or strap that helps you pick up that ramp when you’re on the go.
- Smooth Things Out: Use your sandpaper to sand down any edges or splinters that might catch a paw. You want your dog to feel like royalty, not like they’re walking through a beauty treatment gone wrong.
- Finish with Non-slip Surface: Finally, add a non-slip surface to guarantee your dog won’t take a tumble when using the ramp. This is often the most critical step—don’t skip it. It can be as simple as gluing carpet strips to the ramp surface or applying an adhesive grip strip.
Optional Add-ons/Variations:
- Color It Your Way: Why not paint or stain the ramp to match your home decor? A nice stain can bring out the wood’s natural beauty while making it more of an attractive feature in your space.
- Decorative Fabric: Covering the ramp with a stylish fabric can also add flair. Just make sure it’s durable and easy to clean—because let’s be real, no one wants dog hair sticking to it.
Pro Tip:
Before finalizing anything, double-check the ramp’s weight capacity. You want to guarantee it’s sturdy enough to handle your dog’s size and weight comfortably.
And remember, adding a little extra width to the ramp can provide more space for your pup to maneuver, so they feel safe and secure when they’re climbing up or down.
Now you’re not just making a ramp; you’re crafting a bridge of comfort and love for your furry friend, proving just how much you care. Happy building!
5. Weather-Resistant Finish
If you’re a dog owner who wants to make your DIY dog ramp last through all kinds of weather, this is the step for you. Here, we’ll explore how to apply a weather-resistant finish so your ramp stays sturdy, safe, and stunning, no matter the season. Say goodbye to the worry of wood warping or fading, and hello to a long-lasting addition to your home that keeps your furry friend comfy! Additionally, investing in high end dog supplies like quality ramps can enhance both functionality and style for your pet.
Materials Needed:
- Weather-resistant paint or wood sealer
- Paintbrush or roller
- Drop cloth or old newspaper (to protect surfaces)
- Clean cloth for dusting
- Optional: Clear coat finish for extra protection
Step-by-Step Instructions:
- Prep Your Space: Lay down a drop cloth or some old newspaper under your work area. Let’s avoid any unwanted drips on your floor. We all love our pets, but not so much when they leave paw prints on freshly painted floors.
- Clean the Ramp: Before you start painting, give the ramp a good wipe-down. Use a clean cloth to remove any dust or debris. It’s like giving your ramp a little spa day—it deserves it.
- Choose Your Finish: Decide on a weather-resistant paint or wood sealer. If you want extra protection, you might want to reflect on a clear coat finish on top. Think of it as icing on the cake; it makes everything just a bit better.
- Start Painting: Dip your brush or roller into the paint or sealer, and start applying it to the ramp. Go with the grain of the wood for the best effect. Apply a thin, even coat and don’t rush! Besides, you’ve got plenty of time to impress your pup with your handiwork.
- Let It Dry: Allow the first coat to dry completely, which usually takes a couple of hours. If you can still see the wood grain through the first coat, it might need another layer. Think of this as applying sunscreen; one coat mightn’t be enough for ideal protection.
- Apply Additional Coats: If you want more durability, go ahead and apply a second coat once the first has dried. Just make sure it’s dried completely. Your dog will be keen to test the ramp, and we don’t want anyone slipping or sliding, right?
- Final Touches and Cure Time: Once you’ve finished painting, let the ramp cure for a day or two before letting your dog use it. This means keeping scratches and paws off it while the finish completely hardens. This guarantees your hard work pays off in the long run.
Optional Add-ons/Variations:
Want to take it up a notch? Ponder using colored weather-resistant paint to jazz up your ramp. Perhaps a bright blue or a fun pattern that complements your home decor.
Or, why not add a fun quote or your dog’s name stenciled on it? It’s all about personality here.
Pro Tip:
Always check the manufacturer’s instructions on your paint or sealer for drying times and recommended number of coats. And remember to let your ramp breathe in a well-ventilated area while it cures—after all, we don’t want your fur baby getting dizzy from those fumes.
With a little dedication and creativity, your DIY dog ramp will be the envy of all your pet-owning friends—and your dog will feel like the star they are. Now, who’s up for a ramp competition?
6. Customized Size Options
If you’re diving into the domain of DIY dog ramps, customizing the size is perhaps one of the most exciting aspects. Not only does this ramp cater to your furry friend’s needs, but it also guarantees it fits seamlessly into your home. A well-sized ramp can save you money, provide comfort to your pooch, and make your space look more unified.
Let’s take a look at how you can tailor a dog ramp to fit your specific requirements.
Materials Needed:
- Measuring tape
- Pencil or chalk for marking
- Saw (circular saw or jigsaw)
- Sandpaper
- Weather-resistant paint or wood sealer (for finishing)
- Optional: Non-slip surface material (like carpet or rubber matting)
Step-by-Step Instructions:
- Measure Your Space: Start by measuring the area where the ramp will be placed. Consider factors like the height the ramp needs to reach and the space you have available for the width and length. Think of it as preparing for a new pet bed—everything needs to fit just right.
- Assess Your Dog’s Size: Next up is measuring your dog. How tall is your pup standing next to the couch, bed, or car? Factor in their size, age, and any mobility challenges. If your dog is like mine and decides to take a flying leap off the couch, you might need a sturdy ramp to help them.
- Calculate the Angle: Aim for a gentle slope to make it easy for your dog to climb. Ideally, the longer and lower the ramp, the softer the angle. Use a simple formula: for every inch of height, allow for 1.5-2 inches of length. If math isn’t your jam, just visualize it like this—your pup doesn’t want to conquer Everest to reach you.
- Cut the Wood: With your measurements in hand, it’s time to cut your wood to size. Use a saw and be sure to wear safety goggles. Remember, this is meant to be a smooth and safe ride for your furry friend, not a lumberjack contest.
- Sand the Edges: After the cutting, sand down all edges to ascertain they’re smooth. This is vital to prevent any splinters or scratches. Dogs being dogs, we’d hate for their graceful climb to turn into a painful experience.
- Finish It Up: Once you’ve got the shape and the smooth edges, apply a weather-resistant finish to protect the wood. Just like we talked about earlier, you want this ramp to withstand the elements and time, so don’t skip this step.
- Optional Non-Slip Surface: For enhanced safety, consider adding a non-slip surface at the top, especially if you have a little daredevil at home. This could be a strip of rubber matting or some carpet. Your dog will thank you when they can ascend without fear of slipping.
Optional Add-ons/Variations:
Feeling a bit creative? Why not paint your ramp in a fun color that matches your decor? A soft blue or a lively green can add a pop to your room.
Or consider using different wood types—like oak or pine—for a varied appearance. Personalizing your ramp not only makes it functional but also a beautiful focal point in your space.
Pro Tip:
Remember to test the ramp’s stability before letting your dog use it. You want to verify it’s sturdy and can support their weight adequately. A little wobble might turn a routine climb into a nail-biting circus act, and we want to keep our precious pups safe and happy.
With a customized size, your DIY dog ramp can be a perfect fit and a stylish addition to your home!
7. Built-in Safety Rails
When it comes to creating a DIY dog ramp, incorporating safety rails is a fantastic way to provide that extra layer of security for your furry friend. Let’s face it, our dogs are adventurous, sometimes more so than we’d like. Safety rails can prevent those heart-stopping moments when they slip off the side, guaranteeing their ramp experience is fun and secure.
Plus, it adds a sleek touch to your ramp—who doesn’t want a stylish safety feature in their home?
Materials Needed:
- 1×2 or 1×3 wood boards (for the rails)
- Measuring tape
- Pencil or chalk for marking
- Saw (circular saw or jigsaw)
- Drill and screws
- Sandpaper
- Weather-resistant paint or wood sealer
- Optional: Non-slip surface material (like carpet or rubber matting)
Step-by-Step Instructions:
- Prepare Your Ramp: Start with the main ramp structure you previously built. Guarantee it’s sturdy and stable because we want everything to be safe for your pup.
- Determine the Height of the Rails: Decide how tall you want the safety rails to be. A good guideline is to have them around 4–6 inches high. This way, they provide enough support without creating an unclimbable fortress for your dog.
- Cut the Rails to Size: Measure and cut two lengths of wood for the sides of the ramp, parallel to the sides where the rails will be placed. You might feel a little like a woodworker, and who doesn’t love a bit of DIY self-glorification?
- Attach the Rails: Use your drill to secure the cut pieces to the side of the ramp. Make sure they’re evenly spaced and securely fastened—because nobody wants to ride a wobbly rail.
- Sand the Edges: Remember that sandpaper? Yeah, it’s time again. Sand down the edges of the rails so they’re smooth. This is key—splinters aren’t in the dog’s travel guide.
- Finish It Up: Once everything is in place, apply that weather-resistant finish we talked about. This makes the rails blend seamlessly into the ramp and protects them from wear and tear. Your pup will appreciate this small act of love, trust me.
- Final Touches and Non-slip Surface: If you haven’t already done so, you can apply a non-slip material to the ramp surface and the tops of the safety rails. This makes it easier for your dog to navigate without slipping.
Optional Add-ons/Variations:
- Paint or Stain the Rails: To add a pop of personality to your ramp, consider painting or staining the rails in a fun color or finish that matches your decor. Simple shades like light gray or pastel colors can look quite chic!
- Add Decorative Accents: Think of adding some dog-themed stencils or decals to the rails. It shows off your personality and celebrates your love for your furry friend—all without breaking a sweat.
Pro Tip:
For an extra safety precaution, always check the stability of the ramp and rails after your first few uses. You’ll be grateful later, knowing your pup can leap on and off with abandon, without leaving you in a panic.
Plus, if you use treated wood, it’ll stand the test of time, resisting both weather elements and doggy mischief.
Building a dog ramp with safety rails not only makes life easier for your pup but adds peace of mind to your day. So grab those tools, and let’s make your furry buddy’s life just a little more comfortable—and stylish too!
Extra Tips & Ideas
While building a DIY dog ramp can be a fun project, there are a few extra tips and ideas that can take your creation to the next level.
Consider adding ramp accessories like non-slip treads for safety—trust me, no one wants a four-legged friend doing the doggy slip-and-slide. If you’re into dog training, use the ramp as part of your pup’s practice routine. It can help build confidence while giving them a new skill to show off.
Plus, make the ramp a bit more aesthetically pleasing. Some paint or treat it with sealant, and voilà, you’ve got a piece of furniture that even your friends might notice.
Keep things simple, and don’t stress too much. Your dog will love it, even if you fumble a bit.
Frequently Asked Questions
What Materials Are Best for Building a DIY Dog Ramp?
To build a dog ramp, use sturdy wood types like plywood or pine for the structure. For ramp finishes, consider non-slip paint or rubber mats to enhance safety and grip, ensuring your pup’s secure footing.
How Steep Should a Dog Ramp Be for Safety?
You’d think a steep ramp’s exciting, but for safety, keep it under a 30-degree angle. Aim for the right ramp height to meet safety standards, ensuring your dog’s journey remains a smooth, secure adventure!
Can I Customize the Ramp Size for My Dog’s Breed?
Yes, you can customize the ramp size for your dog! By considering ramp dimensions based on your specific breed specifications, you’ll guarantee it fits perfectly, providing safety and comfort for your furry friend.
What Weight Capacity Should My DIY Dog Ramp Support?
Your DIY dog ramp should support at least 200 pounds to guarantee adequate weight distribution and ramp stability. Always consider your dog’s size and any additional items they’ll carry to verify safe usage.
How Do I Ensure My Dog Uses the Ramp Confidently?
To guarantee your dog uses the ramp confidently, start ramp training with treats and positive reinforcement. Gradually encourage them to walk up and down, celebrating their progress, and creating a positive association with the ramp.
Conclusion
Building a DIY dog ramp can really boost your furry friend’s confidence. Did you know that nearly 70% of dogs will experience mobility challenges as they age? That’s a lot of pups needing support. So, why not show your pup some love with a personalized ramp? It’s a simple, rewarding project that can make a big difference. Plus, you’ll feel like a superhero every time your dog races up and down, tail wagging like a flag.