Creating an outdoor dog area is like building a cozy little kingdom just for your pup, a space where they can roam, relax, and bask in the sun. Have you ever watched your dog joyfully tumble through grass or snooze under a tree? It’s heartwarming. But where do you start? With a few simple ideas and a sprinkle of creativity, you can make a spot that feels special. So, let’s explore some fun options you can whip up together.
Cozy Shaded Relaxation Spots
When you think about your pup lounging in the great outdoors, do you picture them sprawled out on the grass, baking in the sun? That’s a little too toasty for my taste, and I’m sure your furry buddy feels the same.
Why not set up some cozy shaded relaxation spots? Think about adding shaded seating, like a cute doggy gazebo or even a large umbrella. If you’ve got trees, those provide fantastic natural shade.
Your pup will love curling up in a cool, comfy spot, tail wagging, while watching the world go by. You’ll be the proud owner of the happiest dog on the block, and trust me, your neighbor’s jealous glances will tell you all you need to know.
Our Collection
Now that you’ve set up those cozy shaded spots for your furry friend, let’s talk about some must-haves from our collection.
You’ll find everything from a portable water bowl stand and sturdy chew-resistant toys to a secure dog fence and a comfy outdoor dog bed.
Isn’t it great knowing you can create the perfect play and rest area for your pup with just a few thoughtful additions?
1. Portable Water Bowl Stand
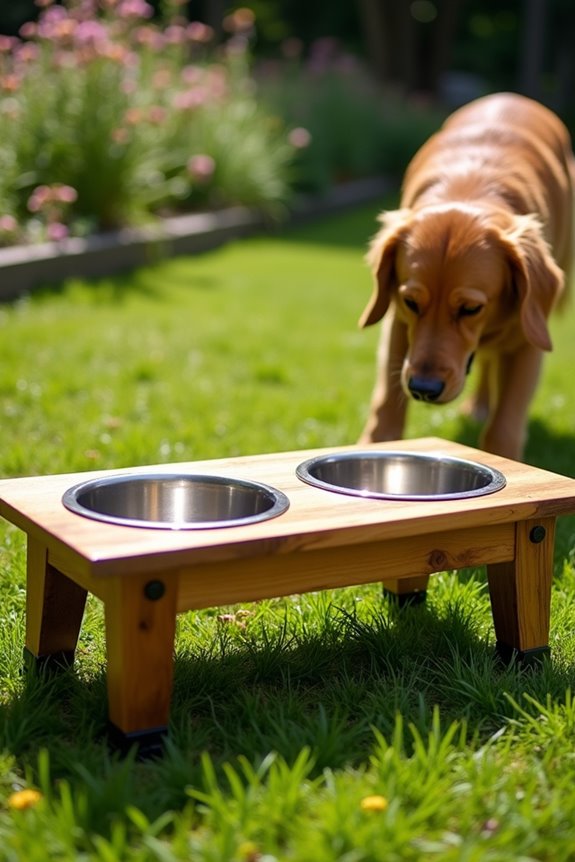
Creating a portable water bowl stand is a fantastic DIY project for dog owners looking to keep their furry friends hydrated while enjoying the great outdoors. Not only does it make trips to the park or the backyard a bit easier, but it also saves you from those annoyingly messy water spills. Plus, who doesn’t want to elevate their dog’s drinking game with a stylish stand? Let’s roll up our sleeves and get started on this paw-some project!
Materials Needed:
- Wooden board (the size will depend on your dog; 2×4 inches is a good start)
- Two sturdy legs (you can use more wood or repurpose old furniture legs)
- Dog bowls (preferably stainless steel for durability)
- Wood screws (size according to your wood thickness)
- Wood glue (for extra stability)
- Sandpaper (medium and fine grit for smoothing edges)
- Paint or wood stain (optional, for customization)
- Paintbrushes (if you’re painting)
- Measuring tape
- Drill (for making holes for screws)
- Screwdriver (to tighten everything up)
Step-by-Step Instructions:
- Measure and Cut the Wood: Decide on the height of your stand (about 3-6 inches above ground is generally ideal). Cut your wooden board to the desired length for your dog bowls.
- Prepare the Legs: If you’ve chosen to repurpose furniture legs, make sure they’re sturdy enough for your furry friend. Attach your legs to each end of the wooden board using wood screws. If you’re using additional wood, cut two pieces for legs and secure them under the board.
- Drill Holes for Bowls: On top of your wooden board, mark where you want the dog bowls to sit. You can either use a jigsaw or a hole saw to create circles that fit the bowls snugly. Confirm the holes aren’t too deep; you want the bowls to sit flush with the wood surface.
- Sand and Smooth: Grab your sandpaper and smooth out all the edges of the wood to prevent splinters. You wouldn’t want your pup giving you a ‘what was that?’ look as they sip their water.
- Paint or Stain: Here’s where you add your personalized touch. Paint or stain the stand in colors that complement your outdoor decor or go wild with a fun pattern. Let it dry completely.
- Attach the Bowls: Once it’s dry, place your bowls in the holes, ensuring they fit snugly. If you’d like a little more security, you can use glue to hold them in place.
- Finalize and Enjoy: Check to make sure everything’s stable, and voila! Your portable water bowl stand is ready for action. Take it outside, and watch your pup enjoy their invigorating drink in style.
Optional Add-ons/Variations:
Get creative with your stand! You can choose to use reclaimed wood for a rustic look or paint it with bright colors to match your dog’s personality.
Want to take it a step further? Consider adding hooks on the side for leashes or other outdoor essentials, making your stand a multifunctional piece.
Pro Tip:
When you’re outside enjoying the fresh air, remember to choose weather-resistant materials if your stand is going to be a permanent fixture—things like treated wood or even a plastic option can save you from constant repairs.
Also, consider adding rubber padding to the legs for grip so your stand doesn’t slide around when your pup is energetically sipping away.
Now that you’ve crafted your own portable water bowl stand, your four-legged friend will be ready for hydration whenever and wherever! Plus, you’ll feel pretty proud every time you see it. Happy DIY-ing!
2. Sturdy Chew-Resistant Toys

Let’s be real: keeping your furry friend happy and entertained can sometimes feel like a never-ending quest. Chew toys come to the rescue, but let’s face it, not all toys are created equal. If your dog has a penchant for destruction, investing in sturdy chew-resistant toys can save you time, money, and the heartbreak of watching your pup munch on a toy that’s barely lasted a week.
Plus, durable toys keep dogs occupied and prevent boredom, which may save your favorite pair of shoes. Here’s how to either pick or create a sturdy, chew-resistant toy that’ll stand the test of time—and those sharp little teeth. Remember, high-quality premium dog chew toys can also offer exceptional durability and fun for your pup.
Materials Needed:
- Heavy-duty fabric (like canvas or upholstery material)
- Stuffing material (like cotton or recycled polyester filling)
- Sewing machine
- Thread (strong polyester thread is best)
- Scissors
- Marker (for sketching your design)
- Dog-safe squeakers (optional, for added fun)
Step-by-Step Instructions:
- Sketch Your Design: Start by deciding what kind of toy you want to create. A simple shape like a bone or a plushie works great. Use your marker to outline your design on the heavy-duty fabric. Aim for a size that matches your dog’s breed—big enough to chew, but not so big they can’t carry it around.
- Cut the Fabric: Carefully cut out two identical shapes from your fabric using scissors. If you’re planning to add a squeaker, make sure to cut a small pocket for it in one of the fabric pieces.
- Sew the Edges: Place the two pieces together, right sides facing each other. You’ll want to sew around the edges, leaving a small gap (about 2-3 inches) open for turning and stuffing. Make sure you use a strong, tight stitch; we don’t want any fabric giving in to those enthusiastic jaws.
- Turn and Stuff: Turn the toy inside out through the gap you left. Now it’s time to stuff it with your filling material. Give it a good, fluffy filling but don’t overstuff—this toy still needs to have some give, or it may not survive the first chew session.
- Insert Squeaker: If you’re adding a squeaker, tuck it into its pocket now. It’s sure to excite your pup and keep them engaged.
- Close Up: Once you’re happy with the stuffing, carefully fold the raw edges of the opening inward and sew it shut to secure everything in place. This guarantees no stuffing escapes during playtime—it’s a classic dog toy move!
- Admire and Test: Give it a good look-a-roo! Make sure there are no loose threads or places where the seams could give way. Hand it over to your pup and watch them enjoy their new favorite toy.
Optional Add-ons/Variations:
Feeling creative? Consider using vibrant colors of fabric or adding fun patterns to make the toy more visually appealing. You can also try using different shapes and sizes, like making a small round ball or a quirky animal plush.
Alternatively, mix up the textures—think about adding a soft fleece backing or even a rope for added chew resistance.
Pro Tip:
To make your toy extra durable, double stitch the seams. This small hack will help withstand even the strongest chewers, turning your DIY project into a long-lasting treasure instead of a fleeting fun time.
And don’t forget to check for wear and tear regularly; the last thing you want is your pup to munch on loose fabric bits.
Now you’ve got a durable chew toy ready for playtime, a project that not only saves money but also adds a personal touch to your dog’s toy collection.
Who knew being a dog parent could be so crafty? Happy making!
3. Outdoor Dog Playhouse
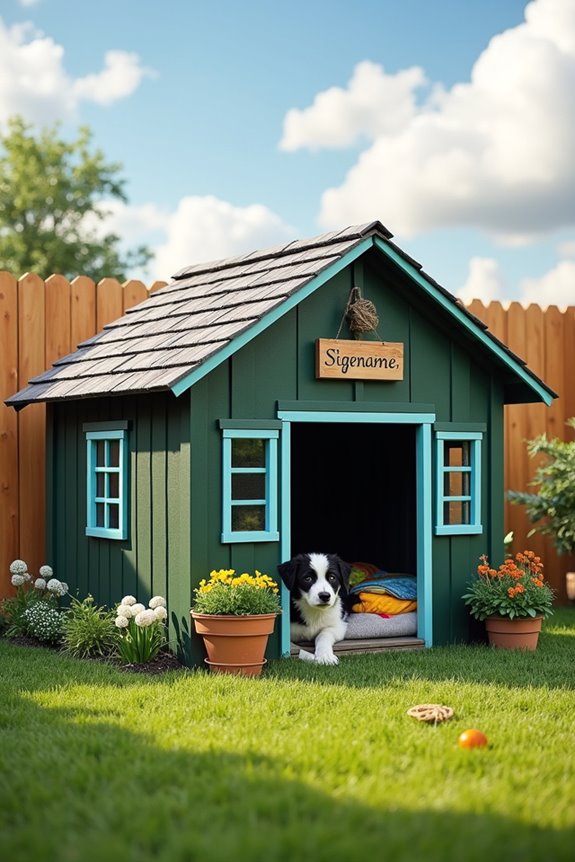
Creating a cozy outdoor dog playhouse isn’t only a fun project but also a fantastic way to provide your furry friend with a special space to relax, play, and enjoy the great outdoors. This DIY playhouse can save you money on store-bought structures, while giving your dog a comfortable place that suits their personality and style.
Plus, it can enhance your backyard aesthetics, making it a win-win for both you and your pup. In addition, consider complementing your playhouse with a luxury dog cage to further elevate your pet’s comfort. Let’s build a haven that your canine companion will treasure.
Materials Needed:
- Plywood sheets (for the walls, roof, and floor)
- Wood screws and nails
- Wood glue (for extra security)
- Outdoor paint or stain (weather-resistant)
- Roofing material (like shingles or metal sheeting)
- Brackets (for added structural support)
- Sandpaper (to smooth rough edges)
- Saw (hand saw or circular saw)
- Drill (with appropriate drill bits)
- Paintbrushes (for applying paint or stain)
- Measuring tape
- Safety goggles and work gloves (safety first!)
Step-by-Step Instructions:
1. Plan Your Design: Before you start cutting, sketch out a rough design for your playhouse.
Consider the size depending on your dog’s breed—you want them to be able to stand, turn, and lay down comfortably. Visualize the roof style too; a slanted roof is great for rain runoff.
2. Cut Your Materials: Use your saw to cut the plywood into the pieces you need: walls, roof panels, and floor base.
Don’t forget to sand down any rough edges, or you might be nursing a scratched hand later on.
3. Assemble the Base: Start with the floor. Securely attach the wall panels to the base using wood screws, ensuring they’re nice and sturdy.
Check that everything is level; you don’t want your dog’s playhouse to be the fun house.
4. Attach the Roof: Once the walls are up, it’s time for the roof.
Attach the roof panels at an angle to allow rain to run off easily. Use brackets for extra support if your pup is a little more rambunctious.
5. Paint or Stain: Once it’s all assembled, treat your playhouse with outdoor paint or stain to protect it from the elements.
Pick a color that suits your backyard palette; maybe a bright blue that pops or a natural wood finish for a rustic vibe.
6. Add the Finishing Touches****: Line the inside with soft blankets or a comfy dog bed to make it extra inviting.
You can even hang a sign with your dog’s name out front—because every good playhouse deserves a personal touch.
7. Inspect and Introduce: Before you let your dog explore, inspect the playhouse for any sharp edges.
Safety first! Once you’re satisfied, coax your dog inside with treats, showing them their new territory.
Just like that, you’ve created a haven.
Optional Add-ons/Variations:
- Decorative Trim: Use colorful wood trim to create a unique border along the edges for a pop of personality.
- Windows and Vents: Cut out squares for windows and cover them with mesh for ventilation while keeping insects at bay.
Pro Tip:
Consider elevating the playhouse off the ground a few inches to prevent water pooling underneath during rain.
This simple adjustment can extend the life of the structure and keep your pup dry and comfortable.
There you have it—a simple yet effective way to create an outdoor dog playhouse that your four-legged friend will love.
You get a cozy space, save some pennies, and boost your backyard appeal all at once. After all, happy dogs equate to happy humans, right?
4. Secure Dog Fence Panels
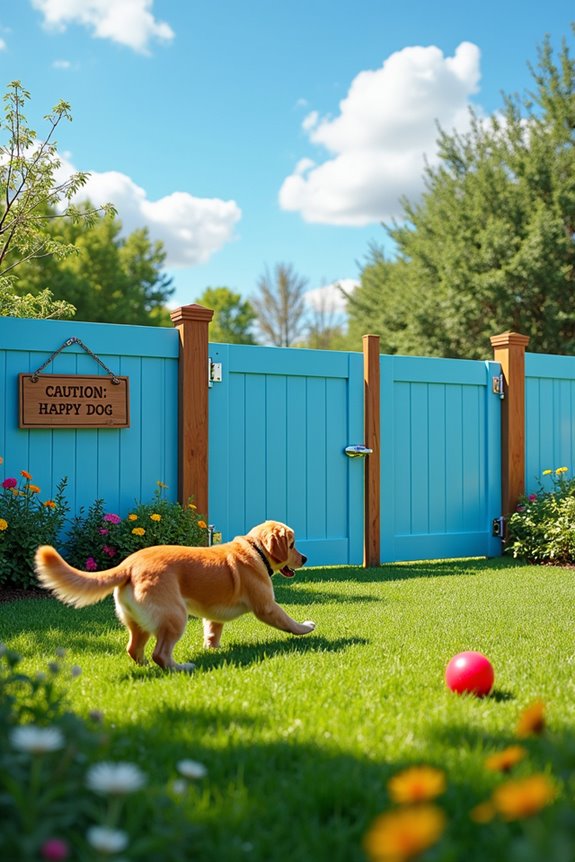
Creating a secure outdoor space for your dog is imperative for their safety, happiness, and overall well-being. Dog fence panels not only help keep your furry friend safe from wandering off but also prevent other animals from entering their play zone. Plus, with a well-designed fence, you can add value to your property while guaranteeing your pup has plenty of room to run and frolic in the yard. Additionally, incorporating a dog camera collar monitor can enhance your peace of mind by allowing you to keep an eye on your pet’s activities even when you’re not outside with them. So let’s explore how to build a solid fence panel that complements your backyard and keeps your canine companion happy.
Materials Needed:
- Dog fence panels (select the right height and gauge for your breed)
- Fence posts (make sure they’re sturdy and weather-resistant)
- Concrete mix (to set the posts)
- Nails and screws (for securing panels)
- Gate hardware (for adding a secure gate)
- Post level (to verify everything is upright)
- Tape measure (to plan your layout)
- Hammer or drill (for assembly)
- Shovel (for digging post holes)
- Safety goggles and work gloves (better safe than sorry!)
Step-by-Step Instructions:
1. Design Your Layout: First things first—decide on the perimeter of your dog area.
Use your tape measure to outline where the fence will go. This step is imperative, so no one ends up playing hopscotch with the posts later.
2. Dig the Post Holes: Once your layout is set, it’s time to dig the holes for your fence posts.
A solid rule of thumb is to dig holes about 2 feet deep, spaced 6 to 8 feet apart, depending on the style of the panels.
Remember, these are going to hold back your energetic furball!
3. Set the Fence Posts: Place your posts in the holes, and use your post level to verify they’re perfectly vertical.
Once positioned, pour the concrete mix around them and add water as directed.
Give it a little time to set—patience is a virtue even if you want to see your pup frolicking in their new space right away.
4. Attach the Fence Panels: After your posts have set, it’s time to attach the panels.
Start at one end, aligning the panels with the posts and securing them with nails or screws.
Don’t worry if you misalign one or two; we’ve all been there. Just pretend it’s a creative interpretation of “rustic charm.”
5. Install the Gate: If you’ve got a gate to add, now’s the time.
Follow the manufacturer’s guidelines to attach the hardware.
Make sure it swings open smoothly and closes securely—your dog will thank you later when they can’t perform an escape artist act.
6. Final Touches: Take a step back and admire your handiwork.
Once you’re satisfied, you can customize it further with a fresh coat of outdoor paint, or plant some shrubs or flowers near the base to make it extra inviting.
Optional Add-ons/Variations:
– Color Me Happy: Consider painting your fence panels in bright colors that complement your home or garden.
Maybe a vibrant green or soothing blue—something that expresses your style and brightens the yard.
– Decorate with Charm: Add fun elements like decorative vinyl wraps or signs, “Beware of Dog: Cuteness Inside!”
This will give your fence a unique personality while keeping the important function intact.
Pro Tip:
Before you start digging, check for any underground utilities in your yard.
Nobody wants to accidentally unearth that mysterious cable running beneath the surface, turning your DIY project into a quest for the megazord.
You can contact your local utility company for free guidance.
Now that you have a dependable dog fence, your pup can roam freely and safely in the outdoors.
Enjoy watching them play, and hey, maybe join in the fun.
Trust us, nothing says “happy dog” like a tail that won’t stop wagging.
5. Durable Outdoor Dog Bed
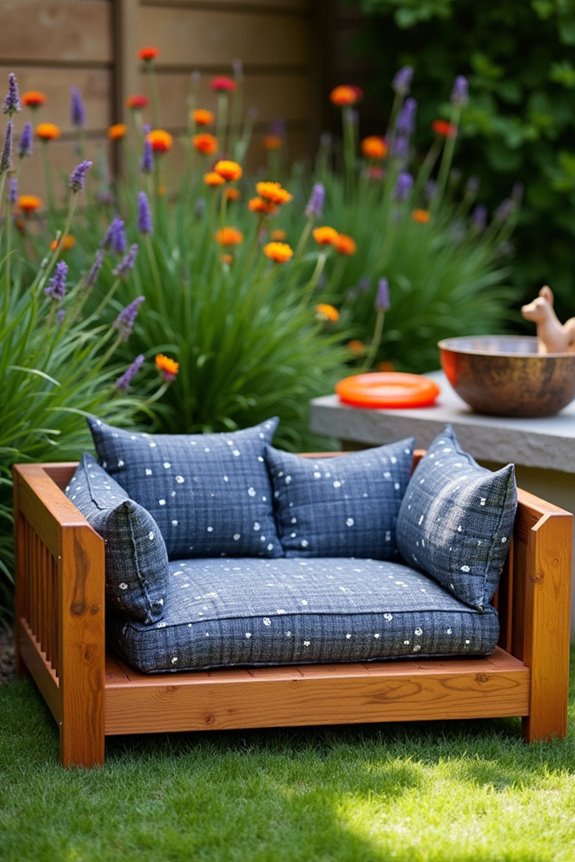
Creating a cozy outdoor dog bed is a fantastic DIY project for dog owners who want to provide their furry friends with a comfortable place to relax outside. Not only does it save you money compared to store-bought options, but it also gives your pup a dedicated spot to lounge and soak up the sun.
Plus, it’s a great way to add some personal flair to your outdoor space, making it look inviting and pet-friendly!
Materials Needed:
- Treated wood (like cedar or pine)
- Outdoor cushion or foam pad (water-resistant preferred)
- Screws (outdoor-rated for durability)
- Wood glue (optional for extra sturdiness)
- Sandpaper (for smoothing edges)
- Wood sealant (to protect against moisture)
- Saw (circular or hand saw)
- Drill (for the screws)
- Tape measure (for precise cuts)
- Safety goggles and work gloves (because safety first!)
Step-by-Step Instructions:
- Measure and Cut the Wood: Decide on the dimensions of the bed. A nice size is about 36 inches long by 24 inches wide, but you can adjust based on your dog’s size. Use your tape measure to mark the wood, then cut the pieces: two long sides, two short sides, and a base.
- Sand the Edges: After you’ve cut the wood, do yourself and your dog a favor by sanding the edges. No one wants splinters when they’re trying to snooze outside. Just a few swipes with the sandpaper will do.
- Assemble the Bed Frame: Lay out your wooden pieces in a rectangle, then attach the side pieces to the ends using screws. Pre-drilling the holes can make this a breeze, and using wood glue in addition to screws makes it even sturdier.
- Add the Base: Secure your cut base piece to the bottom of the frame by screwing it in place. This will support your cushion and give your dog a stable surface to rest upon.
- Seal the Wood: To protect your masterpiece from the elements, apply a wood sealant. This not only prolongs the life of the bed but also prevents moisture from damaging the wood.
- Add the Cushion: Place your outdoor cushion or foam pad inside the frame. Make sure it fits snugly, and if you’re feeling extra crafty, you can sew a waterproof cover for your cushion using fabric that matches your outdoor decor.
- Find the Perfect Spot: Finally, choose the right location for your dog bed in a shaded area where your pup can chill without roasting in the sun—because nobody likes a sunburn.
Optional Add-ons/Variations:
- Paint or Stain: Feel free to add a pop of color or match the bed to your garden furniture. Just make sure to use outdoor-safe paint or stain.
- Personalized Touches: Add your dog’s name or favorite designs using stencils or wood-burning techniques. It’s a great way to show some love.
Pro Tip:
To keep your dog bed looking fresh, consider using a removable, washable cover for the cushion. This way, any muddy paws or stray fur won’t be a permanent fixture.
And let’s be honest, you’ll appreciate it when it’s time for cleaning day. Who knew being a pet parent could come with such creative perks?
6. Agility Training Equipment
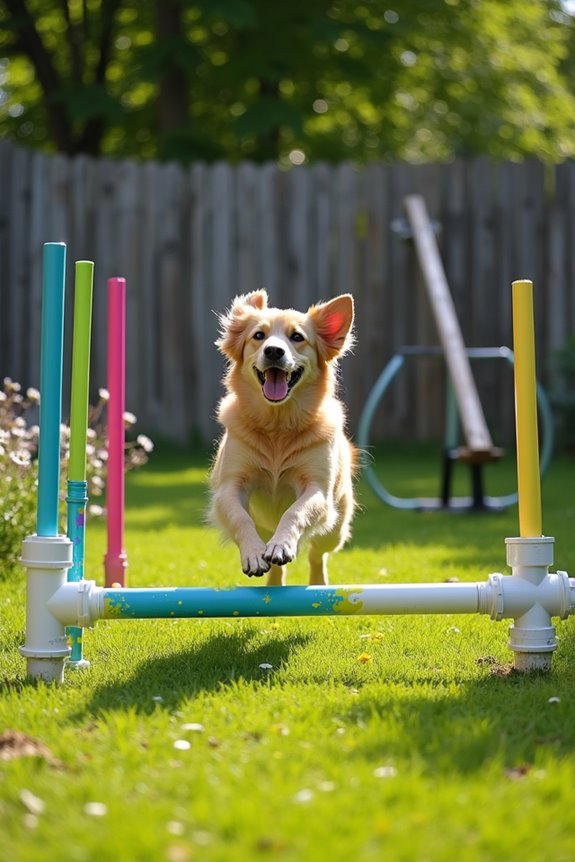
If your pup has energy to spare and a love for jumping around, making your own outdoor agility training equipment is a perfect project. Not only will this keep your dog fit and engaged, but it’ll also save you money compared to buying commercial equipment. Plus, who doesn’t want to watch their furry friend navigate an obstacle course with all the grace of a gazelle—or at least a happy squirrel? Incorporating agility equipment into your yard can enhance the training experience and offer your dog even more challenges.
Materials Needed:
- PVC pipes (varying lengths for different obstacles)
- PVC pipe connectors (to create frames)
- Duct tape (for securing pieces)
- Wire cutters (to cut the PVC pipes)
- Safety goggles (protect those peepers!)
- Measuring tape (to keep everything in proportion)
- Paint (optional, for a splash of color)
- Sand or bricks (to stabilize equipment, if needed)
Step-by-Step Instructions:
- Choose Your Obstacles: Decide what agility obstacles you want to create—think jump bars, weave poles, or tunnels. Keeping it simple can help ease you into the world of dog agility training. For this project, we’ll focus on a jump bar and weave poles.
- Cut the PVC Pipes: Measure and cut your PVC pipes according to the desired height and width of your jumps or weave poles. A good jump size is around 24 inches high for small to medium dogs. Take your time—the last thing you need is a jumping apparatus that’s low enough for a hamster to clear.
- Assemble the Jump Bar: For a jump bar, create two vertical posts and secure a horizontal pipe across the top using the connectors. You can use duct tape to secure the joints, or if you’re feeling fancy, go for glue for a sturdier build. Just avoid any sticky situations with the tape—no one wants their dog tangled up.
- Create Weave Poles: For weaving, cut several straight pieces of PVC about 36 inches long. Push these vertically into the ground about 2-3 feet apart. You can paint them different colors to add some fun flair. Who knew agility could be so artistic?
- Secure Your Equipment: If your jumps or poles are looking a little topply, use sand or bricks to weigh down the base. Safety first—most of us don’t want to witness a dramatic topple during training, least of all your dog.
- Test It Out: Encourage your dog to try out the agility course. Use treats to coax them through the jumps and weaves. It’s all about positive reinforcement—you’ll be amazed at how quickly they pick it up. Don’t be surprised if they show off their talents like they’re auditioning for a dog circus.
- Adjust as Needed: Based on how your pet performs, you can always tweak the heights or distances to better suit their skill level. After all, the aim is to have fun, physically challenge them, and not turn them into Olympic contenders overnight.
Optional Add-ons/Variations:
- Customize Colors: Give it a personal touch by painting your PVC pipes in bright colors that match your backyard or your dog’s personality. No one says agility training has to be boring!
- Add more obstacles: Once your dog masters the basics, consider adding more intricate equipment like a seesaw using a long board balanced on a tall piece of PVC. Just make sure it’s sturdy enough to withstand your dog’s wild enthusiasm.
Pro Tip:
When assembling your jumps or weaves, make sure all edges are smooth to avoid any potential scratches or snags for your dog. Use a fine-grit sandpaper to buff any rough edges. It’s all about keeping your training fun and safe, which is a great philosophy for many things in life—like balancing cookie consumption with agility training.
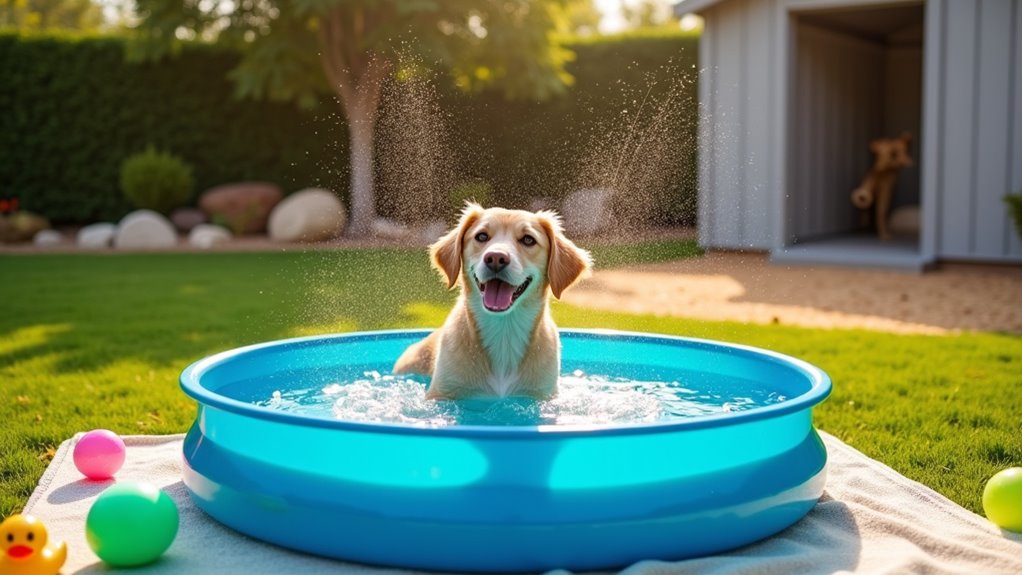
7. Interactive Splash Pool
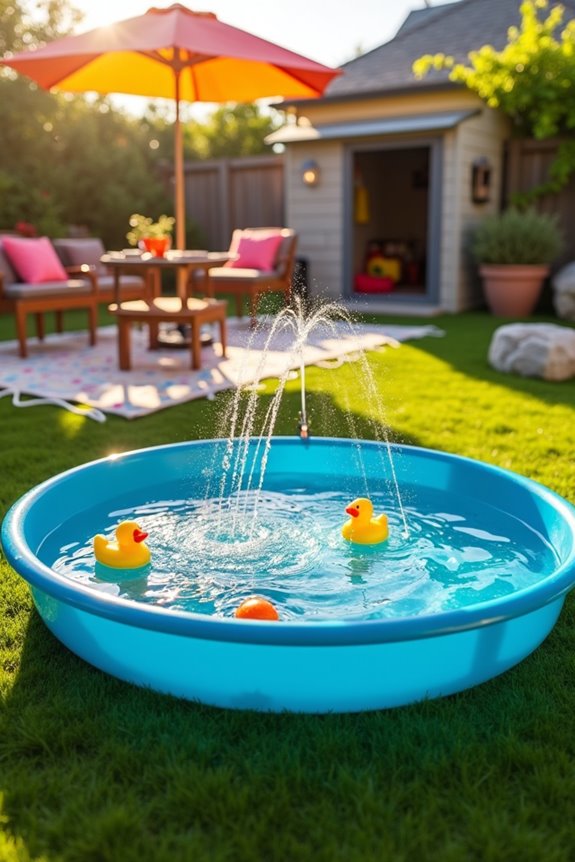
Looking for a way to keep your pup cool while adding a splash of fun to your backyard? Why not create an interactive splash pool?
It’s a fantastic DIY project that saves you money, keeps your dog entertained during hot summer days, and best of all, you won’t have the guilt of making them sit indoors for hours on end. Plus, it’s a great way to turn your yard into a summer playground for your furry friend. Furthermore, having a heavyduty outdoor kennel can provide a safe space for your dog when they’re not splashing around.
Materials Needed:
- Plastic kiddie pool (your furry friend’s new happy place)
- Sturdy plastic water toys (think floats, balls, or even a dog-safe sprinkler)
- Water (lots of it, but not too much to cause a flood)
- Non-slip mat (to keep things safe—no one wants a slip ‘n slide event)
- Garden hose (for convenient filling)
- Decorative rocks or sand (optional, for flair)
Step-by-Step Instructions:
1. Choose Your Location: Find a flat space in your yard that gets some sun but also has a little shade. The goal is a perfect combo of comfort and coolness—no one wants to bake under the hot sun for too long.
2. Set Up the Pool: Place your kiddie pool in the selected spot. If you’re feeling fancy, you can clear the space of any sticks or rocks to guarantee a smooth experience for your pup.
3. Add the Non-Slip Mat: A non-slip mat placed underneath the pool can provide added safety and prevent any potential sliding.
Trust me; it’s way better than watching a slow-motion slip as your dog takes a dive.
4. Fill With Water: Use your garden hose to fill the pool with water. The water level can be about 4-6 inches deep, enough for splashing but not too much to drown a toy.
Check it often—puppies have a knack for wanting to drink from pools.
5. Toss in the Toys: Throw in a few sturdy plastic water toys, like floating balls or rubber ducks. This will encourage your dog to jump in and play.
Just keep an eye on the toys—sometimes they try to claim them as their new best friends.
6. Create a Fun Environment: If you want to make it more inviting, consider surrounding the pool with decorative rocks or sand.
It gives that extra beachy vibe without needing to plan a full-on trip to the ocean.
7. Introduce Your Pup: Finally, coax your dog into the pool with treats or toys.
Once they see the fun awaiting them, they’re likely to dive right in (not literally, of course).
Optional Add-ons/Variations:
- Add a Sprinkler: Position a dog-safe sprinkler nearby for added fun. Imagine the joy of watching your pup dash through the spray—like a mini water park just for them.
- Custom Colors: Paint the pool sides with waterproof paint or stick on dog-themed decals for a personal touch. Go wild with colors that match your dog’s personality—after all, they deserve their own splash zone.
Pro Tip:
For a cost-saving trick, look for a kiddie pool at the end of summer sales, or check out secondhand spots—your wallet will thank you, and your pup will still have a splash-tastic time.
Just make sure to clean the pool regularly to keep that water fresh and inviting—no one likes a stinky splash zone!
Extra Tips & Ideas
While you might think your outdoor dog area is good to go, there are always a few extra touches you can add to make it even better for your furry friend. Have you considered incorporating dog-friendly landscaping? Planting shade trees or adding tall grasses can create a natural retreat from the sun.
And about those cooling solutions? You could set up a misting system or a shaded awning for those hot summer days—your pup will thank you. You might even throw in a cozy dog bed or a few chew toys to make it feel like home.
Every little detail counts in crafting the perfect doggy oasis. Trust me, your four-legged buddy deserves it all, don’t you think?
Frequently Asked Questions
What Materials Are Best for a DIY Dog Area?
For a DIY dog area, consider sturdy fencing options like wood or chain link for safety. For surface materials, durable choices like gravel, artificial grass, or interlocking pavers provide comfort and easy maintenance for your pet.
How Much Space Is Needed for a Dog Area?
Think of your dog area as a cozy living room. Ideally, aim for at least 200 square feet, allowing enough space for fun dog features like agility obstacles and lounging spots without feeling cramped.
Can I Include Plants in the Dog Area?
Yes, you can include plants in the dog area, but make sure they’re dog-friendly plants. Avoid toxic plant species like azaleas and lilies to keep your furry friend safe while enjoying the greenery.
Are There Specific Safety Considerations for a Dog Area?
When dog-proofing your area, it’s essential to perform a thorough hazard assessment. You wouldn’t want your playful pup to nibble on dangerous plants or chew exposed wires, right? Safety’s always the priority!
How Do I Maintain the Dog Area for Cleanliness?
To maintain cleanliness, establish a regular cleaning schedule for picking up dog waste. Aim for daily checks, and thoroughly clean the area weekly to prevent odors and keep it safe and enjoyable for your pet.
Conclusion
Creating a DIY outdoor dog area isn’t just a project; it’s like crafting a mini paradise for your pup. Imagine your dog lounging under a leafy tree, sipping from a stylish water bowl, or zipping through homemade agility equipment. It’s their happy place, bursting with joy and wagging tails. So, roll up your sleeves, grab those supplies, and let your creativity run wild. Who knew dog paradise could be just a few DIY steps away? Your furry friend will thank you.