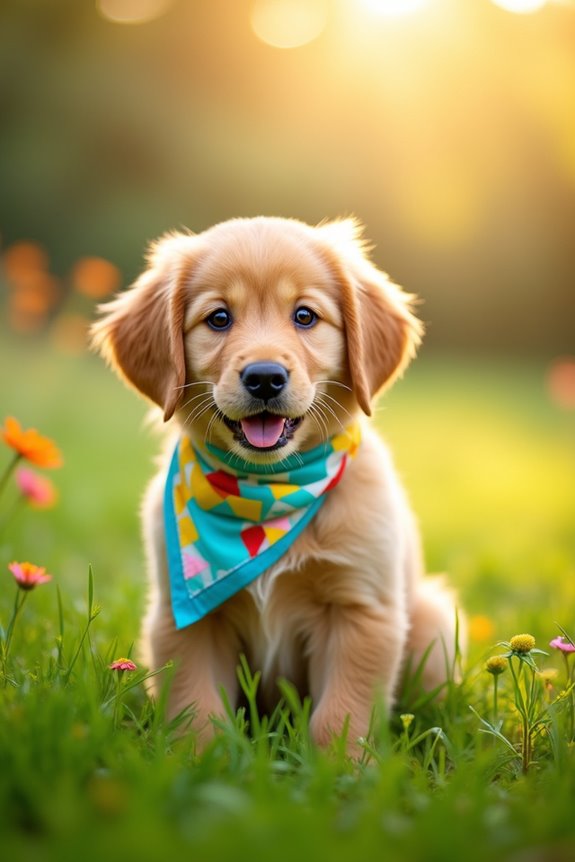
Picture your pup strutting down the street, sporting a handmade bandana that screams personality. Doesn’t that sound fun? Crafting a DIY dog bandana is not only a great way to express your furry friend’s style but it’s also surprisingly simple. With just half a yard of fabric and some basic sewing skills, you can whip up something adorable. Now, let’s chat about choosing the perfect fabric patterns—trust me, there’s a lot to take into account.
Fabric Patterns to Consider
When it comes to choosing fabric patterns for your DIY dog bandana, the options are nearly endless! You might find yourself lost in a sea of colors and prints.
Consider your dog’s personality—are they a wild spirit or a sophisticated pooch? Fabrics come in various textures, from soft cotton to rugged canvas, so pick what suits your furry friend best.
Don’t forget the bandana size; it should be big enough to show off that awesome pattern without overwhelming them. Think polka dots, florals, or even funky cartoon characters.
Trust me, every time you look at your pup rocking that bandana, you’ll feel a warm glow, even if you accidentally stitched a seam backward—once done, it’s still cute, right?
Our Collection
Now that you’ve got some fabric patterns in mind, let’s explore our collection of bandana ideas.
Whether you’re drawn to floral prints that brighten up your pup’s look, or classic plaid patterns that scream “country chic,” there’s something for every furry friend.
And if you’re feeling wild, how about some animal prints or geometric styles to really make a statement?
1. Floral Print Bandana Ideas
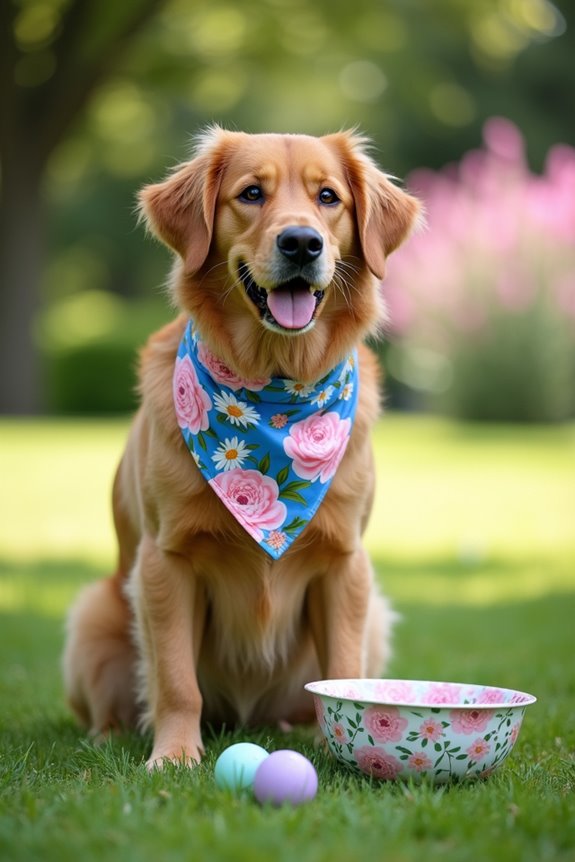
Adding a floral print bandana to your dog’s wardrobe isn’t only a fun DIY project, but it’s also a fantastic way to brighten up your pup’s style while saving some cash. Plus, who doesn’t appreciate a splash of color in their life? With just a few materials and steps, you can create a handmade accessory that’ll have your dog strutting their stuff like a runway model. Additionally, consider pairing your handmade accessory with luxury dog training equipment for a stylish yet functional training experience.
Materials Needed:
- Cotton fabric with floral print (about 1/2 yard)
- Scissors
- Measuring tape or ruler
- Fabric marker or chalk
- Sewing machine (or needle and thread)
- Iron (optional, but helpful)
- Pins
Step-by-Step Instructions:
- Measure and Cut: Start by measuring your dog’s neck. Add a few extra inches for tying. Cut a square piece of fabric (about 22 x 22 inches for a medium-sized dog) from your floral print.
- Fold and Iron (Optional): If you’re feeling fancy, fold the fabric in half diagonally to form a triangle and give it a gentle press with the iron. This will help in shaping later on.
- Pin the Edges: Align the edges of the fabric, keeping that triangle shape. Pin along the long side of the triangle to hold it in place. If you’re not a fan of pins, you can hold it with your hand; just be careful of those sharp scissors!
- Sew the Edges: Using a sewing machine or needle, sew along the pinned edge. A simple straight stitch will do the trick. No need to go fancy here; you can always go back and do touch-ups.
- Trim Excess Fabric: After sewing, trim the excess fabric close to the stitching, making sure not to cut through your stitches. This will give your bandana a nice, finished look.
- Turn It Right Side Out: Turn your bandana inside out so that the fabric’s right side is showing. You can use a pencil or chopstick to poke out the point of the triangle for a crisper look.
- Final Touch-Up: If you want a cleaner edge, run an iron over your bandana again to flatten it out. Make sure it’s completely dry if you used steam.
Optional Add-ons/Variations:
- Different Fabrics: Try using flannel for a cozy look in colder weather or a lightweight cotton for summer breezes.
- Add Personalization: Use fabric paint or iron-on letters to add your dog’s name or a fun phrase like “Floral Fashionista”.
Pro Tip:
If you’re worried about durability, consider using pinking shears for the edges. This gives a pretty wave-like effect and also prevents fraying. Isn’t that a win-win?
With these steps, not only will you have saved some bucks, but you’ll also have a unique accessory that reflects your dog’s personality. As my own pup would say if only they could talk: “What’s a better accessory than a flower power bandana?”
Now go, get crafty, and remember to take some cute photos for the ‘gram. Your dog will definitely appreciate it (even if they don’t understand social media).
2. Plaid Pattern Inspiration
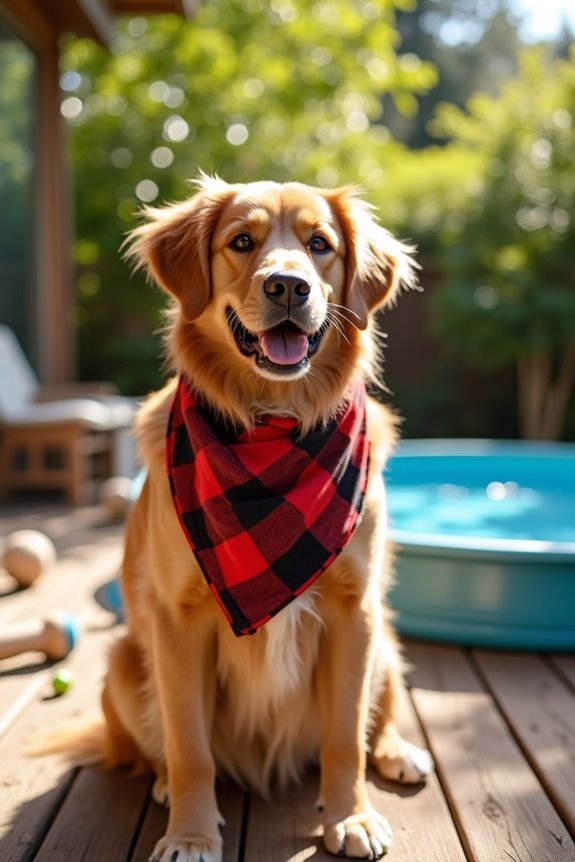
Want to give your pup a stylish update without breaking the bank? A DIY plaid dog bandana is just the project for you! Not only will it keep your furry friend looking dapper, but it also serves as a fun way to express their personality and yours. Indulge your pup with a luxury dog pool experience to complement their new fashionable bandana.
Who doesn’t want a dog that matches their plaid shirt at family gatherings, right?
Materials Needed:
- Cotton fabric with plaid print (about 1/2 yard)
- Scissors
- Measuring tape or ruler
- Fabric marker or chalk
- Sewing machine (or needle and thread)
- Iron (optional, but helpful)
- Pins
Step-by-Step Instructions:
- Measure and Cut: First things first—grab that measuring tape and measure your dog’s neck size. Don’t forget to add a couple of extra inches for tying. Cut out a square piece of fabric about 22 x 22 inches for a medium-sized dog.
- Fold and Iron (Optional): Take that square fabric and fold it diagonally to create a triangle. If you want to keep things neat, give it a gentle press with the iron. This helps it hold its shape later on.
- Pin the Edges: Keep that triangle shape intact by pinning the edges together. Pin along the long side of the triangle. If you’re feeling brave, you can just hold it together with your hands—but watch those fingers.
- Sew the Edges: Now it’s time to sew! Using a sewing machine or needle and thread, sew along the pinned edge with a simple straight stitch. Keep it easy—there’s no need for anything fancy here.
- Trim Excess Fabric: Once you’ve sewed the edge, trim away any excess fabric near your stitches, being careful not to cut through those stitches. It’ll help your bandana look extra neat.
- Turn It Right Side Out: Flip your bandana inside out. Poke the tip of the triangle out with a pencil or chopstick for a sharper look. You’ll be amazed at how much a little point can change things.
- Final Touch-Up: Give your bandana a final iron if needed. Flatten it out and make it look all snazzy for your pup!
Optional Add-ons/Variations:
- Mix it Up: Swap out the plaid fabric for something with polka dots or stripes for a little extra zing.
- Personalize It: Use fabric paint to write your dog’s name or a fun phrase like “Plaid and Proud.” It’s a great conversation starter at the dog park.
Pro Tip:
For a more durable finish, consider using pinking shears to cut the edges. They give a wavy effect and prevent fraying—think of it as a fashionable way to keep your work looking fresh!
3. Animal Print Variations
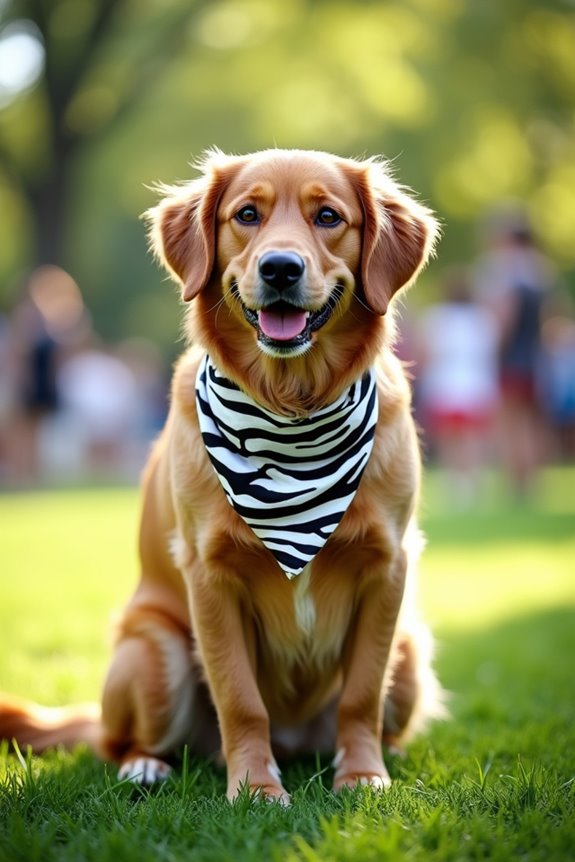
Looking to let your pup strut their stuff in style? A DIY animal print dog bandana could be just the thing. It’s a fun way to add flair to your pet’s wardrobe, plus it serves as a cozy accessory that shows off their unique personality. Additionally, consider pairing the bandana with a stylish premium dog costume to elevate your dog’s fashion game for special occasions.
Imagine your furry friend lounging at home, or better yet, turning heads at the dog park. The best part? You can whip one up for a fraction of the cost of store-bought options. Ready to get crafting?
Materials Needed:
- Cotton fabric with animal print (about 1/2 yard)
- Scissors
- Measuring tape or ruler
- Fabric marker or chalk
- Sewing machine (or needle and thread)
- Iron (optional, but helpful)
- Pins
Step-by-Step Instructions:
- Measure and Cut: Begin by measuring your dog’s neck—don’t forget to add a few extra inches for tying. Cut a square piece of fabric measuring approximately 22 x 22 inches for a medium-sized dog.
- Fold and Iron (Optional): Fold that lovely square diagonally to form a triangle. If you feel fancy, press it gently with an iron to keep the shape nice and crisp.
- Pin the Edges: Secure that triangle shape by pinning along the long side. If you’re feeling daring, you can hold it with your hands, but let’s be real, using pins is probably the safer bet.
- Sew the Edges: It’s time to sew! Use your sewing machine or a needle and thread to create a simple straight stitch along the pinned edge. No need to get too fancy here.
- Trim Excess Fabric: Once you’re done sewing, carefully trim any extra fabric close to your stitches—just don’t cut through the stitches themselves. This little detail helps your bandana look sleek and polished.
- Turn It Right Side Out: Flip the bandana inside out—poke out the tip of the triangle with a pencil or chopstick for that perfect pointed look. You’d be amazed what a little point can add to your design.
- Final Touch-Up: Give it one last iron if you need to, and voilà! Your stylish animal print bandana is ready for your pup to wear. It’s all about looking snazzy for those Instagram pics, isn’t it?
Optional Add-ons/Variations:
- Change It Up: Instead of animal prints, experiment with floral or funky geometric patterns. Who says dogs can’t be trendy?
- Add Some Flair: Use fabric paint to add paw prints or your dog’s name. It’ll become an instant conversation starter, and your pup will be the talk of the park.
Pro Tip:
To guarantee longevity, consider using pinking shears to cut the edges. They create a gorgeous wavy look while helping to prevent fraying—so your dog can maintain their stylish vibe even after a romp in the mud.
Because let’s face it, they’re probably going to find a way to roll in something, right?
4. Geometric Print Suggestions
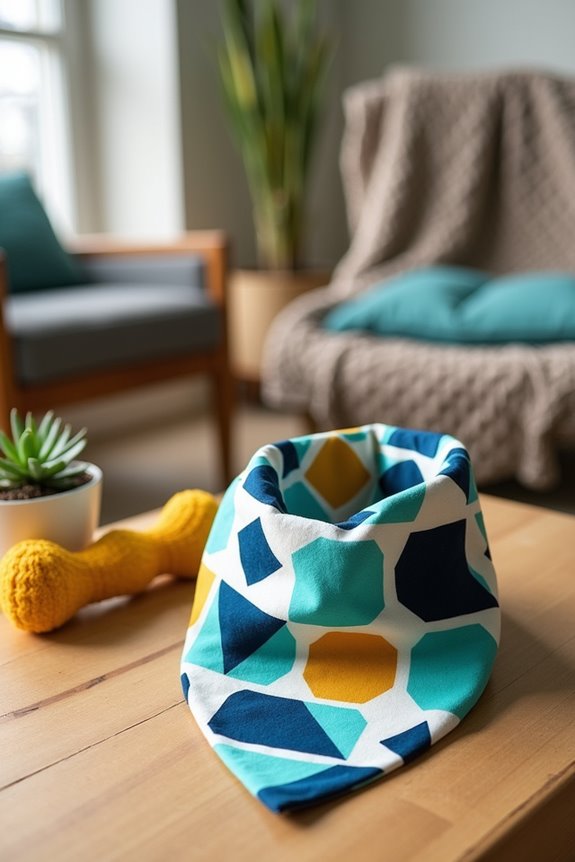
Are you ready to add a splash of creativity and style to your pup’s accessories? Making a DIY geometric print dog bandana isn’t only a great way to show off your furry friend’s personality, but it’s also super practical.
You’ll save some cash while crafting something that keeps your dog looking adorable and feeling comfy. Plus, who wouldn’t want to impress fellow dog owners at the park with a snazzy bandana that you made yourself?
Materials Needed:
- Cotton fabric with geometric print (about 1/2 yard)
- Scissors
- Measuring tape or ruler
- Fabric marker or chalk
- Sewing machine (or needle and thread)
- Iron (optional, but helpful)
- Pins
Step-by-Step Instructions:
- Measure and Cut: Start by measuring your dog’s neck, adding a couple of extra inches for tying it on. Cut a square piece of the fabric about 22 x 22 inches—this size should fit medium-sized pups well.
- Fold and Iron (Optional): Next, fold your square diagonally to create a triangle. If you’d like that crisp look, kindly iron the fold gently.
- Pin the Edges: Time to secure your triangle. Pin along the long side to keep everything in place. You could use your hands, but let’s face it; pins are much more reliable (and less stabby).
- Sew the Edges: Grab your sewing machine (or needle and thread if you’re feeling retro) and sew along the pinned edge. A simple straight stitch will do the trick—no fancy footwork required here.
- Trim Excess Fabric: Once you’ve finished sewing, carefully trim any extra fabric close to your stitches—just be careful not to cut through the stitches. This will keep it looking sharp (pun intended).
- Turn it Right Side Out: Flip your bandana inside out. Use a pencil or chopstick to push out the tip of the triangle for that perfect point. Trust me, every bit counts!
- Final Touch-Up: If it’s looking a little wrinkled, give it a quick iron to refresh it. Now, your geometric print bandana is ready for your pup to rock at the dog park and charm everyone with their stylish new accessory.
Optional Add-ons/Variations:
- Different Patterns: Feeling adventurous? Switch it up by using polka dots or stripes instead of geometric prints. After all, every dog deserves a wardrobe that matches their quirky character.
- Personalized Touch: Use fabric paint to add your dog’s name or some cute shapes. Imagine the looks of envy when your pup struts by with personalized flair.
Pro Tip:
For added comfort, consider using soft cotton fabric that feels great against your dog’s fur—less chance of itchiness or discomfort during those long walks.
Plus, it’ll keep your dog looking cool and feeling cozy!
5. Denim Fabric Options
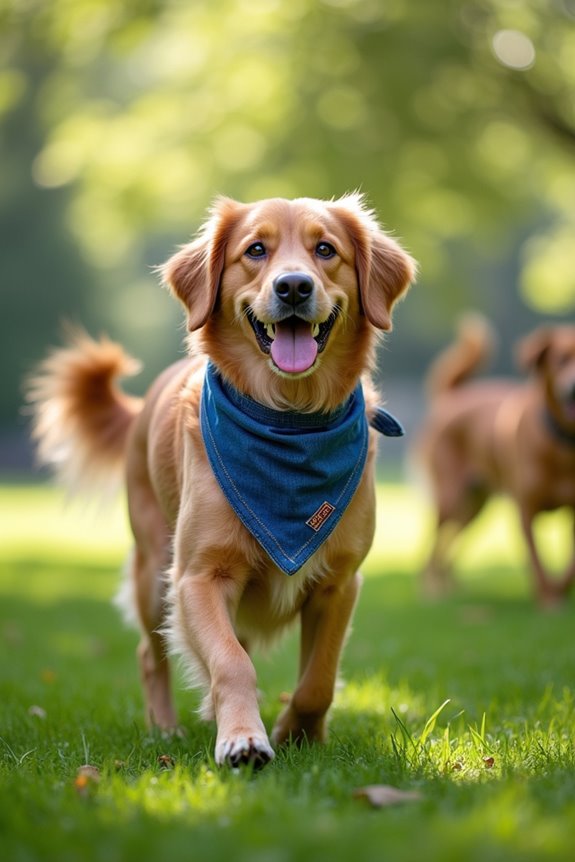
Are you looking for a fun and practical way to spruce up your dog’s wardrobe? A DIY denim bandana isn’t only stylish but also super durable, ensuring your pooch looks marvelous on all their adventures. Plus, it’s a great way to recycle old jeans and save some bucks! Your furry friend is bound to be the talk of the dog park with their new cool accessory. Additionally, dressing your dog in a customized bandana complements their premium training gear, such as dog training equipment premium, making outings both functional and fashionable.
Materials Needed:
- Old denim fabric (from jeans or a jacket, about 1/2 yard)
- Scissors
- Measuring tape or ruler
- Fabric marker or chalk
- Sewing machine (or needle and thread for the hand-sewing enthusiasts)
- Iron (optional, but makes it look neat)
- Pins
Step-by-Step Instructions:
- Measure and Cut: Start by measuring around your dog’s neck and then add a few extra inches for tying it on comfortably. Cut a square piece of your denim fabric, roughly 22 x 22 inches—it’s perfect for most medium-sized pups.
- Fold into a Triangle: Take that square and fold it diagonally to create a triangle. Need a crisp edge? Iron the fold if you want that professional touch.
- Pin the Edges: Grab those handy pins and secure the long side of the triangle. Pinning prevents any slipping while you sew—it’s a small step that makes a big difference. You don’t want the side of your bandana to resemble a modern art piece, after all.
- Sew the Edges: Now it’s time to sew! Use your sewing machine or needle and thread (I won’t judge if you choose the retro route). A simple straight stitch will work wonders—just keep it steady.
- Trim the Excess Fabric: Finished with the stitching? Carefully trim away any extra fabric close to your stitches. Just make sure you don’t clip those precious stitches; we want this bandana to hold up, not fall apart at the seams.
- Turn it Right Side Out: Flip your newly sewn bandana right side out. A pencil or chopstick can help poke out the tip without risking a hole or a broken nail.
- Final Touch-Up: If it looks a bit crinkled, hit it with a quick iron. Now your denim bandana is all set and ready for your pup to wear proudly around the neighborhood.
Optional Add-ons/Variations:
- Whimsical Designs: Feeling crafty? Add some patches or fabric paint to give your bandana a personalized flair. A comic-book superhero patch? A splash of bright paint? The choice is yours. Let your creativity shine!
- Unique Fabrics: Why stop at denim? Experiment with colorful fabrics or even themed prints if denim isn’t your vibe. How about a vibrant floral fabric for those sunny walks?
Pro Tip:
When working with denim, consider using a heavier needle to get through those thick layers. And if your dog is one to play rough, make sure the bandana is tied securely but not too tight, so they can run freely without any discomfort.
Remember, happy pup equals happy owner!
Now, grab those sewing tools and let’s get crafty! Who knew that creating something stylish for your dog could be this fun?
6. Bright Color Combinations
If you’re the proud parent of a pup who loves to turn heads while strutting their stuff, then this DIY bright color bandana project is just what you need. Not only does it add flair to your dog’s wardrobe, but it’s also a fun, budget-friendly way to express your personal style. With just a few materials and some creativity, you can create a vibrant accessory that makes your dog stand out in any crowd, whether it’s a stroll through the park or a trip to the beach.
Materials Needed:
- Brightly colored fabric (cotton or flannel works great, about 1/2 yard)
- Scissors
- Measuring tape or ruler
- Fabric marker or chalk
- Sewing machine (or you can sew by hand if you’re feeling adventurous)
- Iron (optional but helpful for a polished look)
- Pins
Step-by-Step Instructions:
- Measure and Cut: Grab your measuring tape and get the neck size of your pup. Add a few extra inches for a comfy knot. Next, cut a square piece of fabric that’s approximately 22 x 22 inches—a perfect size for most medium dogs.
- Create the Triangle: Fold the square fabric diagonally to form a triangle. Have an iron on standby? Give that fold a quick press for a crisp edge—it’ll make everything look a bit more professional, if that’s your vibe.
- Pin It Down: Secure the long edge of the triangle with pins. This little step can make a big difference when you go to sew. Trust me, you don’t want your bandana to look like abstract art gone wrong.
- Sew the Edges: It’s the moment of truth. Time to sew! If you’re using a sewing machine, a simple straight stitch is all you need. If you’re hand-sewing, just keep it steady and consistent. Don’t stress; it doesn’t have to be perfect—remember, you’re not auditioning for Project Runway.
- Trim the Extras: Once you finish sewing, carefully trim any excess fabric close to the stitches. Be cautious not to snip those precious stitches; we want this bandana to stay intact during zoomies and puppy playdates.
- Flip It: Now, flip your bandana right side out. You can use a pencil or chopstick to push out the tip. Just be gentle—you’re not trying to win a game of darts here.
- Final Touch-Up: If your bandana looks a little crinkled, a quick iron will fix that up right away. Now that it’s all set, your dog is ready to take on the world—one colorful adventure at a time.
Optional Add-ons/Variations:
- Mix and Match Colors: Get funky with your fabric! Combine two or three bright colors into one bandana for a playful patchwork effect. Who says you can’t be a fashionista even if you’re a dog?
- Add Some Bling: Feeling extra crafty? Sew on some fun embellishments like buttons, ribbons, or even reflective strips for nighttime walks. Your pooch can twinkle like a star in the evening breeze.
Pro Tip:
When measuring your dog’s neck for the bandana, it’s always a good idea to leave a little extra room for comfort. Think of it this way: a bandana should be an accessory, not a constrictor. Plus, who wants to see their pup struggling to breathe while looking fabulously artistic? Plus, incorporating dog agility equipment can further enhance your pup’s performance and skills.
With these steps in hand, you’re all set to whip up a colorful bandana that will make any dog proud. Enjoy the process, and most importantly, have fun creating something special for your furry friend!
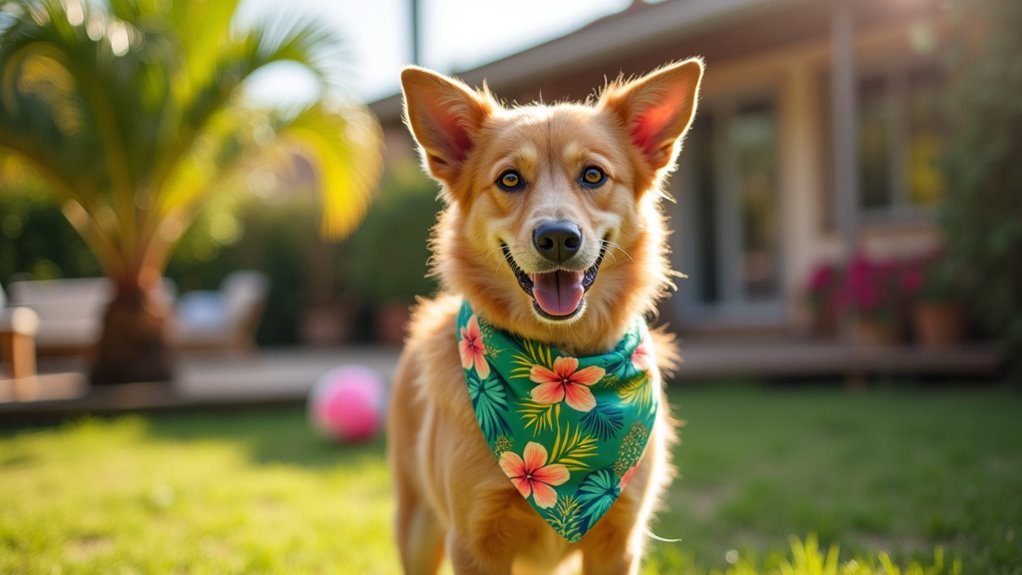
7. Tropical Theme Bandana Designs
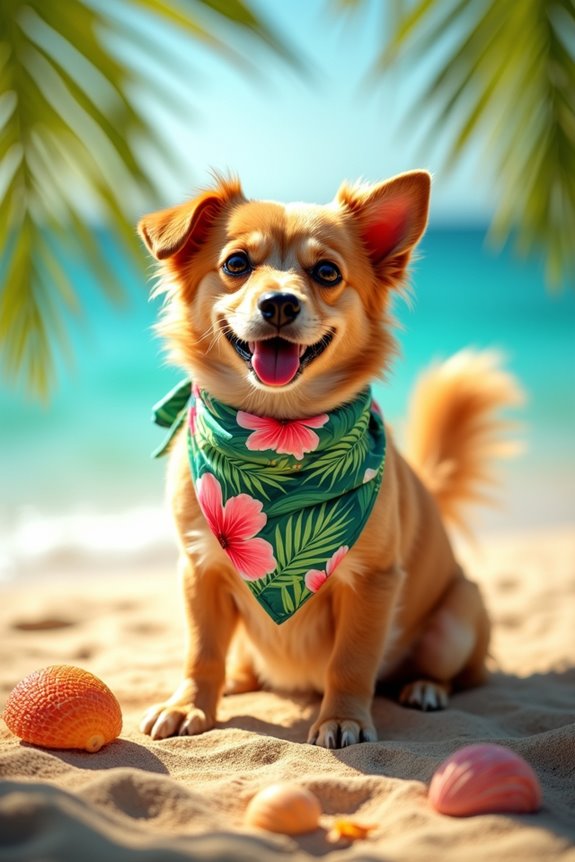
If you want your furry friend to sport some island vibes, search no further than creating a tropical-themed bandana. It’s not just a fun DIY project; it also adds a splash of color and personality to your pup’s appearance. Plus, you’ll save some cash while ensuring your dog stays stylishly comfortable. So let’s get crafting!
Materials Needed:
- Tropical-themed fabric (cotton or flannel, about 1/2 yard)
- Scissors
- Measuring tape or ruler
- Fabric marker or chalk
- Sewing machine (hand sewing works too, no judgment here)
- Iron (optional, but recommended for neatness)
- Pins
Step-by-Step Instructions:
- Measure and Cut: First thing’s first, measure your dog’s neck size and add a couple of inches for a comfy knot. Cut a square piece of tropical fabric measuring about 22 x 22 inches. It should be big enough for most medium-sized pups, but you know your pet best.
- Create the Triangle: Next, fold the square diagonally so you have a triangle. If you want everything to appear sharp (pun intended), give the fold a quick press with an iron.
- Pin It Down: Pin down the long edge of your triangle. This step is pretty essential, so your bandana doesn’t turn into a fabric fiesta when you sew it. Nobody wants a hot mess, right?
- Sew the Edges: Here comes the fun part: sewing! A simple straight stitch works wonders if you’re using a sewing machine. Hand sewing? Just keep it steady. We’re not going for perfection—think of it as adding character.
- Trim the Extras: After sewing, carefully trim any excess fabric near the stitches. Just be careful not to snip the actual stitching; we want this beauty to survive your dog’s zoomies.
- Flip It: Time to flip your bandana right side out. Use a pencil or a chopstick to push out the tip gently. Just be sure to keep it calm and collected—no need for unintentional fabric punctures.
- Final Touch-Up: If your bandana looks a bit crinkled, a quick pass with the iron should straighten things out. Now, you’re ready! Your dog is all set to rock that tropical look, creating envy among the neighborhood pups.
Optional Add-ons/Variations:
– Custom Patterns: Feel free to mix and match different tropical fabrics for a unique look, or add fun fabric embellishments like shell or palm tree appliqués. Your creativity is the only limit.
Pro Tip:
When selecting fabric, go for pre-washed cotton or flannel. This helps prevent any shrinkage or fading after the first wash—no one wants a bandana that turns into a handkerchief, right?
Plus, consider adding a light interface if your dog loves to get a bit dirtier than your average pup. It gives an extra durability boost while keeping that tropical look intact.
With this tropical-themed bandana tutorial, your dog will definitely be the life of the party at your next beach outing or backyard barbecue. Enjoy the process, and don’t forget to show off those stunning results!
Extra Tips & Ideas
When you’re diving into the world of DIY dog bandanas, there are some extra tips and ideas that can really take your creations to the next level.
First, don’t underestimate bandana sizing. Measure your pup’s neck carefully, so they stay comfy and stylish. If you’ve got a puppy, consider fun styles that suit their playful personality—think bright colors or cartoon prints.
Also, why not personalize it? Adding their name can make it one-of-a-kind.
And let’s not forget about double-sided designs—who says they can’t sport two looks in one?
Keeping it all washable is a must too, or you’ll end up with a tie-dyed disaster. Trust me, I learned the hard way.
Happy crafting, and may your pup strut in style!
Frequently Asked Questions
Can I Use Old Clothes to Make a Dog Bandana?
Absolutely, you can use old clothes to make a dog bandana! Upcycling clothes offers great fabric choices—just choose something soft and washable. Your pup will look stylish while you give new life to your wardrobe!
What Size Should I Cut the Fabric for Large Dogs?
Isn’t it essential to get the right fit? For large dog breeds, cut the fabric to about 24 inches by 24 inches for a comfortable bandana. Adjust fabric measurements as needed to make sure it looks great!
How Do I Wash the Bandana Without Damaging It?
To wash the bandana without damaging it, use cold water and gentle detergent. Hand wash if possible, or select a gentle cycle. Avoid bleach and line dry for ideal fabric care. Follow these washing tips for lasting durability.
Are There Any Safety Concerns With Dog Bandanas?
Yes, safety’s a concern with dog bandanas. Avoid tight fabric choices; opt for breathable materials. Certain bandana styles can pose choking hazards, so always monitor your pup while they sport their stylish accessory. Safety first!
How Often Should I Change My Dog’s Bandana?
You should change your dog’s bandana every week or two, especially if it gets dirty. Rotate bandana colors and seasonal patterns to keep things fresh and fun for your pup, reflecting their personality and the changing seasons.
Conclusion
So, here’s the scoop: sewing a dog bandana isn’t just about fabric and thread; it’s about creating a unique expression of your pup’s personality. Who knew that in just a few stitches, you could make your furry friend the trendsetter of the dog park? Whether you go for floral, plaid, or something wild, your dog will strut their stuff with style. So grab that fabric and let your creativity run free—because every dog deserves to look fabulous, right?