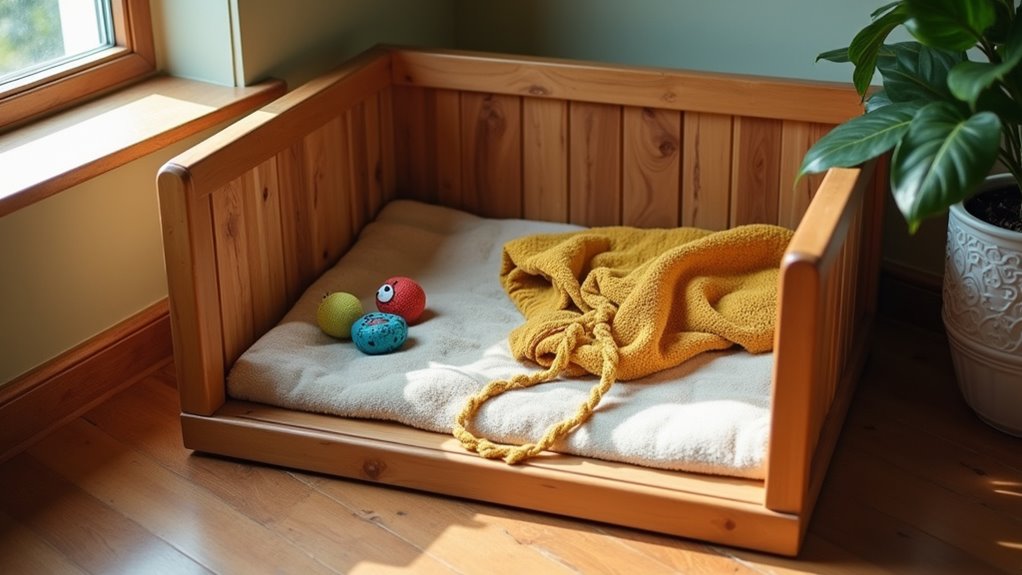
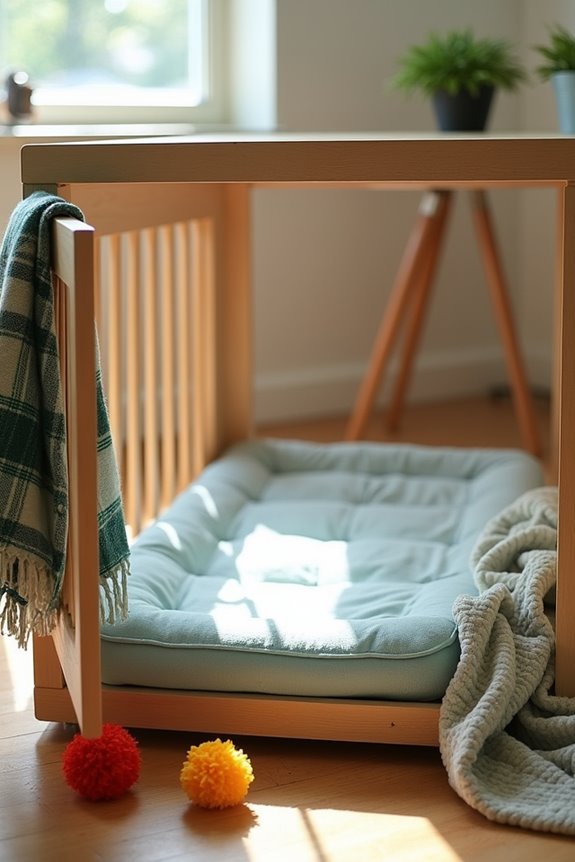
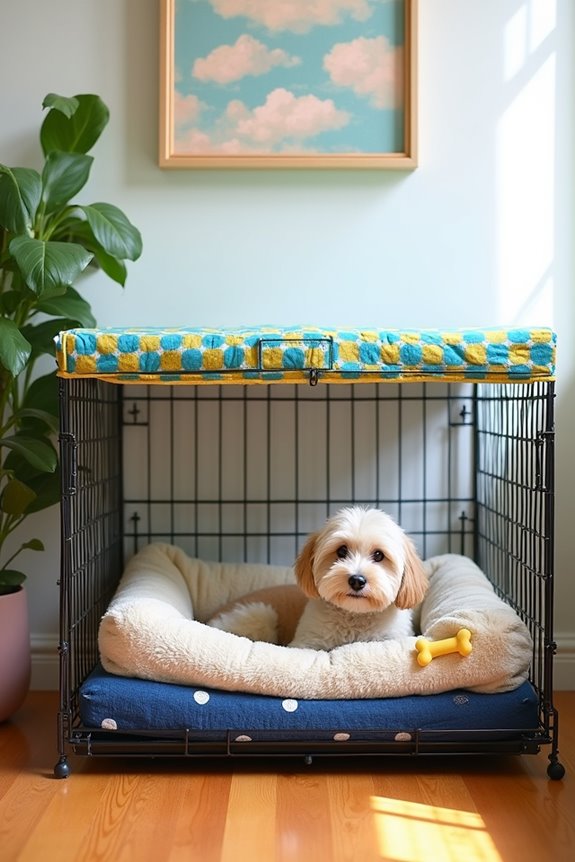
Thinking about sprucing up your dog’s crate? Making a DIY dog crate topper is a fun way to create a cozy zone for your furry friend. It’s all about comfort and style, right? Plus, you can customize it to match your home decor. Grab some soft fabrics or even a cooling gel mat, and you’re on your way. Curious about what materials work best? Let’s take a closer look at some cozy ideas that’ll keep your pup happy.
Cozy Blanket Ideas
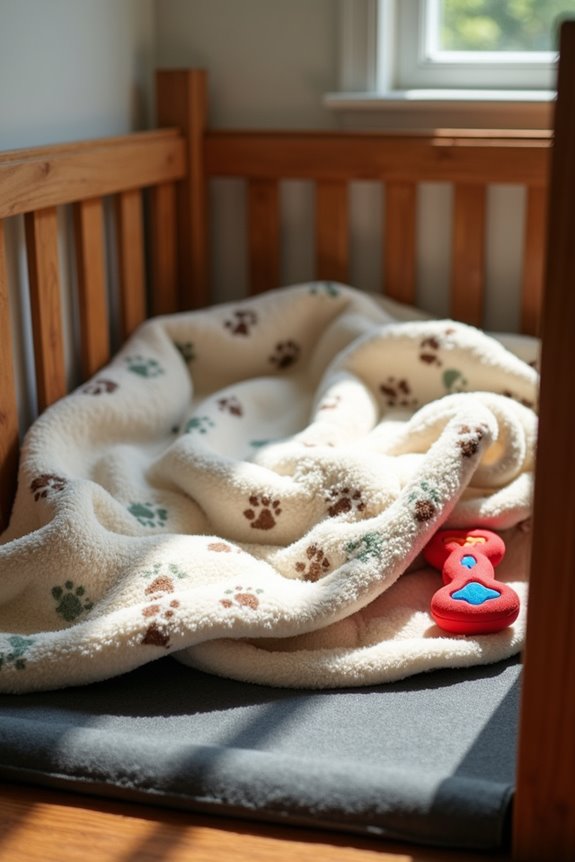
When it comes to cozy blankets for your dog crate, you might wonder what materials can keep your pup snug and comfy. Think about dog-friendly fabrics like fleece or cotton—they’re soft, breathable, and easy to wash.
You wouldn’t want a blanket that attracts dirt like a magnet, right? Personalized blanket designs can add a special touch, too, like your dog’s name or favorite colors. It’s fun to make your pup feel pampered!
And let’s be real, even if you’re not a crafting whiz, you can whip up a simple no-sew blanket in no time. Just remember, it’s about comfort.
Your dog deserves to lounge in style, and trust me, they’ll love it as much as you love their goofy grins.
Our Collection
Let’s talk about our collection of comfy options for your pup’s crate.
You’ve got everything from a super soft faux fur layer to a cozy memory foam cushion pad that’ll make them feel like royalty.
Plus, with the cooling gel pillow topper and waterproof mattress protector, you won’t have to stress about messes or temperature—sounds like a win-win, right?
1. Faux Fur Cozy Layer
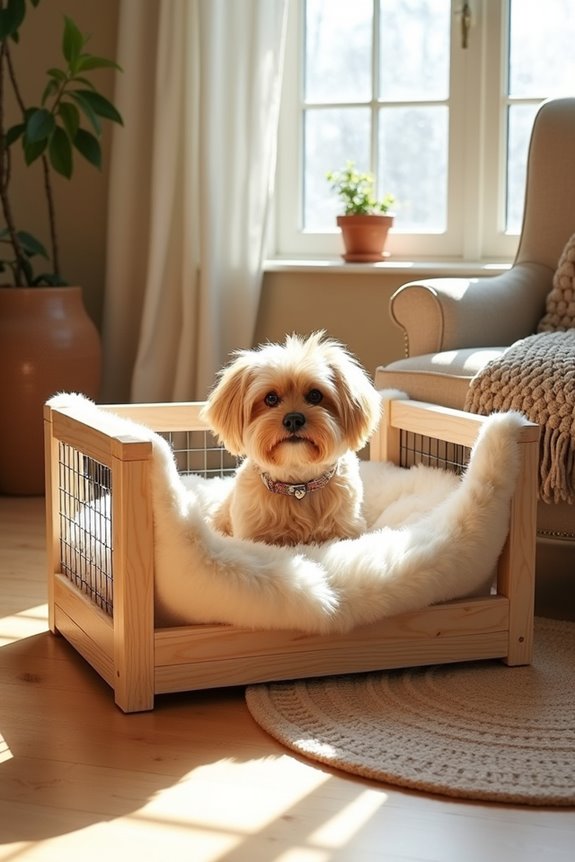
Ah, the joys of being a dog owner. We want our furry pals to feel as comfortable as possible, don’t we? This DIY Faux Fur Cozy Layer isn’t just a cozy upgrade to your dog’s crate; it’s also a great way to save some money while adding a touch of style to your home. Additionally, your pup will be sporting a look that matches the trends in luxury dog boots.
Let’s face it, nothing brightens a space like a cozy fur vibe. Plus, your pooch will love chilling on it—who could resist?
Materials Needed:
- Faux fur fabric (enough for the size of your dog’s crate)
- Scissors
- Sewing machine or needle and thread
- Measuring tape
- Non-slip fabric (for the underside)
- Fabric glue (optional)
- Pins (optional)
Step-by-Step Instructions:
- Measure Your Crate: Start by measuring the dimensions of your dog’s crate. Width, length, and maybe a little extra for cushioning—go ahead, measure twice, cut once.
- Cut the Faux Fur: Using your measurements, cut the faux fur fabric to size. Make sure to leave an extra inch around the edges. This is important for seam allowance unless you like the idea of a halfway-cut blanket.
- Prepare for Sewing: If you have a sewing machine, great! If not, you can always hand sew. Fold the edges of the fabric under about half an inch and pin them in place. This will help prevent fraying and give a clean look.
- Sew the Edges: Sew around the edges, keeping it all nice and neat. If you’re feeling fancy, you could even do a zigzag stitch for extra flair. If sewing isn’t your jam, you can use fabric glue, but sewing will make it last longer.
- Add the Non-Slip Layer: Cut the non-slip fabric to match the size of your faux fur piece and attach it to the underside of the cozy layer. This will keep it in place inside the crate, preventing any slip ‘n slide action while your pup jumps in and out.
- Final Touches: Trim any excess fabric, and give it a good shake. You want it to be fluffy and inviting. Place it in your dog’s crate, and voilà—coziness achieved.
Optional Add-ons/Variations:
- Color Customization: Choose your pup’s favorite color for the faux fur or go bold with a vibrant pattern that pops against your home decor. Who needs art on the walls when you have a stylish dog crate?
- Size Variations: If you’re a multi-dog household, consider making matching cozies for all crates in your home. It’ll look adorable and might even make them feel like they’re in a fancy dog hotel.
Pro Tip:
To add a little extra comfort, consider stuffing the layer with some old blanket scraps or pillow foam before sewing it up. Your pup will think they’ve hit the jackpot with a cozy cloud.
Plus, it’ll make the cozy layer even more inviting, turning that crate into a haven!
Now, let’s transform that ordinary crate into a plush paradise for your furry family member. Happy crafting, and may your dog strut their cozy stuff with pride!
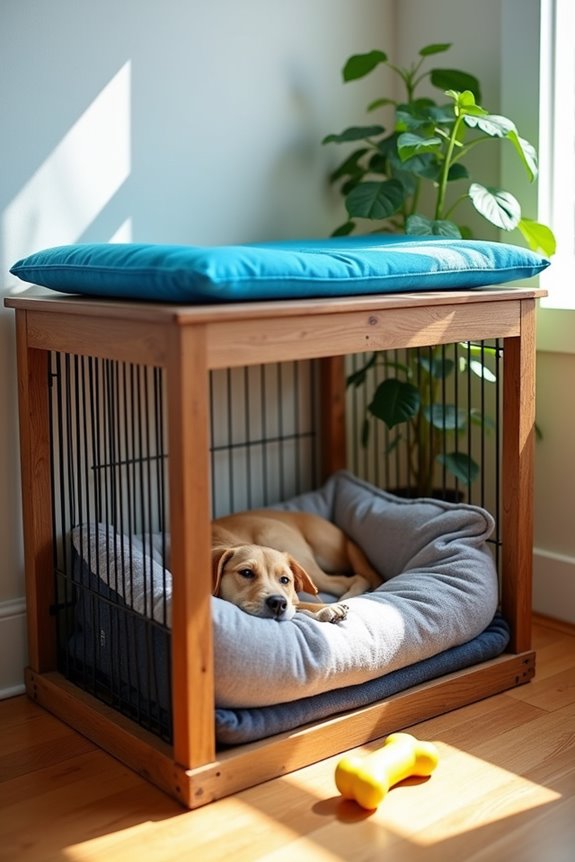
2. Memory Foam Cushion Pad
Let’s face it: we all want our dogs to luxuriate in comfort, don’t we? If your pup spends time lounging in their crate, a DIY Memory Foam Cushion Pad will elevate their space to a whole new level of coziness. Not only does this project save you from splurging on pricey pet beds, but it also allows your furry friend to enjoy great comfort, which means fewer trips to the vet for those achy joints in their senior years.
Plus, you’ll get a warm fuzzy feeling knowing you crafted it yourself. Additionally, using a premium large dog crate can enhance your dog’s experience, providing ample space for relaxation.
Materials Needed:
- Memory foam (enough to cover the size of your dog’s crate)
- Fabric cover (consider soft cotton or plush fleece)
- Scissors
- Sewing machine or needle and thread
- Measuring tape
- Non-slip fabric (for the underside)
- Pins (optional)
- Fabric glue (optional)
Step-by-Step Instructions:
- Measure Your Crate: First things first, grab your measuring tape and note the dimensions of your dog’s crate. Width and length are key here, but it’s wise to add a little wiggle room—like those pants we save for post-holiday feasts.
- Cut the Memory Foam: Once you have your measurements, use the scissors to cut the memory foam to size. Give yourself an extra half-inch around the edges. Nobody likes a cushion that’s just a tad too small, right?
- Make the Fabric Cover: Measure the same dimensions on your fabric cover, adding an inch for seam allowance all around. Cut it out, and don’t fret about being too precise. A little imperfection adds character—just like your dog’s quirks.
- Sew the Edges: Fold the edges of the fabric over the foam and pin them down to prevent fraying. If you want to get fancy, sew a simple straight stitch. No sewing prowess? No problem! You can use fabric glue, but sewing gives it that professional touch.
- Attach the Non-Slip Layer: Cut your non-slip fabric to match the size of your cushion. Attach it to the underside of the cushion using fabric glue or by sewing. This layer will keep your plush creation from sliding around in the crate, which is especially important if your pup’s as energetic as a squirrel on espresso.
- Final Touches: Trim any excess fabric and fluff everything out. You want this pad to feel inviting. Place it in your dog’s crate and watch your furry friend surely take to it—rescued from a less-than-comfy lying position!
Optional Add-ons/Variations:
- Fabric Fun: Pick a fabric cover that matches your dog’s personality! Whether it’s a chic pattern, bright colors, or a fun print—let creativity flow like that time your dog decided the couch was a chew toy.
- Size Up or Down: If you have multiple pets, consider customizing pads in different sizes for each pup. You’ll have a matching set of gorgeous cushions that might make your living room feel like a pet-friendly boutique.
Pro Tip:
For added comfort, consider layering the memory foam on top of a plush blanket. Not only does it provide extra cushioning, but it also keeps your furry buddy warm during those chilly nights.
3. Cooling Gel Pillow Topper
Does your dog suffer from the heat when lounging in their crate? A DIY Cooling Gel Pillow Topper is just the fix you need! Not only does it help regulate your pup’s body temperature, keeping them cool and comfortable, but it also serves as a stylish addition to their crate, giving it a fresh, inviting look. Plus, you’ll save some bucks compared to those fancy store-bought options. Talk about a win-win!
Materials Needed:
- High-density cooling gel mat (size as per your dog’s crate)
- Soft fabric (cotton or breathable mesh recommended)
- Scissors
- Sewing machine or needle and thread
- Measuring tape
- Velcro strips or zipper (for easy removal)
- Pins (optional)
- Fabric glue (optional for non-sewing solutions)
Step-by-Step Instructions:
- Measure Your Crate: First, take your measuring tape and write down the dimensions of your dog’s crate. It’s super important to make sure the cooling topper fits snugly. You wouldn’t want it flopping around like a bad haircut.
- Cut the Cooling Gel Mat: Using your scissors, cut the gel mat to match your dog’s crate size. Leave about a half-inch extra on each side for a bit of wiggle room. Trust me, nobody likes a topper that’s a hair too small.
- Prepare the Fabric Cover: Measure the same dimensions on your fabric, plus an extra inch all around for seam allowance. Cut out the fabric—perfect lines are so overrated and your dog will love it regardless of a little wonky stitching.
- Sew the Edges: With the fabric laid out, wrap it around the cooling mat and pin it in place to prevent any fraying. If you want to show off your fabulous sewing skills, sew a nice straight stitch along the edges. No sewing machine? No sweat! Fabric glue works fine here too.
- Add Closure Option: To make it easier when cleaning, you can sew on Velcro strips or a zipper along one side of the fabric cover. It’s like giving your dog the VIP treatment with easy access to a fresh topper whenever you need it.
- Final Touches: Trim any excess fabric. Give it a good fluff to make sure it looks inviting and cozy. Then pop it in your dog’s crate and watch your fur baby enjoy their new chill zone.
Optional Add-ons/Variations:
– Fabric Fun: Choose fun patterns or colors that reflect your dog’s vibrant personality—maybe polka dots or stripes? Go wild with your choices, because why shouldn’t your pup have personality too?
Pro Tip:
When selecting the cooling gel mat, look for one that’s easy to clean or machine washable. It’s a small step that can save you a lot of hassle later and help keep your dog’s crate smelling fresh, not like old tennis shoes.
Plus, regular cleaning means your pup will always have a nice, cool spot to plop down after a long day of being adorable.
4. Waterproof Mattress Protector
Dog owners know that accidents can happen, whether it’s from an overly excited pup who just couldn’t hold it or a sleepy dog dreaming sweetly and drooling all over the place.
That’s where a DIY Waterproof Mattress Protector comes in handy. Not only does it keep your dog’s crate or bed clean and dry, but it can also save you money on costly clean-ups and replacements. Plus, it adds that extra layer of comfort, making sure your furry friend has a cozy spot to snooze! Additionally, investing in a high-end outdoor dog kennel can provide excellent protection and comfort for your pet outside.
Materials Needed:
- Waterproof fabric (like PUL or a heavy-duty vinyl)
- Soft quilted fabric (for comfort)
- Sewing machine or needle and thread
- Scissors
- Measuring tape
- Pins
- Optional: fabric softener for extra softness
Step-by-Step Instructions:
1. Measure Your Crate Bed: Use your measuring tape to find the dimensions of your dog’s crate or bed. This way, you’ll create a protector that fits just right—because too small is never a good look.
2. Cut the Fabrics: Cut your waterproof fabric to the same size as the mattress, plus an extra inch on each side for seam allowance. Do the same for the quilted fabric. Think of it as making a sandwich—waterproof layer, delicious softness layer, all together now!
3. Pin the Layers Together: With the waterproof fabric on one side and the soft quilted fabric on the other, pin them together, ensuring they align perfectly. This will keep everything nice and tidy while you sew.
4. Sew the Edges: Get your sewing machine ready and sew around the edges of the stacked fabrics, leaving one end open for easy removal and cleaning. If you’re feeling fancy, you can also add a straight stitch around for durability.
No sewing machine? A needle and thread will do just fine; just prepare for a bit of a workout!
5. Turn it Inside Out: Undo those pins and turn your sewn fabric right side out through the open end. Start with that waterproof side showing for maximum protection—it’s like flipping a pancake, but for your pup!
6. Final Touches: Hem the open end or sew on some Velcro to close it up securely. You should now have a snug, comfy waterproof mattress protector ready to shield your dog’s bed from messy mishaps.
Optional Add-ons/Variations:
– Color Me Happy: Choose vibrant colors or patterns for the quilted fabric that scream “doggo-chic.” Imagine your furry friend lounging on a bright polka-dotted protector—who wouldn’t want that?
Pro Tip:
For ease of cleaning, consider adding a removable closure using Velcro or snaps, making it a breeze to toss in the wash when it gets a little too… ‘well-loved.’
Remember, a little extra effort now can save you serious scrubbing time later; your future self will thank you.
With this DIY Waterproof Mattress Protector, you’ve not only made a practical addition to your dog’s crate but also crafted a loving touch to their space. Happy sewing!
5. Non-Slip Crate Liner
Have you ever watched your dog try to settle into their crate, only to see them sliding around like they’re on a slippery dance floor? Well, a Non-Slip Crate Liner is here to save the day—and to keep your furry friend cozy and secure!
This easy DIY project not only enhances your dog’s comfort during those crate snoozes but also protects the bottom of the crate from scratches and wear. Best of all, it adds a touch of style to your home. Who knew pet accessories could be so chic? Plus, using premium dog supplies can ensure your dog has the best products available.
Materials Needed:
- Non-slip rubber mat (available at most home improvement stores)
- Fabric of your choice (consider something soft and washable, like fleece)
- Measuring tape
- Scissors
- Stencil or marker (for tracing)
- Paintbrush and fabric adhesive (if using fabric for added texture)
- Optional: Velcro strips for extra grip
Step-by-Step Instructions:
- Measure the Crate: Grab that measuring tape and determine the inside dimensions of your dog’s crate. You’ll want the liner to fit snugly, not too tight or too loose.
- Cut the Non-Slip Mat: Using your scissors, cut the rubber mat to the same size as the bottom of your crate. Remember, measure twice, cut once—it’s a classic for a reason.
- Cut the Fabric: Lay the rubber mat flat and trace it onto your fabric using a stencil or marker. Cut out the fabric, adding an extra inch on each side for seam allowance. This helps give it a finished edge if you choose to hem it.
- Attach the Fabric: If you want to get fancy, apply fabric adhesive onto one side of the rubber mat and carefully place the fabric over it, smoothing out any wrinkles. You can also hem the edges for a clean look, but let’s be honest, perfection isn’t always necessary.
- Secure the Edges: For that extra grip, consider adding Velcro strips along the edges of the mat and directly onto the bottom of the crate. This can help reduce any sliding, making sure your pup stays put as they settle in.
- Test it Out: Place the non-slip liner inside the crate and let your dog give it a whirl. Watch their delight as they find their new cozy spot, and smile knowing you did that.
- Maintenance: Keep an eye on it—give it a quick wash as needed. Just like us, dogs appreciate a fresh, clean space.
Optional Add-ons/Variations:
- Play with Patterns: Choose abstract patterns or colors that match your home decor. A fun fabric can really elevate your crate into a piece of furniture—fido deserves the best, right?
- Personal Touch: Add your dog’s name to the fabric using fabric paint. It’s like a furry fashion statement.
Pro Tip:
If you’re worried about the liner shifting, a sprinkle of non-slip shelf liner underneath the mat can provide even more stability. It’s like giving your pup the ultimate dance floor grip—no more slipping and sliding.
6. Breathable Mesh Crate Cover
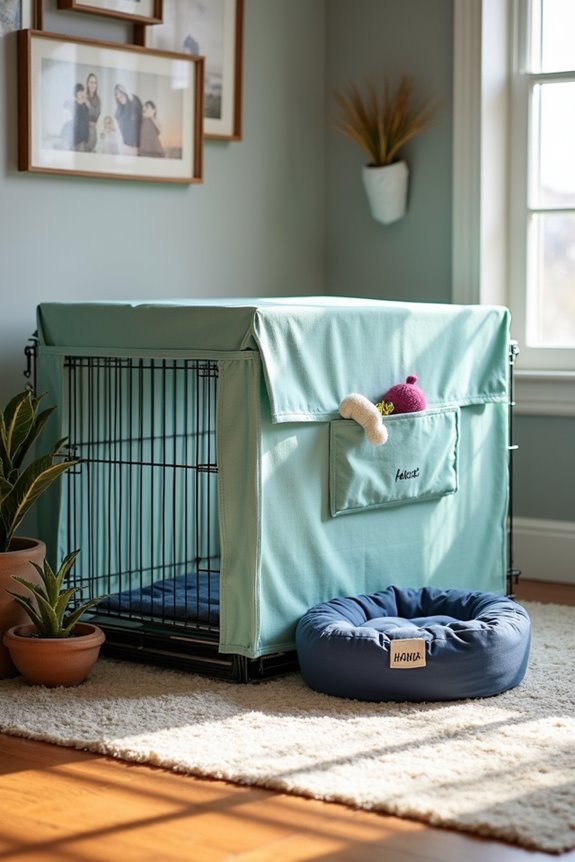
So, you’ve got a lovely crate for your furry friend, but it could use just a bit more flair and functionality. Enter the Breathable Mesh Crate Cover. This DIY project not only protects your pup from drafts and light but also adds a stylish touch to your home. Plus, it can save you some cash compared to store-bought covers. It’s like giving your doggo their very own cozy den while effortlessly blending into your decor. Bonus points for making it yourself! You might also consider adding high-end dog enrichment toys to keep your pup engaged and entertained while they’re lounging in their new cozy space!
Materials Needed:
- Breathable mesh fabric (can be found at fabric stores or online)
- Measuring tape
- Scissors
- Sewing machine (or needle and thread if you’re feeling crafty)
- Straight pins
- Velcro strips or ties for securing the cover
- Optional: Fabric paint or patch for personal flair
Step-by-Step Instructions:
- Measure Your Crate: Start by measuring the height, width, and length of your dog’s crate. Write these dimensions down. Knowing these measurements is like having a map—you’ll need it to create the perfect cover.
- Cut the Fabric: Cut your mesh fabric into four sides that will wrap around the crate. Make sure to add a couple of extra inches to each piece for folding over and sewing. Trust us, it’s better to have a little extra than not enough!
- Pin the Sides Together: Place the mesh pieces around your crate. Use straight pins to secure them together. This helps keep everything in place while you sew. Ever tried to sew while juggling fabric that keeps shifting? It’s like wrestling an octopus.
- Sew the Edges: Using a sewing machine (or needle and thread if you’re feeling ambitious), sew along the pinned edges to create the sides of your cover. If you’re hand sewing, just take it slow and steady. A straight line isn’t a race, my friend.
- Create a Top Flap: Cut a piece of fabric that fits the top of the crate. This fabric should overlap the sides slightly. Attach it with Velcro strips or ties to secure it down. No one wants a stray flap flapping in the wind.
- Test Your Cover: Place the finished cover over your crate. Make sure everything fits snugly and allows for airflow. Give it a little tug here and there. If it stays put, well done. If not, don’t fret—adjust as needed. This is a judgment-free zone.
- Personalize it: If you want to add some flair to your cover, consider using fabric paint or patches. You could even create a tiny name patch for your pup! After all, what’s a den without a little personal touch?
Optional Add-ons/Variations:
- Choose a Fun Color: Go bold! Pick a bright mesh fabric that stands out or something seamless that fits in with your existing decor.
- Add a Pocket: Sew a little pocket on one side to hold your pup’s favorite toys or some treats. Who doesn’t love convenient storage?
Pro Tip:
If you’re concerned about staying power, try using heavy-duty sewing thread. It will hold up better against any little puppy adventures, just like that time I attempted to bake cookies and ended up with a flour explosion. Let’s say, some things need a strong foundation.
Now, go on, enjoy making a lovely breathable cover that your dog will love while giving a nod to your creativity. Happy crafting!
7. Rubberized Crate Bottom Mat
Let’s face it, dogs can be messy, and their crates often take the brunt of it. A rubberized crate bottom mat is the perfect DIY project for dog owners looking to keep their dog’s space clean and comfy without breaking the bank. Not only does this mat protect the bottom of your crate from accidents and spills, but it also adds a layer of comfort for your pup, making their crate feel even cozier. Trust me, your furry friend will thank you for it!
Materials Needed:
- Rubber mat (you can find these at hardware stores or online)
- Measuring tape
- Scissors or utility knife
- Cutting board (to protect surfaces while cutting)
- Non-slip rug pad (optional for extra cushioning)
- Strong adhesive spray (optional)
Step-by-Step Instructions:
- Measure Your Crate: Start by measuring the bottom of your dog’s crate. Jot down the length and width so you can cut your rubber mat to size. Think of this as a puzzle—every piece needs to fit just right.
- Cut the Mat: Grab your rubber mat and lay it flat on a cutting board. Using your measurements, cut the mat to fit your crate’s bottom. Don’t worry if it’s not perfect; a little wiggle room is perfectly fine. Just don’t be a perfectionist—your dog won’t care about a couple of crooked edges.
- Optional Non-Slip Pad: If you want to increase comfort, lay a non-slip rug pad beneath the rubber mat. This adds a nice cushion and keeps the mat in place. It’s like adding a plush mattress to your pup’s den—everyone deserves a soft spot to land.
- Check the Fit: Place the cut mat inside the crate and verify it fits snugly. If it’s too big, you can always trim a bit more off. Remember, a happy dog is a comfortable dog.
- Secure the Mat (Optional): If you’re concerned about the mat sliding around during your dog’s antics, you can use strong adhesive spray to keep it in place. Just spray the bottom edges and press it down firmly. This step is optional, but it can offer peace of mind.
- Regular Maintenance: Plan to clean the mat regularly. A quick wipe down or rinse will keep it looking fresh. Think of it as giving your dog’s favorite spot a little spa day—it’ll feel brand new again.
Optional Add-ons/Variations:
- Customize Colors: Want a pop of color? Consider painting your rubber mat with non-toxic spray paint or using colorful duct tape along the edges for a fun border.
- Add a Soft Cover: If your pup prefers extra comfort, you can lay a soft blanket or towel over the mat. This adds coziness and can easily be removed and washed.
Pro Tip:
If your dog is a chewer, choose a thicker rubber mat that can withstand pesky teeth. It’s a small investment that will save you from needing to replace it regularly. Plus, a sturdy mat keeps your pup comfy and safe from slipping around—always a win-win.
Creating a rubberized crate bottom mat is an easy and practical DIY project that not only protects your dog’s space but also enhances their comfort. Now go on, your furry friend is waiting for their new cozy corner.
Extra Tips & Ideas
While you might think a dog crate topper is just about comfort, it’s also a chance to express your creativity and add some personality to your pup’s space. Why not use fabric that matches your home decor?
Oh, and don’t forget about crate safety—ensure the topper doesn’t shift around too much. A well-fitted topper prevents any unexpected accidents during those wild tail-wagging moments.
You could also add some cozy blankets or pillows for ultimate dog comfort. If you’re feeling crafty, try painting a fun design on plywood as a topper. It’ll definitely spark joy for both you and your pup.
Plus, let’s be honest, the cuter the crate, the better the Instagram photo opportunities, right?
Frequently Asked Questions
What Materials Are Best for a Dog Crate Topper?
For a dog crate topper, choose sturdy plywood or soft foam for dog comfort. Make certain it’s securely fastened to promote crate safety. Cover it with washable fabric to maintain cleanliness and a cozy feel for your pup.
How Do I Clean a Dog Crate Topper?
To keep your dog’s space clean, regularly vacuum the topper and spot clean with mild detergent. Isn’t it essential for their hygiene? Follow these cleaning tips, and you’ll guarantee a fresh and comfy environment!
Can I Use a Regular Blanket as a Crate Topper?
Yes, you can use a regular blanket as a crate topper. Just make certain it’s made of soft blanket materials for added dog crate comfort, helping create a cozy space for your furry friend.
Is It Safe for My Dog to Sleep on a Crate Topper?
It’s generally safe for your dog to sleep on a crate topper, as long as it’s sturdy and fits well. Prioritize dog safety and crate comfort by choosing materials that won’t slip or pose hazards.
How Do I Secure the Crate Topper to the Crate?
To secure the crate topper, use non-slip mats or heavy-duty Velcro strips. This guarantees stability while enhancing your dog’s comfort. Incorporating these crating techniques helps create a safe, cozy space for your furry friend.
Conclusion
So there you have it—your dog’s crate can go from blah to blissful with just a little effort. Think of it as their cozy castle, a place where dreams can take flight (or at least where they can snore peacefully). You’re not just making a topper; you’re creating a sanctuary, one fabric swatch at a time. Why not treat your fur baby to a slice of luxury? After all, don’t we all deserve a bit of pampering now and then?