Have you ever thought about building a cozy dog kennel that fits your furry friend’s size perfectly? Imagine this: Fido snoozing in his comfy space while enjoying the fresh air, safe from any unexpected visitors. But where do you even start? There are so many options—insulated, portable, or even waterproof—with each having its pros and cons. Let’s break it down so you can create a spot that feels just like home for your pup.
Design Your Own Kennel
When you think about it, designing your own dog kennel can be a bit like crafting your pup’s dream castle—right? You’ve got to evaluate kennel materials carefully; wood, metal, or even PVC can make all the difference. Each has its pros and cons, plus your pup’s personality might lean toward cozy wood or sleek metal.
Now, let’s talk size evaluations. You can’t just wing it. Measure your furry friend when they’re standing, sitting, and, let’s be honest, sprawling. A cramped kennel isn’t going to win any “Paw of Approval” awards.
Give your pooch room to move, stretch, and even sprawl, because who doesn’t love a good nap? All this planning means you’ll build a space they’ll actually love.
Our Collection
Now that you’ve designed your own kennel, let’s check out our collection.
You’ll find everything from insulated kennels perfect for those chilly nights to portable options for your adventures.
Whether you’re dreaming of a cozy shade canopy or a customizable indoor-outdoor setup, there’s something here for every pup’s personality and your unique style, so let’s get into it.
1. Insulated Kennel for Winter
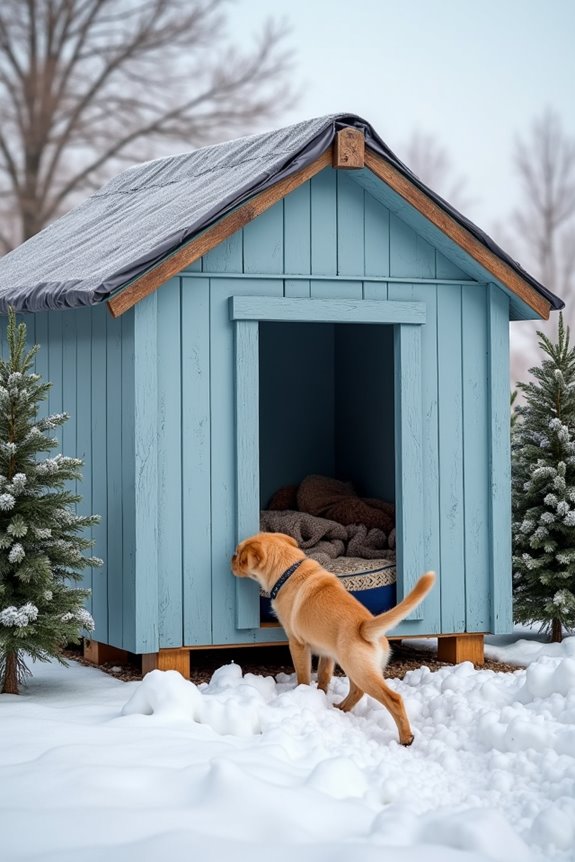
When temperatures drop and winter winds howl, your furry friend deserves a warm and cozy place to hunker down. This DIY insulated dog kennel not only keeps your pooch snug and comfortable but also saves you from hefty vet bills down the line. Plus, it’s an excellent way to showcase your mad DIY skills while adding a touch of charm to your yard. Additionally, consider incorporating a dog food storage cabinet to keep their food fresh and ready for meal times.
Materials Needed
- Wood or plywood (1-inch thick)
- Foam insulation boards (1-inch thick)
- Wood screws
- Wood glue
- Heavy-duty, waterproof tarp or outdoor fabric
- Four corner brackets
- Saw (hand or power)
- Drill
- Measuring tape
- Sandpaper
- Paint or wood stain (optional for aesthetics)
- Dog bed or blankets (for extra comfort)
Step-by-Step Instructions
- Measure Your Dog: Start by measuring your dog’s length and height when they’re standing. This will help you determine the overall size of the kennel. A little extra space is nice, but you don’t want it to be a mansion.
- Cut the Wood: Based on the measurements, cut the plywood for the base, top, and four sides of the kennel. While I once thought I could just eyeball it (spoiler: I was wrong), using precise cuts guarantees it all fits together snugly.
- Assemble the Frame: Using wood screws, attach the base to the sides to create a sturdy frame. Don’t forget to drill in the corner brackets for extra support. Your future pup will thank you for your craftsmanship… or at least, they’ll give you a tail wag.
- Insulate Like a Pro: Cut the foam insulation boards to fit snugly inside the walls of the kennel, then use wood glue to secure them in place. This is where the magic happens; insulation is key to keeping that chill out during frosty nights.
- Seal the Deal: Cover the entire kennel with the heavy-duty tarp or outdoor fabric, using wood screws or staples to keep it tight. Think of it as giving your dog a cozy winter coat—a doggie parka, if you will.
- Customize: Give your kennel a splash of personality. You can paint or stain the exterior with fun colors, or add your dog’s name in bright letters. Who could resist a classy “Duke’s Den”?
- Add Comfort: Finally, place the dog bed or soft blankets inside. Your dog can now curl up warmly, and you can finally be at peace, knowing they’re snug as a bug all winter long.
Optional Add-ons/Variations
- Roof Ventilation: If you live in an area that sees a lot of snow, consider adding a small vent near the top of the kennel to help circulate fresh air while preventing moisture build-up.
- Solar Heating: You can attach a small solar panel to power a heated dog pad for especially chilly nights. Honestly, who are we kidding? Dogs deserve a little pampering.
Pro Tip
Make sure you elevate the kennel a bit off the ground using wooden blocks or bricks. This prevents moisture from seeping in from the ground and helps keep it dry. Your dog will appreciate the dryness when they’re trying to lay down after a long day of barking at the squirrels.
2. Raised Floor Kennel Design
Give your dog a cozy home that’s not only safe but also super comfortable with this DIY raised floor kennel design. By elevating the kennel, you provide better ventilation and comfort, especially during those hot summer months or rainy days when the ground can get cold and soggy. Plus, a raised kennel can keep your pooch dry and happy while adding a charming element to your yard—so your friends might just start asking you for design tips. Additionally, investing in a quality large outdoor dog house can further enhance your pet’s outdoor experience.
Materials Needed
- Plywood (1-inch thick for the base)
- Wooden beams or 2x4s (for the frame)
- Wood screws
- Wood glue
- Outdoor waterproof sealant or paint
- Saw (hand or power)
- Drill
- Measuring tape
- Sandpaper
- Dog bed or soft blankets (for extra comfort)
Step-by-Step Instructions
1. Measure, Measure, Measure: Start by measuring your dog’s length and height while they’re standing. Keep it snug—too much space can make it feel less safe.
2. Cut the Base and Frame: Cut the plywood to your required size for the base. Then, cut the wooden beams for the frame that will elevate the kennel off the ground.
I learned the hard way that measuring twice saves a lot of time and frustration.
3. Build the Frame: Assemble the frame using the wooden beams. Attach them together with wood screws—think of it like building a mini house. Make sure it’s sturdy; your furry pal will appreciate it.
4. Attach the Base: Secure the plywood base to the frame using wood screws. A strong foundation is key for your pup’s comfort, so don’t skimp on the screws.
5. Seal It Up: Apply outdoor waterproof sealant or paint to protect the wood from moisture and pests. Make sure it’s completely dry before letting your dog explore their new home.
6. Add Comfort: Place a soft dog bed or some blankets inside. Your dog will feel like they just walked into their own little luxury suite.
7. Enjoy Your Work: Place your newly crafted raised floor kennel in a shaded spot in your yard where your dog can relax without overheating. Don’t forget to take a picture for Instagram; your followers will want to see your awesome handiwork.
Optional Add-ons/Variations
- Color it Up: Consider painting the kennel a vibrant color or using outdoor fabric to enhance aesthetics. Your dog’s abode can be a real focal point in your yard.
- Add a Roof: You could create a simple slanted roof to provide extra shade during sunny days. Your dog will love it, and it can be a great spot to hang their favorite toys.
Pro Tip
If you’re using wood screws, remember that pre-drilling the holes can help prevent the wood from splitting—something I definitely learned from experience. And keep in mind, a little bit of love (and maybe a treat or two) goes a long way when introducing your dog to their new raised floor kennel. Happy building!
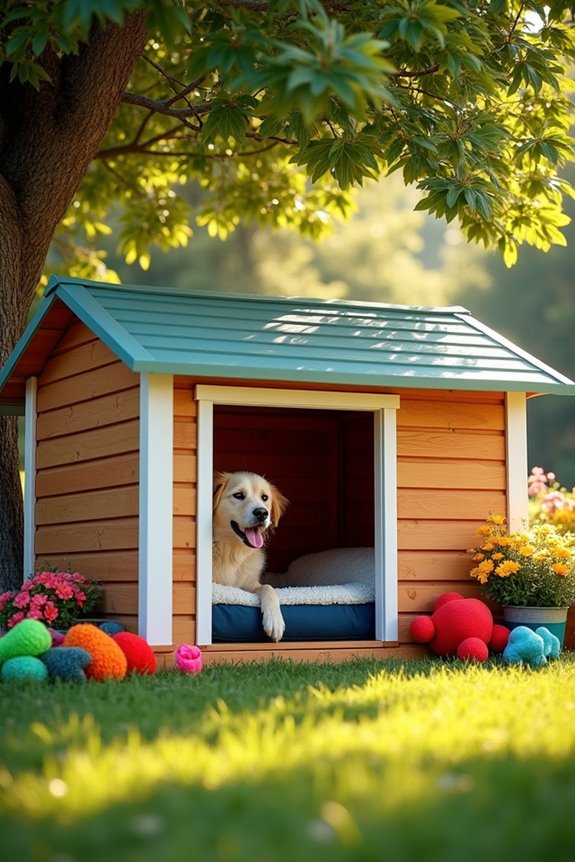
3. Cozy Shade Canopy Design
Creating a cozy shade canopy for your dog’s kennel isn’t just a fun DIY project—it’s a necessary addition for any dog owner wanting to provide a comfortable outdoor space. This project blocks out harsh sunlight, allowing your furry friend to stay cool and relaxed during hot days. Plus, it’s budget-friendly and improves the overall look of your dog’s outdoor setup. If you can wield a hammer and operate a drill, you’re ready to bring this project to life.
Additionally, consider enhancing the dining experience for your pet with luxury raised dog bowls, as they can help improve your dog’s posture while eating.
Materials Needed
- PVC pipes (1-inch diameter for frame)
- PVC pipe connectors (T-joints and elbows)
- Outdoor fabric or tarp (for shade cover)
- Scissors (for cutting fabric)
- Measuring tape
- Drill with bits (for making holes in PVC, if necessary)
- Weight bags (to hold the canopy down in windy conditions)
- Rope or bungee cords (for securing fabric)
- Optional: Vinyl or fabric paint (if you wish to add some color)
Step-by-Step Instructions
1. Measure Your Space: Start by measuring the area of the kennel where you want the shade canopy to sit. This will help you determine how much material you’ll need.
2. Cut the PVC Pipes****: Cut the PVC pipes to create the frame. You’ll need four vertical pieces for the corners and four horizontal pieces to connect them, making a rectangular shape above the kennel.
3. Assemble the Frame: Connect the pipes using the T-joints and elbows. Picture it like building a really simple skeleton; you want it sturdy but lightweight.
If the pipes feel wobbly, you might need to make some adjustments.
4. Add the Cover: Lay your outdoor fabric or tarp over the frame and secure it using rope or bungee cords. Make sure it’s tight enough that wind won’t send it flapping, but loose enough to allow for some airflow.
5. Secure the Frame: Use weight bags filled with stones or sand to hold down the corners of the canopy. Trust me on this—nobody wants a surprise shade flyaway.
6. Enjoy the Shade: Place your new canopy over the kennel. Now, your pup can chill out, basking in the dappled sunshine while staying cool—perfect for those lazy afternoons.
Optional Add-ons/Variations
– Get Creative with Color: Want your canopy to stand out? Use fabric paint to add your dog’s name or fun designs to the tarp.
It’s a great way to personalize their setup and show off their unique personality.
– Add Side Curtains: Think about adding side curtains that can be tied back or let down for extra shade. You can use lighter fabric to let some light in or something thicker if you want complete coverage.
Pro Tip
When assembling your canopy, consider using fast-drying adhesive or even cable ties for extra stability at joints. It’s a small touch that can greatly improve how well the canopy holds up over time.
Plus, check periodically for any wear or looseness—keeping it secure will make sure your pup can enjoy their shade for years to come.
4. Customizable Indoor-Outdoor Kennel
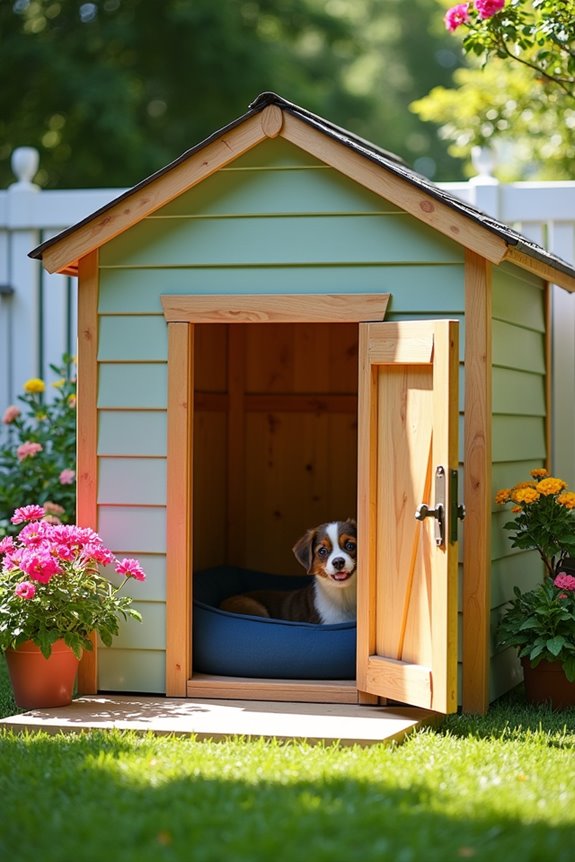
Have you ever thought about creating an indoor-outdoor kennel that perfectly suits both your pup’s needs and your home aesthetic? This DIY project isn’t just about giving your dog a cozy space; it’s a functional investment that enhances the comfort, safety, and visual appeal of your home. Plus, you can make your furry friend feel even more special by adding emotional support dog accessories that cater to their emotional well-being.
And since we love saving money while making our pets happy, you’ll find that this customizable kennel can be a cost-effective way to give your furry friend a stylish haven.
Materials Needed
- Wooden boards (2x4s for the structure)
- Plywood sheet (for the floor and roof)
- Nails and screws (for construction)
- Hammer and screwdriver
- Sandpaper (for smoothing rough edges)
- Outdoor paint or sealant (for weatherproofing)
- Measuring tape
- Saw (hand saw or power saw)
- Wood glue (optional for added stability)
- Hinges (if you want a door)
- Dog bed (for that comfy touch)
Step-by-Step Instructions
- Plan Your Design: Sketch a rough design of the kennel based on your dog’s size and available space. Consider if you want a roof or a door.
- Measure and Cut the Wood: Measure the lengths you need for the frame and cut your wooden boards accordingly. You want to make sure everything fits nicely without awkward gaps. Remember, measure twice, cut once—that’s a classic saying for a reason.
- Assemble the Frame: Using nails or screws, start assembling the frame of the kennel. Make sure it’s sturdy; your pup might give it a good jostle now and then. Picture yourself building a fort, and don’t be afraid to channel your inner architect.
- Attach the Bottom and Roof: Securely attach the plywood sheet to the bottom as the floor, and then fit another sheet on top for the roof. This will keep your dog protected from rain or snow. Bonus point: You can paint the roof to reflect your home’s exterior color.
- Add a Door: If you want easy access, install hinges on one side for a door. It’s a simple touch that makes a big difference. Just imagine your pup barging in and out with style.
- Finishing Touches: Sand down any rough edges to prevent splinters—yes, that means getting close with some sandpaper, which can be surprisingly satisfying. Then, weatherproof it with paint or sealant to guarantee it withstands the elements.
- Personalize the Space: Throw in a cozy dog bed, and voila! Your kennel is ready. Don’t forget to snap a picture of your pup enjoying their new digs. You’re now the proud parent of a stylish indoor-outdoor space.
Optional Add-ons/Variations
- Paint Away: Use outdoor paint to decorate your kennel. Choose colors that match your home or go for something fun and bright—it’s like a little house party for your dog.
- Add a Flower Box: Get crafty and create a flower box that can hang on the outside of the kennel. A touch of nature not only beautifies the space, but it might just distract your pup if they hear a squirrel nearby.
Pro Tip
To keep the kennel comfy and inviting, consider adding an insulated layer in the walls if your pup will spend time there during colder weather. Happy dogs are cozy dogs, after all.
And there’s no harm in grabbing some extra treats as a reward for their good behavior during this fun project.
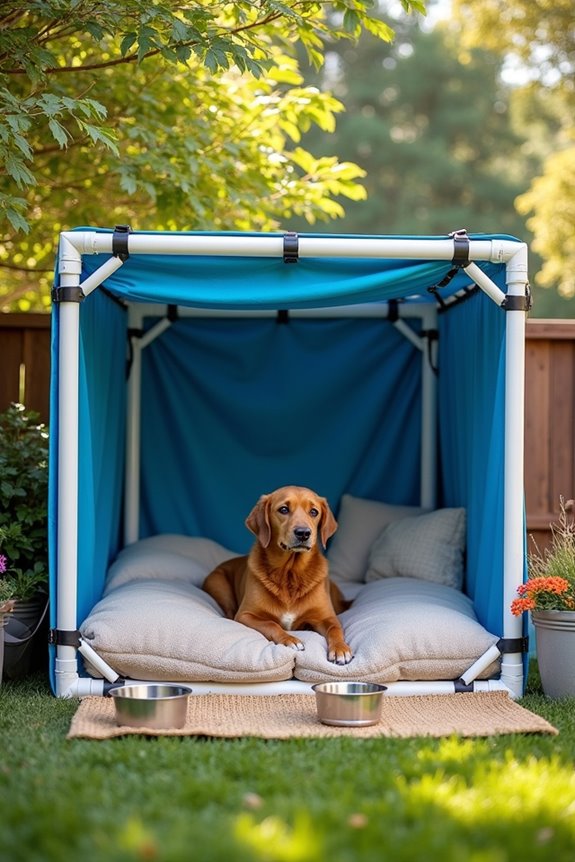
5. Portable Travel Kennel Option
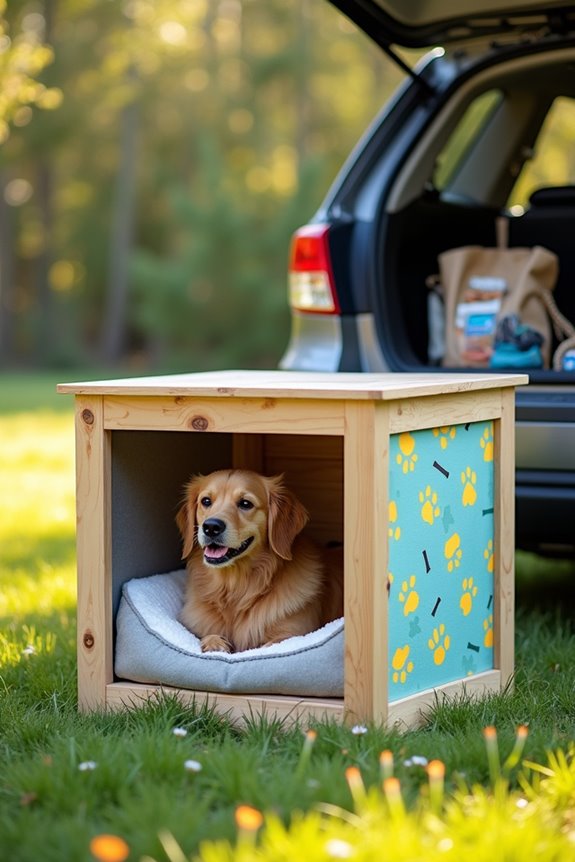
Do you love taking your pup on adventures, but dread the thought of where to keep them safe and secure while you’re on the go? Enter the portable travel kennel. This DIY project combines practicality with a touch of style, creating a cozy haven for your dog wherever your travels might take you. Plus, you’ll save some money and have a kennel that suits your pet perfectly.
Materials Needed
- Wooden boards (1x2s for lightweight structure)
- Plywood sheet (for the top and bottom)
- Nails and screws (for assembly)
- Hammer and screwdriver
- Sandpaper (for smooth edges)
- Measuring tape
- Saw (hand saw or power saw)
- Wood glue (for added stability)
- Fabric such as waterproof canvas (for a removable cover)
- Velcro strips or zippers (to secure the cover)
- Dog bed or blanket (for comfort)
Step-by-Step Instructions
- Plan Your Design: Decide how big you want your travel kennel. Think about how much space your dog needs and how it will fit in your car or RV. Sketch a basic layout that features a top, bottom, and sides.
- Measure and Cut the Wood: Measure out the pieces needed for the frame—typically six pieces for the walls and four for the base and top. Make precise cuts based on your design, because who wants a lopsided kennel?
- Assemble the Frame: Use nails or screws to put together your rectangular frame. Start with the sides, attaching them to the base, and then cap it off with the top. Make sure it feels secure; you want your pup to feel safe inside.
- Attach the Base and Top: Once the walls are up, attach the plywood sheet as the base for your dog to stand on. Then, secure another piece on top. This creates a solid structure—ideal for car rides, and it doubles as a place to stack your bags.
- Create a Removable Cover: Cut the waterproof fabric to fit around your kennel snugly. Use Velcro strips or zippers along the sides to allow for easy removal and washing. Your dog might appreciate being able to peek out, so consider leaving a window.
- Finishing Touches: Sand down any rough edges to keep your pup safe from splinters. You might even consider painting or staining the wood to match your vehicle or home decor—who said dog kennels can’t be stylish?
- Add Comfort: Throw in a cozy bed or blanket so your dog can lounge comfortably during your adventures. Feeling fancy? You could even embroider their name on it.
Optional Add-ons/Variations
- Personalize it: Use fabric with your dog’s favorite patterns or colors—there’s nothing quite like a stylish kennel. If you’re feeling particularly crafty, you could even add pockets for treats or toys.
- Travel-friendly feature: Create collapsible sides that allow the kennel to fold down for easy storage in the car. Bonus points for utilizing lightweight materials.
Pro Tip
Make sure to reinforce the bottom of the kennel. Dogs can lean or shift around while in transit, and you want to prevent any accidents. A sturdy base can save you from a potential travel fiasco. And hey, always bring along your furry friend’s favorite toys to make them feel at home, wherever you go.
Now, you’re all set to build a travel kennel that may make your pup bark with joy, and you’ll be the talk of all your pet-loving friends. Happy building!
6. Durable Waterproof Kennel Cover
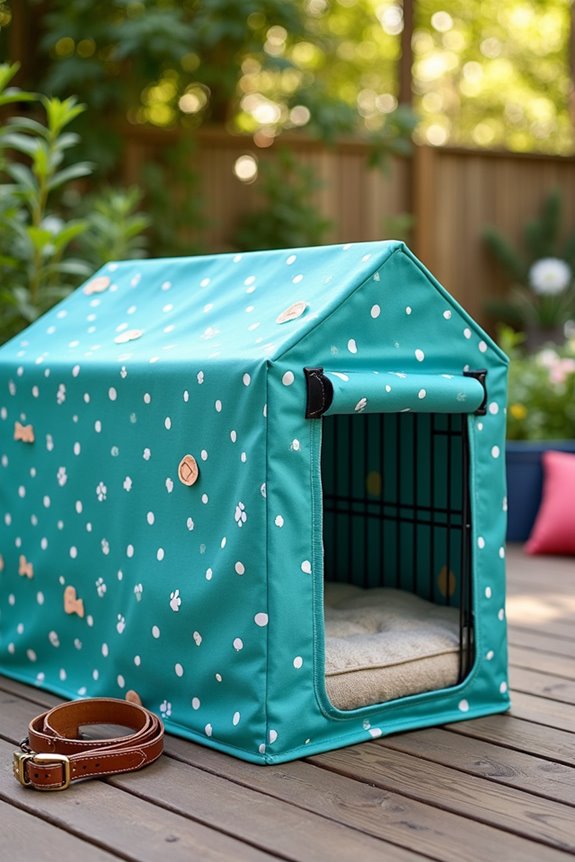
If you’re a dog owner who loves exploring the great outdoors or just enjoys taking your pup on short trips, this DIY durable waterproof kennel cover is a must-have. It’s a simple project that protects your beloved dog from the elements, whether rain and mud or those occasional spills during car rides. Plus, it saves you money compared to fancy store-bought covers and brings a touch of your personal flair to your dog’s space. Moreover, you can elevate your pup’s style with our luxury collar kit to match their new waterproof cover. Ready to get started? Let’s jump in!
Materials Needed
- Waterproof fabric (such as nylon or canvas)
- Measuring tape
- Sewing machine (or needle and thread for hand sewing)
- Scissors
- Velcro strips or snaps (for closures)
- Pins
- Chalk or fabric marker (for marking measurements)
- Optional: A fun pattern or color fabric (to customize your cover)
Step-by-Step Instructions
1. Measure Your Kennel: Start by measuring the dimensions of your dog kennel—length, width, and height. Your goal is to make a cover that fits snugly, so be precise. A snug fit keeps it from blowing away, especially on windy days.
2. Cut the Fabric: Based on your measurements, cut your waterproof fabric into five pieces: two for the sides, one for the top, one for the bottom, and one for the front. Don’t forget to add a couple of inches for seams. No one wants a cover on a rainy day that doesn’t quite wrap around!
3. Sew the Pieces Together: With your pieces prepped, it’s time to sew. Start by attaching the sides to the top piece. Use pins to hold everything in place—this little step prevents a fabric fiasco when you’re sewing.
Next, attach the bottom and front pieces, ensuring no stray threads hang around like uninvited guests.
4. Add Closures: Once the main structure is complete, sew on your Velcro strips or snaps along the edges of the cover. This allows for easy removal and washing—the last thing you want is a grimy cover hiding all the adventure memories.
So, go ahead, give it a good wash after an action-packed weekend!
5. Finalize Your Customizations: Here’s where the fun kicks in. If you used plain fabric, now’s your chance to personalize your cover with fun patches, stencils, or even some fabric paint.
Just be aware of any drying times so you don’t get caught in the rain without proper cover.
6. Test It Out: Place the cover on your kennel to verify the fit is right. Adjust as needed, and remember: you want it snug, but not suffocating. Your pup should be able to pop in and out with ease, and you want a cozy space for them to retreat after a day of adventure.
Optional Add-ons/Variations
- Different Fabrics: Swap out the waterproof fabric for something in a fun color or pattern to match your style. Maybe you want stripes for summer outings and polka dots for doggie playdates.
- Built-in Air Vents: Consider adding mesh panels at the sides for extra ventilation. This is especially useful during those warm summer months when your pup just needs a good breeze.
Pro Tip
When working with waterproof fabric, be sure to use a needle suitable for thicker material.
Also, tape down your fabric edges when sewing to prevent them from shifting. Planning on washing it often? This hack will save you the hassle of unpicking everything. Just imagine a scenario where you’re stuck sewing something that’s unraveling—yikes.
With your newly crafted waterproof kennel cover, you’ll be ready for anything, whether unexpected rain during a hike or just a little splash from a river!
And best of all, it keeps your pup feeling comfy and stylish—who wouldn’t want to travel in such cozy style?
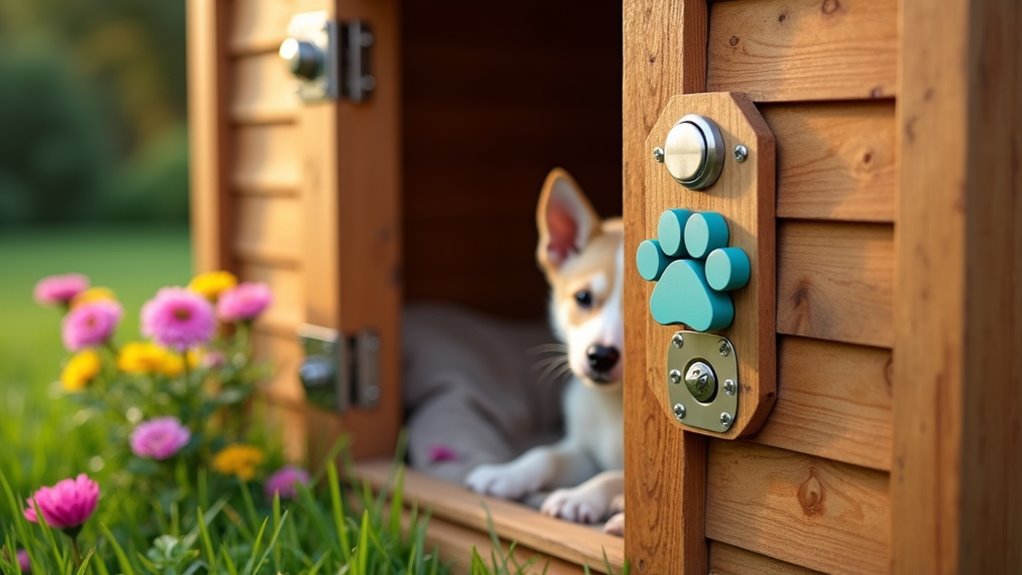
7. Secure Locking Mechanism
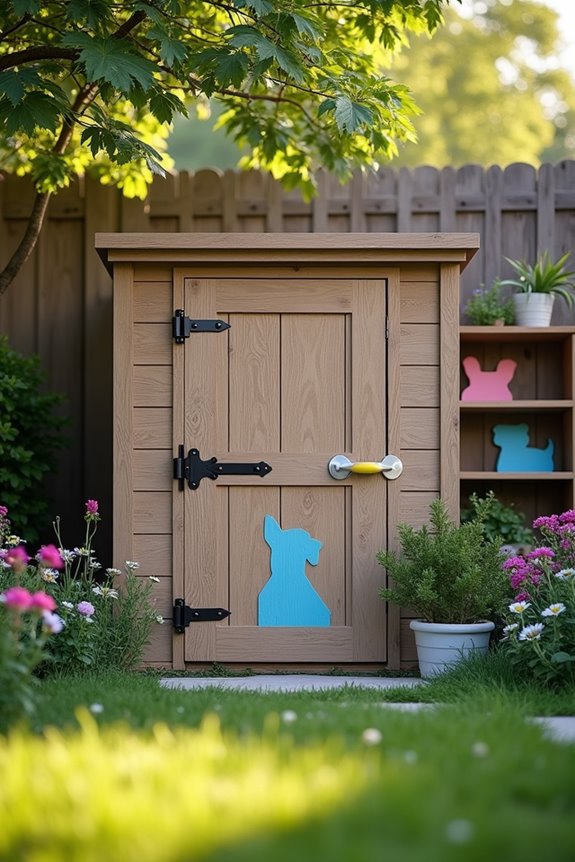
Keeping your dog safe and secure in their kennel is a top priority for any dog owner. A strong, reliable locking mechanism can greatly enhance the safety of your pup when you’re away or busy. Plus, it’s a great project that not only boosts your decorating skills but also adds a practical aspect to your DIY dog kennel. Let’s explore how you can create your very own secure locking mechanism.
Materials Needed
- Wood or sturdy metal for the latch
- Hinges (2-4 depending on your design)
- Screws (to match the hinges and latch)
- Screwdriver or drill
- Measuring tape
- Wood glue or strong adhesive (if needed)
- Sandpaper or file (for smoothing edges)
- Optional: Paint or stain (to match your kennel)
Step-by-Step Instructions
- Plan Your Design: Before you start cutting or drilling, sketch out how you want your locking mechanism to work. Think about whether you’ll go for a simple latch, a bolt lock, or even a padlock. Choose something that fits your comfort level and skills.
- Measure the Door: Measure the area where the lock will go on your kennel door. This guarantees it’s perfectly aligned and properly fits. Remember, a secure lock won’t help if it’s positioned awkwardly.
- Cut Your Locking Mechanism: If you’re using wood, cut it to size based on your design, allowing a bit of extra length for depth into the frame. Smooth out any rough edges with sandpaper to avoid any splinters that might make your dog reconsider their safety.
- Attach the Hinges: Attach the hinges first if they’re part of your mechanism. Align them carefully to allow the door to swing open and close smoothly. If you’ve ever wrestled with a stubborn door (we’ve all been there), you’ll appreciate the importance of this step.
- Install the Lock: Securely attach your locking mechanism where you planned, using screws and/or wood glue as needed. Make sure it’s tight and won’t wiggle—wiggly locks tend to cause worry, and you definitely don’t want that.
- Test It Out: Give it a few test runs to confirm it operates smoothly. Open and close the door with the lock engaged to check everything fits right and works as expected. If your dog gives you a puzzled look during this process, it’s perfectly normal—they’re just evaluating their new fortress.
- Final Touches: If you want to jazz up your project, now’s your chance. Paint or stain your locking mechanism to blend with the rest of the kennel. Just be sure to let everything dry thoroughly before giving your dog the “all clear” to explore.
Optional Add-ons/Variations
Feeling extra creative? Try adding a fun handle or decorative element to your locking mechanism. Maybe use bright colors that stand out, or even some cute dog-themed stencils. This kiss of creativity not only adds flair but can also make it easier to operate—after all, who doesn’t love a good doggie-shaped handle?
Pro Tip
Don’t forget to check the sturdiness of your locking mechanism every few months. Especially if your pooch has managed to figure out how to open it—because that’s a whole saga we all know too well. Keeping it maintained guarantees your furry friend remains safe and stress-free when inside their kennel.
With just a little bit of effort, you’ve tackled a valuable DIY project that heightens both security and style. Now go ahead and brag a bit about your handiwork—it’s not every day you create a safe haven for your furry family member.
Extra Tips & Ideas
While you may have nailed the basics of building a dog kennel, there are always those extra touches that truly transform it into a cozy haven for your furry friend.
Think about soft bedding—dogs love snuggling in comfort. You’ll want to guarantee good kennel ventilation, too, to keep the air fresh during hot days.
Adding some shade or even a simple tarp can boost dog safety, protecting your buddy from harsh sun rays.
And don’t forget fun little features, like a chew toy corner or a water bowl that replenishes automatically.
It’s the little details that show you care. Your furry pal might just claim it as their favorite home within a home—and they’ll thank you with wet-nosed kisses.
Frequently Asked Questions
What Size Kennel Do I Need for My Dog?
To determine the right kennel size for your dog, consider breed specifics and kennel dimensions. Typically, choose a kennel 1.5 times your dog’s length and height for comfort. Check your breed’s recommended sizes for best results.
How Much Does a DIY Kennel Cost?
Building your kennel’s like crafting a cozy nest for a cherished friend; it can cost anywhere from $200 to $1,000. Break down your budget carefully—wood, fencing, and essentials shape your dog’s safe haven beautifully.
What Materials Are Best for Outdoor Kennels?
For outdoor kennels, you’ll want durable materials like weather-resistant wood or metal. Don’t forget about kennel ventilation; install proper wire mesh or vents to keep your dog cool and comfortable in varying temperatures.
Can I Use Recycled Materials for a Dog Kennel?
Sure, you can use recycled materials for your dog kennel—unless you want to end up on “World’s Worst DIY” show! Just guarantee everything’s safe and sturdy for your pup’s comfort and safety.
How Do I Ensure My Kennel Is Weatherproof?
To guarantee your kennel’s weatherproof, consider insulation options like foam or reflective materials. Also, implement drainage solutions by elevating the floor and adding sloped surfaces, keeping moisture away and your pet comfortable year-round.
Conclusion
Building your own outdoor dog kennel can be as satisfying as seeing your pup wag their tail in pure joy. By incorporating elements that suit your dog’s needs and adding a bit of your personality, you’ll create a cozy haven for them. Just think about all the adventures your furry friend will have in their own little space. So grab those tools and get started—your dog will thank you with endless tail wags and puppy kisses.